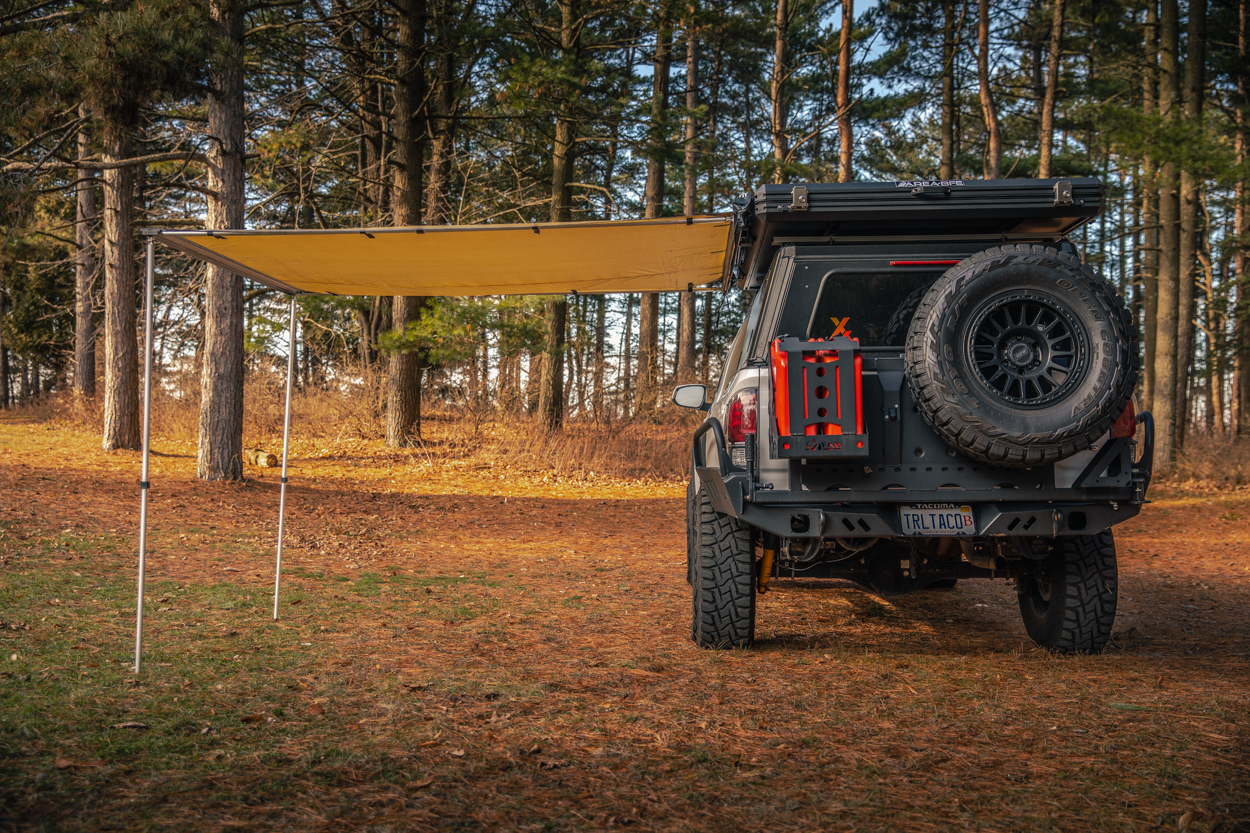
When you’re off-roading, overlanding, or car camping, protection from the elements can be hard to come by. Be it the bright midday sun or a chance rainstorm, having an easy-to-deploy awning is pretty much essential.
As you already read, this awning is mounted on my AreaBFE Hard Shell Rooftop Tent. I covered an install and setup, and a full review. It’s a super rad RTT. Really makes camping a breeze.
The AreaBFE mounts to their tent with the aid of some custom brackets. They slide into the t-slots on the sides of the tent and make installation quick and easy. Alternatively, you can use some included universal mounts.
Find Them Online
- AreaBFE: Check Price
Table Of Contents
Installation

As I mentioned, the awning comes with a set of universal brackets and the hardware needed to attach it to just about any roof rack or slotted surface.
Since I used the AreaBFE mounts, I did not need the universal brackets, but I did use the hardware. All you need is a basic set of wrenches for this install unless you use the custom mounts. You’ll need an Allen key set for those as well.
The install process is pretty straightforward, even if you’re using the universal mounts.
Step 1. Prep Awning

Grab eight of the provided bolts, pull back the rubber end caps on the mounting rail, and slide in four bolts in each channel.
You’ll need to use four bolts per mount for the AreaBFE mounts. Two bolts per universal mount.
Step 2. Mount RTT Brackets

The AreaBFE mounts slide right into the slots on the side of the tent.

Above, you can see how to properly orient the mounts. Don’t install them with the top portion, otherwise, your awning will move with the top of the tent when it opens.
This part may take some patience. Make sure the silver spaces are loosened to make things easy.

Once you’ve got both of the mounts lined up, make sure they’re spaced properly to evenly distribute the weight of the awning.

This angle highlights how the mounts completely avoid the shocks on the side of the tent.
Step 3. Bolt To Mount

Bolting the awning to the mount is pretty simple. An extra set of hands is super helpful to help orient everything.
Although the four nuts would work just fine, I added some stainless washers. Just in case.
Mounted

Set Up

Setting is just about as easy as installing it. Probably easier.
Step 1. Unzip

The first step is easy. Unzip the entire length of the zipper.

You have to remove the cover to set up.
Step 2. Remove Straps

Three straps hold the tent into place.
Step 4. Unroll

The entire awning is nicely rolled up and you’ll need to keep unrolling until you get to the legs.
Step 5. Deploy Legs

The legs will pop right out of their respective channels.
Unfold both of them. It’s much easier to do the next step if you temporarily have someone support the legs while you walk around to deploy the arms/side supports. To extend the legs, turn the lower portion counterclockwise, they unscrew just like a nut and bolt.
Step 6. Deploy Side Supports

The innermost portion of the awning contains the arms/supports.

Swing them out towards the legs.

To extend the side supports, you’ll have to turn the inner rod counterclockwise.
Keep extending the rod until it reaches the hole in the support near the leg. Add tension as you insert the rod to keep the awning material taught.

Use the velcro straps to secure the sides.

Finished side shot of the velcro and side supports.
With that done, so are you! The awning is all set up. On a final note, it also comes with some guy ropes and hooks to stake the awning into the ground.
If you’re expecting any sort of wind, or if you want to avoid someone knocking it over, use the guy ropes and hooks to completely secure it.
Deployed

Review

This is a simple awning, similar to others on the market.
It’s a solid product and has held up pretty well over the past few trips we’ve taken. It definitely gets the job done. Setting up is painless and can be done with one person. Having an extra hand is definitely helpful. It could probably be deployed in five minutes with two people. Less than ten with just one. It’s not very difficult.
This awning is great for breaking camp after a long day on the trail. We’ve used it as a cover for our camp kitchen most frequently. It keeps bugs, sticks and ash from the fire from landing in our cooking and prep space.
There really isn’t much to complain about. I will make one comment though. I had an ARB on my previous 4Runner build. Essentially the same design. One difference between the AreaBFE and the ARB one was that the material was a little bit thicker, and seemed to be a little more durable.
I’m not saying that this material is not, I’m just making an observation. I will say this, the thicker material made it more difficult to roll up and store. Because the material is so long, you have to be careful when you roll it up, otherwise, it starts to roll up on an angle and that can make closing it more difficult. Again, that’s with the ARB. I haven’t really experienced that with the AreaBFE one.
All in all, I can’t complain!
Final Thoughts

If you’re looking for a solid awning, look no further.
If you’re getting an AreaBFE tent, it complements it very well. And how could I forget? The tent has a black cover which is great because it doesn’t clash with any color scheme you might have on your truck.


