
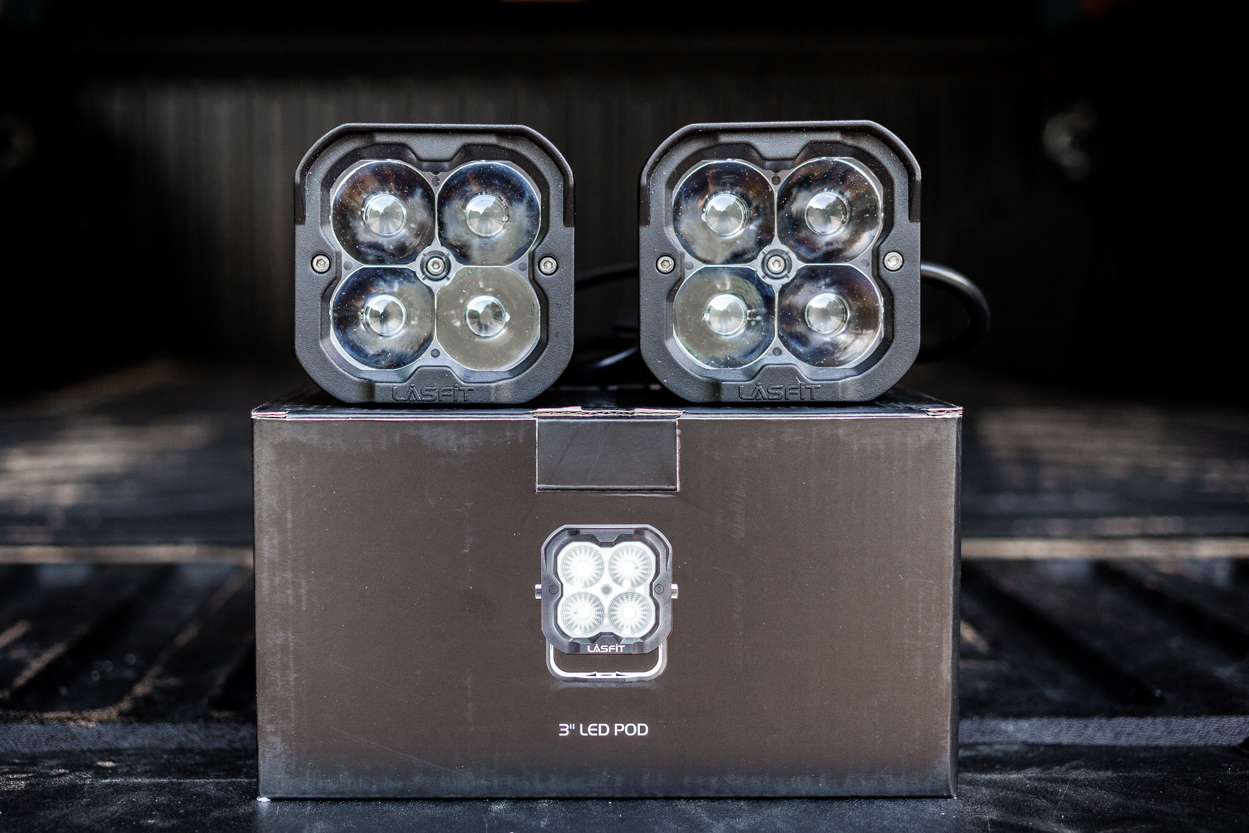
There are several manufacturers of automotive LEDs on the market right now, but that doesn’t mean there isn’t room for one more. It’s pretty clear Lasfit feels the same way, or they wouldn’t have expanded their product line to include their new 3″ LED Pods.
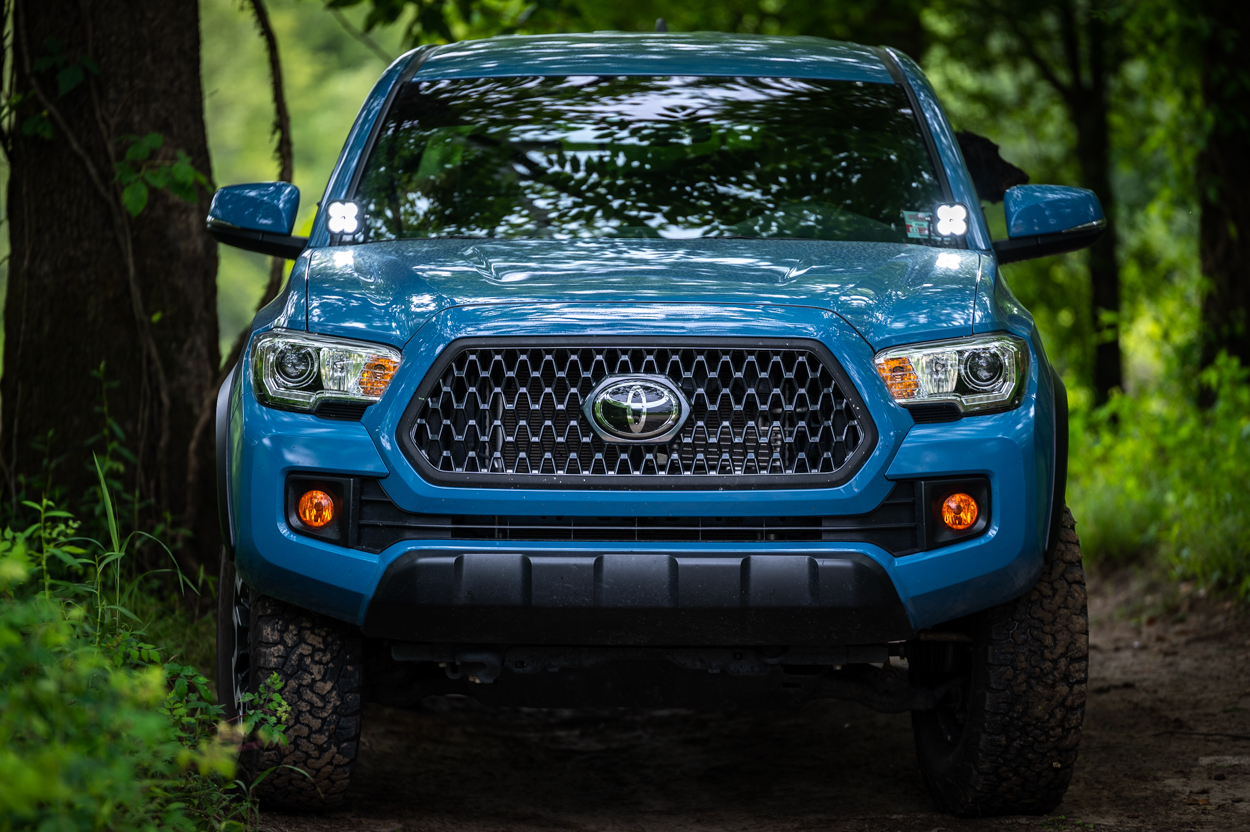
Pod lights, or ditch lights as they are sometimes called, are auxiliary lights that are usually mounted where the A-pillar meets the hood. You could also mount them on your bumper, or even use them as reverse lights. They are meant to give you additional output when your headlights and/or fog lights are lacking.
Whether you’re off-roading at night or in less-than-ideal conditions, or just cruising a dark road late at night, pod lights will give your factory output a boost to help you make it back to camp or home safely.
Find It Online
- Lasfit 3″ LED Pods: Check Price
- Cali Raised LED Ditch Light Brackets: Check Price
Table Of Contents
Who is Lasfit?
Before I wrote this article, I had no idea who Lasfit was or what products they had on the market.
So, I did a (very) little bit of digging to get some background on them. Established in 2015, Lasfit was started with a simple objective: to provide high-quality products with competitive pricing while carrying out excellent customer service and technical support for their customers.
From the Honda Civic to the Toyota Tacoma, Lasfit produces high-performance LED replacement bulbs to enhance your vehicle’s lighting. Although the bulk of their product line is currently custom-fit floor liners and replacement LED bulbs, it’s apparent that they are a growing company that is trying to innovate and reach a new customer base.
Patterns & Colors
Like other manufacturers, they offer multiple patterns and come either white or amber in color.
I am personally running the spot pattern in white, so that’s what I’ll be drawing my impressions from.
We’ll look at the installation process as well as general aesthetics, build quality, and light output to try to help you determine if these lights will be a nice addition to your truck.
Features & Specs
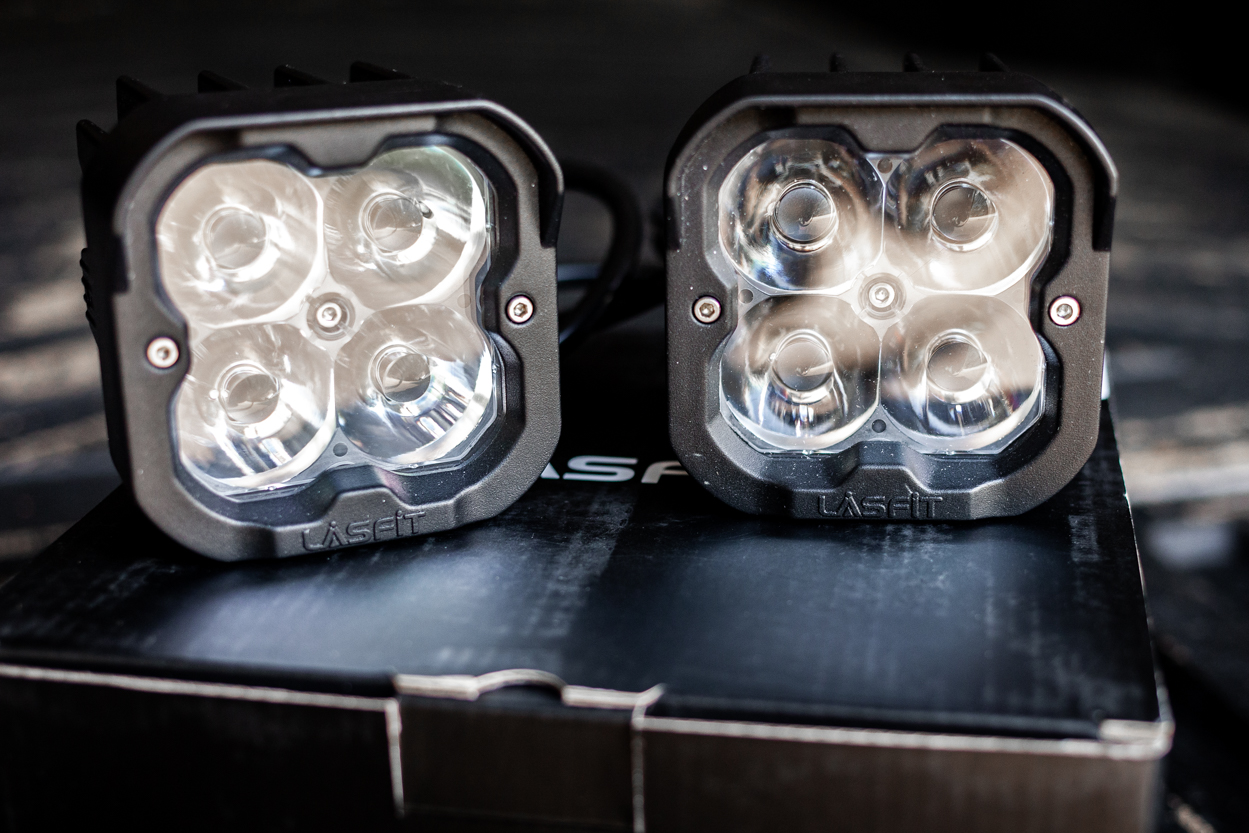
The Lasfit 3″ LED Pods have total internal reflector (TIR) optic technology. TIR uses a refractive lens inside the light’s reflector. This allows for more light capture and emission than a traditional reflector. TIR also produces a sharper cutoff than a traditional reflector. High-intensity Osram LEDs inside the housing provide excellent light output. The spot pattern is “suitable for long-range vision”, according to Lasfit. This means the beam will be smaller in circumference compared to a flood pattern, but is more focused and will provide lighting for a farther distance.
These LEDs have IP67 waterproof-rated housings. The IP67 (Ingress Protection) rating states that a product is dustproof and should be capable of being immersed in a meter of water for up to half an hour without a loss of function. To give a little context: the iPhone X and iPhone XR share this same rating. To aid in heat management, the LED board is mounted directly to the heat sink. The large fins on the back also help with cooling and the ventilation hole assists with preventing condensation inside the lens.
Specifications
- 5W-10W Osram LEDs
- Lux: 8672 lx @ 150ft
- Input Voltage: 9-36DVC
- Input Power: Sport 18W / HP 36W
- Amp Draw: 1.3/2.7 amps @ 14.2V
- Operating Temp.: -40°F to 185°F
- Ingress Protection (IP) Rating: IP67 Waterproof
- Weight: 1.25 lbs each (without brackets)
Note: Lasfit offers an 18W Sport version and a 36W HP version. I’m covering the 18W version in this article.
Installation

Included Items
- (2) 3″ LED Pod Lights
- (2) Mounting Brackets (to attach lights to ditch brackets)
- (2) Deutsch-style Wire Pigtails
- Hardware and Allen Wrench
This is a pretty simple install that can be done with just a few tools and doesn’t require much electrical experience.
Materials
- Ditch Light Brackets
- Socket Wrench
- 12mm Socket
- 10mm Wrench
- 14mm Wrench
- Cable Ties
- Knife or flathead screwdriver
- Allen Wrench (provided)
- Cutting Pliers
- Wiring Harness (optional)
Step 1. Ditch Lights Brackets
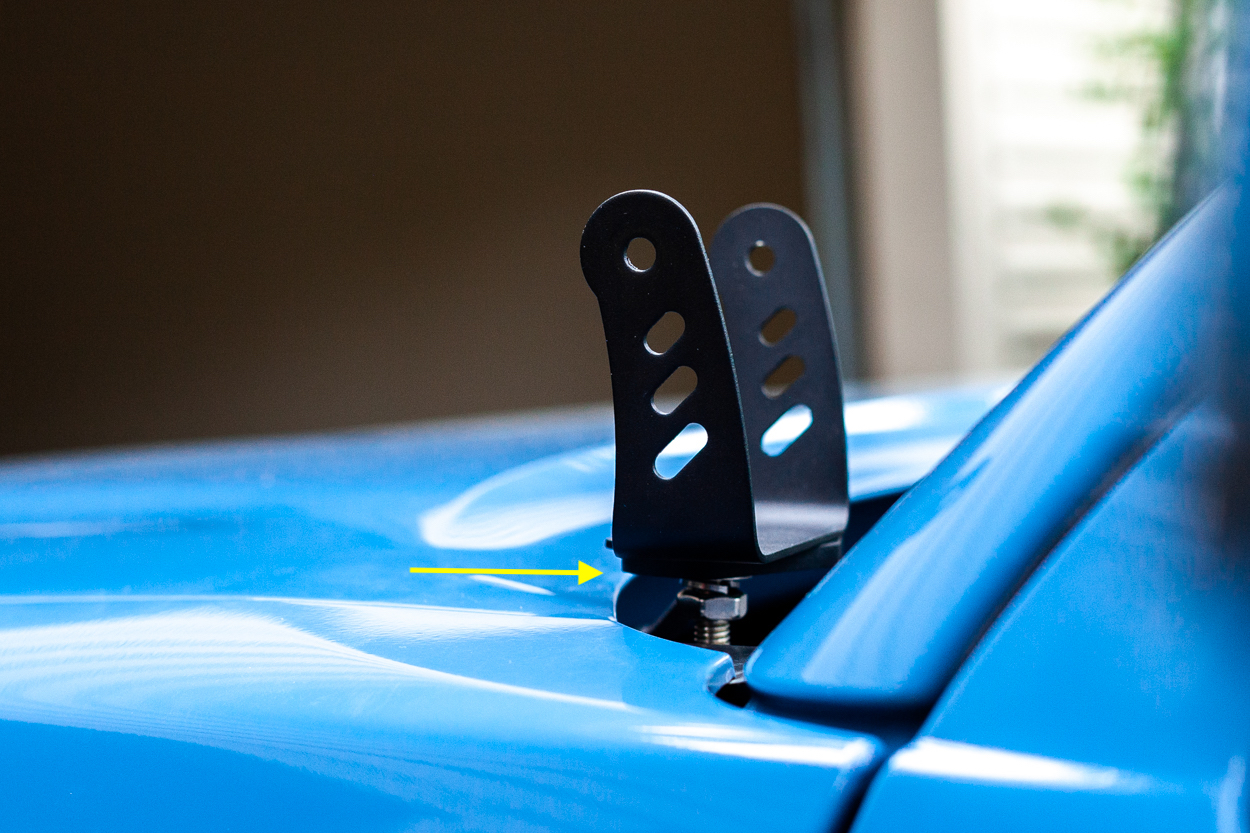
First of all, I want to say that you can’t be impatient like I was with my install. I got ahead of myself because my Low Profile Cali-Raised Ditch Light Brackets showed up before my lights did. So, what did I do? I went ahead and installed them. Big mistake. It is MUCH easier to install the provided light bracket to the ditch light bracket before installing them on the truck.
The biggest reason for putting the entire assembly together beforehand is that once you have the brackets on the truck, it is extremely difficult to install the hardware that attaches the two brackets. There are multiple washers and nuts to deal with, and you will have a much easier time putting them together when off the truck than you would if you installed the brackets first.
Step 2. AttachAssembly to Hood
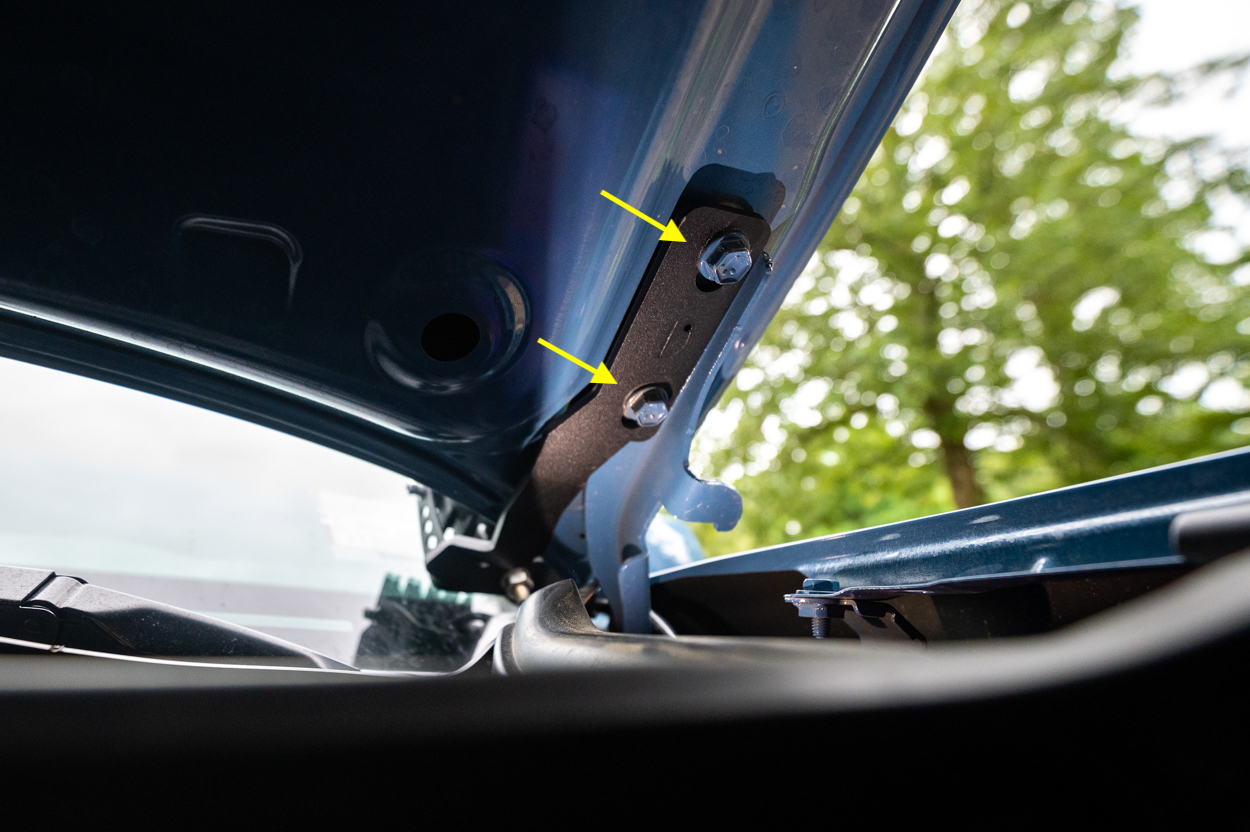
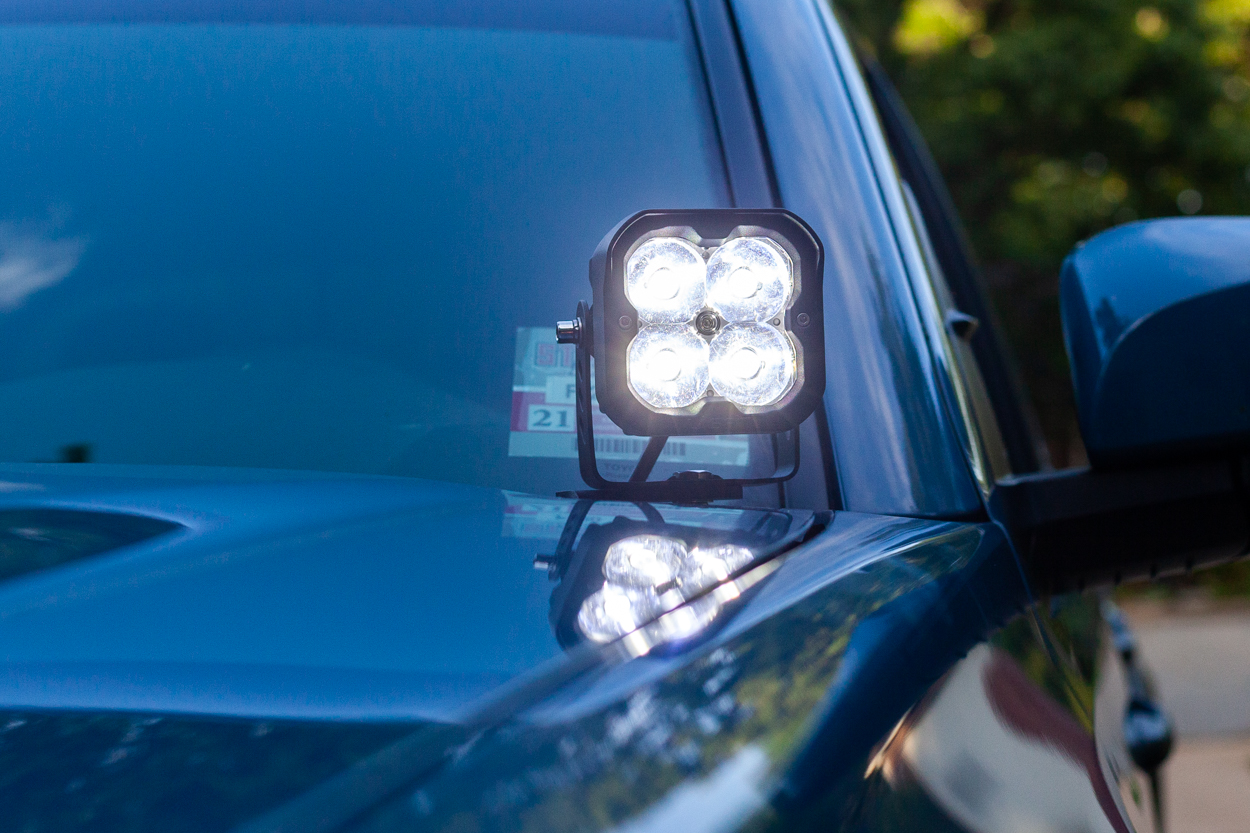
After you have the light assembly put together you’re ready to install them. Pay attention to the brackets because they will have a driver or passenger designation.
If you install them on the wrong side, you may run into clearance issues. Take your 12mm socket and wrench to remove the hood hinge bolts. Once you have the bracket in place, you can re-insert the hood hinge bolts and snug it down a bit.
Note: You may want another person to help you with that.
Step 3. Install Wiring Harness
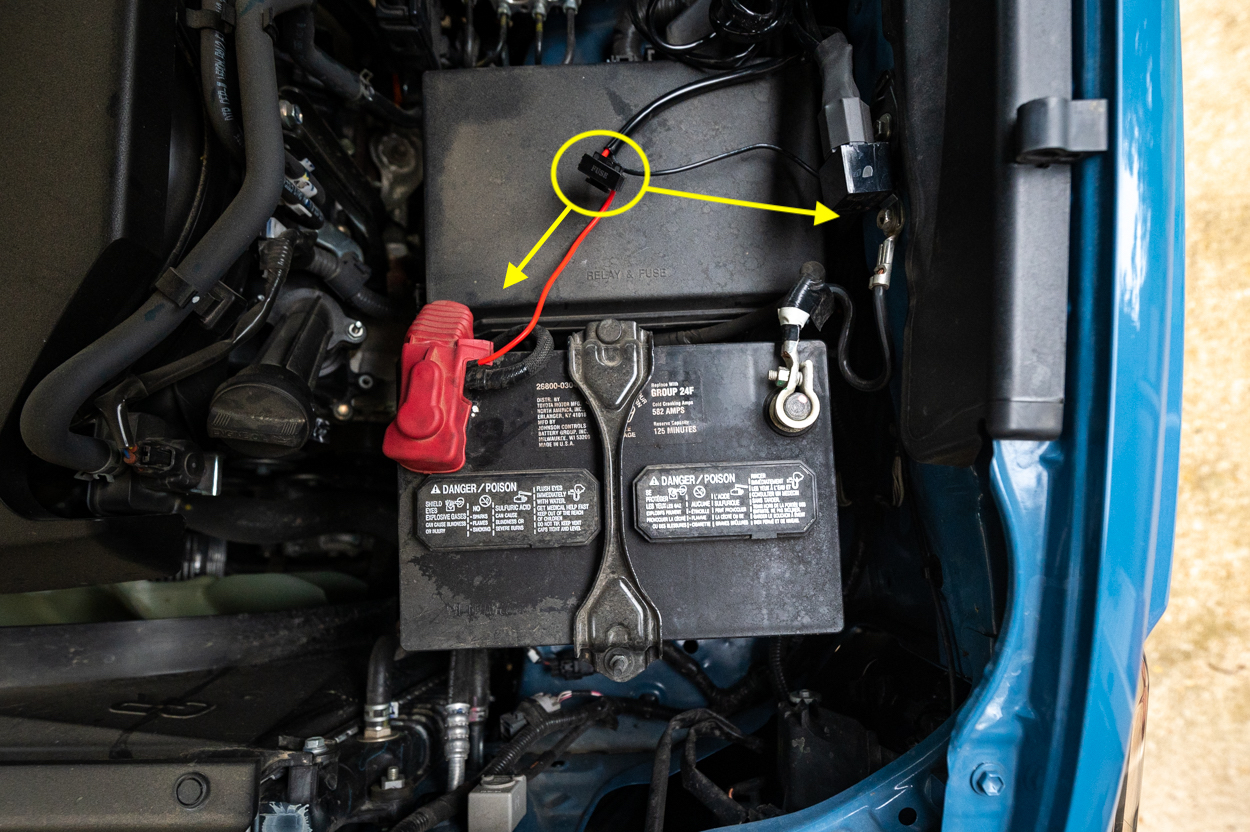
Go ahead and disconnect the battery at this point since you’ll need to attach the positive wire to the positive terminal and the negative wire to the negative terminal or a grounding point on the body of the truck.
After you’ve got the wiring harness connected, reinstall the battery cables and plug in the lights.

Because the wiring harness is so long, I decided to start on the passenger side. Once the passenger side light is plugged in, you can run the wires just under the plastic hood shroud along with the factory wiring that’s already in place.
Place some cable/zip ties to keep the wires secured and to keep everything nice and tidy under the hood. You could also do this after you’ve got everything plugged in and situated.
Step 4. Run Wire Through Firewall
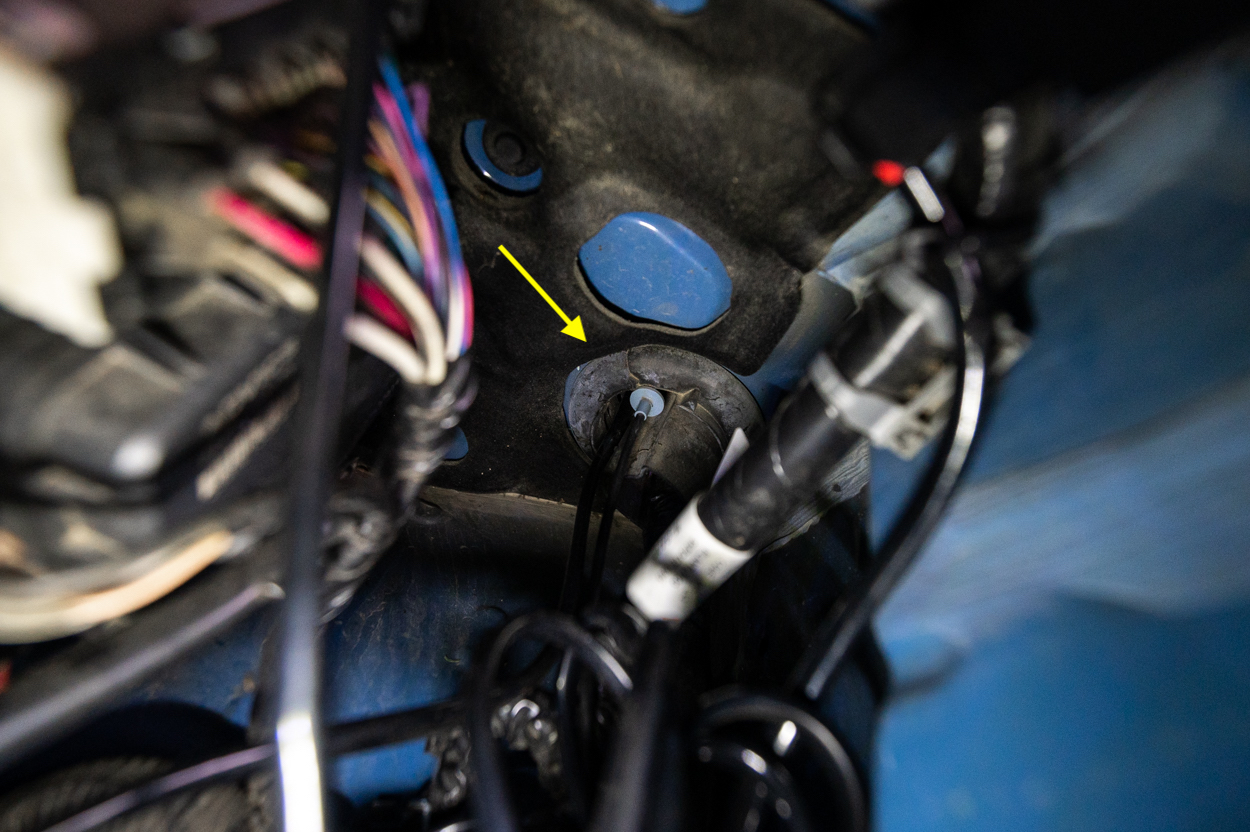
Now that you have the lights wired, run the connector through the firewall so you can plug in the provided switch. There is a rubber grommet in the firewall (where the bundle of wires is) that connects to the fuse box.
Cut a tiny slit into the grommet and then run the wires through it.
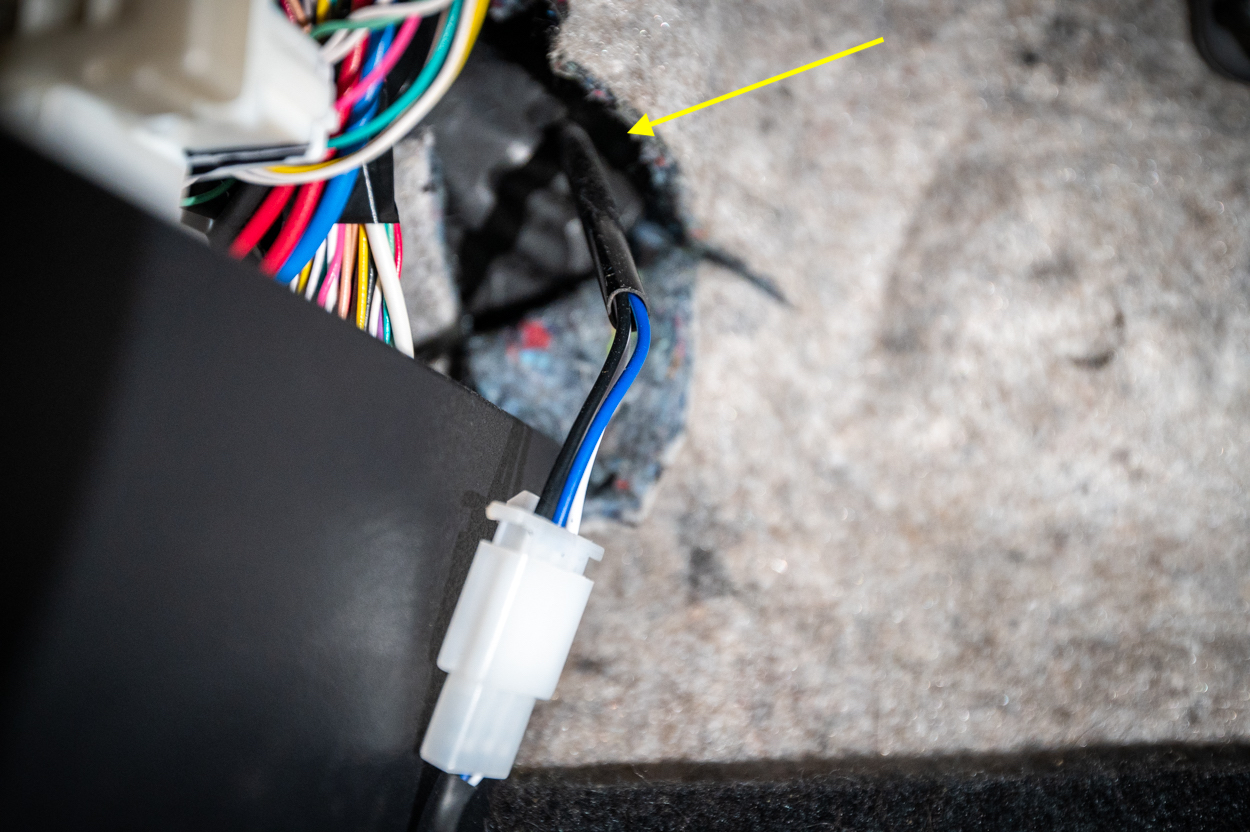
The easiest way to get the plug and wires through the hole is to take something reasonably stiff (like a straightened coat hanger), tape the wires to it, and then push/pull it through.
Step 5. Test Lights
Once you’re through the firewall, you can plug in the switch and test the lights to make sure they are operational.
Mount the switch somewhere on your dash where it’s convenient for you to access.
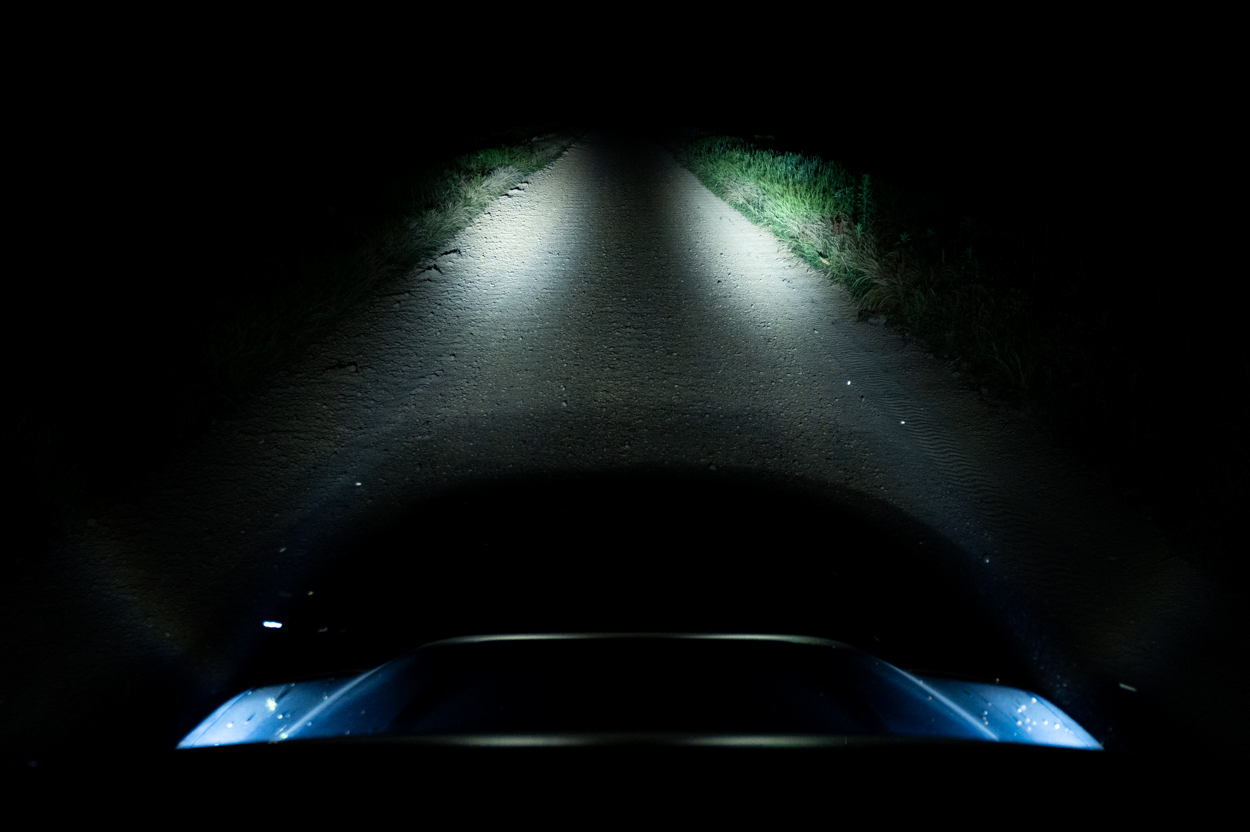
Output Shots
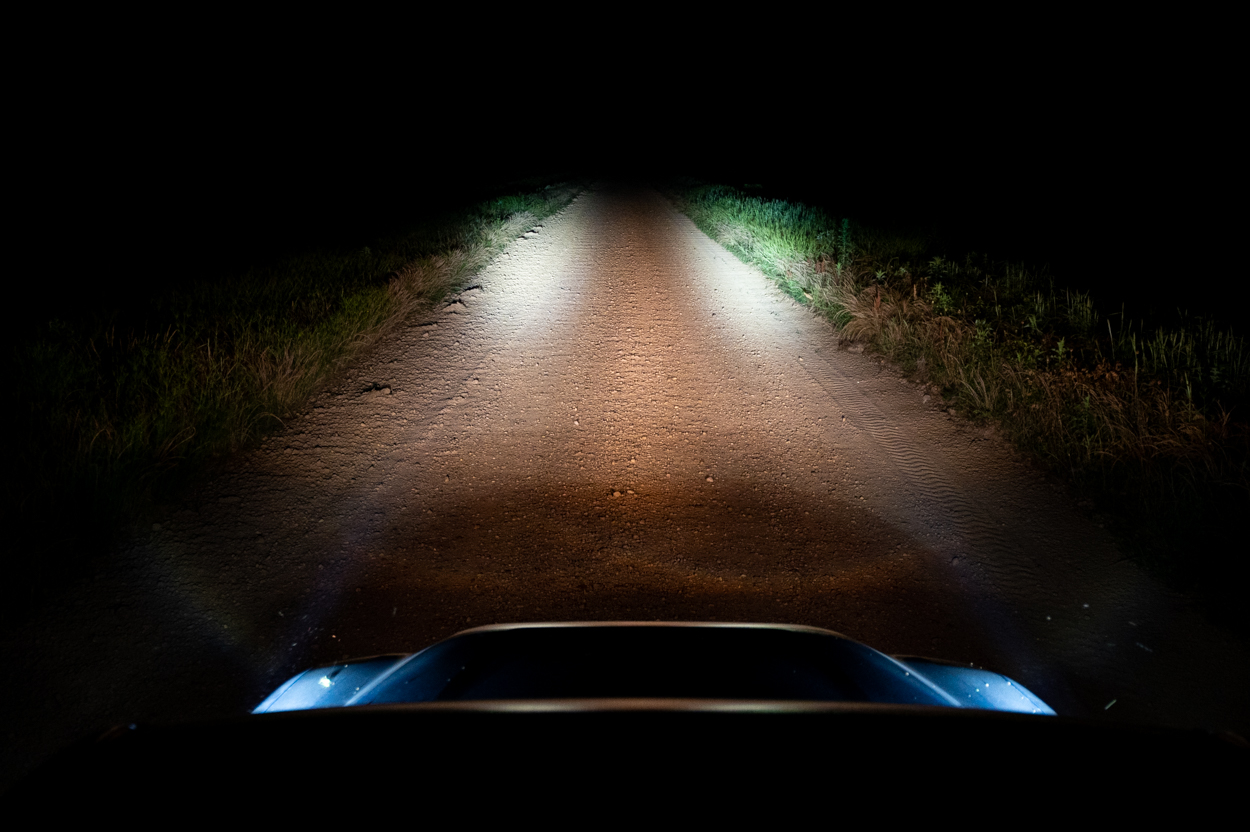
Pictured above: Lasfit 3″ LED Pods + Stock Low Beams
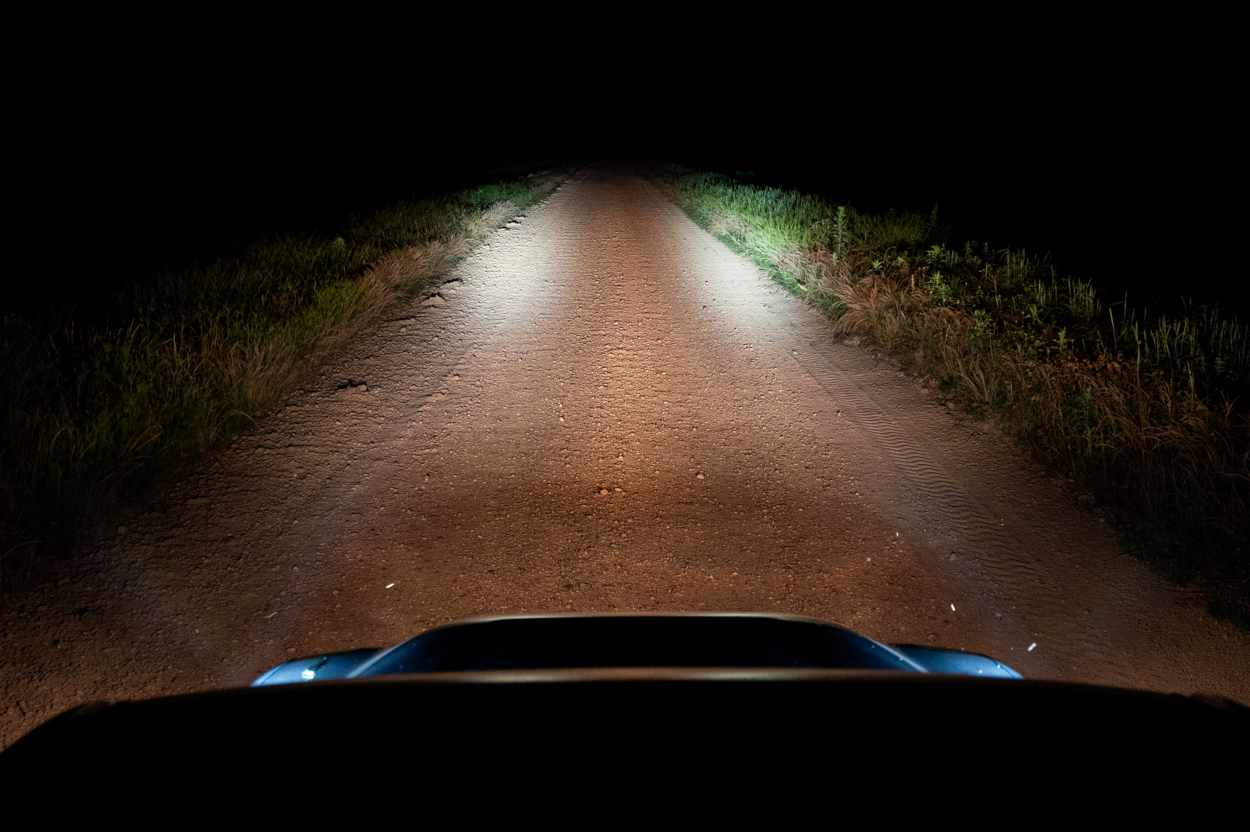
Pictured above: Lasfit 3″ LED Pods + Stock Low Beams + Stock Fog Lights (w/ Lamin-X Covers)
Pictured above: Lasfit 3″ LED Pods Only

Pictured above: A quick comparison on a parking garage wall for those looking for even more output comparisons.
As you can see from above, the Lasfit 3″ LEDs are quite powerful, especially when compared to the factory lighting. The additional light output is extremely beneficial. Considering how poor the stock light output is with the 3rd Gen Tacoma, it’s easy to see how these will help you out in rural and off-road environments.
I shot the first series of output images from the bed of my truck, so keep that in mind. It’s difficult to capture the distance they cover without being able to get high above them, like with a drone.
Another thing to remember is that these lights are offered in multiple patterns, and not just the spot pattern that I have. You can always aim them in a different direction than mine too, so that might change their apparent light output. Either way, hopefully, these photos help give you an idea of what to expect if you decide to go this route.
Final Thoughts
The spot beam pattern is very tight and has a very sharp cutoff, so they are a distance light. The beam pattern might be the only thing I would actually change at this point. The other patterns might be too blinding on the hood though now that I think about it. Either way, make sure to order yours with the pattern that’s most beneficial to you.
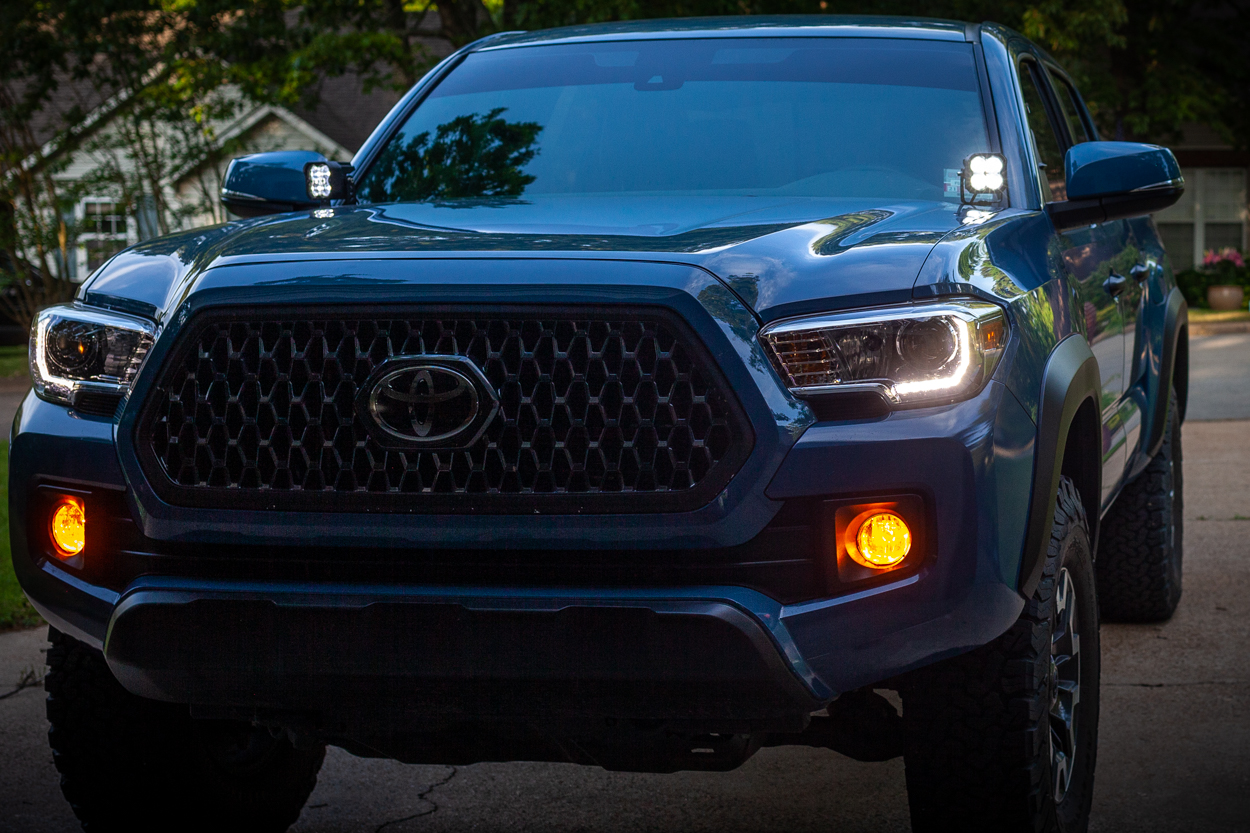
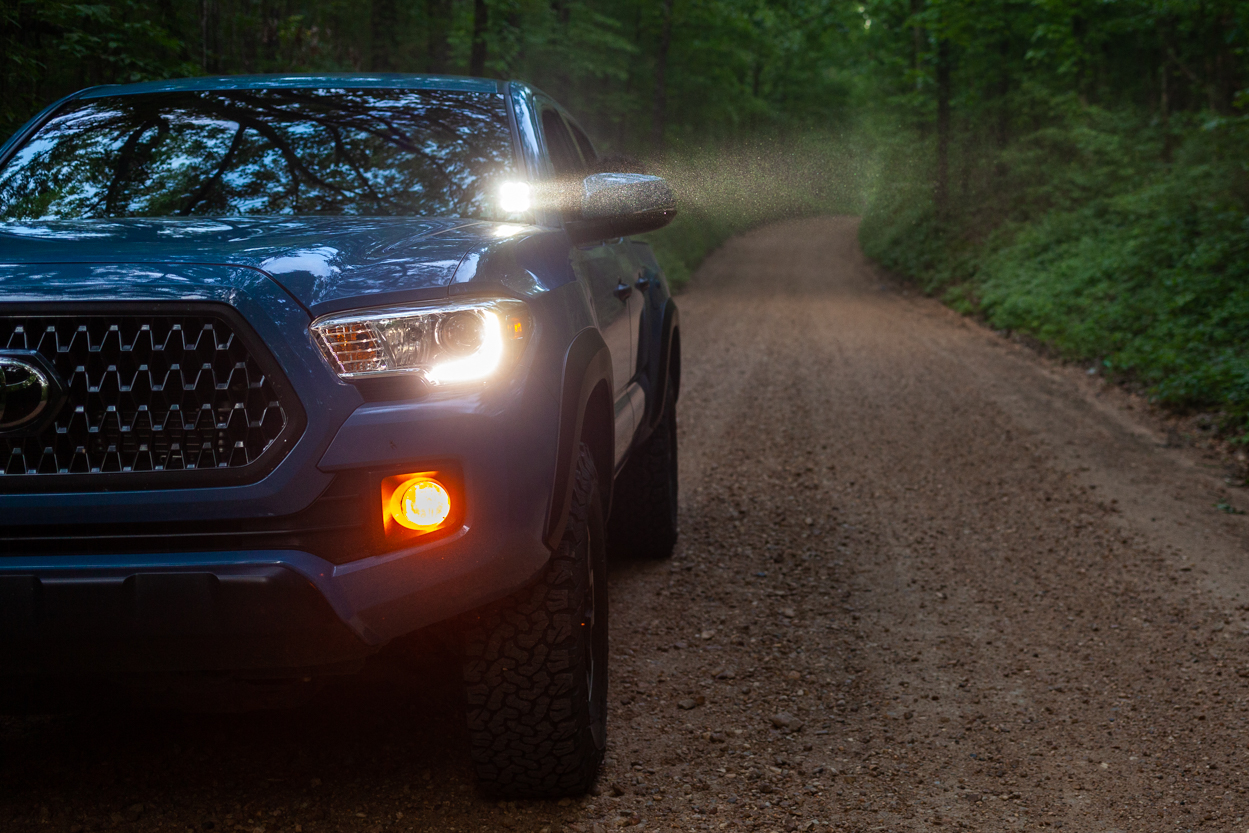
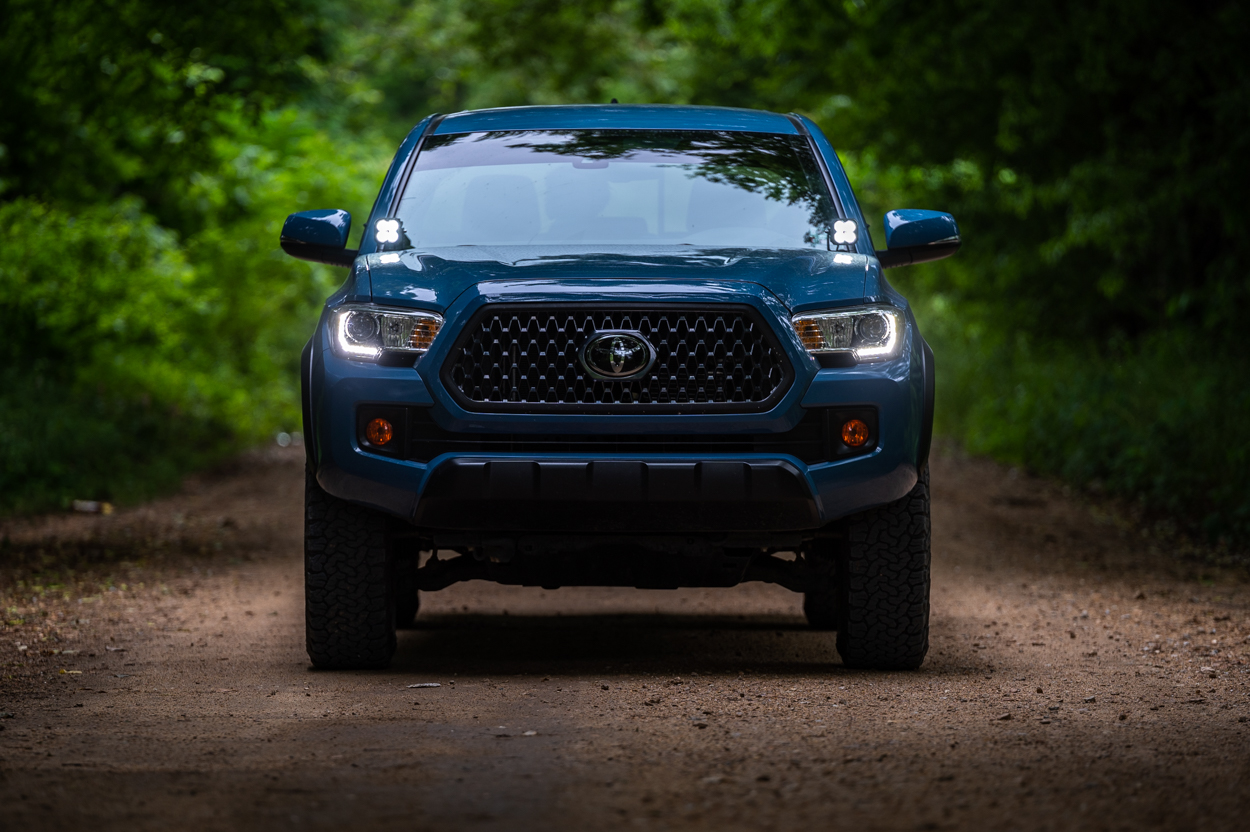
One thing I didn’t mention before is how they look when they’re installed. I wasn’t sure if they would bother me or my line of sight, but they don’t. I actually think they look pretty cool. The low-profile ditch light brackets from Cali Raised LED are VERY low profile.
All in all, I would say these lights are a worthy addition. The build quality is nice and the performance is great. I can’t speak to their performance against other similar lights, but I like these and they seem to perform very well.
Are these pods the spots?
Hey man. Yes, this particular set was a spot pattern.