
So you went out and bought a 3rd Gen Tacoma. It’s a sweet little truck, there’s no doubt. It’s not without faults though.
One of the biggest shortcomings of the truck is the light output. The biggest culprit? The headlights. While I like the design… The light output sucks.
In this post, I’ll go over an installation guide, and break down the features, specifications, and output like you’ve never seen before.
This post should go a long way if you’re on the fence about these. Are they on the pricier end of the spectrum? Absolutely. Are they worth it? I would certainly say so.
Find It Online
- AlphaRex NOVA-Series (2016-2023):
- Chrome: Check Price
- Black: Check Price
- Alpha Black (featured here): Check Price
Table Of Contents
Features & Specifications

AlphaRex designed these not only to stand out but also to offer some serious performance.
Features & Specs
- Lens Material: Polycarbonate (PC)
- Housing Material: Polypropylene (PP)
- Lens Color: Clear Lens
- Housing Color: Alpha-Black
- DRL (Light Tube) Lighting
- Sequential Turn Signal (Light Tube)
- DRL (White) and Signal (Amber)
- Built-in Osram LED Light Source
- Osram Oslon Black Flat LED Low Beam & High Beam
The design is based on the upgraded 2020 Toyota Tacoma TRD headlights, which (in my opinion) improved on the already great design that came with the Tacoma when it first came out in 2016.
AlphaRex uses its trademark 3D ice-cube projectors. They also include a U-shaped LED border that almost completely encompasses the outside of the lights. You can see their logo beneath the LED tube as well.
The quad projectors provide epic amounts of light, with the outer three being used for the low beam and the inner projector as the high beam.
The projectors are outfitted with Osram Oslon black flat LED chips, this helps to ensure that the cut-off line is not only sharp but that it gives off incredible light output for American left-hand drive regulations.
They feature a unique start-up feature, which is optional. Upon start-up, the sequential light will dance around the outside of the housing – which is what they are known for incorporating into their designs.
Finally, the housing is offered in chrome and black.
SAE and DOT

These headlights are also completely compliant with both SAE and DOT regulations.
In addition, all its products are certified to ISO-9000, ISO-9001, and ISO-9002. Every light is inspected to ensure ultimate satisfaction and quality control.
To top all that off, products comes with a 2-year limited warranty – so you can rest easy that the quality and guarantee is there that your new lights will perform as expected for years to come.
Installation
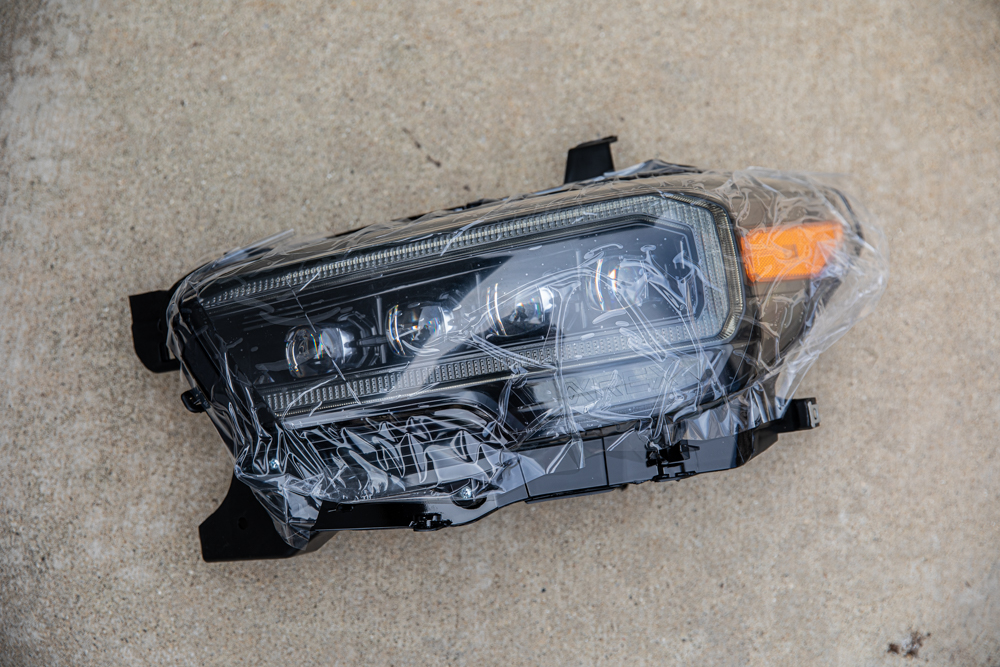
While this install is not necessarily complicated, it does require some basic wiring, especially if you want your lights to do the signature start-up sequence. It’s good to note that the installation might vary a little bit depending on which trim you have. Certain trims had different headlight harnesses or might need a converter. Choosing the correct light for your specific truck is easily found when you’re placing your order.
My truck is a 2017 Off-Road Toyota Tacoma. Again, this install will be focused on my truck, but with minor tweaks, the general installation is too wildly different for other trims. I’ll be covering primarily the driver’s side, but I’ll make notes where it’s relevant for the passenger’s side.
Tools & Materials
- Mechanic’s Tool Set
- Wire Cutter/Stripper
- Wire Crimper
- Butt Splices
- Heat Shrink
- Electrical Tape
- Zip Ties
Step 1. Negative Terminal
As with any installation that deals with the truck’s electrical system, it’s always recommended that you disconnect your negative battery terminal, just to be safe.
Step 2. Factory Harnesses
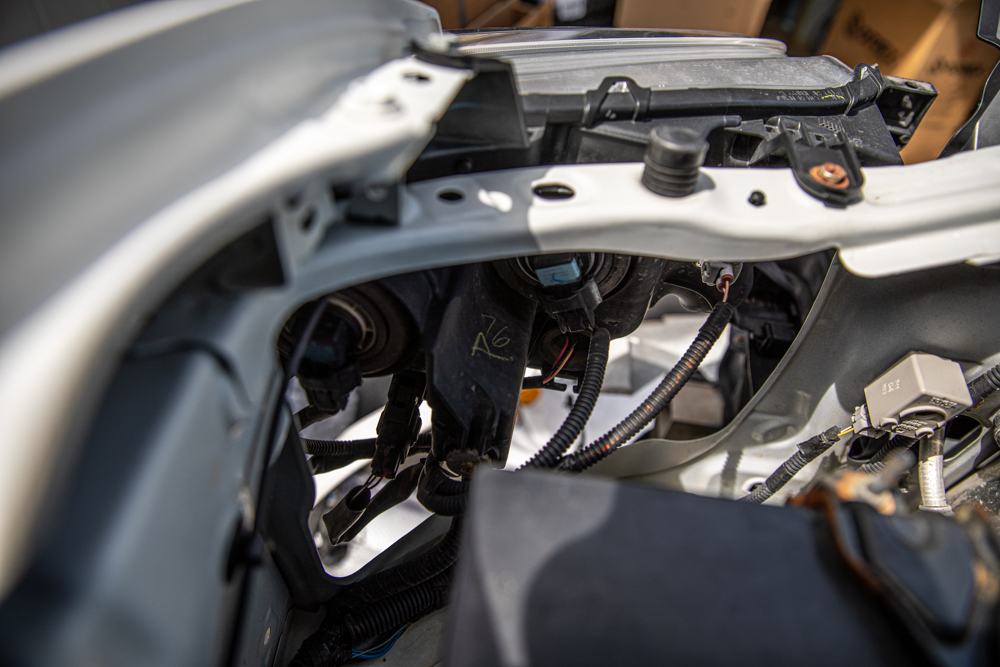
Several harnesses power each headlight. Before you proceed, disconnect all of them.
Step 3. Remove Front Grille
This step is fairly simple. Here is a detailed guide on removing the front grille.
Step 4. Headlight Bolts
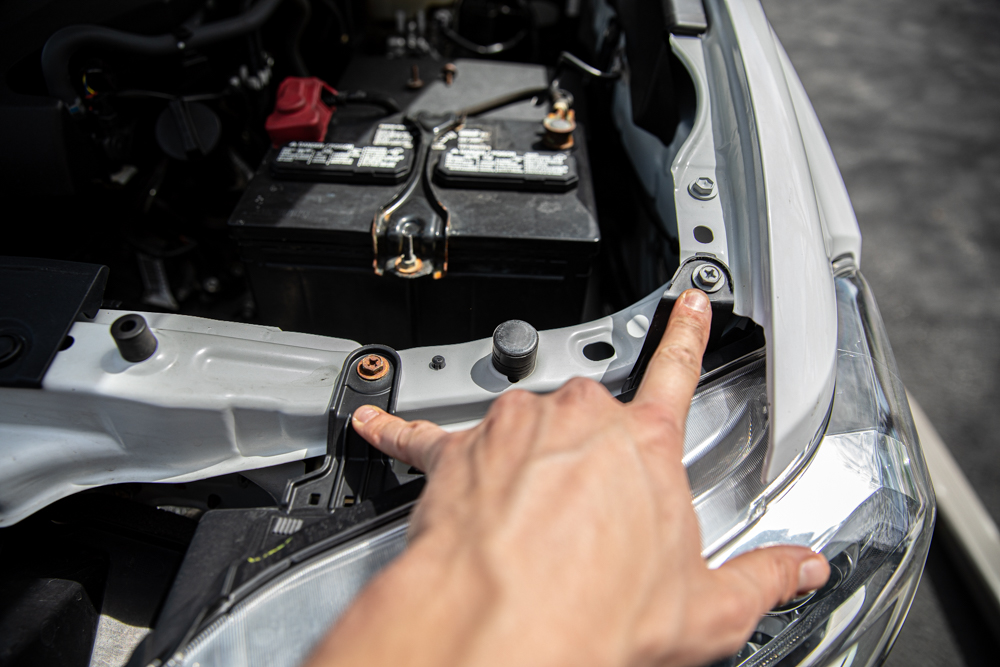
Two bolts hold the headlight to the body of the truck. Remove both of them to start.
Don’t lose these bolts, you’ll need them later on to secure the new lights.
Step 5. Front Bumper Cover

If you work your way around the front bumper cover, you can’t miss where the front bumper cover is attached. Depending on your front bumper setup, you may have more bolts.
Once all the external bumper cover attachments are disconnected, make your way to the next part. You don’t need to disconnect every attachment, just the ones that would prevent you from getting to the bolt that’s holding the side of the headlight into place.
As seen above, you’ll also need to disconnect the clip that I’m pointing to. It’s located on the inner bumper cover, under the front grille.
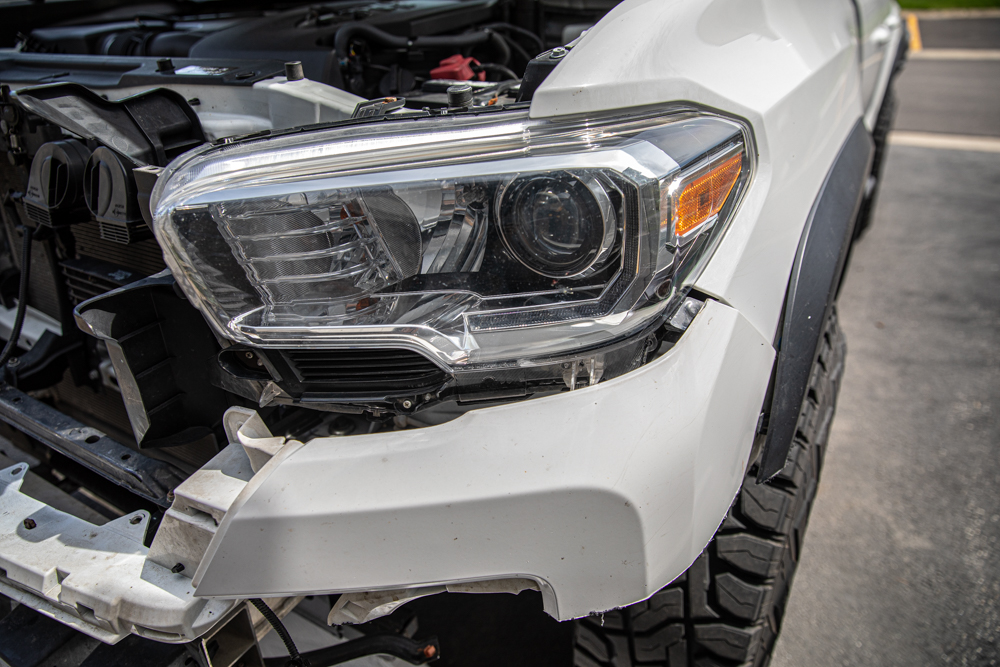
Before you actually pop the cover off, also notice the bottom left of the image above.
You can see a few tabs that are missing towards the center section of the bumper cover. To make slipping the bumper cover off easier, there are a handful of clips that need to be removed there as well. These clips are pretty much the same as the clip seen in the previous image.
Once all the clips, nuts, bolts, etc., are removed, you can gently pry up the fender flare, and then the bumper cover itself.
Step 6. Side Mounting Bolt

Man, all that work to get the bumper cover off, just to get to this stubborn little bolt at the top of the black plastic piece.
Remove this bolt to (almost) free the headlight.
Step 7. Remove Headlight

Ok. One last spot where you’ll need to be careful. Especially if you’re looking to preserve your old ones.
There’s a small pressure mount where the headlight attaches to some support brackets. Carefully pull on it to remove it, but seriously, do it carefully. I couldn’t figure out the direction to pull and ended up using more force than need be. I didn’t pay enough attention here, and I ended up hitting myself in the face with the headlight. So, yeah.
Step 8. Prepping Wiring

Pictured above are the harnesses that come with your new headlights. Now, it’s important to note again that these install slightly differently depending on the trim you have. Certain trims, per the AlphaRex website, will require converters or a slightly different installation.
The big harness on the far left is for the DRL sequential dance for the headlights, the rest are converters. The shorter ones with the gray ends, and the black and yellow wiring, are just plug and play. The one directly to the left of the short ones, you’ll only use one of them with an Off-Road trim, will need to be crimped to the gray wire coming from the harness.
It’s also good to note the two red wires coming off of the big harness, towards the top left. Those will connect directly to wires that stick out of the back. More on that later.

For an Off-Road trim Tacoma, you’ll need to cut the add-a-fuse off the end of the long gray wire and crimp it with a butt splice to the small connector and wire as seen above.
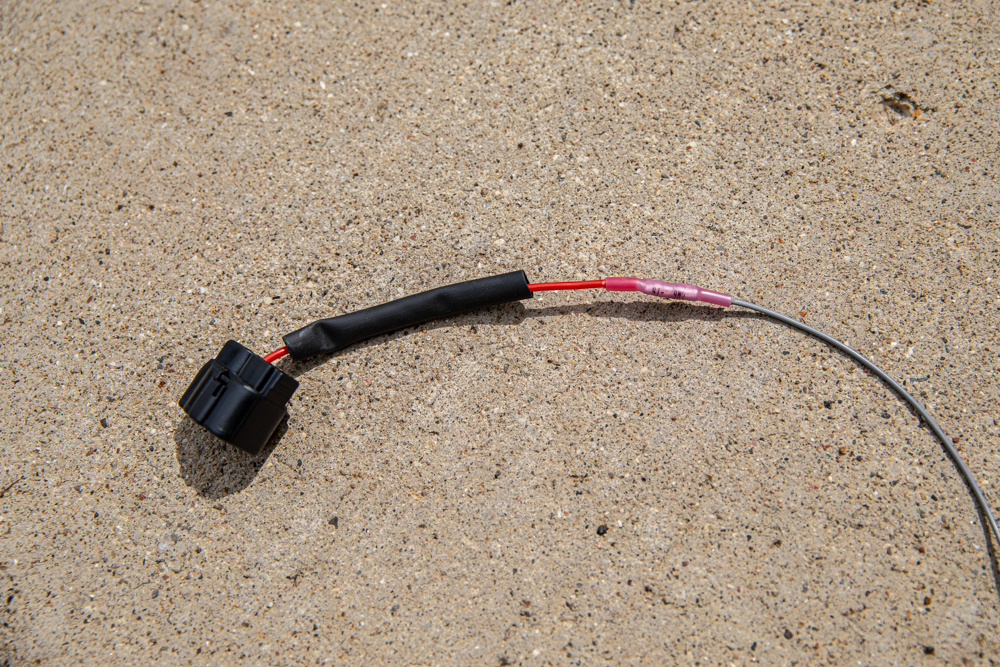
The finished crimped wire. I decided to add some heat shrink to it for peace of mind too.
Step 9. Converter Harness
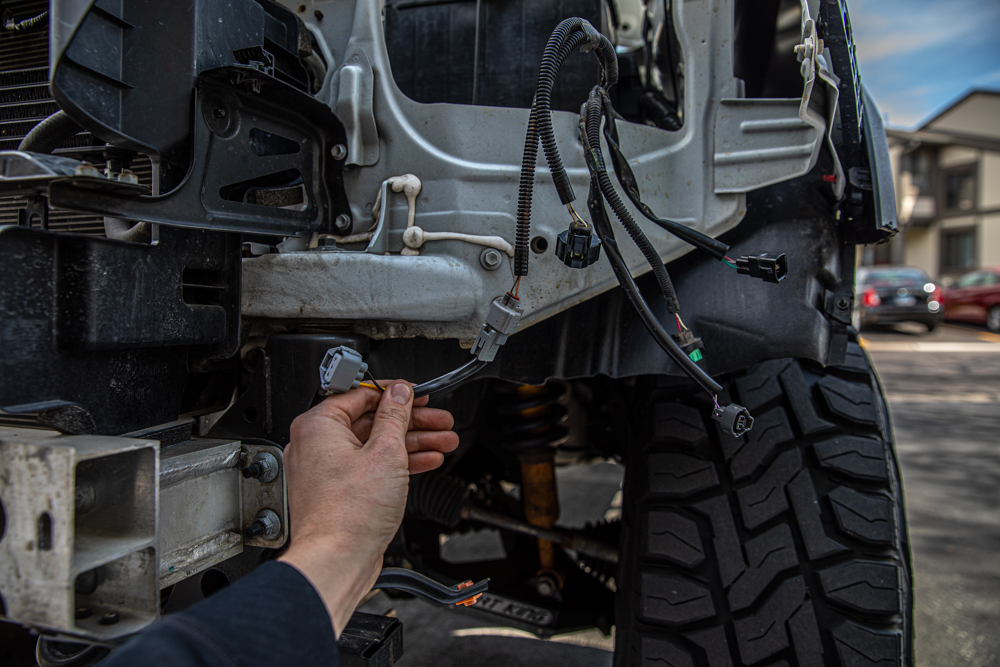
Pretty simple, just install the converter. It should only fit on one of the harnesses. The end of the factory harness that I connected to the converter harness was gray.
This should hold true for many models but might not hold true for all. Just double-check all your connections. This will be done on both driver’s and passenger’s lights.
Step 10. Short Adapter Harness

Once again, pretty easy. Just connect the two ends as seen above. This step is also done on both sides.
Step 11. Red Wire to Brown Wire

I touched on this before, but here is when you’ll need to connect the red wiring that comes from the DRL module to the brown wire that comes out of the headlight.
Both ends already have connectors on the end, so you’ll just need to push them together. I took it a step further and added some heat shrink here too. The red/brown wires will need to be connected on both sides.
Step 12. Yellow Wire to Headlight Harness
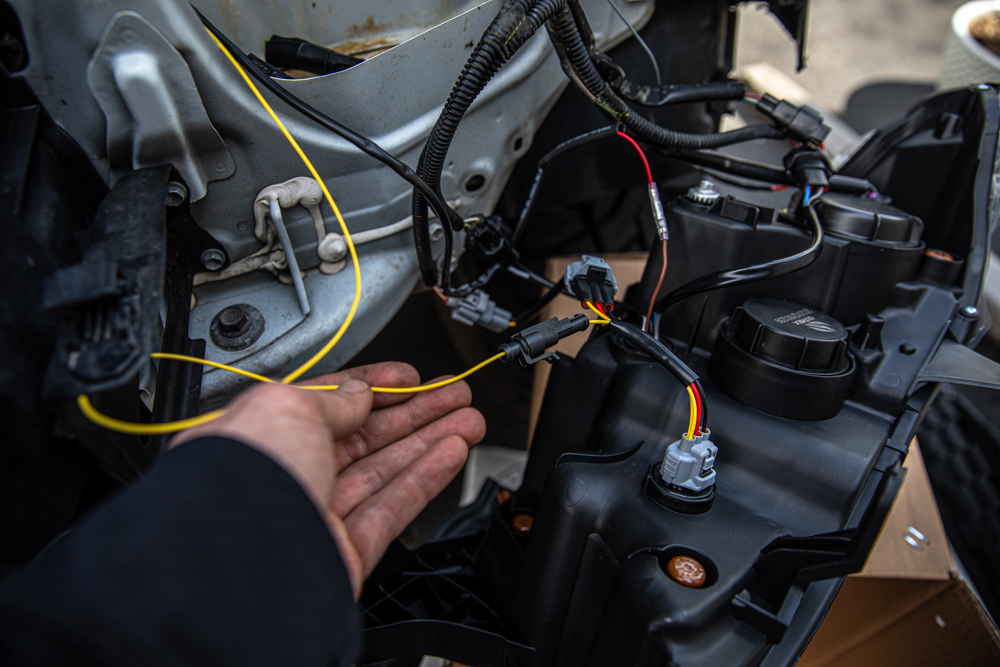
This step is simple, but it’s good to know that you’ll only need to connect this wire to one of the headlights, in this case, the driver’s side. The passenger’s side will not need one.
I electrical taped the passenger’s side connector (to keep it dry) and threw a zip tie over it to help from unraveling.
Step 13. Spliced Gray Wire to Factory Harness
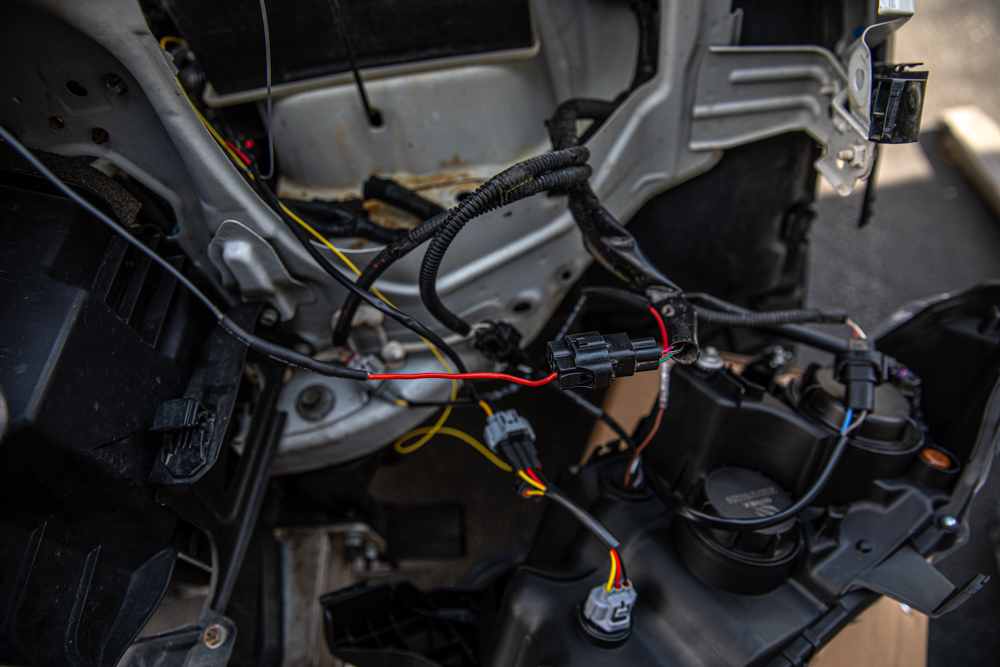
Remember that gray wire that was spliced to the connector with the red wire in the prepping wiring section? This is where you will connect that newly created harness to the factory connector.
This connector is only attached to the driver’s side, there is no connection like this on the passenger’s side.
Step 14. High & Low Beam Harnesses

Another simple step. Just be sure to connect these correctly.

If you reverse the connections, which I did by accident on the driver’s side headlight, they won’t work properly when you first turn them on.
Step 15. Side Marker Harness

Once again, just connect the final harness. This is on both sides. Almost done!
Step 16. Positive Terminal & Ground

One of the final steps is to connect the sequential power module to the battery.
Attach the red wire to the positive terminal (don’t judge my corroded one).

Then, attach the black wire to your negative terminal, or as seen above, to the factory ground location.
Step 17. Organize Wiring

The final step is to deal with all the excess wiring in the engine bay.
The majority of the mess will be on the driver’s side since it has all the extra connections and the new module. The bulk of the additional wiring will stay near the driver’s side headlight and battery. I carefully organized the wiring and zip-tied it where appropriate. Might still look a bit chaotic, but it’s much cleaner this way.

Above, you can see how I routed the red wire that connects to the brown wire on the passenger’s light. I simply used zip ties to attach the wire to the radiator cowl.
Step 18. Test All Functions
Probably the easiest step of them all.
Test your high/low beams, turn signals, DRL functions, etc. Lock and unlock your truck to test for the sequential dancing and associated features.
And with that, you’re all finished! Not the most difficult installation, you just need to carefully follow the instructions.
Breakdown & Comparison

One of the hardest things to find while looking for new lights online is often quality output shots.
I made sure to cover this at length since this is likely a huge factor in most purchasing decisions. I was able to get output shots from an aerial perspective with my drone as well as several images with the output as seen on a garage door. I got my hands on two trucks – one with the original factory headlights and one with the updated LED version that debuted for 2020 models.
I’ll post all the images in the following sections, and then do a detailed breakdown of everything you need to know right after. I did my best to ensure that the conditions, camera settings, and edits were all identical to provide as accurate a depiction as possible. No funny business. I even went as far as to measure and place the trucks in the same exact position, for each comparable shot.
Aerial Shot – Factory Halogen Projector

Aerial Shot – Factory LED Reflector

Aerial Shot – AlphaRex LED Projector

Drone/Aerial Footage Analysis
Ok. Let’s break the drone shots down first.
Factory Halogen Projector
From the eye in the sky, you can tell that the factory halogen projector output has a decent amount of distance. It could be worse. Still not on par for an expensive truck like an OR 3rd Gen Tacoma, but the light output isn’t completely dismal. Where the factory halogen falls the shortest, in my opinion, is in light intensity and color.
While it may look okay from the drone, from the cabin, as I’m sure many of you have experienced, using only the front headlights is not nearly adequate for safe driving, especially without the use of the fog lights (if your Tacoma is equipped). This is very true if you’re looking to get a better beam spread into the periphery of the road, where hazards may originate. The bottom line? Factory halogen headlights need some help.
Factory LED Reflector
The upgraded LED reflectors, available on the 2020 Tacoma, are certainly an improvement over the halogen option. It’s easy to see that the output is much broader, brighter, and reaches a bit further than the halogens. The LEDs definitely provide the driver with much more usable light.
The main issue with the LEDs is that the light pattern is not as focused as a projector setup. This leads to a bit more “bleed” of the light output, and much of that bleed is not usable for lighting the road. This might make the second image look better than the rest, but the reality from the road is a bit different. More on that in the following sections.
AlphaRex LED Projector
And the shot everyone was looking for. First and foremost, it’s easy to see that the intensity of light output far exceeds the factory halogen and LED lights. The amount of light cast directly in front of the vehicle is incredible. Relative to the rest of the drone shots, the light output is so bright in the front of the truck, it’s a bit blown out, meaning that it’s bright enough that it overexposed that small section of the image. With the AlphaRex lights, I don’t even feel the need to use fogs anymore – that’s how bright they are up close.
Now, you might look at this final shot in comparison to the LED option, and it might look like the factory LED reflectors have the AlphaRex lights beat. That is not the case. Again, the light is much more bright, so it’s easier to make out the road. It’s also more focused, with significantly less scattering, giving you more usable light. The LED reflectors might throw light a bit further, but at 4-5 car lengths down the road, your eyes, at ground level, can’t really appreciate the difference. Lastly, the whiter output of the AlphaRex lights is better for visibility than the bluer output of the LED factory headlights.
Garage Door – Factory Halogen Projector

Garage Door – Factory LED Reflector
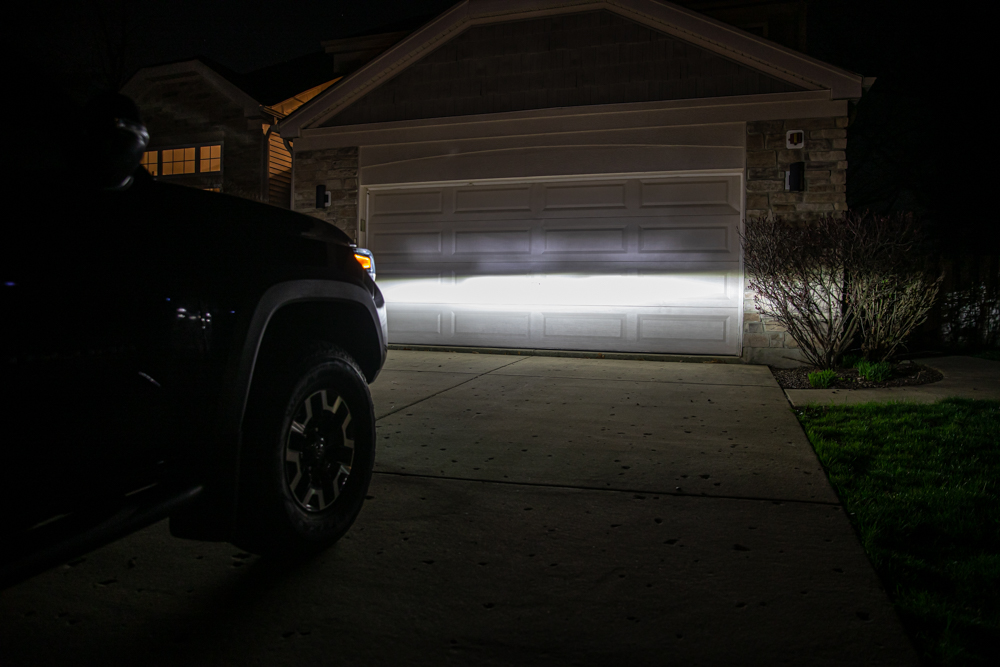
Garage Door – AlphaRex LED Projector
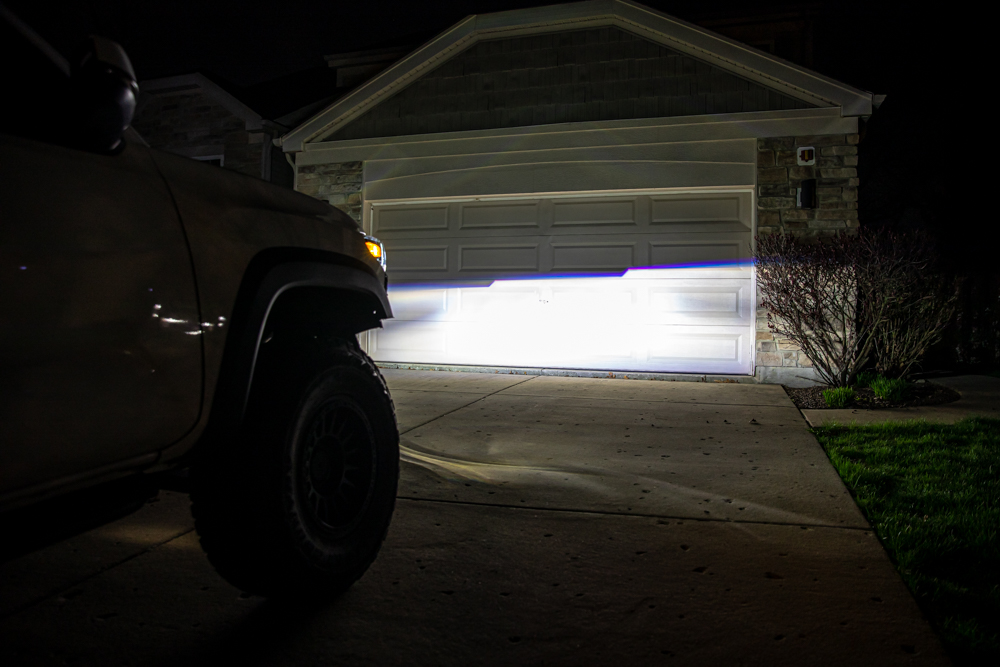
Garage Door Footage Analysis
Ok. Now let’s break down the output shots on the garage door.
Factory Halogen Projector
Right off the bat, you can see the sharper cutoff lines of the projector halogens. The cutoff is nice, but that’s pretty much where it stops. You can see how the center of the output has the most intensity, lining up with the drone shot where we saw the amount of distance these lights are able to cover. Outside of that, relatively unimpressive.
Factory LED Reflector
First things first, the LED reflector is clearly brighter, at least when compared to the halogens. The cutoff is not nearly as sharp, and if you look around the image, you can better understand what I was referencing in the previous sections when it came to light scatter. While these lights may provide more light, it’s the usable light that we’re after.
Now, while these are certainly an improvement in performance over the halogens, they leave a bit to be desired. There was obviously some debate when Toyota decided to employ LED reflectors, instead of LED projectors, like the AlphaRex lights. More cost-effective to use reflectors, I would assume. I would also like to note that the extra scattering seen with these lights could account for a few people flashing their brights, thinking that you’re intentionally keeping your vehicle’s brights on, especially with a lifted truck.
AlphaRex LED Projector
Once again, we’re at the money shot! Relative to the other lights, it’s very easy to see that the cutoff line is extremely sharp, and the light pattern is much brighter, across a much larger area. This is where we can really see the massive differences between the other factory options.
The cutoff line is almost razor-sharp and there is effectively no light thrown above the easily differentiated output line. The use of a quality projector is also evident by the crisp blue/purple hues seen towards the top. It’s worth noting that the angled beam pattern is a perfect highlight of the thought put into making these lights as effective as possible for left-hand drive applications. I can say from experience, that when properly aimed, these lights turn night into day and they don’t blind other drivers.
Long-Term Review

I think by now, it’s at least somewhat obvious that I absolutely love these headlights. Do you blame me?! There’s a reason many of our community have bought these lights.
I won’t go into crazy detail again about the output, the previous sections did a great job covering that particular portion. Simply put, these crush the OEM options and many other aftermarket alternatives. The light quality is exactly what you should expect when you purchase lights of this caliber.
The build quality is extremely solid. These lights feel great in your hands, and I would say that they are on par with OEM quality. The entire light assembly screams quality and I have no doubts that these lights will continue to perform till the day the truck is finally retired.
You can tell that these have had a ton of time and effort that went into their creation. Up close, you can see the attention to detail, where AlphaRex made sure that these lights look great from any and all angles.
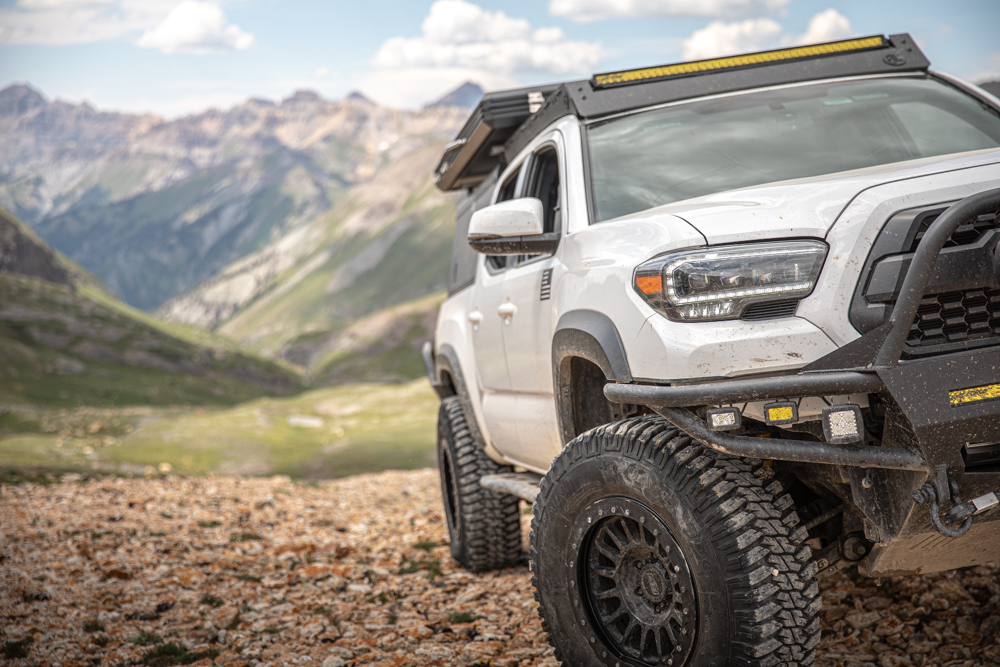
I’ve had these lights for a few months now – I’m happy to report that I have zero issues of any kind.
We’ve put almost 10,000 miles on the Tacoma with these lights installed and they’ve done great in every kind of terrain and condition. I’ve power washed them several times (no leaks or fogging), they’ve been pelted with bugs, rocks, dirt (with effectively no damage or degeneration), and they have experienced hundreds of miles where the trail was rough enough to rattle anyone’s brain.
CONs
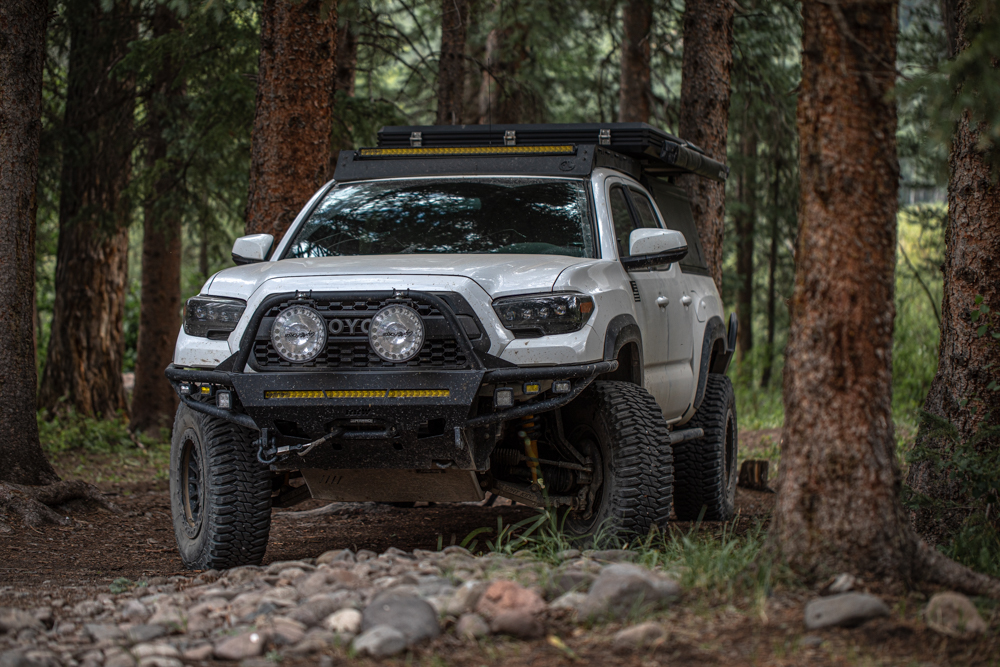
I really don’t have a single issue with these lights.
The only thing that might potentially help the design, is if there was an option to run the amber sequential turn signal and the DRLs in reverse. I’ve seen quite a few people attempt to rewire their lights to do so, somewhat successfully. I know only one or two other companies offer this option, and while it’s not a game-changer for me, I know many people would like to see an amber DRL and white sequential turn signals. I imagine AlphaRex has had a fair amount of requests to make lights as described. Who knows, maybe we’ll see an amber option in the future. Time will tell.
Final Thoughts
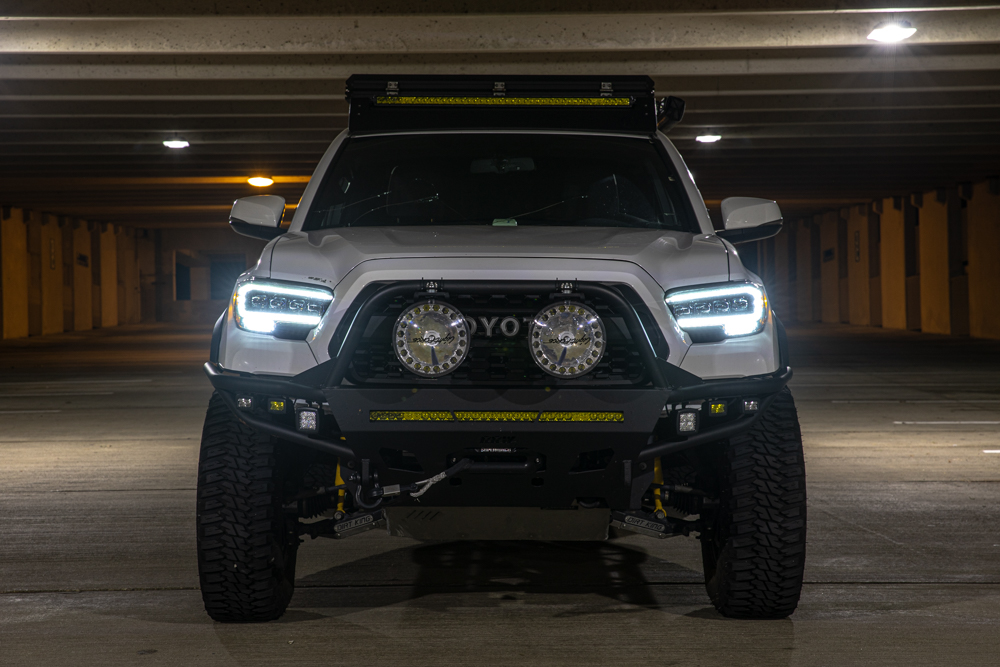
I could go on and on about how impressed I’ve been with these lights. But the bottom line is, if you’re in the market for a quality set of headlights, I recommend that you strongly consider this one.
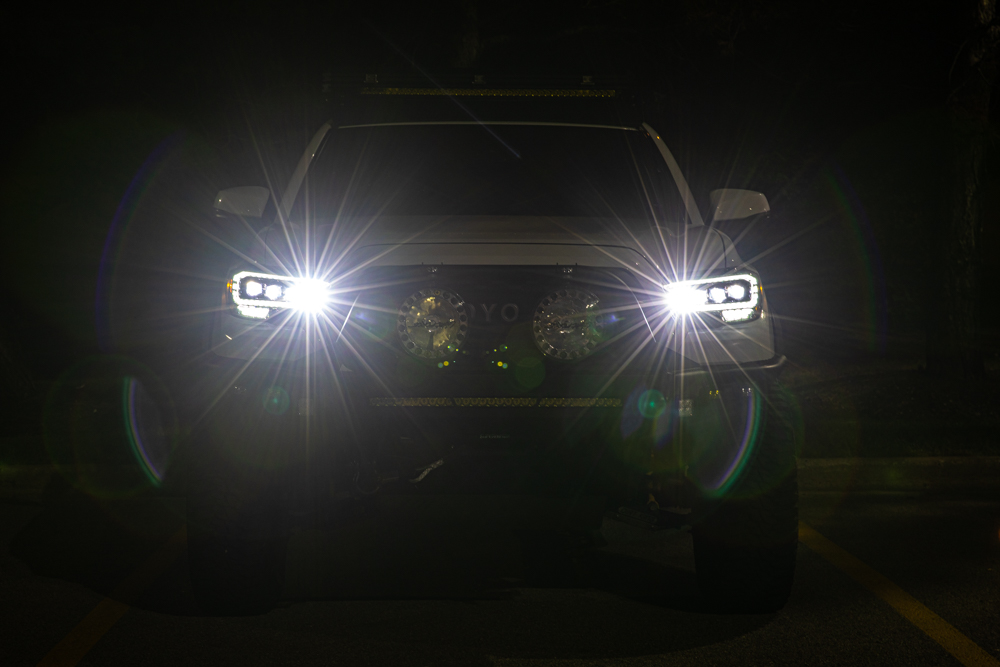
Aftermarket headlights can drastically change the look of your truck (for the better), and with several housing options to choose from for your build, you really can’t go wrong. And as good as these lights look in photos, like most upgrades, they look even better in person.
If you want to add a set that combine both form and function, look no further.


Hello I got to get everything going driver side headlamp work but my passenger headlamp don’t, the low an high been is not working, try to switch plugs, put it in the driver side and did work, put my old headlamp on the passenger side and it did work, everything else except for the low and high beens work
Might be a bad headlight? Not sure man. Did you try talking with AlphaRex? I know that different models have some special adapters. Maybe you don’t have the right adapter?
My husband and I have a 2017 Tacoma where the prior owner installed these AlphaRex headlights. One of the headlights have gone out and we are trying to figure out how to fix it. Please let us know your input. Hopefully, we don’t have to spend $ on a whole new assembly.
I would reach out to them directly. Tough to tell what the issue is. You might have to look around and see if you notice any damaged wiring, harnesses, or water inside the housing. If there’s no issue there, I would get ahold of AlphaRex customer service. See if you can replace the bulb or something, or if you need a replacement unit.
Okay, thank you for your input. My husband is trying to contact them. We’ll see if there is something that can possibly be replaced.
Just curious how you respond to some of the really negative comments on certain tacoma forums about the lights’ longevity? I’ve been looking at these lights for awhile now but I’m nervous about throwing down money on lights that might not last. Are you still happy with them?
Hey Larry. I’m not really sure, I personally haven’t heard that. I didn’t know they got bad remarks in terms of longevity. I’ve had these lights for almost a year now. I have them on quite often and I do a good amount of miles. I haven’t had a single issue yet! Hopefully, it stays that way. I imagine AlphaRex would be pretty cool if they do break for at least the first year of ownership.
Those overhead pictures show just how bad these alpharex headlights are. Imagine doing a review on headlights and have no idea what a good headlight is suppose to look like. The second picture has WAY better output and it’s not close.
From someone who drives an hour and a half to work every morning at 430am….on country roads, in deer country, i completely agree with you Evan….146.7% The second shot is exactly the type of output Id be after, in a heartbeat.
Evan, While I understand what you’re getting at, just the fact that the factory LED headlights seem to throw more light, doesn’t mean that light is usable. I touched on that in the section. The LED lights might have more reach, towards the periphery of their output, but that light is not very helpful. Neither is the light scatter that goes to the moon… lol. The AR headlights do have a lot of focus up close, but the light, especially being closer to a pure white, is easier on the eyes and better for visibility. Are they better than the… Read more »
I’ve been watching (and drooling over) the Nova headlights since they were announced for presale… Yeah, price. ugh. As I continue to build my ’12 OR, I continue to come back to these. Not only stylish, but you’ve proven them super effective. Thanks ;P lol Let’s see what promotions holiday time might bring us!
The 2012 version are so good! Probably my favorite 2nd Gen option on the market. They actually offer a few different configurations too. They range from $500-1000+ so there are options for all budgets. But I hear you! Maybe we’ll be able to line something up with them… Keep an eye out!
Wow. Impressive drone comparison shots. Really cool seeing that perspective on the output.
Thanks, man! Really wanted to create the most solid headlight post around.