
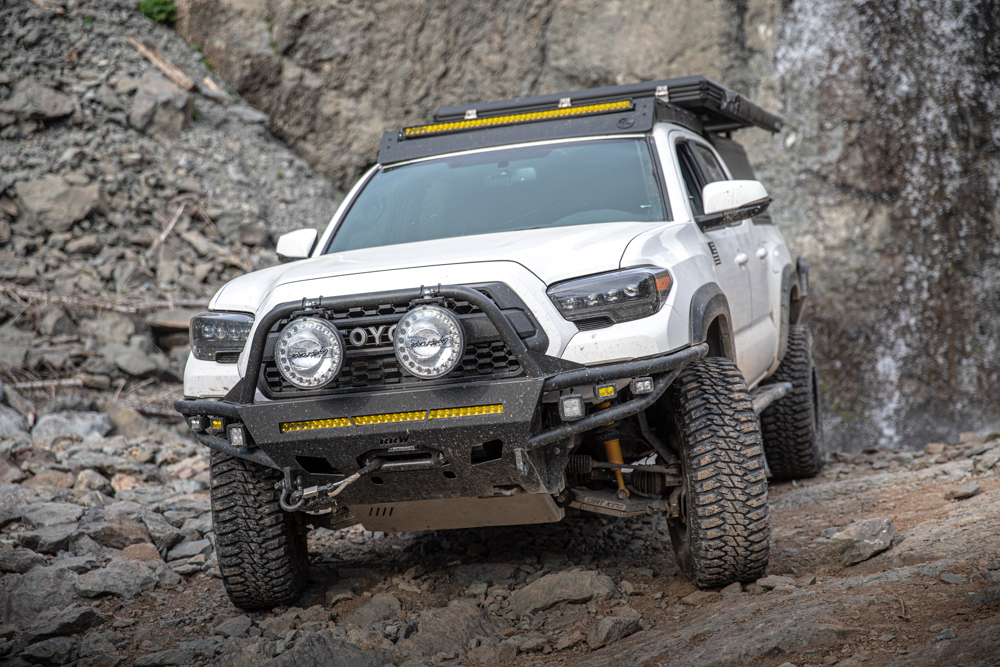
If you’ve started to lift and wheel your truck, chances are that you’ve heard of spindle gussets. In this post, we’ll go over what these gussets are, what they’re for, and a quick guide to adding them to your Tacoma.
In the majority of the Tacoma community, we typically hear the phrase spindle gusset, but you may also hear them being called knuckle gussets. Technically, the terms spindle and knuckle can be used interchangeably (for the most part).
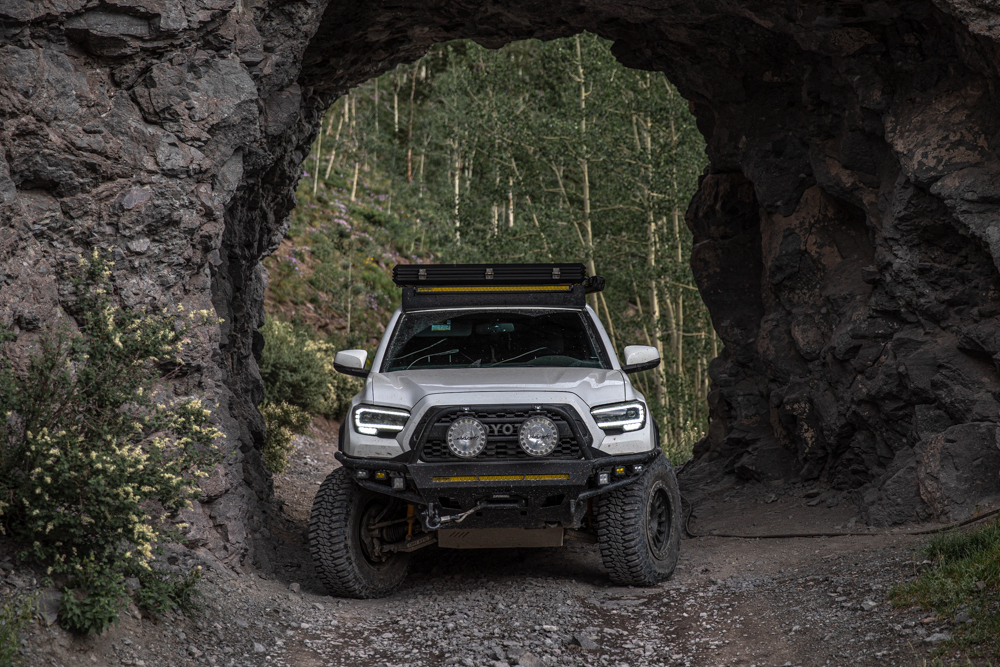
This post is focused on my 3rd Gen Tacoma, but these gussets will work with certain 4Runners, FJs and Lexus GXs. Just check your year, make and model on the Dirt King Fabrication website.
Find It Online
- Dirt King Spindle Gussets (2005-2023): Check Price
Use code “DIRTKING5” when ordering from TacomaForce!
Table Of Contents
What is a Spindle?
In a truck like the Tacoma, and other vehicles with similar suspension setups, the spindle is a crucial part of the suspension system.
This part connects several aspects of your suspension, to help keep your suspension cycling properly and tracking straight on the road. The spindle houses the Tacoma’s wheel hub and bearing assembly, it connects to the upper control arm (UCA) and the lower control arm (LCA), the sway bar, the brake caliper, the steering rack via the outer tie rod, and a couple of other minor parts. The spindle is so important, that instead of being made from cast steel, it’s made of forged steel, which is a more intensive/expensive process but produces much stronger final results.
Ultimately, the spindle (knuckle) connects the wheels and tires, to the steering assembly and a few other crucial suspension components.
Do You Need Gussets?
To start, will a factory Toyota Tacoma need this modification? Extremely unlikely.
This particular modification requires quite a bit of disassembly to remove, you must have the capacity to weld the new gusset. You’ll also need to think about painting the new gusset, and getting an alignment once the job is finished. The point being, this upgrade is mainly suited for those of us who are looking to off-road and modify our trucks with bigger tires, lift kits, and so on.
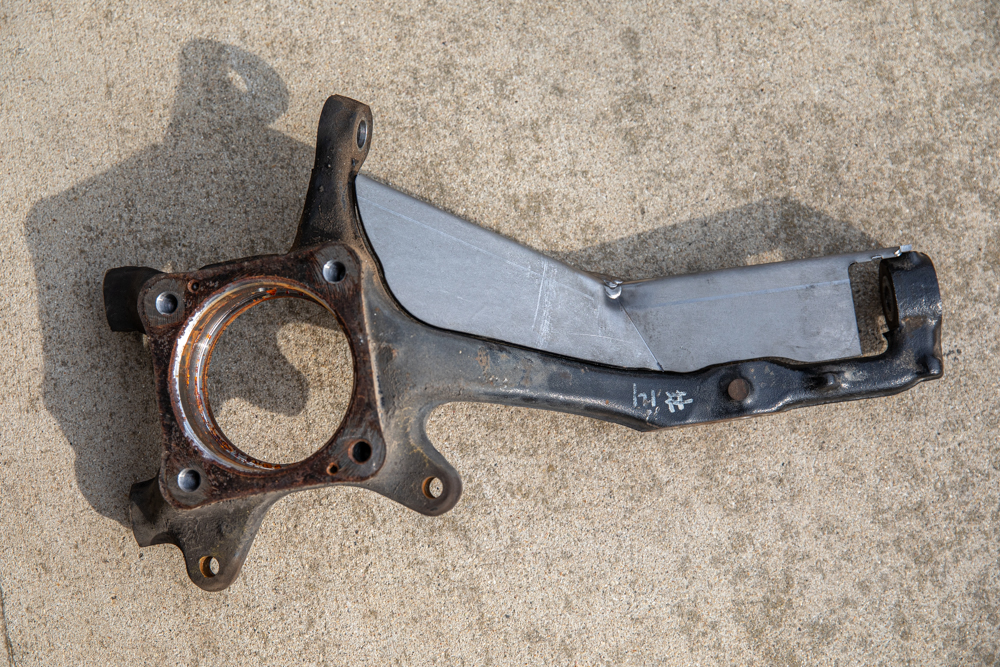
When you start to build your truck for the trail, you inevitably subject the vehicle (and its components) to increased stresses and loads. During the more extreme use and abuse, it’s not out of the ordinary to bend a spindle, since it’s technically one of the weak points in the front suspension. Before I installed these on my Tacoma, guess what? I bent both my spindles while out in Colorado, from big hits from boulders to my wheels. And the bends were fairly significant. To top it all off, the hits were hard, but not massive. Just pointing out that a bent spindle can happen on any moderately difficult trail, not just hardcore wheeling.
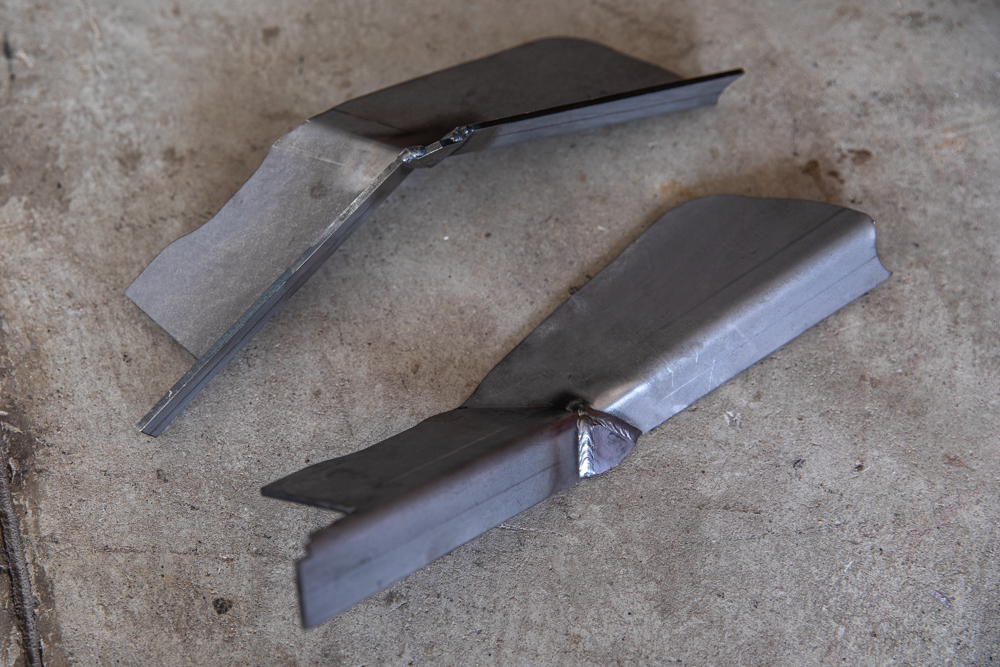
These gussets are cut, bent, and welded to conform to your spindle. When properly installed, these gussets help to prevent damage by reinforcing weak and problematic areas. After welding, there is a large increase in overall strength. The gusset’s design is carefully thought out to allow the maximum possible wheel backspacing and it eliminates the OEM sway bar. The material for the gusset is made from 1/8″ steel.
Installation
The overall process for installing these gussets is not something most people can perform in their driveway. I’m not trying to discourage anyone, but you’ll need to have the ability to disassemble and reassemble a big portion of your front end, and you’ll need a welder who is comfortable with welding suspension components. Depending on where you live, that may or may not be an issue.
To have my truck grounded for the shortest amount of time possible, I decided that it made the most sense to buy a new set of spindles so that swapping the new gusseted spindles was less of a headache. I went with a used set, and it turned into a bit of a mess. More on that later.
Anyway, these next few sections will serve as a general guide to the process, and potentially help to identify if you’ll need to have the work done at a shop, or with a welder/fabricator.
Prepping
Special Consideration
Before you begin, you’ll want to check your spindles. If you’re working on with used spindles (like I was), or if you suspect that your spindles are bent, it’s a good idea to mock up the gussets to the spindles you’ll be working on. This helps to ensure that you aren’t stuck with a spindle that is too deformed to use. Ask me how I know…
Be Careful with Used/Recycled Spindles
I purchased my spindles from an auto recycler, thinking I was going to save time and money, and then ended up not being able to use the passenger’s side spindle after it didn’t fit with the new Dirt King gussets whatsoever. Since most salvage parts are from wrecked vehicles, there’s the potential for getting a damaged part. Lesson learned there – but it doesn’t stop there.
I called the recycler and they eventually sent me another spindle. We welded it up and I proceeded to install it on my truck. Everything seemed to be fine, until I almost completely reassembled the passenger’s side, just to find out that the UCA ball joint stud sat deeper in the top of the spindle than it was supposed to – by a solid 1/4 inch. The cotter pin didn’t line up either. That may not seem like much, but it makes a huge difference.
Tapered Shafts on Various (seemingly) Interchangeable Parts
Many Toyota/Lexus models have interchangeable parts. The recycler was under the impression that the spindles on the Tacoma could be sourced from another vehicle because they are identical. That is not completely true. While almost the entire spindle is the same, there is one difference. The taper on the inside of the top of the spindle, where the UCA mounts, is different on certain models. In my case, the spindle came from an FJ, which is what caused my issue.
After speaking with Dirt King, they informed me that they were well aware of this issue. While the UCA ball joint stud may seem to be firmly seated in the spindle, the difference in taper means that the two surfaces are not properly mated. In the long term, that means that with all the forces that the stud experiences, the stud will be moving around more and more with time and wear. Eventually, the danger is that the ball joint stud might snap, and cause catastrophic damage, injury, or death in the meantime. DK strongly advised that I did not use the spindle and that I should source a new one.
Long Story Short
In the end, I ended up using one used spindle, and one brand new one. All said and done, I was able to find an online Toyota OEM parts dealer, and purchased a new spindle for roughly the same price as a used one – but with none of the hassle. Once again, lesson learned! Hopefully, someone else can learn from my mistakes.
Back to Prepping
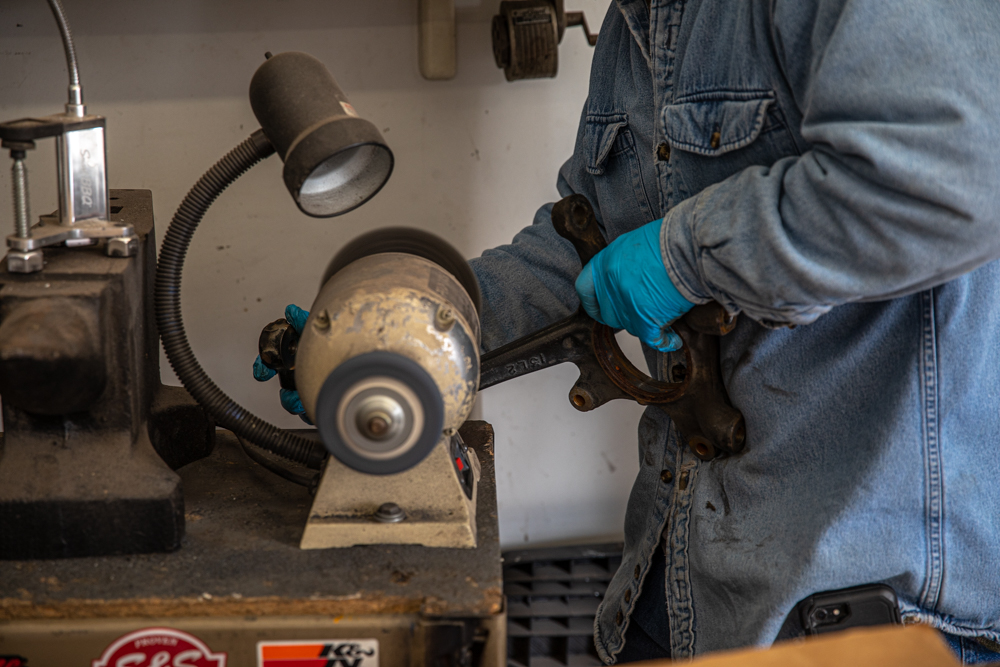
To weld the gussets, you’ll want to strip off some of the coatings, so you don’t have to burn through it. In the image above, you can see my buddy stripping off as much paint as possible before proceeding.
Welding the Gussets

Once your spindles are prepped, carefully line up the gussets, make sure you’re happy with their placement, and tack them into place.
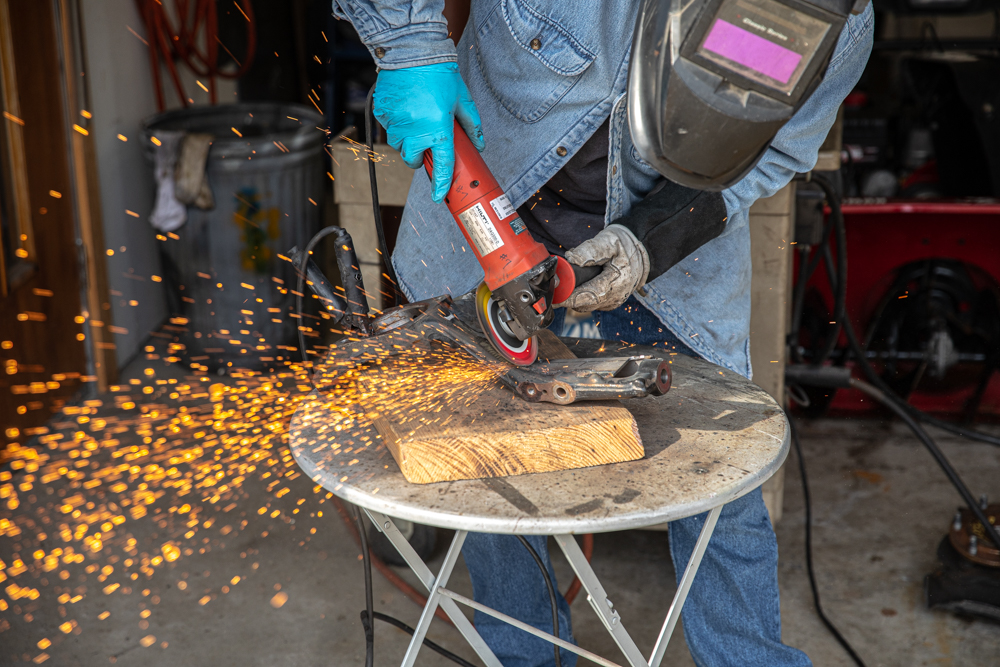
Once the gusset is tacked into place, and you’re happy with the fitment, you can proceed with welding the spindles on both sides. Keep reading the next section for a quick discussion on welding forged steel.
Preheating Forged Components
It’s worth noting here that due to the forged nature of the steel, you don’t want to technically overheat your spindles, or heat them too quickly. I tried to do as much research on this as possible, and the main conclusion I came to was that as long are you are careful, and you’re not welding completely cold steel, on say a fall/winter day, and welding your gussets in small sections (instead of all at once), you shouldn’t compromise the integrity of the steel too much.
Now I know that might set some people off, and I’ve seen more than a handful of people say you should be preheating any forged steel before welding, but the previous statement was the best I was able to come up with. My buddy who helped with the welding also noted that the preheating rule may be more important in cases where you are welding forged parts with tighter tolerances, on say, a motor. In a spot where the tolerances are relatively less important, as long as you are careful, you should be fine. But take that advice with a grain of salt. I’m not the complete authority on metallurgy – but I have had zero issues thus far, even after some heavier wheeling.
Cleaning Up the Welds
As my buddy likes to say, if I was a great welder, I would be a terrible grinder. Lol. Just a little humor before we continue.
If you’re dropping perfect welds, or you simply don’t care about the appearance of your spindles, this step isn’t completely necessary. We just wanted the outside of the spindle to be a little more aesthetically pleasing, without any splatter or larger uneven welds. Are the spindles just as strong and was the penetration of the weld good? We certainly think so.
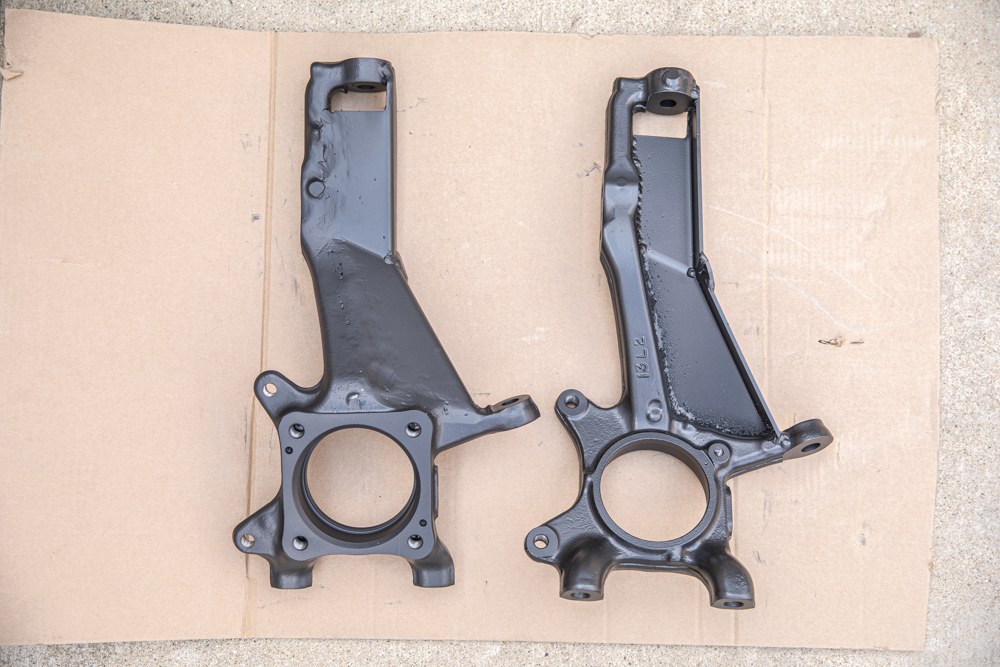
Finished Gusset
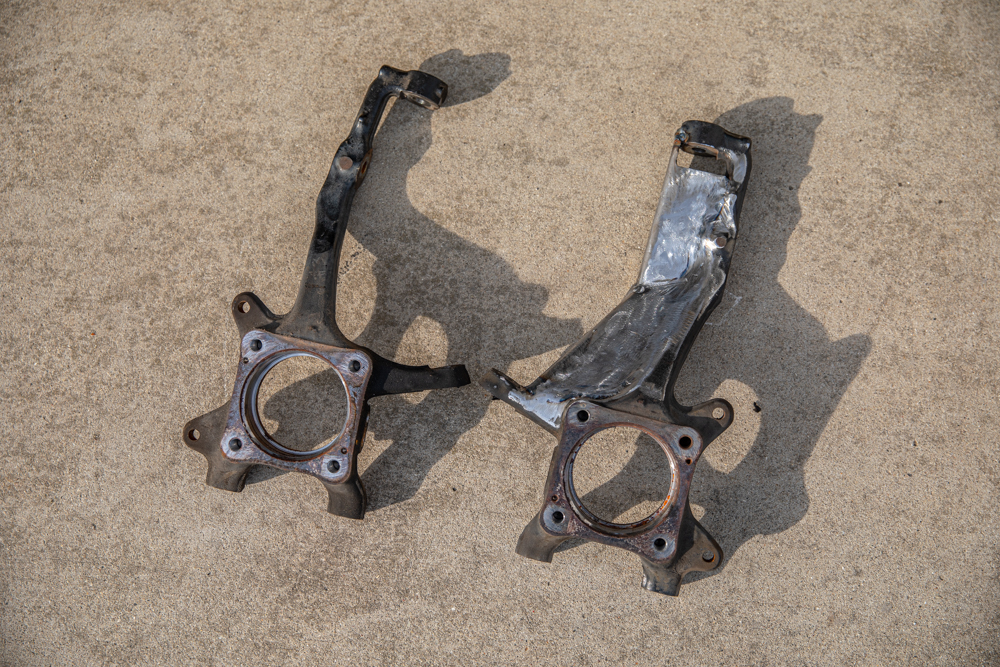
Here you can see the finished driver’s side spindle with the new Dirt King gusset.
If you look closely, you can see that the passenger’s side spindle has a slight bend in it. This was the bend I was referring to earlier, which I didn’t catch until we went to weld that side a few weeks later.
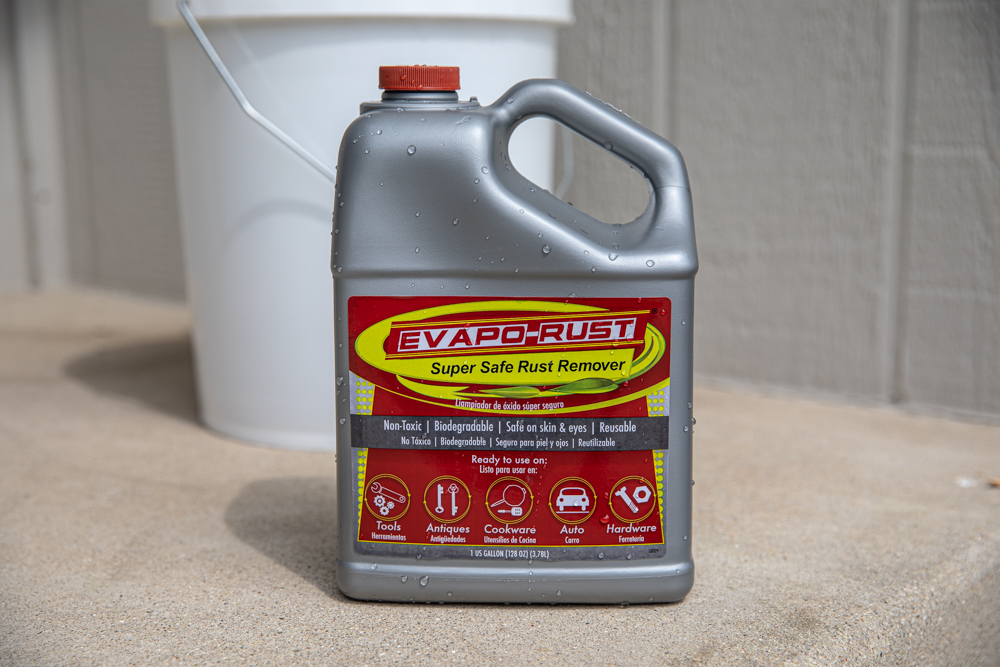
Evapo-Rust
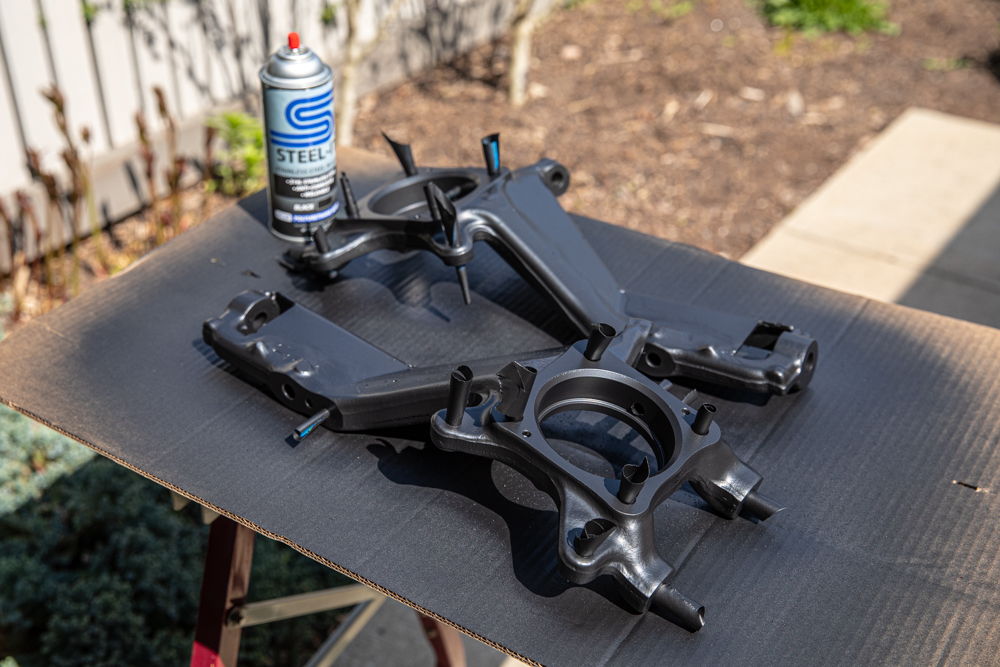
Once I finally had the proper spindles, it was time to prep them for paint.
With proper preparation, you could use a quality rattle can paint. In my case, I’ve been playing with and testing STEEL-IT. I’ll be doing a more detailed post on it soon, but in the meantime, check out this step-by-step STEEL-IT application guide. It requires a bit more preparation and attention to application, but it’s super promising. It’s embedded with stainless steel particles and you can even weld over it without the need to strip it beforehand. Super cool stuff!
Since I had used spindles, some corrosion had built up over the years. Nothing crazy, but I wanted to make sure that the spindles were as clean as possible before I sanded them down. I usually use a very strong rust remover like Rust Bullet Metal Blast. It’s effectively, as far as I know, a super-strong phosphoric acid mixture that simply eats and dissolves rust. It’s awesome because it’s easy to use, cleans metal surfaces well, etches the surface, and prevents future rust.
Unfortunately, this time I did not have any on hand, and I was in a rush to get the spindles painted. So I tries a non-toxic, biodegradable rust remover from the local hardware store called Evapo-Rust. It had decent reviews, so I figured why not. It was also advertised as very safe, so that’s a plus.
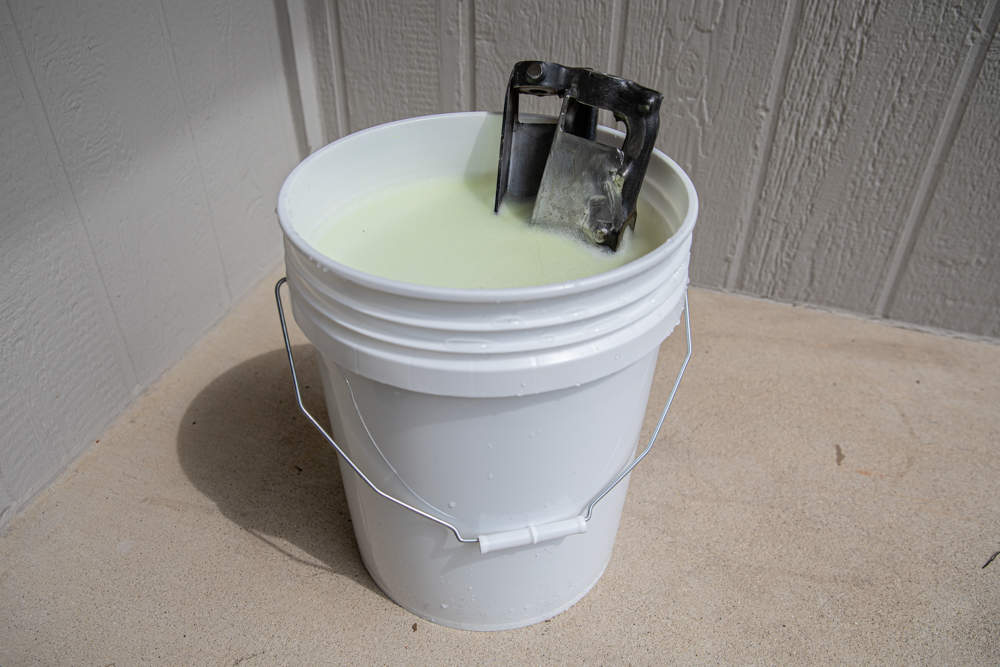
I grabbed a bucket to soak the sanded spindles. My bucket was a bit too small, so I had to rotate the spindles a couple of times each day.
Since the Evapo-Rust is a bit weaker and slower acting compared to the Metal Blast, the process took several days, instead of several hours. Not a huge deal, but the acid works much, much faster, no question. The trade-off is the toxicity, but you can’t win them all.
Rust Reformer

If you’re going to use Steel-It, make sure that you follow the preparation instructions very carefully. Prep is always the most important part of the painting process, and especially so in the case of Steel-It. For the best results, spend the time to do everything as directed. You don’t want to do any of this process twice! After thoroughly sanding the spindles, avoiding excessive sanding of the surface where the hub/bearing mate with the spindle, there was one last step left.
The final step in preparing the spindles for paint is to remove as many surface contaminants as possible. I bought some pure acetone and rags from the hardware store and thoroughly cleaned the prepped spindles until they were spotless. Make sure you wear gloves and a respirator when using things like acetone. The gloves not only protect you but prevent any dirt or oils from transferring from your skin. It might sound crazy, but this is how proper paint prep has to be done.
Taping & Masking
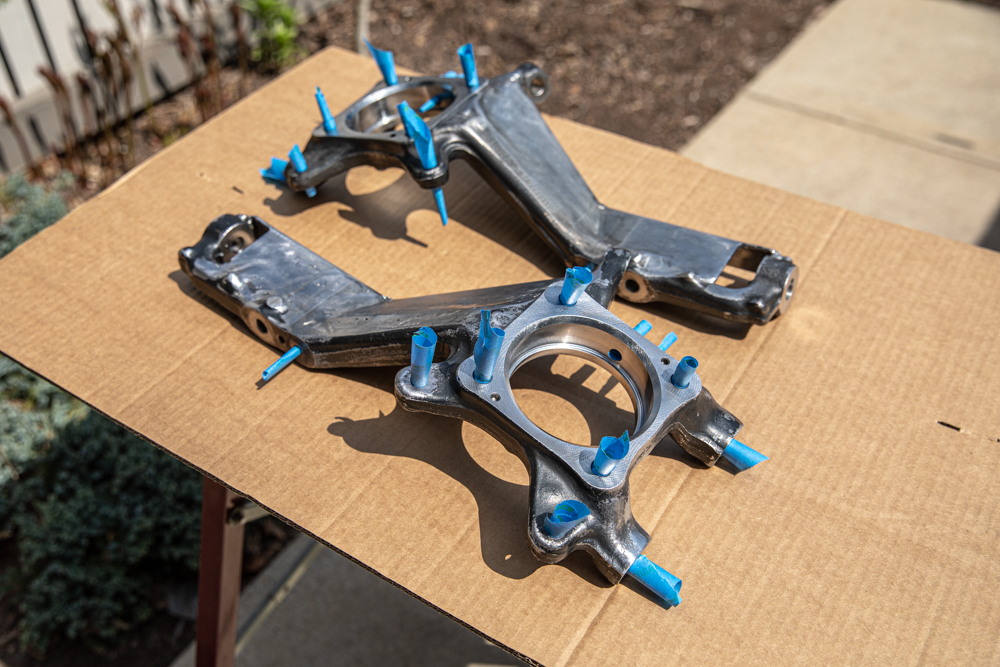
There are a lot of threads that could get gunked up with paint, especially a thicker paint like Steel-It.
I rolled up the painter’s tape and made sure that none of the vital openings would be affected by the paint.
Steel-It Paint
Steel-It is probably my favorite rattle can paint of all time. It goes down much thicker than any other spray paint I’ve ever worked with and does an excellent job of adhering to a properly prepped surface.
This was my first time using Steel-It, but I was thoroughly impressed. I can see the value in spending a few more dollars to get a coating that can easily outperform other rattle can paint products. This could be especially true for someone who is in an area that’s more prone to rust. Either way, I would definitely recommend you try out Steel-It on at least one project. Again, I cannot stress enough the emphasis that is placed on proper preparation here.
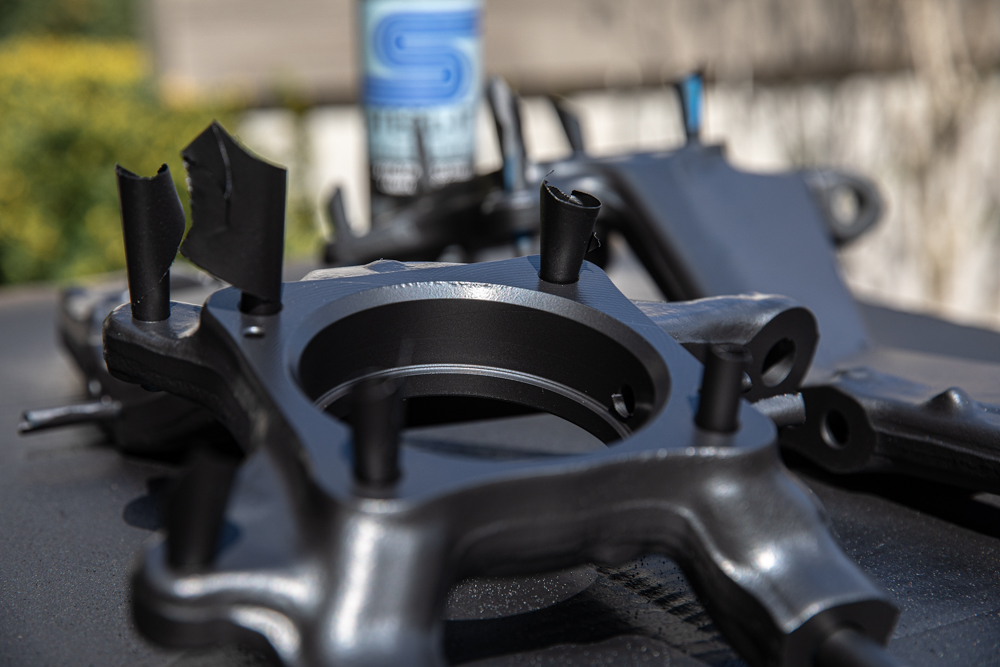
Another quick, but important note. I should absolutely not have painted the inside machined surface where the wheel bearing sits. The tolerances are already super tight, and Steel-It goes down really thick. Let’s just say I had to do some sanding after. Hindsight is 20/20.
Painted
Final product looking super clean!
Did it take extra time and effort? Of course. But the end result is something I’m confident wheeling hard off the grid.
Final Thoughts
I didn’t expect this post to be so long, but there’s a lot of information surrounding the process of upgrading your spindles.
If you plan on doing anything more than your average forest service road, you’re going to want to improve your factor spindles. Take it from me, dealing with one or more bent spindles is not a good time and can make your life much more difficult. Not to mention messing with things like wheel alignment and tire wear. So do yourself a favor, and upgrade those spindles with some Dirt King Fabrication gussets.
Proof read this article, it says you cut and bend spindles and weld to fit the spindles! IDK LOL! SMH
I think you misunderstood. I was just saying I bent them from hard wheeling. And then got them fixed.
Great post! I’ve always been told that there’s a minimum wheel offset needed to fit these gussetted spindles. It varies between -18mm to -24mm depending on who you ask. Is this true? Will these fit with a 0mm offset?
Thanks, Adam! The DK site doesn’t mention anything. But the gusset sits entirely, within the confines of if we’re talking in a manner parallel to the way the wheel is mounted, where it MAY contact, relatively flush with the design of the spindle. Basically, it doesn’t seem to me that these would interfere with the wheel. I could take some measurements and look at it tomorrow though. I’ll get back to you. Or you could hit up DK. That would probably work too haha.
https://trailtacoma.com/2021/12/12/arb-old-man-emu-ome-lift-kit-2nd-gen-3rd-gen-tacoma-50k-long-term-review
Scroll towards the middle/end of this post. You’ll see what I mean.
Great write up. I personally have installed the Total Chaos and DRT Fab kits. I did not like the fitment of the total chaos. It was more complex and fitment was not as great. This dirt king kit looks like a good in between, giving a bit more flexibility for those who may prefer to keep their sway bar. I opted for maximum strength which I believe the DRTFab set gives. It’s the only fully boxed kit I’ve seen and fitment was great.
Thanks, man! I know what you mean about the TC ones. I’ve never had a set, but I was thinking it was more complex as well. The DK are definitely a good middle ground. The DRT Fab ones are sweet too.