

I think by now everyone has heard the name C4 Fabrication. They have been a staple in the Toyota community since 2014 and continue to grow incredibly fast. I don’t think the company needs a long-drawn-out introduction as that has been done throughout Trail4Runner.com and TrailTacoma.com numerous times.
If you are unfamiliar with C4 fabrication, they’re well known for their high-end Toyota-specific aftermarket armor. They build sliders, front bumpers, rear bumpers, skid plates, and so much more for the 4Runner, Tacoma, Tundra, and other platforms.
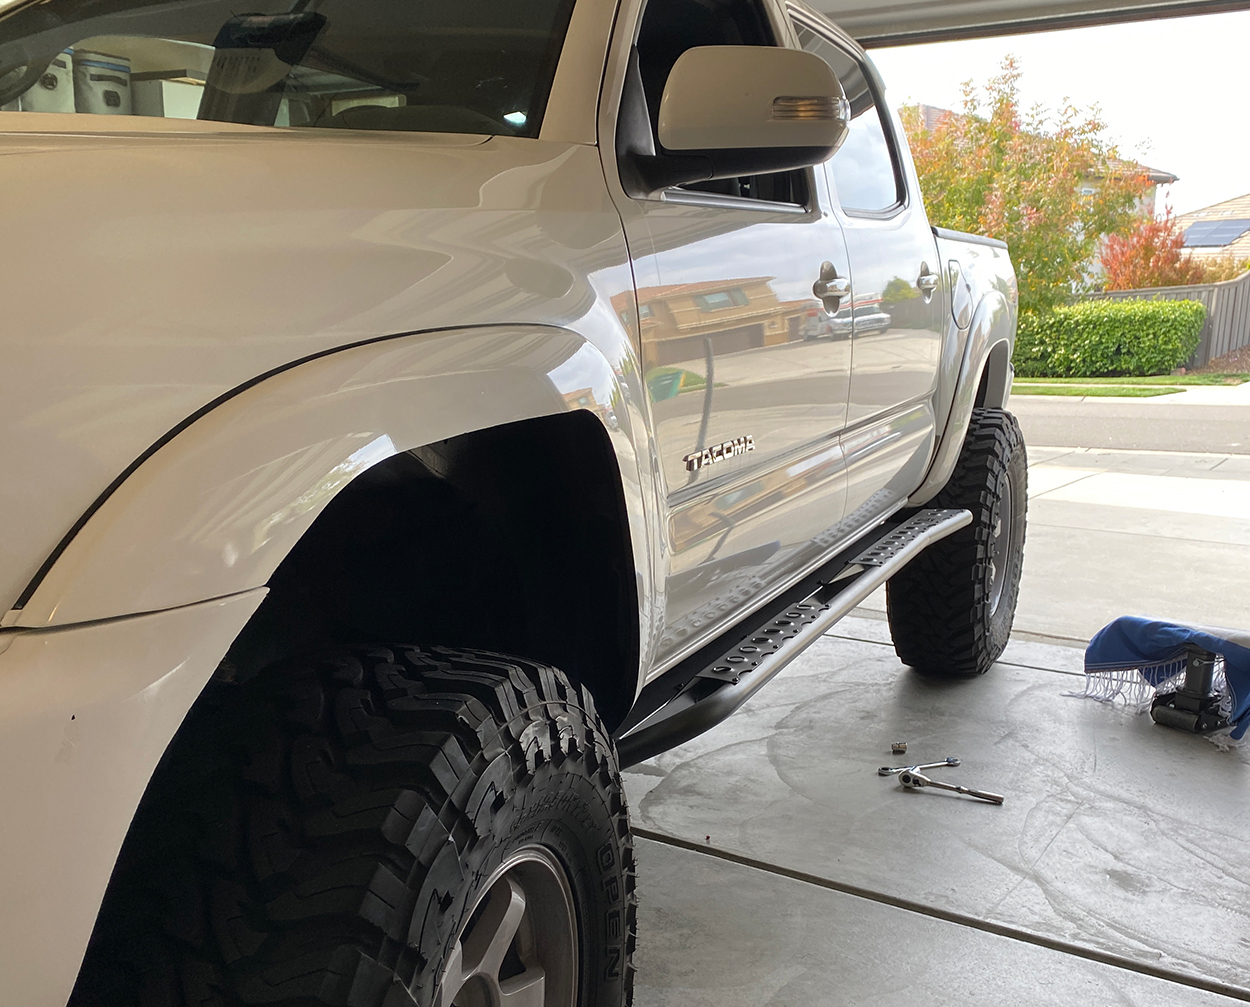
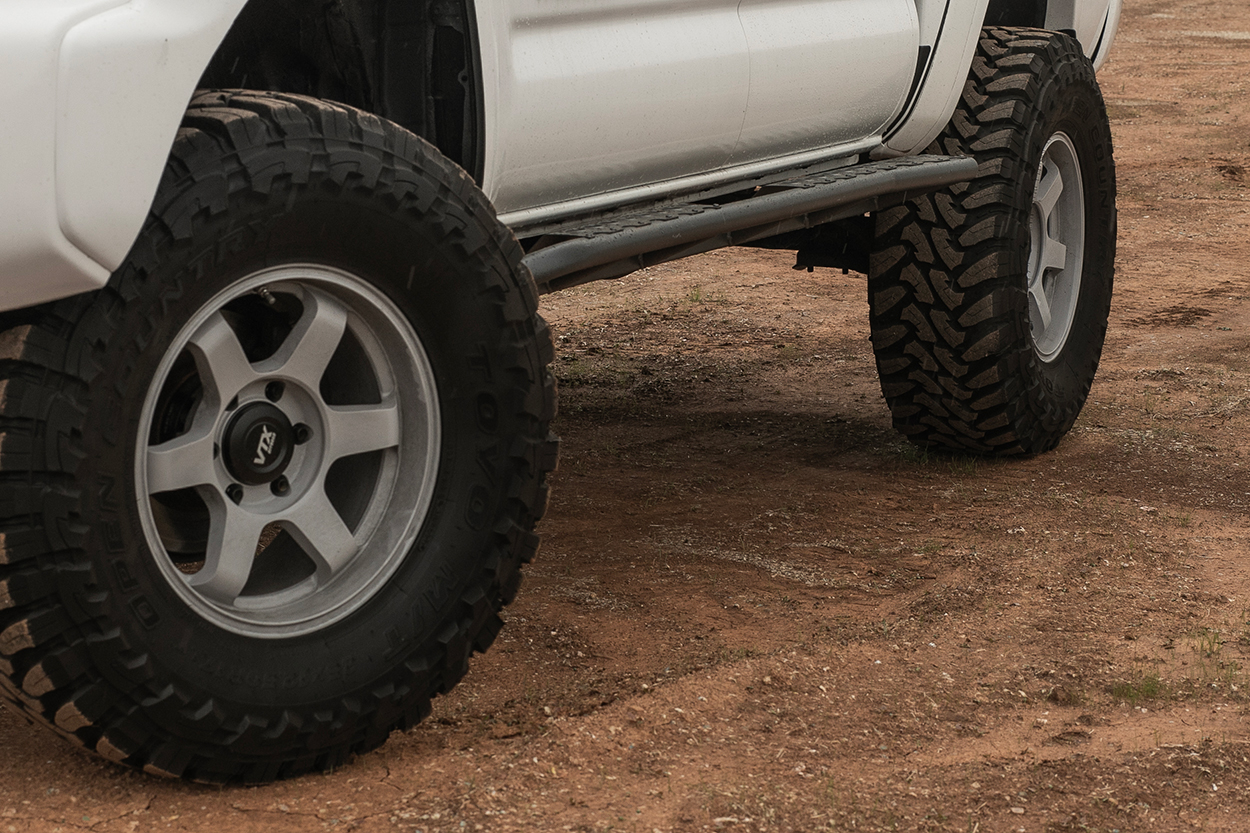
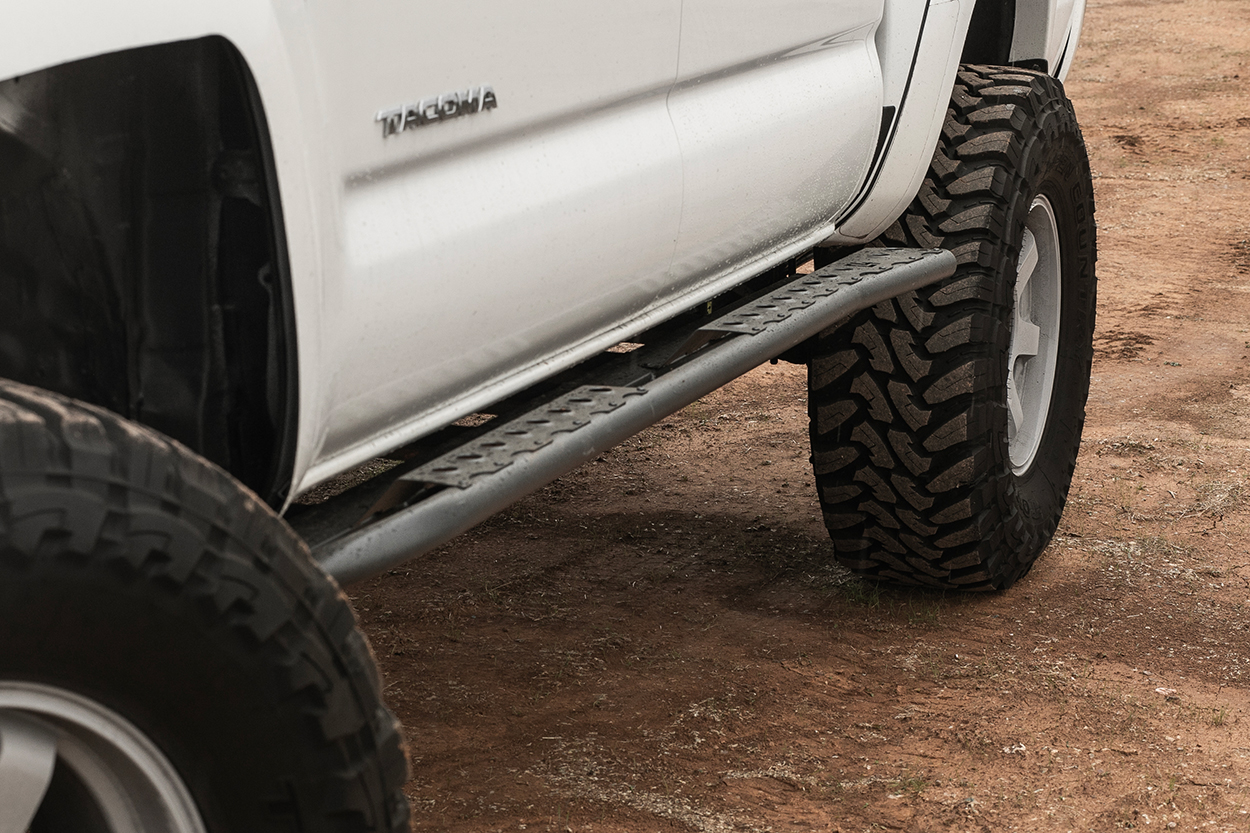
We recently added a set on our 2015 double cab short bed. I wanted to break down a quick overview of installing by yourself and what the installation looks like for late-model (facelift).
C4 Fabrication has a step-by-step installation guide on the forum for the 2005+ which applies to every Tacoma ever built. However, there are quite a few differences in the installation process on the early model 2nd Gen (2005-2011), the facelift 2nd Gen (2012-2015), and the 2016+ (3rd Gen) models.
With all that said, here is what you can expect for an install.
Find It Online
- C4 Fabrication Sliders (2005-2015): Check Price
Table Of Contents
Tools and Materials
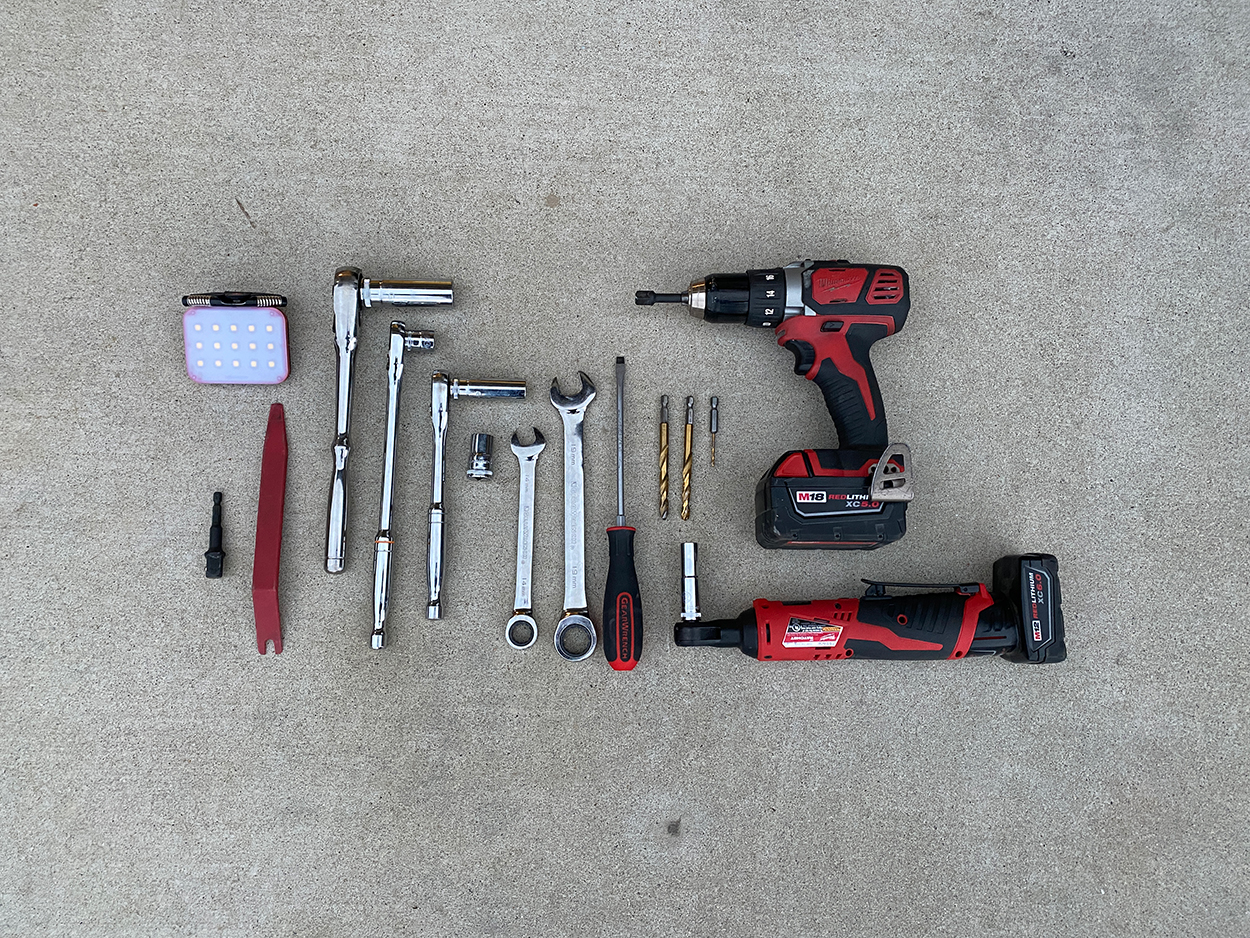
You really don’t need much for this install, basic shop tools will get the job done. And even though C4 fabrication calls for a friend to help lift the sliders into place, you don’t even need that. This job can be done by yourself given you have a strong enough jack, which if you’re reading this blog you more than likely do.
Tools and Materials List
- 2-Ton Pro Eagle Jack
- 12mm wrench/socket
- 14mm wrench/socket
- 9/16″ open-end wrench and socket
- 3/4″ open-end wrench and socket
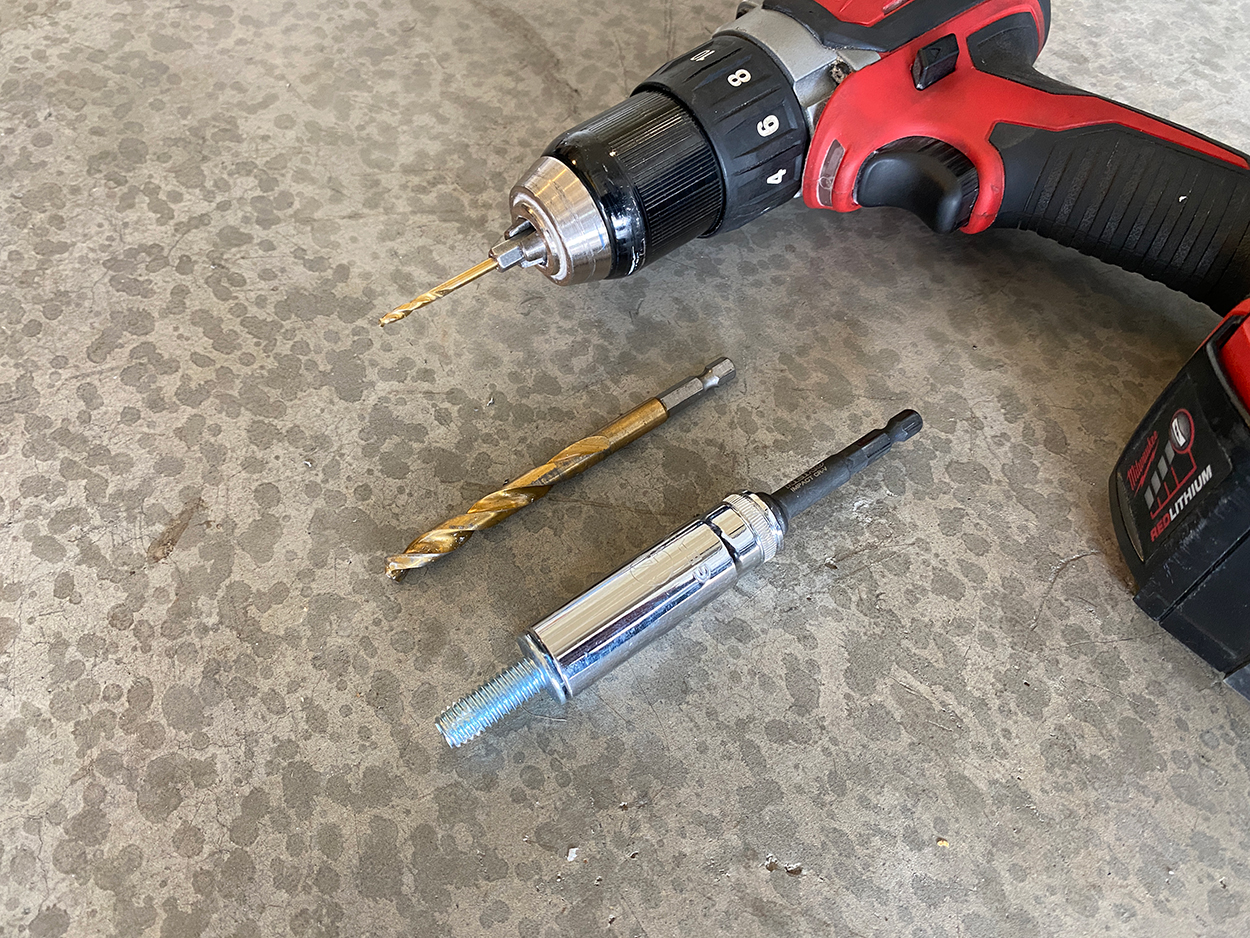
- Drill driver
- 1/8″ drill bit
- 5/16″ drill bit
- 3/8″ drill bit (Use high-quality titanium Milwaukee drill bits or even better; Irwin Turbo bits.)
- Flathead screwdriver
- Tap lube for cutting screws or WD-40
- Flashlight
- Blanket for sliders to rest on
- If drilling; glasses, gloves, long sleeve shirt or hoodie
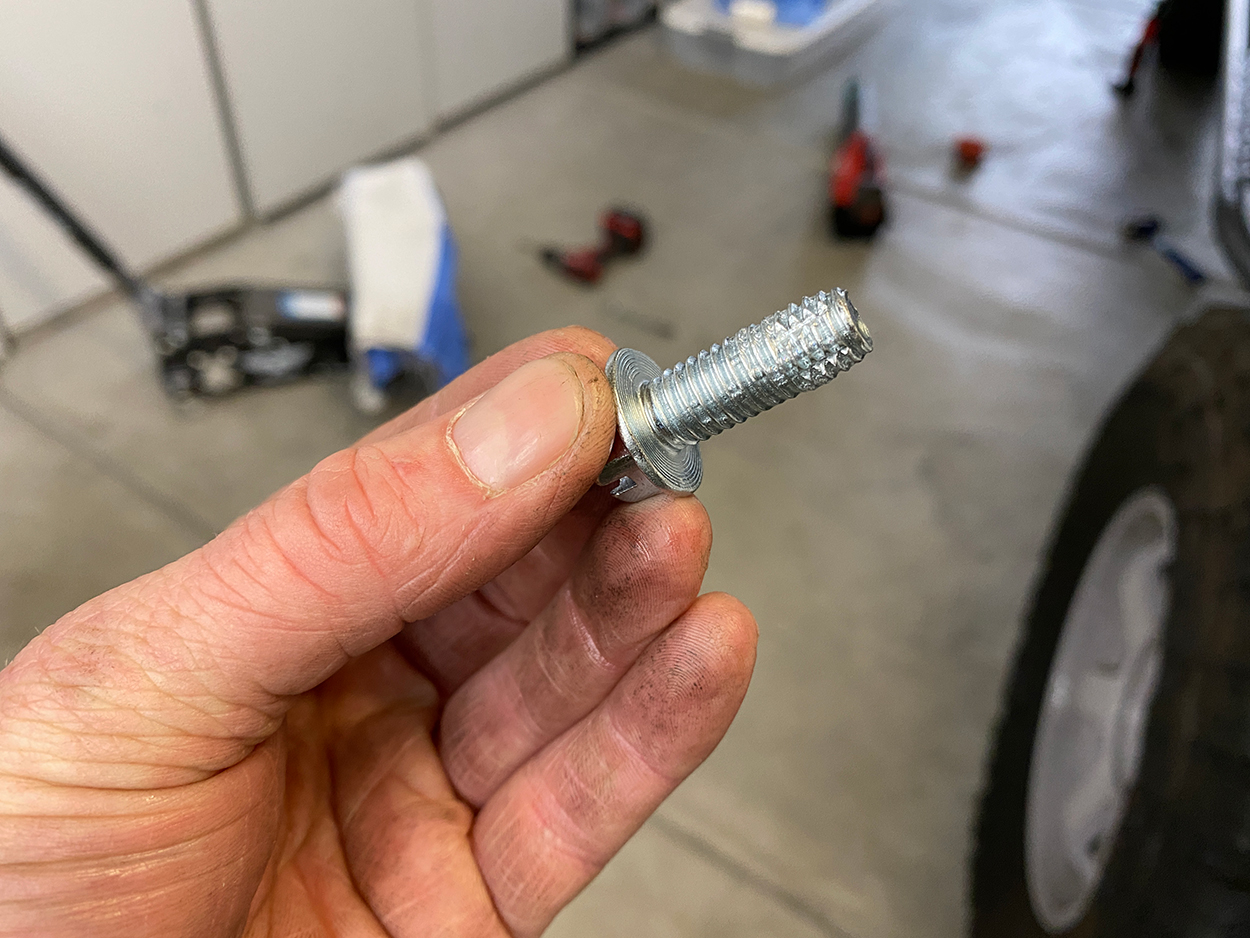
Hardware included:
- (8) 1/2″ x 1 1/2″ Flange bolts
- (4) 1/2″ Flange nuts
- (1) nuts on a stick, front driver side (reaches inside boxed portion of frame rail)
- (1) nuts on a stick, front passenger side (reaches inside boxed portion of frame rail)
- (2) square nut plates (2″ x 2″ plate)
- (2) rectangle nut plates (2″ x 1 1/2″ plate)
- (4) 3/8″ x 1″ Grade 8 bolts
- (4) 3/8″ Grade 8 nuts
- (4) 3/8″ x 1″ thread cutting screws
- (6) 3/8″ x 1″ carriage head bolts
- (6) 3/8″ flange nut
- (14) 3/8″ flat washers
Step 1. Lift Sliders into Place
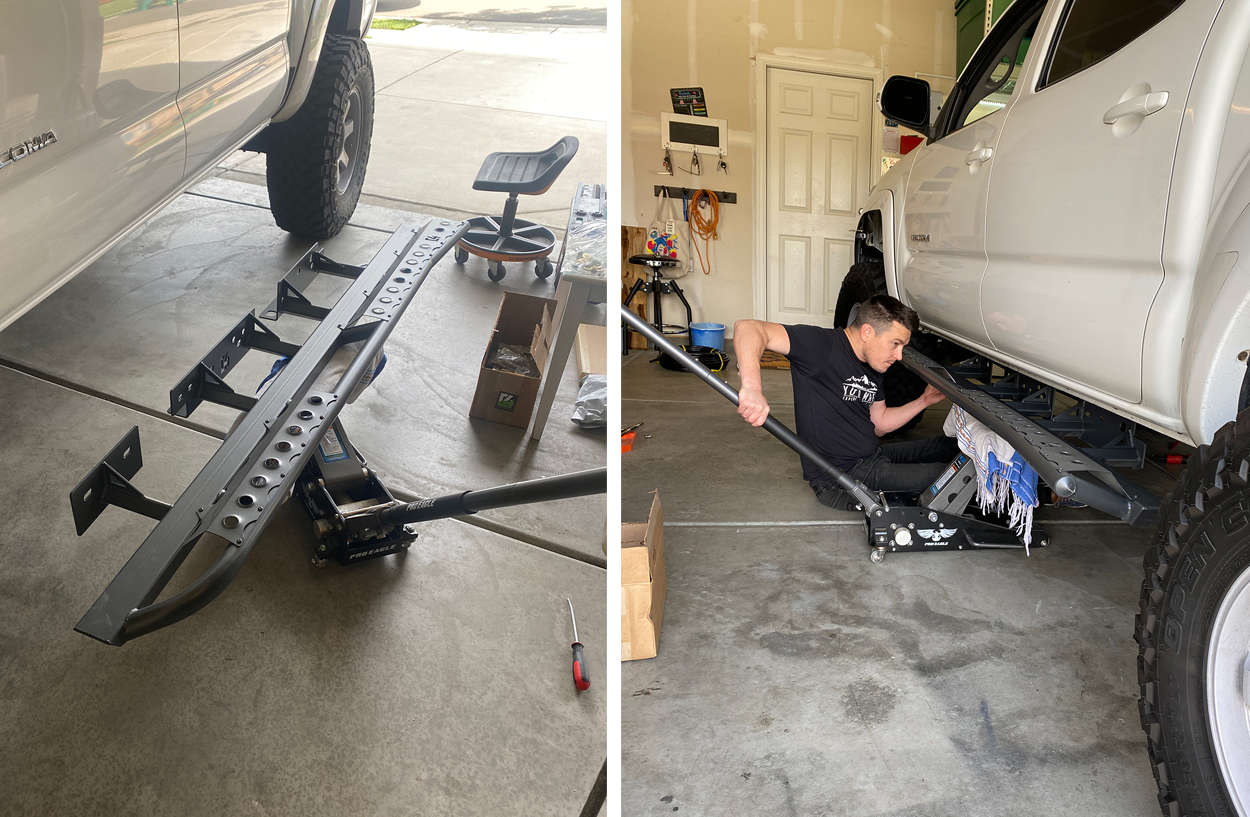
If you are attempting to install a set of sliders without any help, this is how you do it. You don’t need jack stands, you don’t need anyone’s help at all. As long as you are strong enough to lift a 75lb slider – you can install sliders on your own. We are using our 2-ton Pro Eagle Jack for this installation.
Pictured above is the slider sitting on top of a blanket and that blanket is wrapped around a 2-foot piece of 1×6 wood… leftover from a project. The 1×6 piece of wood offers more surface area and stability sitting on top of the jack. This makes it easier to center the weight. The blanket prevents the wood from scratching the sliders and depending on the material may keep it from sliding around too much. I used a heavy-duty thick blanket with a lot of texture. It did help keep the slider from sliding around.
Centering the weight of the slider on the jack is the most important part here. Before jacking the sliders into place, first, find the center point on the jack.
If this is your first time using a jack or you are a novice when it comes to working on your truck in general, I would not recommend using a jack to lift these 75lb rock sliders into place. If you’ve never used a jack, don’t attempt this install. If you’re comfortable with a jack and aware that the slider may fall off and potentially hurt you, then continue at your own risk.
If you have a friend, ask them for help first. If no friends are in sight, this is another option.
Step 2. Remove Bolts
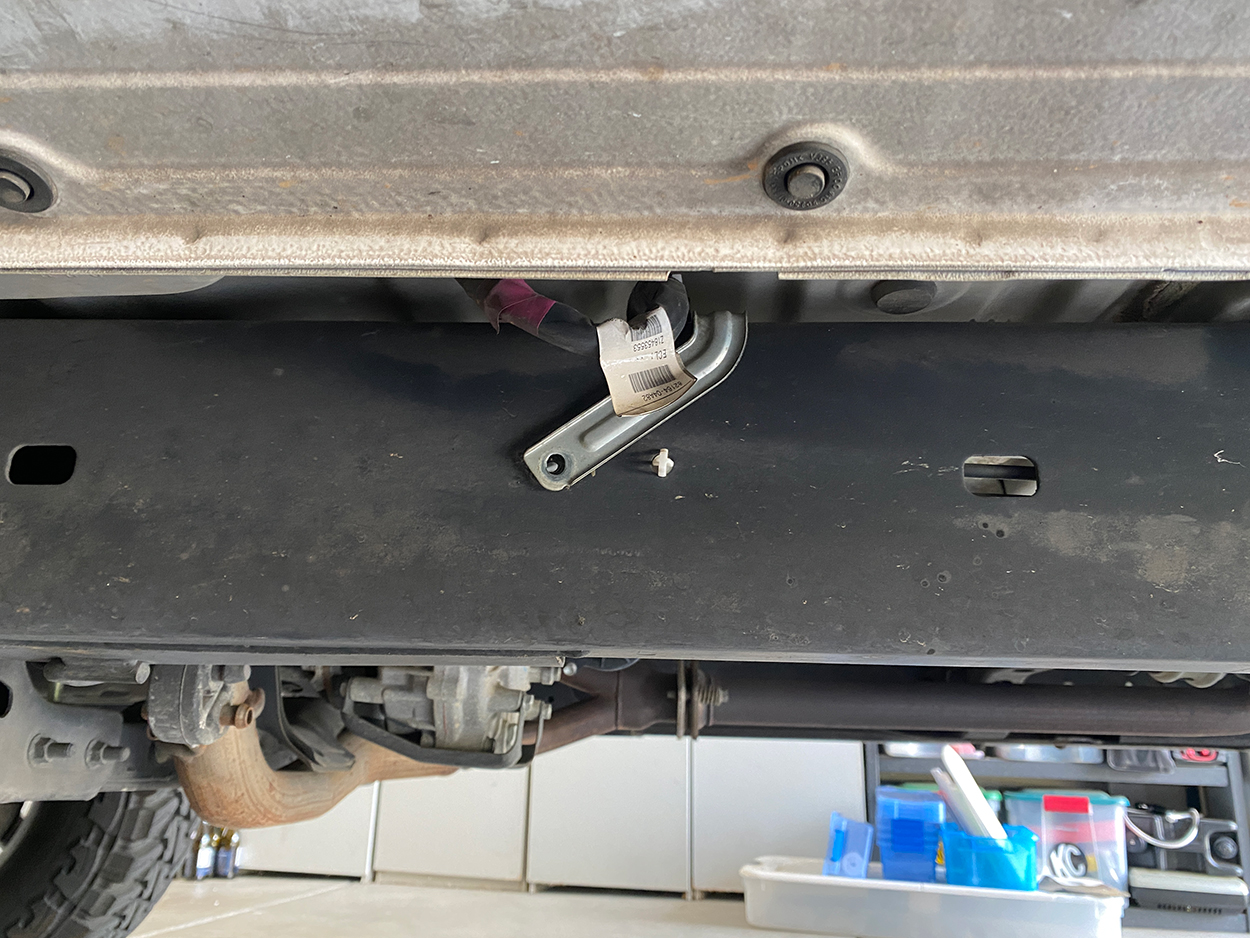
Remove this bolt and save it for reinstalling sliders.
Step 3. Relocate Brake Lines
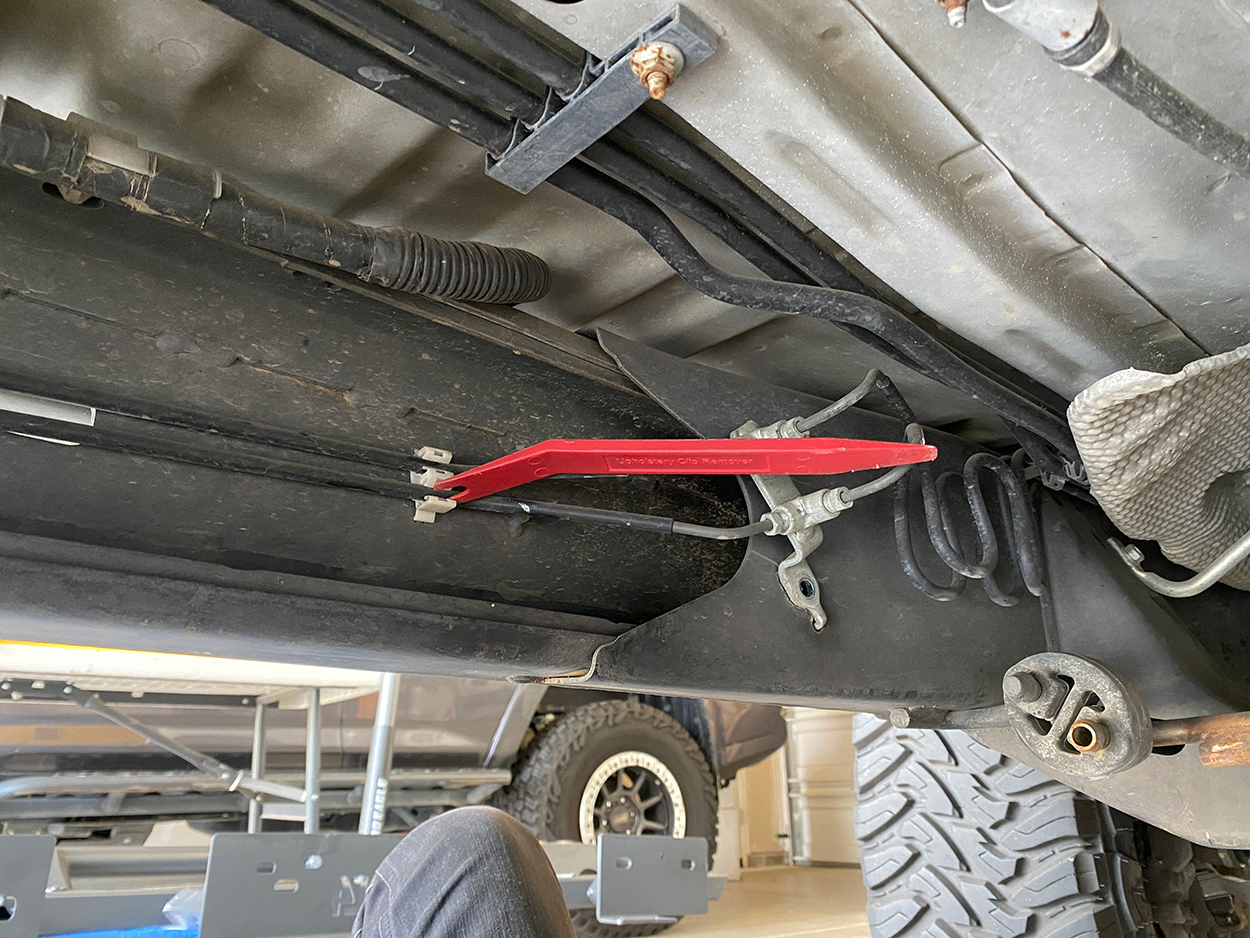
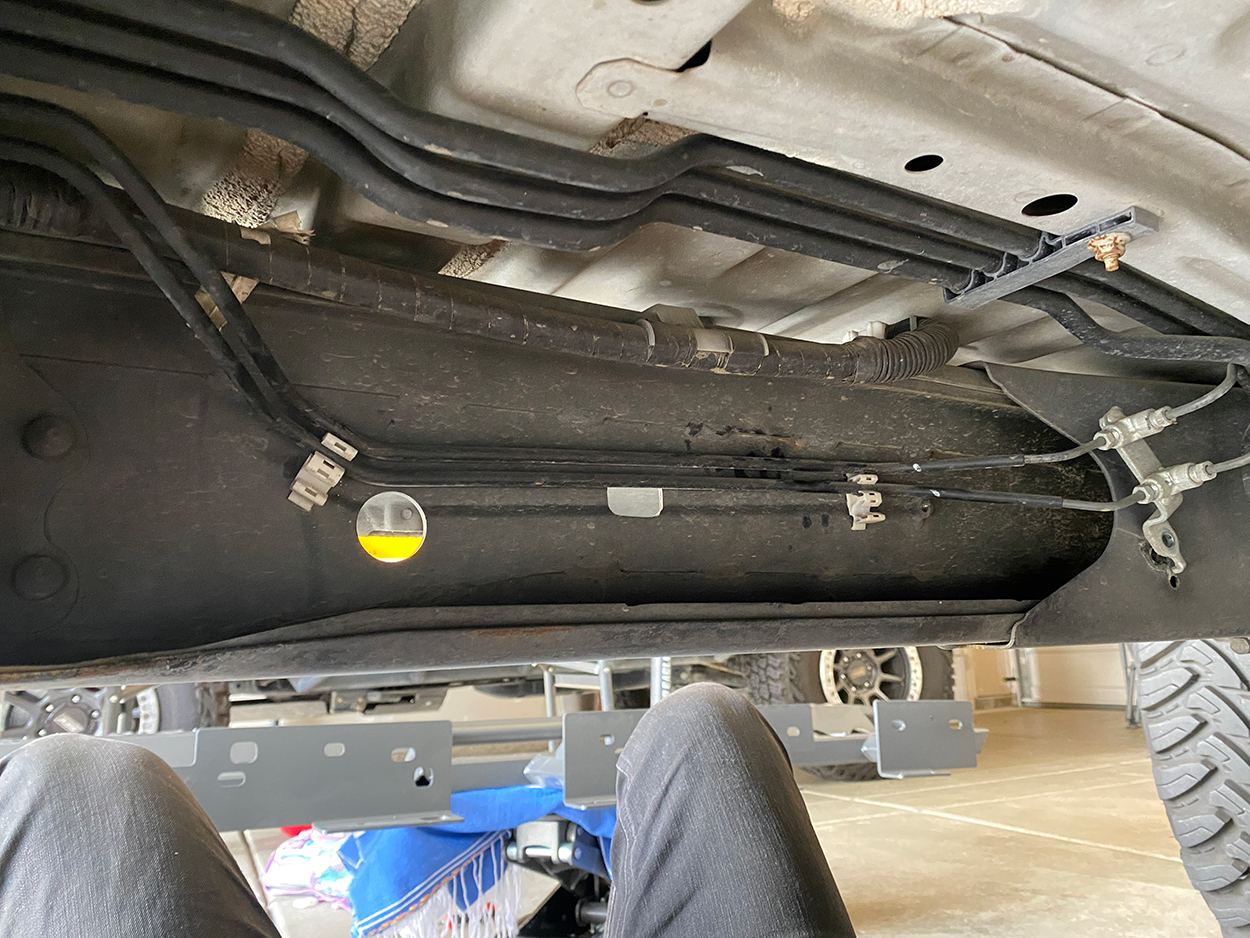
Unclip these lines and then attach the bottom line into the top bracket clip. The other line is fine sitting on top of the bracket.
Step 4. Relocate Rear Lines
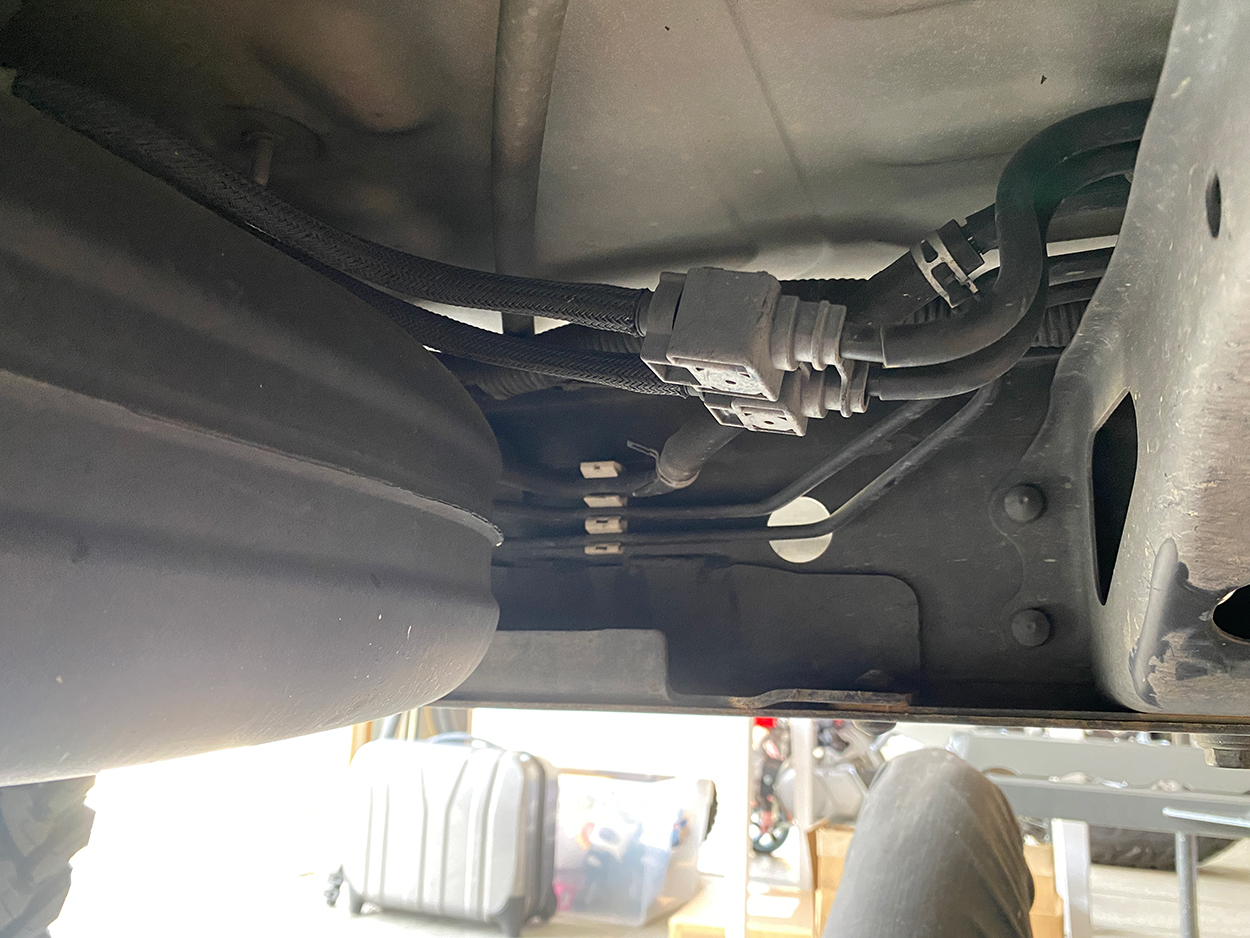
Head to the back of the frame rail and repeat that process on this section of lines, including the large line at the top as well. That line will rest on top of the bracket.
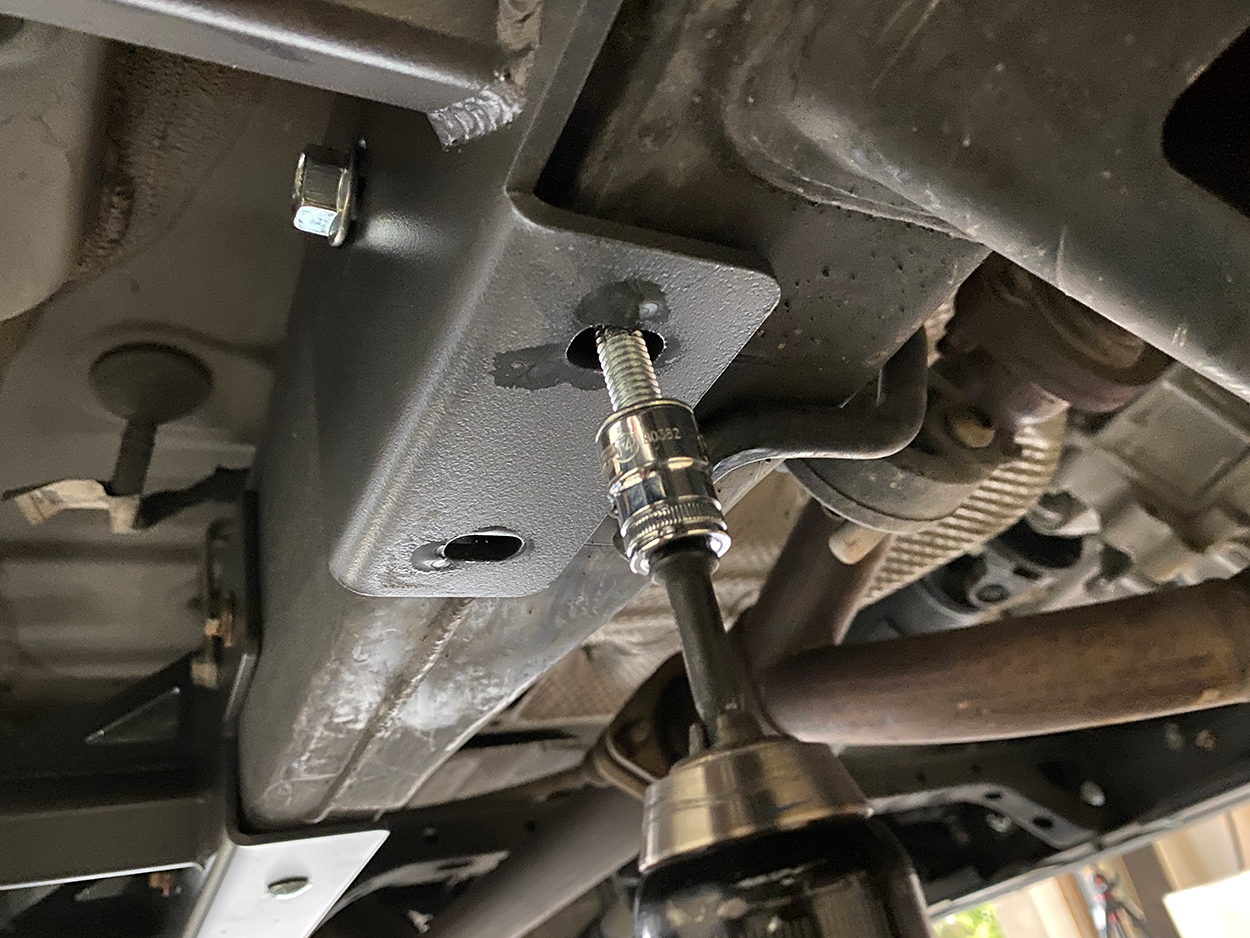
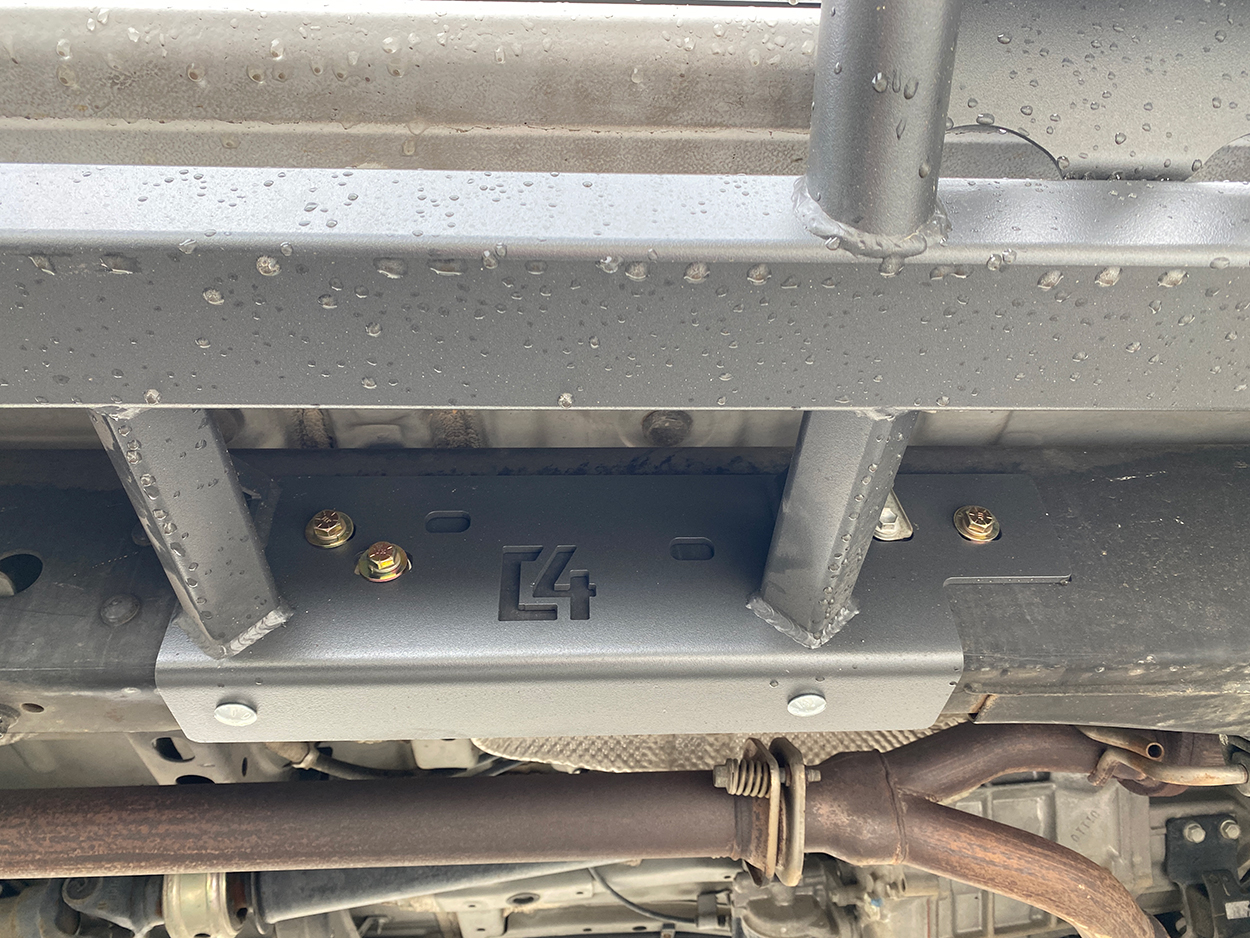
Step 5. Nuts-On-Stick
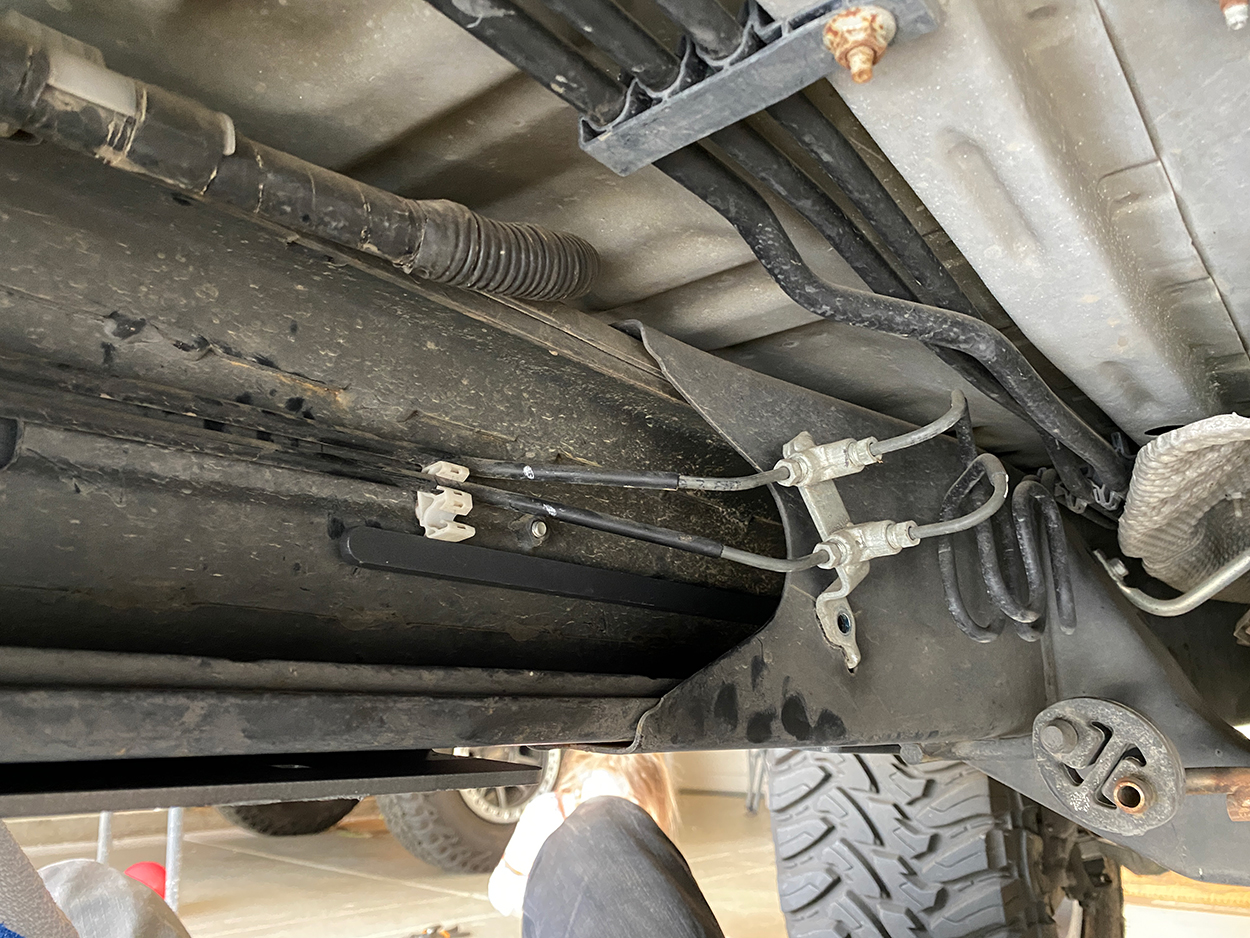
Now take the large Nuts-On-Stick provided in your kit and slide it into the frame rail.
Inside Look at Nuts-On-Stick
Here is a look at the Nuts-On-Stick inside the frame rail with the bolts threaded on.
Step 6. Thread Bolts into Nuts-On-Stick
In order to get the bolts threaded on the nuts inside the frame rail, it helps to sit outside the frame rail and thread with one hand while reaching underneath the frame rail while holding the nuts-on-stick. You may need to move the nuts-on-stick around in the frame rail before you see it through the openings from the outside. Once you spot your threads from the outside, you can start threading them into place.
Note: Leave bolts snug but loosely threaded for now.
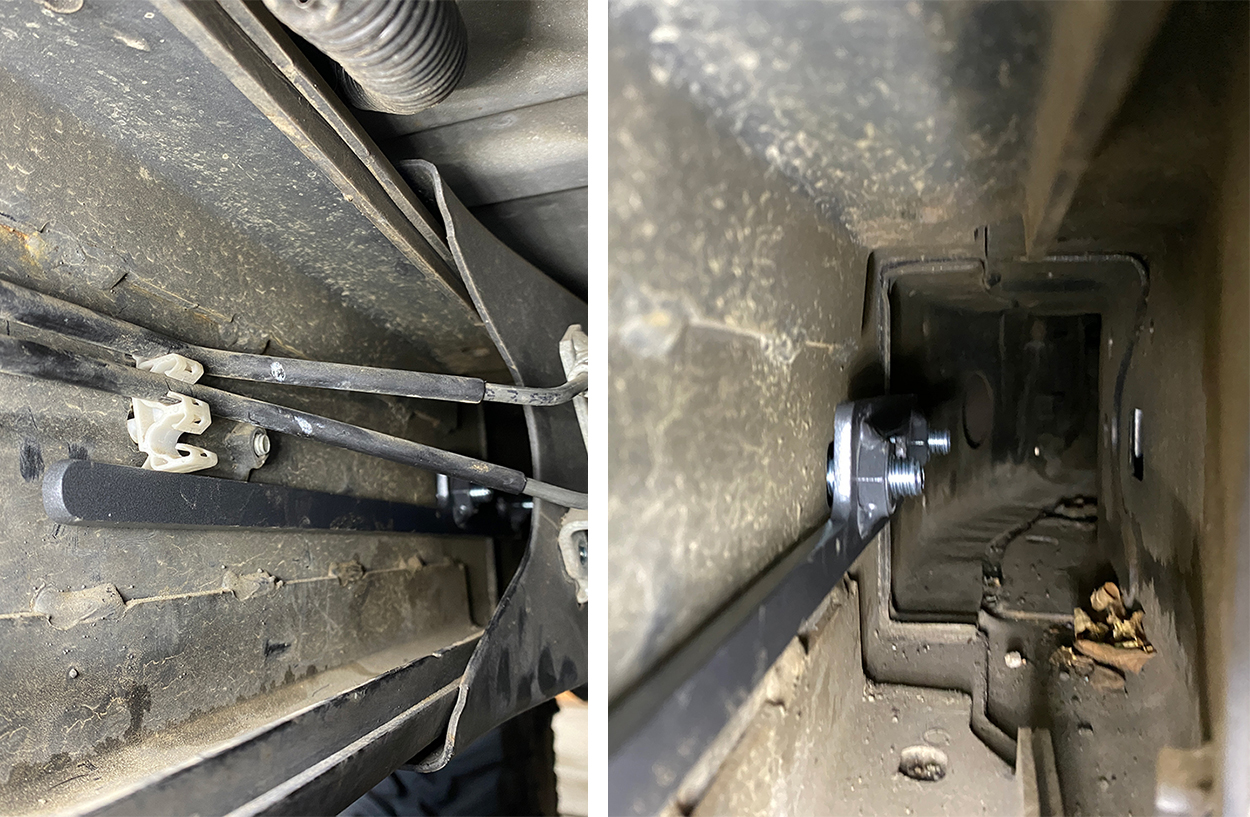
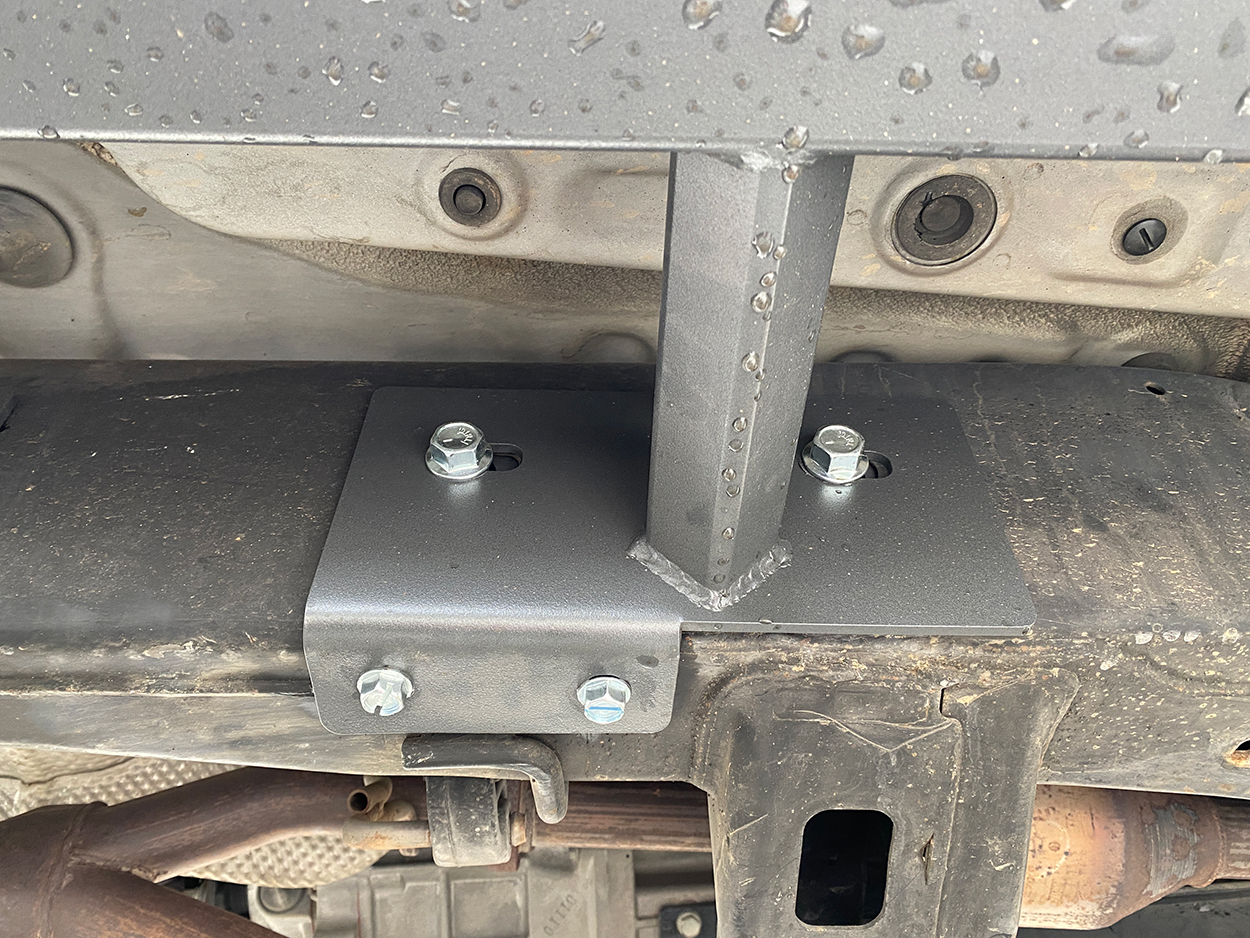
Step 7. Square and Rectangle Washers
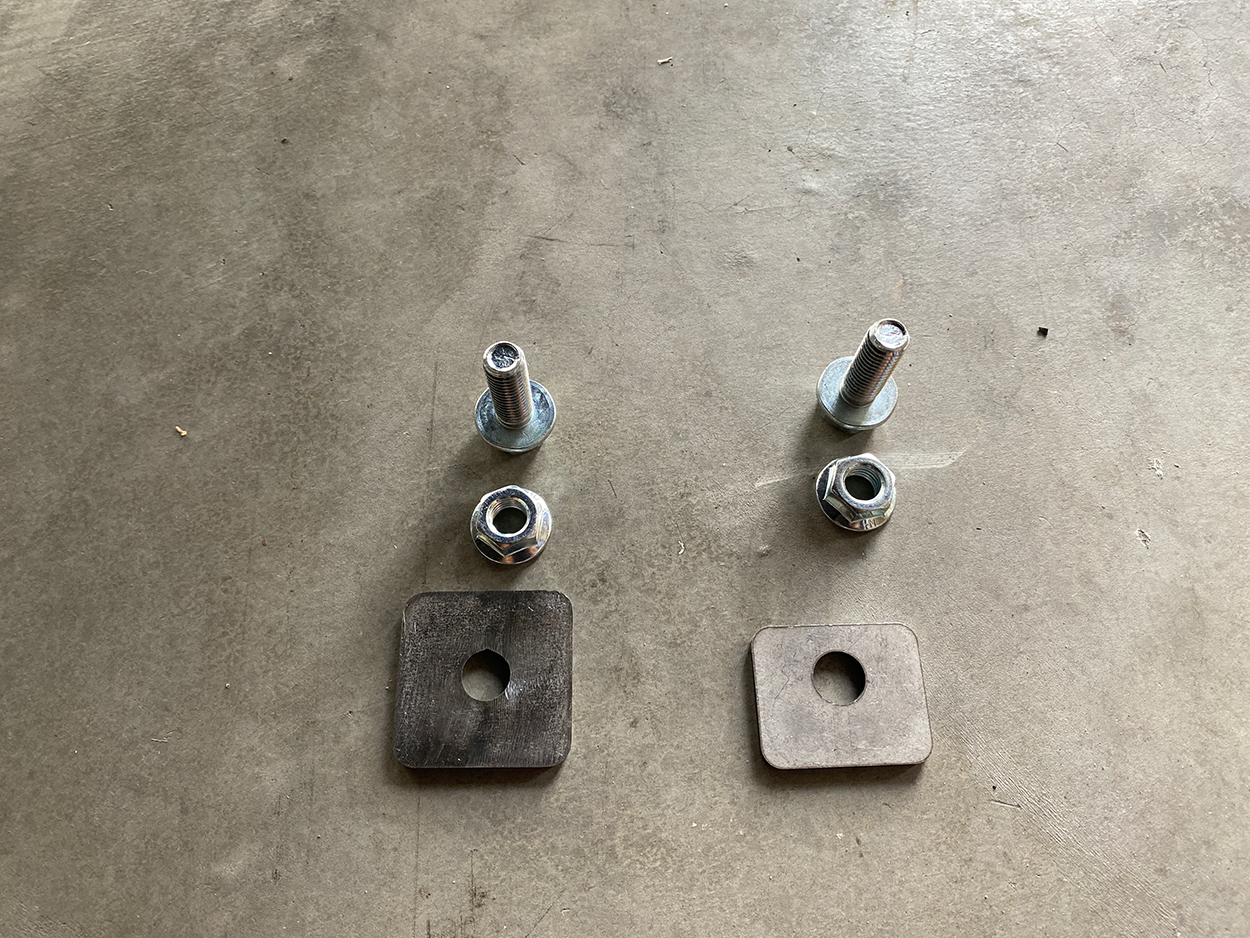
Now set out your rectangle washer and square washer out with your 1/2″ x 1 1/2″ Flange bolts provided.
Step 8. Rectangle Washer (In Front of Gas Tank)
If you want to force your brake lines higher, you can rest the rectangle washer on top of the metal extrusion on the frame rail. I decided to leave my brake lines where they naturally rested in that top bracket pictured above.
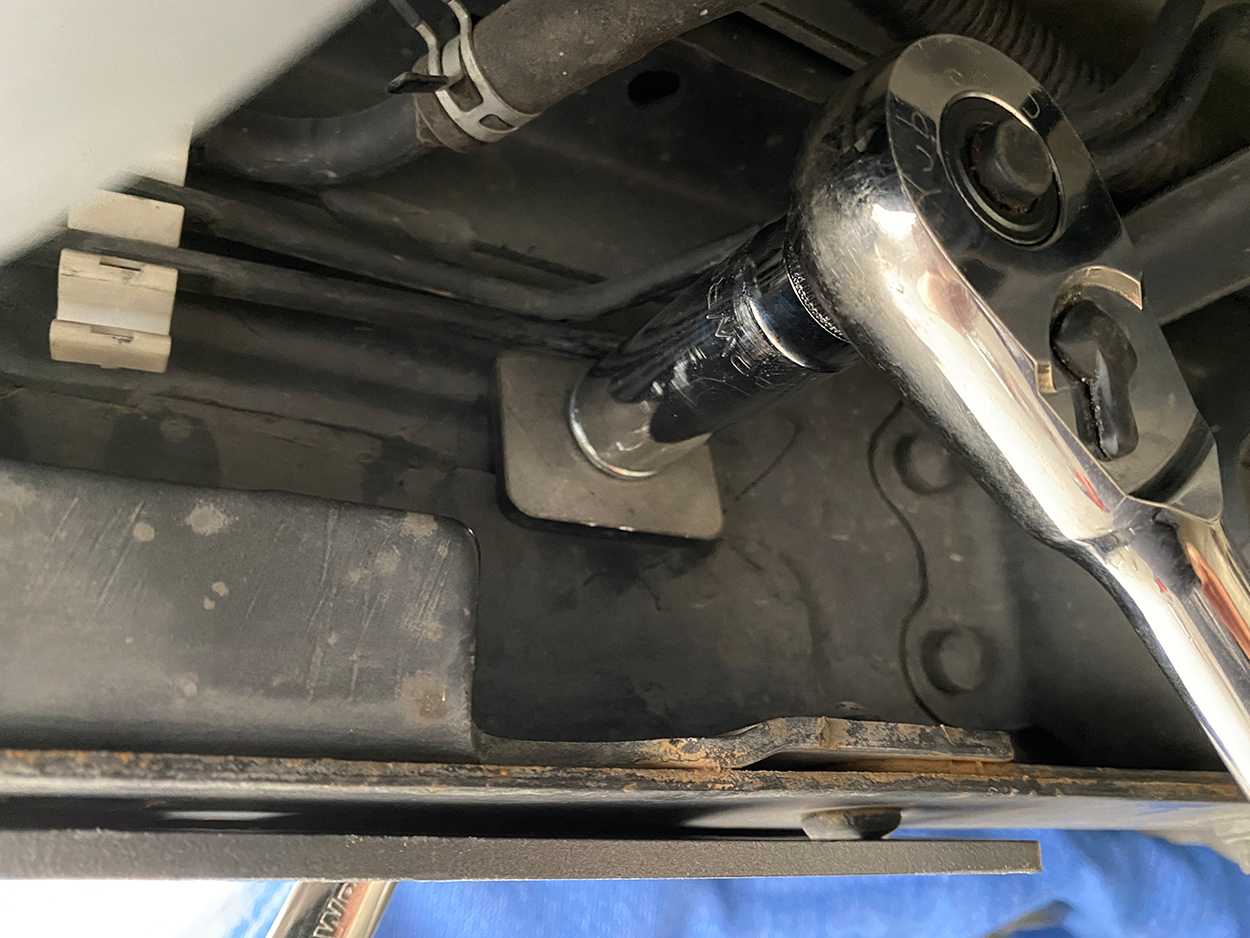
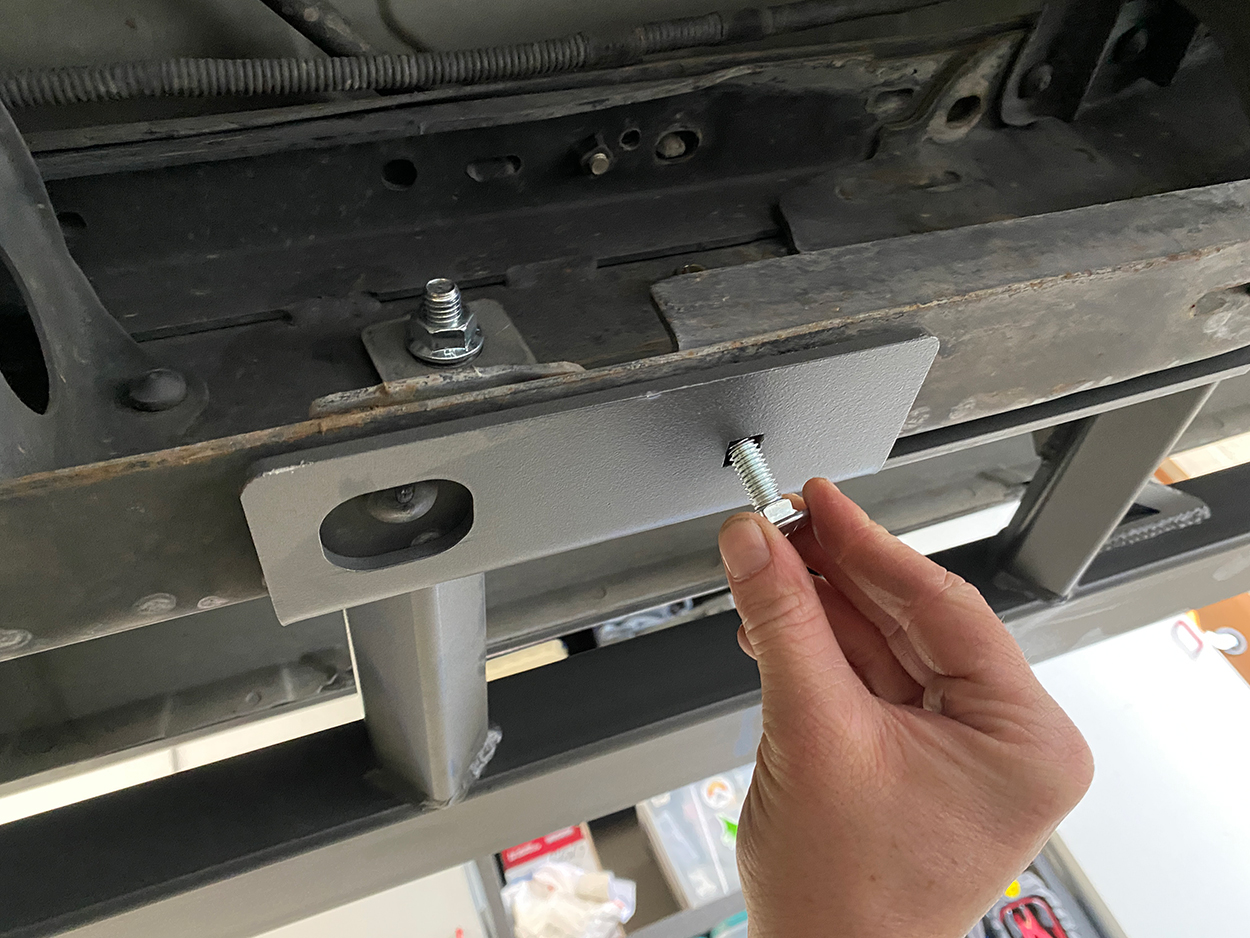
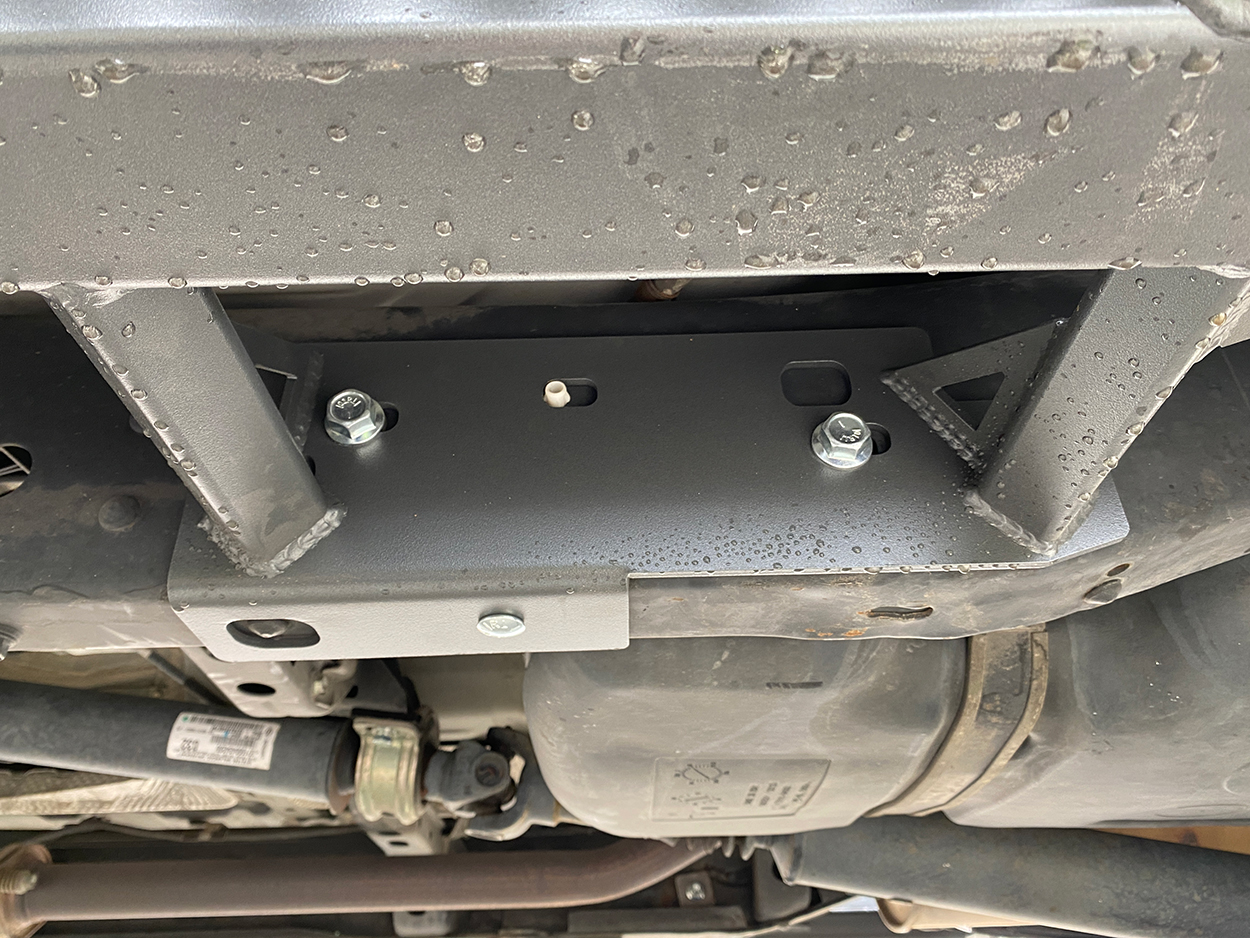
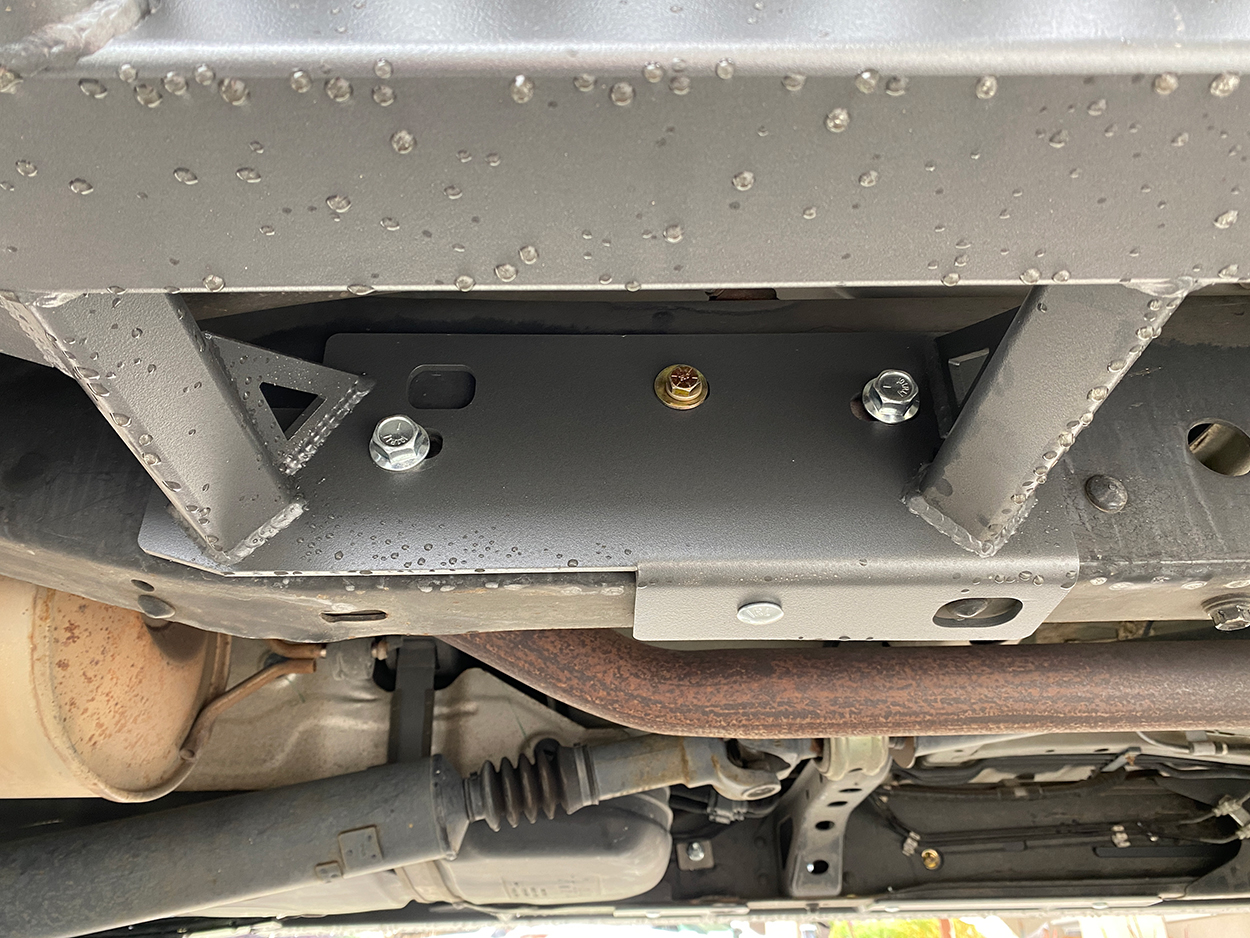
Step 9. Square Washer (Behind Gas Tank)
Now place your square washer back behind the gas tank and thread your bolt through.
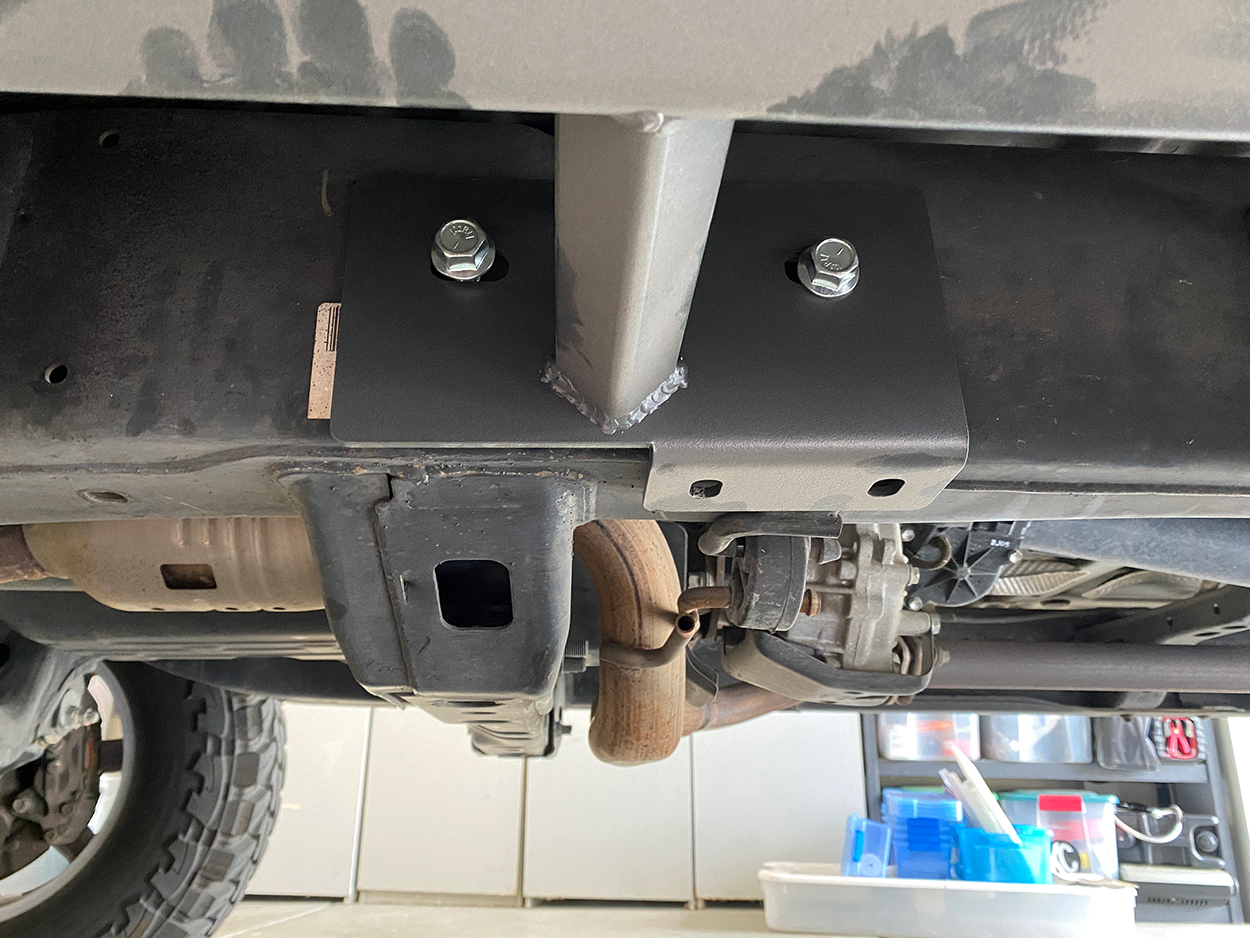
Step 10. 14mm Near C4 Logo
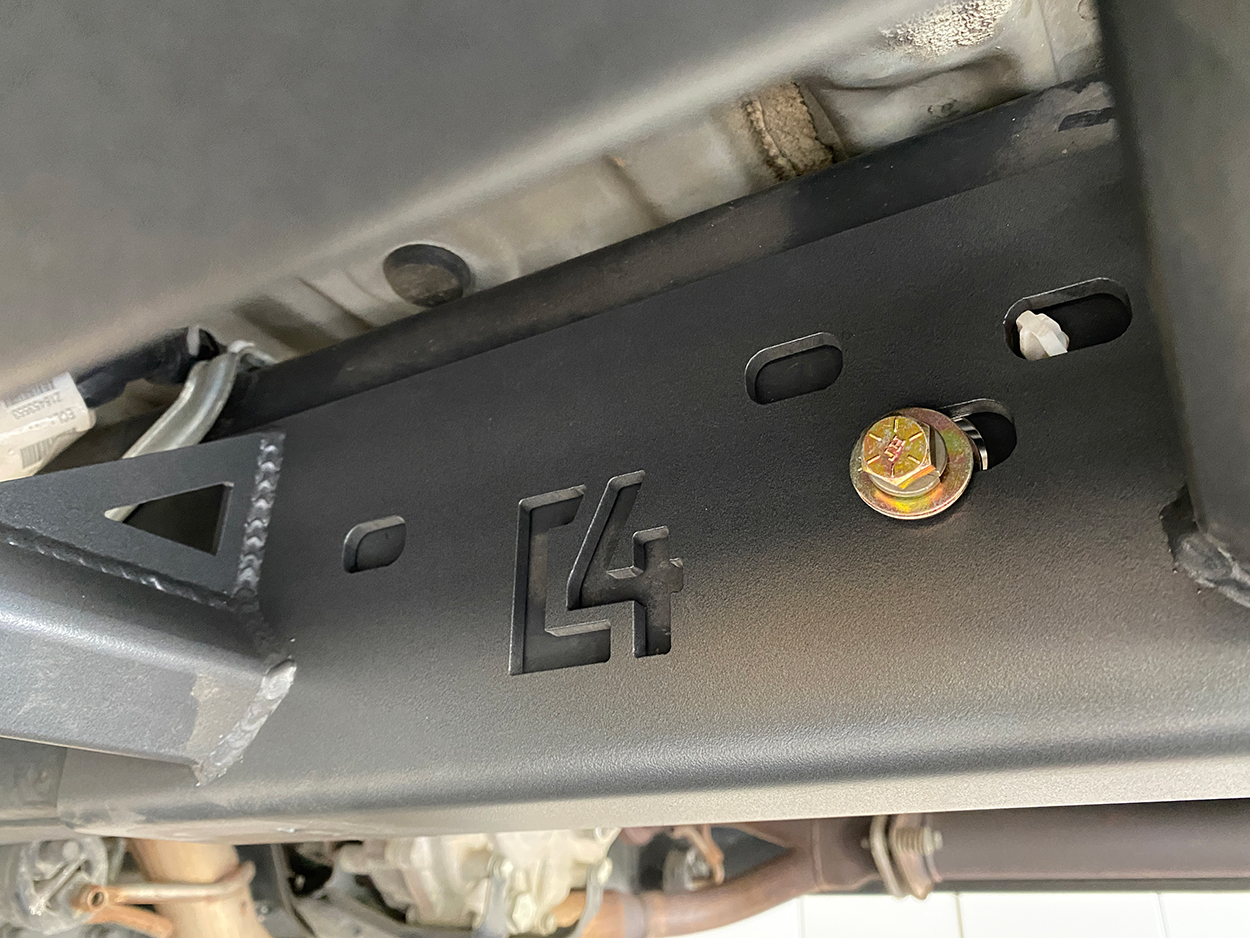
Using a 14mm open-end wrench and socket wrench, snug down this last bolt.
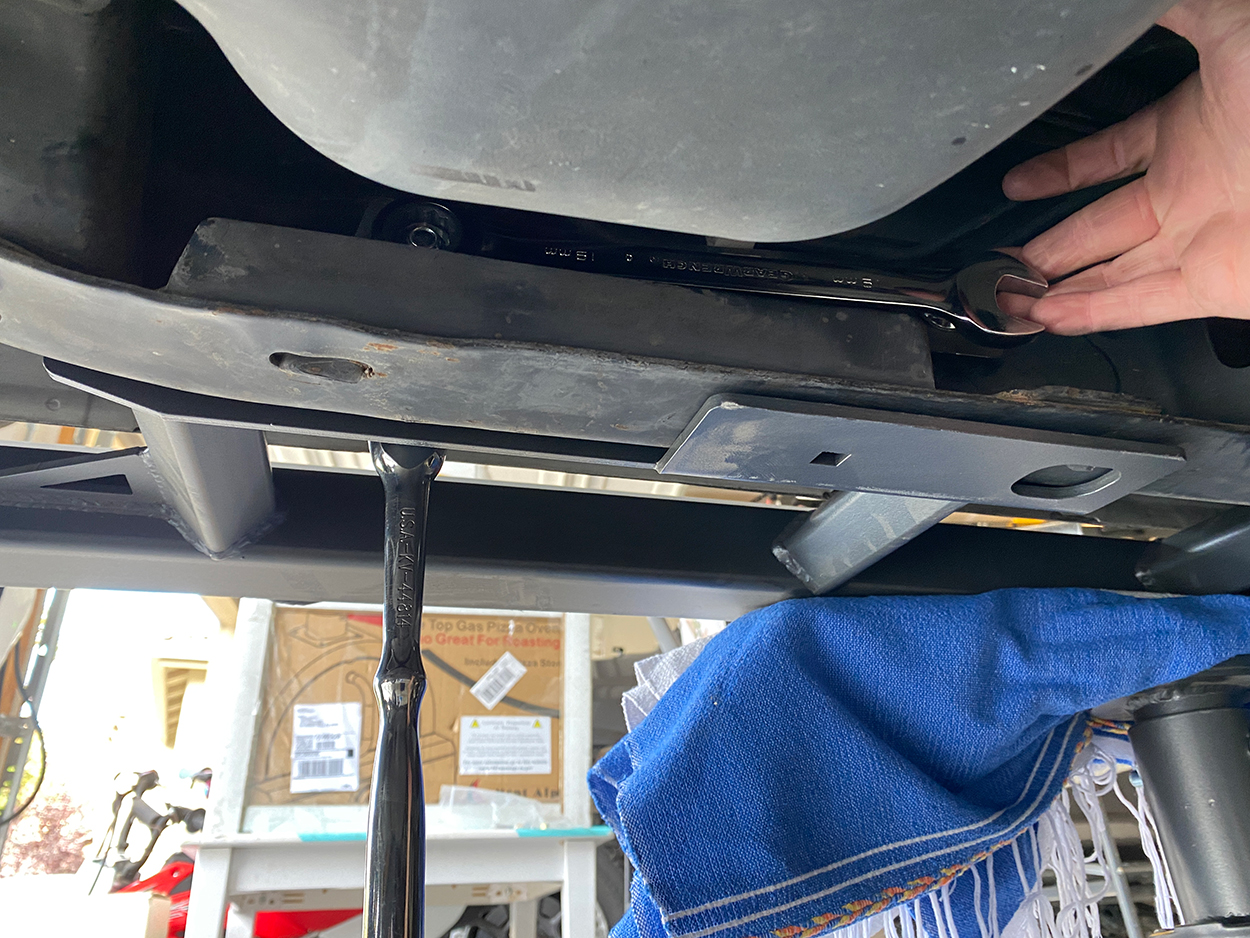
Step 11. Remove Jack Stands
Before fully removing your jack, make sure your bolts are in their final placement. At this time, none of your bolts should be fully torqued. They can be snug but DO NOT FULLY TORQUE your bolts here. Now continue to remove your jack.
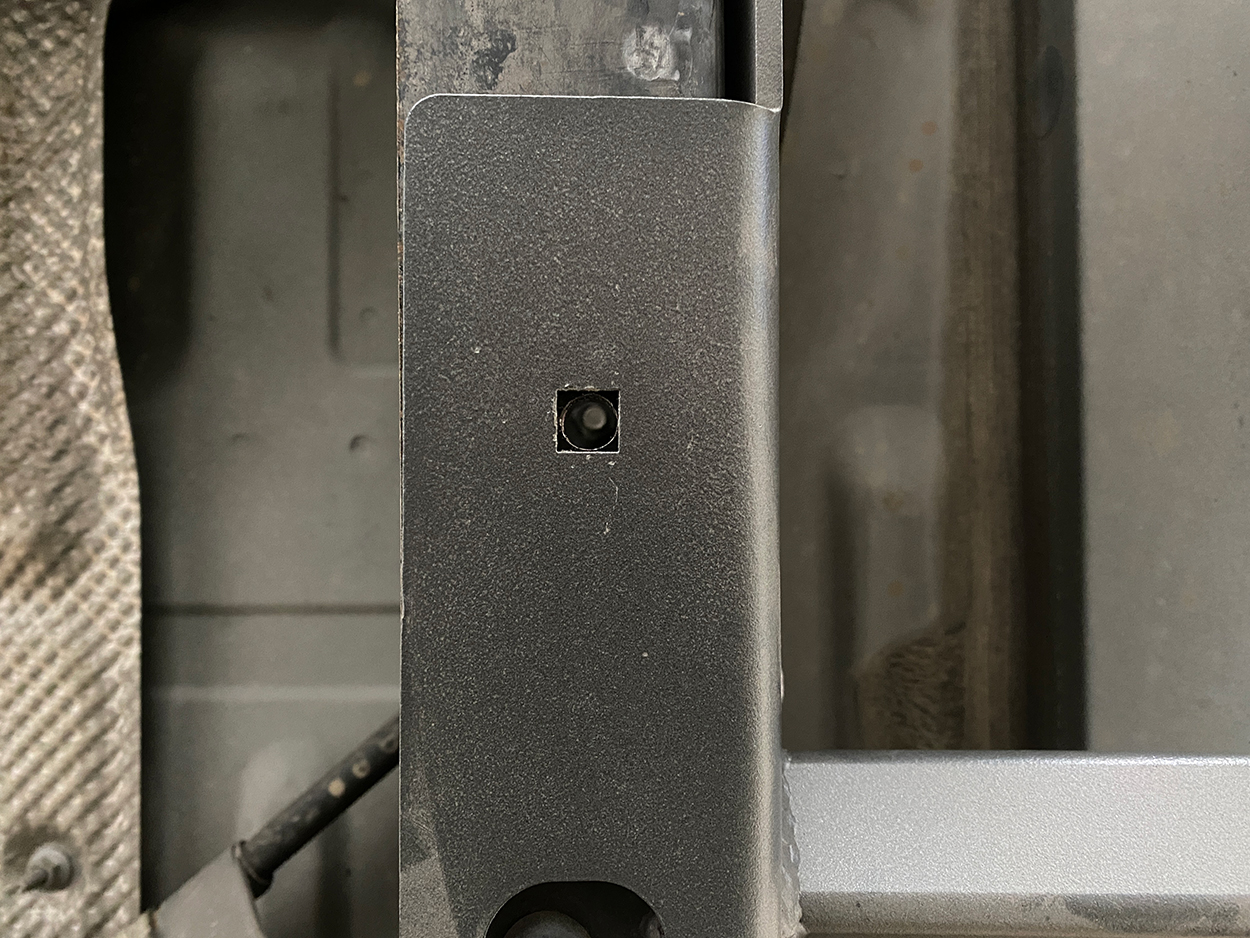
Step 12. Prepare Drilling
Now for the drilling. C4 says this is not mandatory, but if you wheel at all, you should fully set your sliders in place using as many bolts as possible. I like to drill a pilot hole for every hole we are going to drill.
Step 13. Drill 5/16″ Drill Bit (Cutting Screws)
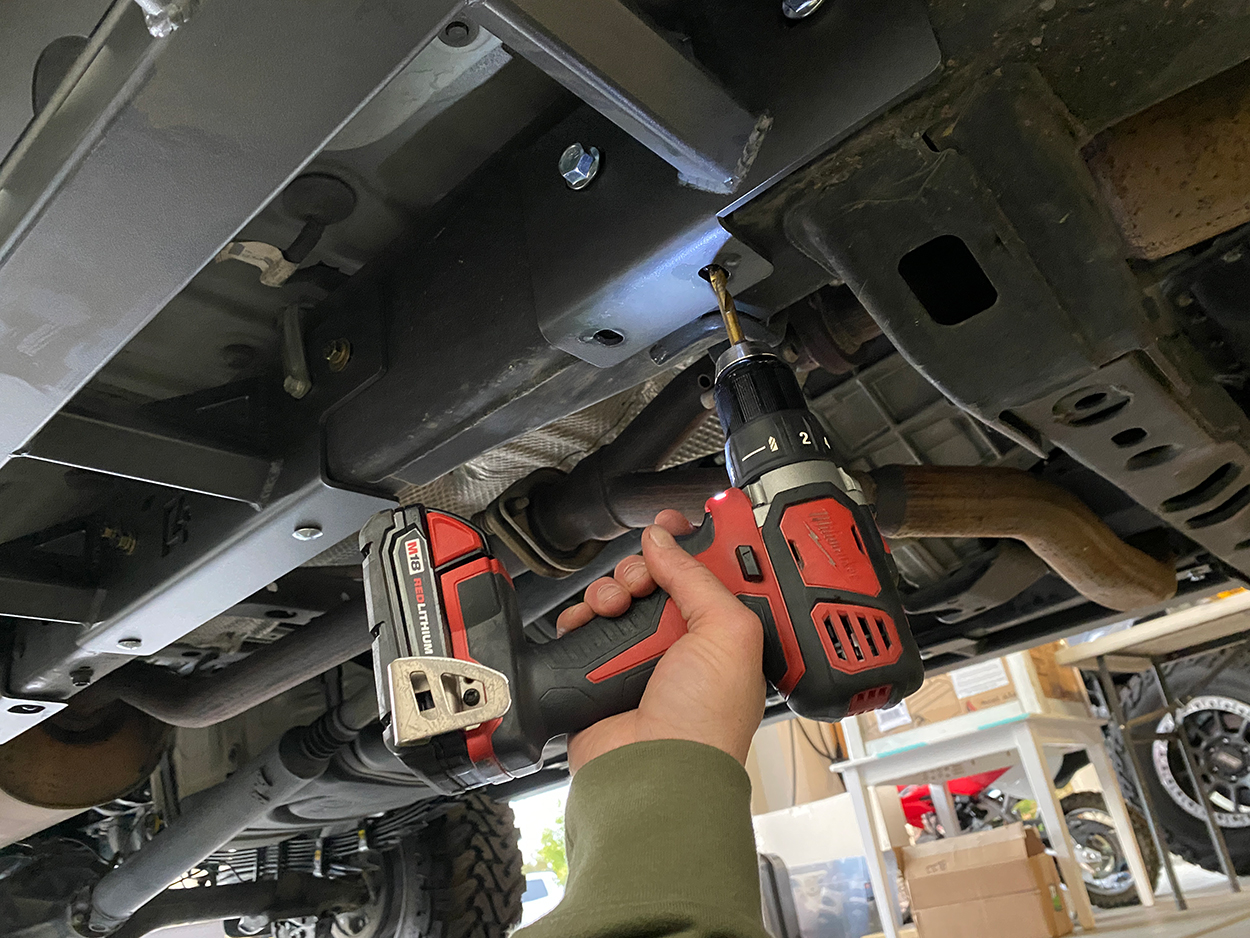
On the front driver side and passenger side, you will drill two holes for your cutting screws.
Start with the pilot bit and then drill using a 5/16″ drill bit for your cutting screws. With your 5/16″ drill bit, drill all the way through the frame rail.
Step 14. Apply WD-40 or Tap-Lube
Once you have your 5/16″ holes drilled through the rail, apply some thread tap lube or WD-40 to the tip of your cutting screw bolts.
Step 15. 9/16 Socket (Do not Use Impact Driver)
Place your cutting screws onto your 14mm socket and with a full battery in your drill, thread these cutting screws into place.
Step 16. Finish Threading
If you do not have enough power in your drill driver, you can thread these down with a socket wrench.
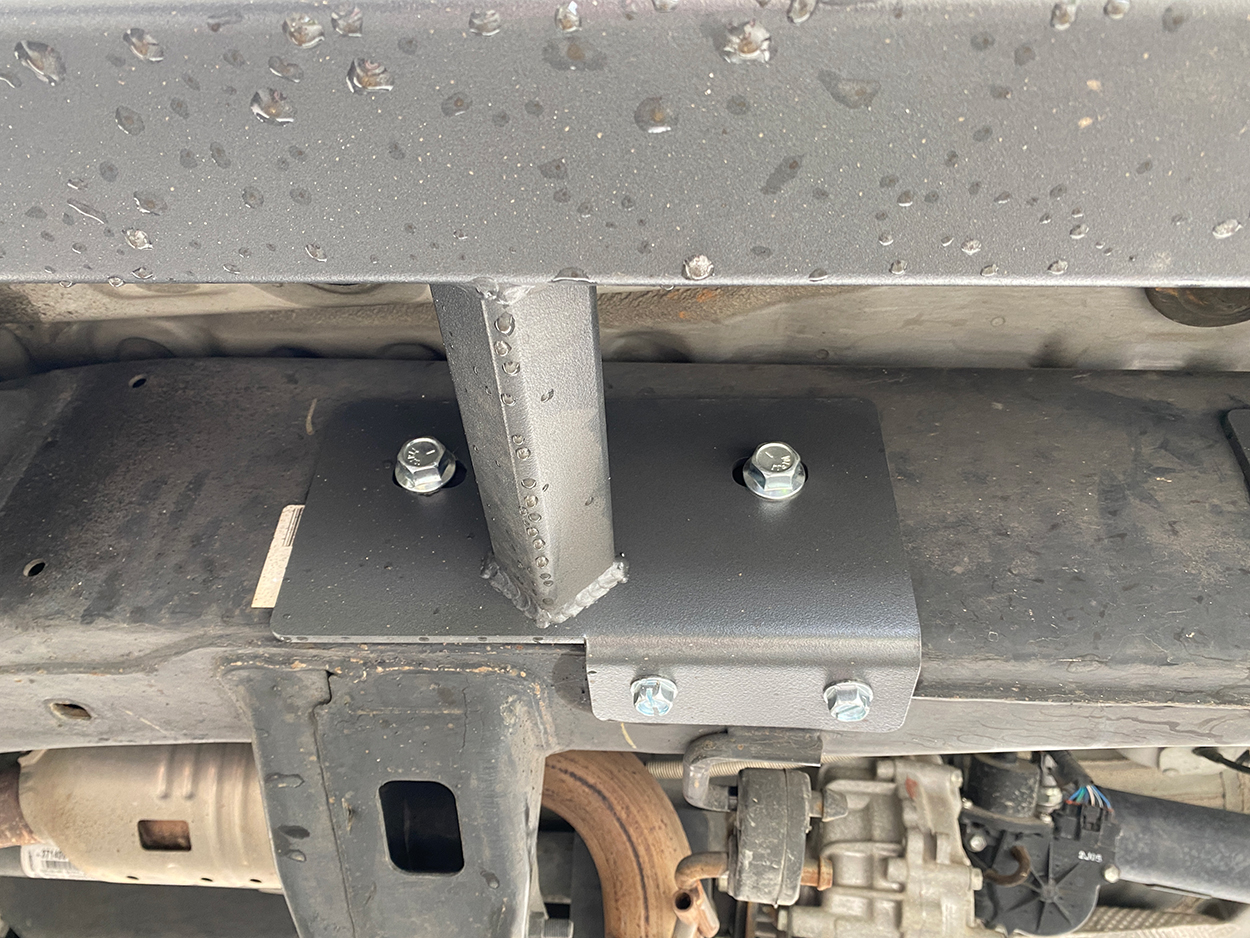
Step 17. Drill Using 3/8” Drill Bit (Carriage Head Bolts)
Now onto the carriage bolts.
Very Important: Start with a pilot dead center so you know you are dead center. You do not want to get off-center with these holes for the carriage bolts or else you will fight with the sliders themselves. Ask me how I know. Using a 3/8” drill bit, drill your main hole.
Step 18. Thread on Top Nut
Once your 3/8” holes are drilled, continue to thread your carriage bolts in place with the top nut inside the frame rail.
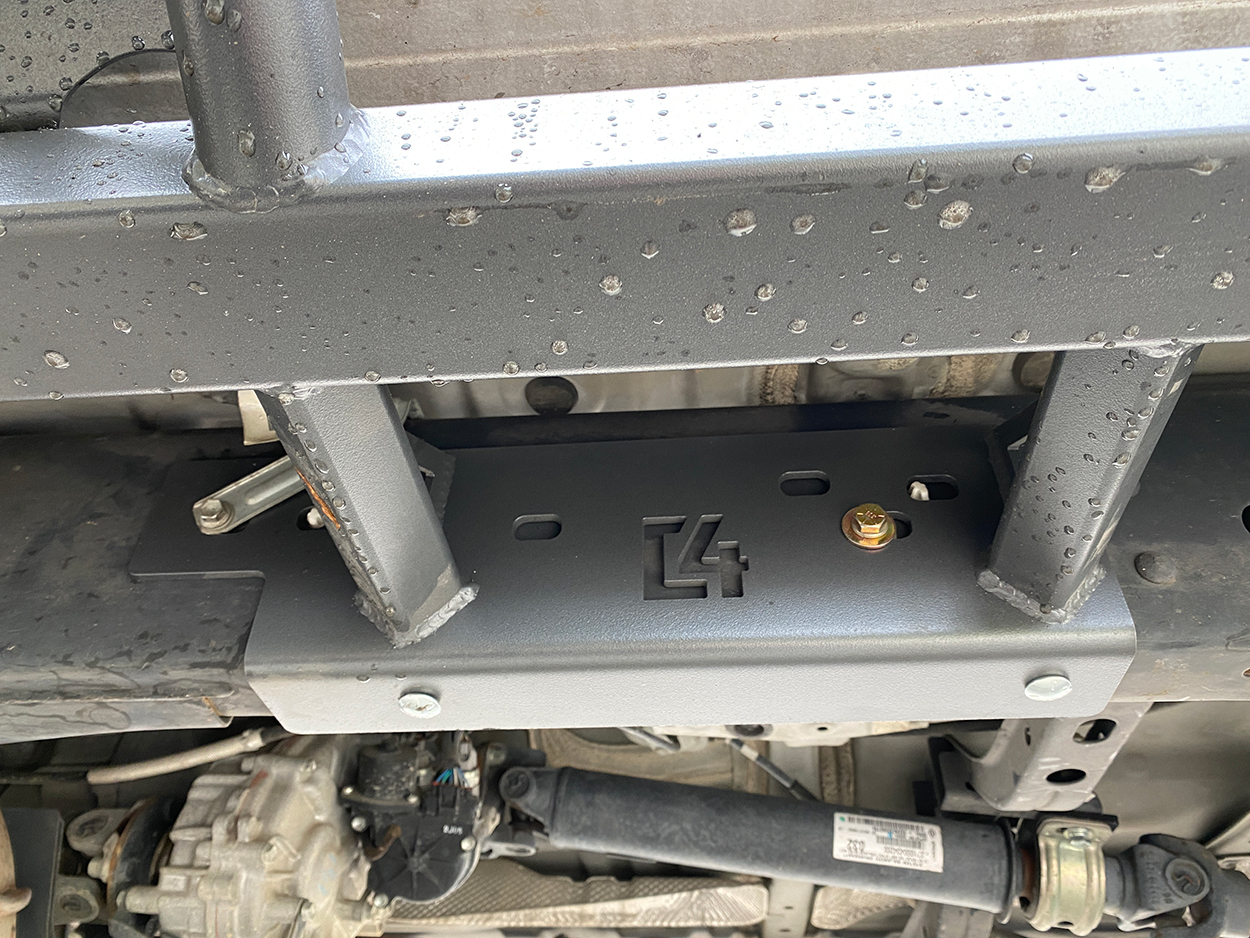
Step 19. Repeat for Remaining Carriage Bolts
Repeat that pross on the remaining carriage bolt locations.
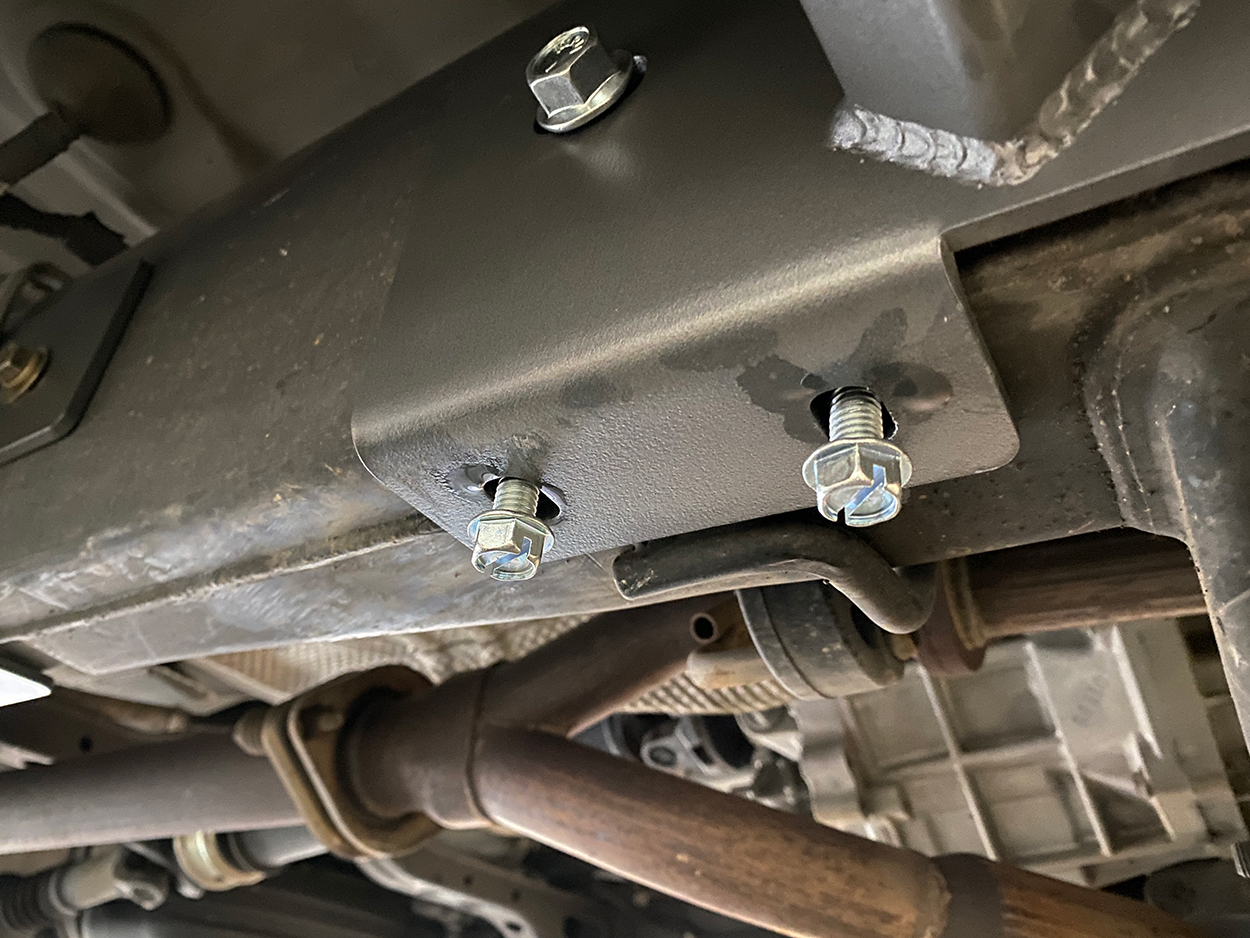
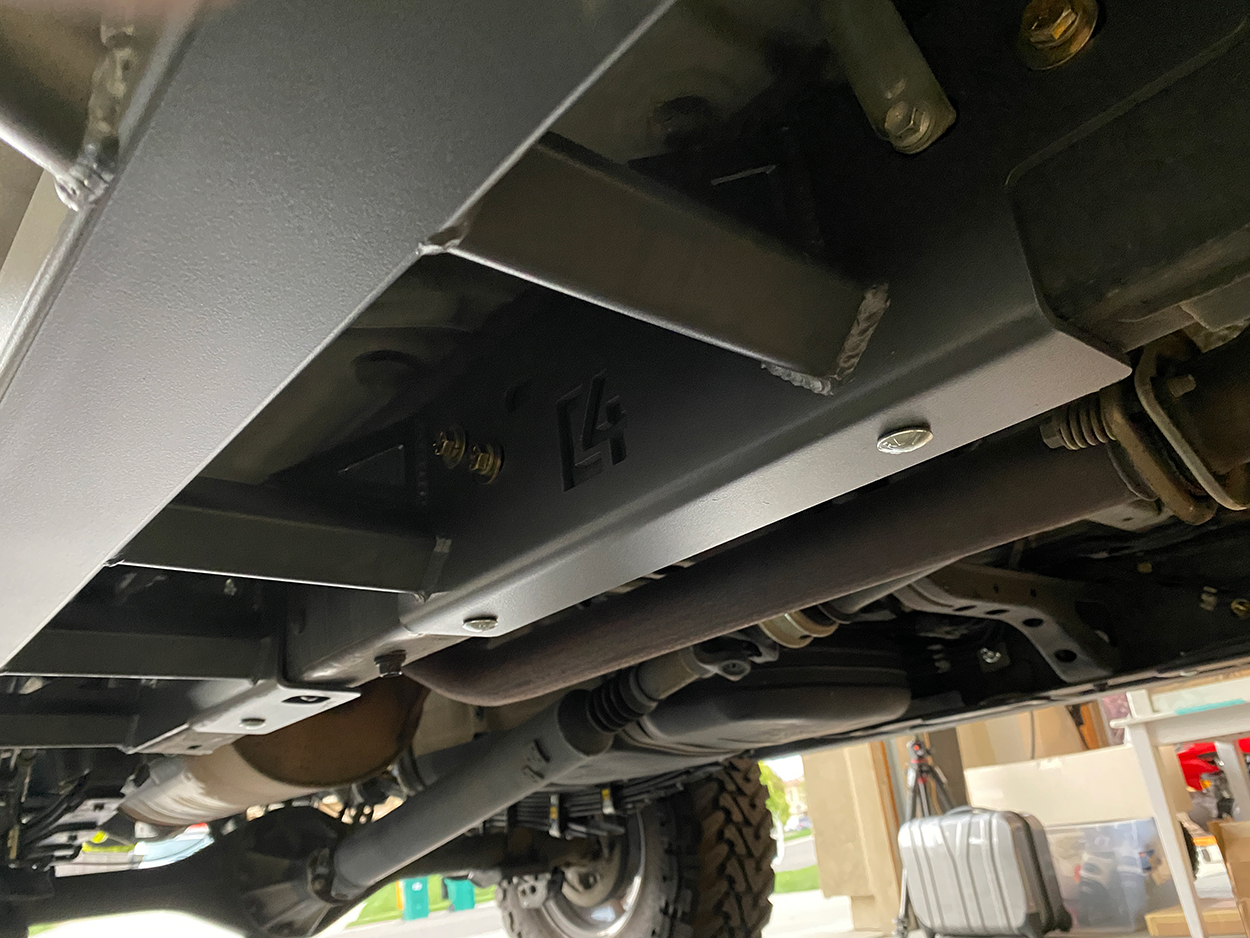
Step 20. Continue Mounting all Hardware

Find all the remaining holes and slide bolt your 14mm Grade-8 bolts into the frame rail.
Final Bolt Locations (Driver Side) – 11 Total
Driver Side Front
Driver Side Middle
Driver Side Rear
Final Bolt Locations (Passenger Side) – 14 Total
Passenger Side Front
Passenger Side Middle
Passenger Side Rear
Final Thoughts
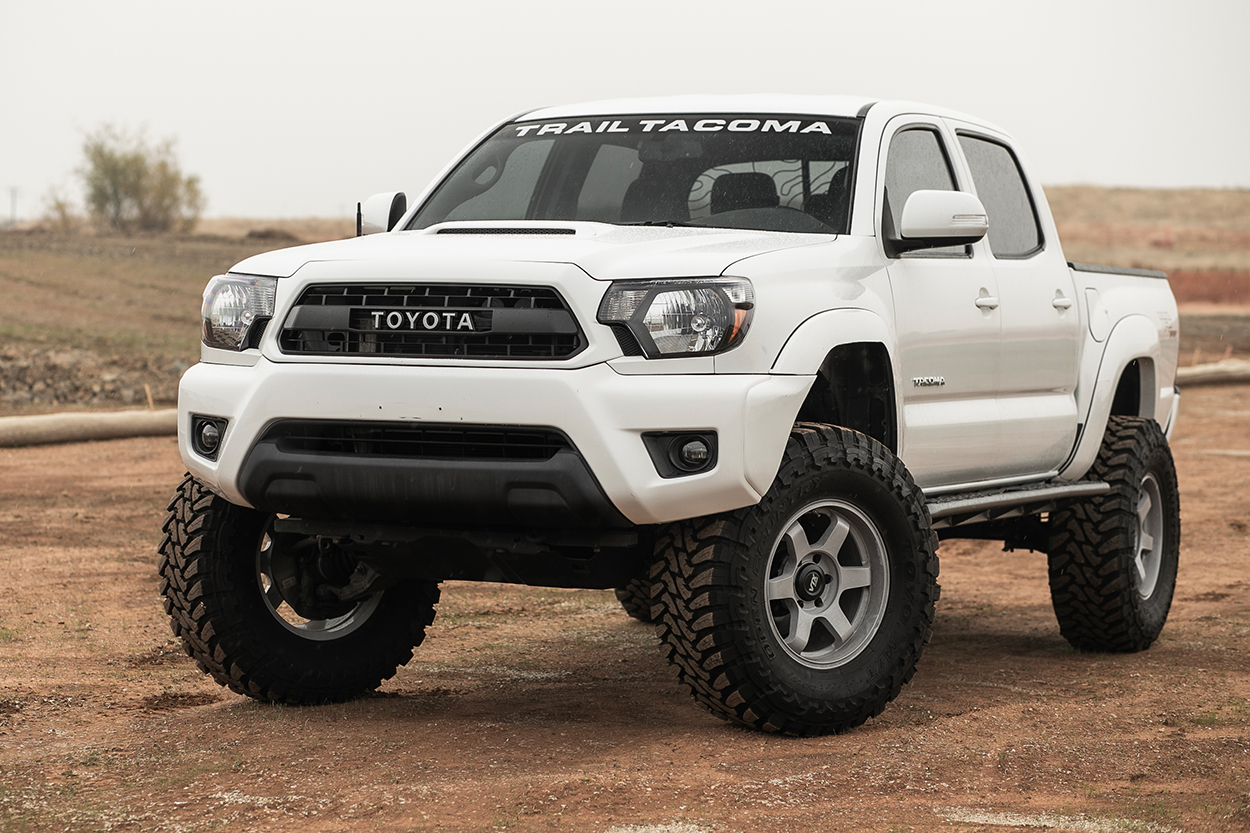
You can’t go wrong with the C4 Fabrication Armor.
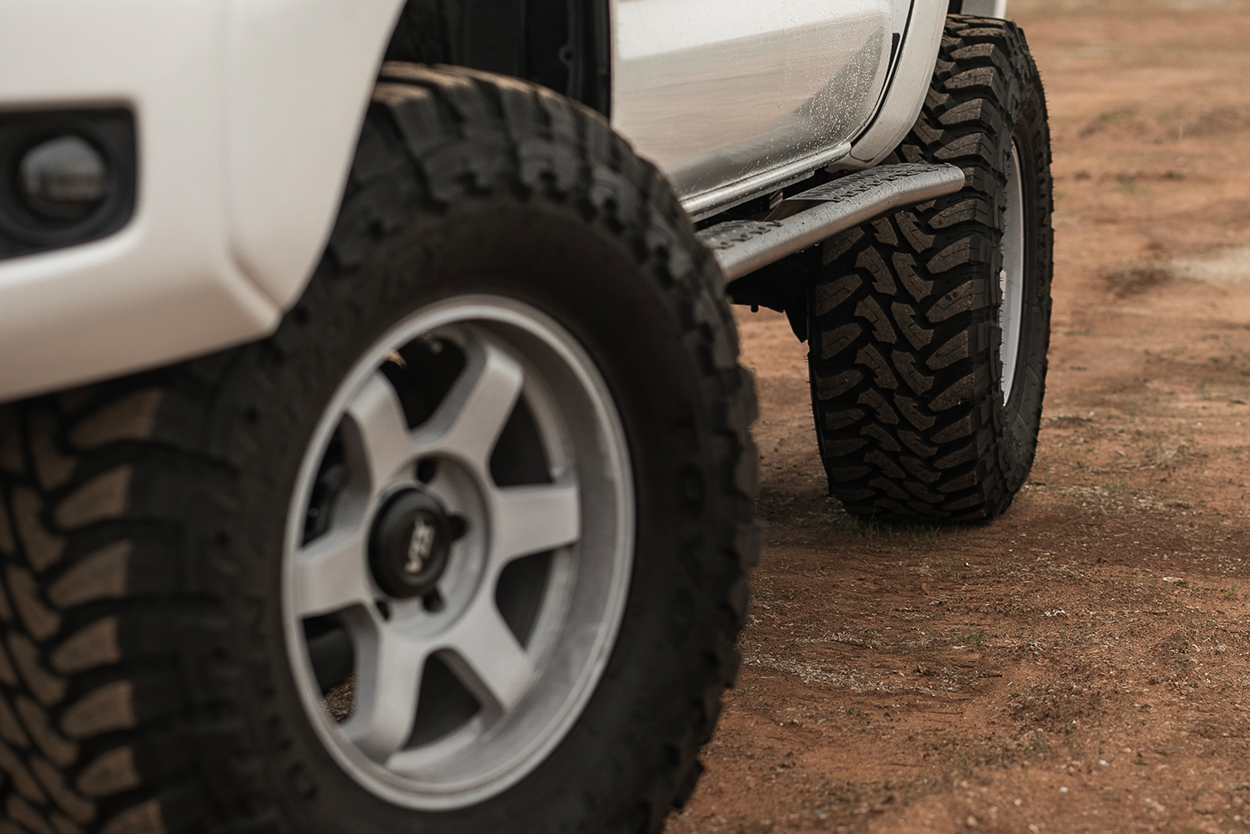
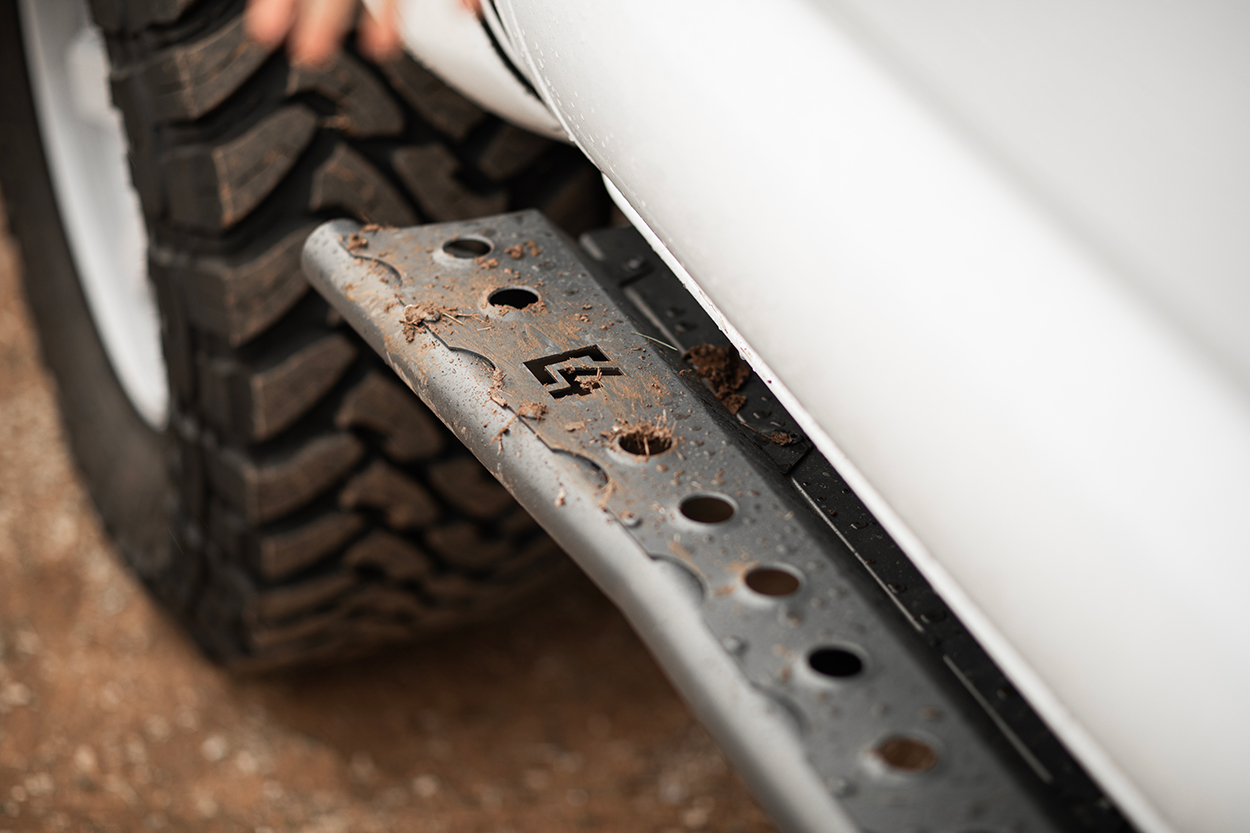
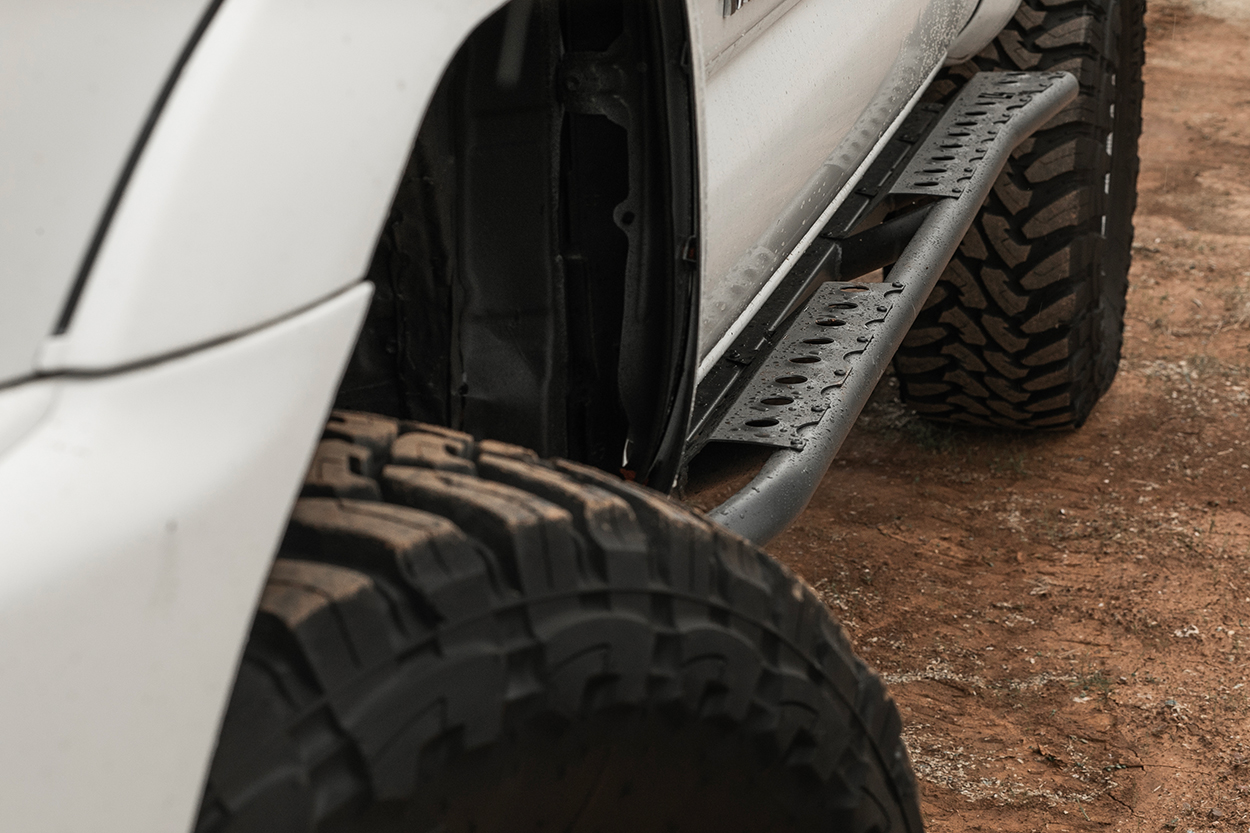
They make versions for all Tacomas; access cabs, long beds, double cab short beds, and double cab long beds. All of their applications are 100% bolt-on for easy installation. No cutting or welding is required. Drilling holes for those carriage bolts in the bottom of the frame rail is recommended if you want to use a hi-lift jack. It’s also recommended to install these if you wheel hard. All of the round tube that C4 uses is made from DOM and 3×2 rectangle tube for increased strength and dent resistance.
These model featured has removable step plates so if you decide later that you don’t want the step plate, you can take them off. Or, you can powder coat/paint them different colors. Speaking of powder coat paint, these sliders ship BARE STEEL. C4 does not offer powder coating services. Your sliders will need to be painted or coated before you install them. We have a good post on how to paint rock sliders so check that out if needed.
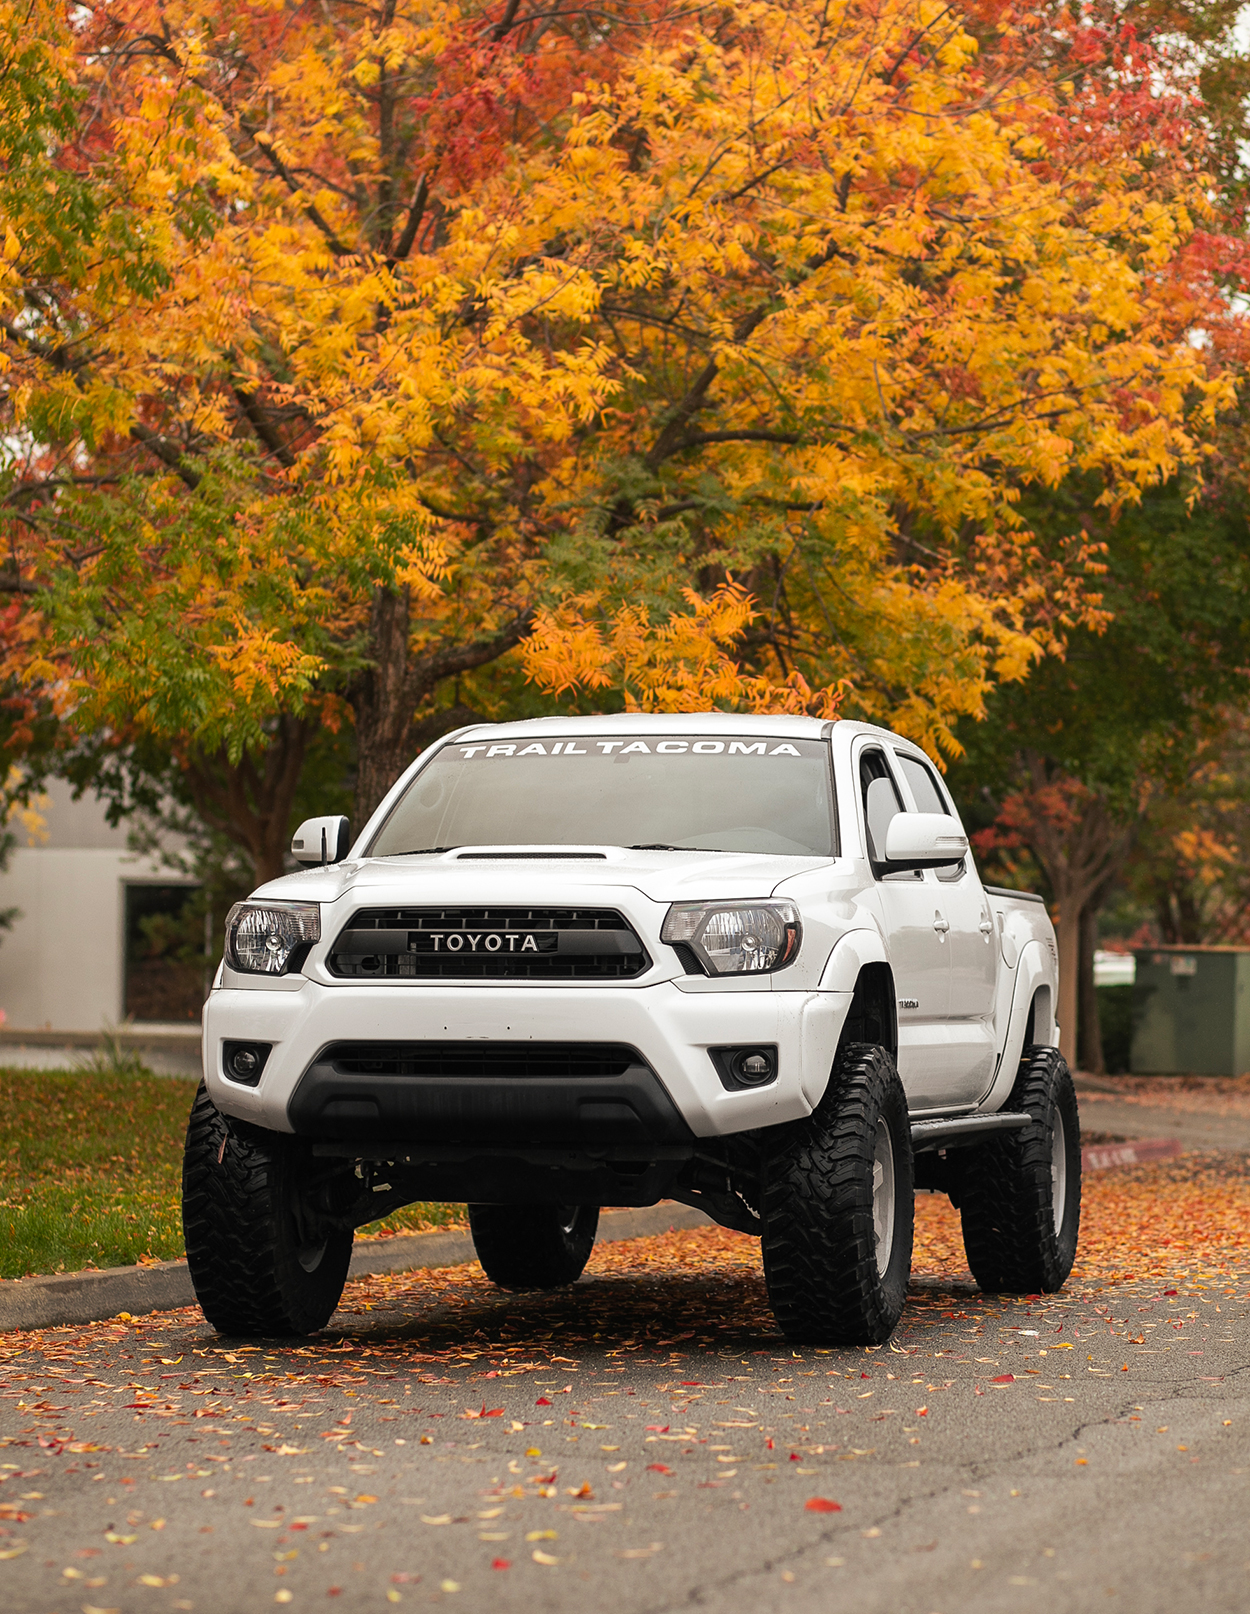
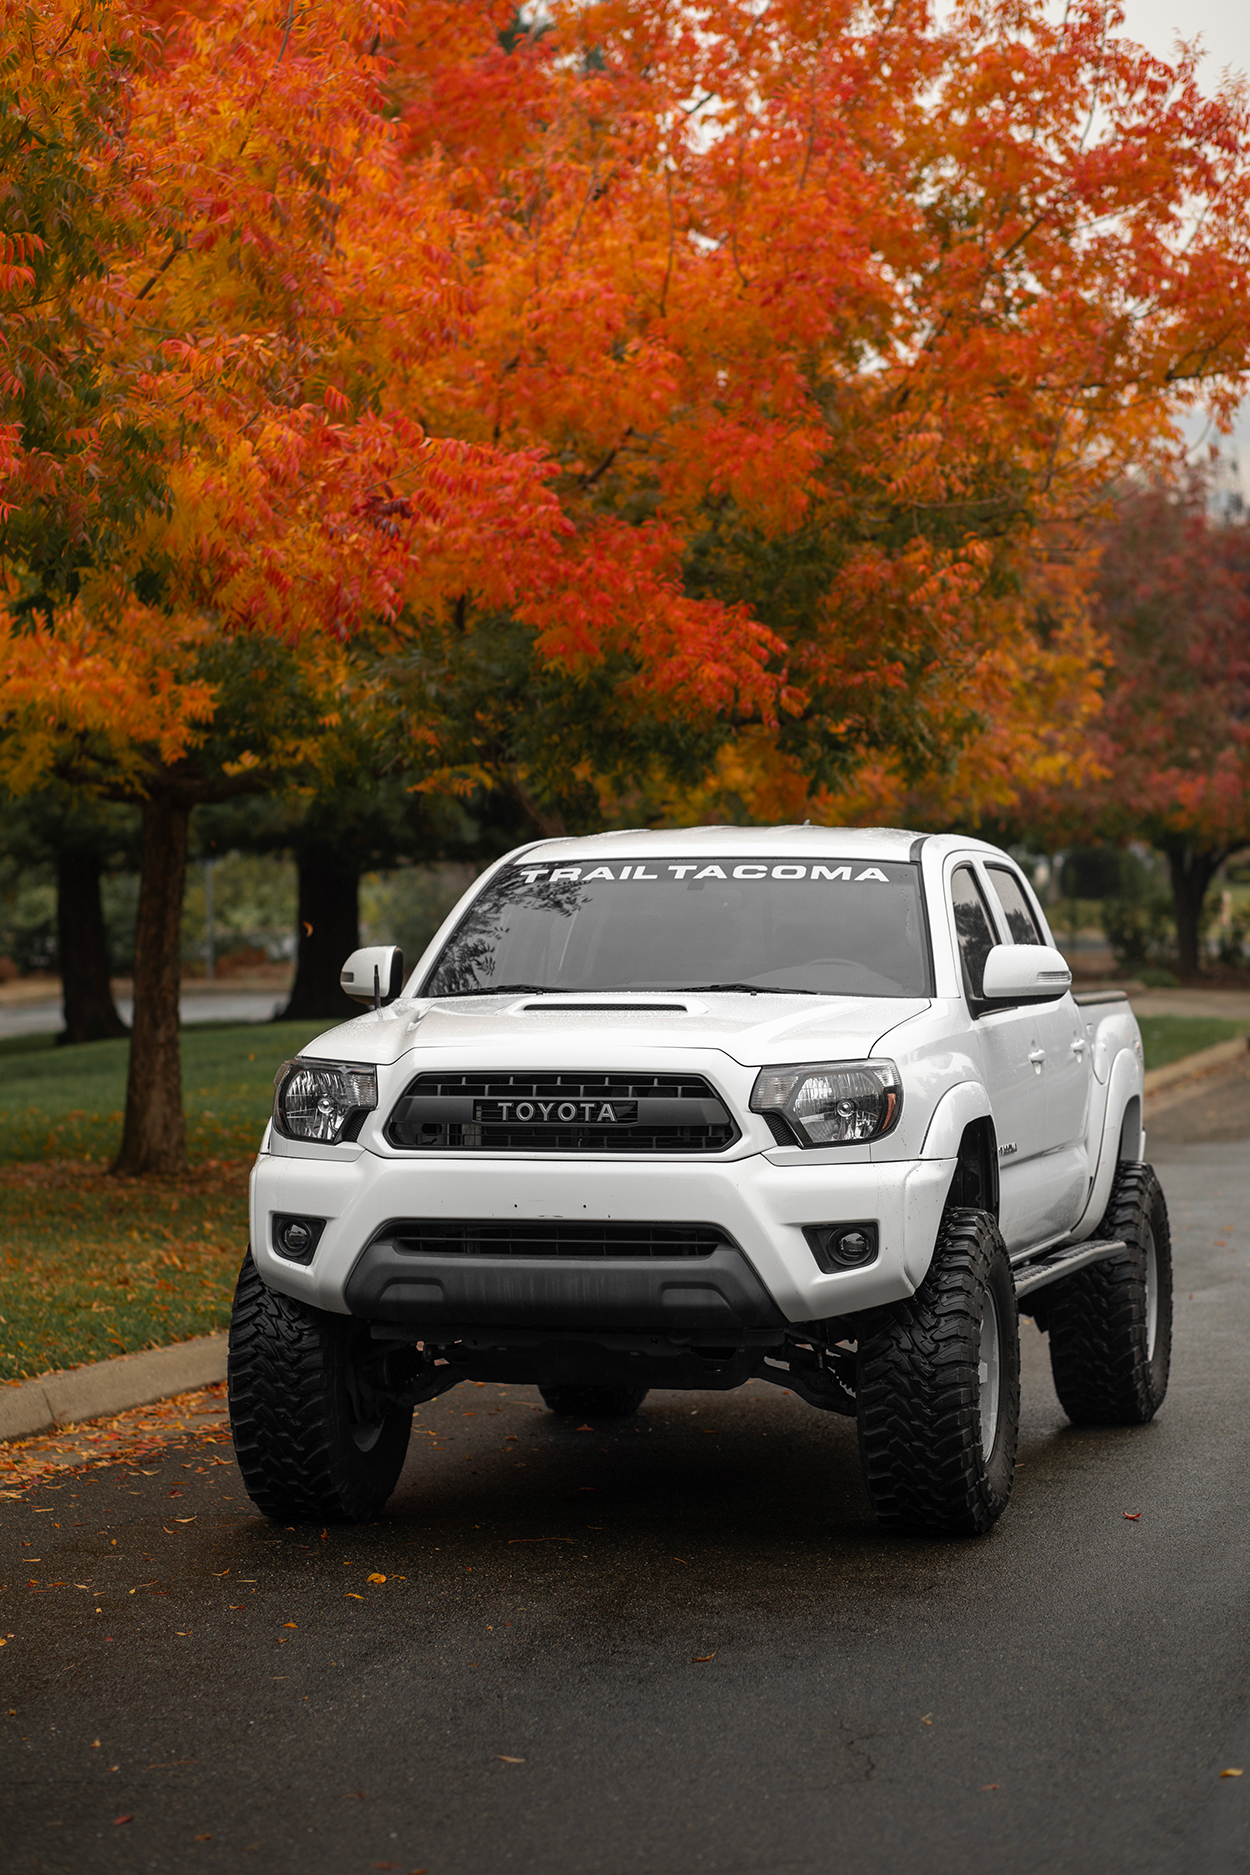
Final Shots


Hi, I’m liking the color on these.
Are they powdercoated and can I get the spec.?
I’d like to order a sample and see if it’d go well with the 4R MGM.
Thanks,
Vince