
Rooftop tents (RTTs) have become the biggest trend in the camping and overlanding industry over the last decade. It seems like just about every Tacoma is rocking a bed rack with a big canvas box on top.
For two years or so, I had a SnugTop camper shell over my bed, and at the time, it was the best setup for me. It allowed me to lock my camping and mountain bike gear in the back, and I even built a bed platform to sleep on for several different camping trips. But, as with most things in the truck world, the build is forever changing, and I decided it was time to mix things up. Enter CVT.
Having seen and researched many different rooftop tents on the market, part of me always had a special love for CVT’s products. I don’t know if it is the quality, aesthetic, or community that they bring together, but I have always enjoyed seeing the products they put out. Below, I’ll go into the Bachelor tent install and setup, and I’ll offer you my first impressions of the tent.
Find It Online
- Mt. Bachelor Pioneer Series RTT: Check Price
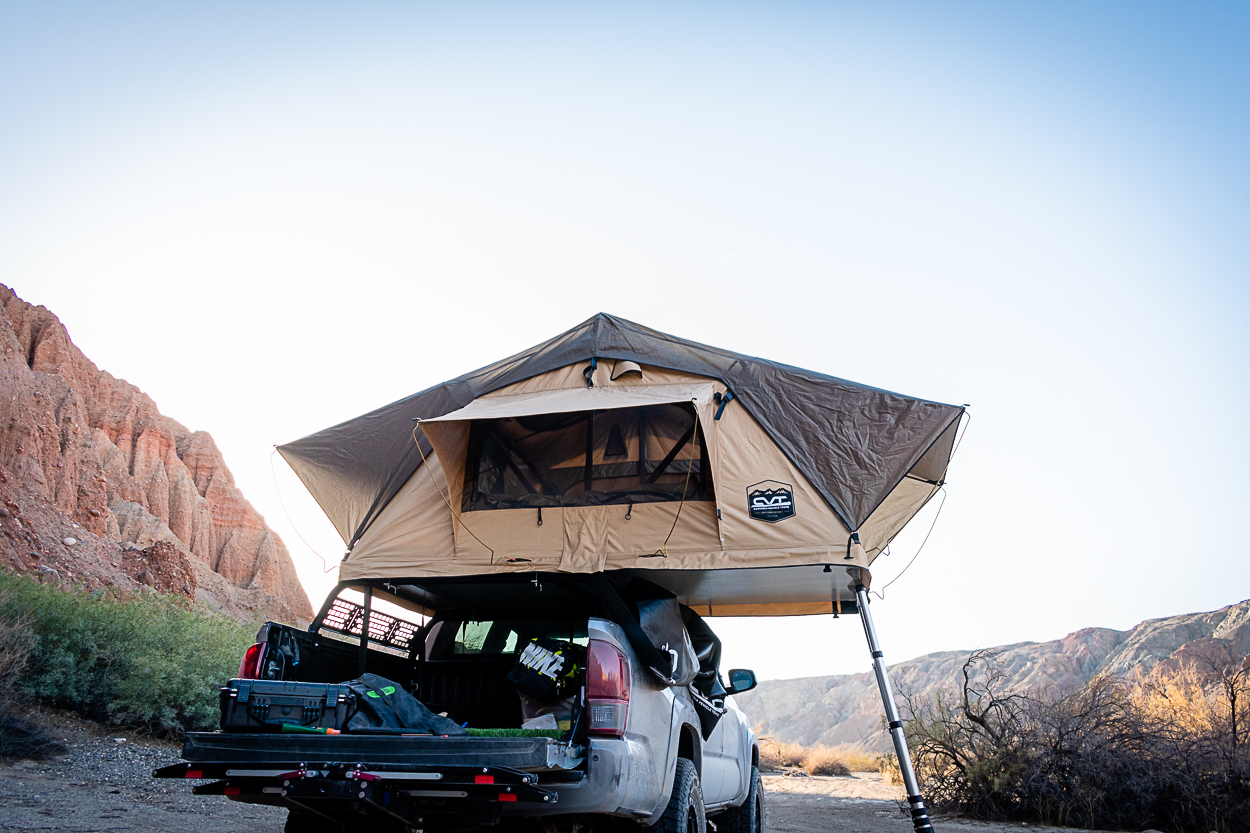
CVT Pioneer Series Bachelor RTT
Installation

Pretty much all rooftop tents mount in a similar fashion.
Installing a tent is relatively simple, but I’ll break down how I mounted this one on my new bed rack system.
Step 1. Unboxing

Your tent will come in a large box on a pallet. First things first, you’ll need to open everything up before getting to the fun stuff. Be sure when opening the box that you don’t cut too deep as you run the risk of cutting the tent’s fabric.
Once you have the box removed, undo the four straps holding the tent together and open the tent into a wedge. It’d be best to do this on a soft surface or on top of the cardboard box so that you don’t damage anything. At this point, you can take a box cutter or knife to lightly cut around the edge of the top and bottom of the tent so you can peel off the clear plastic packaging.
Once the tent is open, inside you’ll find the rails that allow you to mount it, the rods that prop open the windows, and all of the hardware for mounting. You’ll also find the ladder, travel cover, and annex room (if included in purchase).
Step 2. Install Mounting Rails

These rails are what allow you to mount your tent to your roof/bed rack. To install them, you’ll need to remove the small black plugs and press a bolt with a washer on it through the hole. Then, grabbing one of the rails, slide a nut into the center extrusion slot, and reaching through the tent, start threading the two together.
You can drop the second nut into the rail on top and stop it with your finger before beginning to hand tighten that one as well. Repeat these steps on the other rail. Be sure to snug these up without over-tightening them.
Before doing this, you should decide which orientation to mount the rails so you can either open the tent to the sides or backward over the tailgate. I chose to have my tent open up to the side.
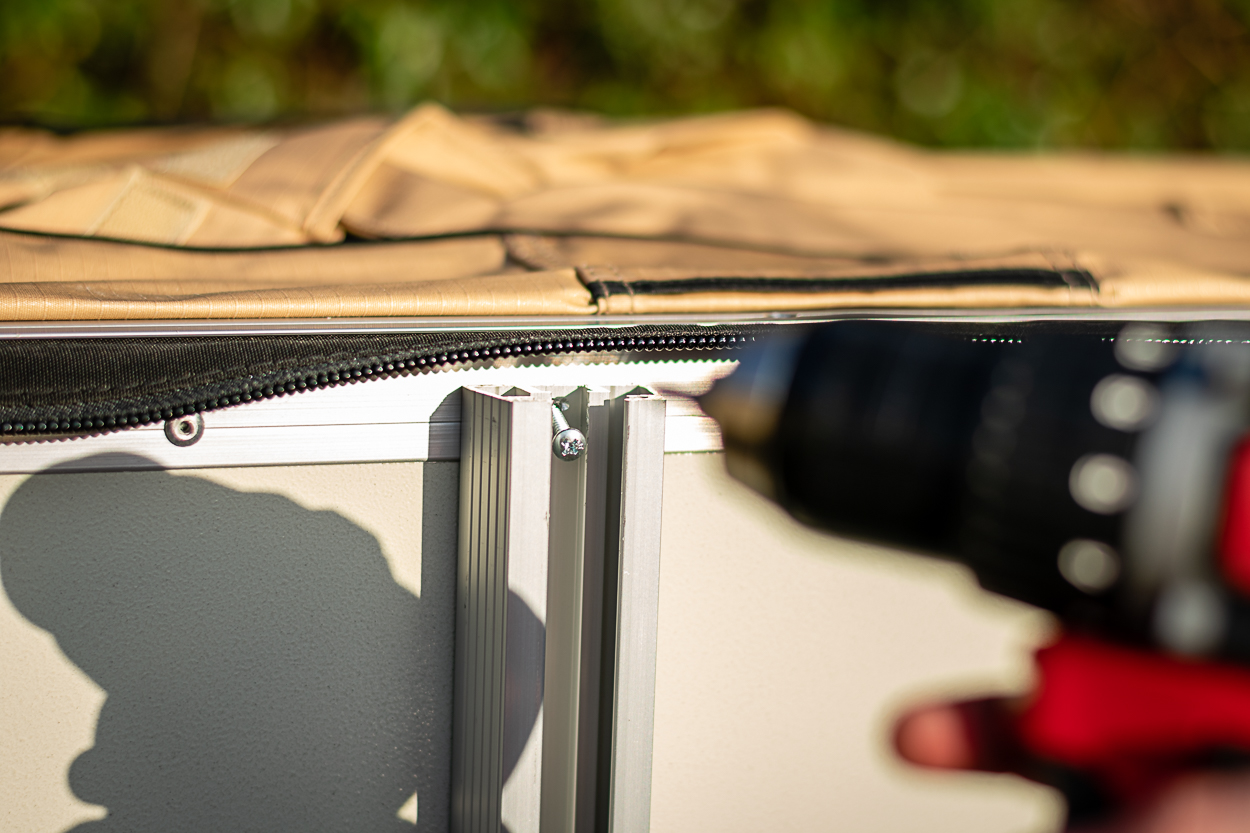
Next, using the four self-tapping screws provided in the kit and a drill, screw in the ends of the rails into the metal frame on the bottom of the tent.
I had a hard time with these, so drilling a smaller pilot hole if you can may make this step go smoother. Now that the rails are on, you can move on to the next step.
Step 3. Install Ladder

On one of the ends, you’ll find four small holes near the edge for the ladder brackets. Secure the brackets with the provided bolts and nuts but keep these loose until you have your ladder in place.
Next, install your ladder onto the brackets with the small black spacer facing inwards towards the ladder mounting holes. Snug everything down while having a buddy hold the ladder straight and in place and you’re all set.
Step 4. Mounting the Tent

Before putting the tent on top of your rack, double-check that the bolts provided are long/short enough.
Due to the wide variety of brands and materials, different racks may require longer or shorter bolts than CVT provides. In my case, on this Cali-Raised rack, I had to run to the hardware store to get longer ones.
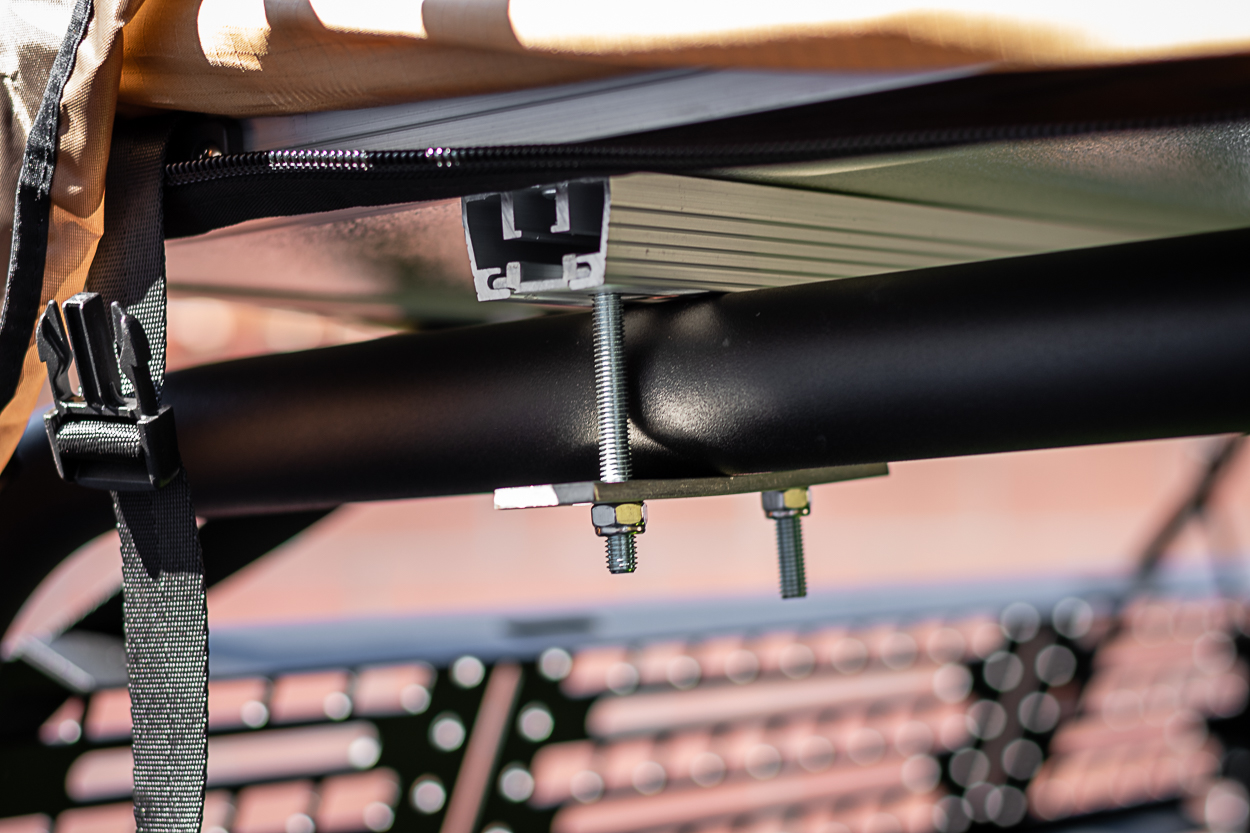
You’ll see that the sliders from CVT fit perfectly within the center slot of the rails. So, to mount these, lift your tent so that you can slide the inner bolts over the roof rack bars, and with a bolt/slider on each side of the bar, place the silver plate underneath it and bolt them together.
Again, snug these down, but no need to crank on the bolts to the point where you’re bending the bracket. As long as they are tight enough to where your tent isn’t shifting around, you will be fine.
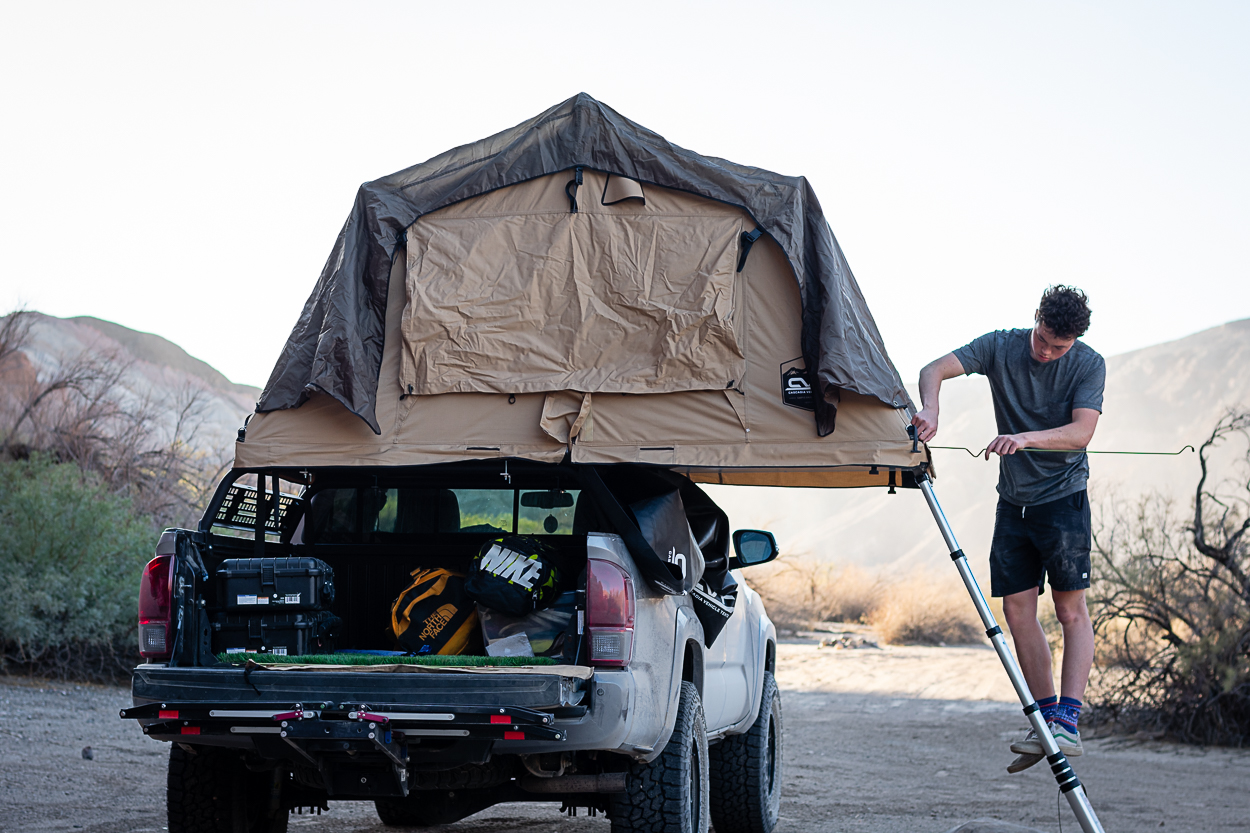
Step 5. Open RTT

Now that the tent is mounted, extend the ladder and pull it downwards. This will pop up the tent about halfway and then, while controlling it, pull the rest of the tent down and extend the ladder to the ideal length.
This will vary depending on the height of your tent, but a general rule is to have at about a 30 degree diagonal.

Once you have the tent and ladder extended, you can use the metal rods provided to prop open the windows/rain fly. Along the bottom edge of the tent, you’ll find holes in the canvas where you can insert the straight end of the rod. Then hook the other end through the corners of the rainfly.
Now with everything opened up, I would suggest taking a moment to mess around and get acquainted with everything. It’s best to figure out the setup details in your backyard rather than 50 miles into the backcountry without cell service on your maiden voyage in your new tent. Mess around with the windows, rainfly setup, and everything else to figure out the best way to set yourself up for success out on the trail.
Step 6. Install Travel Cover

The final step of the installation is to install your travel cover. To do this, after closing your tent again, slide the non-zippered edge into the slots of the extrusion along the bottom of the tent. Take your time here as to not rip anything. Then, while putting downward pressure on the corner of the tent, connect the buckles and tighten them down. Repeat on the other side, and then throw the cover over the tent.
Zip up the cover all the way around, and throw the long black straps along either side of the ladder. Then push them through the metal loops and Velcro them down.

You can find a very in-depth install video by CVT here. Below I picture my setup and takedown steps.
Quick Setup/Takedown


Initial Impressions

My initial impressions of the Bachelor tent are overall very positive. The first thing I noticed after finishing my install was how much attention to detail there is. From the holes for the window props to the shoe/item storage pockets, they’ve thought of just about everything.
The next thing I noticed, while taking the tent out to the Southern California desert, was how much space there was. Before having this setup, sleeping in the SnugTop, while it was stealthy, there wasn’t much headspace. Moving around inside the tent is super easy, and I never felt like I wanted more space. You could easily fit two people and a dog or kid for a family camping trip.

Although the setup wasn’t as fast as I anticipated, it wasn’t any slower than a normal ground tent. My total takedown time after getting acquainted with it took me about 15 minutes. That being said, I imagine I could do it a lot faster after practicing it more and spending some more time with it.
One minor downside I noticed was that as the desert winds picked up at night, the canvas/rainfly ruffled around a decent bit. This issue was limited when I got out and tightened everything down, but it was still definitely there. This could very easily have been an issue in how I set up the tent or just that I am not used to tent noise after camping inside my camper shell, but still something worth noting.
Final Thoughts

All in all, I am super pleased with CVT’s Mt. Bachelor so far, and I am looking forward to spending more nights in it. Although part of me misses being able to lock my camper and sleeping under a solid roof, the benefits and comfortability I have experienced so far in the tent are worth it.
CVT has a widespread and passionate community of supporters behind them, and now I can see why. Moving around freely with room to spare while still sleeping off the ground is a luxury I am glad to have in my setup. Plus, let’s be honest, the setup looks dialed, and I feel like I fit right in with the ever-so-judgmental overland community.
Keep an eye out for an in-depth review of this tent after I have spent some more time in it.