
Although I did not choose my Tacoma expecting racecar-like performance, the truck still leaves a lot to be desired. Regardless of what type of car you have, the driving experience means everything. The more interested you get in modifying your vehicle, the more details and flaws you will notice. For me, one of the most important upgrades I had my eye on was replacing the OEM exhaust.
As I said, I never expected my truck to run like a sports car, but damn, not much can beat a good-sounding exhaust. In this post, I will dive into the simple installation process for the R4T cat-back and my thoughts. I’ll also include some videos and sound clips at the end.
Find It Online
- R4T High Clearance Cat-Back Exhaust (2016-2023): Check Price
Table Of Contents
Upgrade Benefits
Well, I don’t necessarily need an aftermarket exhaust. I guess you would technically consider it a “want” because my OEM one functioned properly. But that shouldn’t stop you from picking up this system. Upgrading is pretty commonplace, and we all like to tinker with our trucks.
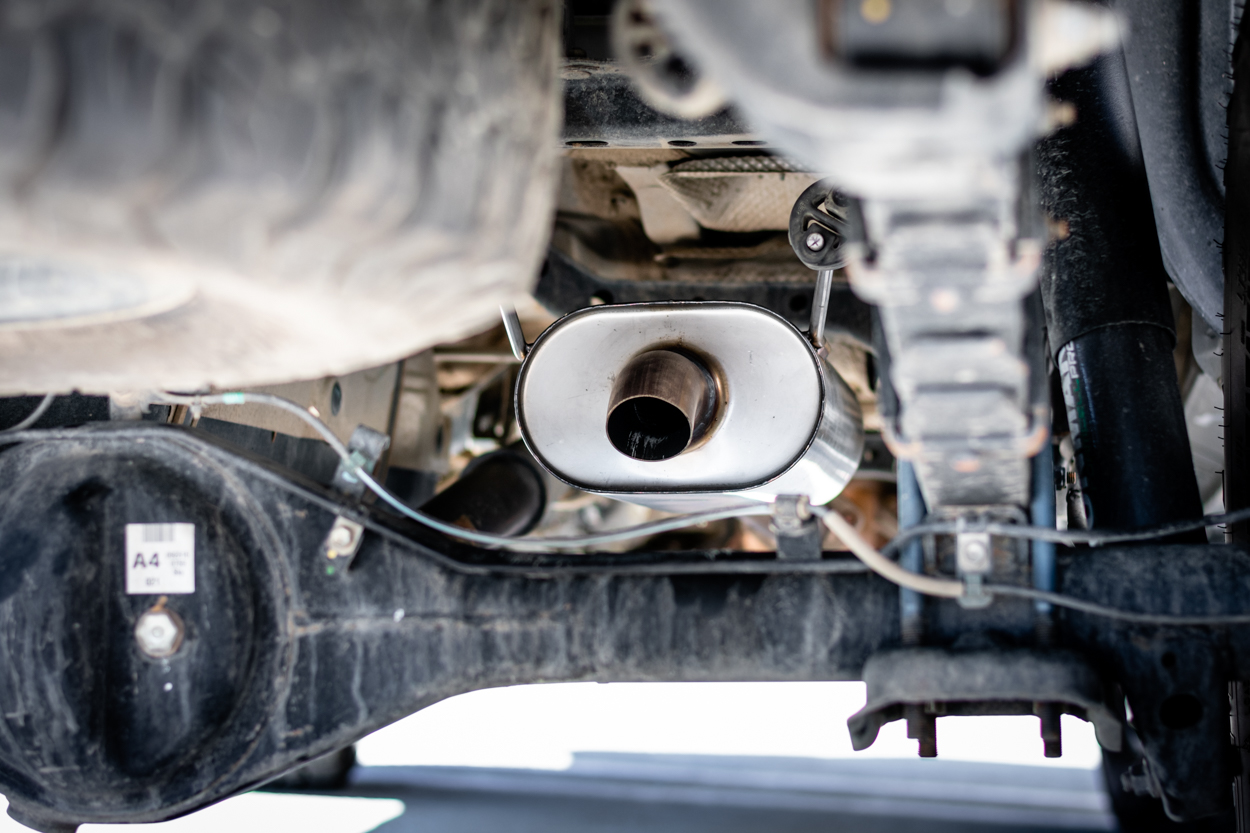
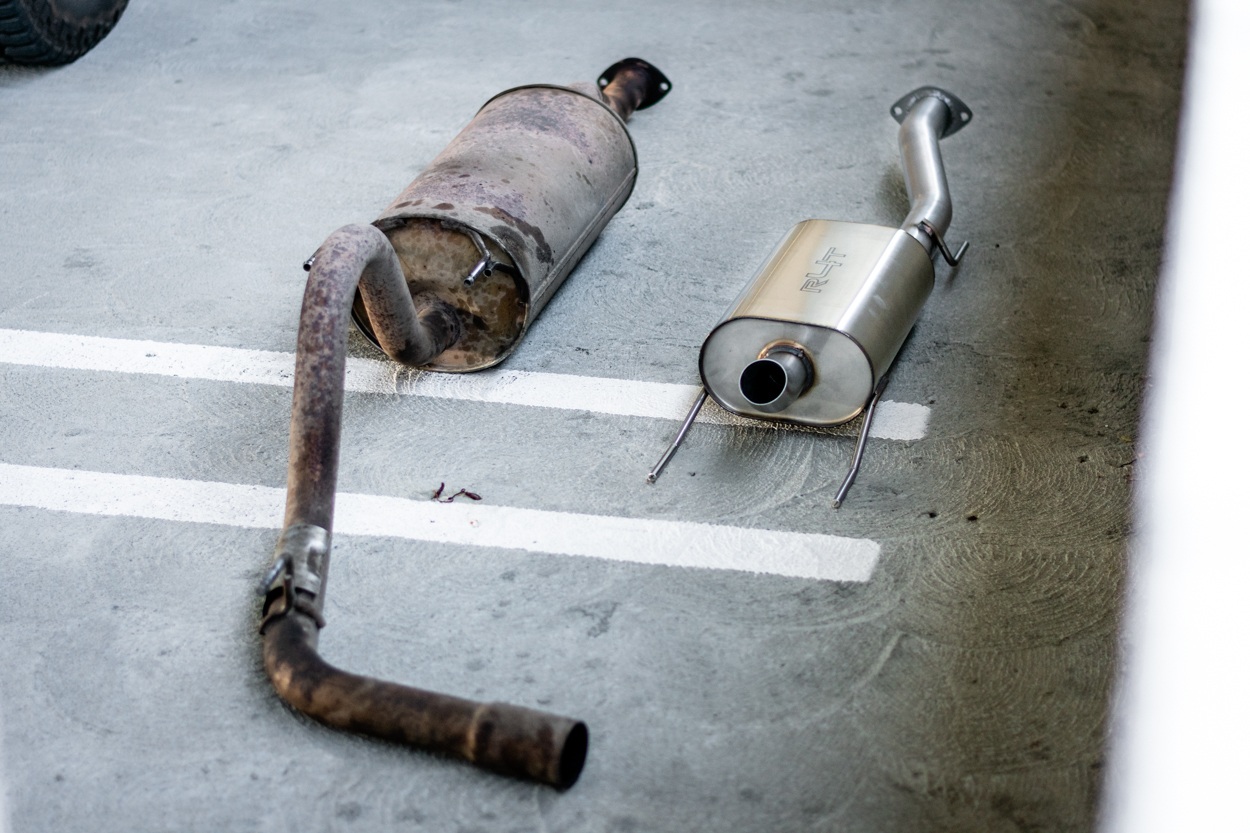
First things first, the biggest difference is the clearance. Where the OEM exhaust weaves around the rear axle and exits behind the passenger side rear wheel, this one turns down right before the axle.
Next, aftermarket exhausts (in general) offer greater, more unobstructed outflow, helping your entire engine system run more smoothly and maybe even squeezing out a little bit of extra power. This is also what contributes to that satisfying deep rumble compared to the depressingly quiet factory option. Speaking of that improved sound, it has made me personally much more excited to drive my Tacoma, which means a lot more than you might expect.
Installation
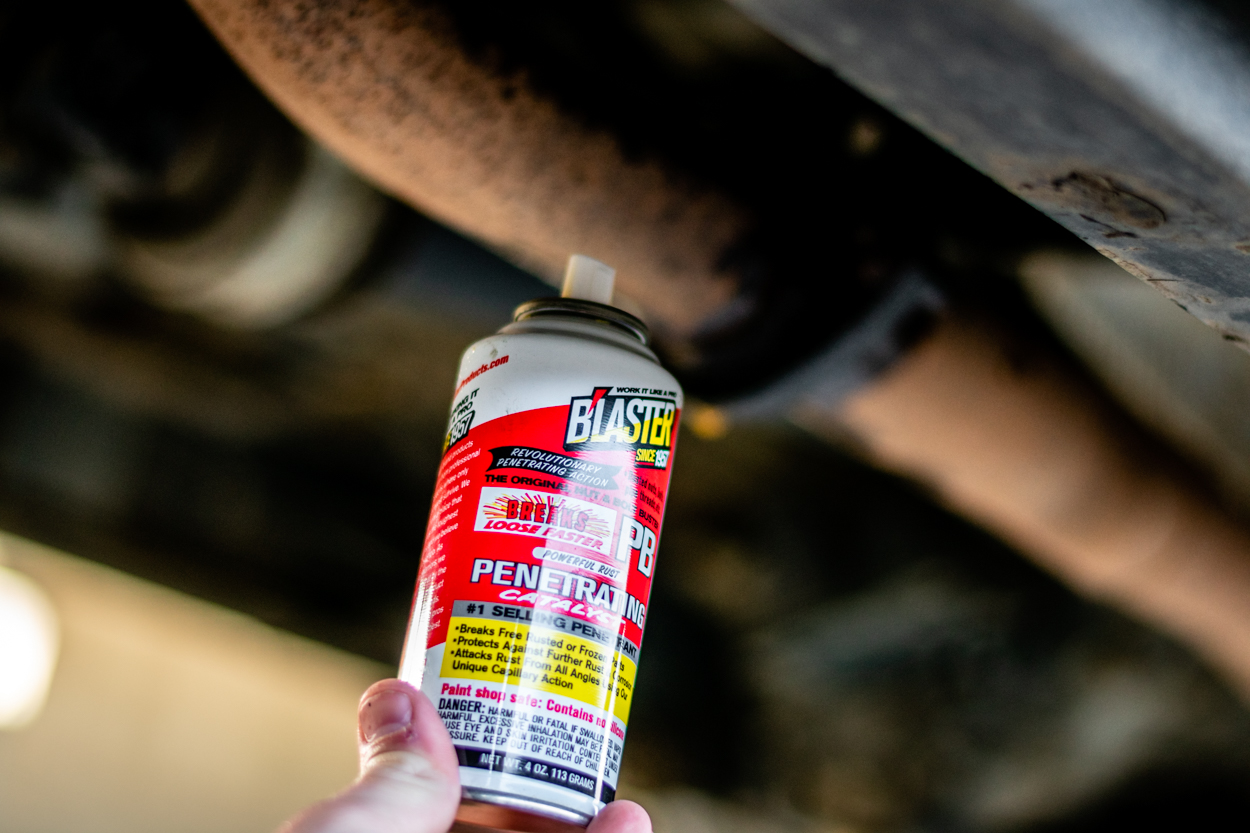
The installation process for this exhaust was surprisingly simple. Usually, when I work with bolts under the truck, they are jammed up and caked with dirt and grime. A few minutes before starting the uninstallation of my stock one, I gave each bolt a hefty dose of PB blaster. Overall, this took a buddy and me about 45 minutes from start to finish, making it one of the fastest modification installations I have completed.
Also, all you need for this install is a socket wrench, and a 14mm socket.
PB Blaster is highly recommended, and also, the longer the handle on your wrench, the easier it will be to crack the bolts loose.
Step 1. Remove OEM Bolts
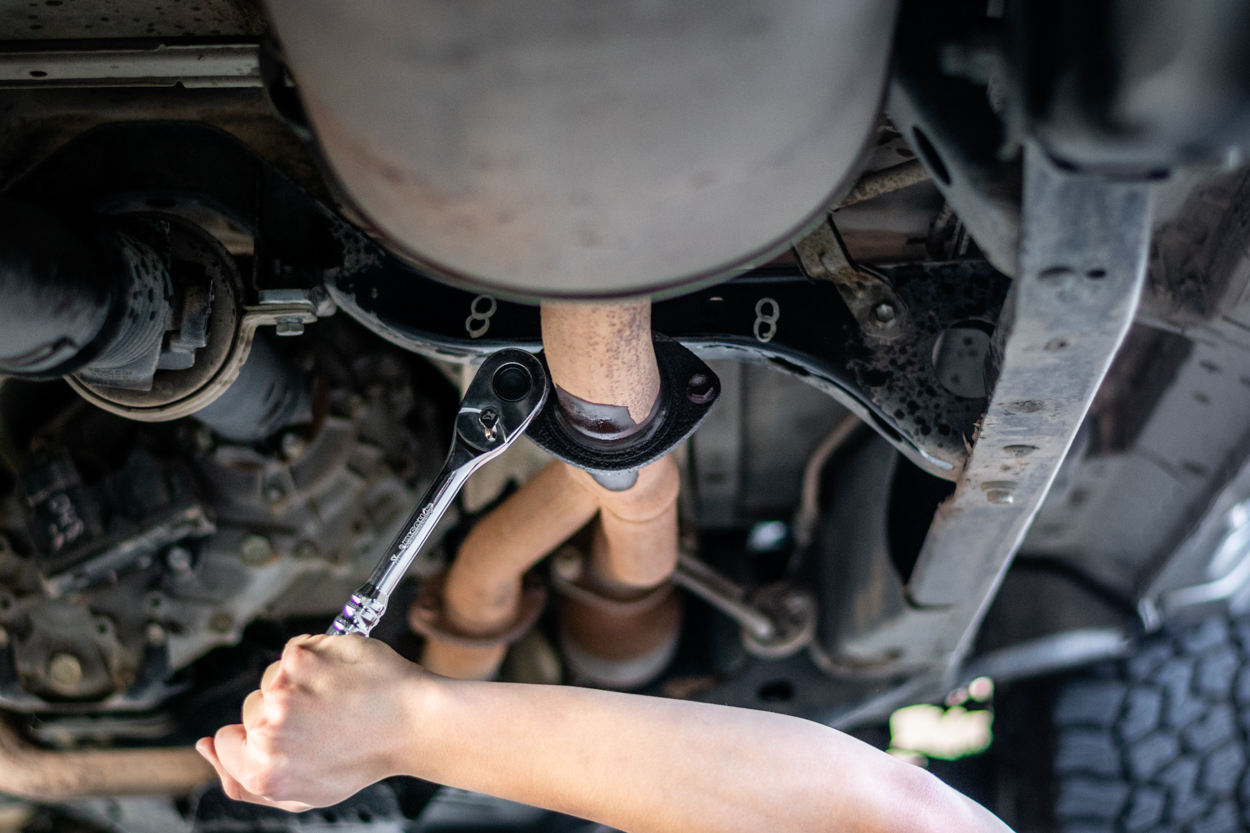
Looking up at the truck’s underbody from the passenger side of your Tacoma, you will see the exhaust pipe and the flange where the OEM muffler bolts into the pipe coming from the engine. This is where you will install your new exhaust. If you have PB Blaster, spray those two bolts excessively. You may not need it, but my truck is about five years old now, so I expected it to be seized.
Using your 14mm socket, loosen and remove both of the bolts on either side of the pipe. Save these as you will be using them to install the new exhaust.
Step 2. Remove OEM From Hangers
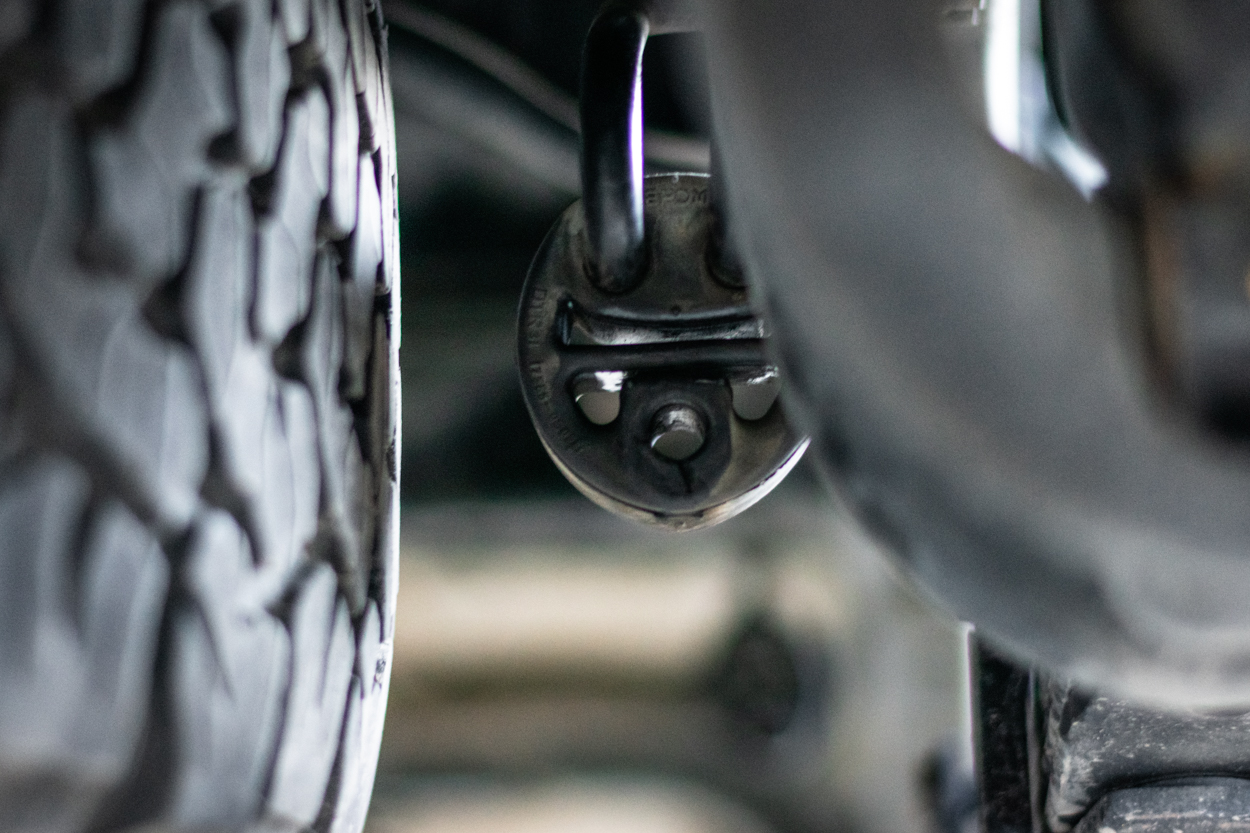
The OEM exhaust, without the two bolts, hangs in place from rubber hangers that hang from the body of the truck. These were slightly difficult to remove, but you can get them out by twisting and pulling the exhaust back and forth while gripping the rubber hanger. Work slowly and steadily, and you should be able to get these out. It may help to use some lubricant, or buy a dedicated tool for this.
The bushing located closest to the tailgate gave me a tough time during the uninstallation process, so I grabbed a pocket knife and cut around the opening that held the exhaust’s support bar in place. Does this ruin it? Yes, but since the R4T exhaust is high clearance (shorter than factory), you won’t be using this bushing/hanger anymore.
Step 3. Install R4T Exhaust
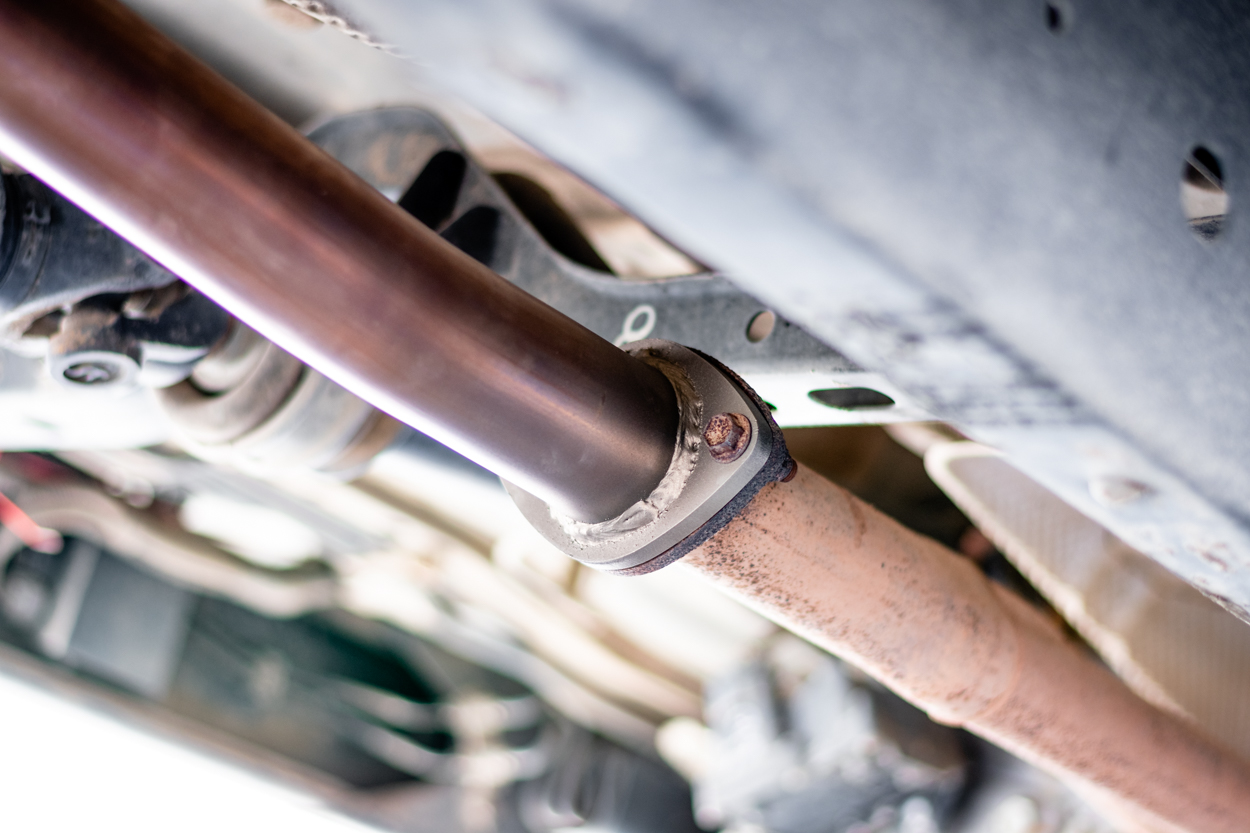
Now that the subpar OEM exhaust is out, we can get that beautifully welded R4T muffler installed. All you need to do is push the three hanger pins into the rubber hangers and then install your 2 OEM exhaust bolts. They recommend installing a new gasket where the exhaust mounts to the OEM pipe, but I did not have the patience to get one from Toyota.
Make sure you tighten these two bolts evenly to avoid an exhaust leak. And with that, you’re done. Stick around to the end of this post to see a dedicated installation video as well.
Audio Clips
Final Thoughts
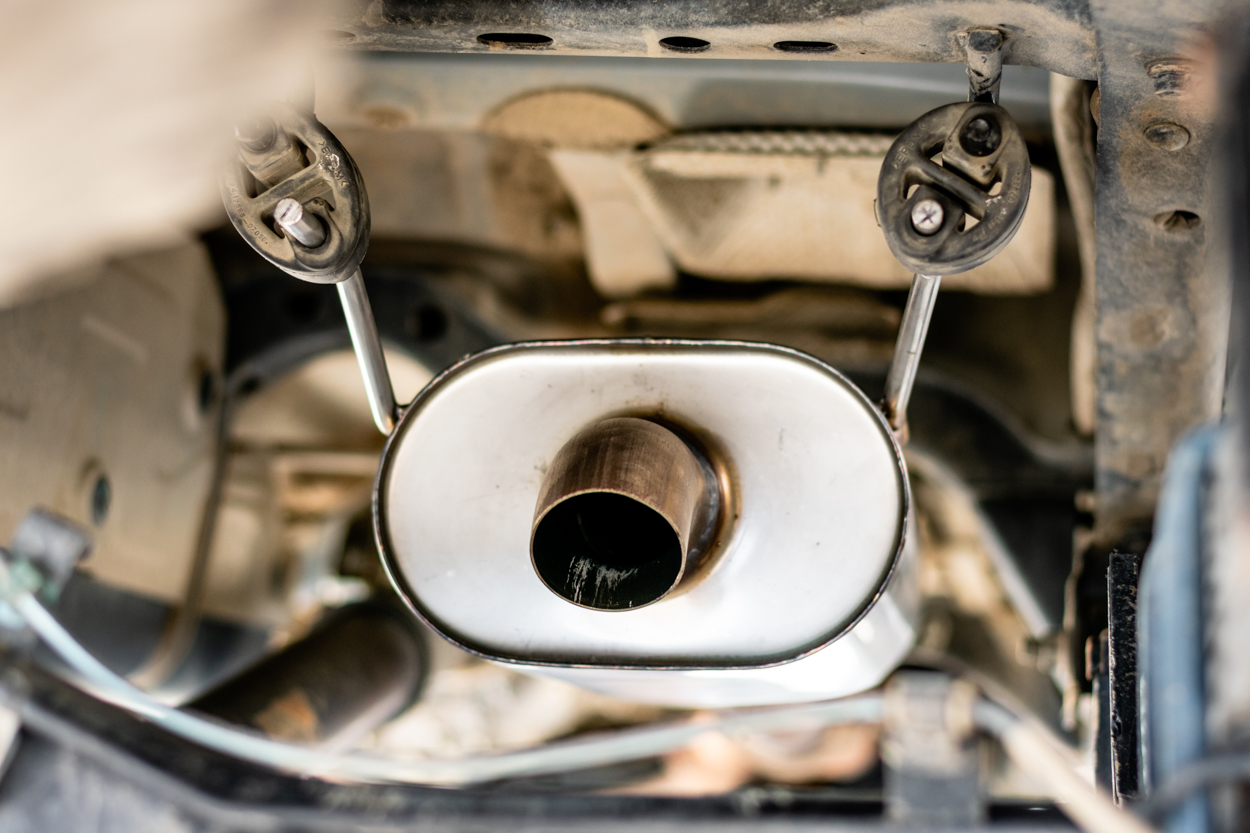
Overall, this exhaust is awesome. It sounds amazing as it is deeper in tone but not excessively loud. It is definitely a bit louder than the OEM exhaust, but in my opinion, it strikes the perfect balance between tone and volume. Driving at highway speeds, I have not noticed any droning within the cab. Also huge. A bad drone will ruin an otherwise good system. The noise is more prevalent but not at all annoying. In my opinion, this one sounds best in the 2500-3500 RPM range.
Additionally, the clearance on this option is far more off-road oriented. No one likes the gut-wrenching noise of dragging their exhaust down a ledge feature on a trail, so this won’t be a worry anymore.
The only thing to note that I have seen is when I “launch” my truck and redline, the lower rumble is a bit diminished, and the sound can be compared to an intense whoosh of air. That being said, I shouldn’t be redlining my truck anyways (too often). But all in all, I am absolutely stoked about this exhaust, and it makes driving the Tacoma a much more enjoyable experience.
Reducing back pressure is a good way to shorten the life of the exhaust valves in the engine. Vanity over longevity.