
If you aren’t familiar with Vision X, I’d like to introduce you to them before diving in. Vision X is a leading company in the lighting industry, providing high-quality products. Not only for people like us but for other commercial applications as well. These guys work directly with organizations like NASA!
Now to briefly talk about their off-roading division. Their lineup of off-road lighting provides products and lighting options for every application and consumer wants and needs. Varying from all auxiliary and vehicle-specific lighting types, their products bring new and innovative technology to the off-road market. They’ve got everything from traditional bars and pods to arrays and small accessory lights!
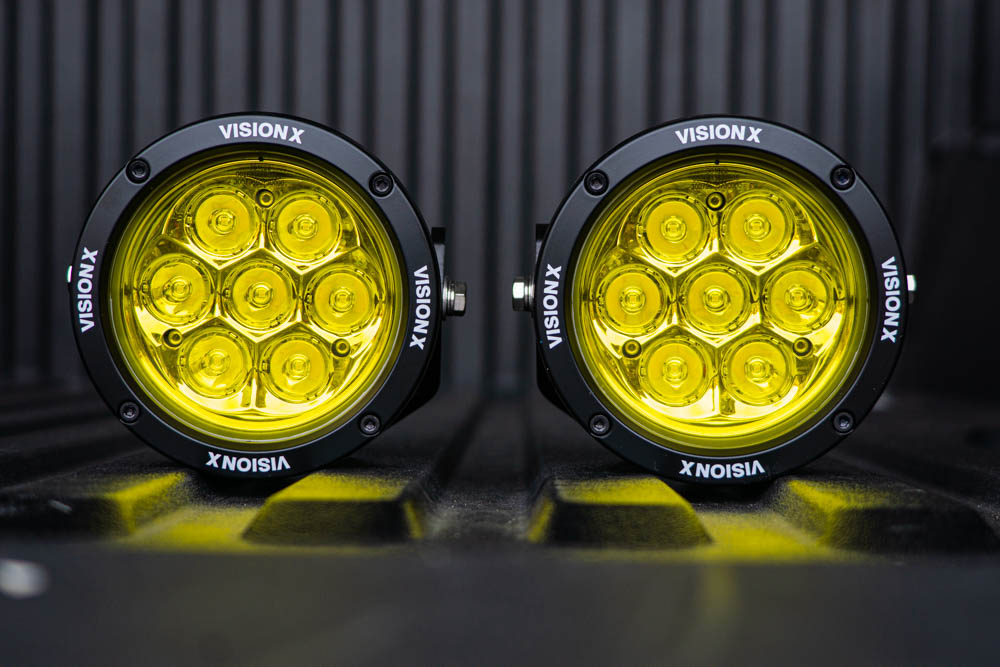
The unique part that Vision X has on all their products is the customization. The CG2 Cannons is one of those product lineups with loads of options to ultimately dial your lighting setup exactly how you always dreamed of. Their CG2 fleet comes in tons of different sizes ranging from 3″, 3.7″, 4.7″, 6.7″, and 8.7″ in diameter.
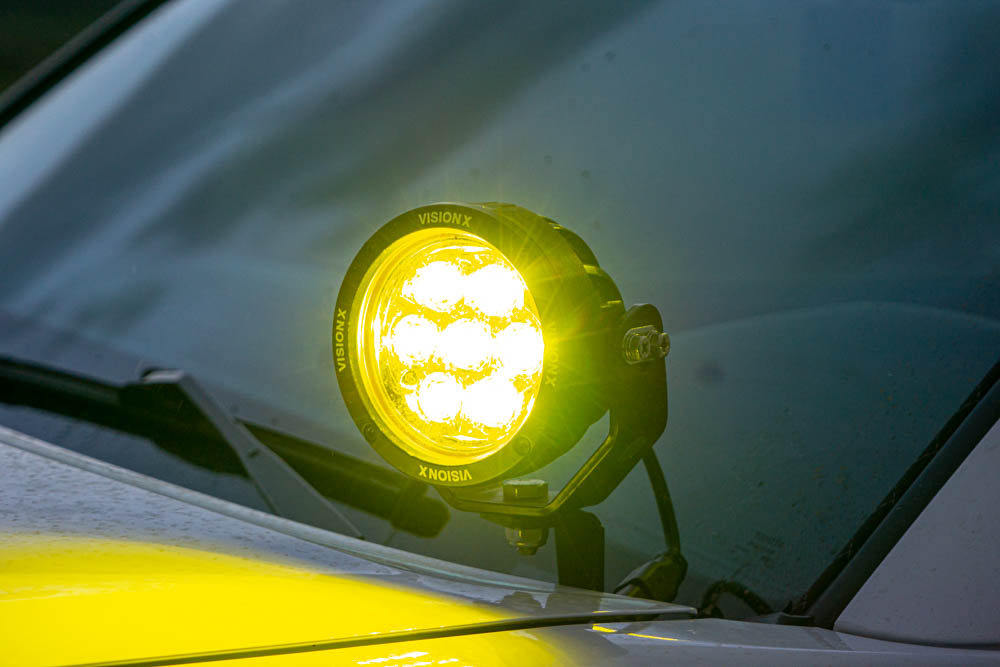
The range of sizes allows you to move them around your rig and place them where they’d be the most useful for your application. I also want to mention the selective yellow lens that they’ve recently come out with. The crisper, clearer and cleaner output from the selective yellow is here to rival the traditional amber we see on many off-road rigs today.

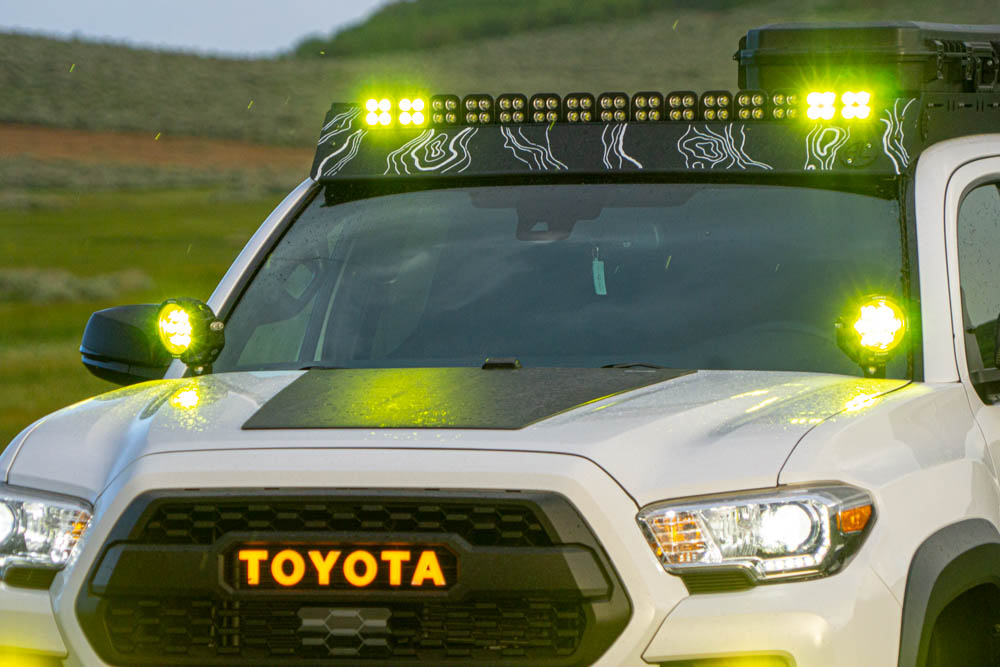
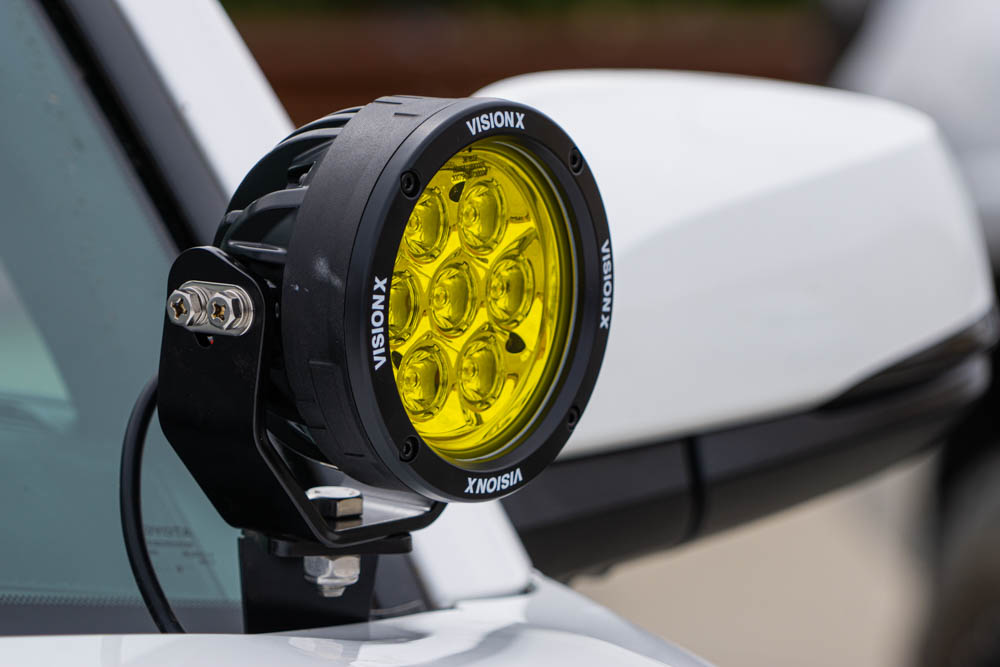
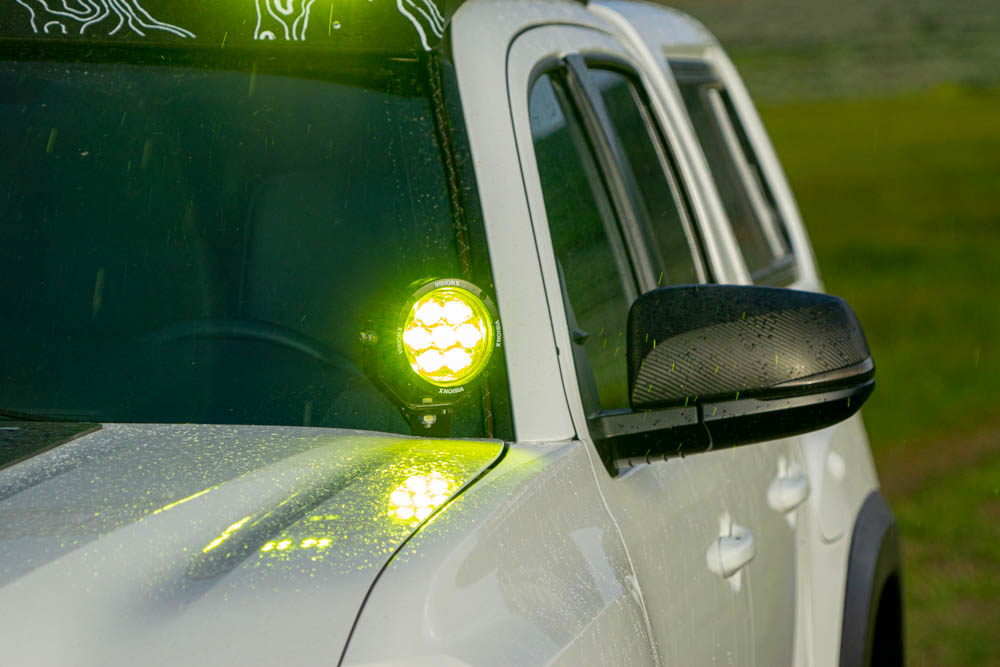
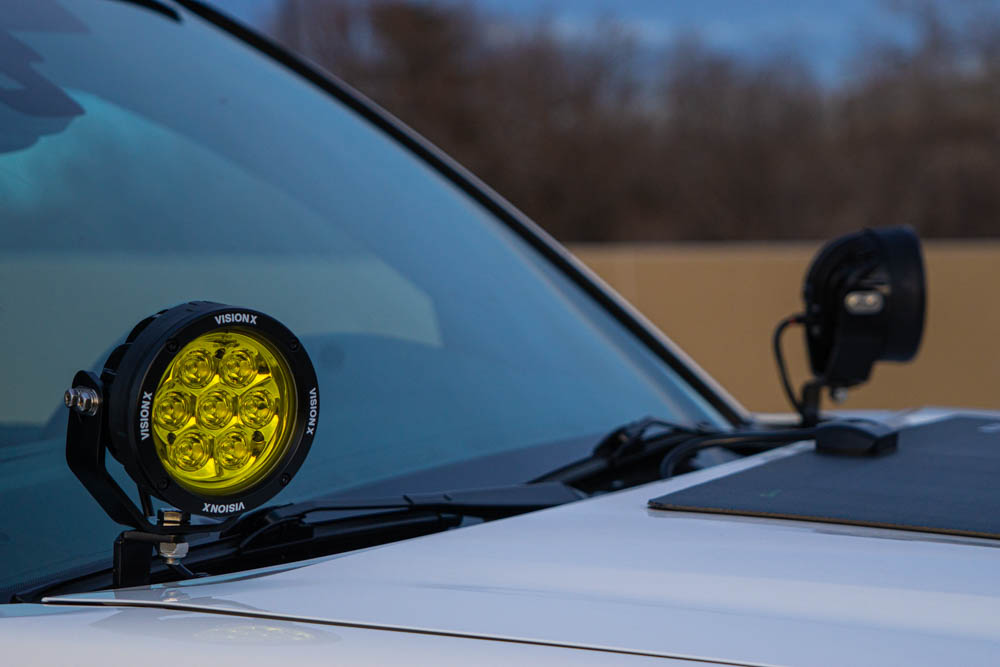
We will look at Vision X’s 3rd Gen Tacoma specific CG2 4.7″ ditch light kit. This kit is Tacoma-specific – an all-in-one package. These pods are big enough and plenty powerful enough to run them as either roof light or even on a bull bar, but I’ll be installing them as ditch lights.
Without further ado, let’s get started!
Find It Online
- Vision X 4.7″ CG2 Light Cannons: Check Price
Table Of Contents
Features & Specifications
General Specifications:
- Combined 10,500 Lumens of output
- Option for clear or amber (selective yellow) lens
- Spot pattern for the optimal spread and distance
- Included wiring harness
- Included ditch light brackets
- No-drill install!
Electrical & Output Specifications:
- Raw Lumens: 10,500lm
- Distance: 915 ft
- Input Voltage: 9-32V DC
- AMP Draw: 8.17A
- Watts: 98W
Unboxing
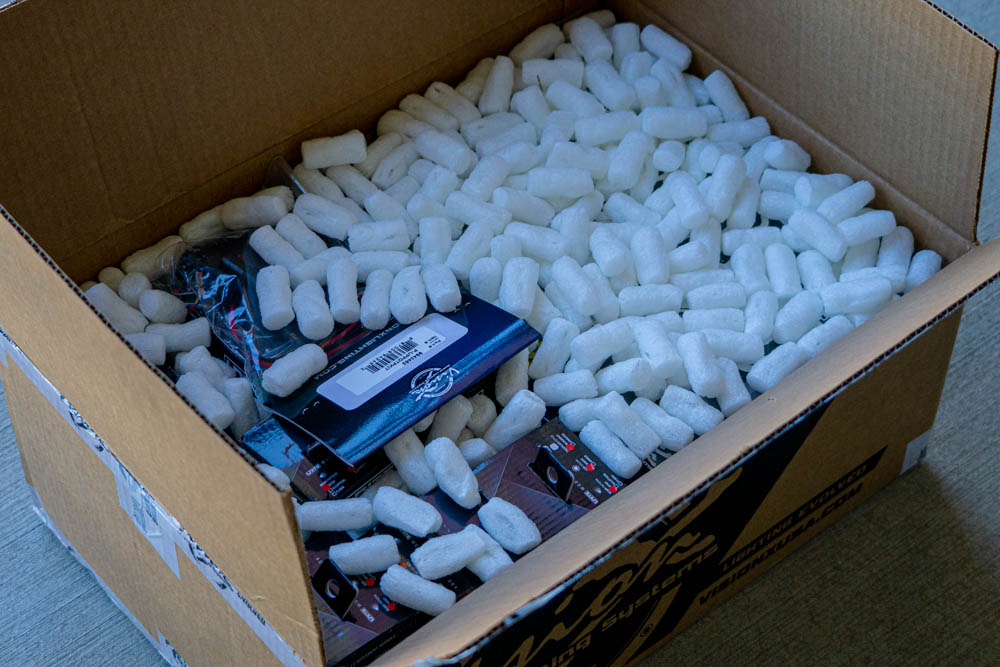
Vision X goes above and beyond to package your product correctly. Proper packaging is essential to ensure your product arrives damage free, and while it seems like an obvious thing to say, not all companies go to this length.
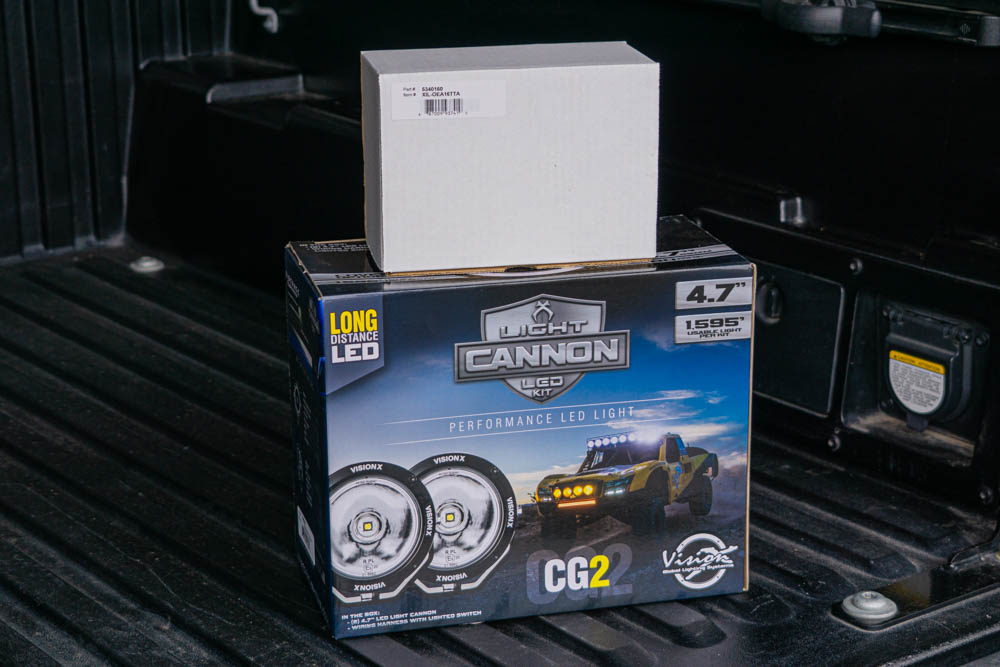
With this kit, you will have two boxes to include the lights and harness as well as the brackets.
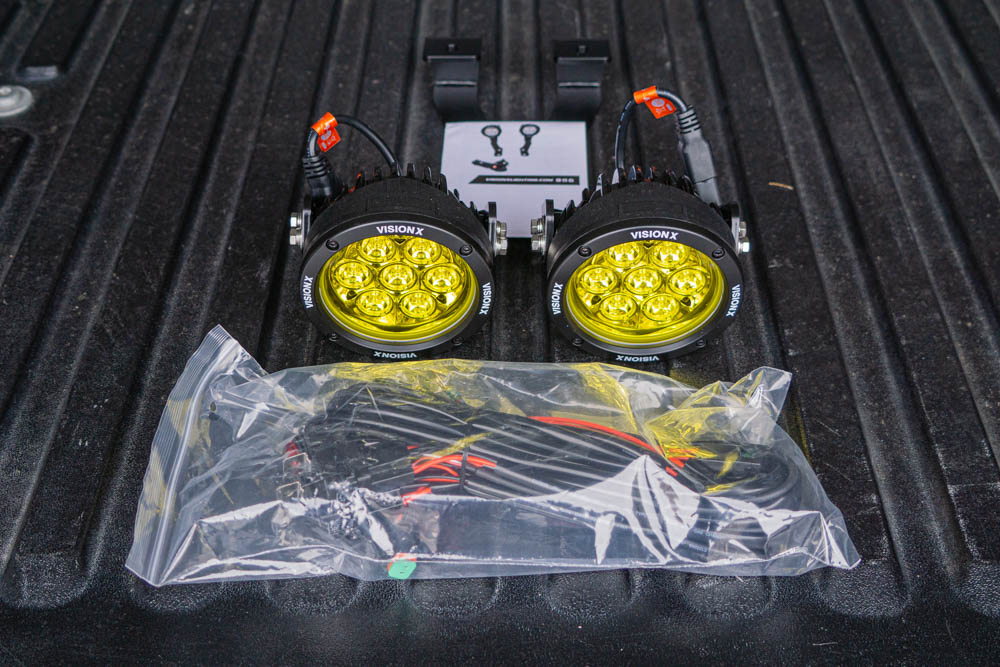
Package contents are seen above.
Before we move ahead, let’s take some time and admire these. While I knew they were 4.7″ in diameter, I didn’t expect them to be this large, and I have to mention that the build quality is top-notch. No cheap plastic components; all powder coated nicely, and the amber (selective yellow) lenses look great. I’m impressed, to say the least!
Installation
Let’s run through this install and get these ditch lights mounted up!
A quick note, Vision X provides a detailed full install on their YouTube channel. The video will be linked at the bottom of this post. Make sure you check it out.
Tools & Materials
- Assortment of sockets (10, 11, 12 mm)
- 11/16 box end (17 mm)
- Wrench (adjustable)
- Dikes (wire cutters)
- Phillips screwdriver
- Assortment of zip ties
- Wire strippers
- Solder shrinks or crimps
- Heat gun
- Assortment of heat shrink
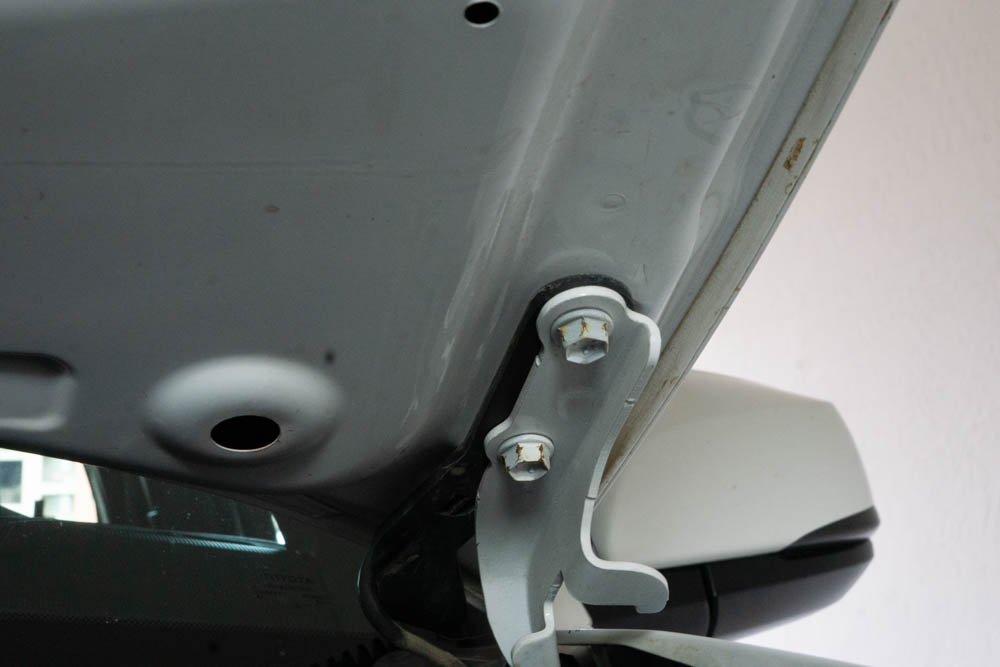
Step 1. Disconnect Hood Hinge
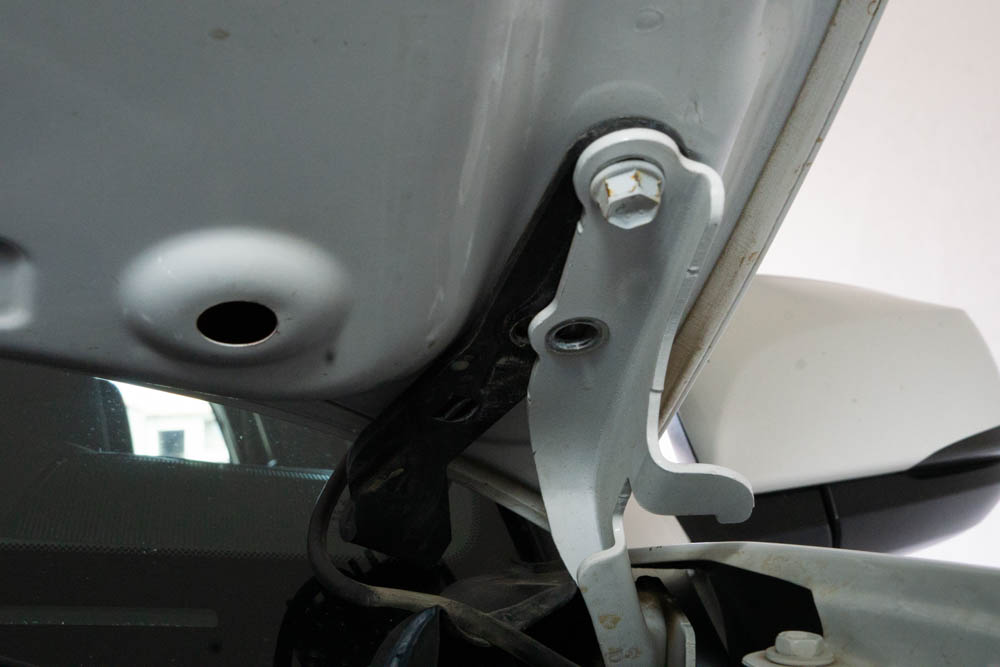
Open your hood and locate the two 12mm bolts that hold the hood to the hinges. Using a 12mm socket, loosen the two bolts but don’t take them out fully yet. This is where an extra set of hands can help as one person continues to loosen the bolts while the other holds the hood.
Note: Once you’ve removed the two bolts holding the hood, it’s free and will move. It can potentially damage the windshield or fall if not braced. Hold it steady and work fast to get the new bracket on!
I’ve found that removing the rear most bolt first helps and then the front one.
Step 2. Install Ditch Light Brackets

Provided brackets.
Installing the new ditch light bracket is pretty straightforward. Separate the hood from the hinge to slide the new bracket between them. Once the holes line up, hand thread the bolts.
Using the same 12mm that you did to remove the bolts, tighten the two bolts until they’re snug. Repeat on the other side.
Step 3. Mounting CG2s
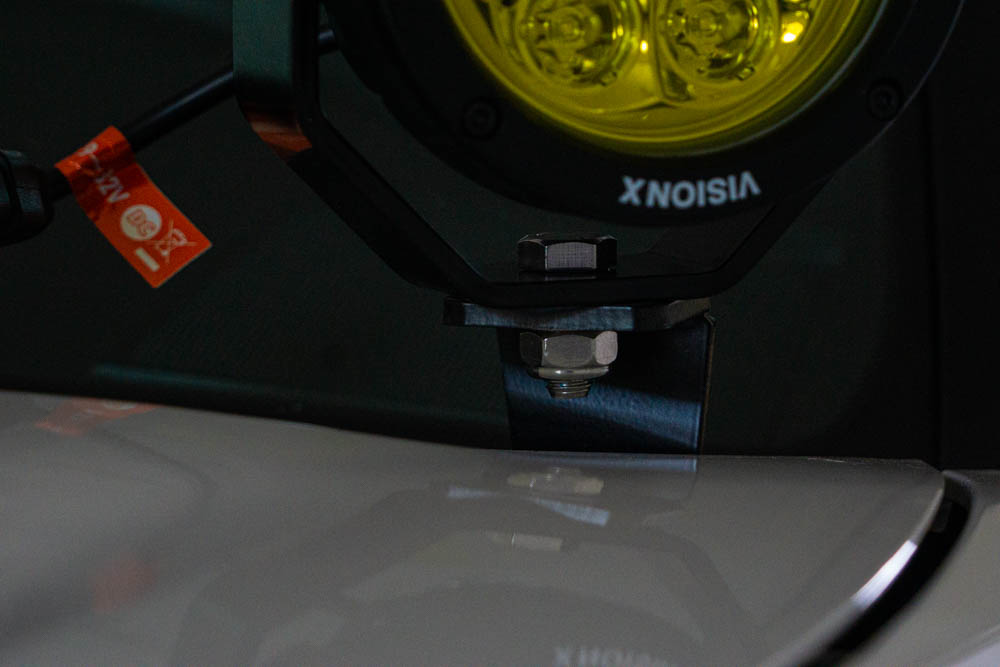
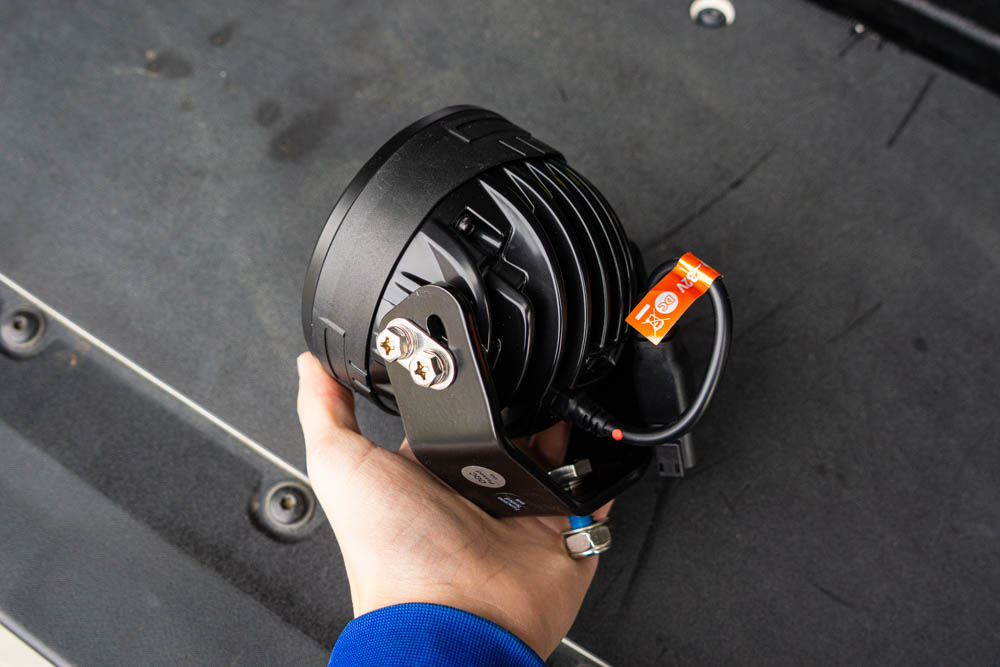
Grab the light cannon and provided nuts and bolt, and start mounting the light to the bracket.
Start tightening them down with a wrench on the top bolt and box end 11/16″ or 17mm on the nut. I like to place a towel on the hood below the bracket if you slip and drop the wrench to ensure you don’t scratch your hood. I chose to leave the bolt loose enough to be able to swivel them after applying some force to rotate the lights.
Repeat this step on the other side.
Step 4. Configuring Wiring Harness
Now comes to the fun part, the wiring.
While I may not be an expert, this setup gets the job done. I’ll modify the provided harness to work with my Aux Beam switch panel. There are additional ways to install and wire these lights. Make sure whichever option you choose, you do your research and make sure you are installing these safely.
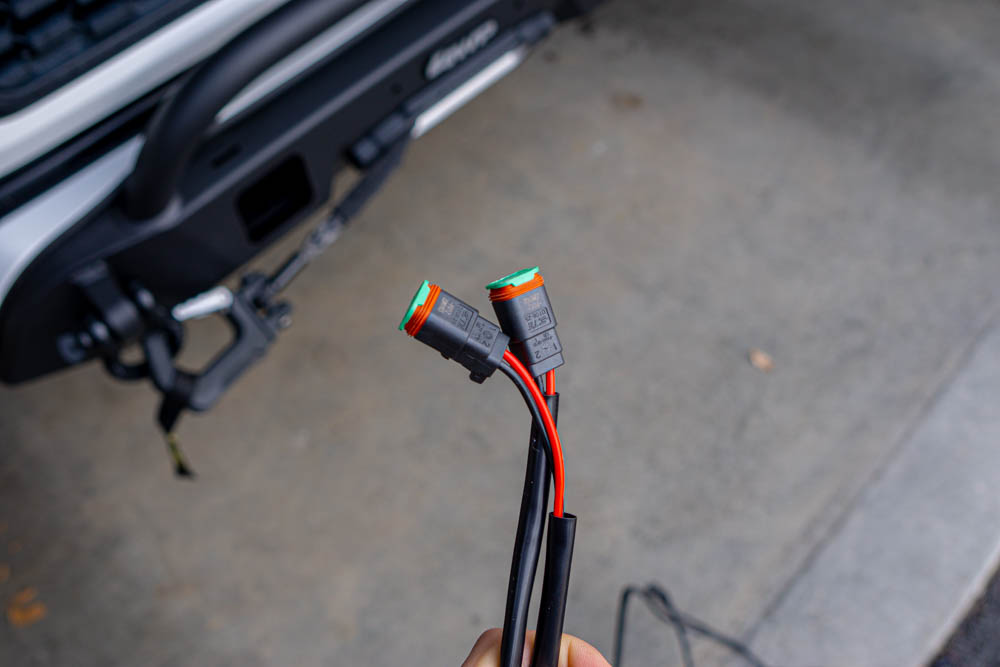
The harness provided by the Vision X kit comes with everything you need. However, I just needed the end of the harness that plugs into the lights and the attached wires for my installation, so I cut the rest off. I then went ahead and laid out the provided harness. This was so I could cut the wires to length for my application.
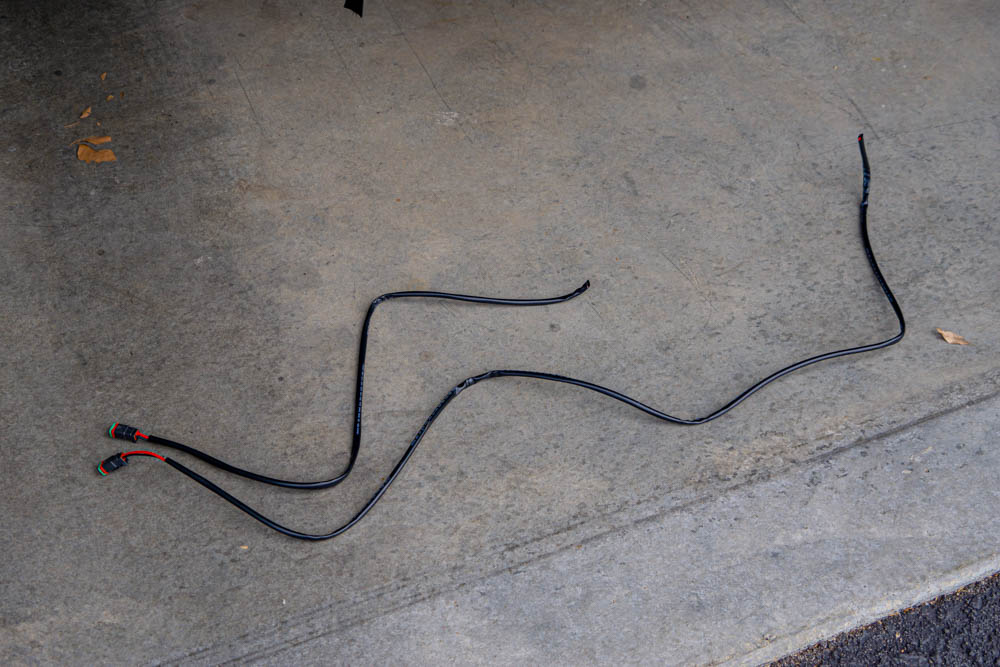
I ran the wires to each of the lights and then cut them down to size, so I didn’t have a ton of excess wires left. In the next section, I cleaned up the harness I modified.
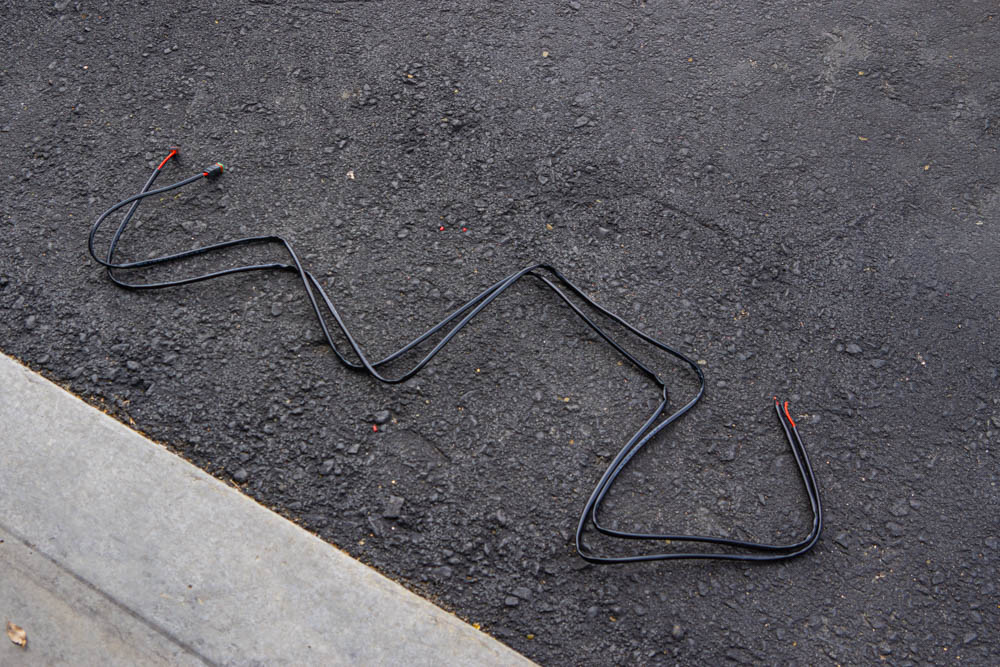
Step 5. Cleaning Up Wiring Harness
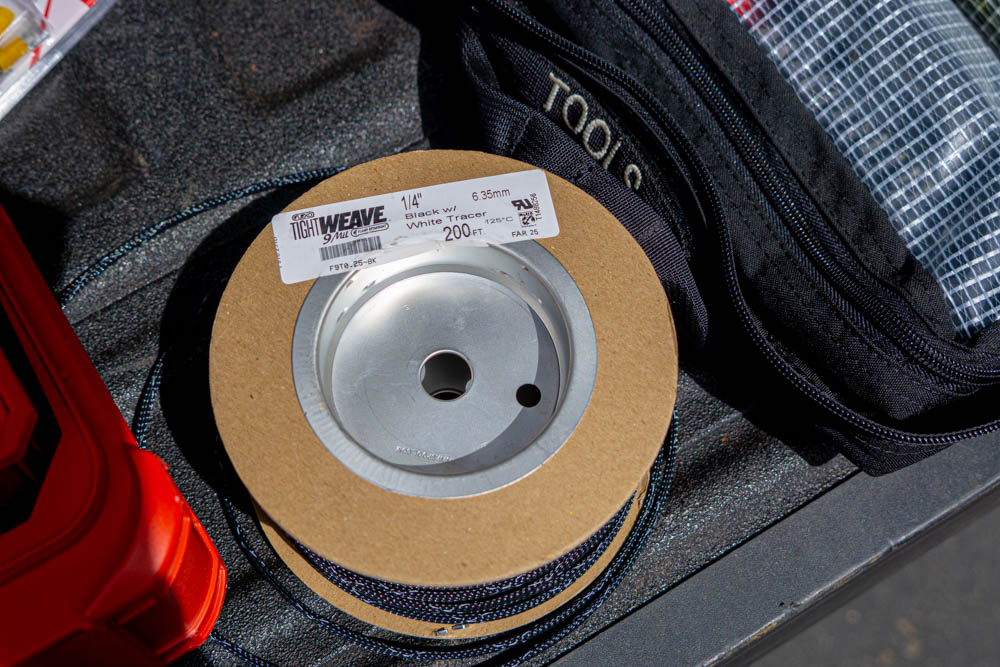
While the stock heat shrink works excellent, we decided to go with something stealthy and familiar called tight weave. It works super well for applications like this as it’s fire-resistant, pliable, and looks good! 1/4″ works well for the gauge of wire and provides a snug fit.
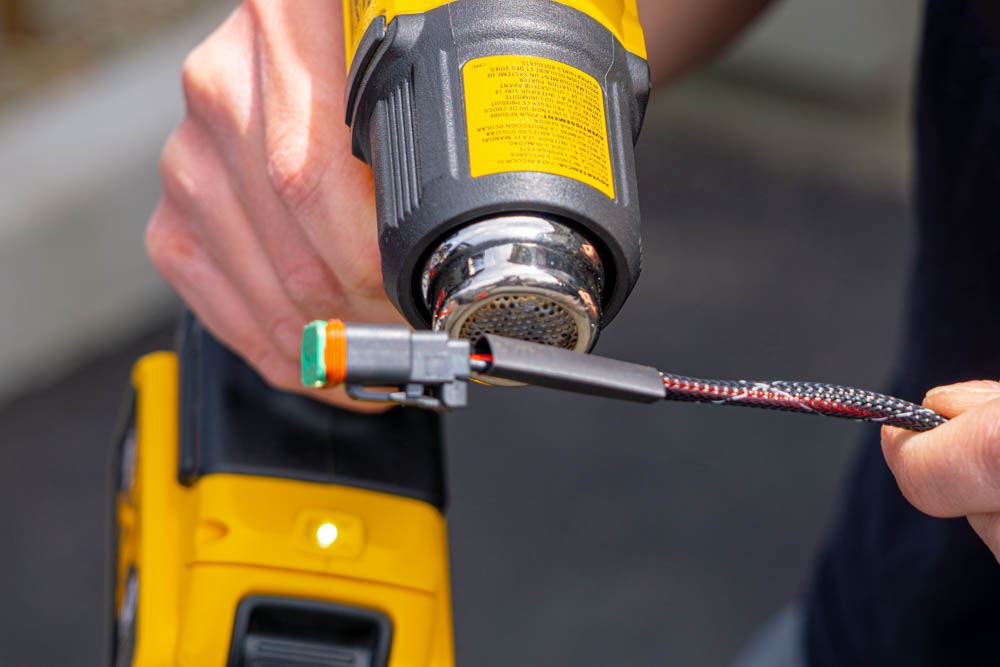
I started by trimming some tight weave to length for the harness we’re working with. Then I used heat shrink on the ends to prevent fraying.
Step 6. Connecting Harnesses Into One
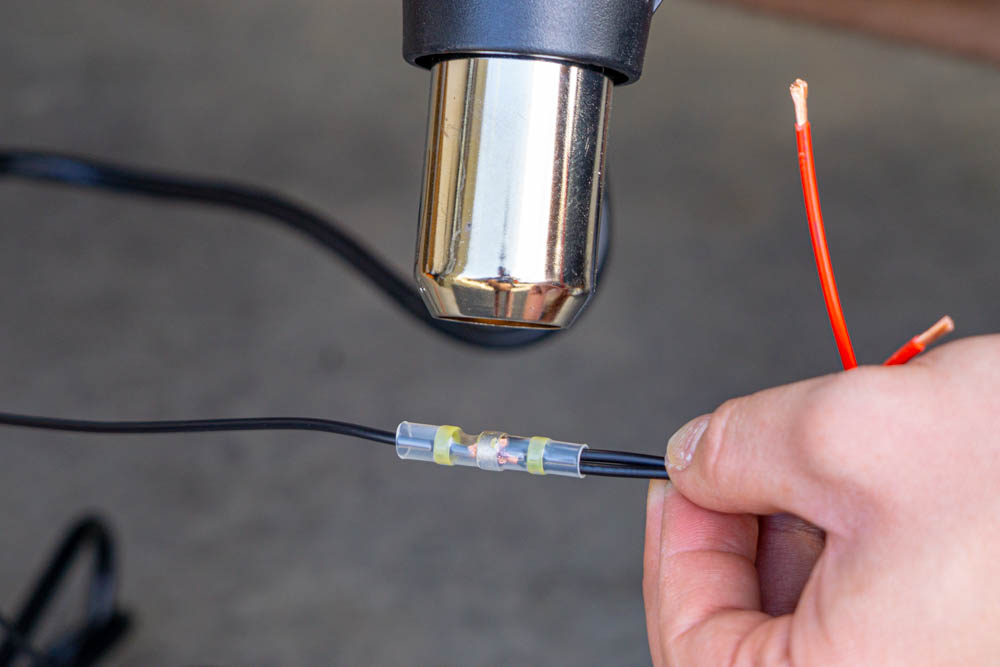
Starting with the black or negative cable, there will be a total of 3 wires joining together in the solder shrink holder. Two from the lights and the single black wire that will be connected to my switch panel. I used these solder heat shrinks for this step. The cool part about these is that the solder helps hold the wires in place and make a strong connection. All while being heat shrunk into place as well.
Step 7. More Harness Clean Up
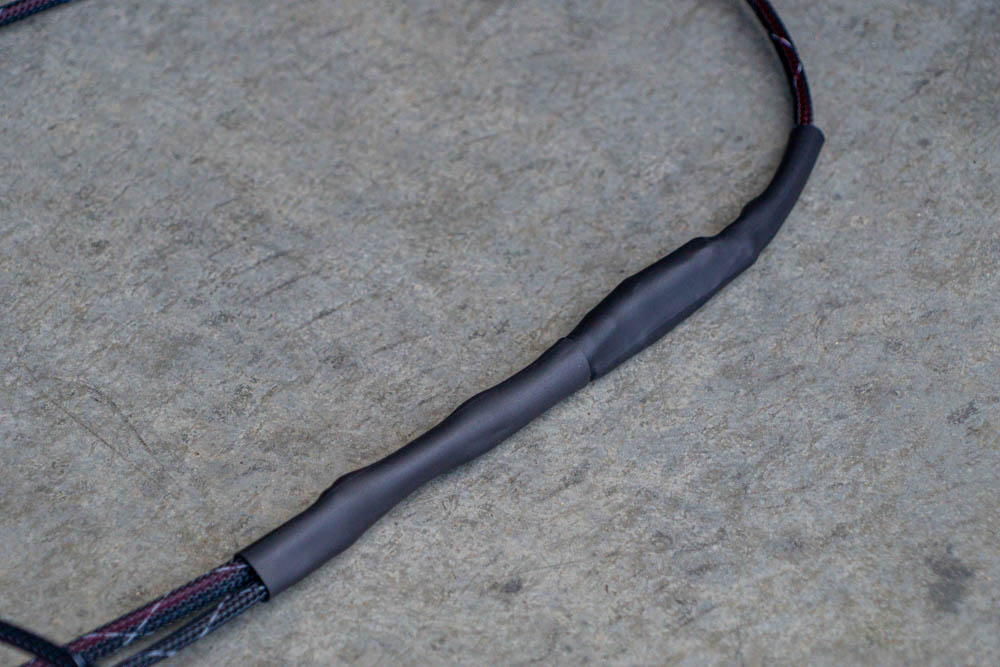
To add more peace of mind and security that the connections won’t come loose, I slid heat shrink over the soldered connection and the frayed ends of the tight weave to bond it all together. Not only does it properly secure everything, but it also looks professional in your engine bay. Once again, repeat with the red/positive wires.
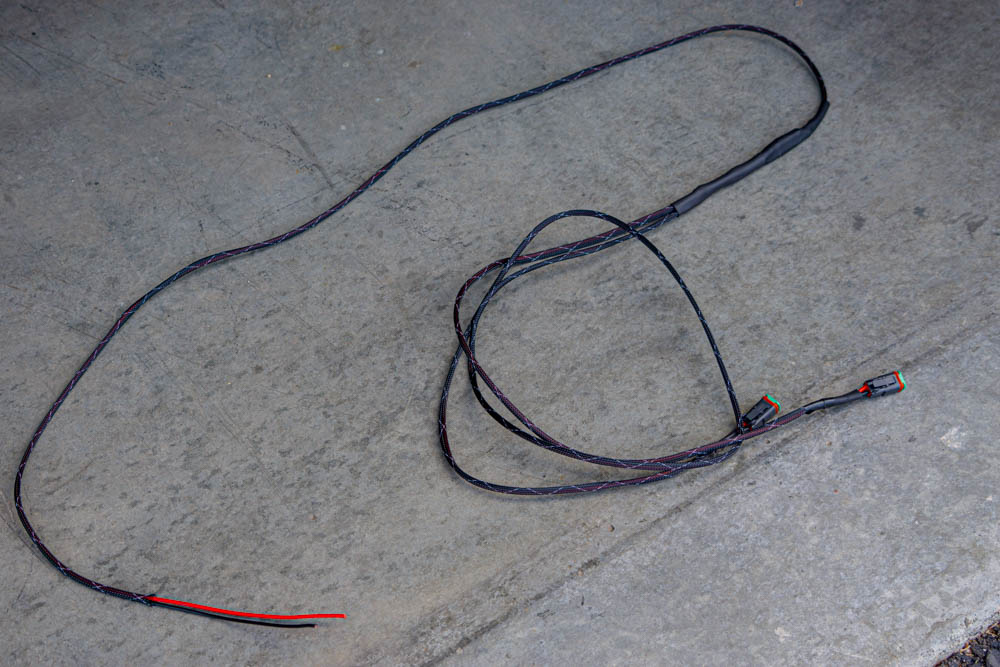
The completed harness is shown above.
Wiring Harness Diagram
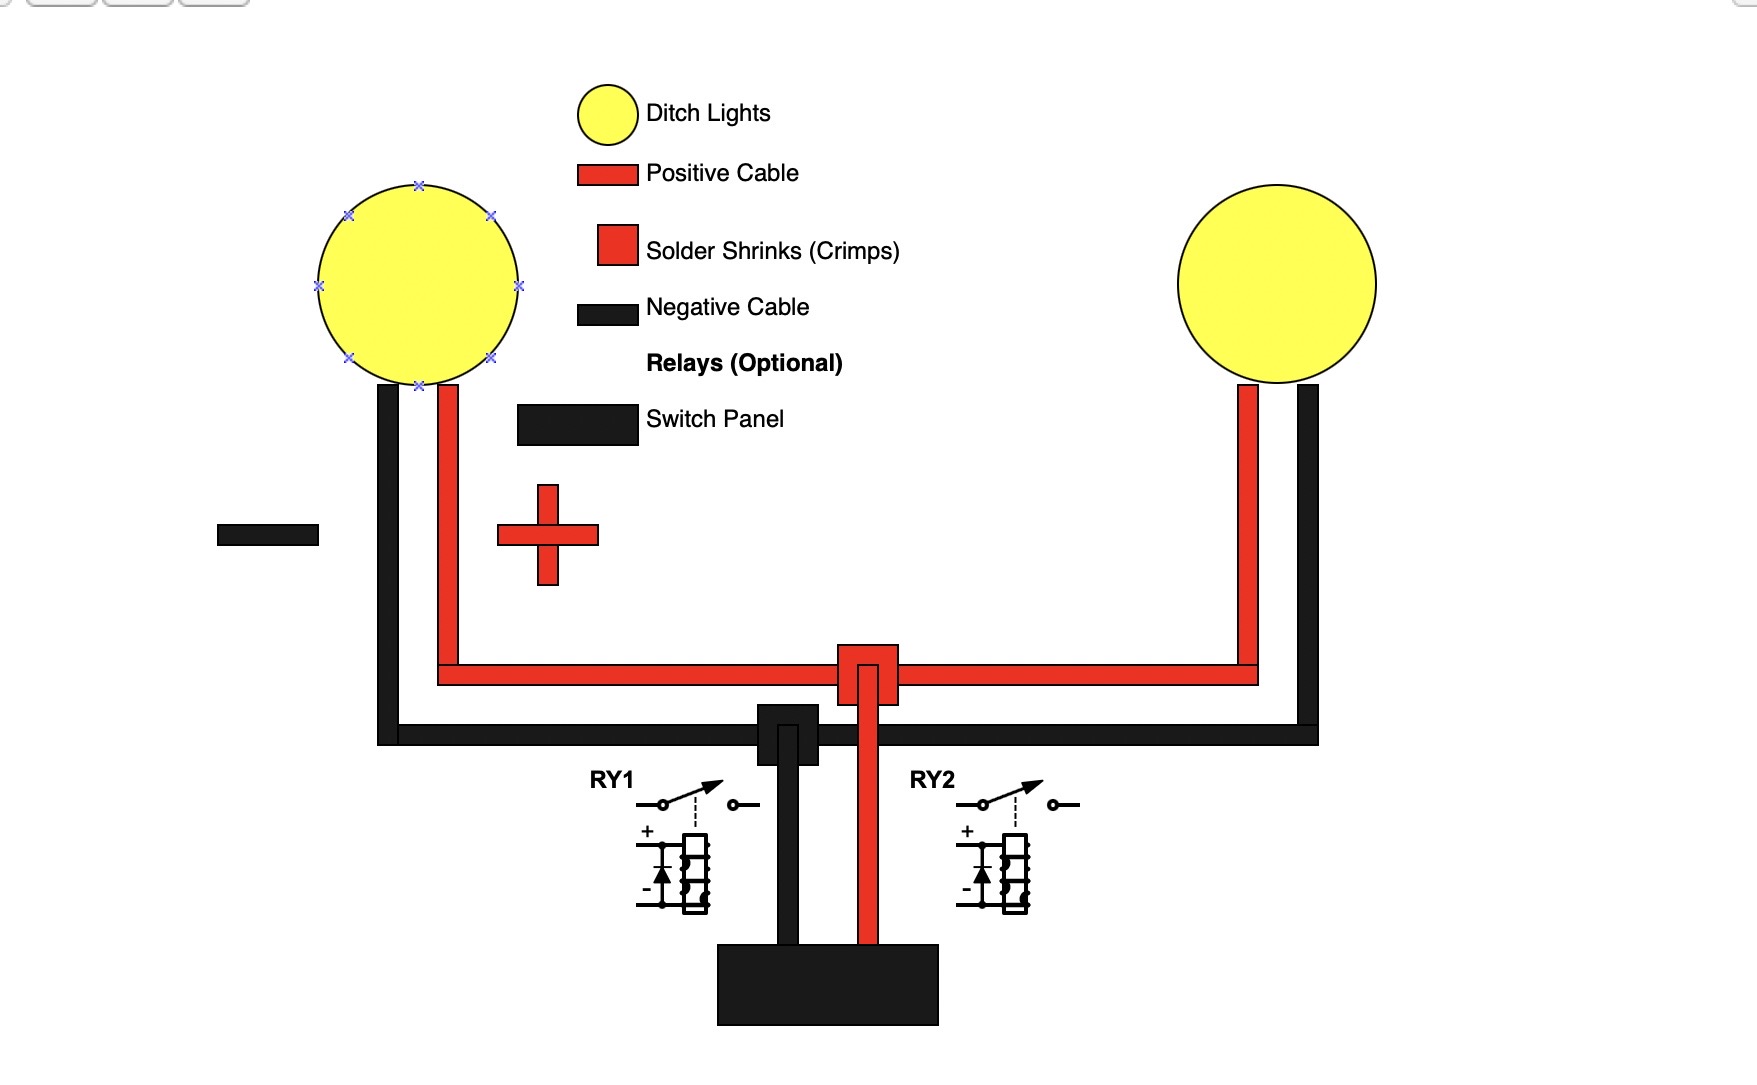
As previously mentioned, there are many ways to wire up these lights, depending on your situation. Since I was wiring to a switch panel, I decided to keep it as simple as possible. The diagram above gives the rough layout of how I went about wiring up my switch panel. Each ditch light will have a negative and positive cable which will feed to a single connection, four leads down to two. You can add a relay between your switch panel and the two leads to step down the amperage draw if your module has a max rating and/or you are running other lights.
Step 8. Connect Harness To Ditch Lights

Connect the lights. I made sure to route the harnesses as tightly and cleanly as possible. I went down the hood supports and under the weather guard as well.
Step 9. Insert Leads Into Switch Panel
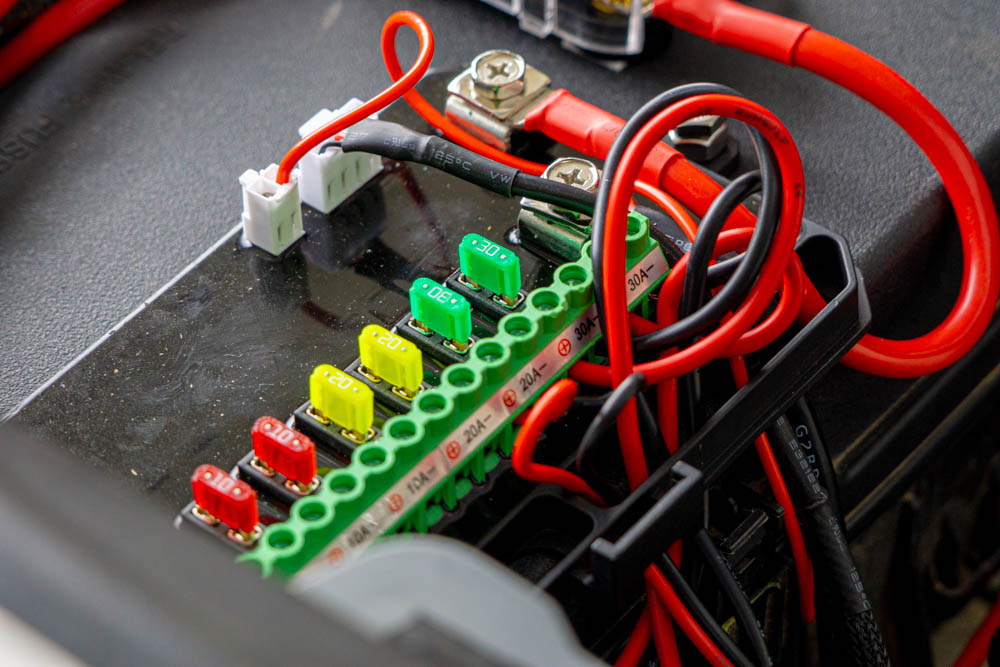
The Aux Beam switch panel has 30, 20, 15, and 10 amp fuses. The amperage of the ditch lights is perfect for the 20 amp fuse. It works well if you’re not using the relay like my setup.
Expose the ends of the harness using wire strippers. I only needed enough to hold the wire in its associated slot on the panel. If you have excess harness left over at this point, trimming the ends down can make your wiring even cleaner.
That’s it! All finished. Now let’s test these lights out.
Output Shots
Let’s compare a few output shots for these lights below.
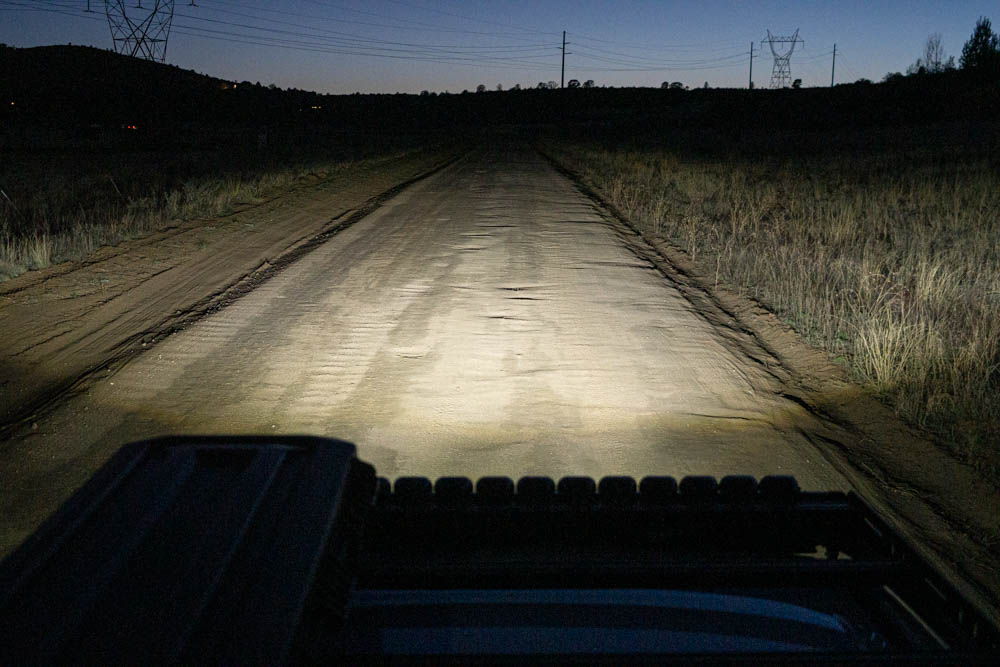
Low Beams VLED
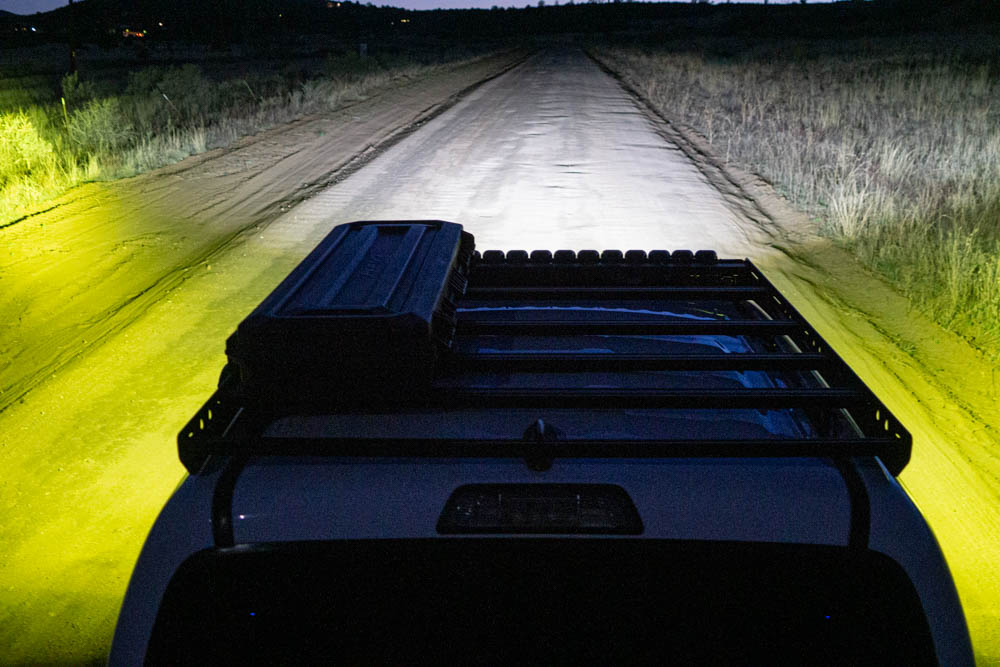
Low Beams + Vision X CG2 4.7″ Cannons
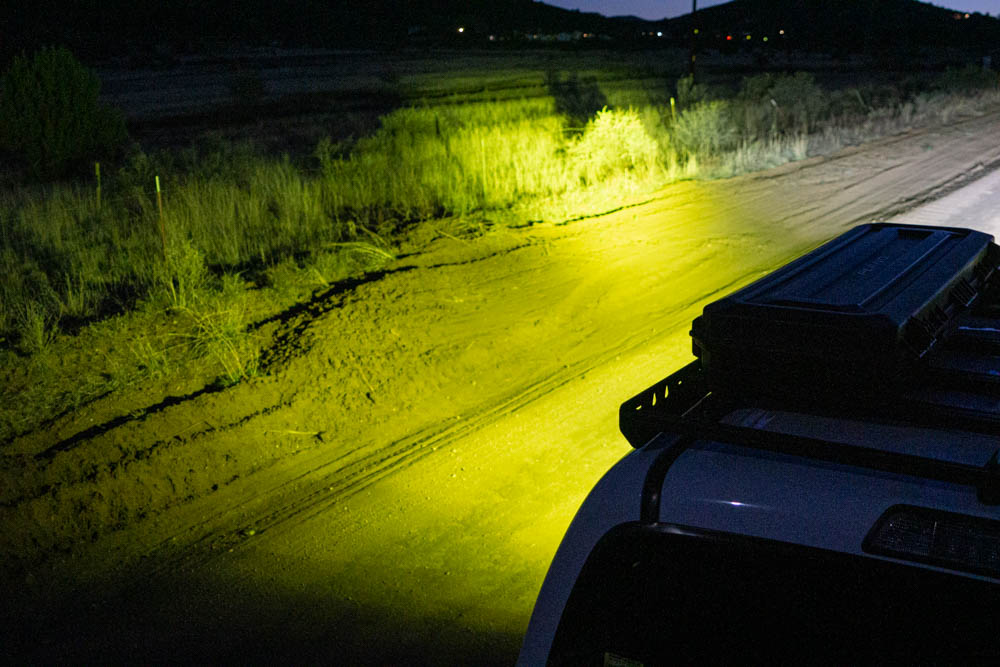
Vision X CG2 4.7″ Cannon (Side/Ditch View)
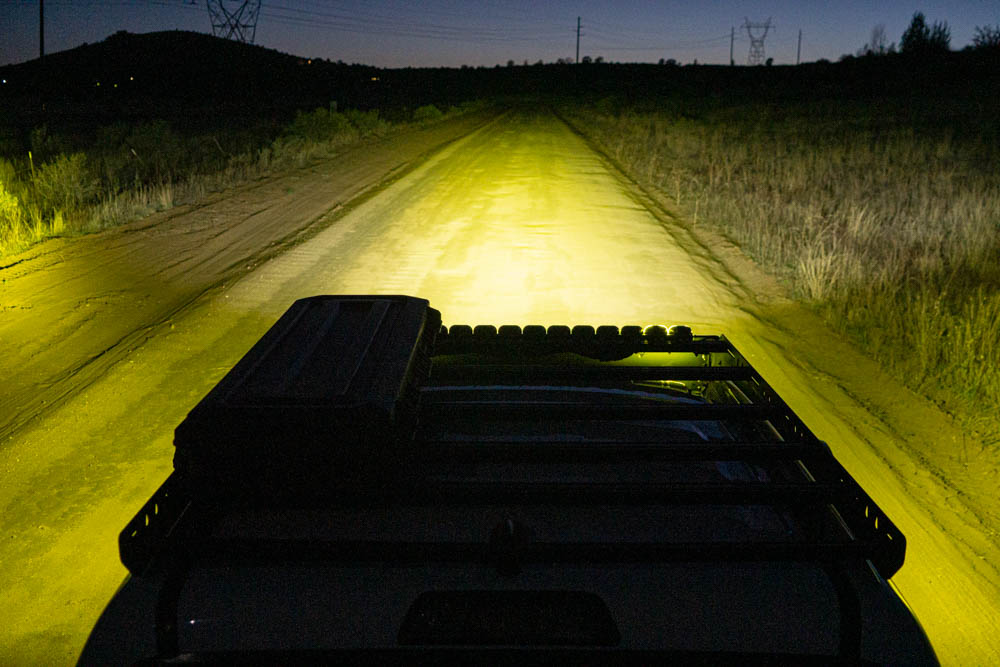
Low Beam + CG2 4.7″ Cannons + Vision X Unite Bar
Review
Ditch lights are one of the most common auxiliary lighting mods. With plenty of options on the market, from cheap to expensive, there are tons of different options to suit the need of the consumer. As near as I can tell, the CG2 kit provided by Vision X has been one of the most impressive, complete kits on the market.
While a bit more expensive than some options, the light output is epic, and the build quality of these lights is exquisite. The powder coat looks solid and should prevent degrading and fading over time. The output of these lights is unbelievable; a total of 10,500 lumens is bonkers compared to most ditch lights which are usually around the 1,500-5,000 lumen mark. Finally is the selective yellow lens color; while I had my fair share of skepticism, it’s all gone away after having my hands on them and seeing them perform. The shade of amber they provide is clearer, crisper, and brighter than the previous amber I’ve used before… they also look badass.
After running the lights for about two months, I’ve started to fall in love with them and the Vision X product line. I’m also running a Unite bar; post coming soon. I’ve put these lights through all sorts of inclement weather and conditions. So far, they have held up great. Whenever I go out and explore at night or early AM, I always turn my auxiliary lights on for safety and visibility. I’ve been beyond happy and satisfied with the results and performance of these lights.
Final Thoughts
The CG2 ditch lights are BRIGHT.
Ditch lights were something that I always looked over and took for granted. After having these in hand, I’ve realized how important and valuable they are. Lighting up the side of the trail is important if you’re out looking for a campsite late or night or just curious about what the heck is out there! While having loads of forward lighting is functional, having around (or over) 180 degrees of light is super helpful when exploring at night.
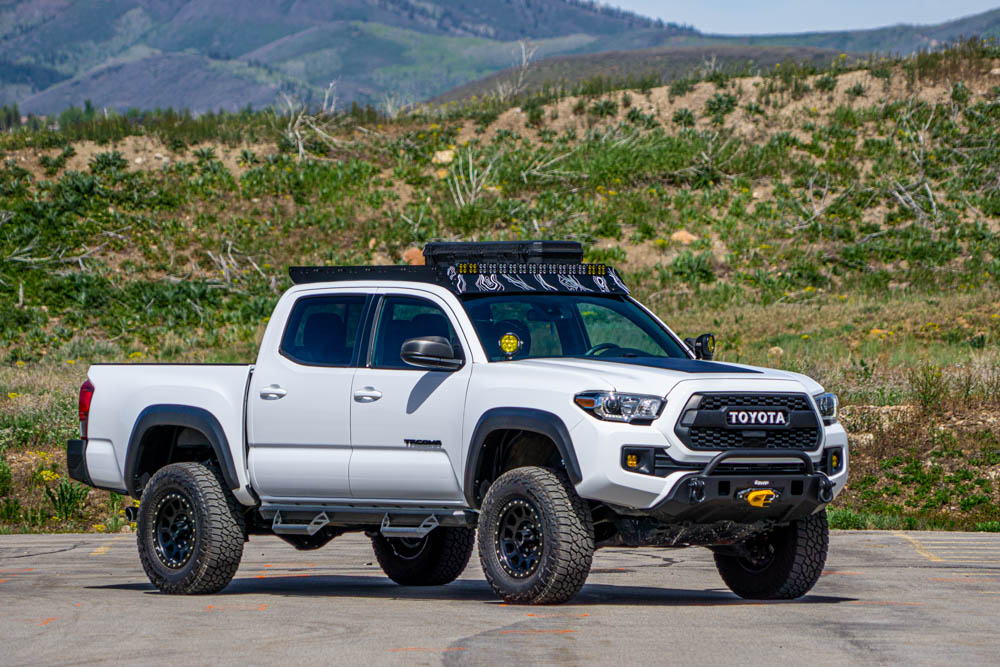
All in all, these ditch lights are sweet. Since this is the second product I have from Vision X, it has sealed the deal with the products and company they are/offer. From customer service to packaging and the product itself has made me realize that Vision X does not mess around and is here to stay to make other prominent names in the lighting industry have a run for their money. I look forward to getting more night wheeling under my belt as an excuse to fire up these ditch lights and get some exploring done!
Thanks for reading, Happy Trails!