
—
*** This product is currently not for sale due to patent claims. Links have been removed. ***
—
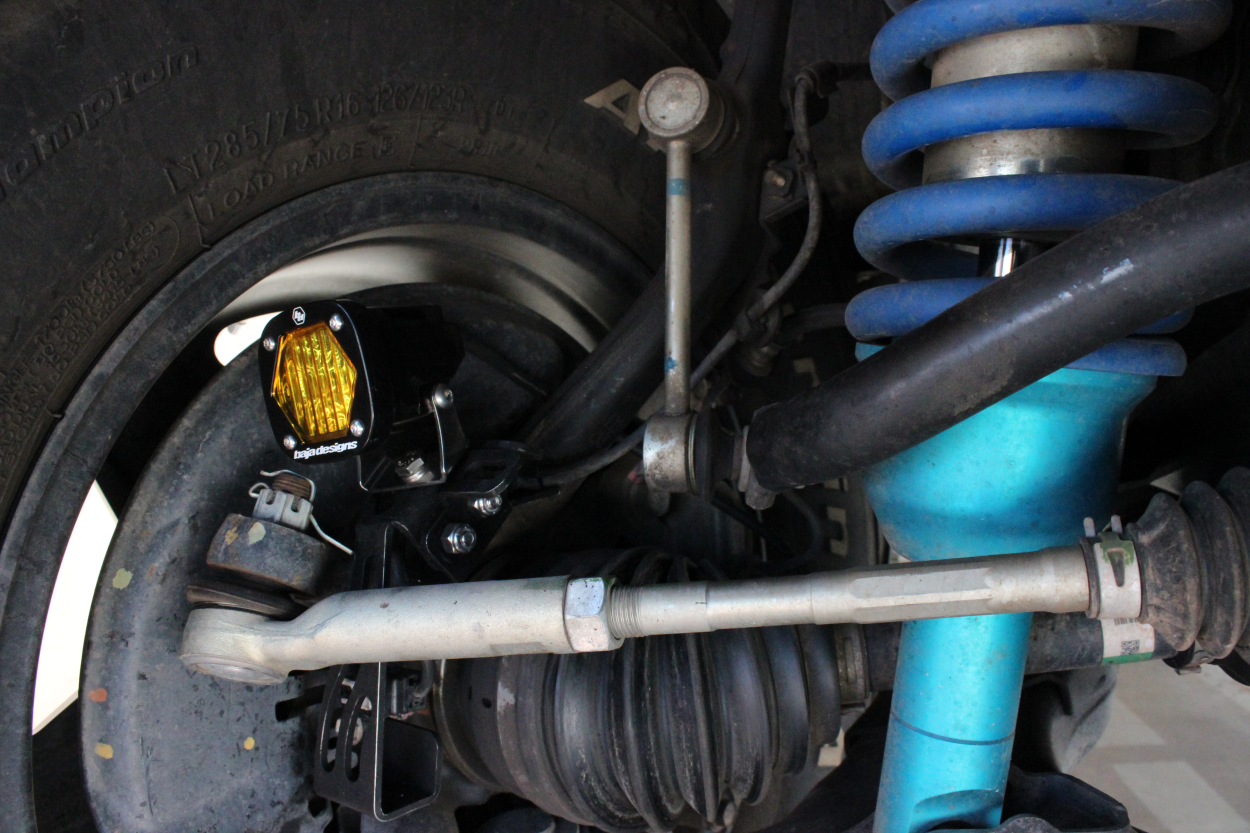
Modifications that provide multiple levels of functionality reign at the top of my list for best Tacoma mods. This spindle-mounted accessory bracket does just that through creative engineering and a thoughtful approach to solving a traditional off-roading problem.
Technically labeled the “ABS Sensor Guard & Accessory Mount” from Tacoma Force, the product is also well known for being a spindle-mounted light pod bracket that emmulates new technology found in adaptive headlights that directs light output based on steering position.
The product serves two functions:
- Protects sensitive components by providing a bracket that encloses the ABS sensor.
- Adds functionality for mounting accessories; Light Pods, GoPro, Etc.
These mounts also fit on many other models of Lexus and Toyota vehicles. Check the link below for additional fitments.
Tools and Materials
- 3/16 Hex Wrench
- Two 7/16 Wrenches
- Small Flathead Screw Driver
- 10mm Socket
- 12mm Socket
- Socket Wrench
- Zip Ties
Table Of Contents
Step 1. Paint The Brackets

The first step involves simply painting your brackets. Since they come as raw steel or aluminum, you can give the brackets a color of your choice. In this case, I just used a simple undercarriage black paint. If you opted for steel brackets, painting them is a must to avoid rust.
Step 2. Loosely Assemble Brackets

Once the paint has dried thoroughly, you will want to assemble each bracket. The assembly is specific to the driver and passenger side of the vehicle, so pay extra attention when putting the larger and smaller pieces of the bracket together. The last important note is to only loosely install the brackets as shown, for now. You will want to allow the assembly to have some play when installing them on your Tacoma.
Step 3. Mount Accessory

If you have an accessory that you plan to install on the bracket, now is the time to figure out how and where you would like to mount it.
IMPORTANT NOTE: If you are installing an accessory and have a sway bar installed, you will need to mount the accessory to the bracket’s outer side (the side closest to the tire) to provide the proper amount of clearance when turning your tires.
This brings up another important note regarding the dimensions of the accessory you plan to install. In this instance, we are installing some amber Baja Designs S1s, which are a perfect fit for this application. Another suggested accessory is the Diode Dynamics SSC1s, which offer a similar fitment profile.
In summary, you want to choose an accessory that allows full turning of the tires and suspension travel without contacting any of the vehicle components.
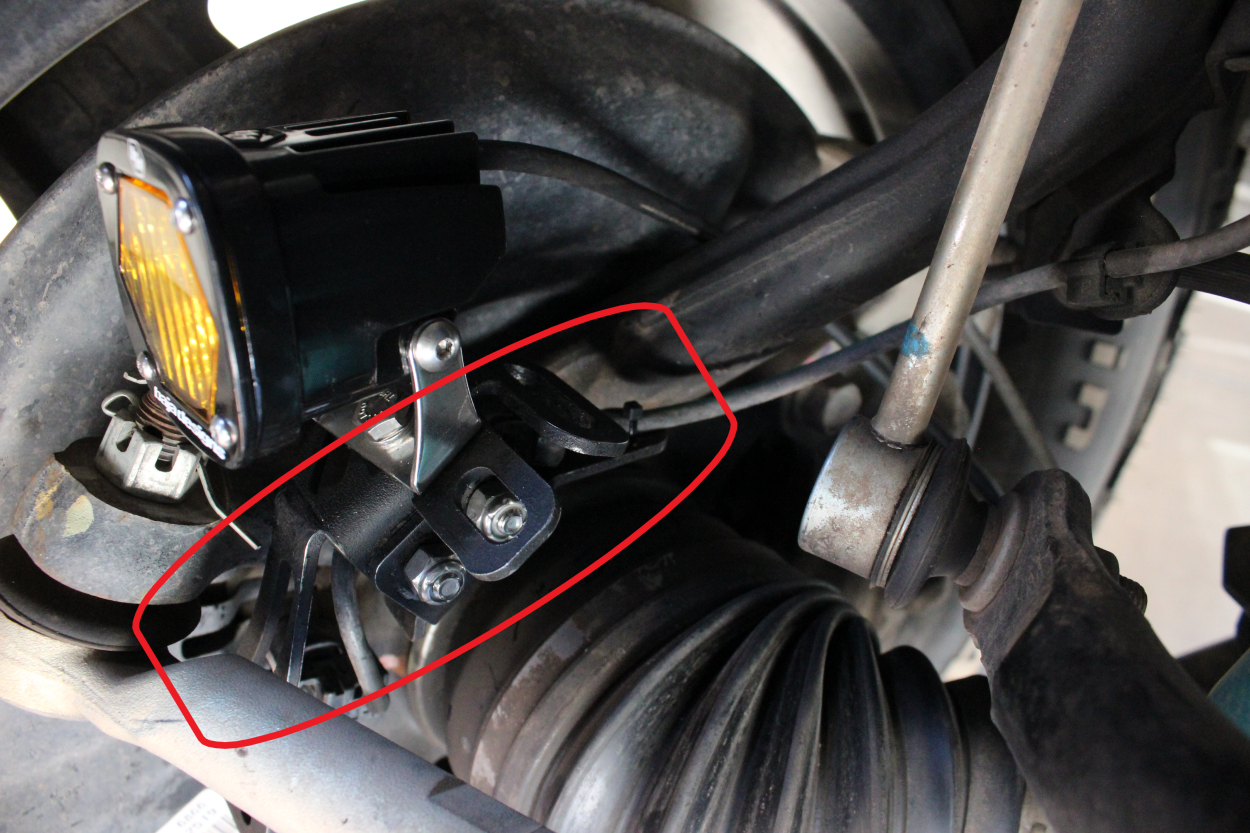
Once you have an accessory chosen, install it on the brackets with the notes mentioned above in mind. Install them as close to the tire as possible and position them accordingly in this step. I recommend tightening them to their final spec as the working space available is very limited once the bracket is installed onto the truck. If you are running lights, I also recommend positioning them accordingly, slightly tilted down and inward if applicable. An example is shown below for reference.
Throughout the bracket installation, you can always install and remove it iteratively for a perfect mount; this is what I ended up doing.
Step 4. OEM Bracket

Next, you can take your 12mm socket wrench and remove the bolt connecting the ABS bracket. This one bolt is all that is needed to remove the stock ABS bracket. Go ahead and remove the bracket altogether.
Step 5. ABS Line

Now remove the ABS line from the bracket. As shown, you will want to use your flathead screwdriver to remove the ABS line. You can either remove the plastic clip entirely or leave it attached.
Step 6. Sensor Bolt
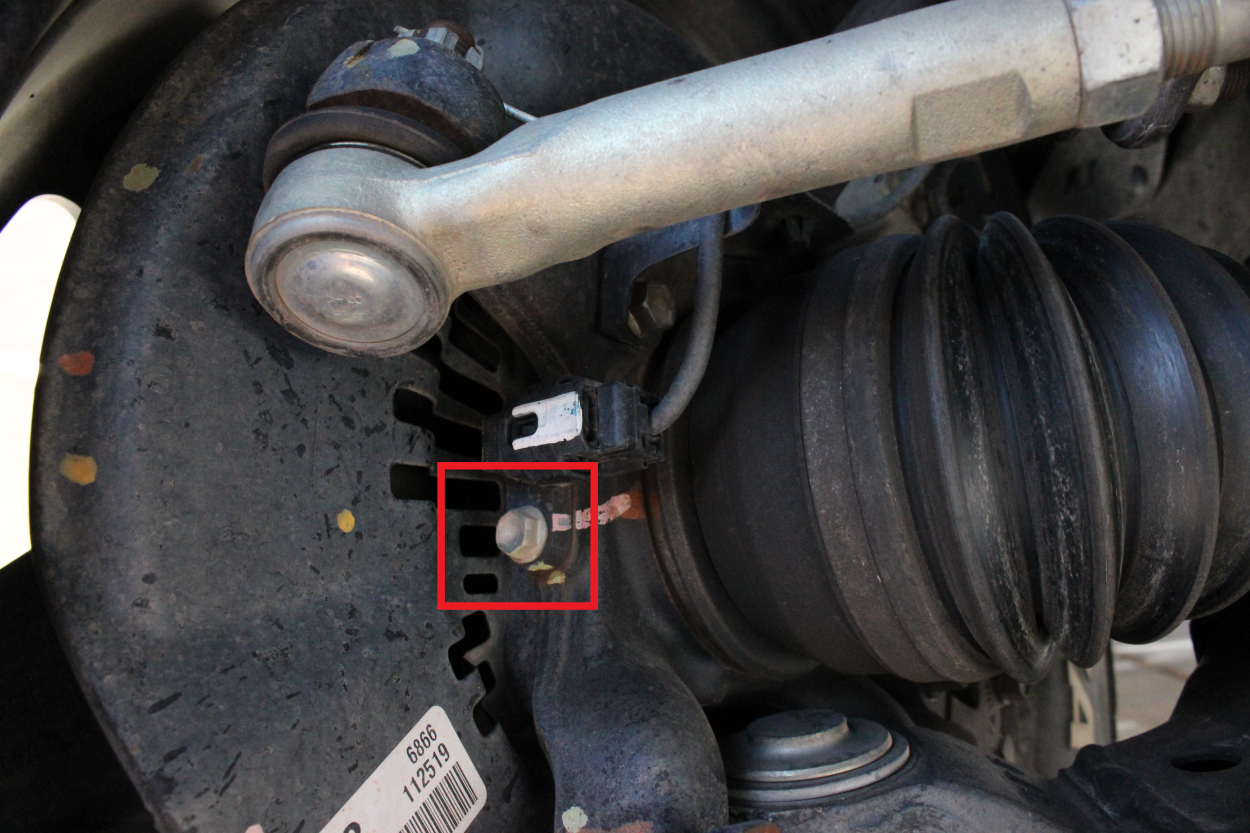
The ABS sensor bolt is 10mm, so you can take your 10mm socket and remove the bolt. Once the bolt is removed, you can keep the ABS sensor itself in its original position as the new bracket will be installed over the ABS sensor. As shown, you will also need to disconnect the ABS sensor from the ABS line.

I recommend using your flathead to disconnect the clip that connects the ABS sensor and the line.
Step 7. Mount New Bracket

Now that the bolts have been removed, go ahead and line up the new bracket with the ABS sensor bolt location and install the ABS sensor bolt.
Note: The bracket should rest on top of the ABS sensor itself.
Step 8. Align Top

The ABS Bracket needs to connect in two places, at the ABS sensor (mentioned in the previous step) and where the pre-existing ABS bracket was. Move the new bracket to where the 12mm bolt goes and loosely reinstall the 12mm bolt.
Tighten both bolts accordingly.
Now that both (10mm and 12mm) supporting bolts have been installed, you can tighten down the 10mm and 12mm bolts, respectively.
Step 9. Route ABS Line
You will then want to route the disconnected ABS line through the bracket and plug it back into the ABS sensor.

Ensure that the ABS line is between the bracket itself and the wheel and does not exist anywhere outside the bracket to avoid contact.
Step 10. Zip Tie the ABS Line

Now that the bracket and ABS line are in place, you can take a zip tie and secure the ABS line to the bracket.
Step 11. Torque Everything Down

Using the hex wrench and 7/16 wrench, tighten the bolts connecting the two bracket pieces together. The working space is tight, so take your time and tighten them incrementally if needed.
Optional Step: Connect Chosen Accessory
The final step simply involves connecting your chosen accessory (if applicable). If you selected a light configuration as mentioned above, route the light wires into the engine bay, zip tie them into place, and connect appropriately to your power source. Then route the switch through the firewall and into the cabin to the desired location.
Light Output – Angled Side Shot

Light Output – Above The Hood

Light Output – Front Of Truck

Final Thoughts

This is one of my favorite mods to date for various reasons. The ABS sensor is a sensitive component; if you enjoy any level of off-roading, protecting it is a must. Given that these new brackets provide an inherit-level of protection to the sensors, it is a mod that makes a ton of sense for Tacoma owners.
The variety of accessory options that can be mounted is just another benefit to these ABS Guards, making them a worthwhile mod. From providing additional lighting in the form of rock or spotlights, installing a front-facing camera to assist in crawling, or even using them to mount a GoPro for that neat angle in your videos, there are ample options that can be leveraged to suit your needs.
I need this bad!!! How do I get my hands on a kit
Will your “SPINDLE LIGHT POD BRACKET” ever be for sale again??