
The first time you take your Tacoma out on the trails and get to climbing, you quickly realize how your factory exhaust limits your departure angle. To remedy this, some people just cut off the back section. For those of us who don’t like the thought of cutting up our trucks, MagnaFlow has a solution. They’ve designed a high-clearance option that also adds an aggressive growl to your Tacoma. Best of all, perhaps, is that it’s customizable.
This system is easy to install yourself. It greatly improves the departure clearance that is limited by the factory and features what MagnaFlow calls a No Drone Technology (NDT) resonator. This resonator eliminates unwanted interior noise that your truck produces at highway speeds, pretty slick.
The exhaust is made out of 3″ mandrel bent 100% stainless steel. It is also covered by a limited lifetime construction warranty. Each is CNC machined which allows for perfect fitment on your Tacoma.
Features & Specifications
- Direct bolt-on
- Cat-back system
- Stainless steel
- 3″ mandrel bent piping
- No tip, high-clearance design
- No Drone Technology (NDT)
- Limited lifetime warranty
Find It Online
- MagnaFlow Overland Series Exhaust (2016-2023): Check Price
Table Of Contents
Installation
The difficulty level of install is very low. There are only a couple of tools required.
Tools Required
- 1/2″ Ratchet
- 14mm & 15mm Socket/Wrench
- (directions state 13mm but for my 2021 Tacoma, I found the bolts to be 14mm)
- Hanger Tool/Pry Bar or Pliers
- Spray Lubricant or Soapy Water (Optional)
Step 1. Unbolt OEM Exhaust
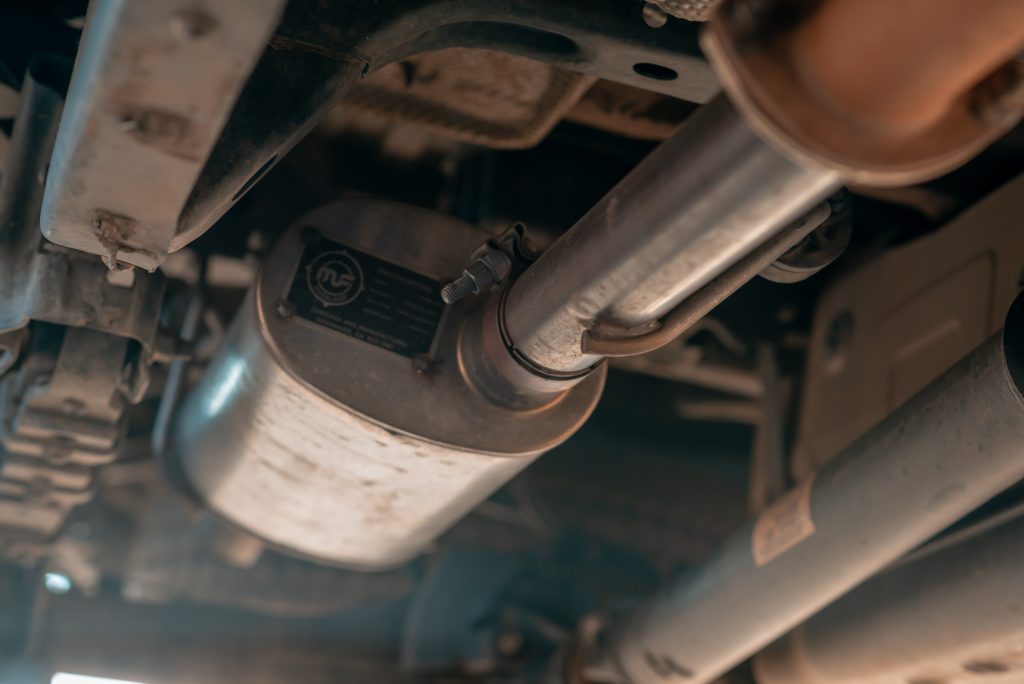
Under your truck, locate the factory exhaust under the passenger side. Next, locate the inlet flange. This is between your muffler and where the exhaust splits into two separate pipes toward the engine.
The inlet flange hardware comprises two bolts and nuts. It holds the front and rear ends of the factory exhaust together. The MagnaFlow will replace the section from the inlet flange all the way back to your tip.
Note: Learn from my mistake and make sure you loosen the bolts which are on the rear end of the inlet flange – not the nuts.
I first started by trying to loosen the nuts on the engine side of the inlet flange and I almost started to throw some tools before I found out the nuts are welded to the inlet flange. Loosen the two bolts but don’t completely remove them until you are ready to drop down your OEM exhaust. Keep these bolts in a safe place once you remove them since they will need to be reused when installing.
Step 2. Remove OEM Hangers
Starting from the front of the exhaust near the muffler and working back to the rear, loosen and remove each hanger from its rubber grommets.
The first rubber grommet is right in front of the muffler on the engine side of the exhaust. Use spray lubricant or soapy water on each grommet before you attempt to remove the hanger. This will make removing them much easier. You can use a hanger tool, pry bar, or pliers to remove the hanger from the grommet.

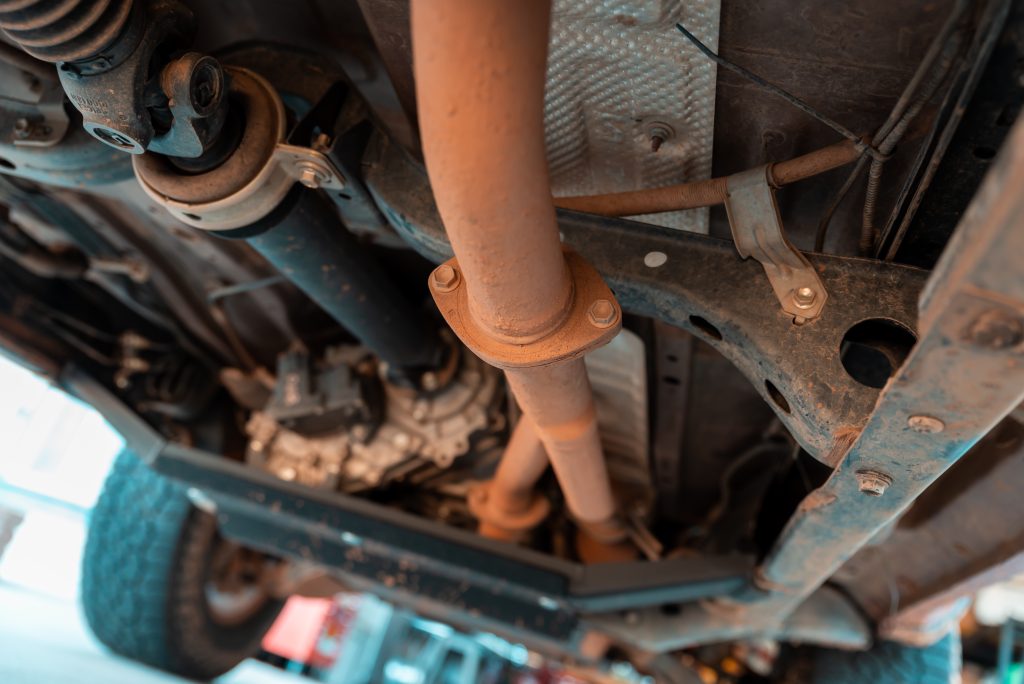
The second and third grommets are going to be located on the rear side of the muffler. As you can see in the photo above, the passenger side hanger is just in front of the rear axle where the exhaust routes up over the rear axle.
On the other side of this grommet is the driver side rear muffler grommet. Again, spray a lubricant on these grommets and remove the exhaust hangers from them.

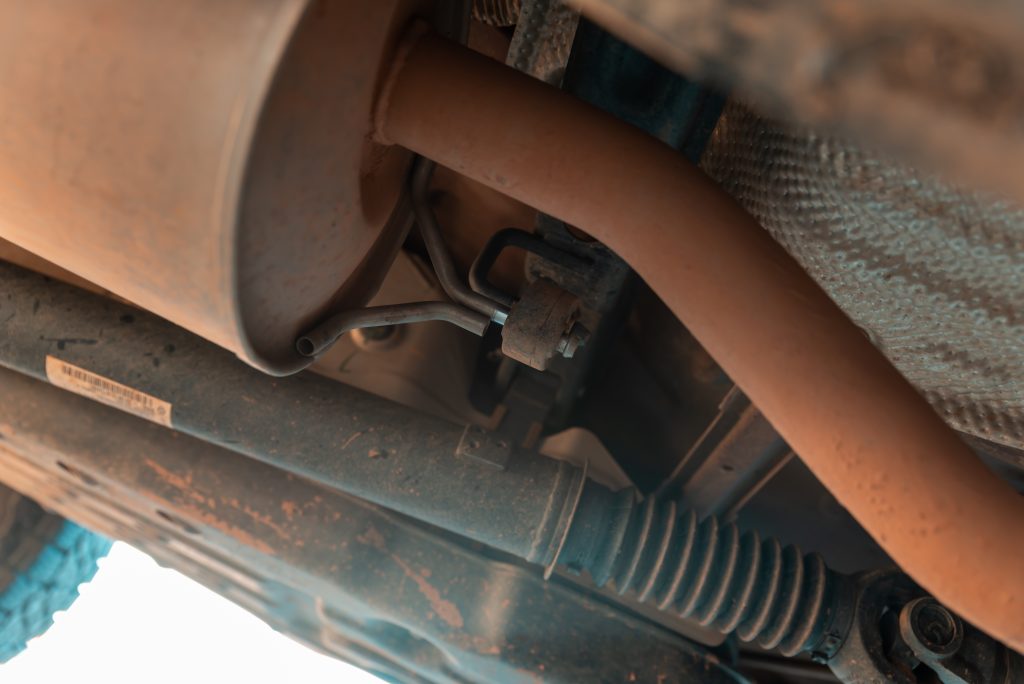
The fourth and final grommet is going to be near the tail end of the exhaust. It is located right by your spare tire mount.
Once all hangers are pulled out of the grommets, the only thing keeping the exhaust on the truck is the two nuts on the inlet flange.
Step 3. Remove OEM Exhaust

Once the two inlet flange nuts have been removed, you can drop the OEM exhaust. You might have to move it around a little bit to work the curve over the rear axle. I found it helpful to rotate the it towards the passenger side as I pulled out towards the front of the truck.
Step 4. Tune Exhaust
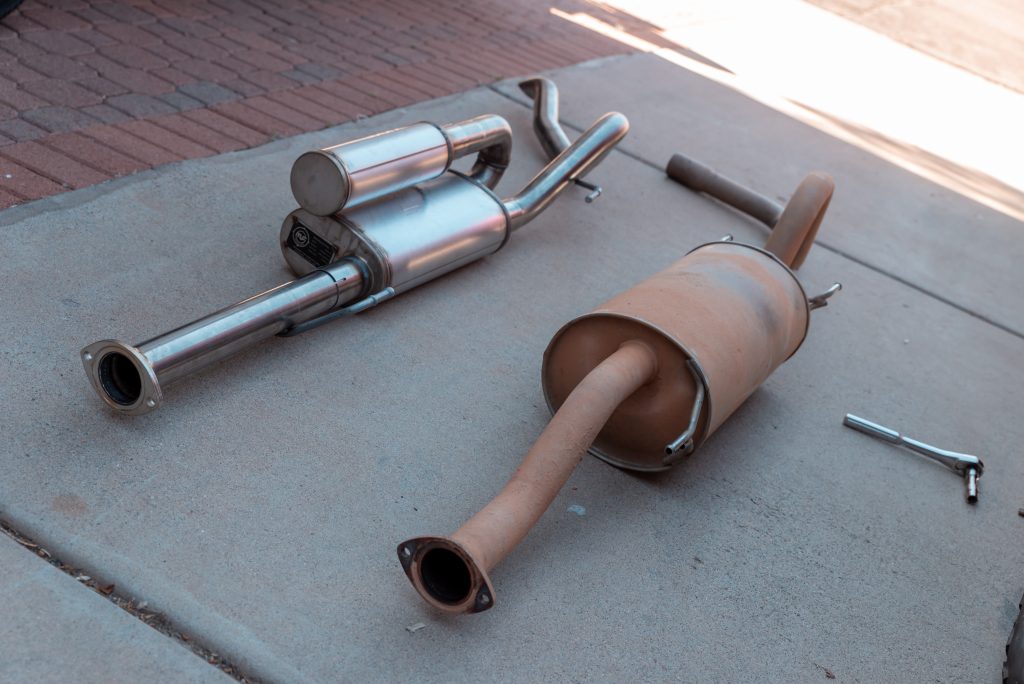
Before you install the new one, you’ll need to tune your muffler to the sound level of your choice. They designed this system to be customizable. There are three different methods to control the amount of noise it produces. This is the first design I’ve ever seen where you get to choose how quiet or loud with an easy adjustment.
On the third outlet to the muffler that faces the rear of the truck, you have three different options to change the tone. They are the U-pipe, the NDT resonator, and the MF pipe cap.
Option 1. Moderate

For a moderate tone, install the u-pipe along with the NDT resonator.
Option 2. Aggressive

For an aggressive tone, install the u-pipe with the pipe cap.
Option 3. Most Aggressive

For the most aggressive tone, only install the pipe cap on the third outlet of the muffler.
Once you have your muffler set up the way you want it, it is time to install it onto the truck.
What Did I Choose?
When I first installed the exhaust system I was worried about how loud it would be in my truck so I choose option 1. After driving the truck a few times I realized that option 1 was too quiet for my taste so I changed my setup to option 2. It changed the tone when I accelerate but I’m still getting very limited drone inside of the truck. MagnaFlow did a really good job designing and working on eliminating the drone noise with the NDT resonator.
Step 5. Install Inlet Pipe
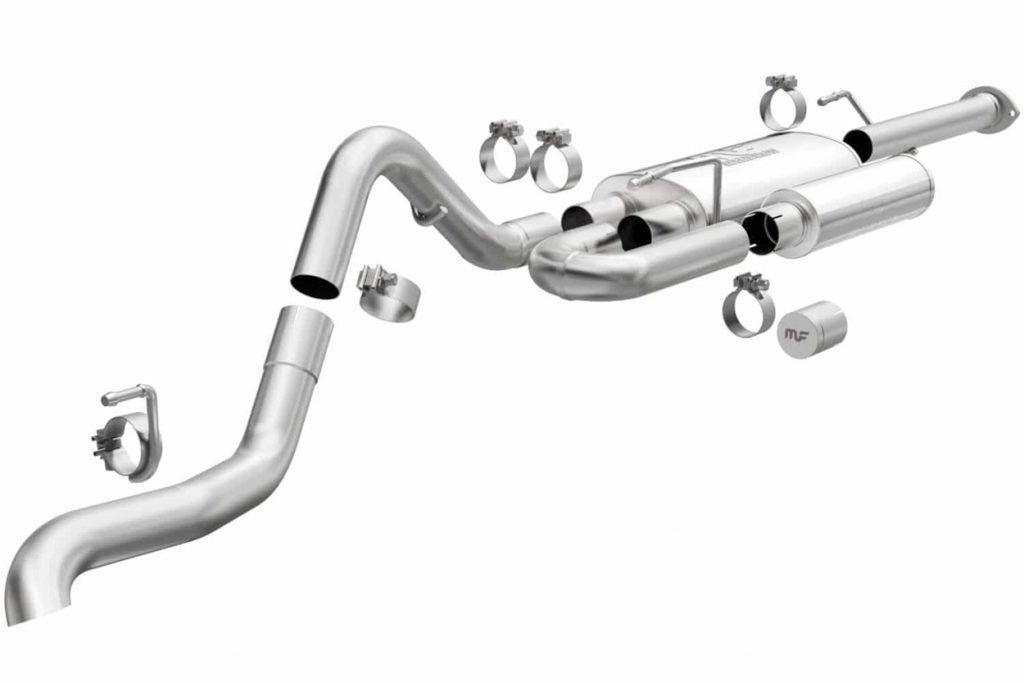
The MagnaFlow is broken up into four separate pieces. This makes the installation much easier than the one-piece OEM exhaust.
Start by grabbing the new inlet pipe and attaching it to your Tacoma. I first inserted the hanger of the inlet pipe into the rubber grommet. Then, I attached the pipe to the factory exhaust using the two inlet flange bolts.
Do not fully tighten the inlet flange bolts yet. You only want to loosely install them so it holds the inlet pipe onto your truck. Once you have all pieces assembled and the exhaust in place, you will fully tighten the flange bolts.
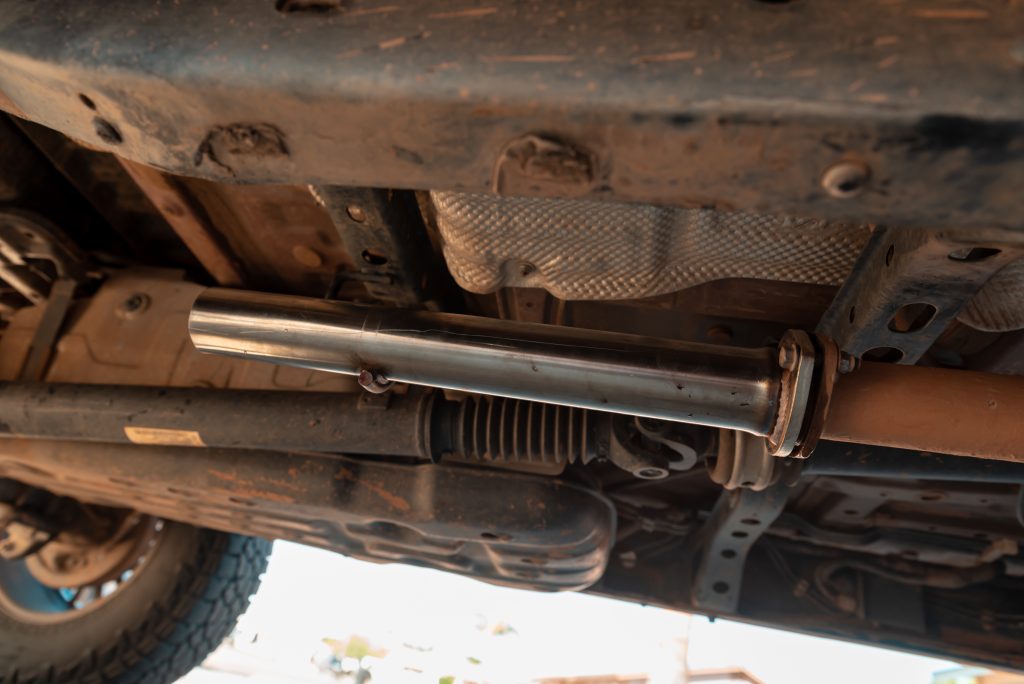
Step 6. Install Muffler

Next, attach the muffler to the inlet pipe. On the rear end of the muffler, there is a hanger that needs to be installed to the rubber grommet.
After inserting the hanger into the grommet, use one of the supplied 2.5″ clamps to connect the muffler and the inlet pipe together. Tighten the clamp just enough to hold the two pieces together but still loose enough to adjust the rest of the exhaust as you finish the installation.
Step 7. Install Curved Pipe

For the third piece of the exhaust system, you will be installing the curved pipe that goes over your rear axle. This pipe has a hanger on the front end of it near the muffler. Insert this hanger into the matching rubber grommet.
Use another 2.5″ clamp to attach the curved pipe to the muffler. Again, do not fully tighten the bolt yet.
Step 8. Install Tailpipe

The final piece is going to be the tailpipe. This last piece will connect with a hanger and the last 2.5″ clamp. The hanger for this section of pipe needs to be attached by sliding the hanger clamp onto the tailpipe and tightening the bolt once it is in place. Make sure to not tighten this hanger clamp completely until the exhaust is fully installed, just in case you need to move the hanger around to fit properly.
Use the last 2.5″ clamp to attach the tailpipe to the back end of the over-axle curved part of the exhaust. I found it easier to insert the hanger into the rubber grommet before I joined the two pipes together.
After the last two pipes have been attached, you can go back over each bolt and tighten them. Start at the rear and work your way back toward the inlet flange. The final bolts to tighten will be the two bolts that connect the inlet flange to the front of the factory exhaust.
Review

I ended up removing the tailpipe end of the exhaust to get the most clearance from this system. Even if you leave the tailpipe on, the clearance is still greatly increased over the factory.
As for the sound, this system has unparalleled customization. It adds a more aggressive tone to the Tacoma but not in an overwhelming way. The ability to choose between three sound levels means that this should be a great choice for everyone’s needs. When driving the truck at highway speeds, there is very little to no drone; that’s better than the factory TRD Pro exhaust.
After running this on my Tacoma for a few weeks, I’m very happy with it. It sounds great and now I have more clearance in the rear to climb fun obstacles off-road.
Final Thoughts
There were two main features that I was hoping to get from this exhaust; more clearance and a more aggressive sound. The MagnaFlow exhaust covered both, and exceedingly well.