

There are a lot of roof rack options out there for the Tacoma. It’s tough to choose one. Today, I’ll be going over a solid choice from All-Pro. With loads of industry experience, a standout crossbar design, and usually in stock – this might be the one for you!
The Overland Roof Rack from All-Pro Off-Road is a great choice for those looking for an option that is durable enough to withstand all of your adventures. Coupled with a highly durable construction, it is super simple to install and only takes about 30 minutes.
Find It Online
- Overland Roof Rack (2nd & 3rd Gen Tacoma): Check Price
Discount Code
-
- Use code – TRAILCO – for 10% off!
Table Of Contents
Overview & Features

This rack has a ton of useful features and is made for just about anything you may need such as holding a rooftop tent, mounting your cargo boxes and gear, and so much more.
It is constructed out of high-quality and lightweight aluminum with a durable black powder coat finish to save weight and ensure that it won’t rust should you scratch it.
Key Features
- Moon roof and “shark fin” antenna compatible
- Full bolt-on installation (no drilling required)
- Includes front wind deflector to minimize wind noise
- Optional 40″ light bar cutout
- Includes 4 adjustable cross bars with the option to add more to increase load capacity
- Pre-drilled cross bars to mount RotopaX, recovery boards, QuickFist clamps, rooftop tents, cargo boxes, and more
Installation

As I mentioned, everything was super easy to install and can be done with some basic tools. It only took me 30 minutes to fully assemble and mount on my Tacoma.
Tools Required
- 4mm Allen Key
- 11mm Wrench/Socket
Included Parts & Hardware
- (4) Load Bars
- (2) Side Panels
- Wind Deflector
- Wind Deflector Mounting Brackets
- VHB Tape Strips
- Wind Deflector Rubber Strip
- Paint Protection Film
- Bolts, Washers, Nuts, Lock Nuts
- Silicone Sealant
- (4) Mounting Blocks
Step 1. Remove Weather Stripping

To get to the mounting holes, you will need to either remove or make cutouts in your factory weather stripping. I removed mine by just pulling it off from the front near the windshield to the back of the cab.
If you want a more OEM look, you can remove the weather stripping and cut out the sections around the front and rear mounting locations. Then, replace the sections that are not covering the mounting holes, and secure them with the provided 3M tape.
If you had the OEM Toyota rack, the weather stripping will already be removed and there will be three exposed mounting locations.
Next, remove one side of the 3M tape strips that cover the middle mounting holes as you will not be using them for the new roof rack. You can also use some of the provided silicone inside the middle mounting holes before applying the tape for additional weather protection and prevent leaks.
Step 2. Attach Cross Bars To Side Panels

To assemble the roof rack, mount the cross bars to the side panels using the provided 1/4″ bolts and washers and a 4mm Allen key. Each crossbar will use four bolts and washers (two on each side). The holes are pre-threaded, so you do not need to use the provided nuts yet.

It is recommended to attach the cross bars in every other mounting hole to start but the gap in between them can be adjusted depending on your mounting needs.
Step 3. Attach Wind Deflector

Attach the wind deflector mounting brackets to both ends of the wind deflector using four of the provided 1/4″ bolts, washers, and locking nuts (two of each on both sides). Leave these hand tight for now so you can adjust the wind deflector at the end.
Make sure that you mount the brackets using the larger holes as the smaller holes will be used to attach it to the side panels.

Next, attach the wind deflector to the side panels with four of the provided 1/4″ bolts, washers, and locking nuts (two of each on both side panels). Hold the locking nut with an 11mm wrench as you tighten the bolt with a 4mm Allen key. You can fully tighten these down.
Step 4. Apply Weather Strip To Wind Deflector

Install the provided rubber stripping to the bottom of the wind deflector to reduce vibrations. Make sure that the soft side of the rubber stripping is facing inward towards the roof.
Step 5. Apply Paint Protection Film (optional)

If desired, place paint protection film along the top of the windshield under where the wind deflector will rest. Make sure to work slowly to ensure there are no air bubbles.
Step 6. Place Rack On Mounting Blocks

This part is easier with two people to minimize the risk of scratching your roof. Lift the roof rack over your roof and align the mounting blocks with the pre-drilled mounting holes.
Under each mounting block, apply a generous amount of the provided silicone. I also put some silicone into the pre-drilled holes in the roof for better weather-proofing.
Step 7. Secure Rack

Secure the roof rack down using the supplied bolts (silver ones), split washers, and flat washers. Leave the bolts slightly loose until you have all four mounting locations and make your final positioning adjustments. Then, tighten them down completely.
For additional weather-proofing, you can also apply silicone on the threads of the bolts before tightening.
Step 8. Final Adjustments

With the roof rack fully bolted down to the roof, slide the wind deflector to the lowest setting and tighten down the four bolts on the face of the deflector using an 11mm wrench and 4mm Allen key.
The wind deflector can be moved higher or lower so you can fine-tune it to reduce wind noise. I found it to be quietest at the lowest position.
Final Thoughts
Upgrading has been a game changer. Compared to my previous one, the wind noise has been drastically reduced, providing a more peaceful ride, especially on the highway.
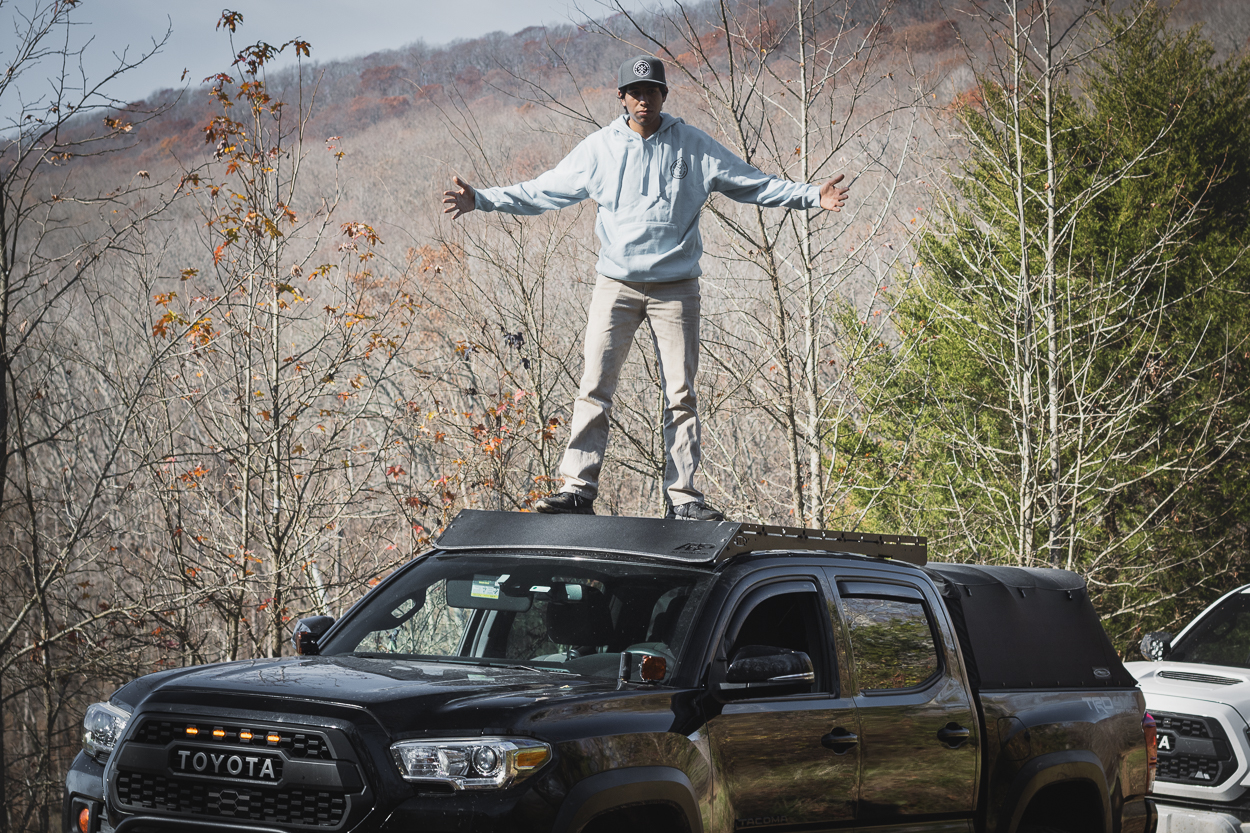
The sturdy construction is what sets this roof rack apart for me. I immediately noticed how stiff the side panels and load bars were. That’s a great feature as I plan to add side grab handles and mount cargo boxes on top. To test its strength, I stood on top and the load bars barely moved (pictured above).
Overall, it has a clean look, flexible mounting holes, and high-quality and durable components. This is perfect for anyone looking to mount heavier gear and give your Tacoma a more aggressive look that will last for years to come.
How did you mount the cargo box? I’m having trouble finding hardware to mount a Sears 20v cargo box.