

The most important investment you can make to protect your undercarriage is a set of high-quality skid plates.
Whether you’re a weekend camper or a dedicated rock crawler, the most exposed parts of your truck are at risk of being caught, smashed, or ripped off on an unexpected obstacle.
Protecting these vital components should be a top priority. If you’ve ever looked at your factory skids or removed them for maintenance, you know that this small piece of tin will not protect you from any more than some tall brush.
Upgrading to a full underbody protection kit will ensure complete protection off-road, and allow you to go places you otherwise wouldn’t dare tread.
You have two options for material, heavy steel or lightweight aluminum. While the aluminum options save considerable weight, they’re more expensive and not as strong.
This is why I opted to test the steel kit from Ironman 4×4. At first glance, they may look ordinary, but they took their time with this kit, designing it from the ground up to blow the competition away at one of the best price points around.
Find It Online
- Ironman Skid Plate Package (2005-2023): Check Price
Table Of Contents
Features & Specifications

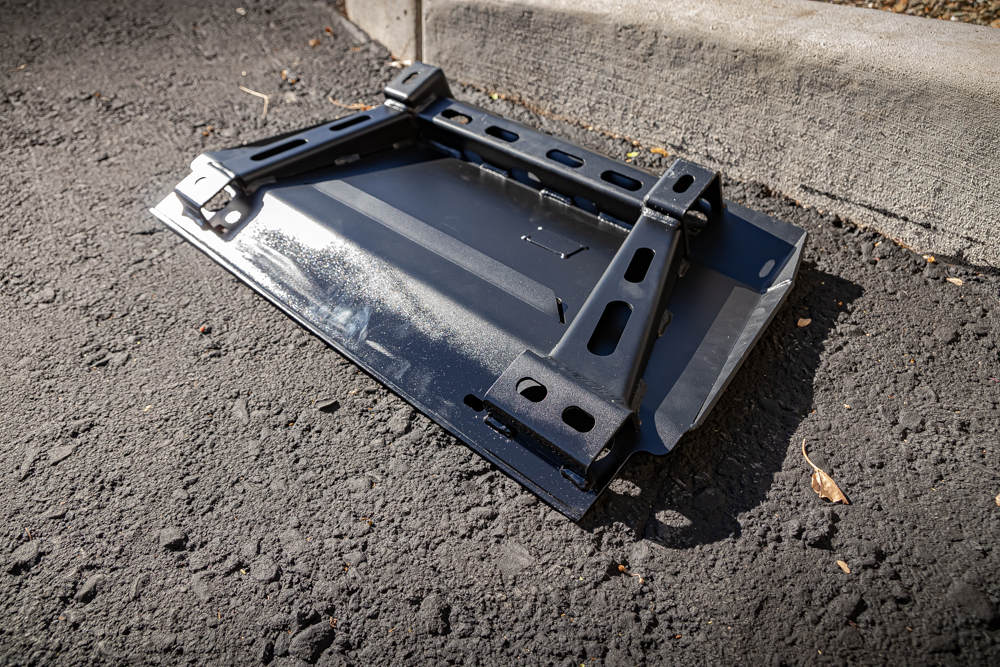
After unboxing these, I couldn’t be more impressed.
They are fabricated out of 4mm thick steel and weigh a total of 81 lbs., which is impressively light compared to other full steel options. The full kit comes with three pieces, a mounting bracket, associated spacers, and all the necessary hardware.
Quality

After some inspection, I’m happy to report the design and construction are top-notch.
They’re specifically designed with an integrated framework and extra gussets to evenly distribute loads and to prevent punctures and damage. That means they’re stronger and more durable than other pressed steel kits, offering up to 5X more strength compared to the competition, according to Ironman.
Along with this reinforcement, the skids feature fully recessed, high tensile-strength mounting locations and hardware—not only will your skids never move or shift, but you’ll also never have to worry about getting caught up on or damaging your mounting hardware.
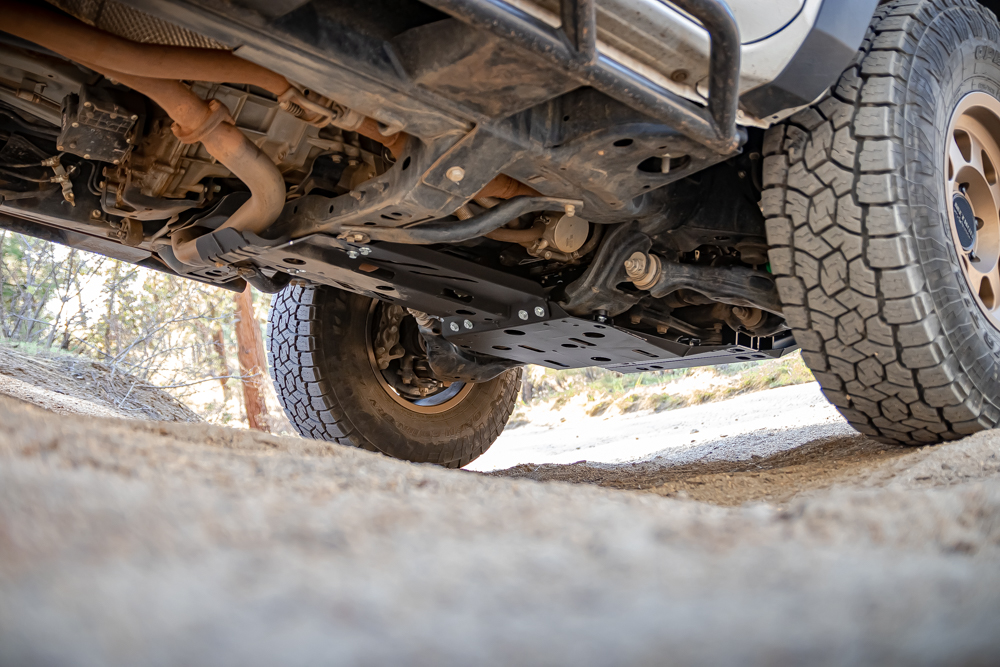
Ironman designed these skids to be as smooth of a surface as possible, while also saving weight and providing access to your truck’s underbody for maintenance.
Size & Powder Coat

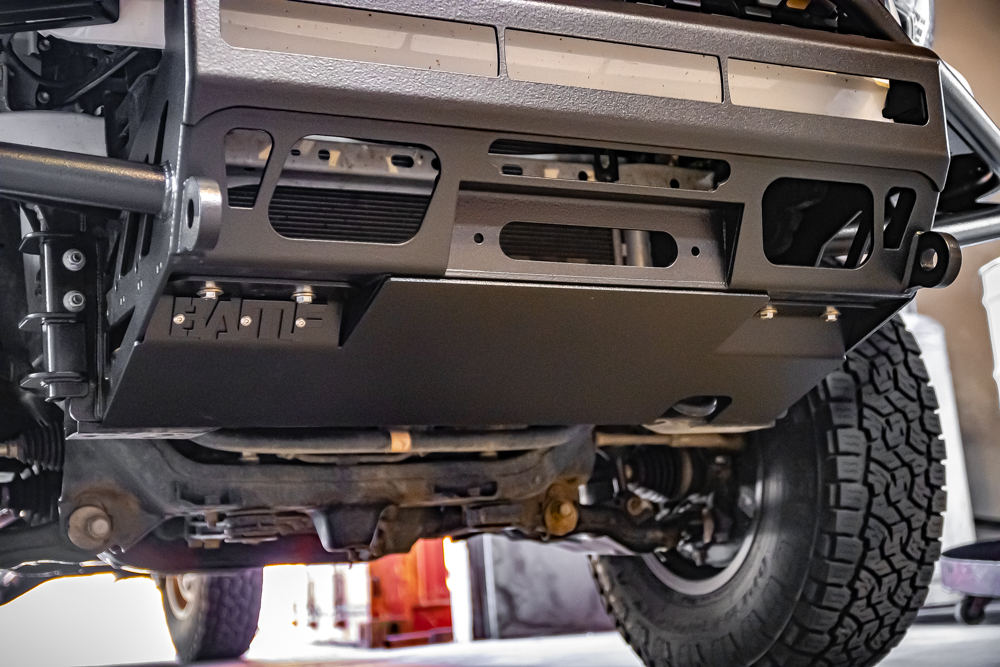
The size of the skid kit is also impressive—these cover 3X more area than the factory skids, protecting your engine, transmission, radiator, and steering components.
Impressively, they’ve also incorporated protection for the exhaust crossover location behind the transmission, which is one of the most common locations Tacoma’s get snagged on. Preventing damage here can save you the cost of an entire exhaust system!
To top it off, these skids come standard with a high-quality textured powder-coated finish. Beneath this is an EDP-E coat protectant layer that’s designed to prevent any corrosion of the steel if the powder coat is damaged.
This is a nice feature to have, especially if you live in areas that use salt on roadways. If you do receive any major damage though, I would highly recommend getting them replaced or re-coated to prevent any permanent rust damage.
Installation

Tools Needed
- Mechanic’s Tool Set
- 10mm Socket
- 12mm Socket
- 17mm Socket
- Torque Wrench
- Floor Jack (optional, but recommended)
- Jack Stands (optional, but recommended)
- Creeper (optional, but recommended)
Note: The front skid plate may need to be modified to accommodate some aftermarket front bumpers. More on that later.
The installation process for these is very straightforward, and the entire process should take less than two hours. Ironman provides a great set of instructions and all the necessary brackets and hardware with the kit.
Step 1. Prepping

First, park your truck on a flat, level surface. Because clearance between the ground and the underbody of the truck is tight, a creeper may not fit. If this is the case, laying down a large blanket or sheet of cardboard makes the installation a bit more comfortable. If you have access to a lift, definitely use it! I chose to use some folding recovery treads from GoTreads to raise the front of the vehicle an extra 6 inches; you can also use drive-up ramps for some added height.
If you wish to jack the truck higher to fit underneath, be sure to place multiple jack stands securely around the frame of the vehicle, chock the wheels, and engage the parking brak.! Take extra care when crawling underneath our out from beneath the vehicle.
If your Tacoma comes with a front lower air guard installed, the first step is to remove this plastic piece. Remove the six 10mm bolts from the front of the air guard and the two 10mm bolts from the rear, then remove the air guard and set it off to the side.
Then, it’s time to get rid of the factory skids and braces. On the front, remove the two 12mm bolts from the front side first. Once these are removed, the front plate can rest on the built-in hooks on the frame while you remove the two rear 12mm bolts. After all the bolts are removed, lift the front of the OEM plate up and out to free it, and set it off to the side.
Next, the two support braces found underneath the front OEM one can be removed. The Ironman skids’ built-in gusset-ing completely replaces these structural components. Remove the seven 17mm bolts from each of these braces. We will be reusing this hardware, so do not discard these bolts.
These braces run from the front cross member to the rear cross member underneath the truck. These cross members are located near the front and rear forks of the lower control arm. This helped me orient myself after crawling out from under the truck and back under to retrieve the hardware, and also made the mounting holes easier to locate.
Step 2. Front Section
With the braces removed, the front portion can now be installed.
I found it easiest to start at the rear and line up the mounting points to the holes left from removing the braces, as there are no other confusing holes around them. Reusing the OEM 17mm bolts, attach it to these mounting locations and tighten the bolts finger tight.

Because the mounting locations are recessed, it’s easiest to use a 17mm socket on an extension without a ratchet.
This will support the weight of the skid plate while also allowing you to adjust them later on.

To finish attaching the front part, use the 17mm OEM bolts to attach the front to the frame in the factory skid mounting locations. With the rear in place, the front should line right up with the three bolt holes.
You can adjust the skid forward and backward to center the hole in the frame with the hole in the skid plate. Leave these bolts finger tight as well to allow for some adjustment.
Step 3. Mid/Transmission Section
Next, the middle portion can be fitted to the frame. The middle is easily identified by the large cutout in the center, towards the back. This cutout will align with the factory jacking location (cross-member) underneath the truck, and the entire thing is tapered to align perfectly with the rear of the front part, making it easy to orient correctly.
To install, first lift the front side to the frame and rest it on the rear end of the front skid plate. This will allow you to hold it in place with one hand and insert the two 17mm OEM bolts with the other. Just like before, these mounting positions are recessed, so using an extension with a 17mm socket works best. Tighten both front bolts finger tight.
The rear of the middle will now use the provided hardware from Ironman. To properly align them, Ironman has included two steel puck spacers that will sit in between the frame of the vehicle and the rear two mounting locations. Using two M8x35mm bolts, lock washers, and flat washers, place the puck spacers on top and thread the bolt through and into the puck spacer into the frame. Leave these two bolts finger tight as well.
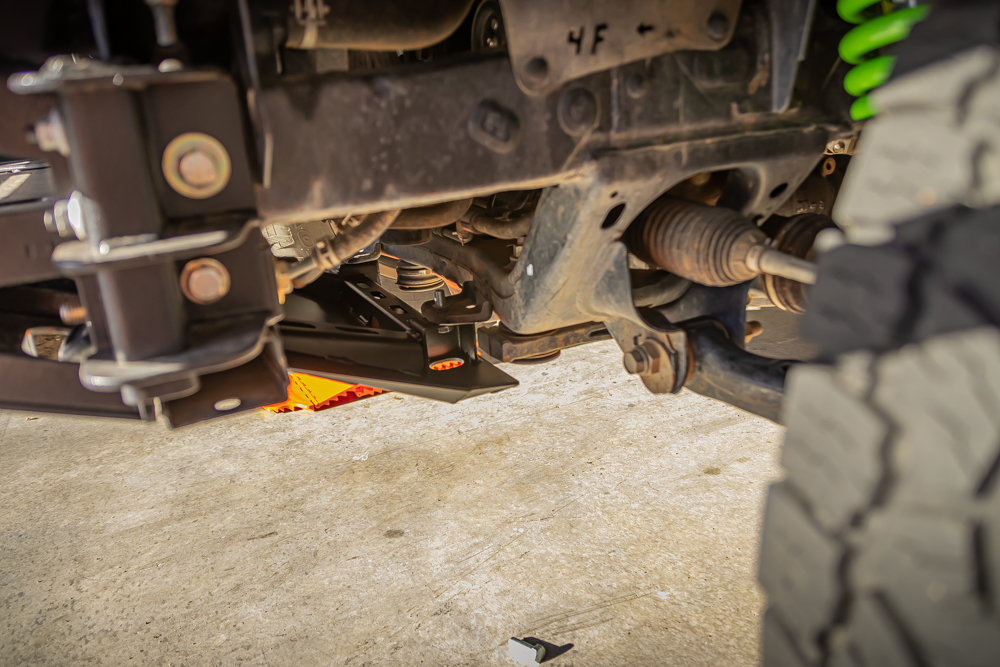
Step 4. Rear Support Bracket

Before attaching the last skid to the vehicle, the rear support bracket will be installed. This bracket provides the rear mounting locations and allows you to slide the rear portion up and down as needed to fit around the exhaust. This bracket can be a bit tricky, but with a little patience, it’s still very doable.
First, locate the cross member that sits just in front of the exhaust crossover and just behind the transmission. This cross member has access points on the underside and two holes on the front and rear. We will be attaching this bracket to the front side of the cross member, so the open side of the bracket should face the front of the vehicle and the flat face of the bracket should sit flush on the cross member.

Ironman has provided two nut plates to use for mounting this bracket.
The easiest way to get everything mounted up is to slide one nut plate up through the access point at a time, orienting the plate with the nut facing the rear so the flat face of the plate sits flush against the inside of the cross member. Place a lock washer and flat washer onto one M10 bolt and thread this bolt into the plate a few turns to hold it in place. Now that this plate is in place, repeat for the other plate.

Next, with your left hand, secure the first nut plate inside the cross member and remove the bolt. Lift the rear bracket into place with your right hand and place it flush against the cross member and into your left hand, lining up the holes with the nut plate.
Then, you can use your right hand to thread the bolt back through the bracket and cross member, and into the nut plate. This bolt will now hold the bracket up, and you can swing it over to the other side and repeat the same process. Tighten these bolts until the lock washer starts to compress, then back them off a full turn. This will ensure these bolts are just loose enough to adjust and save us time later in the install.
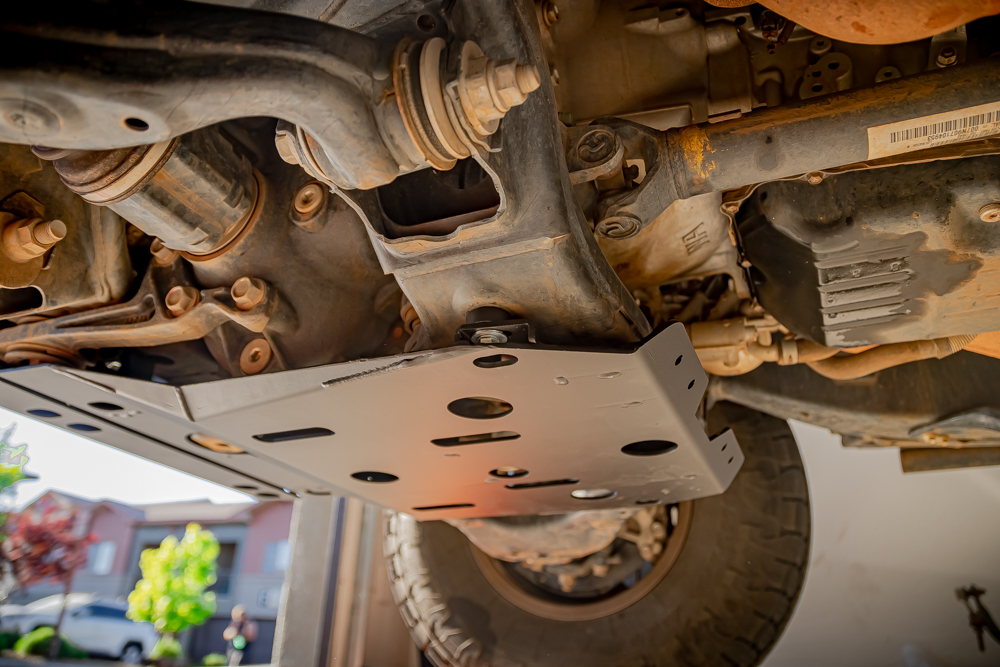
Step 5. Rear/Transfer Case Section

With this bracket in place, we can now fit the rear. Place the front end of the rear skid plate onto the rear portion of the middle one and insert two M8x25 bolts with lock washers and flat washers through the rear and into the middle to hold it in place.
A 13mm socket can be used on these bolts. Lift the rear end up to the bracket and insert four more M8x25mm bolts with lock washers and flat washers through the rear skid and into the bracket. Once these are finger tight, install the other two M8x25mm bolts with lock washers and flat washers on the front to join the middle and rear sections. All 8 of these bolts can then be tightened down to the listed torque spec of 17 ft-lbs.

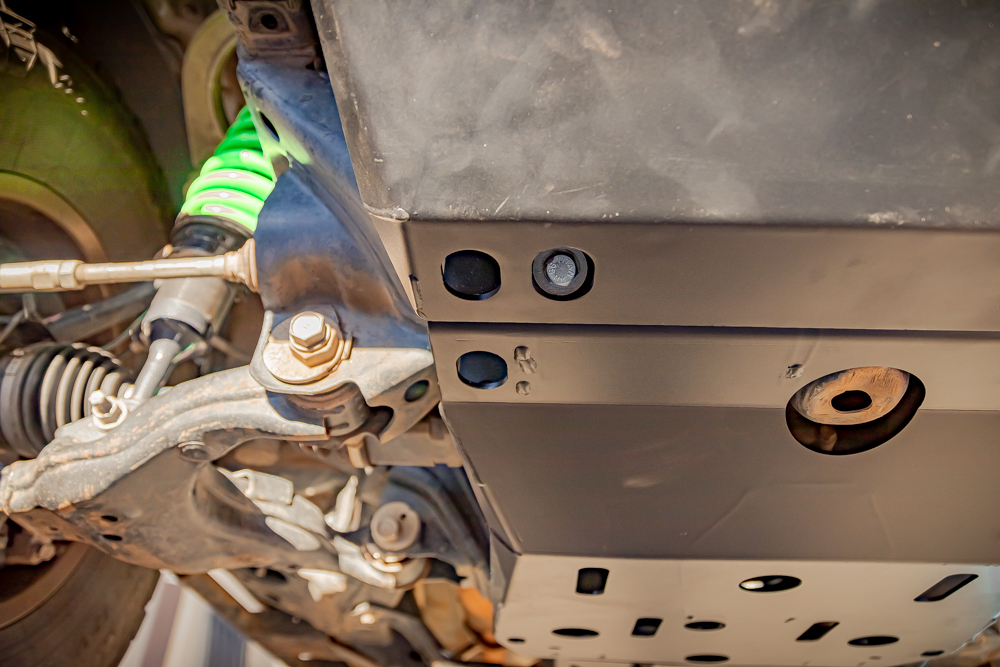
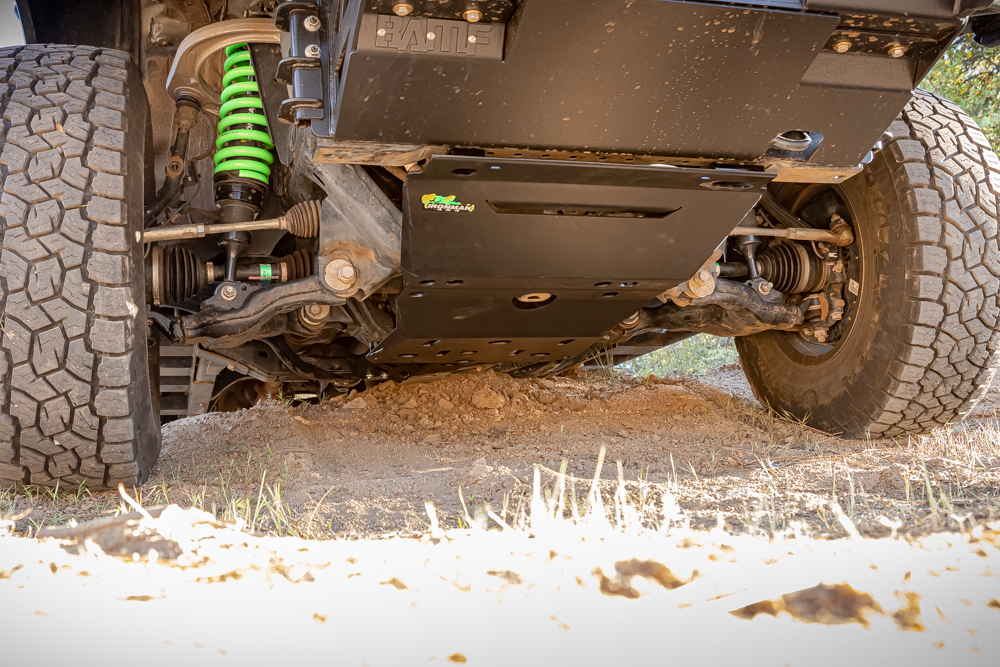
You can now move the rear end of the rear up and down to check the clearance between the exhaust crossover and the cupped portion.

In my case, the skid never touched the exhaust downturn, even when the bracket was slid all the way up, and the rear lined up nicely with the rest of the skid plates in this position, so I decided to mount this bracket to the cross member in the highest position.
Step 6. Final Adjustments & Torque Bolts

There is just enough clearance in this area to fit a 17mm socket on a short extension in between the skid plate and the underside of the vehicle to tighten the mounting bracket.
If you’re having trouble with clearance, a U-joint swivel and a long extension can be used to reach these pesky bolts. Tighten these bolts to 33 ft-lbs.

Now, from the rear of the vehicle, work your way towards the front to tighten the rest of the bolts down to their suggested torque specs.
Tighten the two M8 bolts at the rear end of the middle part to the frame, then tighten the two 17mm bolts at the front of the middle skid plate to the frame to 17 ft-lbs.
With the front skid plate still loose, attach the front to the middle from the front with the two M10 bolts with lock washers and flat washers and tighten these bolts to 33 ft-lbs.
Lastly, tighten the two rear 17mm bolts and the three front 17mm bolts on the front to the frame to 33 ft-lbs.

If at any point in this tightening process holes do not line up nicely, they can be loosened and adjusted accordingly. Tightening these bolts to the recommended torque specs will keep them from shifting around after use.
Initial Review & First Impressions

Right off the bat, I cannot stress how solid these feel. There is just no comparison between these and the stock tin skid. The gussets and reinforcement are also unlike anything I’ve seen on any other brands. I don’t doubt these plates are as strong enough to take a beating.
I had no issues fitting these to the frame and to each other, so they’re designed to fit perfectly underneath the Tacoma. As mentioned earlier, I cannot guarantee these will work with aftermarket front bumpers. I personally had to chop the front lip off of the front skid plate entirely to get it to fit on the truck. I’m not sure if this was a unique case, or if anyone running an aftermarket front bumper that mounts directly to the frame will encounter this problem as well.
There seemed to be a space that this lip could potentially fit into, but my BAMF bumper’s bash plate extends right to the frame. If this is a common problem, hopefully, Ironman notices this issue and resolves it in the future. But doing a bit of trimming and some light repainting of the raw metal edge wasn’t too big of a deal.
The only other issue I noticed with these skids is the powder-coated finish. The color and texture are fantastic, and the coating seems thick, but I found it fairly easy to rough up and even remove some of this finish just handling the skid plates during the install. Which, oddly enough, held up to rocks really well. More on that in the next sections.
Huge props to Ironman for pre-coating these skids in a protective coating before applying the powder though… I’m not worried about these rusting whatsoever. The care taken to package these to prevent damage in shipping was also excellent. They arrived in perfect condition.
I tested them almost immediately. I tested high centering the truck on a mound of dirt to see if the weight of the truck would shift the skids or damage the powder coating.
After a few hard falls onto the dirt, I found nothing had moved and there were no signs of damage whatsoever. All of the bolts remained tight and nothing had shifted.
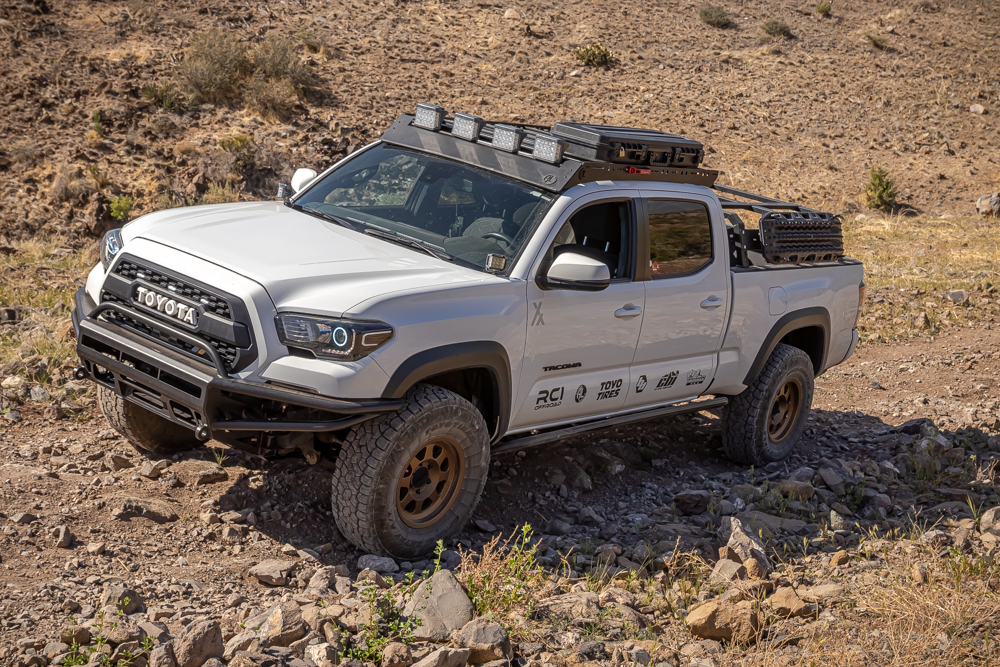
A few days later, I took the truck to a rocky trail to see if there were any worthy obstacles and found that the front skid gave me a slightly higher clearance than the stock one did. That is somewhat evident from the images if you know what you’re looking at.
There were a few obstacles I had come across before that touched my stock skid plate, but I was barely able to clear everything on the trail without touching the skids.
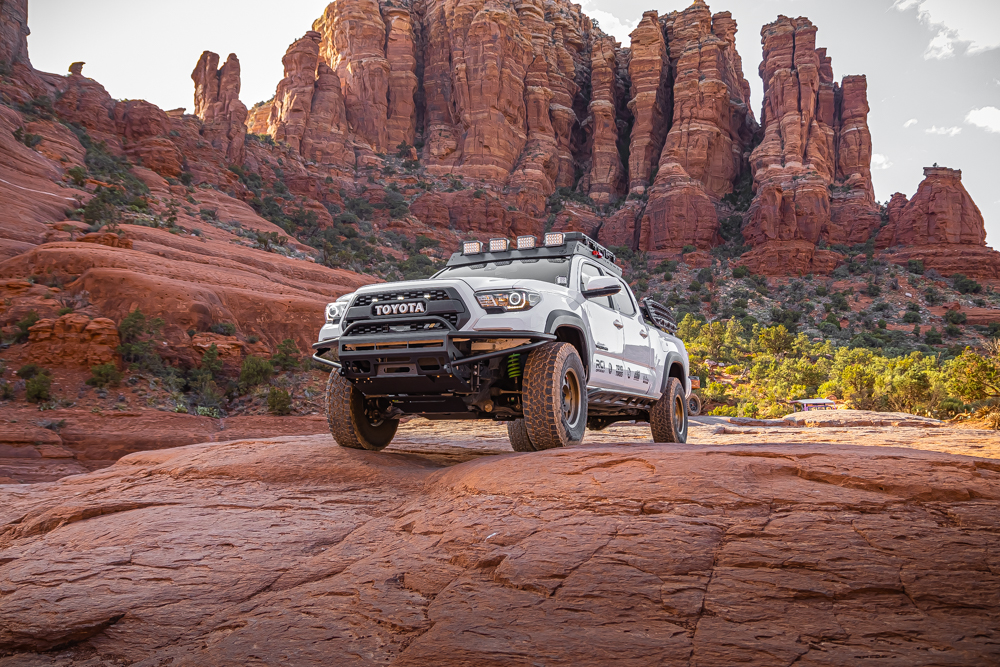
Finally, a few weeks later, I took a trip to Broken Arrow in Sedona, AZ to really give these skids a proper test.
While there, I made contact with a few loose rocks, fell heavily onto a rock ledge, and scraped the rear portion going down the staircase obstacle.
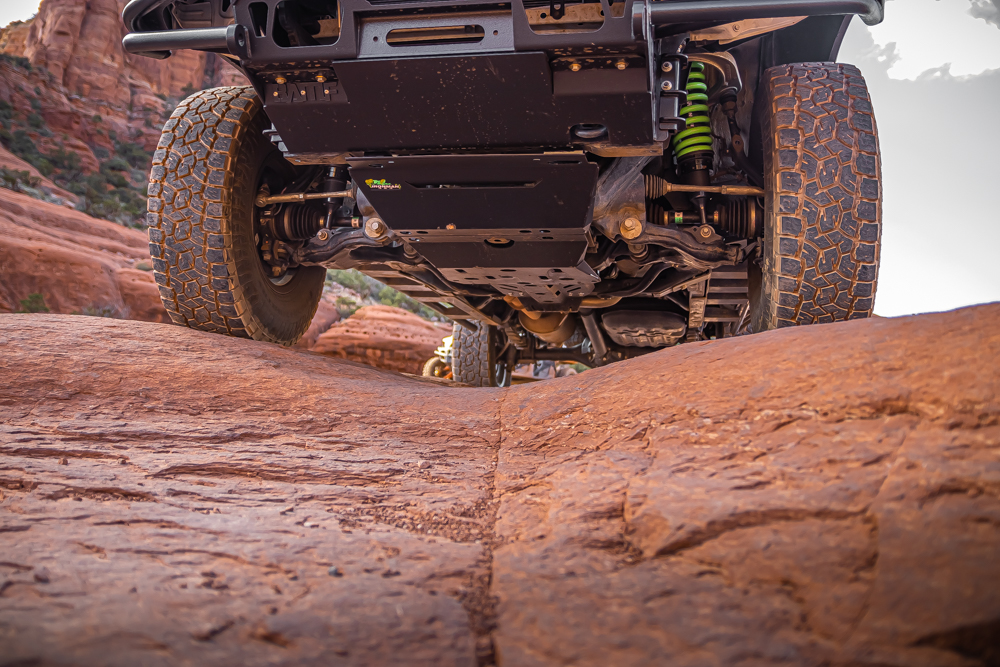
Even though this was a relatively tougher test, none of them shifted or showed any signs of serious damage.
The front skid plate showed some dirt where it had impacted a rock ledge, but was totally undamaged.
Final Thoughts
I have to say that this kit impressed me more than I expected. The quality and design are top-notch, the price is extremely fair for what you get, and the performance has been excellent.
These skids are likely very close in strength to other, more expensive, and heavier kits, and do a great job of covering up the most crucial exposed underbody components. They haven’t gotten caught up on any obstacles so far, everything glances right off.

I’d highly recommend everyone check out this kit—save weight and money without sacrificing any performance!
Hi, looking for a good skid system like this and your review is on point. I just want to make sure this kit covers the catalytic converter? There have been a ton of thefts in my area lately. I believe my converter is integrated and not able to be simply cut off but I don’t want some meth-head cutting it all up trying and then running off leaving me screwed. I know they could cut the skid plate as well but hoping they’re more likely to move on and leave me alone if it looks secure underneath. Thank you for… Read more »
Hey Nate, thanks for commenting!
Unfortunately, I can confirm that this kit does not protect the catalytic converters. I had mine stolen about a month ago now, and the skid plates didn’t seem to inhibit the thieves. There are other companies (like Cali Raised LED) that make skid plate guards specifically for this reason – I hope to be testing them out and publishing another article soon!
This is a very nice skid plate, very clean, and seem like very easy to install but I see that it doesn’t protect the transfer case. It would also be very nice if they would had made the last piece wide enough so it will also protect the cat from theft. Thanks for the clear picture. Awesome job you did.
Would a Fumoto F133n work with the Ironman skids?
Awesome review! Seriously looking at buying this set. Had a question regarding oil changes. Just wondering if the plates allow access to the filter and drain holes for oil changes or do the plates need to be taken off to do an oil change. Also if it is necessary to remove are there any others that do not require removal for oil changes? I change my own and idk if I want to deal with pulling them off every time. Thanks again for the solid review!
Ryan,
This is a great question! Ironman states on their website that there are access holes built into the plates for “service inspection” and recommends the skid plates be removed when draining any fluids. Many other skid plate kits on the market require this as well. From my experience though, there might be enough room to run an oil drain nozzle and hose setup to change your oil without removing the skid plates. In any case, they’re easy pieces to work with and come off and go back on relatively quickly. Hope that helps!
Adam