
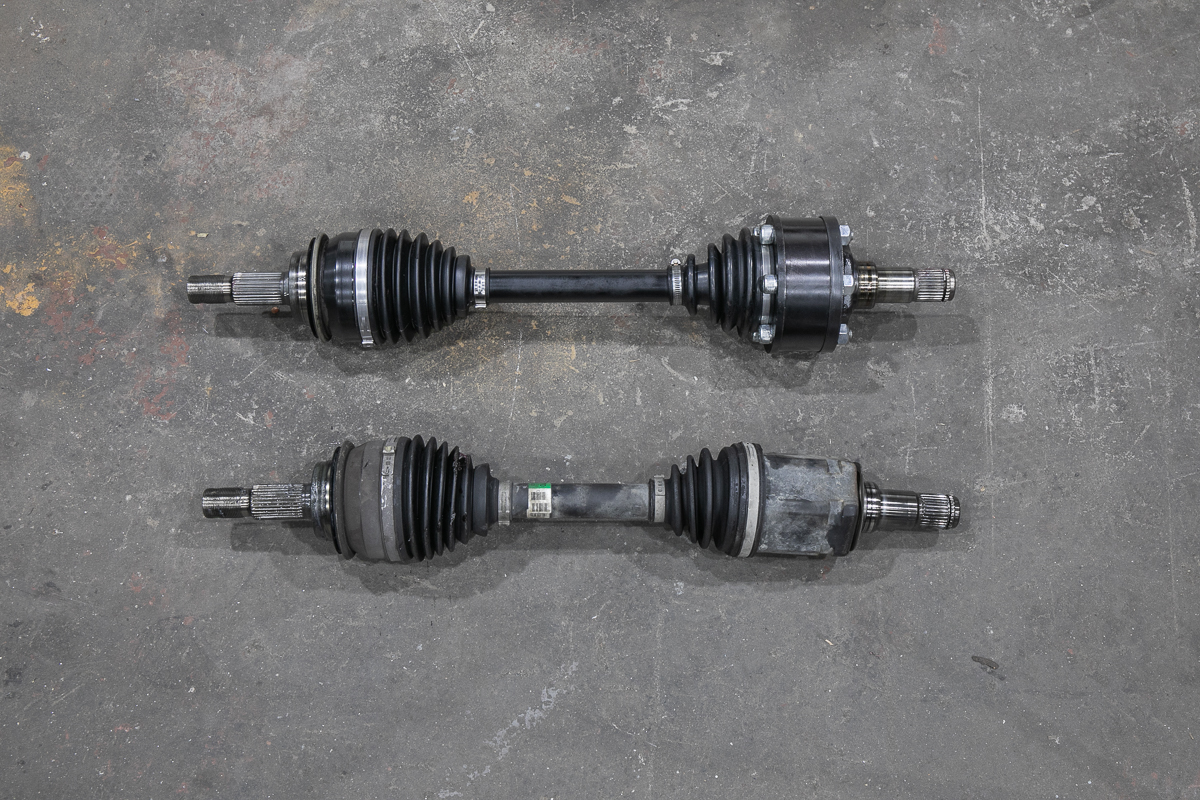
When you take the plunge into long travel, your axle shafts are going to increase in length. This means you’re going to need to install or rebuild (reassemble) new outer joints on your extended CV axle. Or, depending on how bad your joints are on the inside, you may want to rebuild those as well. In my case, the CV axles that I decided to install on our +2.25″ long travel kit already had the inner joints assembled. These are the 934 CV axles made by JD fabrication. So in this case, I only need to rebuild the outer CV joints.
I am going to reuse the outer CV joints (also referred to as birfield joints) supplied on my factory CV axle on our new 934 300M axle shaft. In order to reuse the outer CV joints though, we need to cut off the axle shaft and remove all the internal components of the CV joint. This will allow us to press the remaining portion of the CV shaft out from the CV joint star. This will allow us to reuse and reassemble most of the internal components on the outer CV joint (the housing, spherical bearing, star, and the balls).
The process is pretty simple. We will extract the shaft from the joint using a 40-ton press and then the remaining components will be removed, cleaned, and reassembled so that a new shaft can be pressed into place.
Parts List:
- 934 CV Axles from JD Fabrication: Check Price
- Front Inner and Outer CV Boot Kit (2005-2023) Genuine OE: Check Price
Tools
- Extra Grease – 101 MOLLY: Check Price
- Basic shop tools
- Large flathead
- Fine-point flathead
- Rubber gloves
- Sharp dykes
- Lineman’s pliers
- Circlip pliers
- Grinder
- Large weight press
- Brake cleaner
- Shop towels
- 10-20# rubber mallet
Table Of Contents
934 CV Axles

The actual joint itself on the inside is very similar to that of birfield, however, it does allow side to side motion. This is why 934 CVs are also referred to as a “plunging” CV axle. The plunge is about 1.18″ in inward and outward motion allowing for a massive 28-degrees of motion.
The components on the 934 CV joint use the same concept as your common outer Tacoma CV joint. They consist of a housing, an inner race or “star”, the balls, and the cage or “spherical bearing” that holds the balls to the star. The main difference between a 934 CV and a factory outer Tacoma joint is the size of the housing, the material (300M or Chromoly), the internals of the CV vary in design, and finally, the entire setup is generally larger as well. To say that in simple terms, the housing and internal components are bigger and stronger. The components in a 934 joint are much stronger than your factory outer CV joints as they are reinforced by larger parts and stronger metal.
934 joints are often used by Ultra4 race trucks because of their high strength and reliability. Many guys running LT kits on rock crawlers or buggies are starting to run the 934s too. These 934 CV joints from JD Fab uses a bearing cage manufactured from Chromoly steel – they are fitted with a 33 spline inner race “star” and are connected to a 300M shaft.
This is the next level of IFS guys. Next. Level.
I took photos of Sam on the first axle and then I did the other side. If you have any questions on the process, leave them in the comments section at the bottom of the post.
Step 1. Remove Outer Clips

Removing Outer Joints
Let me preface this by saying that you can just cut off your inner CV joint. You don’t need to disassemble the entire inner CV joint if you’re not going to reuse any other components. I just wanted to show you guys what the internal components of the inner CV joint look like. So let’s go ahead and vice up our CV axle and get started.
Remove both the large and small clips holding the boot onto the joint and the shaft. You are not going to reuse the clips so you can cut them off with a pair of dykes or a grinder and destroy the boot in the process.
Step 2. Pull Off Housing & Clean Joint

Remove the CV joint housing and clean the joint.
Step 3. Remove Tripod Bearing

To remove the internals from the inner CV joint, start by removing the tripod bearing.
Step 4. Remove Circlip

Remove the circlip.
Step 5. Remove Tripod

Remove the tripod by knocking off each extension of the tripod’s edge with a mallet. Work each tripod extension with a few knocks each all the way around the shaft until the tripod falls off the shaft. Again, if you don’t plan on reusing the shaft, you can cut it off at the inner joint with a grinder. But, sometimes it’s just easier to pull the inner joint off before you start working on the outer joint.
Step 6. Remove Inner Shaft Boot

Now you can pull off the inner joint boot and clean the shaft.
Step 7. Remove Outer Joints

Vice the outer shaft and then start removing the clips on the boot.
Step 8. Remove Outer Boot & Clean Joint

Once the clips are off, start removing the outer boots and clean the joint with some disposable rags. Try to remove as much grease as you can. You’re not going to get it all but the more grease you can remove, the better.
Step 9. Cut Axle Shaft

Once you have the grease off the bottom of the shaft where it meets the race “star”, cut as close as you can to the base of the race with an angle grinder. You will need to remove the race from the cage where it sits inside the housing. This will allow you to press the shaft out of the race in order to slam your new CV axle shaft in.
Step 10. Remove CV Joint Balls

After the shaft has been cut down to the base, remove the balls from the cage. Tilt the cage around the race and upwards out of the housing while tilting up the edge as high as you need to in order to remove each ball.
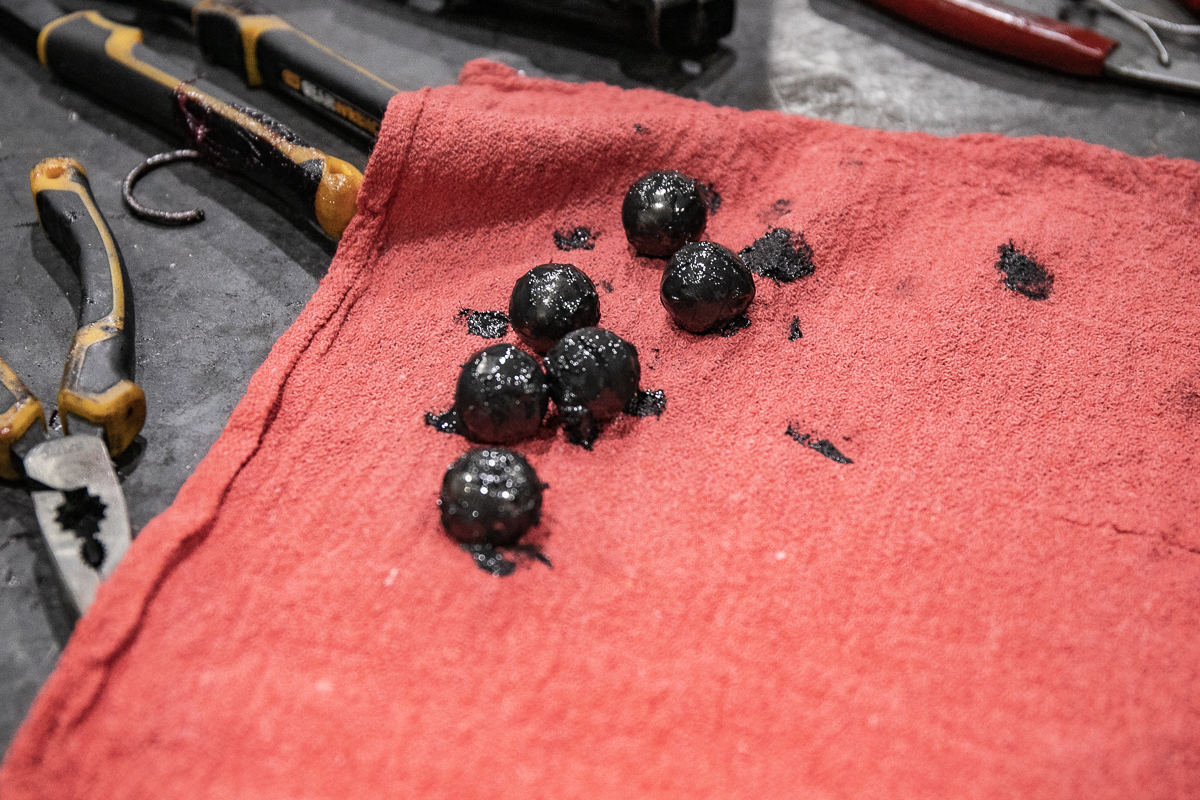
Keep spinning the cage around the race inside the housing until all the balls have been removed.
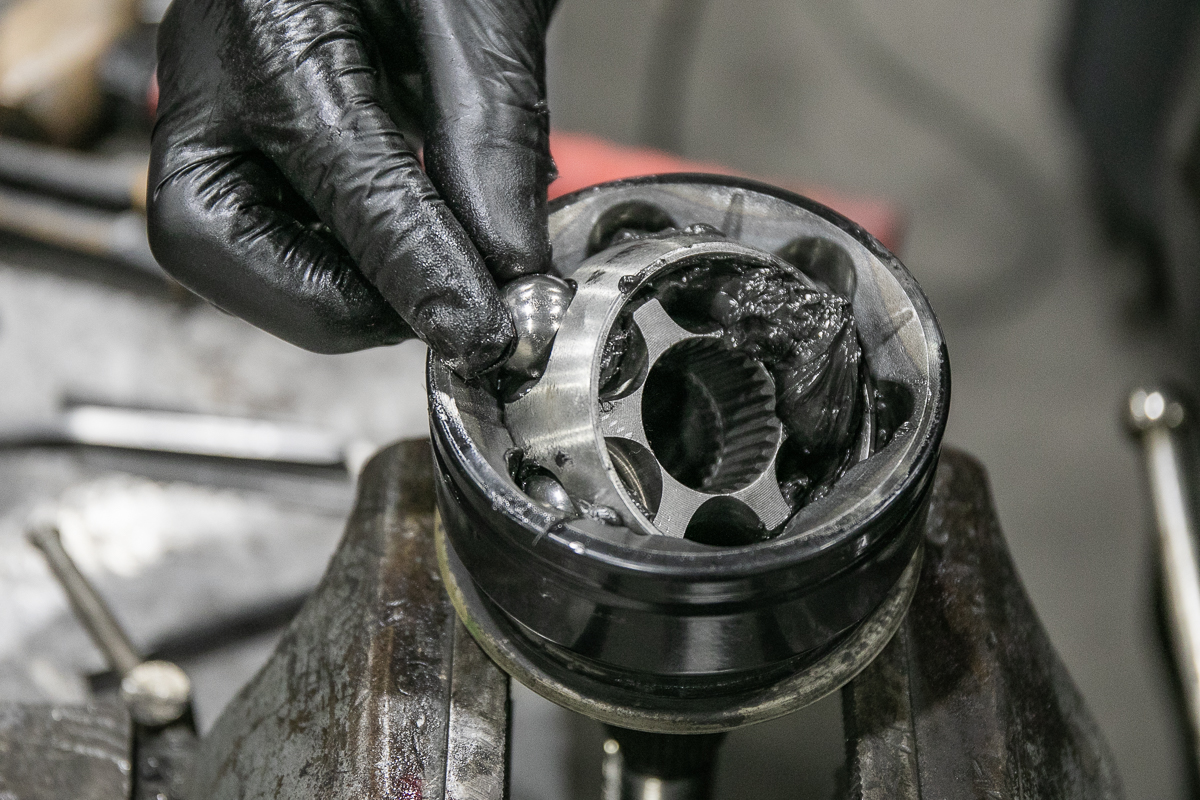
Step 11. Remove CV Joint Race

At this point, you should have just the race and the cage sitting inside the housing. The trick to getting the race out of the cage is locating the two sides of the race that differ from the others. These two points on the “star” will have edges that have a more aggressive slant than the others. Rotate the race so that these aggressive slants are perpendicular to the cage so that they slide up and out.
Step 12. Remove CV Joint Cage

Now pull the CV joint cage straight out. You should have an empty CV Joint housing. You can clean it out with some brake cleaner.
Step 13. Press Axle Shaft

You’re going to need a press in order to press out the shaft from the race. We’re using the shop’s 40-ton press but a lower 5-ton press will get the job done.
Step 14. Prepare & Clean all CV Joint Parts


Take some brake cleaner, or your machine parts cleaner of choice, and clean all the inner joint parts you pulled from joint housing.
Step 15. Remove Circlip from inside race

You’re going to need to reuse the race so you want to remove the circlip that was jammed in between the splines when pressing the old axle shaft out. We do this because we’re going to press a new axle shaft into this race.
Step 16. Clean CV Axle Race

Here you can see the race without the circlip, clean and ready for the shaft to be pressed into place.
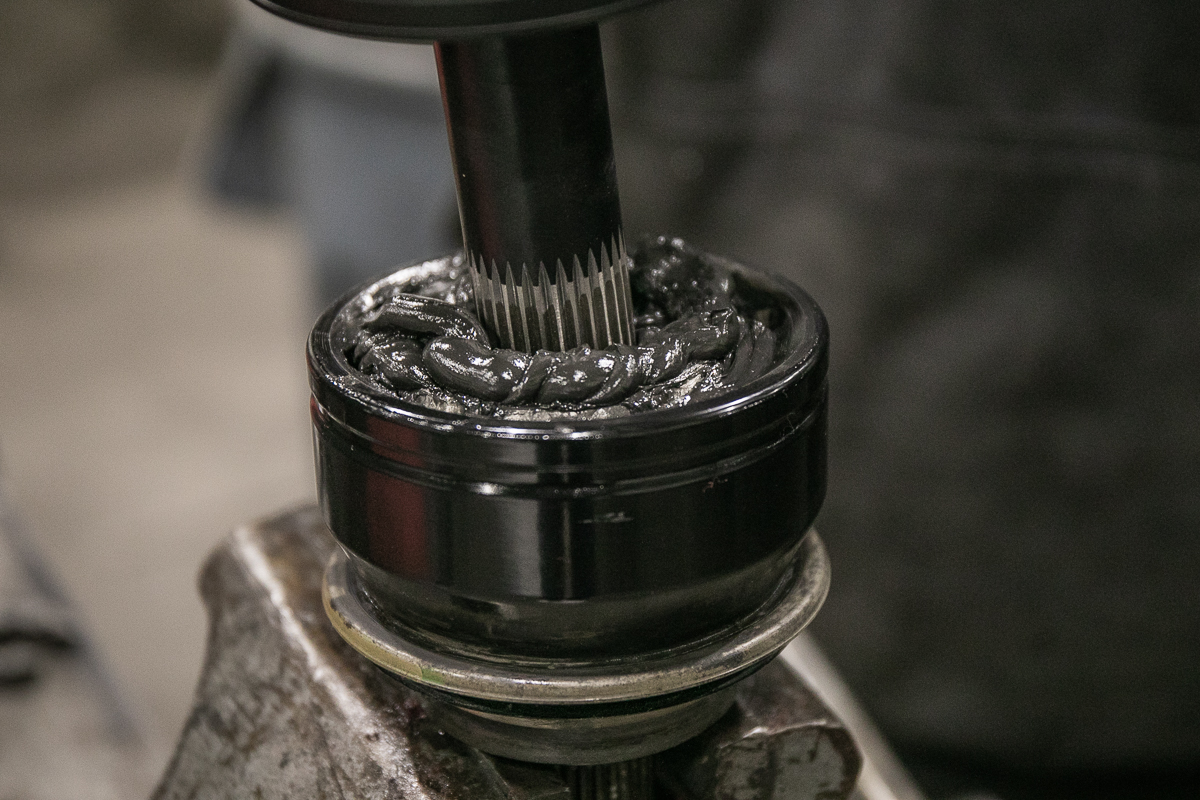
Step 17. Circlip New Axle Shaft

Wrap the new circlip around the shaft circlip slot.
Step 18. Reassemble Joint: Cage + Grease

Now the finicky part, reassemble the joint.
- Insert the cage in the housing
- Add some grease
Step 19. Reassemble Joint: Race

Then…
- Position the cage perpendicular to the race but note step 11 and insert
- The race has two sides opposite each other with slightly shallow star points, align these points perpendicular to the cage and drop the star straight into the cage
- Rotate the race so that it is then parallel with the cage
If you fail to find these two shallow points on the race star, you’re going to fight with the reinstallation process.
Step 20. Reassemble Joint: Balls
Now slowly swivel the race around the cage and install one ball at a time.
While you are inserting balls, lube the race, cage, and balls liberally.
Step 21. Reassemble Joint: More Grease

Yes, this is a step. This is a very important step. If you fail to execute this step properly, you’re going to regret it eventually.
Grease the race, cage, and balls again until no bare metal is showing inside the joint.
Step 22. Prepare Outer Joint Shaft End

Prepare your boots on the shaft.
- Small ring over the boot
- Slide boot over the axle shaft
- Grease the inside of the boot
Step 23. Apply More Grease to Joint

Apply more grease to the inside of the boot and to the inside of the joint.
Step 24. Press New Axle Shaft Splines into Factory Race Splines
This part is tricky. Take your time and line up your splines.
Step 25. Hammer Axle Shaft Into Splines

Once your splines are slowly finding their way into the race, hammer the shaft in place.
Step 26. Clip New CV Boots on Outer Joint Axle Shaft

Clip the inside shaft and then the outside clip around the boot.
Step 27. 934 Plunging CV Axles – Done!
Final Thoughts
As long as you have the right tools, it’s a pretty straightforward process. Make sure that you get the correct OE part number as there are many OE boot replacement kits out there but not all of them come with the circlip that you replace back onto the outer boot. The cages on these axles are so big that we need to notch a portion of the frame rail cross drop in order for the cages to clear.
We got these axles from JD Fabrication but many other companies offer 934 plunging CV axles as well. RCV offers the 934 joint but it’s not assembled on a shaft like JD Fabrication.
The RCV axle that’s offered as an assembled kit on the shaft is a double-offset inboard CV joint (just like the factory joint housing), not the 934. That axle is around $2000 and is also made from 300M and Chromoly parts, however, the cage is much smaller than the JD fabrication cage and is not a plunging axle which gives you more articulation than the latter. The point is JD Fabrication is about $1700 with the 934 joint assembled whereas RCV offers factory-style joints with stronger parts for around $2000. Something to think about.
The inner shaft is going to mount up alongside a brand new 200 Series Landcruiser steering rack. I will update the post eventually with how strong the joints are with the 200s steering rack.

Super helpful post for pulling joints in general but you need to do a post on the inner joints for the poor people who can’t afford big ol’ 943 plunging chromoly caged inner joints all pre assembled.
Thanks for posting this Brennan! It was a huge help when installing our longer axles!