If you are tired of having weak output from your stock headlights, then you have come to the right place. Today we are going to fix that problem by installing the VLEDs LED low beam bulb kit.
If you’re a Tacoma owner, you likely couldn’t help noticing how weak the low beams are on the 3rd Gen. A modern-day truck having weak halogen lights is not ideal—come on Toyota, you can do better! The stock low beam bulbs provide a weaker output and dull color, ultimately affecting your safety and visibility on the road.
You may be overwhelmed by all the options on the market. There are many options to choose from ranging from various color temperatures, brightness, longevity, and price. Today we are going to focus on VLEDS, a well-established company in the aftermarket bulb game. They’ve been providing high-quality bulbs on the market for many years now. They pretty much have lights and bulb upgrades for every vehicle make and model.
We all know that equipping your vehicle with a good set of low beams is essential. Let’s take a look at what it takes to install these lights and do an initial review and overview. These bulbs will fit in any application that requires an H11, H9, or H8 bulb.
Find It Online
- VLEDS Micro Extreme H11/H9/H8 LED Low Beam: Check Price
Table Of Contents
What’s Included?

When your package arrives, you will be greeted with two very well packaged boxes providing tons of padding, ensuring your bulbs won’t get damaged while in transit.
Right out of the box, it’s easy to notice the attention to detail and build quality. The heftiness and precision cut parts just go to show that you are getting a top-notch product; these lights definitely look and feel well built. Included in the kit will be your two new LED bulbs and their wiring harnesses.
Features & Specifications

These bulbs are absolutely packed with features. There’s a reason these might be the best replacement bulbs on the market.
Specifications:
- 4500-lumen output (per bulb) – 9000 lumens total!
- Adjustable LED direction
- Come in 5000k and 6000k color temperature
- OEM fitment in housing
- IP68 water resistance
- Lifespan over 30,000 hours
- 12 LED chips
- Superior performance
- Efficient thermal dissipation and management
Bulb Overview & Comparison

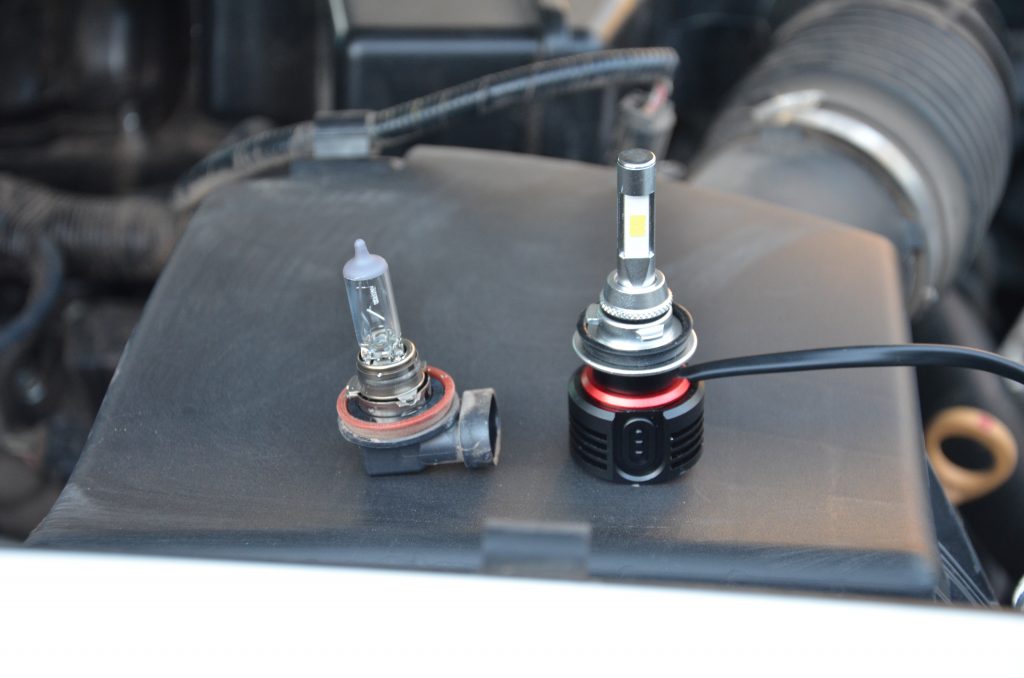
For reference, here is a side-by-side comparison between the stock bulb on the left and the new VLEDS bulb on the right. Equipped is a fan inside the base assembly which ensures the proper cooling of the bulb during operation. Furthermore, the heftiness and the build quality of the build compared to the stock bulb is crazy and speaks volumes.
The bulbs that we will be installing today are the 5000k version. This bulb comes in two options, 5k and 6k. 5k, being pure white, and 6k having a hint of blue. Depending on your preferences and needs, VLEDS provides plenty of options to choose from to ensure total customer satisfaction. The 12 LED chips equipped with 4500LM per bulb is a tremendous upgrade from the stock halogen bulbs.
Enough talk. Let’s install these guys.
Step 1. Remove Stock Bulbs

We are going to start with the driver’s side bulb. Open your hood and locate these three harnesses/bulbs. The outermost harness will be the low beam bulb.
To remove the bulb, all that needs to be done is a counterclockwise turn about 30 degrees and the bulb should unlatch and pull right out.
Step 2. Unplug Low Beam Harness

Once the bulb is removed, it is time to unhook the harness from the actual bulb assembly itself.
There’s a clip that holds the bulb into the harness. Push down on the grooved tab at the end of the clip while slightly pulling on the bulb will separate the harness and bulb.
Step 3. Install New Harness

Line up the MICRO lettering to the cutout on the harness. Making sure everything is square, and snap the harness into place ensuring it is secured after you hear an audible clicking noise.
Now that the harness is installed, head into the cab and turn on the lights. If the bulb turns on, you did it right, if it didn’t, flip the harness 180 degrees and try again. Check to see if it’s fully inserted and secured too.
Step 4. Install New Bulb

Using a similar process to when you removed your bulb, the installation of the bulb will be done in reverse. The bulb housing has slots on it just like the stock one. Line up the slotted tabs to the cutouts in the light housing, and you will feel the light settle into its spot.
Turn the light 30 degrees clockwise while applying forward pressure, ensuring the seal is tight. You will know the light is set in place once the harness wire is directly pointed down at the ground and you feel the light stop rotating.
Output Comparison
Now that the installation is done, let’s take a look at the output for these bulbs compared to my OEM bulbs.
Factory Halogen

VLEDS LED

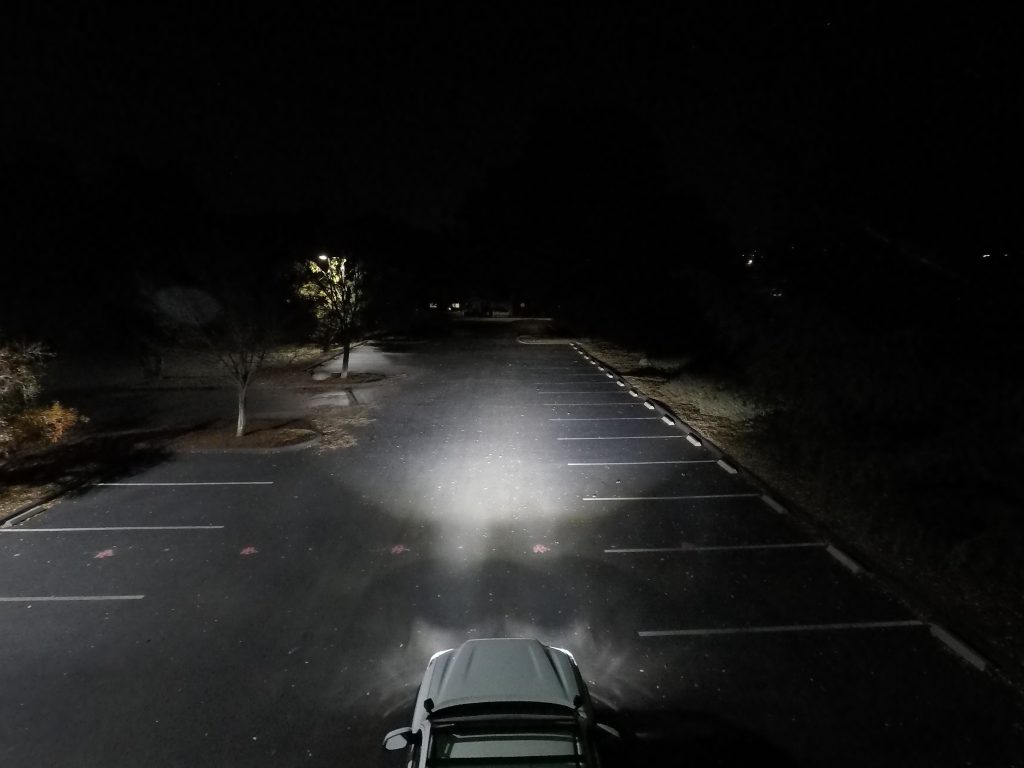
The previous images are a great side-by-side comparison between the stock and new VLEDS bulbs. Right off the bat, I have to mention the clarity. The stock bulbs are dull yellow in color and give off a cheap and unreliable source of light. With the new bulbs, there is a noticeable difference in the color, clarity, brightness, amount of usable light, and overall visibility.
Comparing the two photos, it is easy to see that the VLEDS bulbs blow the OEM bulbs out of the water. With these bulbs, the projection pattern is wider and farther. Objects from a distance are more easily recognizable too. This helps in dark driving conditions being able to see farther ahead on the road. Objects closer to the ground are more illuminated with the new bulbs too.
Final Thoughts

What else can I say? These lights are great. After a few months of usage, I have no complaints. Solid build quality, awesome output, easy install. What more could you ask for? These LED bulbs are definitely one of the best on the market.
LEDs are definitely the way to go. While it is unfortunate that Toyota didn’t equip some of their models with them, there is no need to worry because VLEDS will have you covered—ensuring your driving experience is that much safer and brighter in the future.


I wanted an inexpensive alternative to my stock halogen low beams. This was a great article and I couldn’t be happier with the VLED. Thank you!
Hey Taylor, glad we could help!