Wiring and electrical. It could be worse, but I’m not the biggest fan. They have grown on me in the last couple of years, but still, I want to make the process as easy and quick as possible.
Adding accessories to a truck happens quite often, and even more often if you’re into off-roading and overlanding. But you can’t avoid one thing – and that’s power. All those accessories are going to need power. If you don’t have any experience with running additional electronics, then you probably don’t know they add up fast. All those accessories need lots of wiring – which needs to be run safely and throughout lots of tight places.

This means that you either need to pay someone (gets expensive, fast), figure out how to properly wire (takes time and a certain level of skill), or take the time to wire (loads of time) – I’m sure I missed something. I’m not trying to make it sound like the end of the world, but wiring a handful of electronics correctly can take a long time. Most people don’t have the time or the patience.
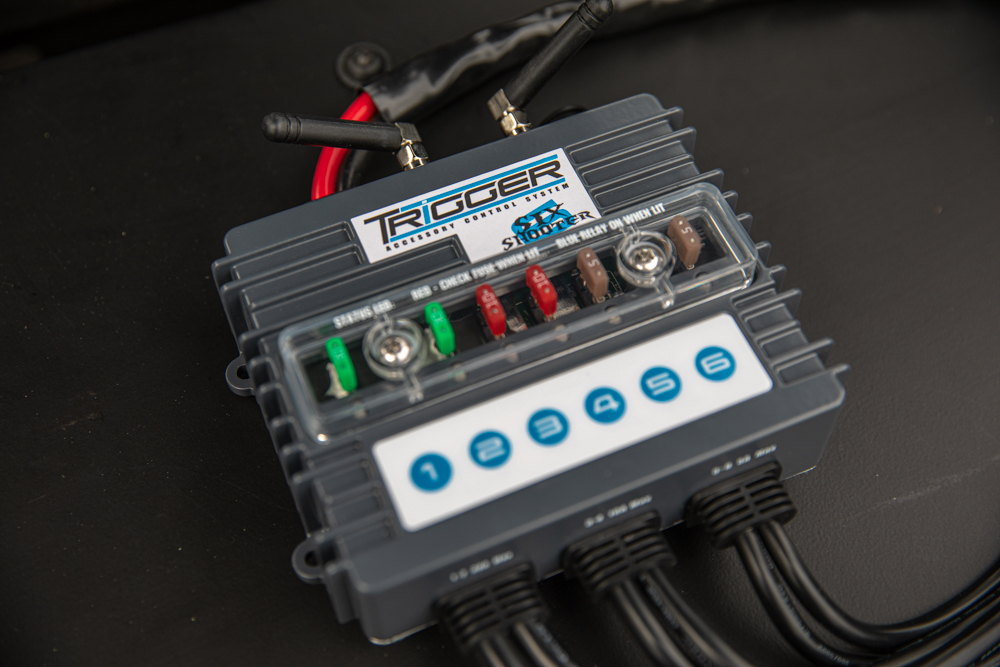
That’s where the Trigger 6 Shooter comes in. This system centralizes all your wiring into one unit, drastically reducing the difficulty and time involved with hooking up auxiliary electronics. Installation couldn’t be easy or more affordable. With several other more expensive (and a few less) competitors on the market, this choice might just be your best bet.
Find It Online
Table Of Contents
Features & Specifications
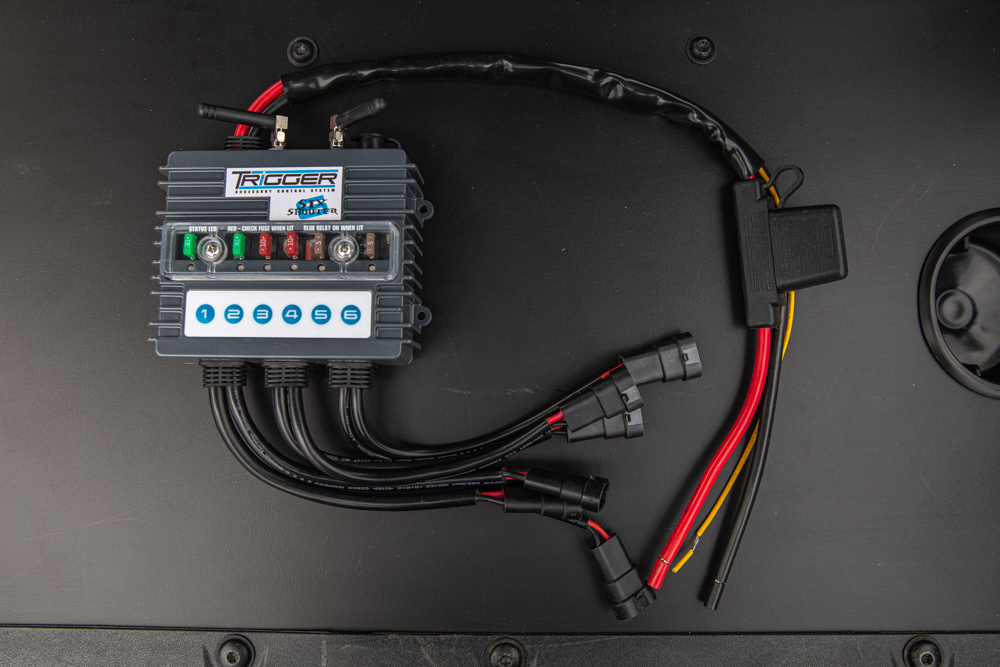
This particular version, named the 6 Shooter, is designated in that manner since it can run an additional six accessories. Trigger also makes the Trigger Controller 4 Plus, which, as you might imagine, has four slots. I would recommend everyone get the 6 Shooter since you’ll likely run out of room at one point if you plan on continuing your build. Get the 4 Plus only if you absolutely know you’ll never need more connections.
As I mentioned earlier, the primary intention of this kit is to save on installation time and hassle. With this system, you don’t need to send any wires through your firewall and into your dash. This setup also comes with a backlit remote controller that is portable and can potentially be mounted in many different ways. Remote colors can be set to custom colors, and switch labels are also included.
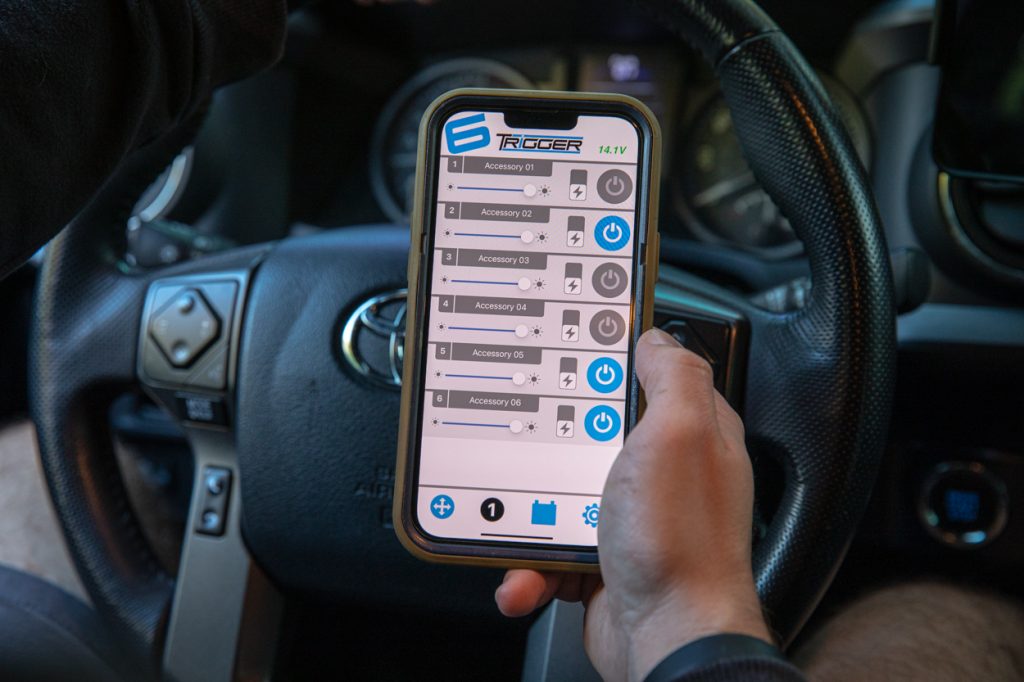
A standard Bluetooth App connection allows you to control the system from your phone and extra functions like flashing (strobing) and dimming. The Bluetooth app also monitors battery voltage.
The unit itself has LED indicators that tell you when a fused circuit is blown. The system comes with different amp fuses for its six connections. (2) 30 amp fuses, (2) 10 amp fuses and (2) 5 amp fuses. This allows you to accommodate a wide variety of power draws.
For being a more cost-effective option, this kit should likely cover the needs of many looking to simplify their truck wiring experience and add some additional functions that in a conventional system would be much more challenging to accomplish.
Installation
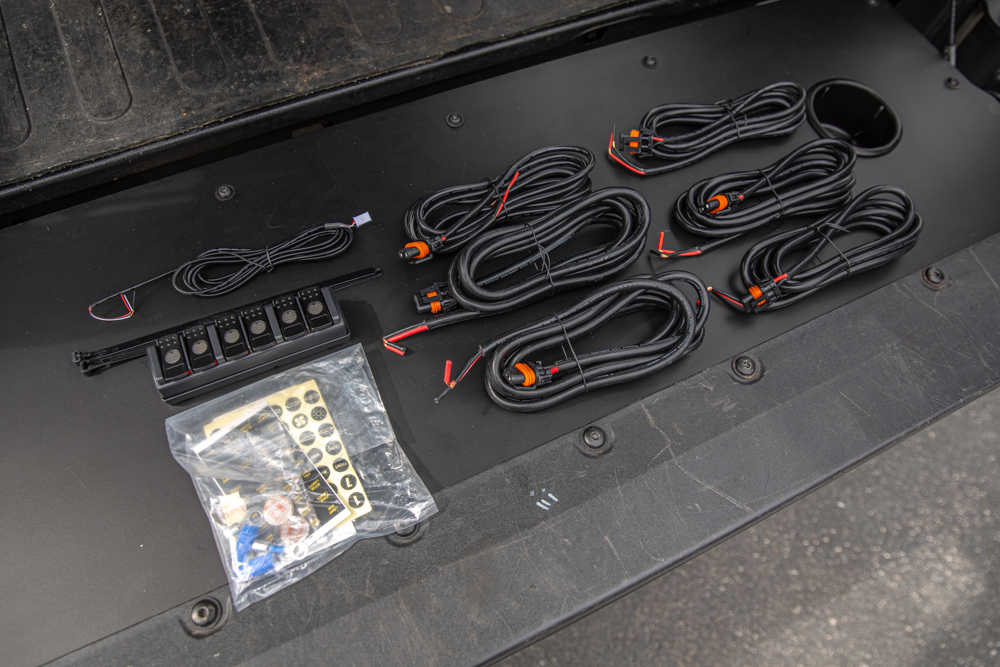
These kits come with everything you need. Well, almost everything.
Since the kit is universal, you get everything except a bracket for your vehicle. The Trigger 6 Shooter has mounting holes built into it, so you can either make your own mount or do something like bolt it to your factory fuse box. If you have a Tacoma, you can cut right to the chase and get the bracket Trigger sells that works great and installs quickly. Bracket found here.
This is what I opted to do, and the rest of the install only requires some basic wiring tools and making a few new connections. The kit comes with six connectors to easily splice into electrical harnesses. Wiring your actual accessories is super easy, but I’ll touch on that later.
Required Tools
- Mechanic’s tool set (basic option works)
- Screwdriver set
- Basic wiring tools (for connecting accessories)
Step 1. Mount Tray in Engine Bay
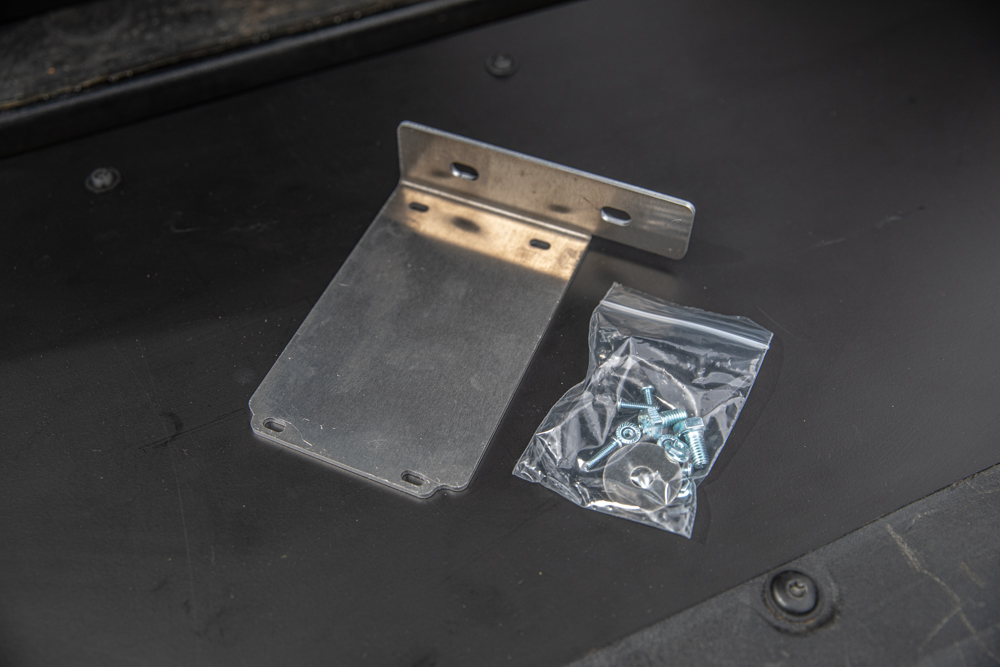
Above, you can see the Tacoma-specific bracket. It comes with everything you need to install it.
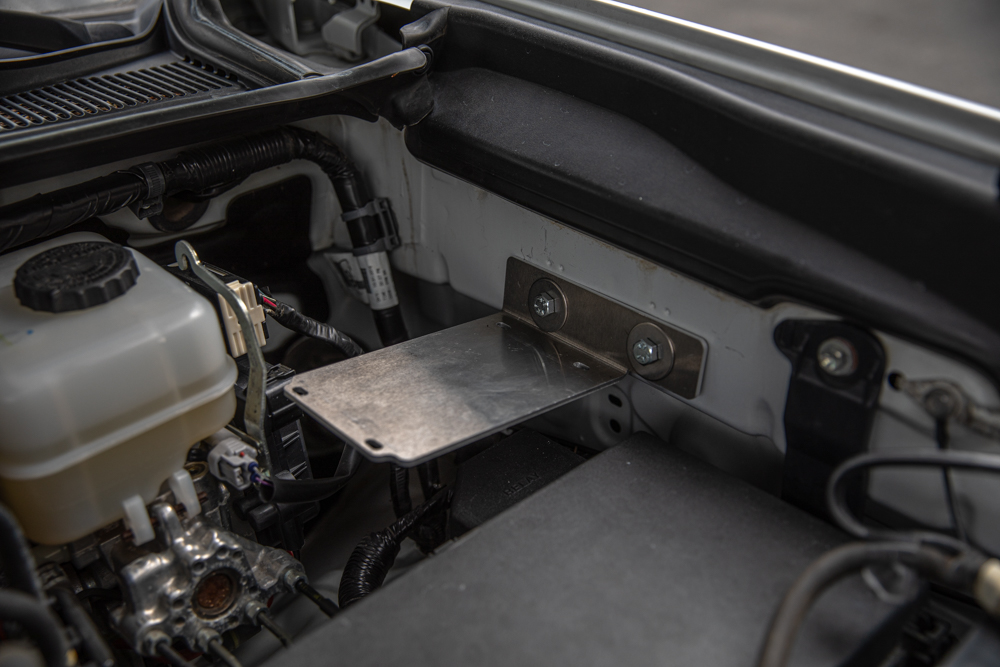
You’ll want to install the bracket first before you mount the Trigger unit to it. Otherwise, you won’t be able to access the screws that connect the bracket to the inner fender.
Step 2. Mount Trigger Controller To Tray

Trigger Controller mounted on the tray. Super easy. You’ll need to use the provided nuts and bolts.
Step 3. Wire Controller To Battery

The kit comes with ring terminals to install on the wiring that attaches to the battery. I used electrical tape over the top of the ends and some zip ties.
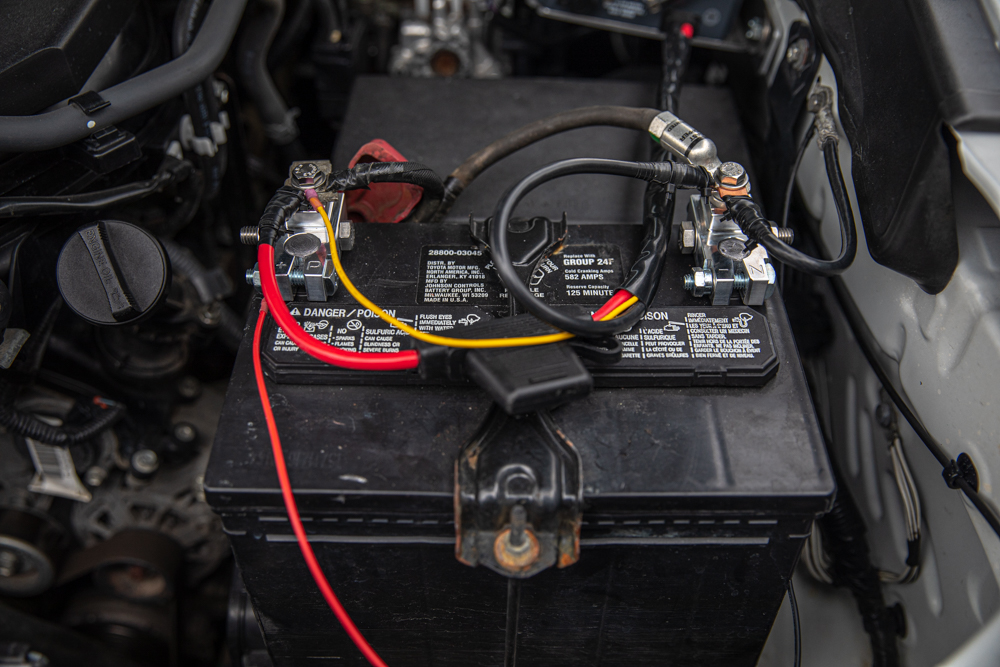
Once you’ve got the ring terminals on, connect the positive and negative leads and the yellow accessory wire. Technically, this wire should tap into a circuit that only has power when the truck is in accessory power mode or when it’s running.
I chose to wire it straight to the positive battery terminal, but keep in mind that the unit will always draw a little power when it’s hooked up this way. My battery had seen better days, and after leaving the truck stationary for a little over a week, this unit drained my older battery. I have since replaced it with an OEM battery and haven’t had any problems since. Again, something to consider when working with the yellow wire.
And that’s it! Time to wire up your accessories.
Wiring Your Accessories
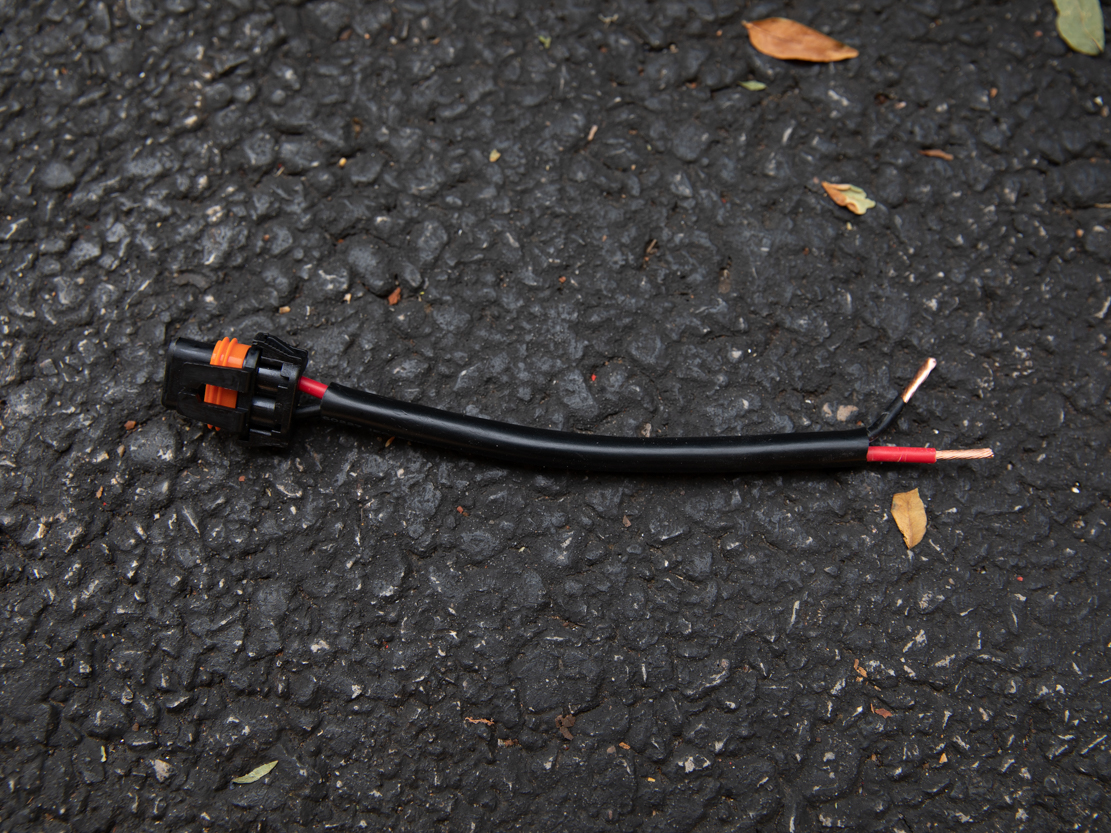
The system has six harnesses ready to plug right into the Trigger Controller. All you have to do is match the appropriate size harness to the correct fuse in the unit and splice in your accessory harness into the provided one. Above, you can see what that looks like.
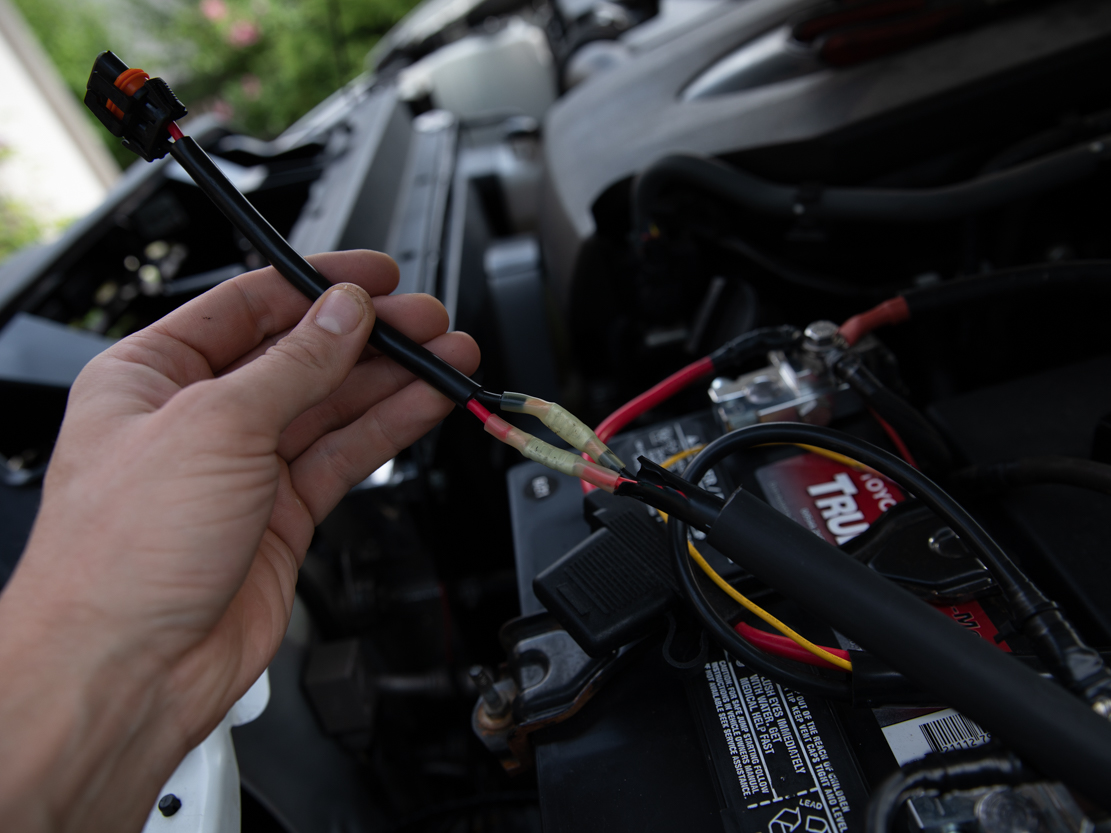
Pretty simple since both the Trigger harness and your auxiliary harness should have red and black color-coded wires. All you need to do is connect them, as seen in the picture above.
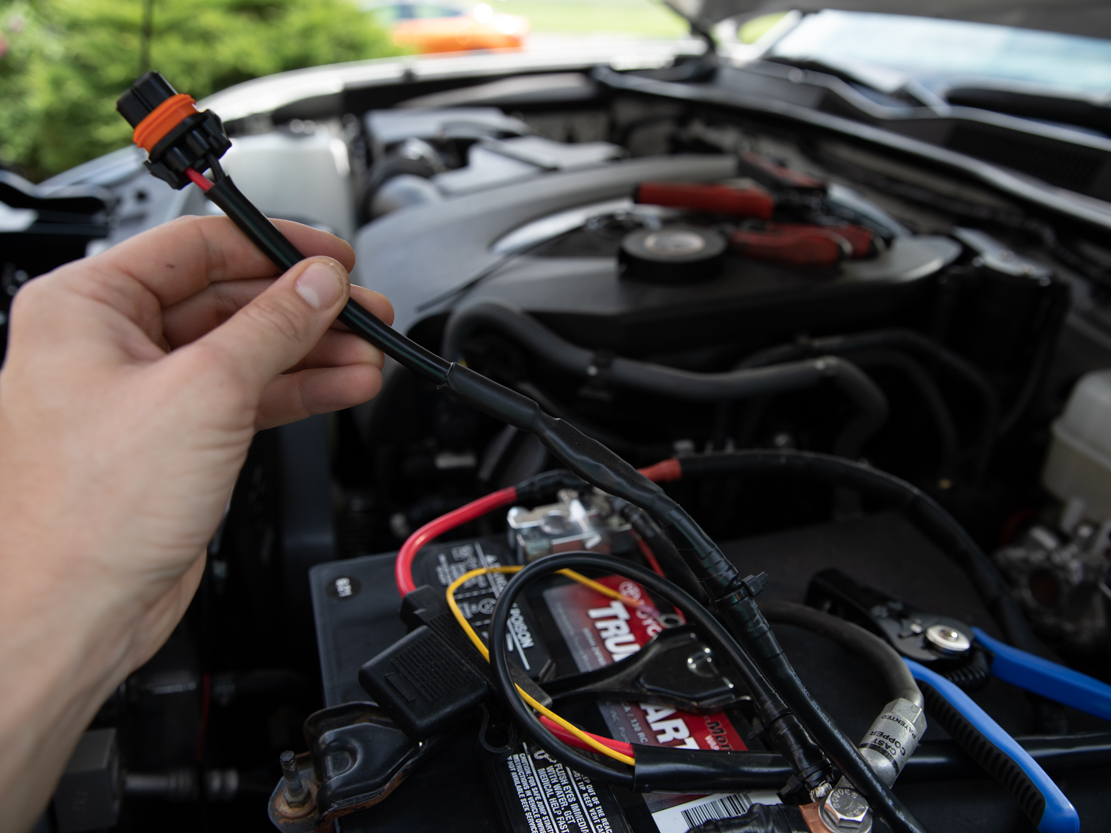
Make sure you protect your connections.

Now you plug into the controller. That easy. No wiring switches, no playing with relays, no pushing wires through the firewall. If you’ve never had to wire anything that way, consider yourself lucky. It’s a pain in the ass, haha. These controllers didn’t exist until about 5ish years ago.
Bluetooth App

The Bluetooth app is okay. It’s straightforward but allows you to make a few custom edits. You can name your accessories on the screen, turn them on and off, and controls for dimming and strobing. It provides you with relatively everything you would want in a kit like this.
I say it’s just okay because the app is a bit glitchy. Dimming can take a bit of playing around with the adjustment slider (it doesn’t respond immediately all the time), and the app tends to be slow to start and operate. Now, yeah, it works, but it’s not stellar. There seem to be issues with the app and how well it communicates with the Trigger unit.
Now, that being said, I’m not too upset by this. It’s a more affordable unit, and although sometimes frustrating, let’s be honest – even if you use your auxiliary lights a lot, it’s usually only to turn them on and off. The Bluetooth app certainly does that fine, and you still have the radio remote.
Could it be better? Sure. Is it that big of an issue? I don’t believe so. Would I still like to see an updated version? Definitely.
6 Switch Wireless Radio Remote
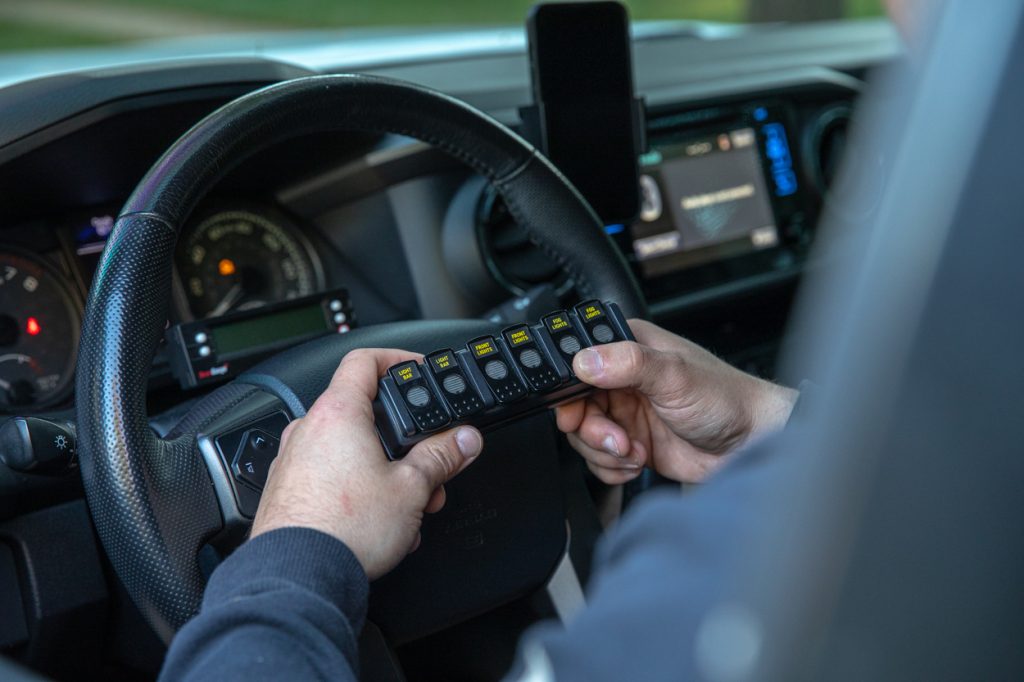
Pretty short section here. The wireless remote works great, and you can add to the switches (some stickers come with the unit). It also has a backlight, which while not super necessary, is nice feature.
The remote is pretty sturdy and the switches need a good amount of resistance to push on and off. I’ve never had any issues with the remote. The unit allows you to mount it to several surfaces. Whether that’s a roll bar, a flat surface, or (using the Trigger holder) you can slide it over your visor like a garage door opener.
Final Thoughts

I’ve had this system for long enough to give a solid review/opinion on it.
At the end of the day, for the price you pay, I think this unit is worth it – especially if you’re a novice to wiring or are looking to knock out your wiring job quickly. Having a simpler way to install six accessories without taking apart your whole truck is great, and through all the time I’ve been using this unit, it’s done well. I’ve even run a slightly larger fuse (by 5 amps) in one of them to accommodate my lighting setup. I do not encourage you to do this, but the unit has been fine.
I haven’t had any real issues with the controller, but I will say, be careful when washing your engine bay. The controller has a seal, but it’s not completely watertight. Mine got a little finicky after I power-washed my engine one day (no, I didn’t spray it directly). Once I let it dry, there have been no issues since.
Anyway, a simple system that makes life easier. Can’t go wrong!


I currently have the 6 shooter and having the amp size issue. For the 5 amps your saying you didn’t have an issue going up by an additional 5 amps? I know it’s not recommended but just want to make sure your unit is still going good.
Hey David, the unit is still working well today. I did have a couple of issues recently… just not sure if it was directly related. I had a couple of fuses melt and start smoking. However, it wasn’t the one with the 5 extra amps that had the issue first. It was one of the smaller ones. Not sure if something I did caused this, but a couple of fuses melted and began to burn rather than fail (as designed). I suspect that I had a run of bad fuses, or maybe the replacements were junk, but it did happen,… Read more »
Thank you for taking the time to answer Konrad. Crossing fingers I don’t run into these issues lol
I just want to make sure I read your review correctly.You said that you did NOT have to use any relays with this unit.Since I am interested in the Trigger 6 an don’t want to have any more than what is necessary under the hood.
Correct. Everything you need comes in the package. And the bulk of it is just the control unit itself. You just need to connect it to power and run your wiring appropriately. Easy!
I’m trying to decide where to mount mine. I have an ARB dual air compressor where it says to install on a ‘13 Tacoma. Any thoughts or suggestions?
On top of your fuse box maybe? Otherwise, I would just find some empty nuts in the engine bay (or use self tappers) to attach a small custom made mount. It wouldn’t be hard to make something that could fit just about anywhere there is metal to mount to.
Great write up! I’ll definitely be looking into this because as you said pushing wire through the firewall is a huge pain in the ass!
Thanks, Josh. It is a world of difference when you only have to splice one harness per light.