

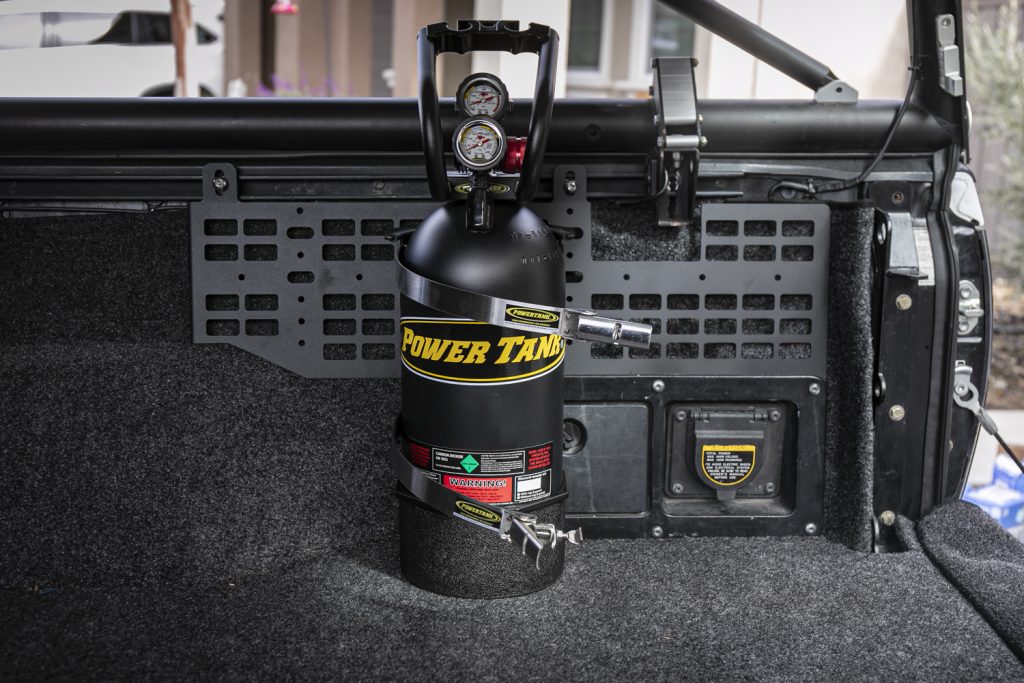
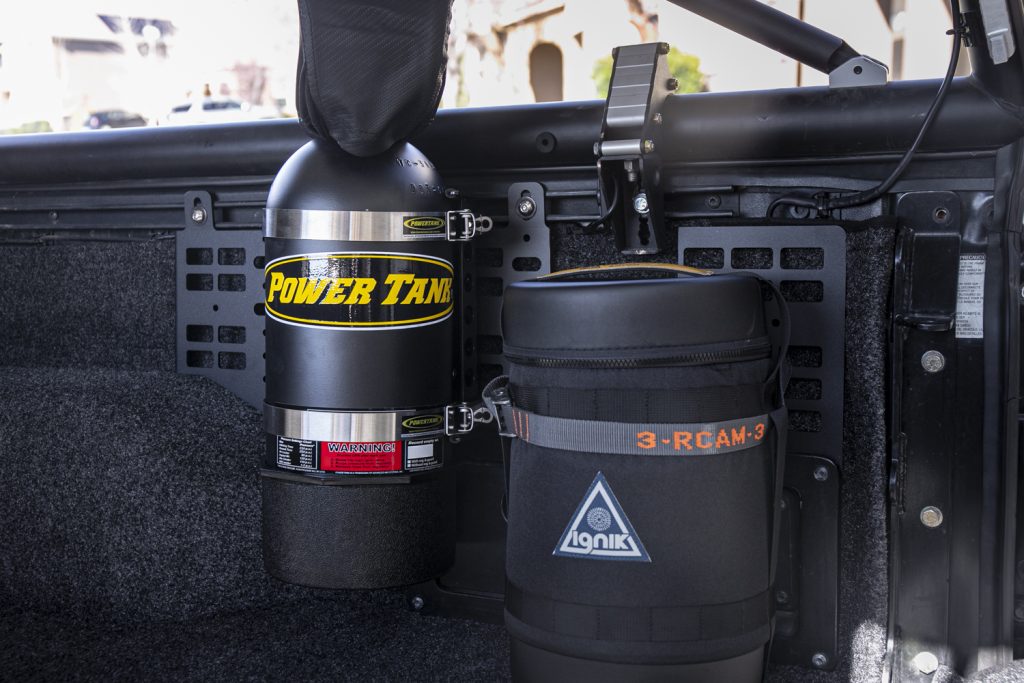
If you are looking to mount a Power Tank in the back of your Tacoma, you have plenty of options for positioning the tank. The easiest and cleanest solution I found for my specific setup was by using a Cali Raised MOLLE panel and attaching a Power Tank universal bracket to it.
Because I am not running on board air on this Tacoma, I wanted a solution in the bed of the truck that wouldn’t interfere with the camper and would be easy to access without getting into the bed of the truck.
With a little placement troubleshooting, it turned out to be a clean, strong, easy-to-access setup that keeps the tank secure and your bed usable.
Located on the rear passenger bedside with a dedicated accessory/hose/inflator gauge storage system, you don’t have to get in the bed of the Tacoma to set everything up and break it all down when you go to air up your tires.
If you want even more flexibility when mounting a CO2 tank or a propane tank horizontally or vertically, check out the Power Plate, a MOLLE Panel specific bracket for Power Tanks and propane tanks. The Power Plate helps to distribute forces over a larger surface area, and the smaller 1/4″ hardware is easier to mount to MOLLE panels with smaller gaps/holes. With our six big bolts/washers behind our MOLLE panel, it likely isn’t an issue, but if only three or four can be installed because of the mating to the MOLLE panel or if it is being mounted to an aluminum MOLLE panel, Power Tank recommends using the Power Plate.
Find It Online
- Power Tank (10lb): Check Price
- COMP2 Bracket: Check Price
- Power Plate: Check Price
- Air Hose (30 ft): Check Price
- Ventoso™ Modular Tire Inflator Gauge: Check Price
- Cali Raised MOLLE Panel: Check Price
Note: I did have to cut out a portion of the Cali Raised MOLLE panel to fit around the GFC bedside brackets. After cutting out a portion of the bracket, I hit the bare metal with some STEEL-IT paint.
Table Of Contents
Organize Your Hardware
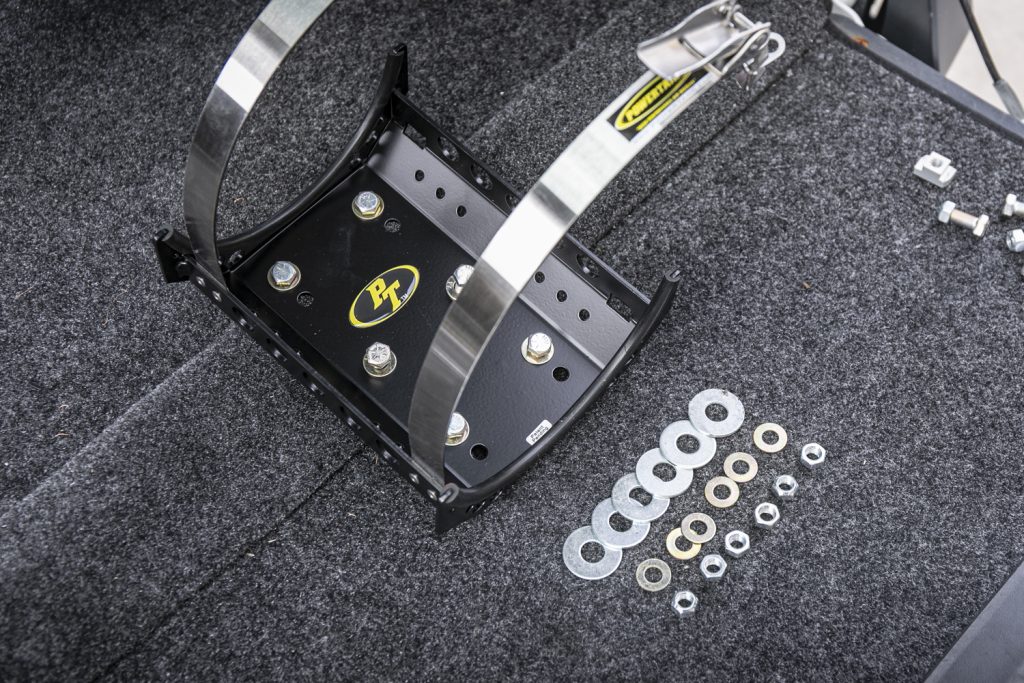
Before you start bolting anything together, lay out all your hardware. This setup uses 3/8″ hardware and oversized washers to spread the load on the backside of the MOLLE panel.
- 3/8 1″ bolts X 6
- 3/8 washers X 12
- 3/8 ID and 1.5″ OD diameter washers X 6 (backside of MOLLE panel)
- 3/8 nyloc nuts
In total, six bolts hold the Power Tank universal bracket onto the Cali Raised MOLLE panel. The oversized washers on the back side are important because they help distribute the clamping force across a larger surface area, where MOLLE cutouts are larger on the backside, and the 3/8 washers don’t fit.
Driver’s Side or Passenger’s Side?
Before you drill anything, decide which side of the bed you want to mount the Power Tank on.
The bracket can be positioned on either side, passenger or driver. All you have to do is flip the bracket upside down.
Whether you mount the bracket on the driver or passenger side, you can simply undo the clamps, swing the bracket open, and remove the tank without interference.
Step 1. Mock Up Universal Bracket On MOLLE Panel
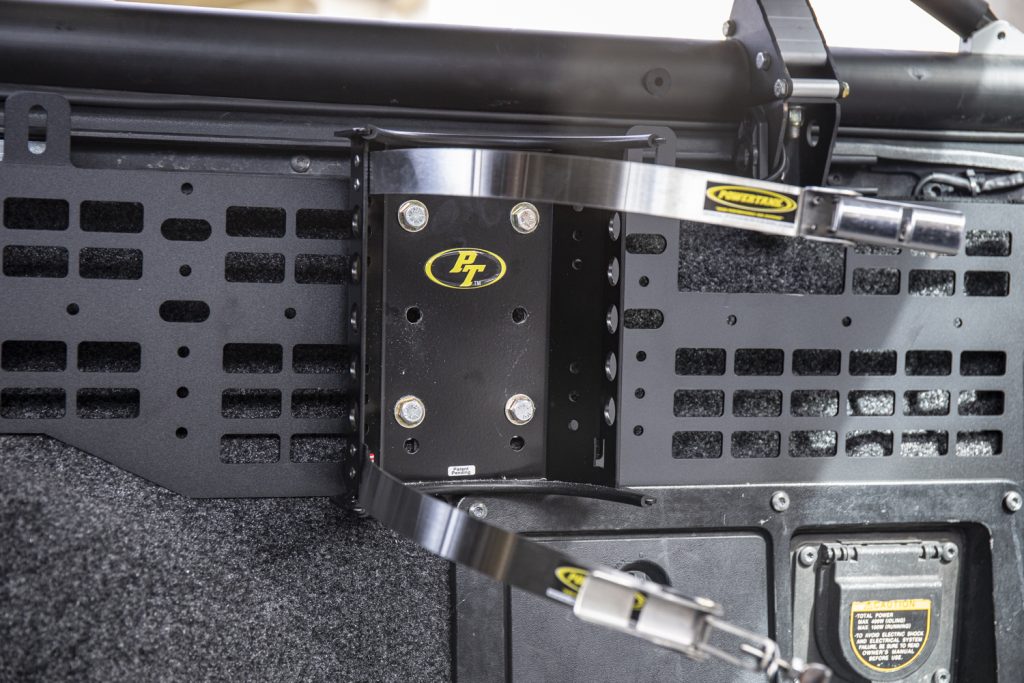
Start by mocking up the Power Tank universal bracket up to the Cali Raised MOLLE panel and decide the best height and position for your bed layout. With a GFC camper (or any camper), pay attention to where the tank sits in relation to your GFC bedside brackets so that the clamps can open freely.
Once you like the placement, install the first four bolts to lock in the position. Do not fully torque them yet, just snug them enough that the bracket stays put while you verify fitment.
If the existing holes do not perfectly line up for all mounting points, you can drill two additional holes (or notch any interfering material) through the MOLLE panel to complete the six-bolt mounting pattern.
You also don’t “need” six bolts on the bracket, but the Power Tank is heavy when full, so it gave me some peace of mind having all six bolts secured.
Step 2. Final Assembly
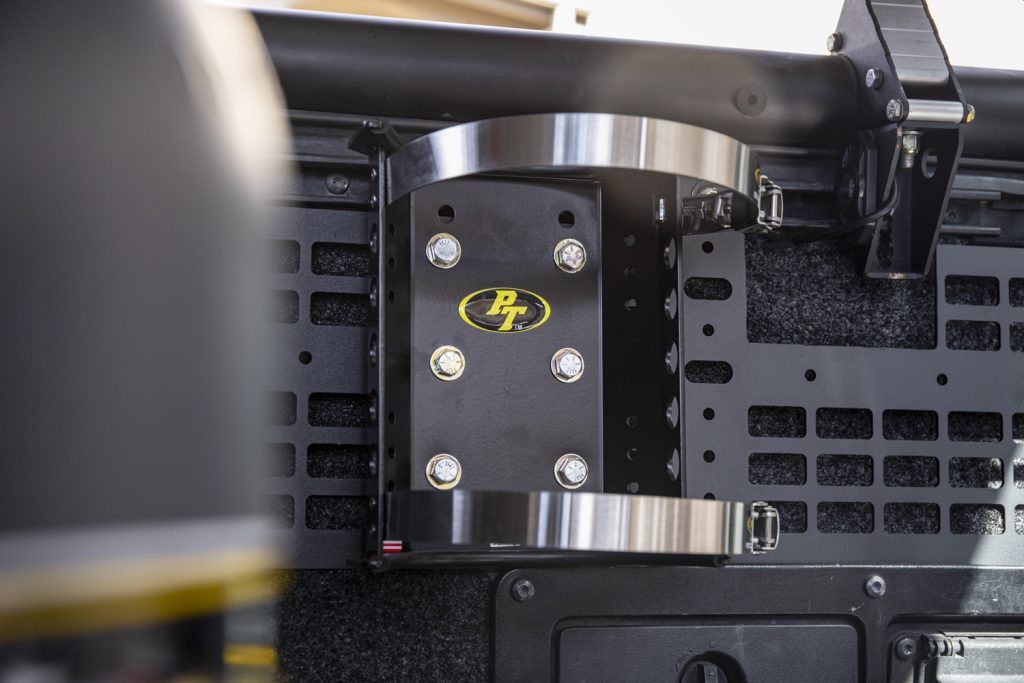
With the bracket positioned and all holes confirmed, install all six bolts for the final assembly.
- Run each bolt through the bracket and MOLLE panel
- Add a washer and oversized washer on the backside where needed
- Install the nyloc nuts
- Tighten everything evenly so the bracket seats flat
Once everything is aligned, torque the hardware down firmly.
Once the Power Tank bracket is mounted to the Cali Raised MOLLE panel, you can fully tighten the panel to the bedside rails.
Step 3. Clamp The Tank To Mount
Now that the universal bracket is mounted to the MOLLE panel, fit the Power Tank to the bracket and fine-tune the clamp hardware provided on the Power Tank bracket so the tank sucks into the bracket with as much pressure as possible.
Since the tank sits off the bed floor, we want the tank to be as secure as possible to the bracket to prevent any movement off-road.
Power Tank Accessory Storage Solution
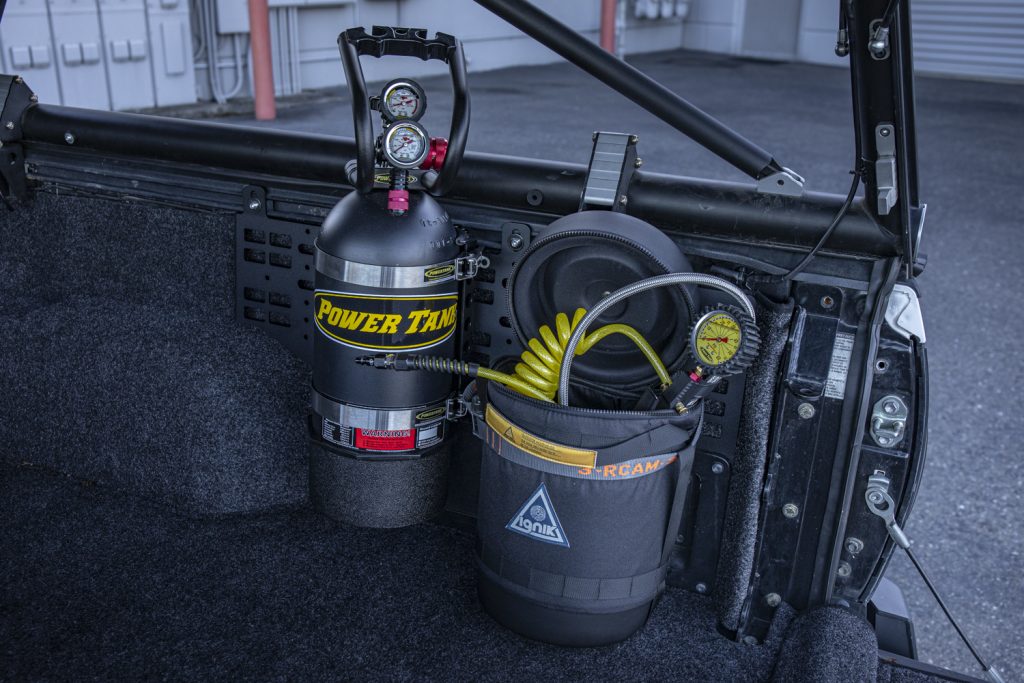
Once the Power Tank is mounted, the last piece is figuring out where to put your hoses, inflation gauge, chucks, and any other accessories you run.
For this setup, an Ignik growler case works perfectly. It is a propane growler case, but the sizing and shape make it an awesome storage solution for Power Tank accessories. I used a Rollercam strap wrapped around the MOLLE panel, and it holds in place but still allows for easy opening and closing of the lid.
The Ignik case fits everything…
- Hoses
- Inflation gauge
- Chucks
- Blow tips
- Any other accessories you keep in the kit
The Ignik growler case is almost the same width as the Power Tank, so it kinda looks like it was meant to be part of the setup. Now, if Power Tank just had a branded case like this for all their accessories, that would be pretty nice.
There are other MOLLE buckets and pouches I considered on Amazon, but the ones I looked at were all around $40 – $50, and the Ignik case is just a better all-around sealed bucket and size for this application, for under $60.
Final Thoughts
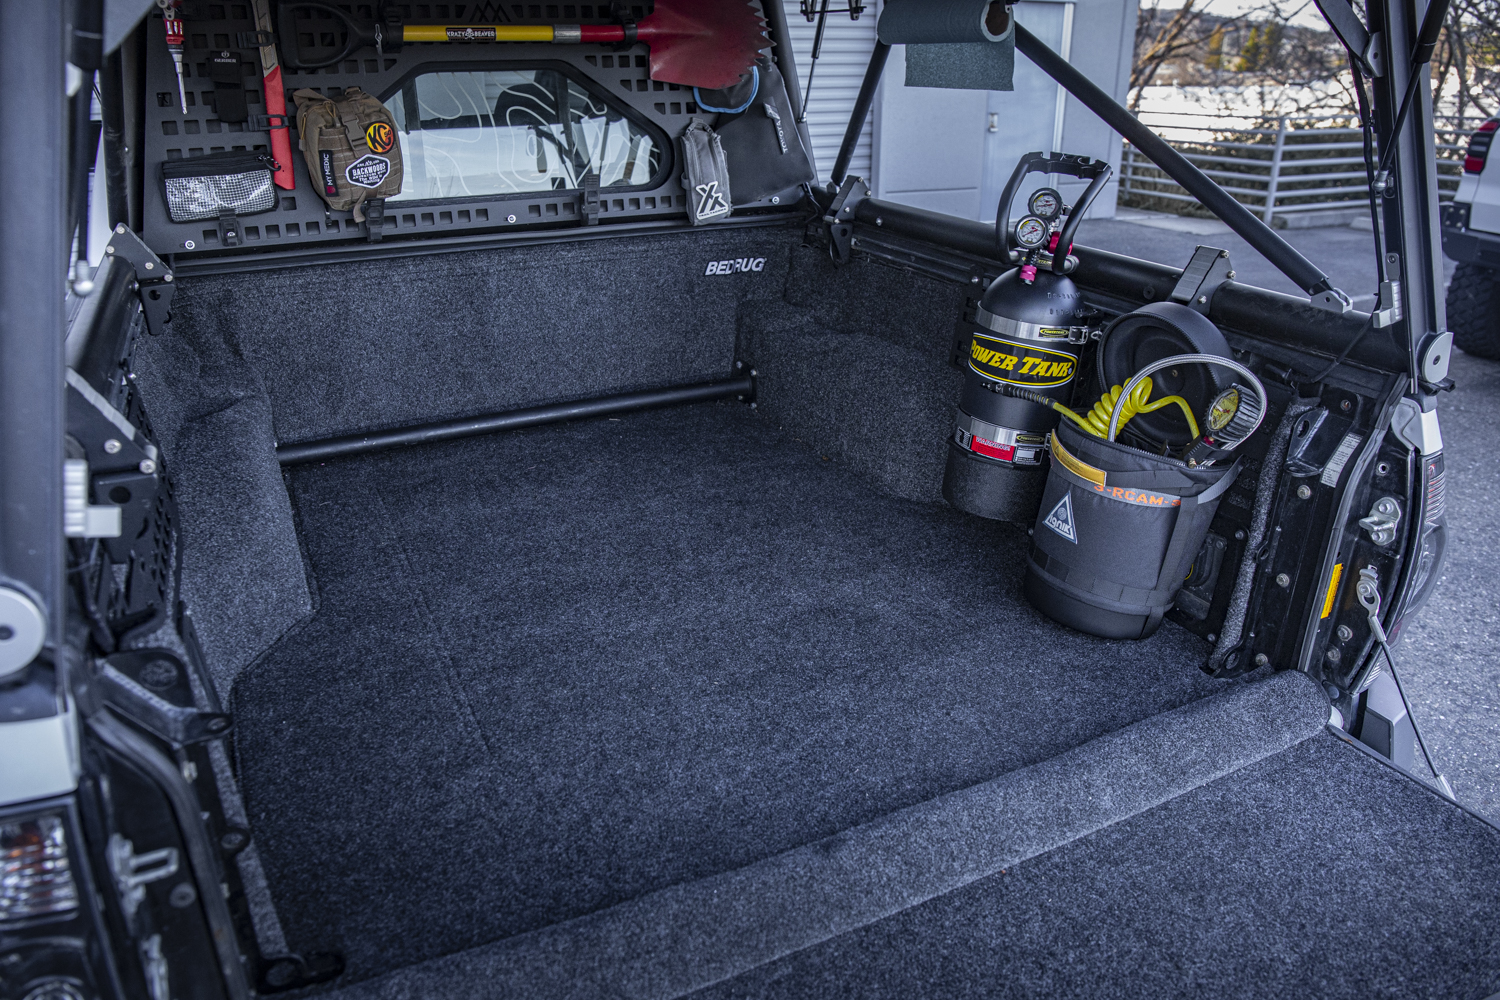
If you want a clean way to mount a Power Tank in the back of a Tacoma, the Cali Raised MOLLE panel works pretty well.
The install is simple, the bracket is secure, and the end result is a setup that is super user-friendly when airing up tires.
Pretty stoked with how this turned out.