

This is a great guide for after you install bigger tires. This will work for both the 2nd and 3rd Gen Tacoma as well as other makes and model trucks.
Imagine you just installed that new suspension and you are about to leave the tire shop with your brand new 33-inch+ off-road tires.
You put your truck in reverse and turn the wheel full lock (all the way left, or right) and hear that dreaded sound; RUBBING! You knew it would come to this eventually and that time has arrived.
Let’s get into how to chop your cab mount to get rid of that noisy rub that’s chewing up your tires.
Table Of Contents
Step-By-Step Guide
Step 1. Gather Supplies
Tools/Supplies Needed:
- Cab Mount Chop (CMC) Plate
- Tape Measure
- Tire Lug Wrench
- Torque Wrench
- Floor Jack
- Jack Stand (x2)
- Angle Grinder
- Flap Disc
- Cut-off Wheel
- Paint Pen
- 3-lb Hammer
- 90 AMP Welder
- Rust Protective Paint
- Eye Protection
- Ear Protection
- Work Gloves
Once you get your Tacoma home and you have all of your gear ready to go, try to find a flat and level area to do the cab mount chop.
Place your truck in park and set the emergency brake. Chock the back wheels and you are ready to begin.
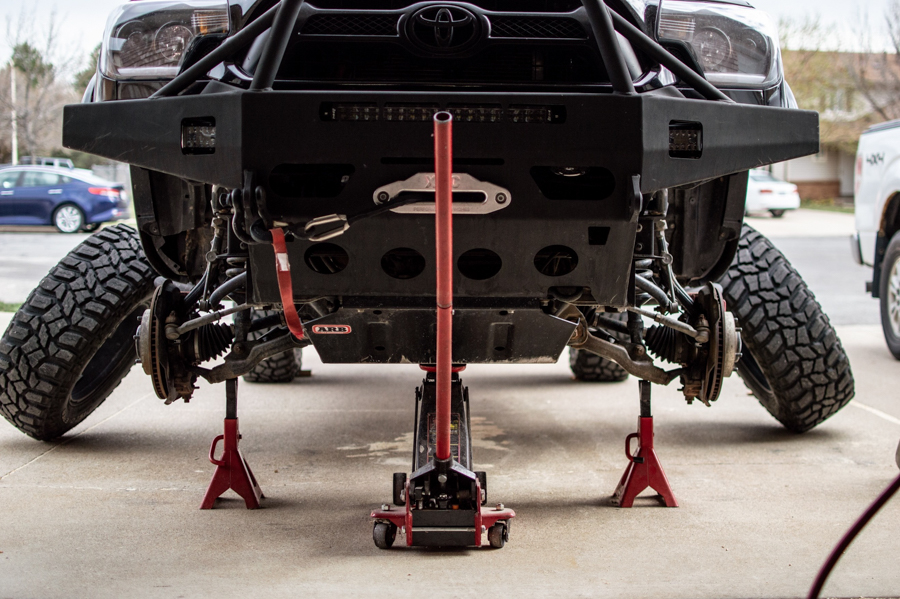
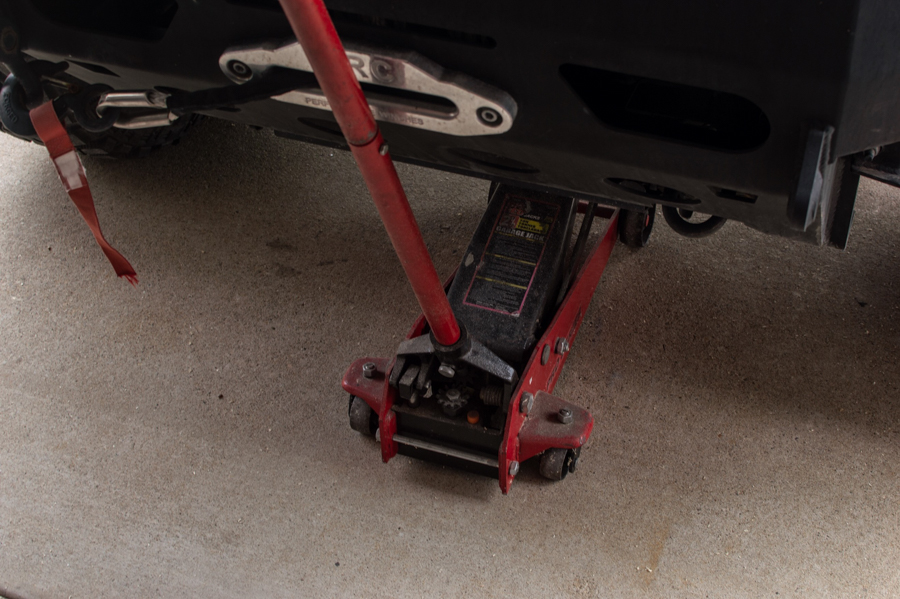
Step 2. Lift & Secure Truck
Utilizing a strong and reinforced frame point, jack up your truck and place your jack stands on each side for added security. You do not want your truck to fall with you underneath it.
For safety, you can place your tires under the truck. That way, if the jack stands or jack fails, the frame of your Tacoma will land on your tires, not you.
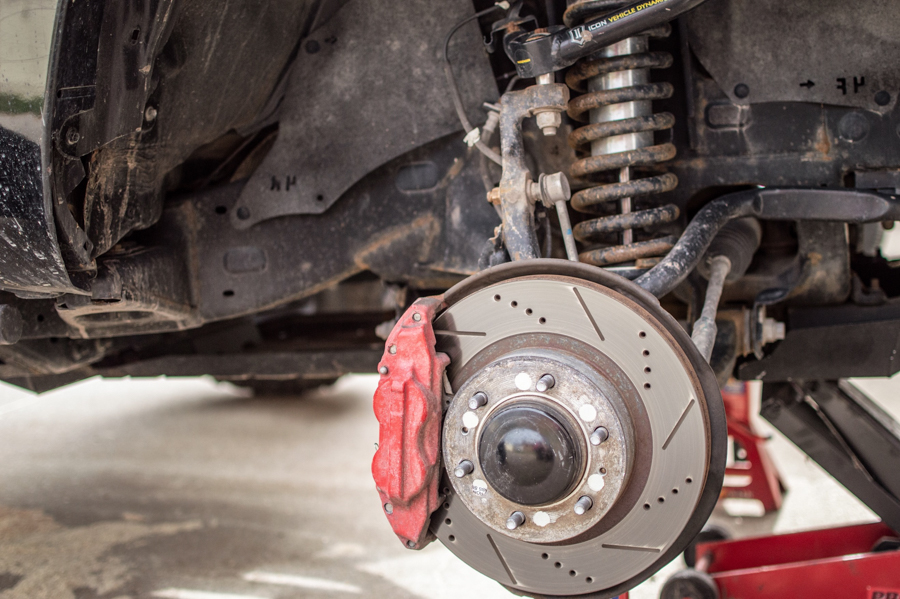
Remove the front wheels and locate the cab mount. From here, you are going to need your tape measure, a paper cutout of your CMC plate and your paint pen or sharpie.
Step 3. Measure & Mark
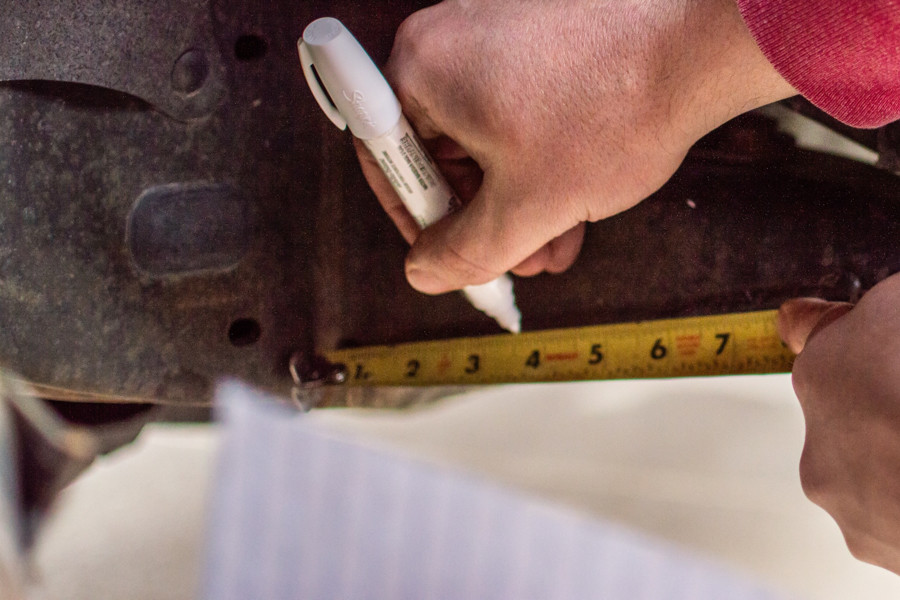
From where the frame meets the cab mount, measure out 3.5 inches and mark with your paint pen.
This mark is used to properly place your cut-out so you can trace where you are going to cut. Ensure that the bottom of your cut-out is flush with the bottom of your cab mount. Mark the bottom of the cab mount as well making sure to leave at least .25 inches of steel to the front of the hole.
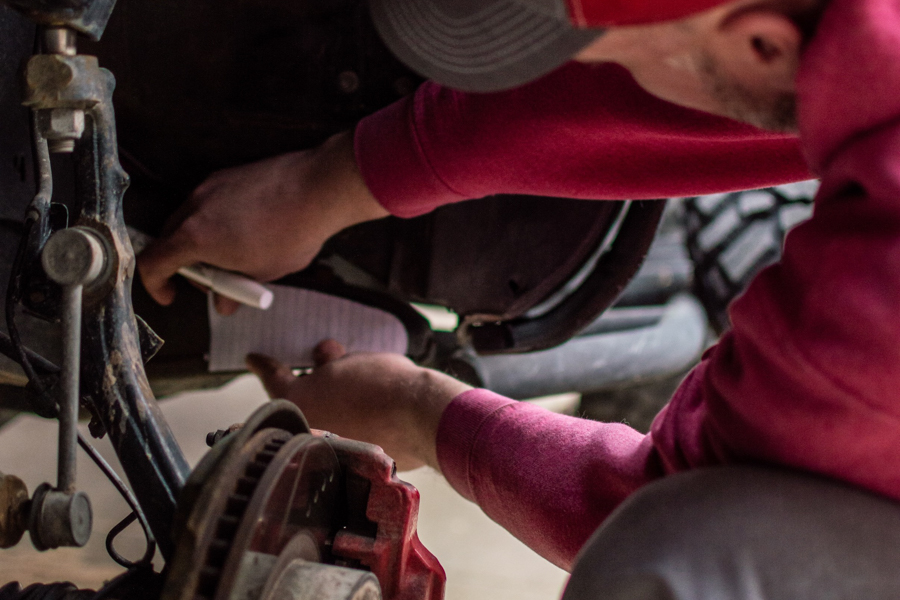
Once you have measured and traced out your cut locations on both sides, check to ensure that you have everything marked perfectly.
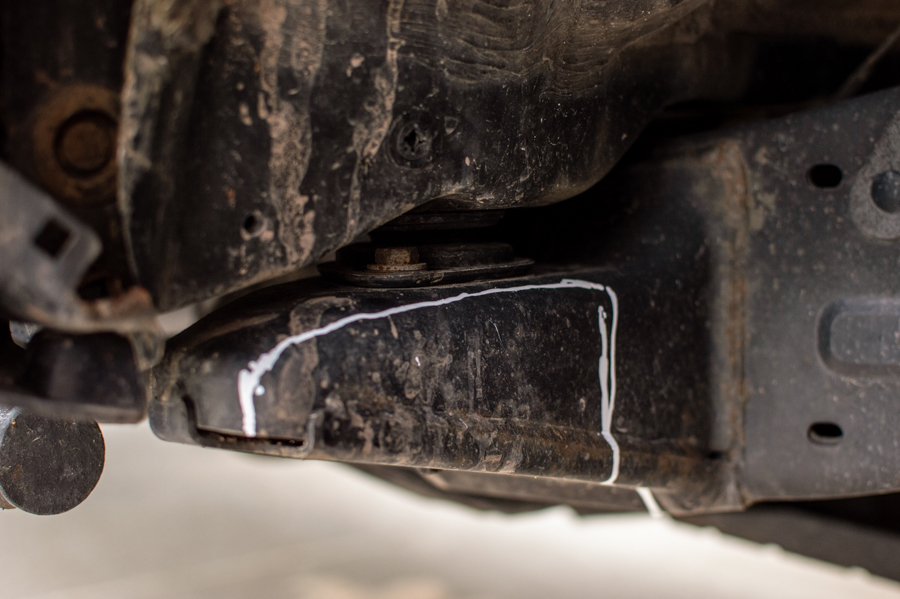
We have all heard it a million times, “measure twice, cut once.”
Step 4. Wear Protective Gear
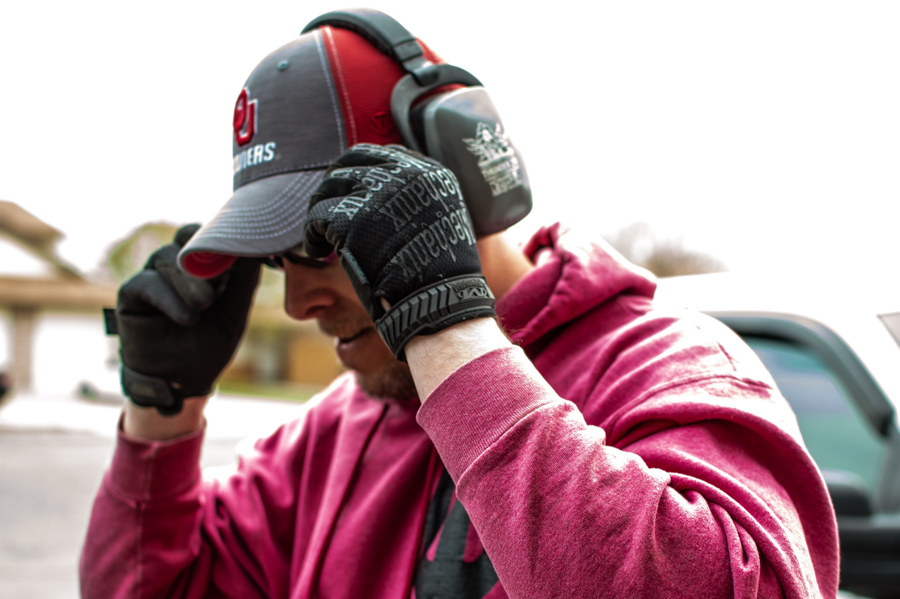
Ensuring that we have functioning eyes and ears once we finish is key (for obvious reasons), but also we’ll need them for all the other mods we can do to our Tacomas.
Being safe and wearing the proper gear ensures that is possible.
Safety Note: Do not neglect to wear your eye and ear protection. Put on gloves and wear a long sleeve shirt. There are going to be a ton of sparks flying in the next hour with all the cutting and welding. Be safe!
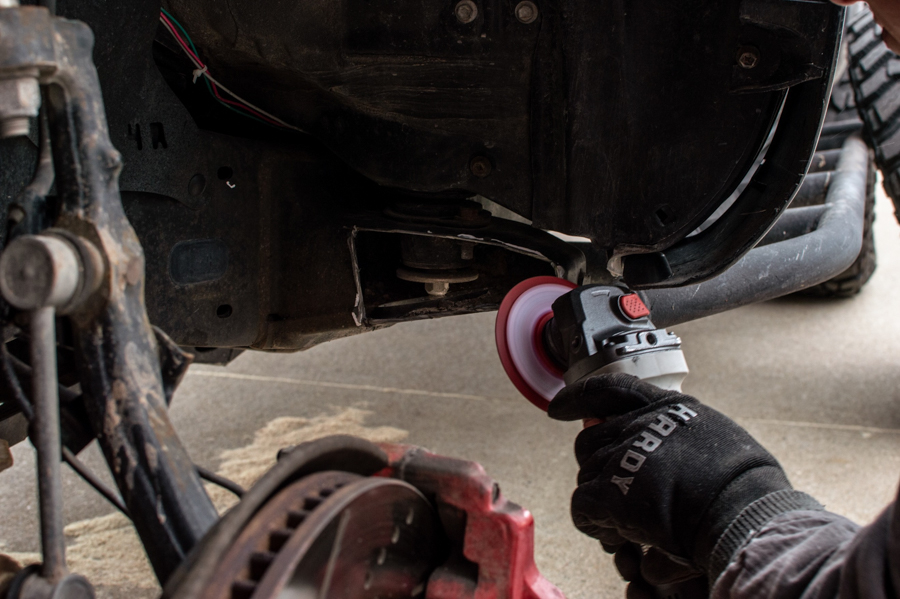
Step 5. Cut Cab Mounts
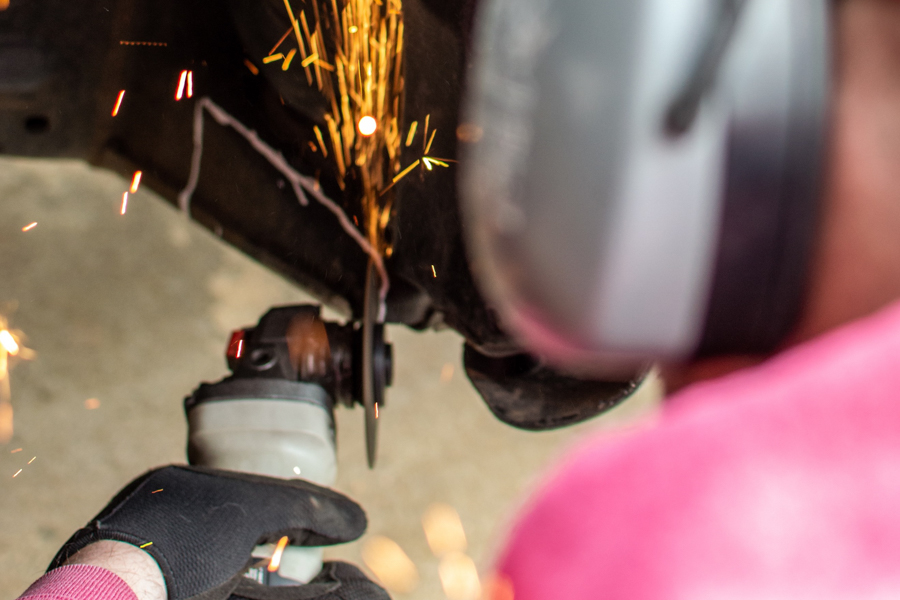
Score the outline of your CMC plate along the marks you made with your paint marker using your angle grinder, being careful not to go all the way through the steel initially. This will ensure an even cut and that the steel will not get too hot.
Once you have outlined your entire area, start cutting all the way through the steel. You will find that your grinder will catch on your cuts as you go. Make sure you have a good grip, you do not want the grinder to catch an edge and be pulled out of your hands.
Note: Take your time during this step. You cannot put back what was already grounded off. Once you remove the piece entirely, it is time to see if your CMC plate is going to fit in the space you just made, as well as give you the clearance you desire.
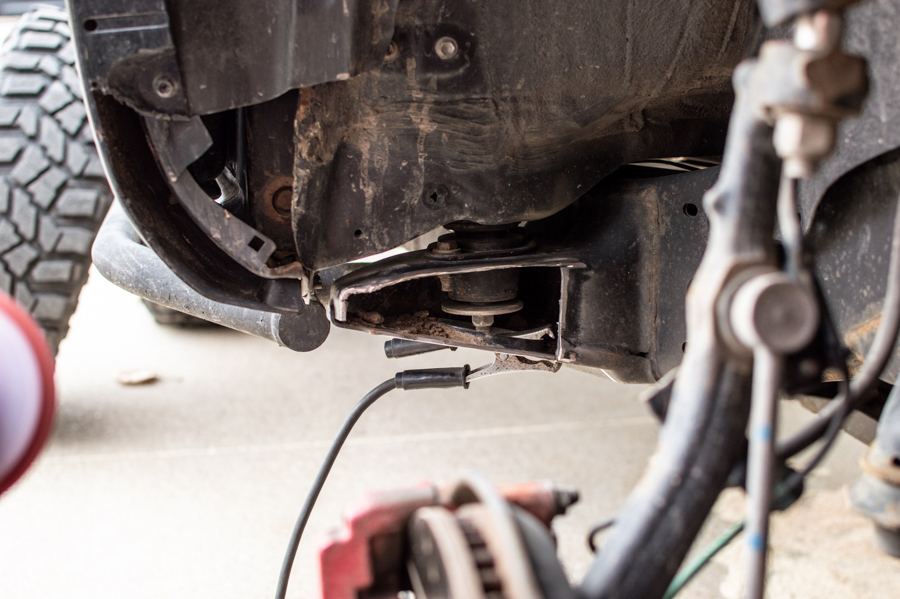
Step 6. Test Fitment

Place your plate in the hole you have made and see if it fits without any gaps.
You may have to repeat this step multiple times to get it perfect. The smaller the gaps you have, the less you will have to spend filling them in during the welding step.
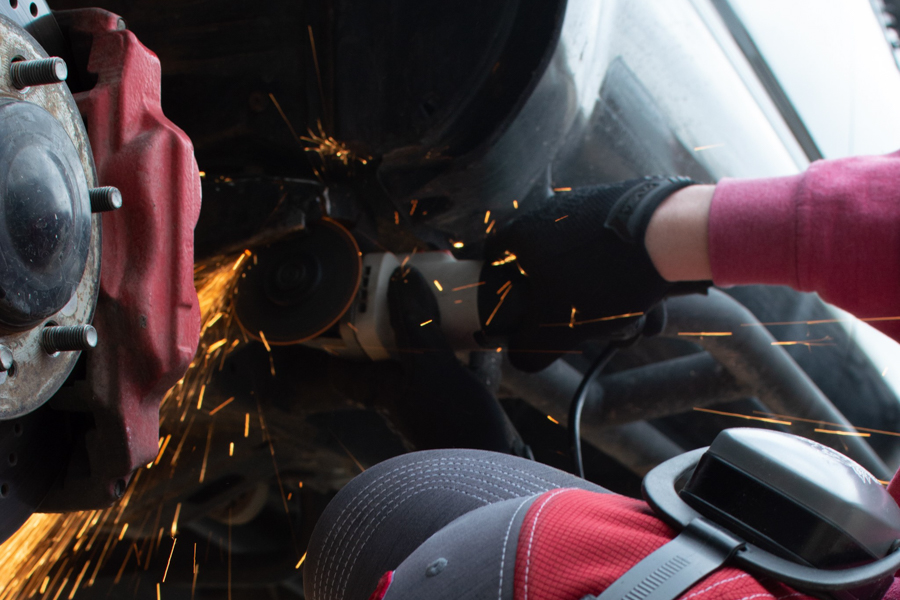
Using a flap wheel on your grinder, clean up the area around your cut to get rid of any loose steel, as well as removing the paint for a clean weld. Using the flap disc, which is less abrasive than the cutting wheel, will remove stray pieces as you clean up your edges.
Step 7. Time To Weld!
We found the best ground point for our welder just inside the cab mount. Once we cleaned up our steel for welding, we set our 90 amp welder to 8 wire speed and max amperage.
Note: Full disclosure, as most can relate, we are not professional welders. It will not be pretty but it will hold if you take your time.
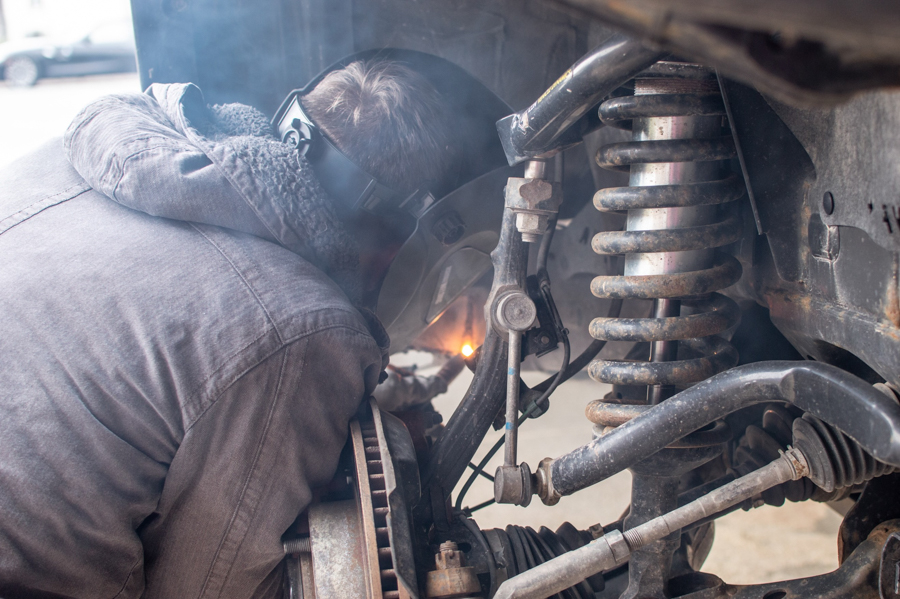
Initially, tack weld in a few spots to test the fitment. Once you are happy with the placement, weld slowly and in different locations, so that you do not get the area too hot and melt the rubber bushing behind your plate.
Depending on how much you cut off initially, you may have to hammer your plate to bend it to fit. As discussed earlier, try to avoid gaps as much as possible.
Step 8. Clean Up Weld
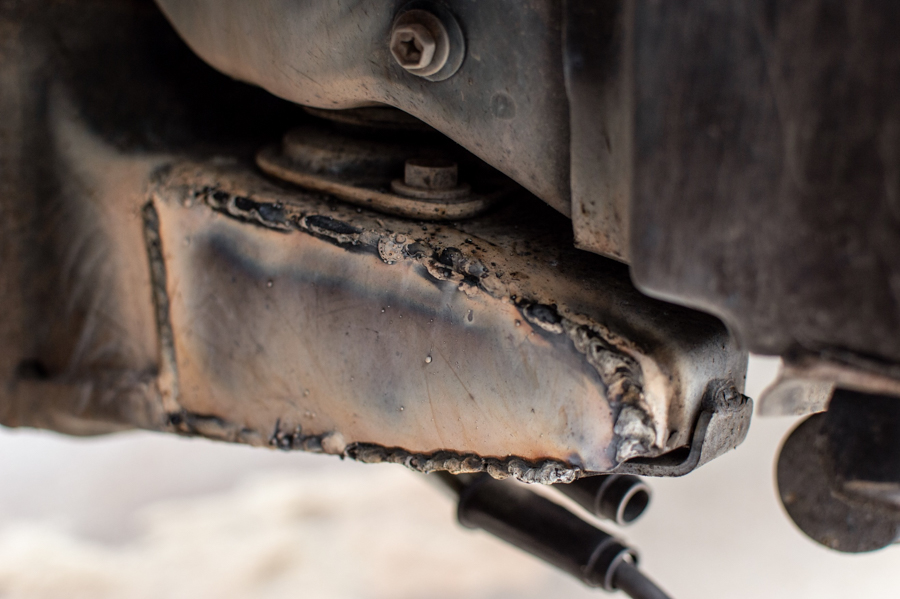
Once you have done both sides and the metal has cooled down, take your flap disc and clean up your welds. You want a smooth, cool surface to paint on.

This is a good place to ensure that you were able to weld evenly around the plate.
Again, we are not “stacking dimes” as any good welder might say. We are do-it-yourselfers with an affordable rig off the net.
The cab mount chop will spend most of its life covered in mud, snow and sand on our adventures. It does not have to be pretty, it just has to work.
Step 9. Apply Paint
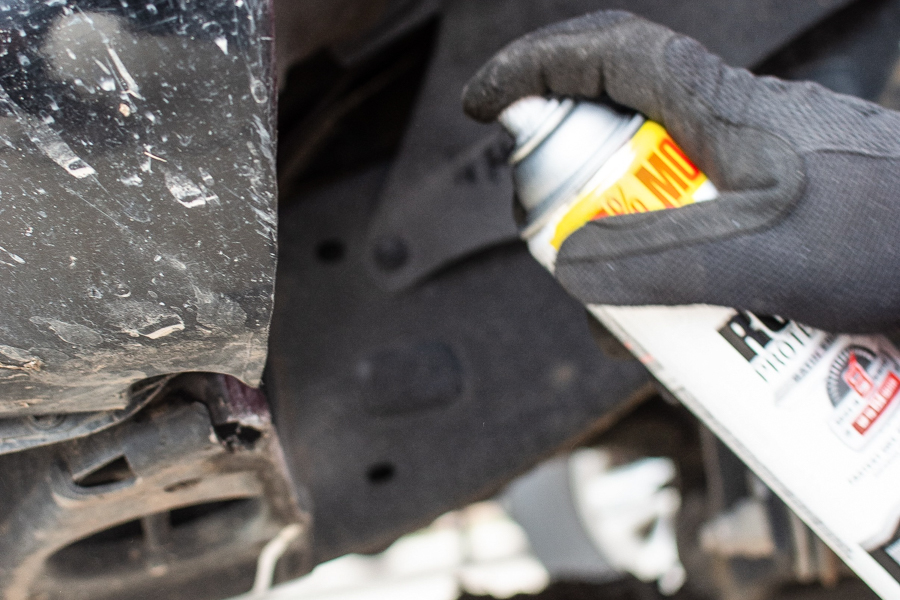
Once everything has cooled down and you have wiped away any grinding residue, apply your rust protective paint.
Put on as many coats as you feel necessary to keep it protected from the elements. I applied two coats to each side and used the rest to paint other parts of my frame that I saw showing signs of rust. Might as well while you are there, right?
Step 10. Reinstall Wheels
The hard part is done. Remount your wheels and ensure that you torque your lug nuts to spec.
Torque Specifications:
- 2005-2010: 85 ft-lbs
- 2011-2020: 83 ft-lbs
Now, take your newly chopped Tacoma for a test drive. Driving in reverse while turning the wheels from lock to lock will test it best. You should find that you hear nothing but your favorite song on the radio.
Congrats on finishing your cab mount chop!
Final Thoughts
For those of you who do not feel comfortable doing this type of work on your own, you still have plenty of options. The CMC plate can be purchased from a variety of vendors. Once you have your plate, call around and find a local welder or shop who feels comfortable working on your frame. But keep in mind, not all shops like to do work on vehicle frames.
Stay safe out there, and see you on the trails!!
Hey, Im curious about the product review application…would it be worth it to apply having a 1st gen Tacoma? I live in Alaska and find this is a great place to put things to the test!
For doing this in your driveway with a buddy who knows how to weld decently, I think this was good post and awesome read. Cool to see guys just out there working on their trucks. Only thing that could have been better was the actual welding portion but for the most part, this definitely got the job done and was a cool little DIY.
Glad you liked the post! We’re all a bunch of DIY’ers at heart.
Hello
i noticed, like most Tacomas, you’re getting some frame rust. Do you have any plans or ideas on how to avoid the total rust out that these rigs are know for? Thanks
Spraying the frame down in the winter with some sort of rust inhibitor is always a great step. I would use Fluid Film, I swear by it!