

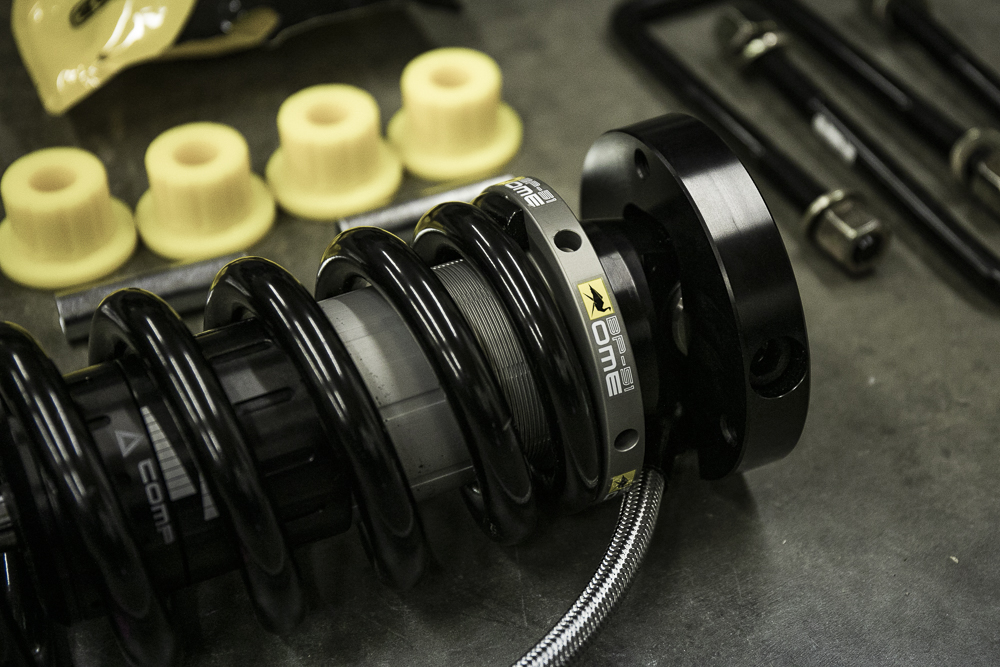
If you’re looking for a full suspension with threaded shock bodies and remote reservoirs, odds are you’ve looked at Fox, Icon, and King. What those companies lack and where ARB picks up the slack, is that the ARB OME BP-51 offers adjustments for both compression and rebound.
The BP-51 comes with everything you need. Front coilovers with reservoirs, rear shocks with remote reservoirs, a leaf pack (medium or HD), and driveshaft drop spacers. The only thing not included is extended brake lines.
I’m not saying that the BP-51 is a better shock than Fox or Icon, I’m just saying they offer compression AND rebound adjustment. Compression adjusters are common on most high-end kits but compression AND rebound adjusters are rare. This is where the BP-51 shines and today we’re covering the installation.
OME BP51 Lift Kit:
- OME BP-51s (2005-2023): Check Price
- SPC UCAs: Check Price
- Ekstrom Designs Strut Shims: Check Price
Recommended Mods:
- CMC (Provided by StellarBuilt.com in Sacramento, CA)
- YotaMafia Extended Brake Lines F/R: Check Price
- Differential Drop Kit: Check Price
OME BP51 Kit Part Numbers:
- (1) BP5190006L Tacoma Front Left Coilover
- (1) BP5190006R Tacoma Front Right Coilover
- (1) VM80010016 – BP51 Fit Kit – Front
- (2) OME Rear Leaf Springs – Choose from Standard or HD for Constand Load
- (1) BP5160011L – Tacoma Left Rear Shock
- (1) BP5160011R – Tacoma Right Rear Shock
- (1) VM80010017 – Tacoma BP51 Fit Kit – Rear
- (1) FK29 – Driveshaft Drop Spacer
- (4) U53A – Ubolts
- (2) SB108 – Spring Bushing Kit
Table Of Contents
Features & Benefits
What is a bypass shock absorber?
While most shock absorbers use velocity-sensitive damping (the faster the shock absorber compresses and expands, the higher the level of damping force is), bypass shock absorbers also generate damping dependency on the position of the piston within the shock absorber body. – ARB USA
Internal vs external bypass
Instead of mounting large tubes directly to the shock body, ARB introduced internal bypass passages integrated into and on the inside of the shock body. This allows for a tighter more compact design to fit within tight spaces such as IFS. It achieves the same goal as an external bypass, without all of the extra extrusions around the shop body.
What does BP-51 stand for?
“Bypass 51mm” – The “51” in BP-51 stands for the width of the shock body. It’s 51mm or 2.0″. It’s basically a 2″ shock body with bypass passages.
Compression & Rebound Damping
One of the biggest standout features of the BP-51 is damping adjusters for both compression and rebound. These adjusters let you dial in the comfort level you desire out of your suspension. If you’re heading off-road for the weekend, you can take the compression and rebound damping down as low as you want. Ready to hit the freeway again? Now it’s time to adjust the compression and rebound back up to a firm setting.
Lift Height (2″ – 3″)
The BP 51 is listed as a 2″ lift kit, but that doesn’t mean you need to settle at 2″. You’re able to adjust the preload and add any amount of lift you want, just note that the more preload you’re adding the less shock travel you will see, and the stiffer the ride quality will become. If you want to retain the preset preload setting directly from OME but still want to get additional lift height, look into adding a set of shims on top of your coilovers.
Stacking Shims
Shims are designed to eliminate the need to add preload to a coilover. A 1.5″ spacer would give you 3″ of lift. So, a .25″ thick shim will produce .5″ of additional lift. In our application, we stacked 2 shims on top of our coilovers and produced 1″ of additional lift. With two shims and the preset preload provided by OME on the BP-51s, we added 1″ of front lift to the BP-51s putting us a 3″ in the front.
Add Shims vs. Adjust Preload
The BP-51s come with very little preload out of the box, which provides a very soft ride, almost too soft. And, that small amount of preload adjustment only gives you 2″ of lift which isn’t enough to clear anything over a 33″ tire. If you’re looking to run a 285/75 or 295/70 (34″ tire) for example, you’re going to need more than 2″ of lift.
By adding two .25″ thick shims to each coilover you are increasing your lift height 1″ and stiffening up the ride a little bit, but not enough to become bouncy or uncomfortable when hitting bumps, dips, or ruts in the road. Keep in mind, adding shims will take away 1″ of your up travel because you’re pushing your entire coilover down. You’re gaining 1″ of down travel but losing 1″ of up travel. Overall, you still have the same wheel travel but it’s just being shifted in favor of the down travel.
Ride Quality
Adjusting the preload on the springs to gain height is going to be harder on your ride quality. When you start cranking down on the springs, you sacrifice rebound control which ultimately causes sharp jolts and a stiffer ride quality all the way around.
OME valves their shocks to pair perfectly with the 690lb spring rate X5K coil – which was tuned specifically for the application intention; in this case the Tacoma. It has a predetermined preload setting at an optimal placement to maintain a comfortable ride balanced for the compression and rebound stroke on the BP-51s. As you compress the spring you are increasing the rebound velocity.
How to Adjust BP-51 Coilovers without Special ARB Tool (Spring Mounted Wall Compressor + King Coilovers Adjustment Tool)
The more preload you crank on the spring, the more rebound velocity occurs during the rebound stroke (energy). When the rebound stroke has that much more energy stored in the coils, the less control you have, and the more uncomfortable your ride gets.
To correct this, you would need to re-valve the rebound shims in the shock body in order to slow the compression stroke (slow down the rebound). Which, let’s be honest, none of us are going to open up the BP-51 shock body and start adjusting shim placement for tuning compression and rebound. So what should you do? Simple, try not to adjust your preload too much.
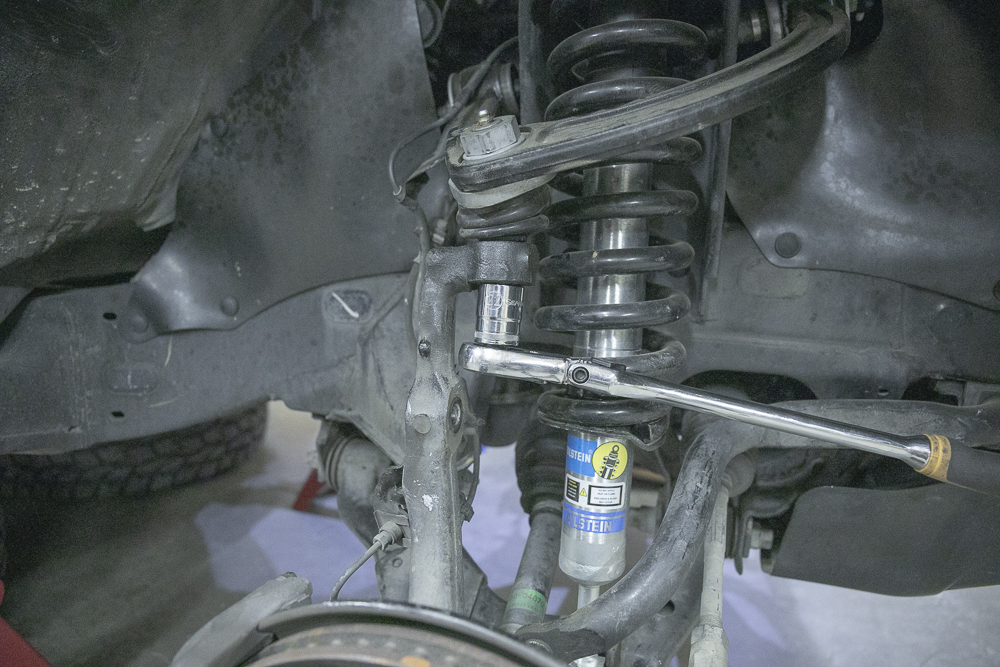
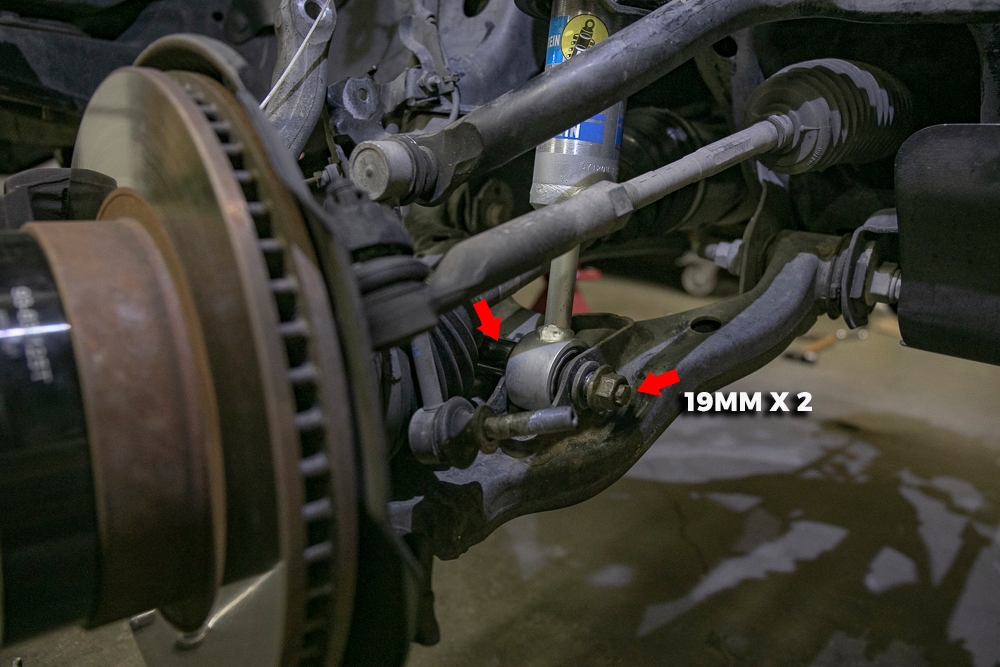
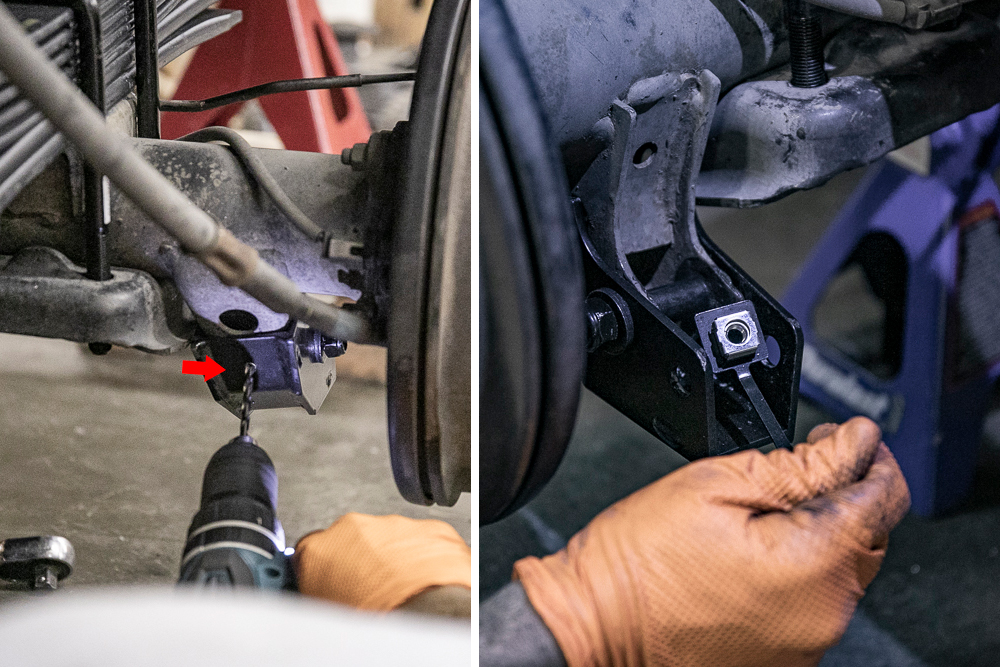
Step 1. ABS Bolt on the UCAs
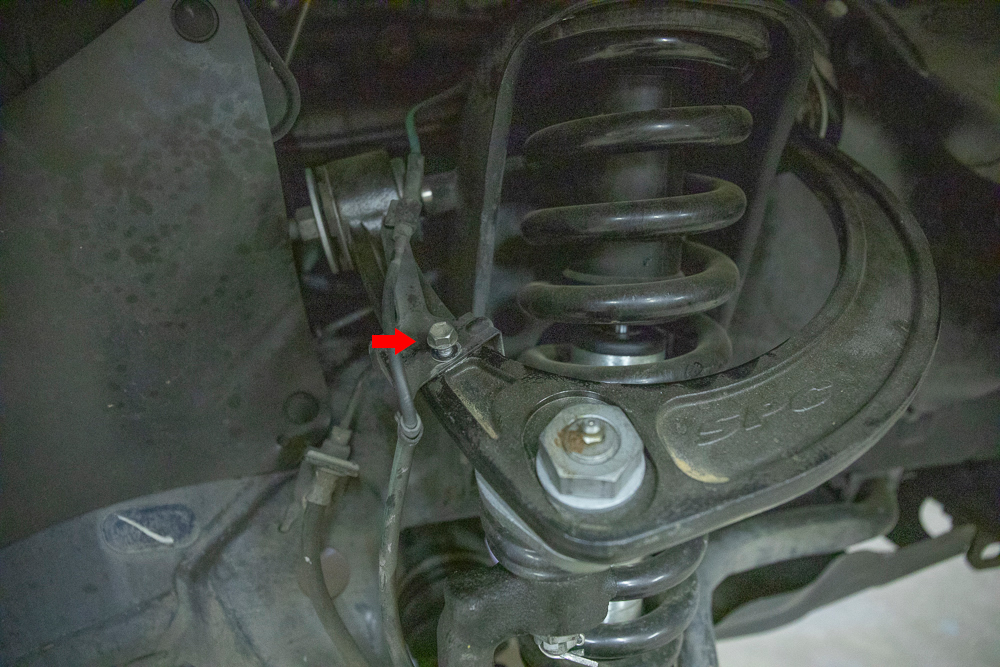
Step 2. Brake Line and Sway Bar
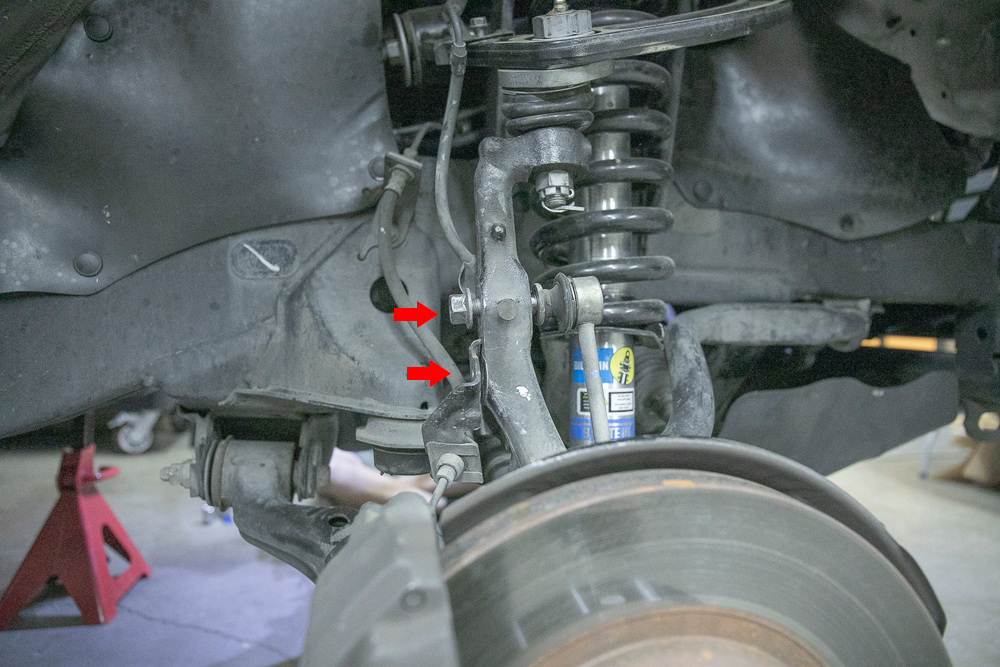
Remove 12mm brake line bolt and 14mm sway bar link bolt.
Step 3. Castle Nut Cotter Pin
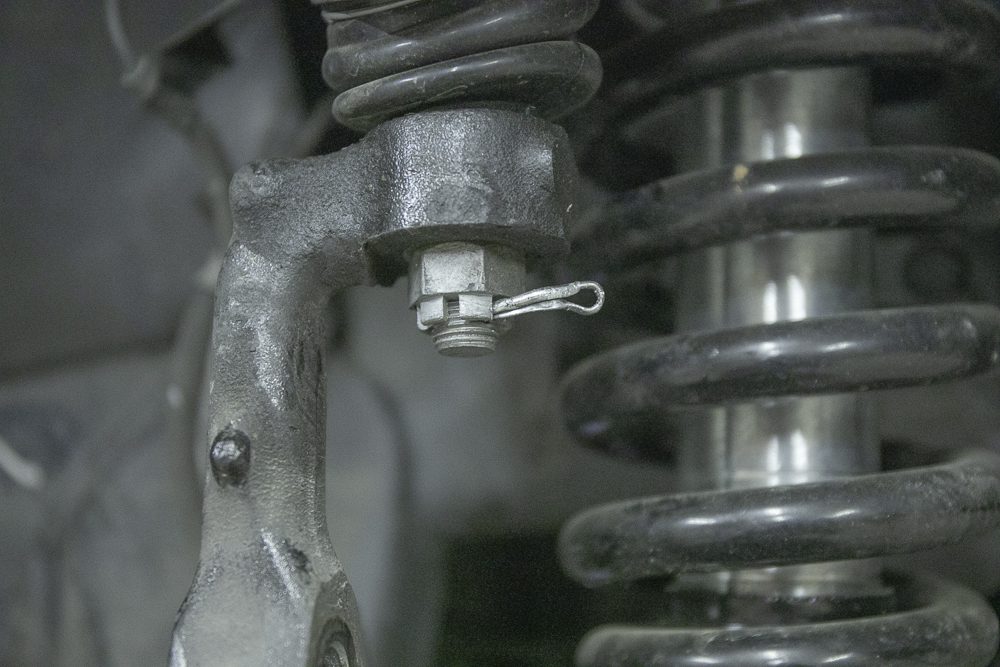
If you don’t have a box of replacement cotter pins, you will need to reuse this cotter pin.
I would recommend buying a set of universal cotter pins. They’re cheap and come in a wide variety of sizes.
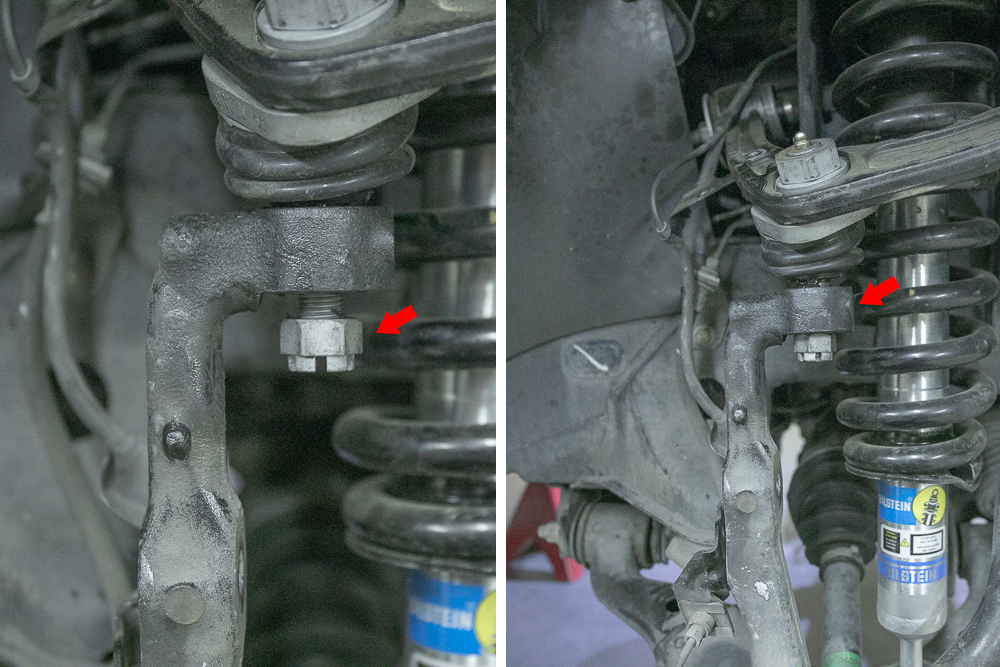
Step 4. Castle Nut
Loosen (do not remove) 22mm castle nut
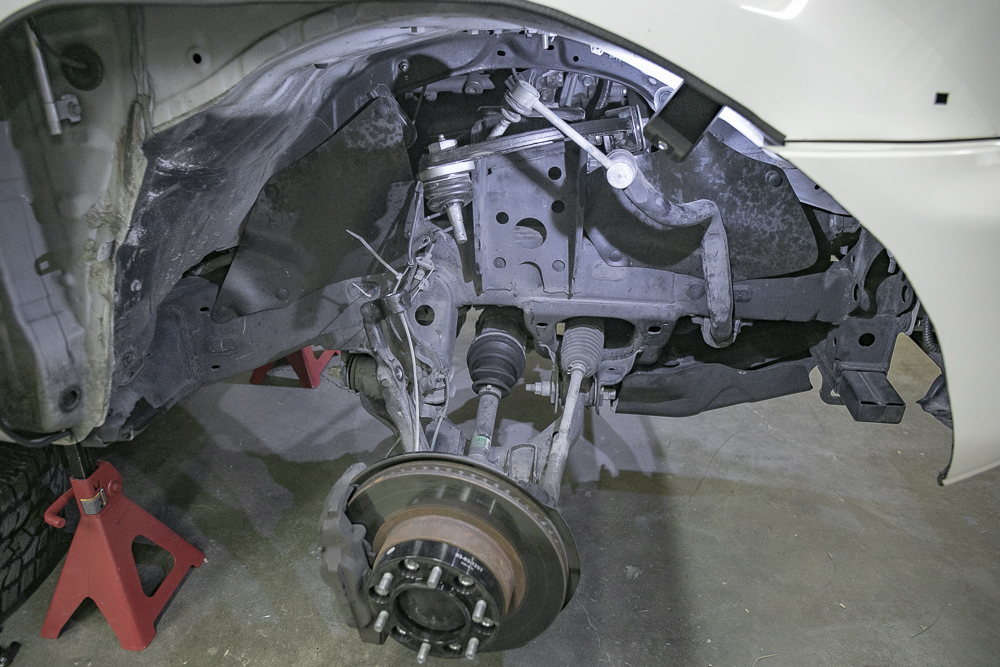
Step 5. Loosen Spindle
Leave castle nut on upper control arm bolt – knocked loose with a hammer.
For this step, just make sure that you leave your castle nut on the upper control arm bolt before knocking the spindle loose so that the spindle doesn’t fall to the side aggressively.
I would recommend using at least a 2-pound hammer in order to knock the spindle loose.
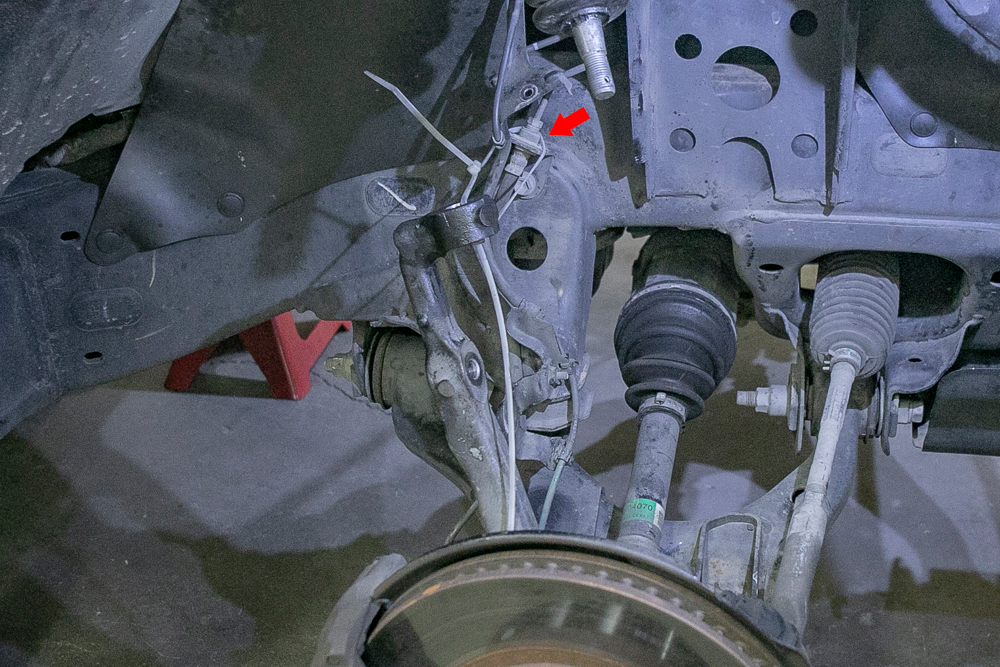
Step 6. Spindle to Brake Line Bracket
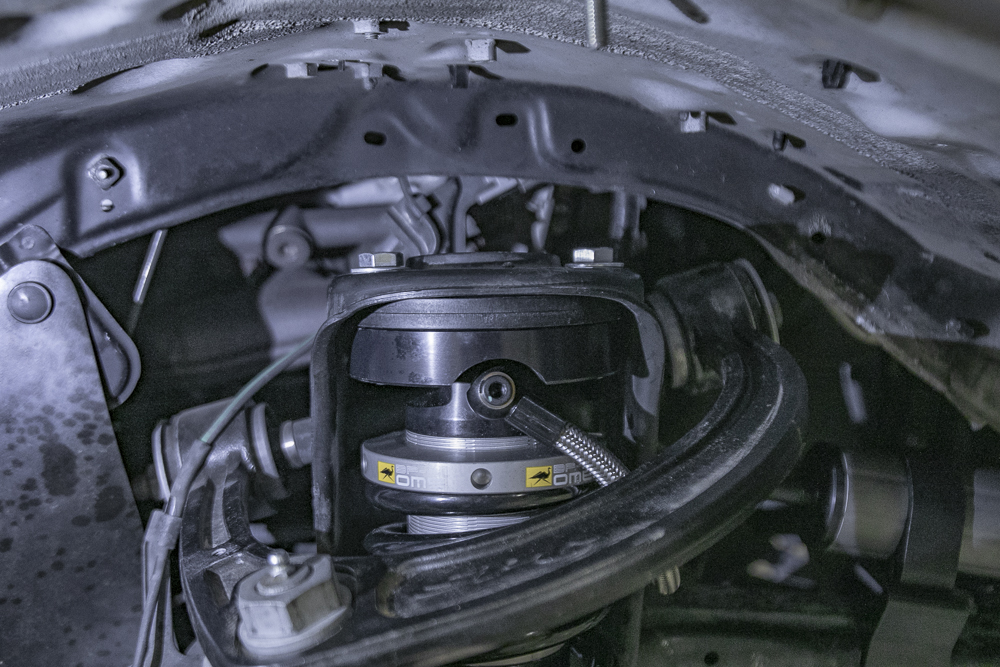
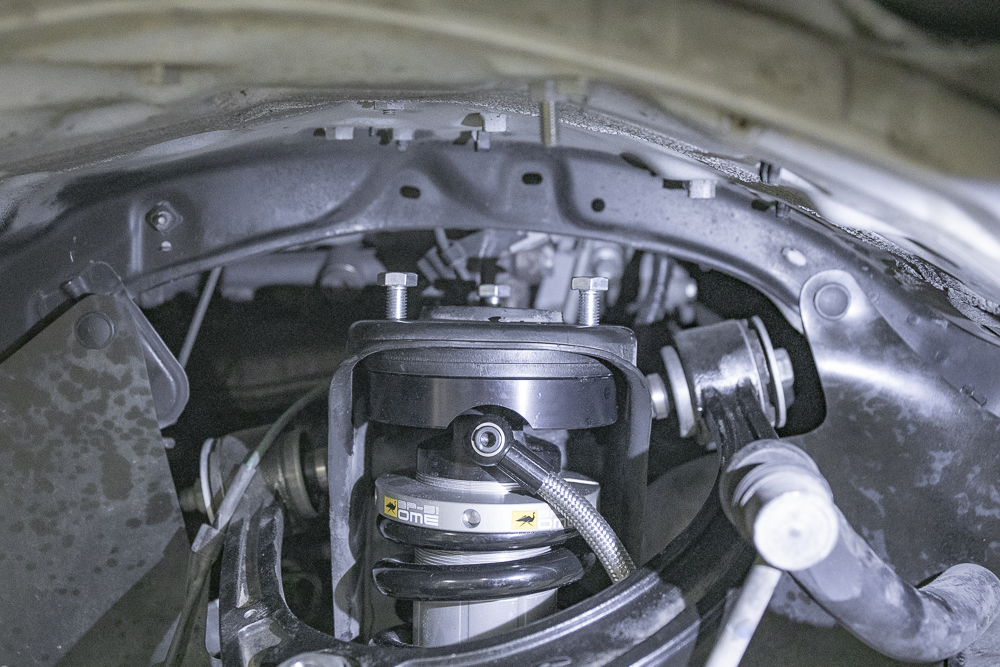
Step 7. Three Bolts on Coilover
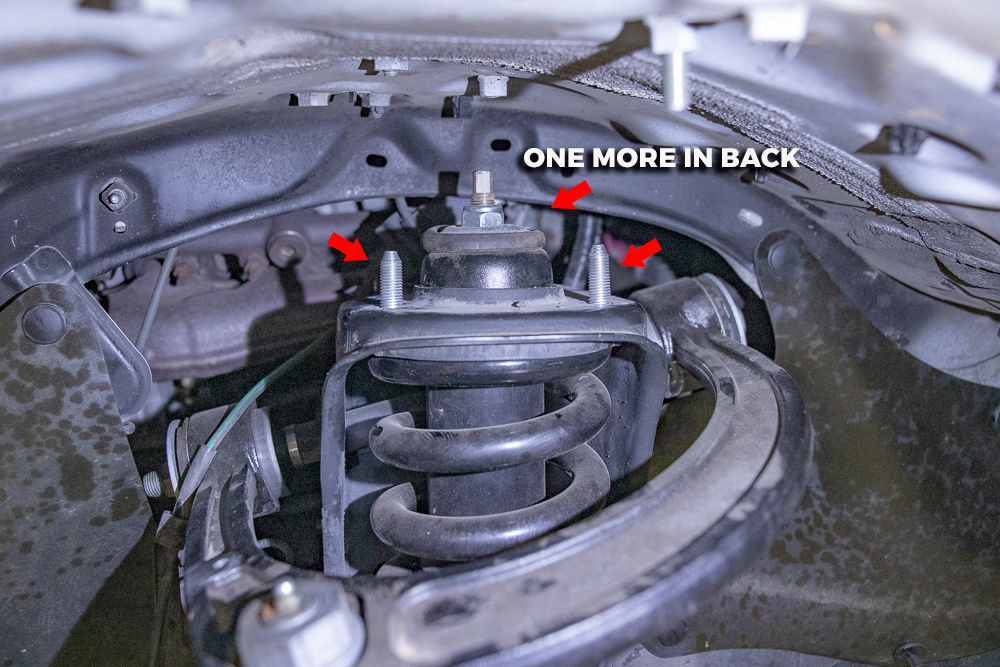
Depending on your situation this may look different.
Since we are running the Bilstein 5100 lift kit, we are removing nuts that are holding our Bilstein 5100 shocks in place. Regardless, you’re going to have three nuts or bolts to remove on the top of your coilover.
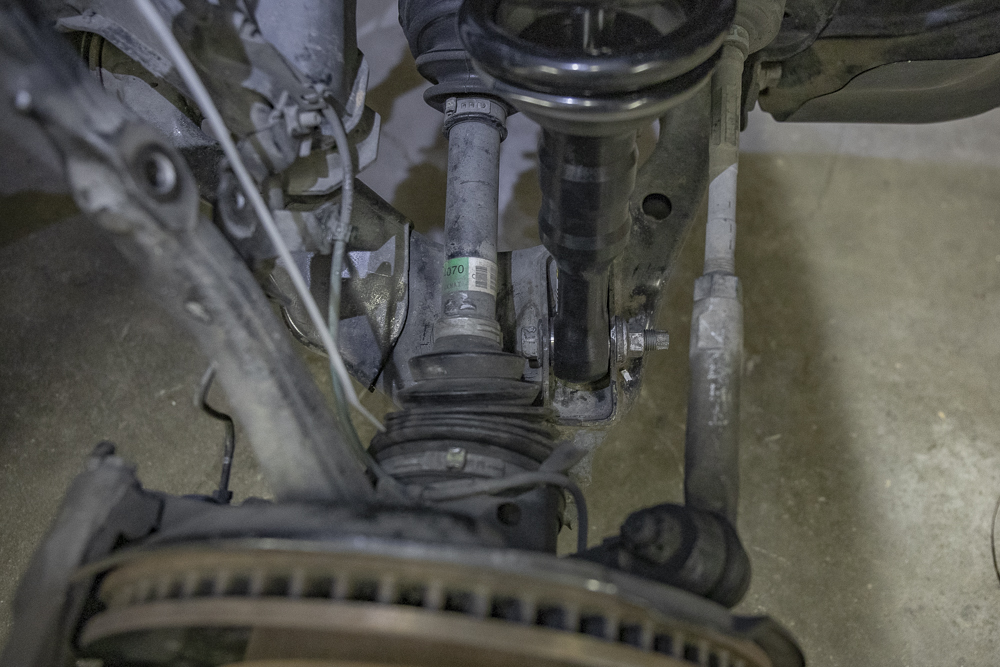
Step 8. 19mm Lower Shock Bolt
Using two 19mm sockets and using one extension of at least 6″ you can remove the lower shock bolt.
Once you have the nut free from the shock bolt, you can use a punch and a hammer, and punch the bolt out.
Step 9. Remove Coilover
Push down on the lower control arm and pull the coilover out. Depending on how tight your coilover sits in the housing, you may need help here.
I was able to do it on my own by pushing down on the wheel hub (wheel spacers) with my foot while pulling the coilover out at the same time.
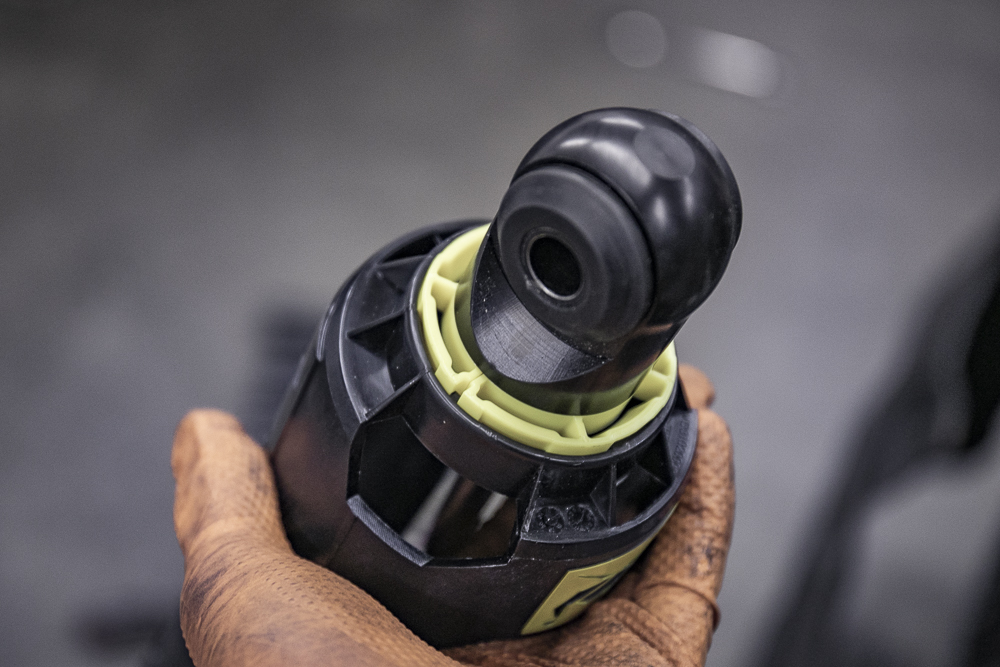
Step 10. Prepare Shims

As mentioned previously, we decided to install a set of Ekstrom Designs .25″ shims.
Before we got started on the install, I stopped by Ace Hardware to match up the width and thread pitch of the BP-51 bolts and then extended that by .5″. ACE hardware didn’t have those in stock, so I settled for extending them by .75″ which is why you see exposed bolts underneath the shims in other images.
Step 11. Line up Shims
In order to get the coilovers back into the shock tower, you may need to push down on the lower control arms with your foot while placing the coilover to the tower with both hands (if doing solo).
At the same time, stack shims on top of the coilovers and line up the bolts. You don’t need to thread them down all the way just yet, just line them up enough to get a few threads on each bolt threaded into the coilover.
Step 12. Lower Shock Bolt
Step 13. Engine Splash Guards

If youe not using this Gearwrench tool to remove your plastic clips on your Toyota, you are missing out.
This tool is pricey but it’s incredibly worth it as you’re able to pop plastic clips off while keeping them intact with ease.
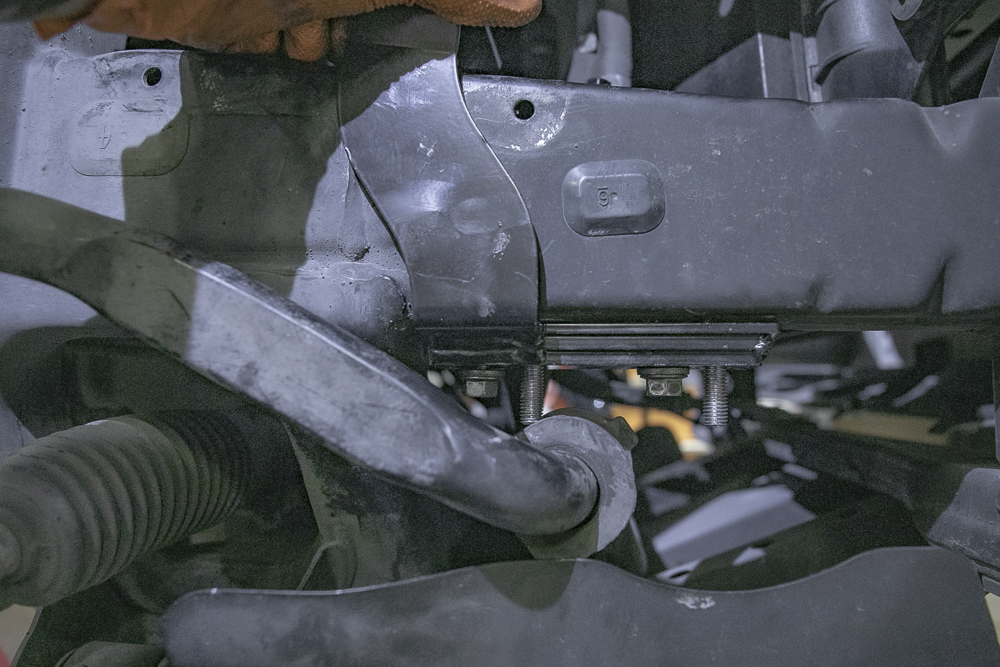
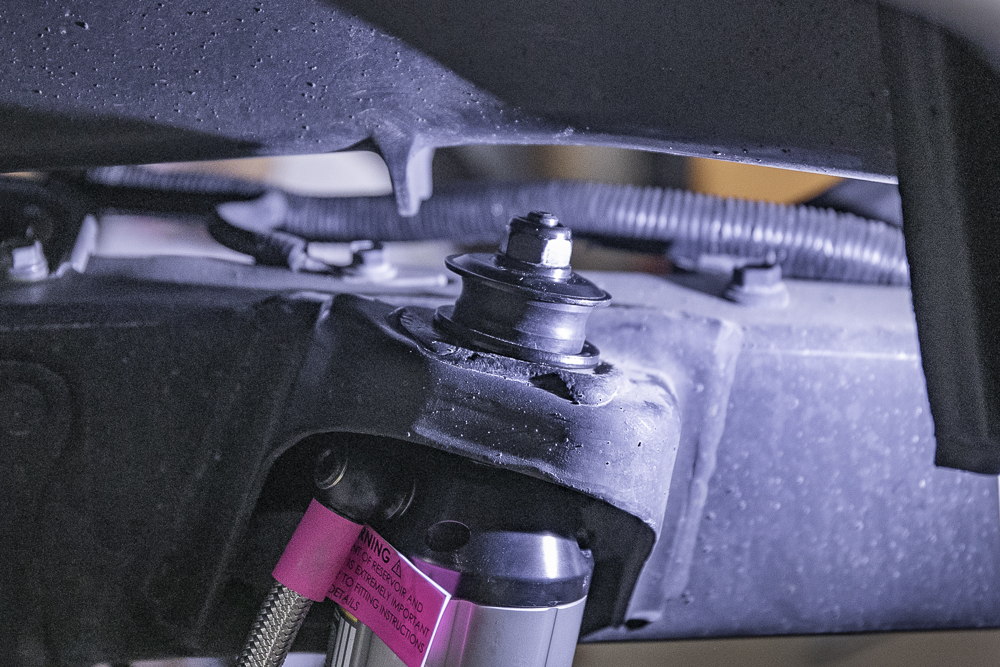
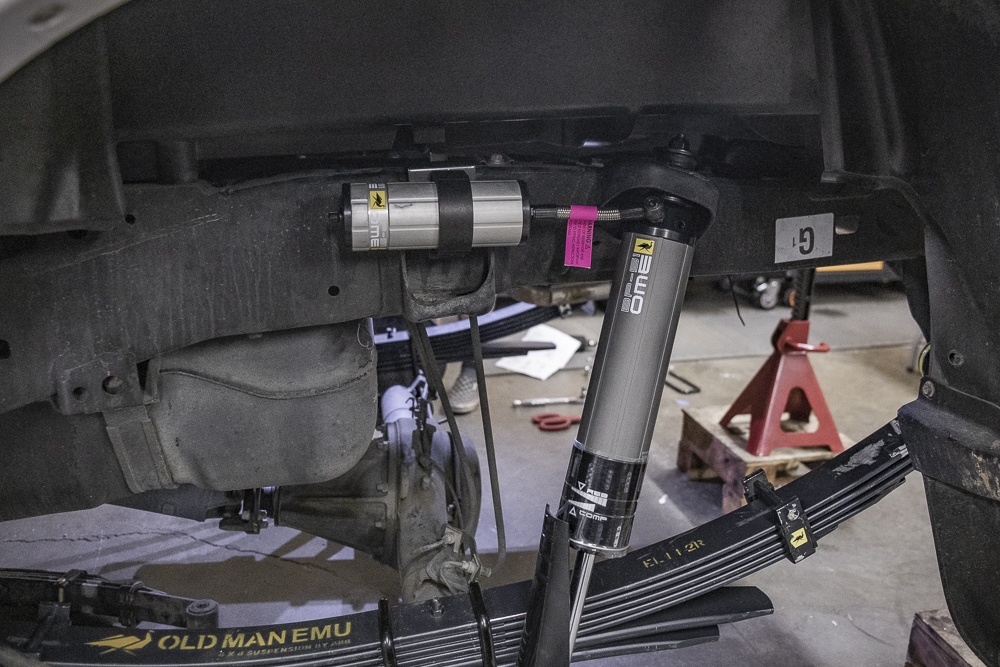
Step 14. First Reservoir Bracket

The small bracket allows you to reposition the bolt indicated above.
You do this to make room for the remote reservoir.
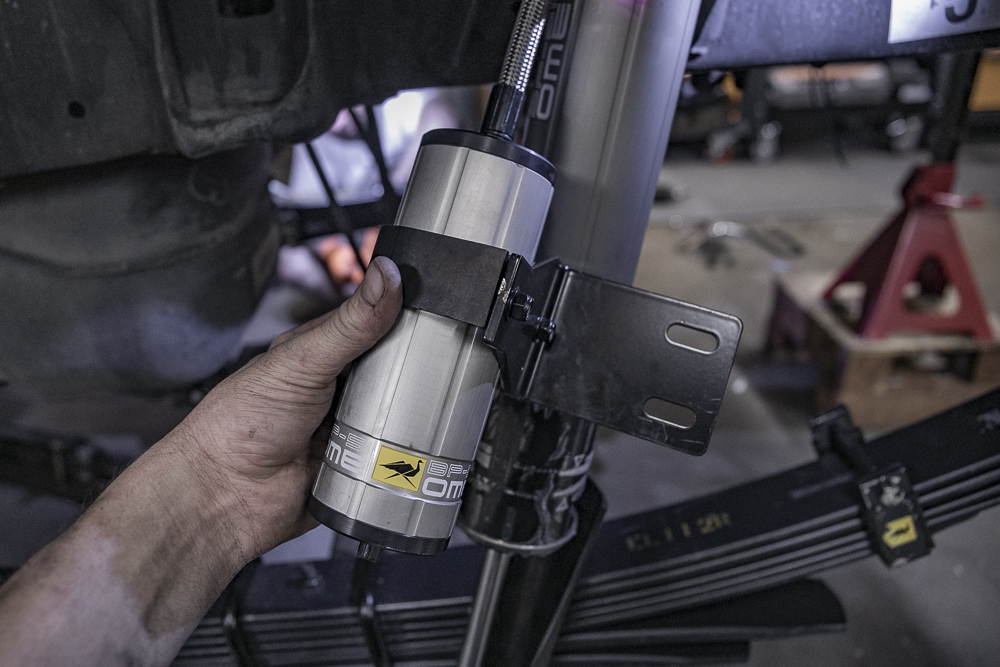
Step 15. Reservoir Bracket
Remove the sway bar from the frame rail and position the remote reservoir bracket into place using the new hardware and the factory hardware that was holding the sway bar in place.
Step 16. Mount Reservoir
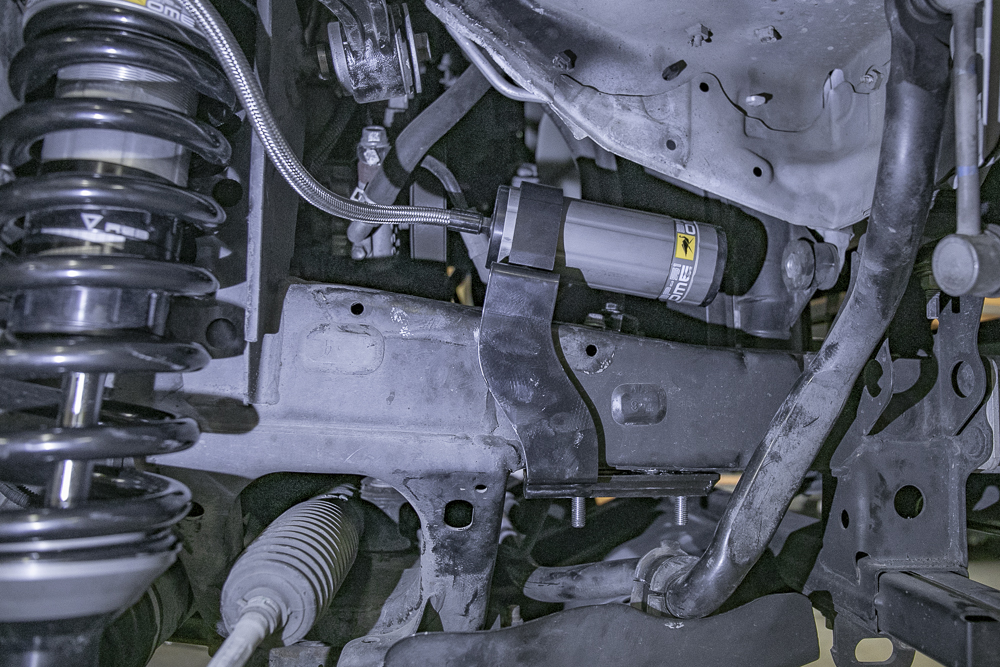
You may have an easier time mounting the remote reservoir to the remote reservoir bracket while it’s off the frame rail instead of trying to mount the reservoir to the bracket while it’s on the frame rail.
Step 17. Torque Specs
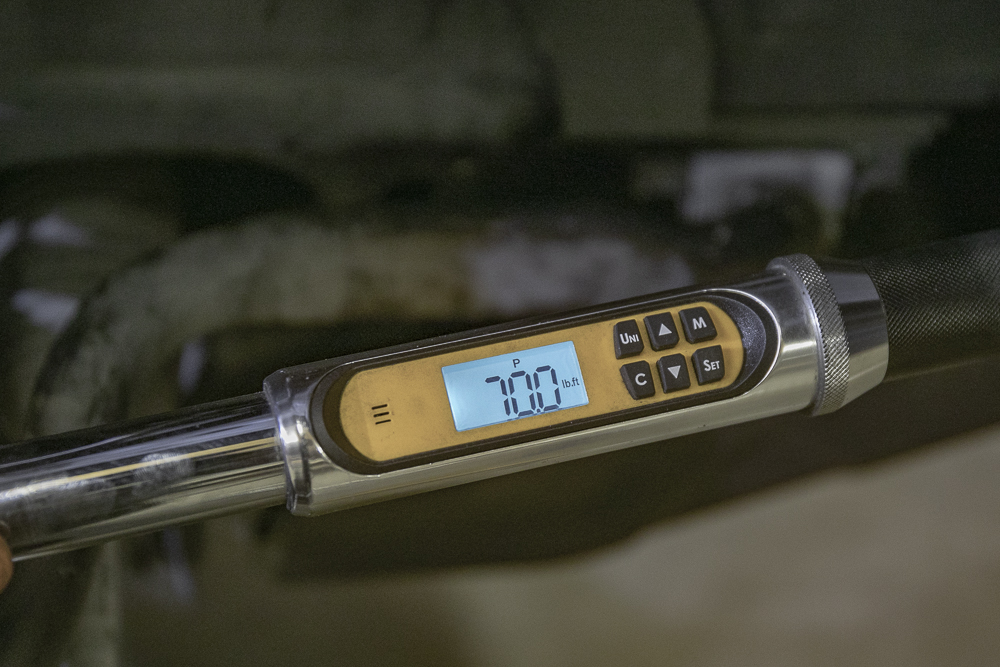
Torque Specs
- Upper Control Arm Ball Joint to Spindle: 110ft-lbs
- Front Sway Bar Link to Spindle: 70ft-lbs
- Lower Shock Bolt: 83ft-lbs
- Top Shock Tower (3 bolts/nuts): 64ft-lbs
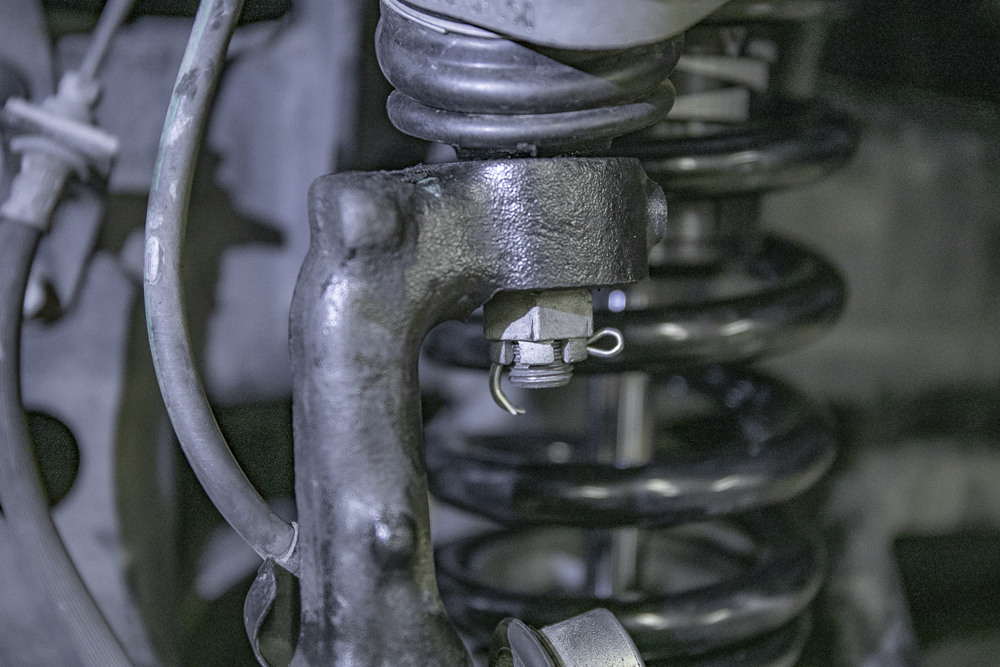
Step 18. New Cotter Pin
Step 19. Torque Nuts

Connect & torque all nuts, bolts, brackets, and lines.
Step 20. Rear Suspension
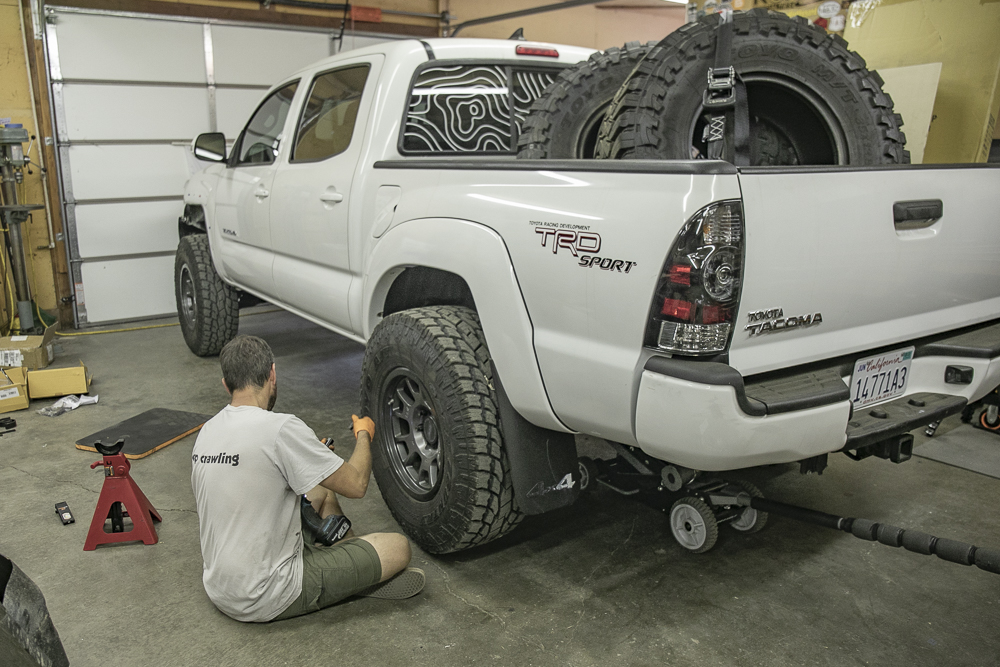
For the rear suspension, you want to make sure you have mid-height jack stands in order to support your rear axle.
Having an extended height jack and multiple jack stands will help you articulate the rear axle in order to stuff or droop either side for uninstalling and reinstalling components.
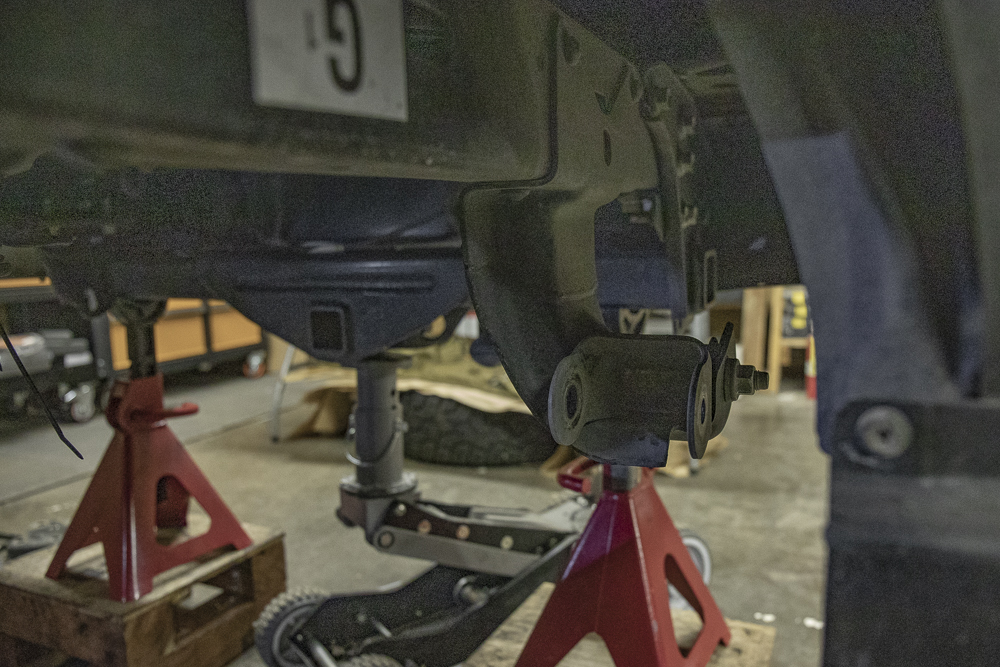
Step 21. Lower and Top Shock Bolt

If you are removing the factory rear shock, you may need a set of vice grips in order to prevent the shock from spinning when untightening.
You can reference this article on installing Bilstein 5100 previously.
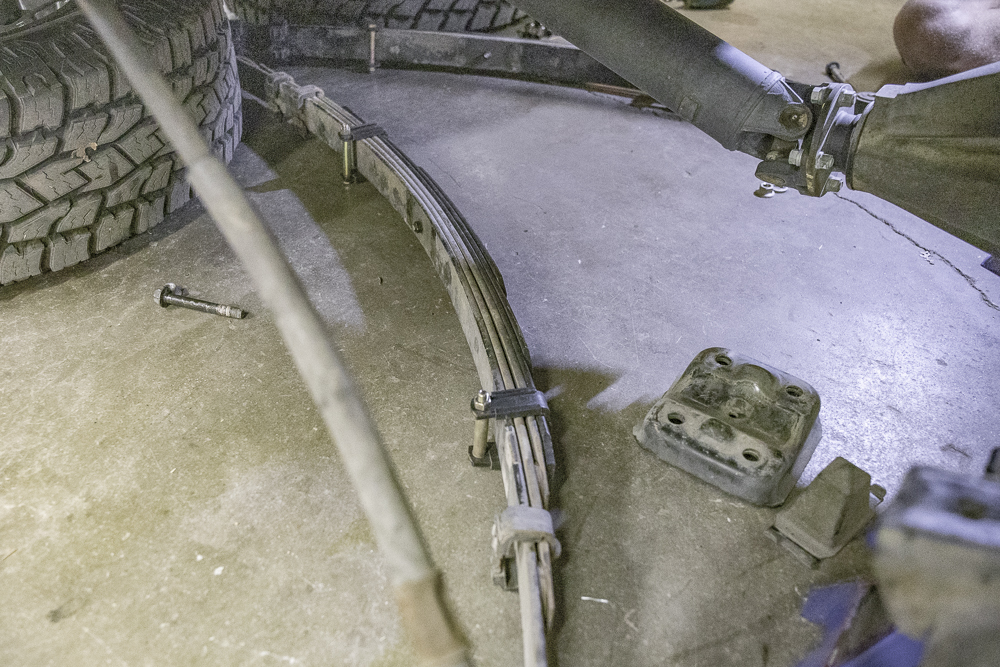
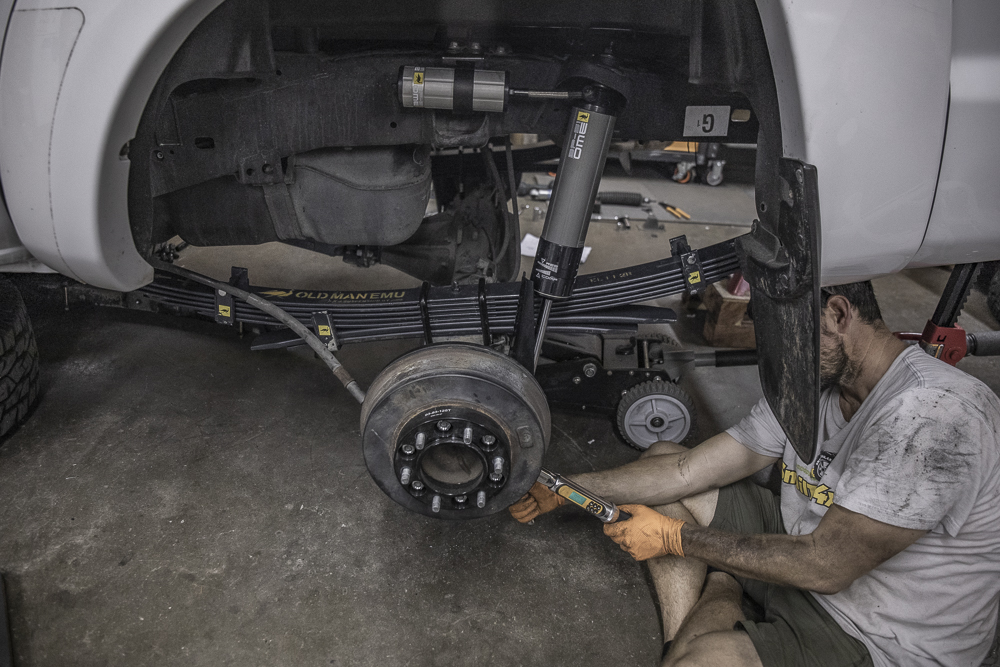
Step 22. Drop Leaf Pack from Leaf Hanger
Step 23. Set Leaf Pack Aside
Step 24. ARB Dakar
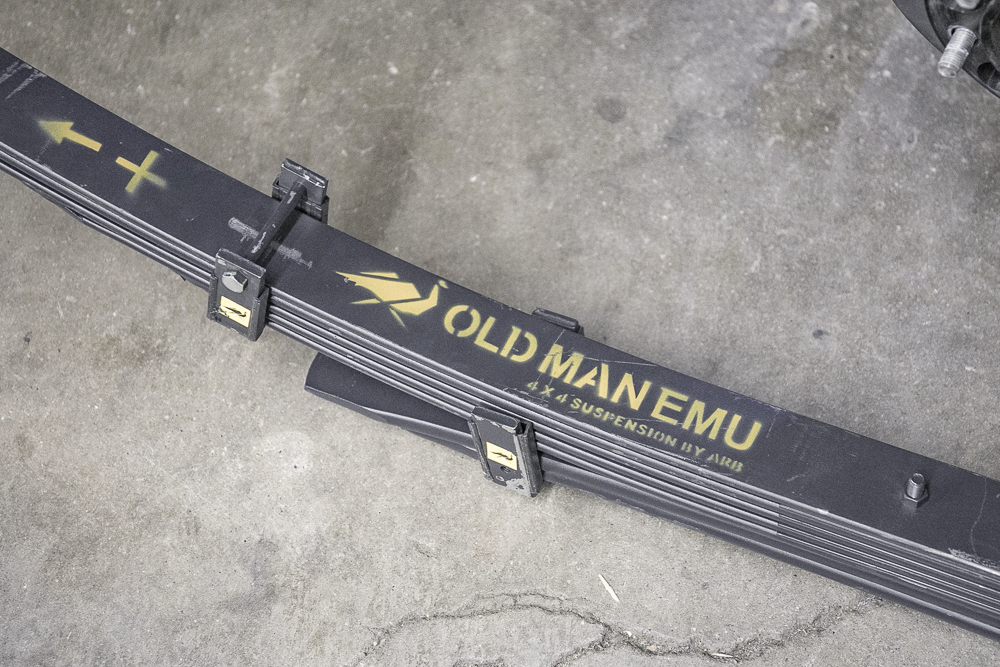
What does the + and – mean on the ARB Dakar Leaf Pack?
The + is for the driver side and the – is for the passenger side to accommodate for lean. The – is a little lighter weight than the + side. The – side is supposed to be about 20lbs lighter than the driver side. After reading through a few forums, and talking with retailers – it’s normal to be delivered a +/- along with -/-, and yeah, you guessed it; +/+.
Regardless of which leaf packs arrive at your doorstep, install both leaf packs with the icon facing forward. If you were delivered a +/+ then you may need to adjust your coilovers up on the passenger side to correct any lean. If you were delivered a -/-, adjust your coilovers up on the driver side to correct any lean.
Step 25. Grease Rods – Not Bushings
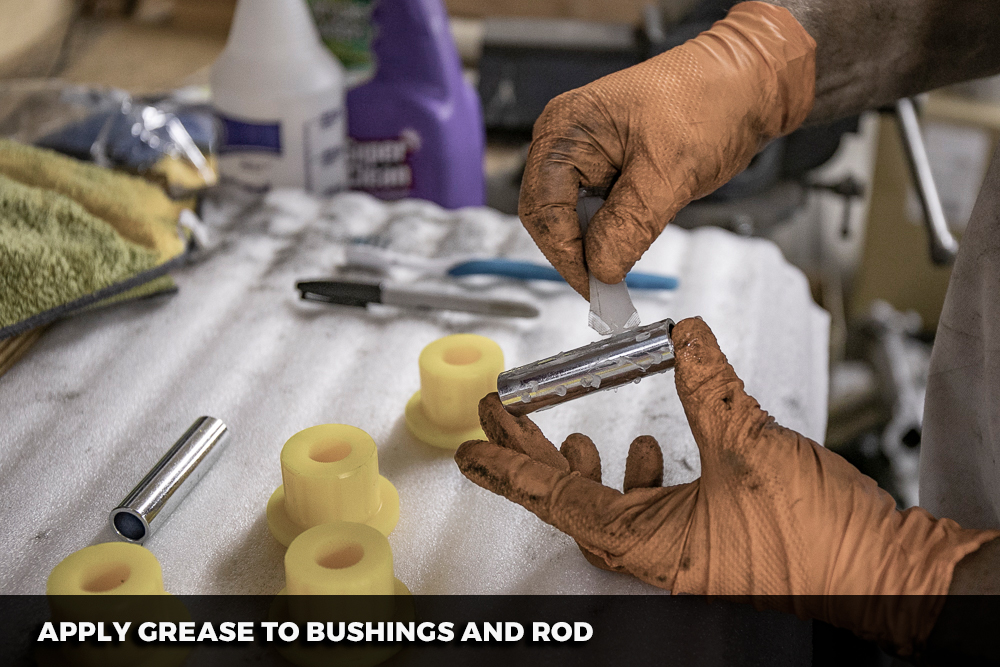
Yes. Apply to both. OME suggests that you apply grease to only the rods but a friend who runs these leaf packs and has for about 8 years recommended that we grease them both as without grease on the bushings will cause them to squeak.
After applying grease to his bushings, they have since stopped squeaking and it’s been about 2 years. So on that note, we applied grease to both. To each their own on this one. We applied a minimal amount of grease to the bushings. OME calls for a molybdenum grease. We used a spare grease pack from another bushing set. Something like this would work.
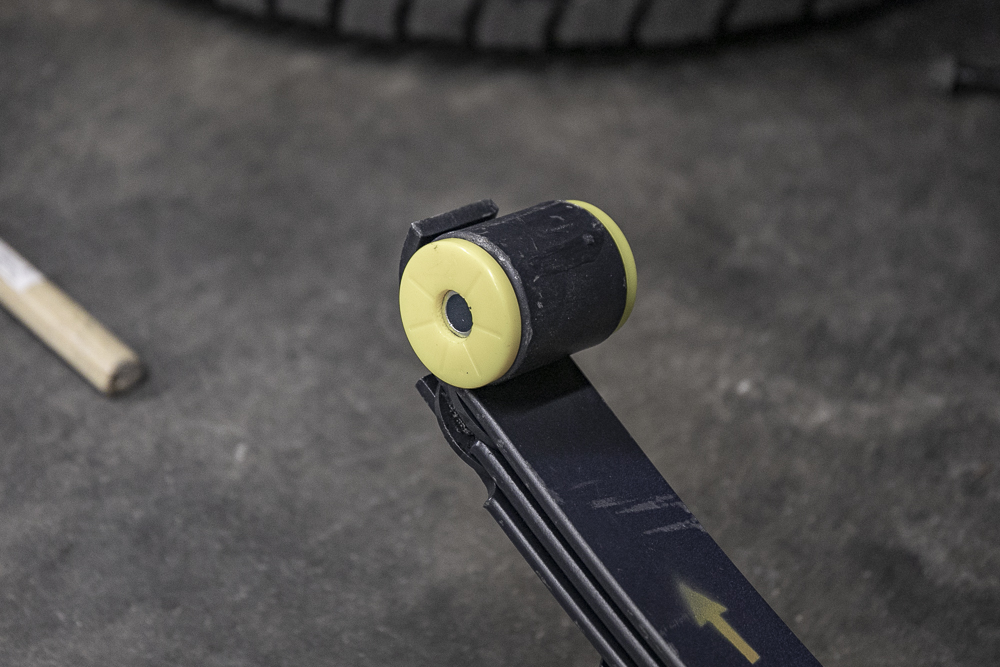
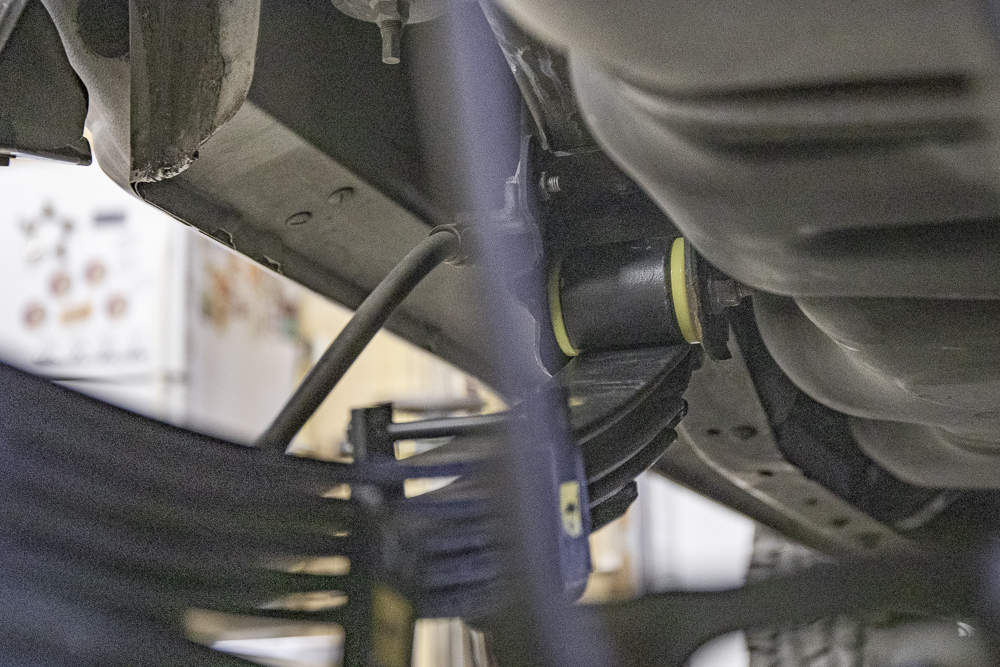
Step 26. Insert the Bushings and Rod
Step 27. Install Leaf Pack
Step 28. Install U-Bolts
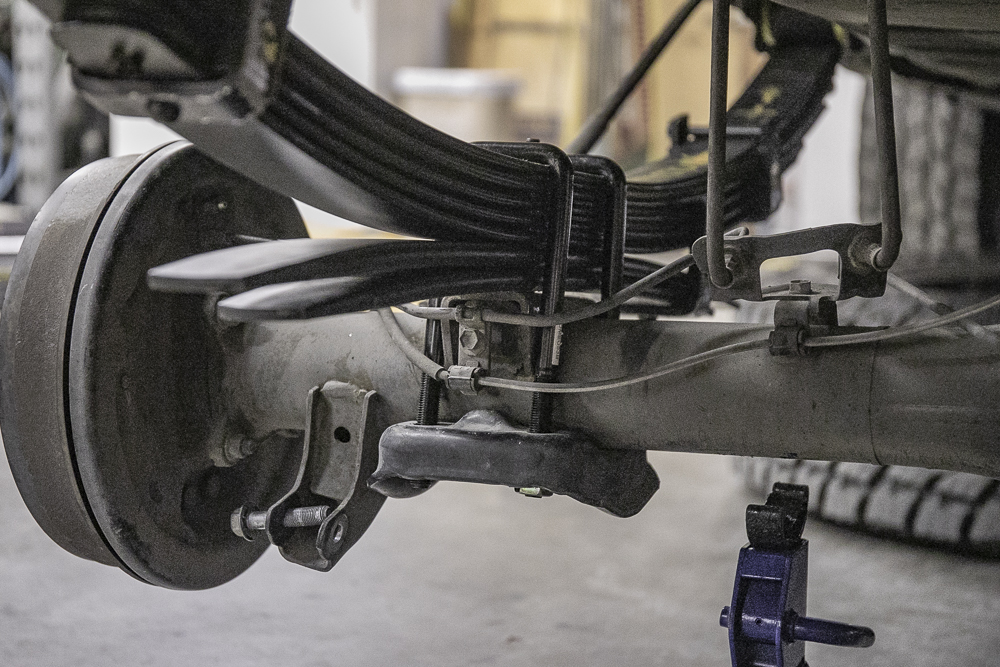
These leaf springs are heavy and will require two people for an install here.
Each leaf pack weighs around 75 lbs and they are incredibly difficult to install solo so it will take two people, a little bit of time, and some patience.
Step 29. Prepare Rear ARB Shocks
OME provides rear shock guards and they need to be installed with these little yellow brackets so make sure you have the orientation of the little yellow brackets are correct before sucking the shock guards into place.
Step 30. Drill Holes & Insert Stick Nuts
OME provides these lower shock mount brackets that you need to drill a hole through in order for a stick nut to be threaded in place.
Step 31. Install Rear Shocks
Step 32. Rear Remote Reservoir
In order to install the rear remote reservoir bracket, you need to remove the rear brake line bracket. Because the rear brake lines are so tight with the axle drooped, you may need to raise the driver-side axle in order for the brake lines to gain some slack.
This will help you reinstall the brake line bracket over the rear remote reservoir bracket.
Step 33. Mount Rear Remote Reservoir
Step 34. Torque Rear Suspension
Torque Specs
- Leaf Pack U-bolts: 50ft-lbs
- Leaf Pack Hanger Bolts: 120ft-lbs
- Rear Lower Shock Bolt: 100ft-lbs
- Top Lower Shock Bolt: 20ft-lbs
Step 35. Drop Bracket for Driveshaft
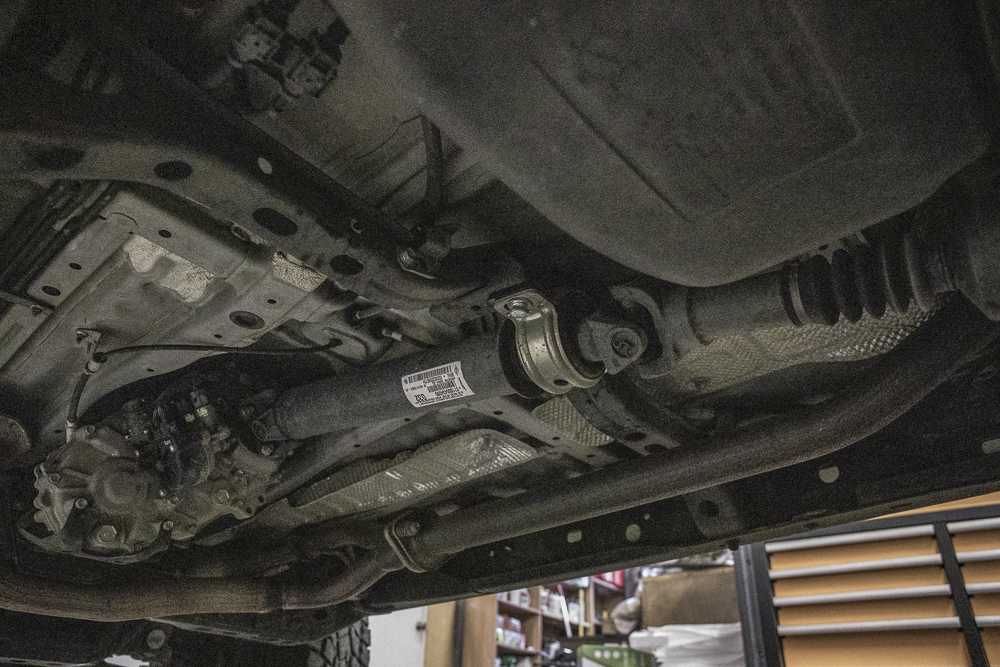
Last but not least, install the driveshaft drop bracket.
Final Thoughts
This is the second time I’ve run this lift kit now, the first time was on one of my 5th Gen 4Runners. You can see my overview on that kit here. I ran the suspension on my 4Runner for well over 2,000 miles through Moab, Utah, and Southwest Colorado and it’s still going strong. No leaks, no problems. It just works.
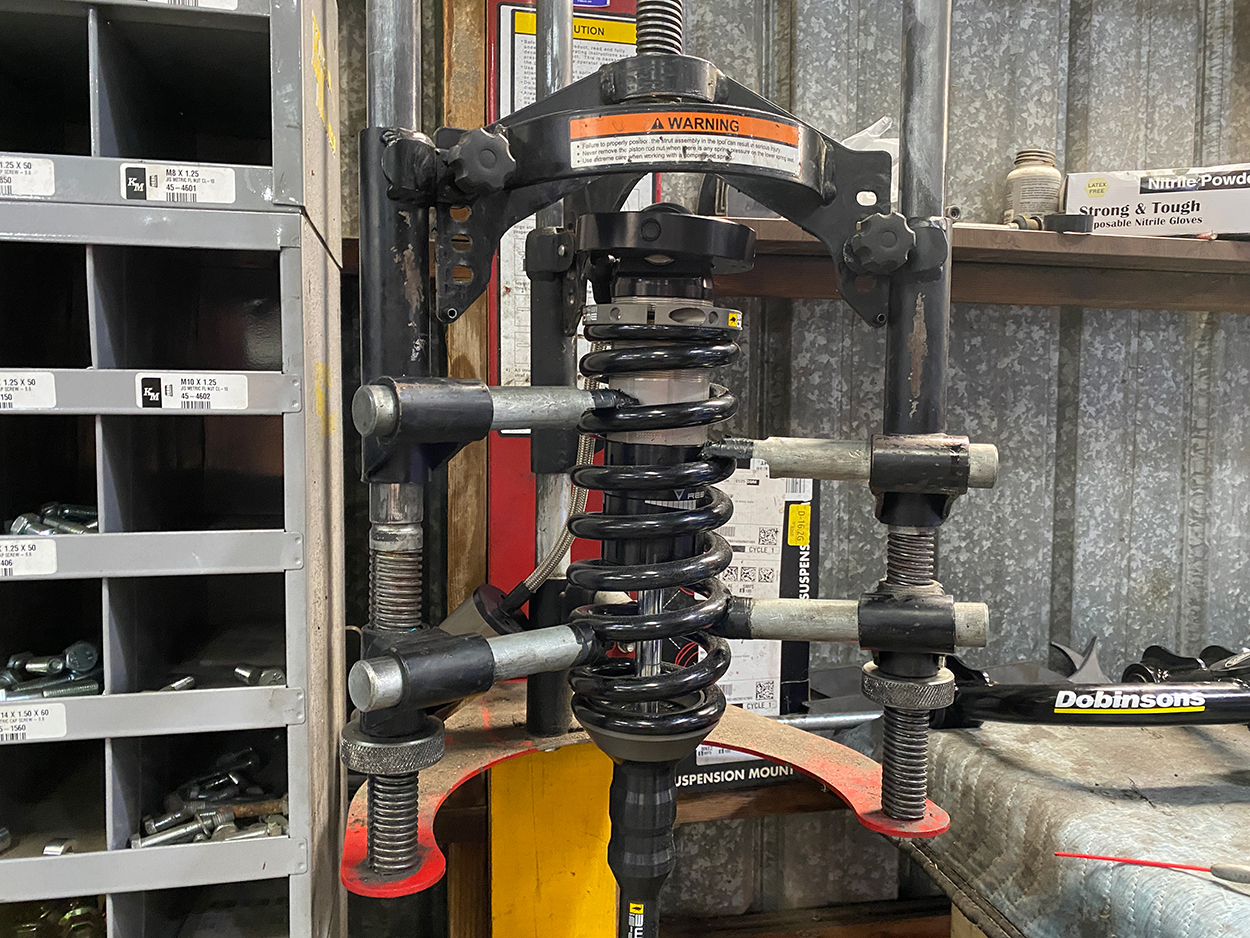
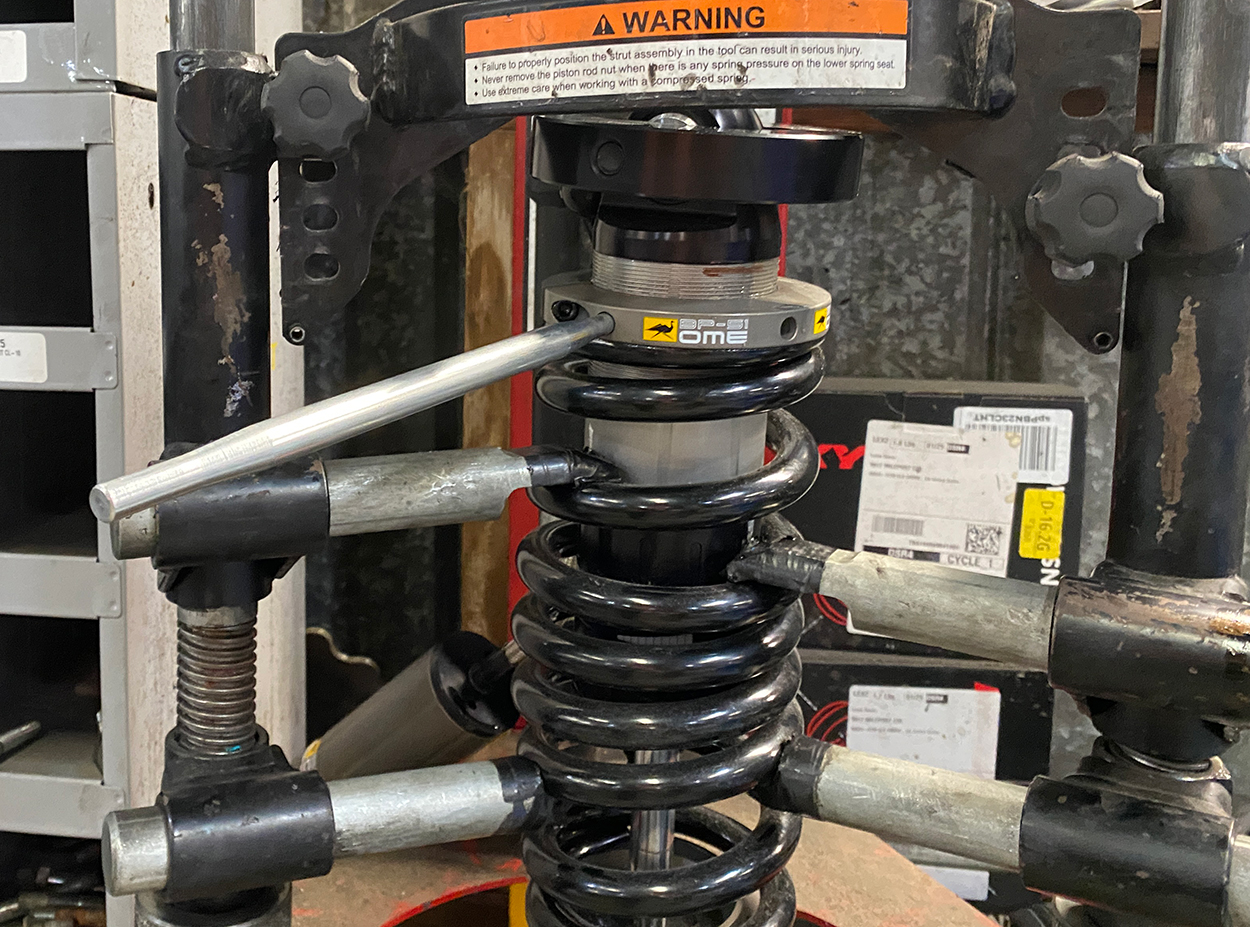
The only problem I have with this suspension system is making an adjustment to the preload. The only difference with the BP-51s is that they call for a special tool, however that special tool isn’t “needed” in order to make an adjustment. As you can see here we are making an adjustment to the preload with a wall-mounted spring compressor.
We attempted to make an adjustment to the preload using our floor-mounted spring compressor, however, the horseshoe style spring inserts are much too large to fit around the wide shock body of the BP-51s. This led me to our shop of choice in Sacramento, CA; StellarBuilt. He threw the coilovers in his wall-mounted spring compressor and we were able to adjust the preload up .75″.
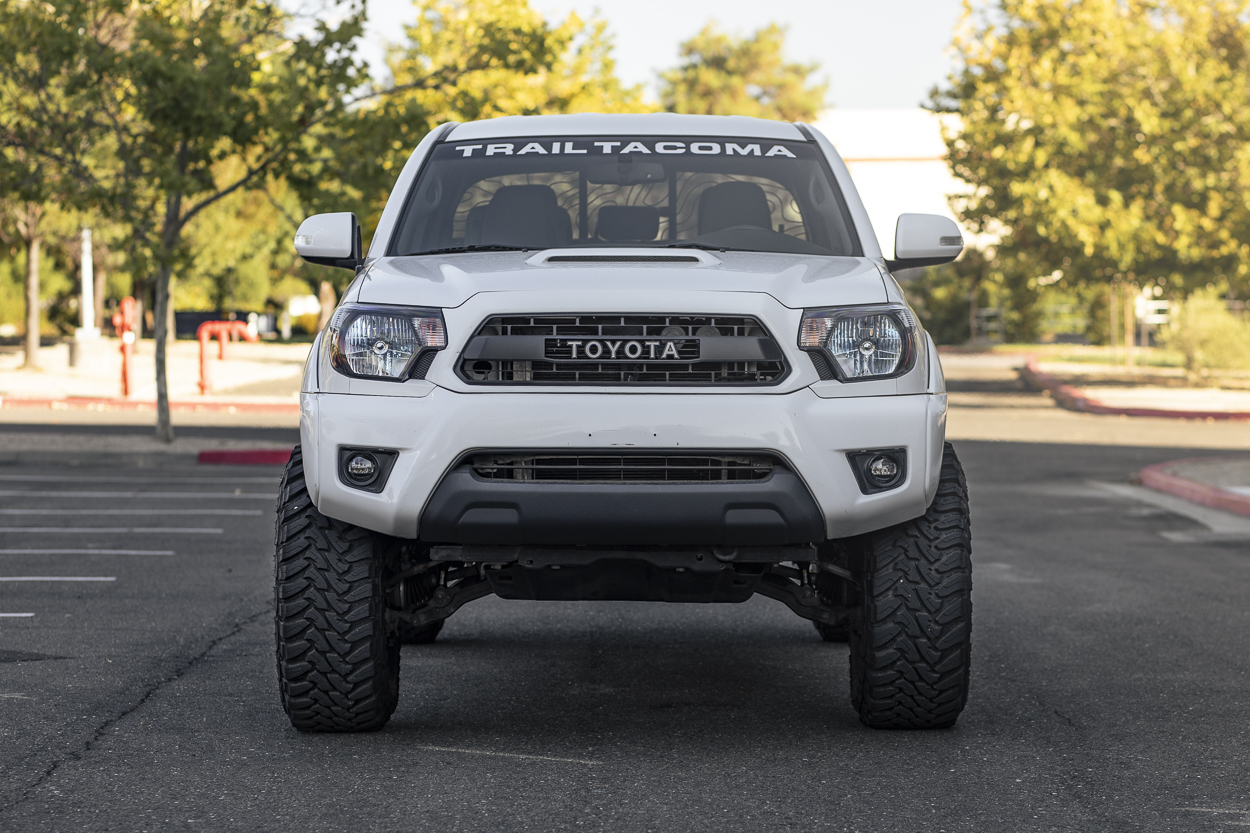
We will follow up with a full review post soon but for now, here is a look at how she sits. I still need to trim the rear fenders to match the front fenders and then pick up our armor; C4 Fabrication everything. We are going with a C4 Hybrid front bumper, C4 Sliders with top plates, and a C4 Rear Bumper. I am beyond stoked to pick up those parts at powder coat in the next month or so.
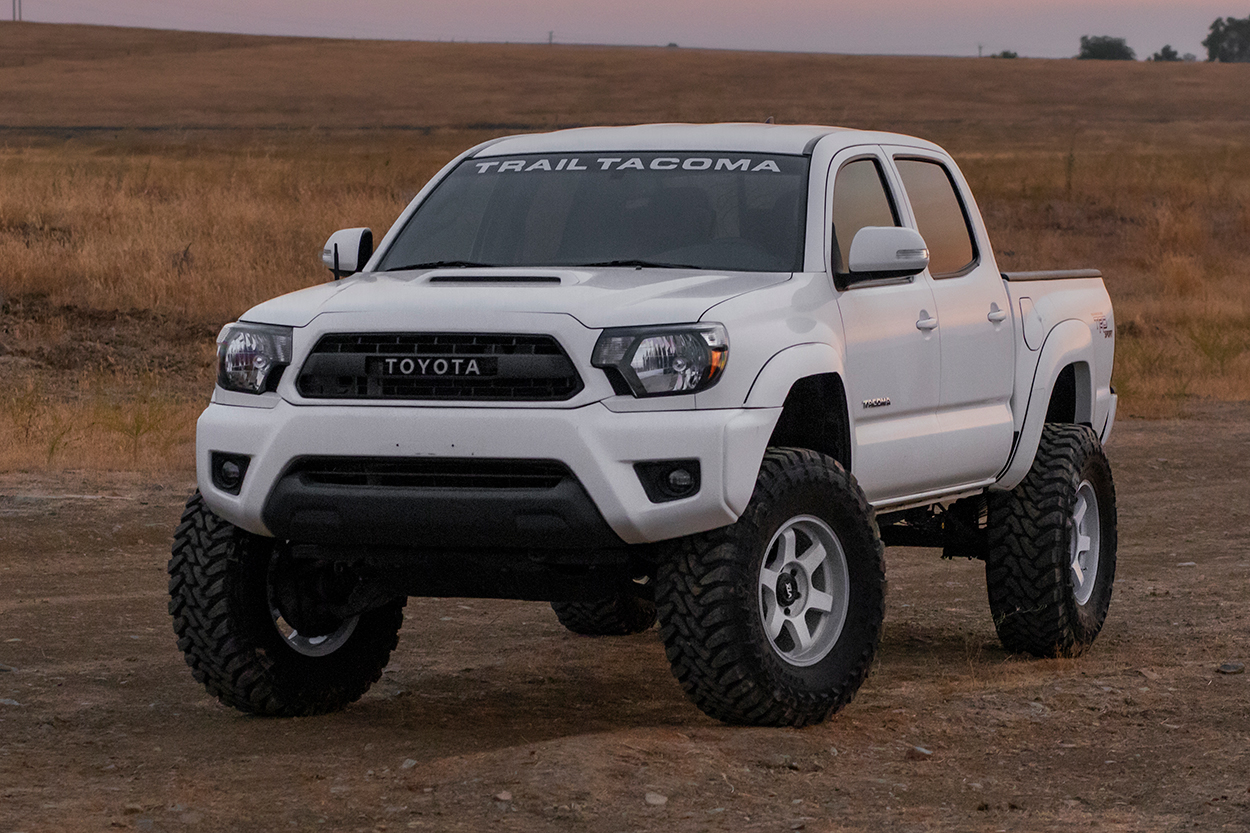
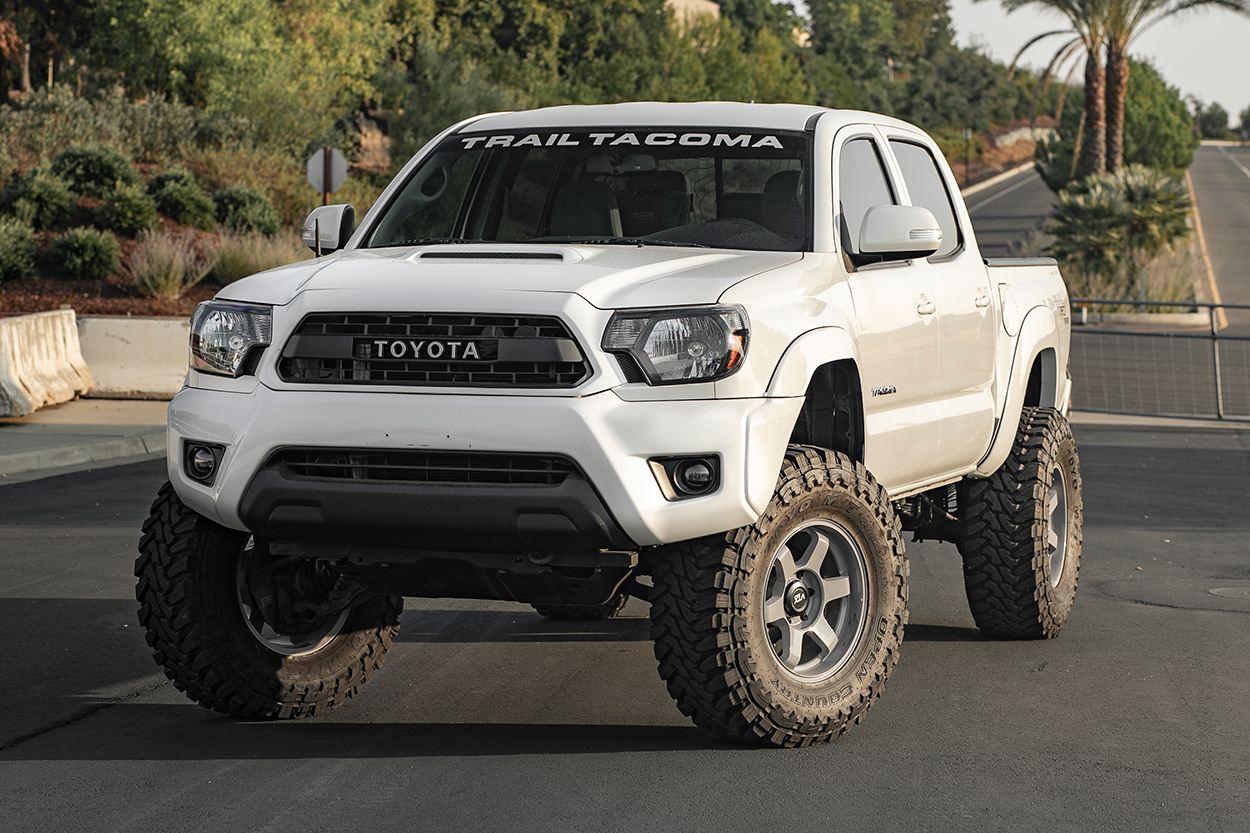
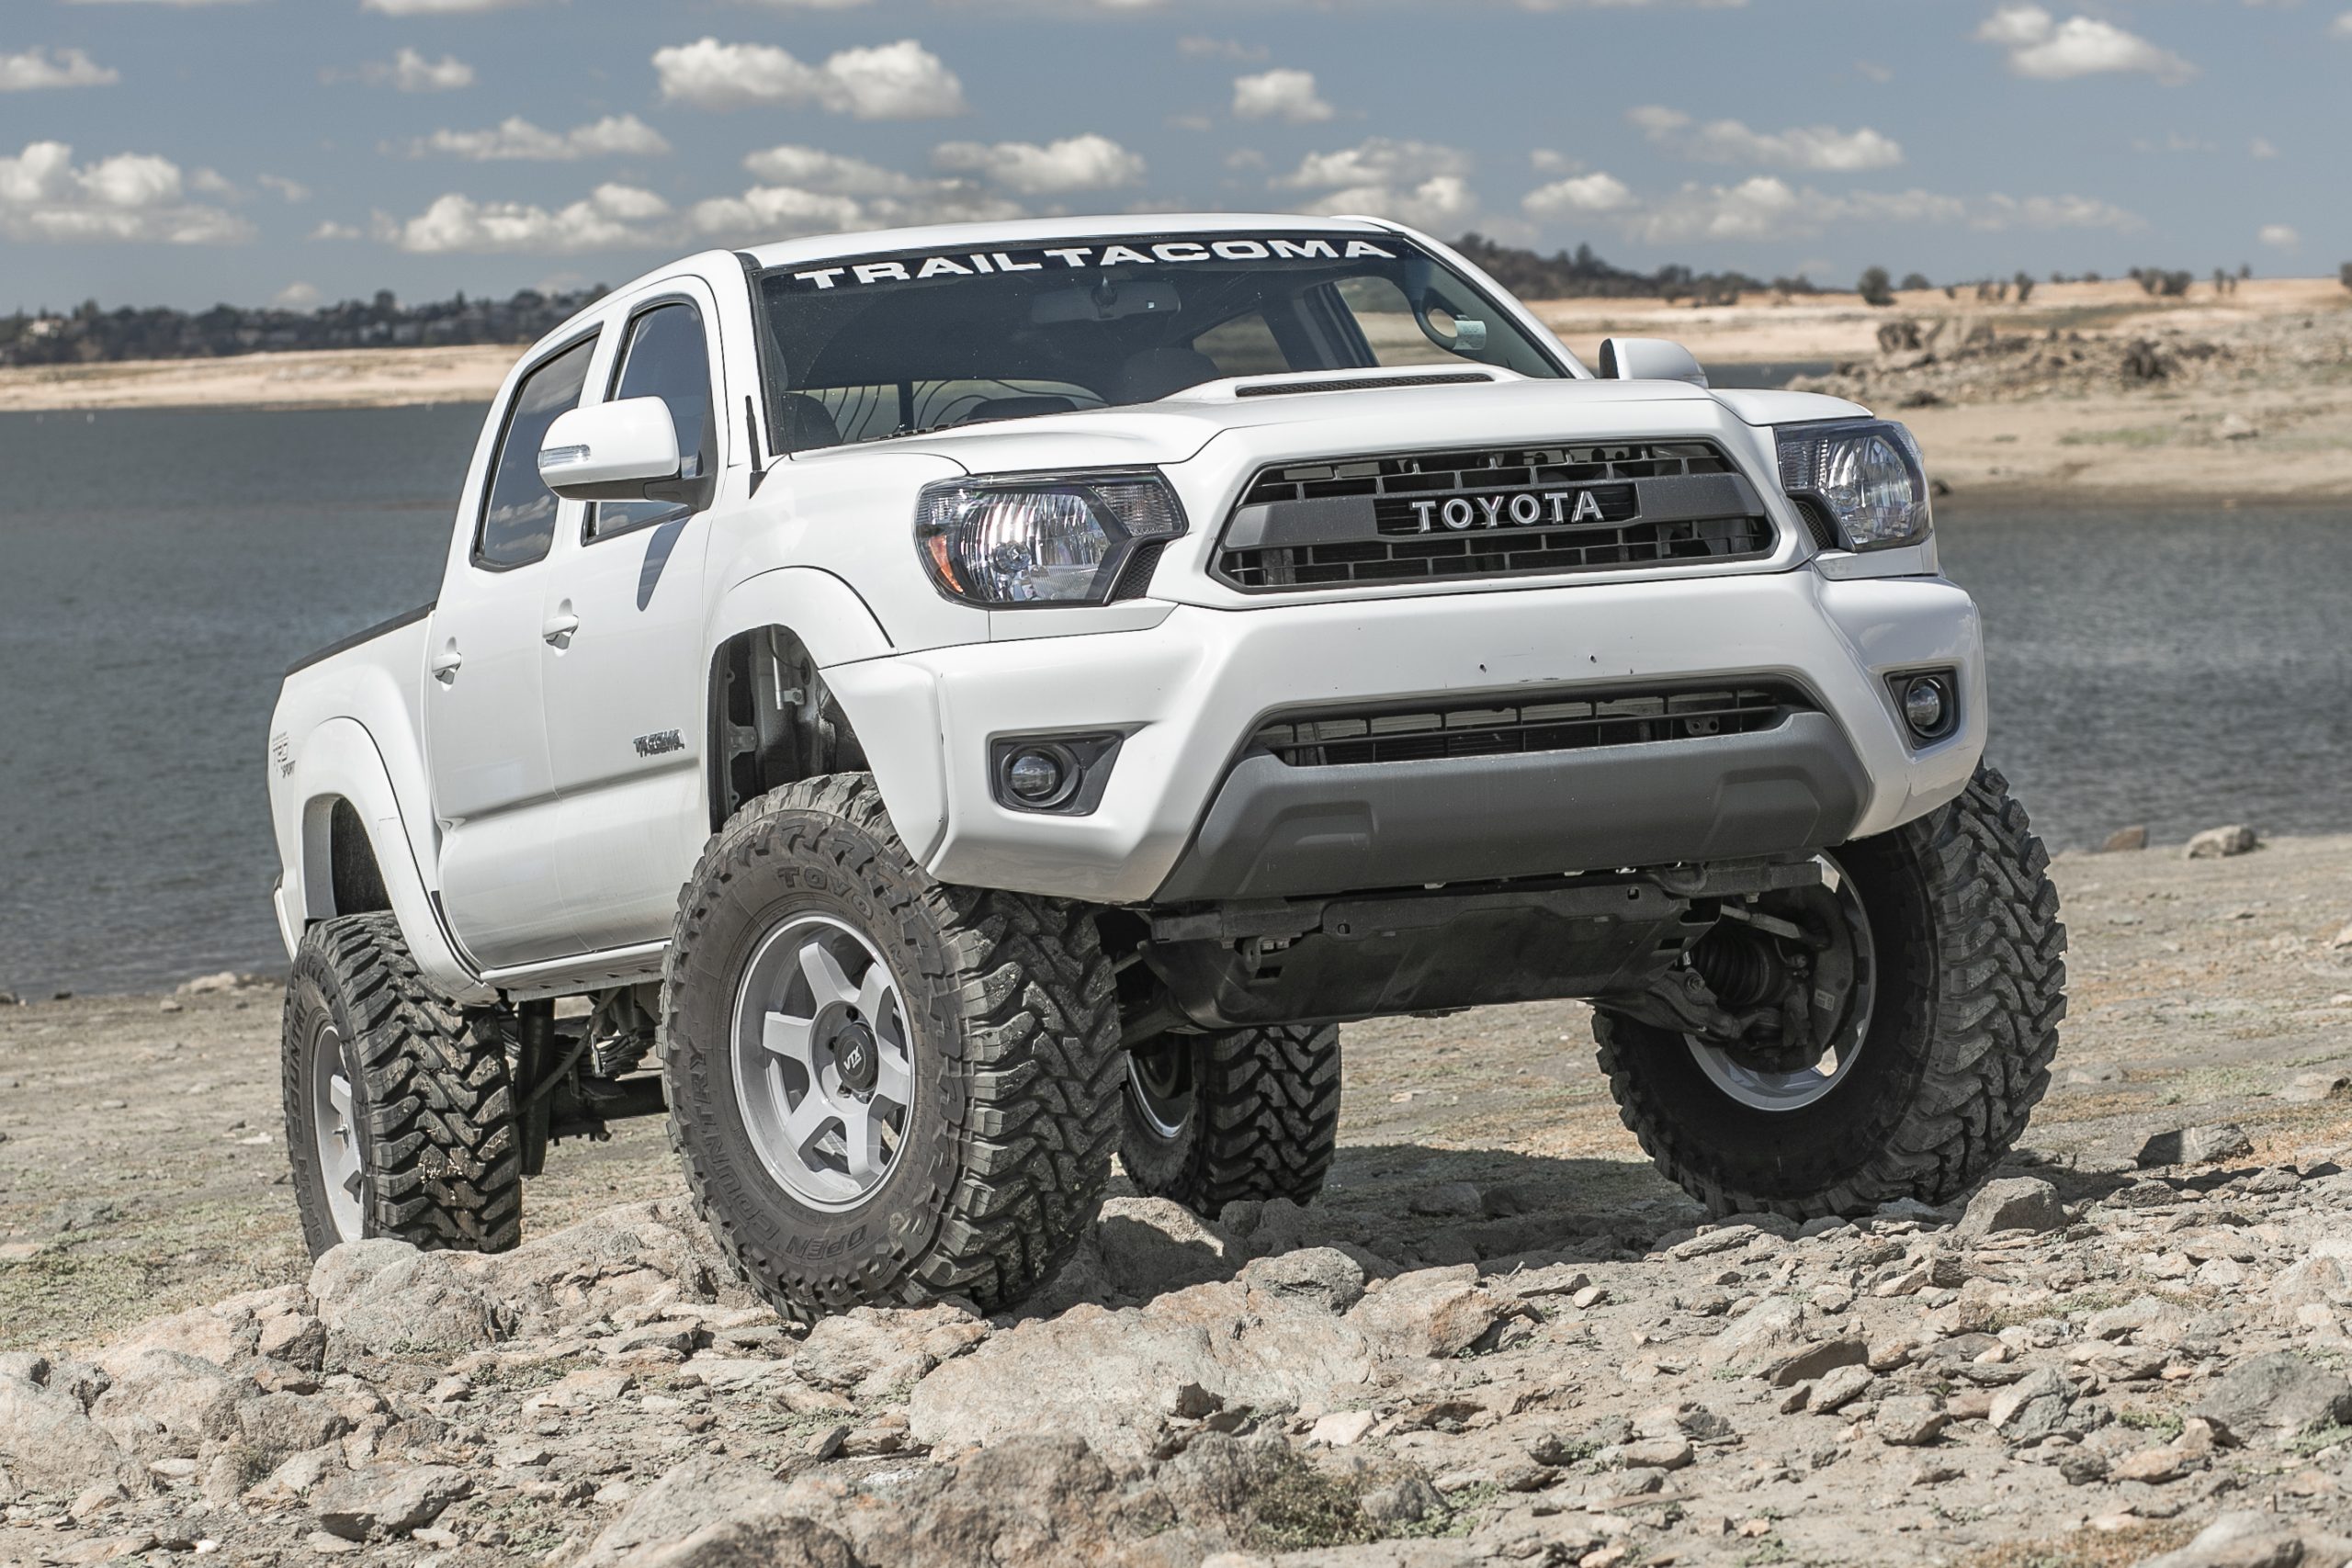
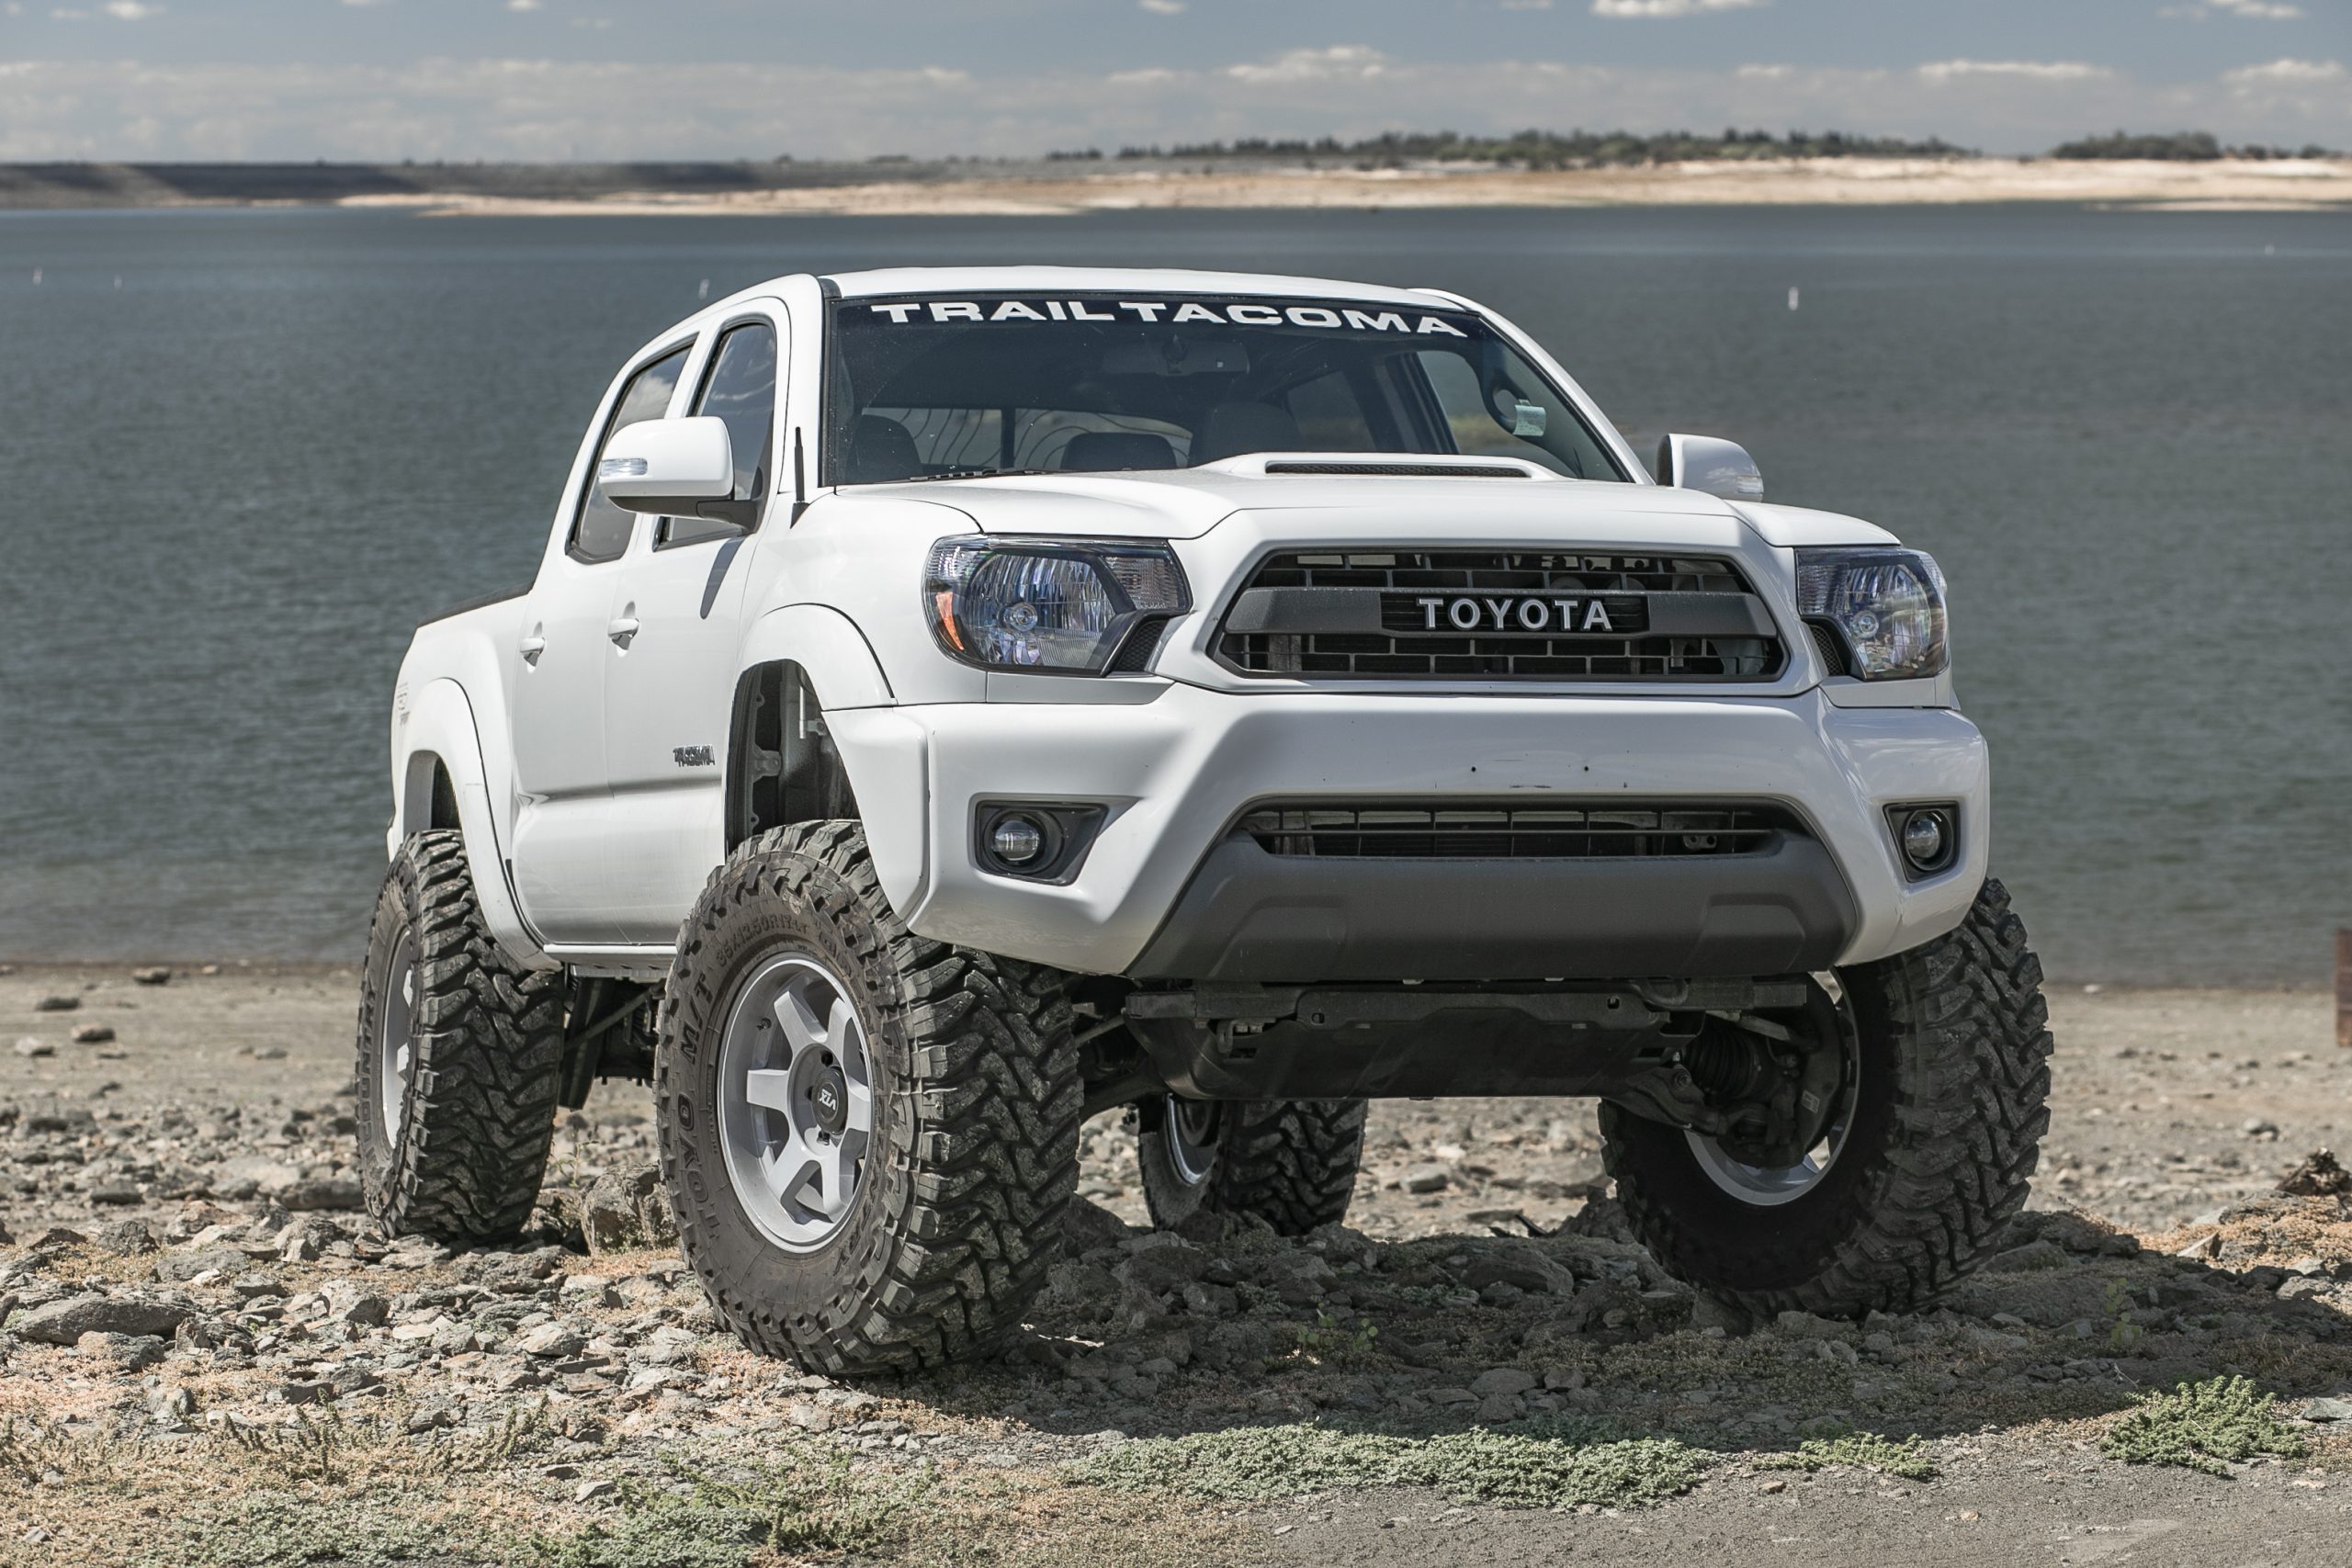
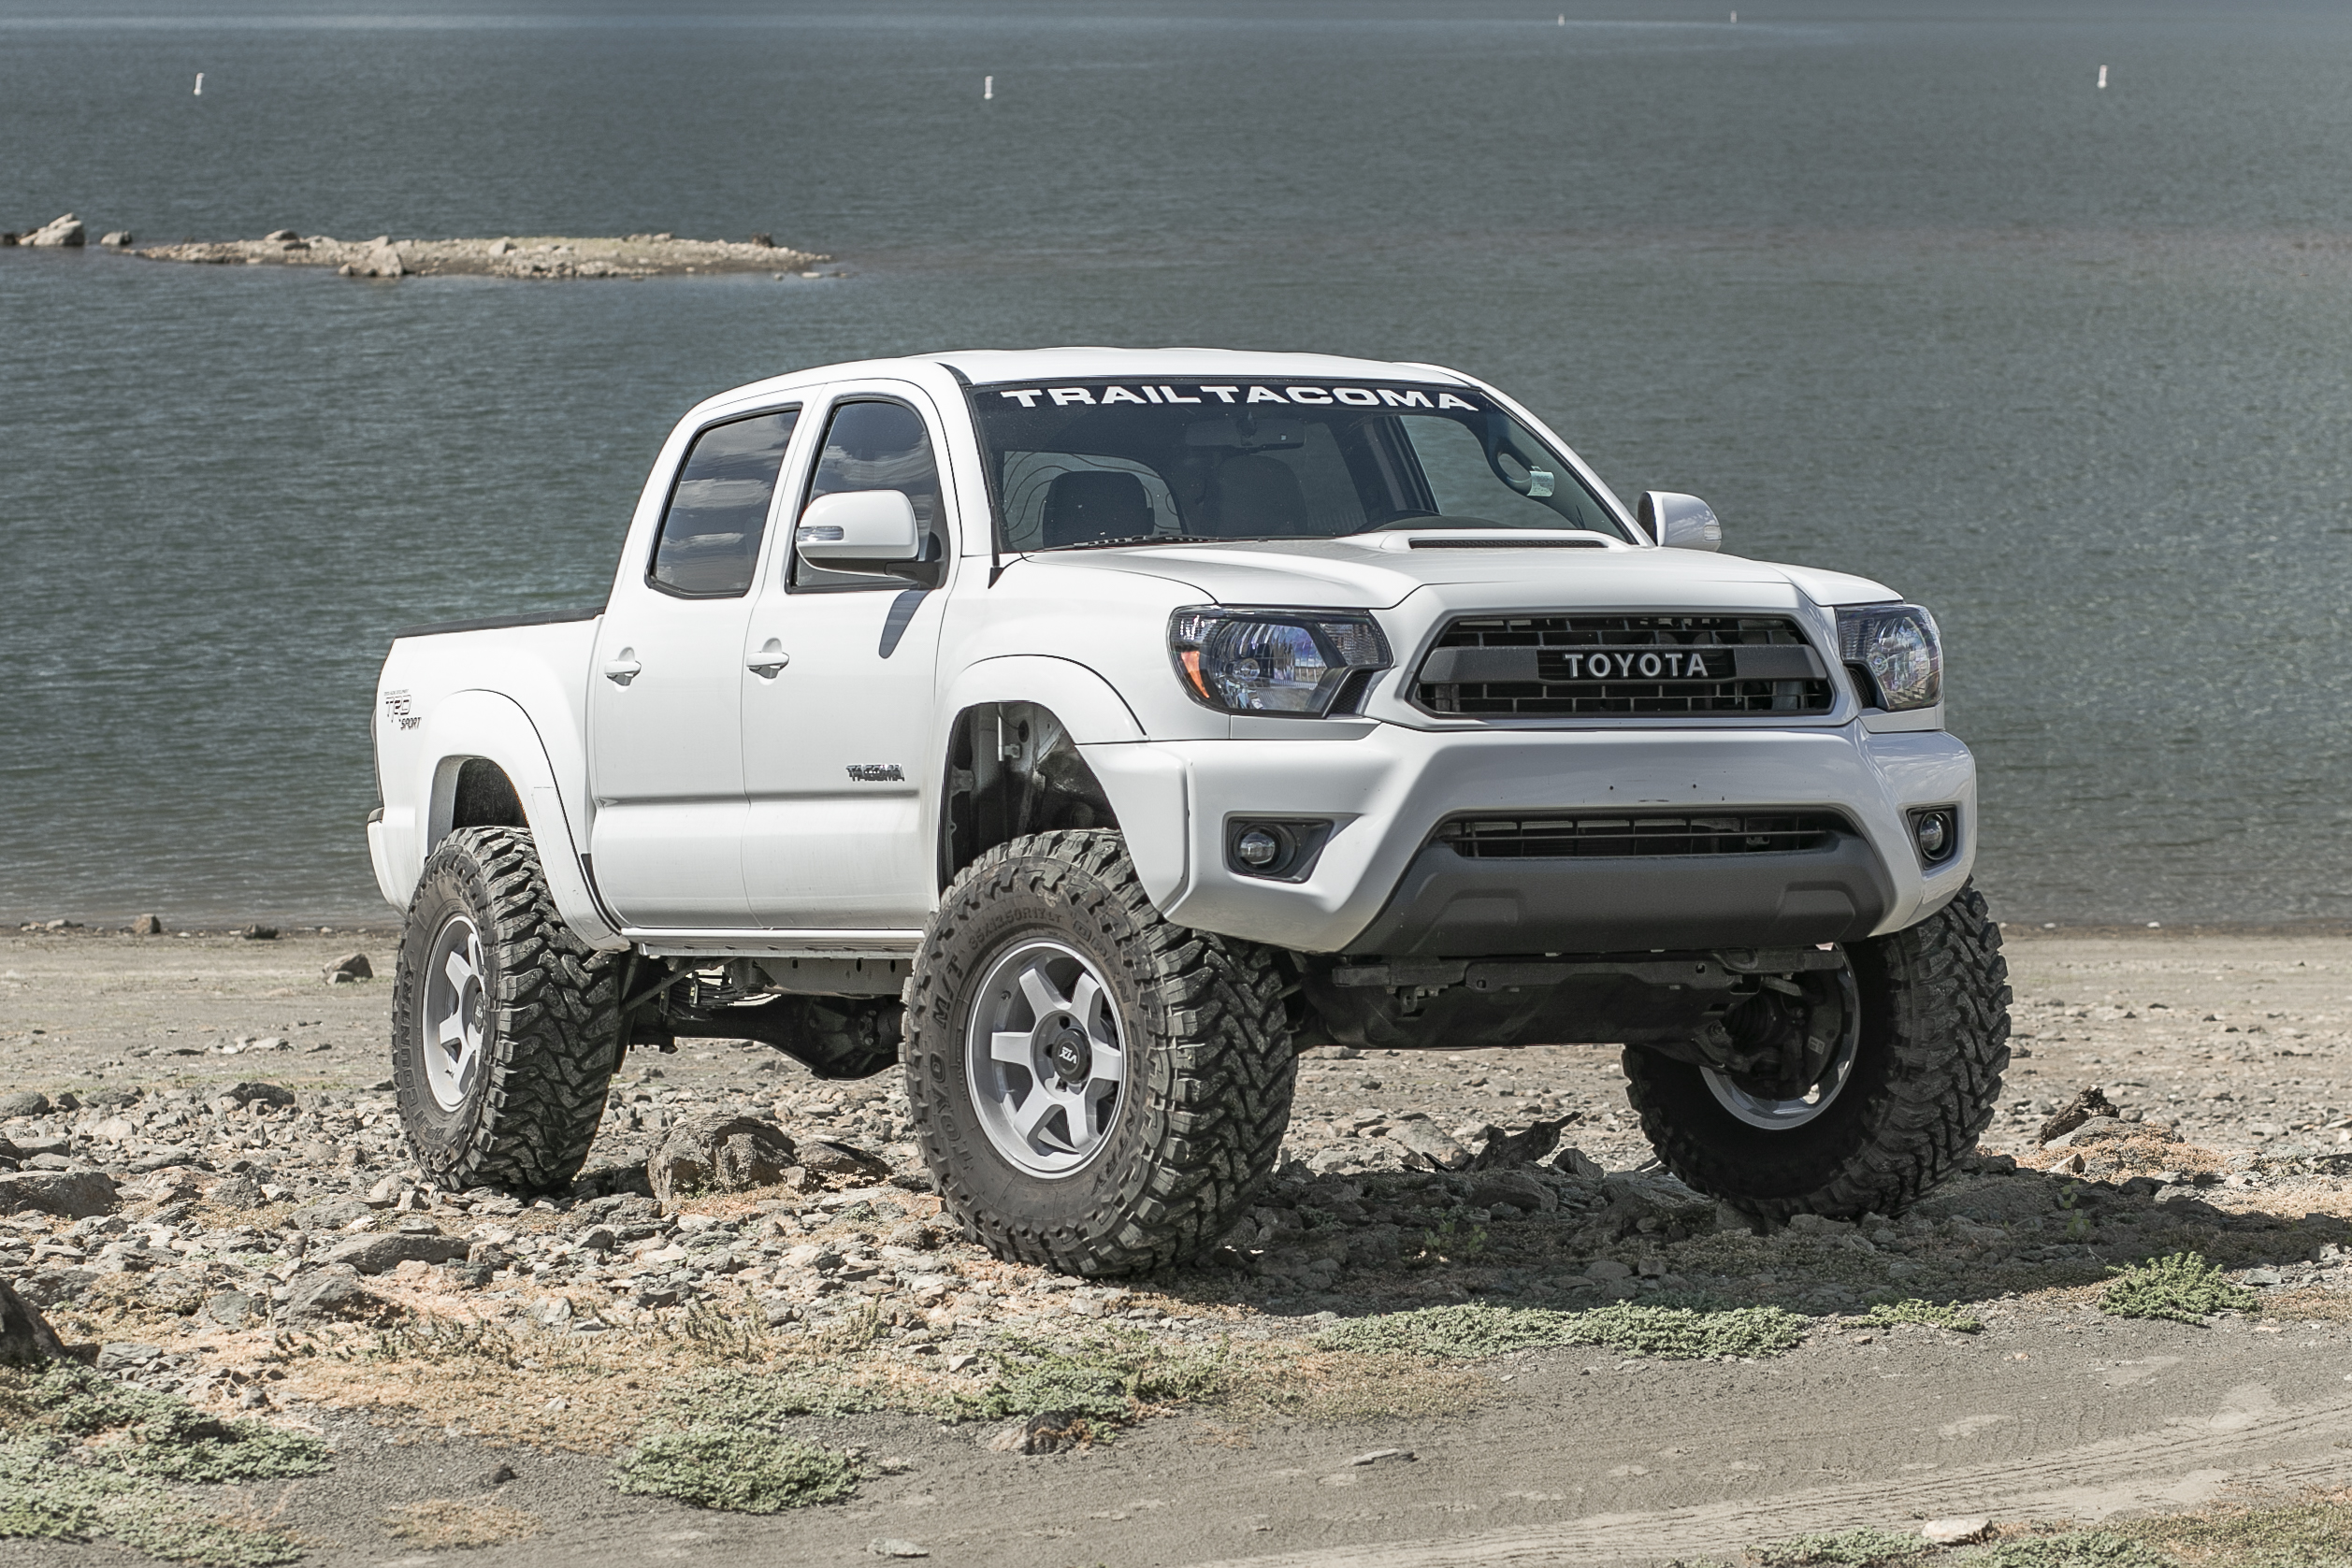
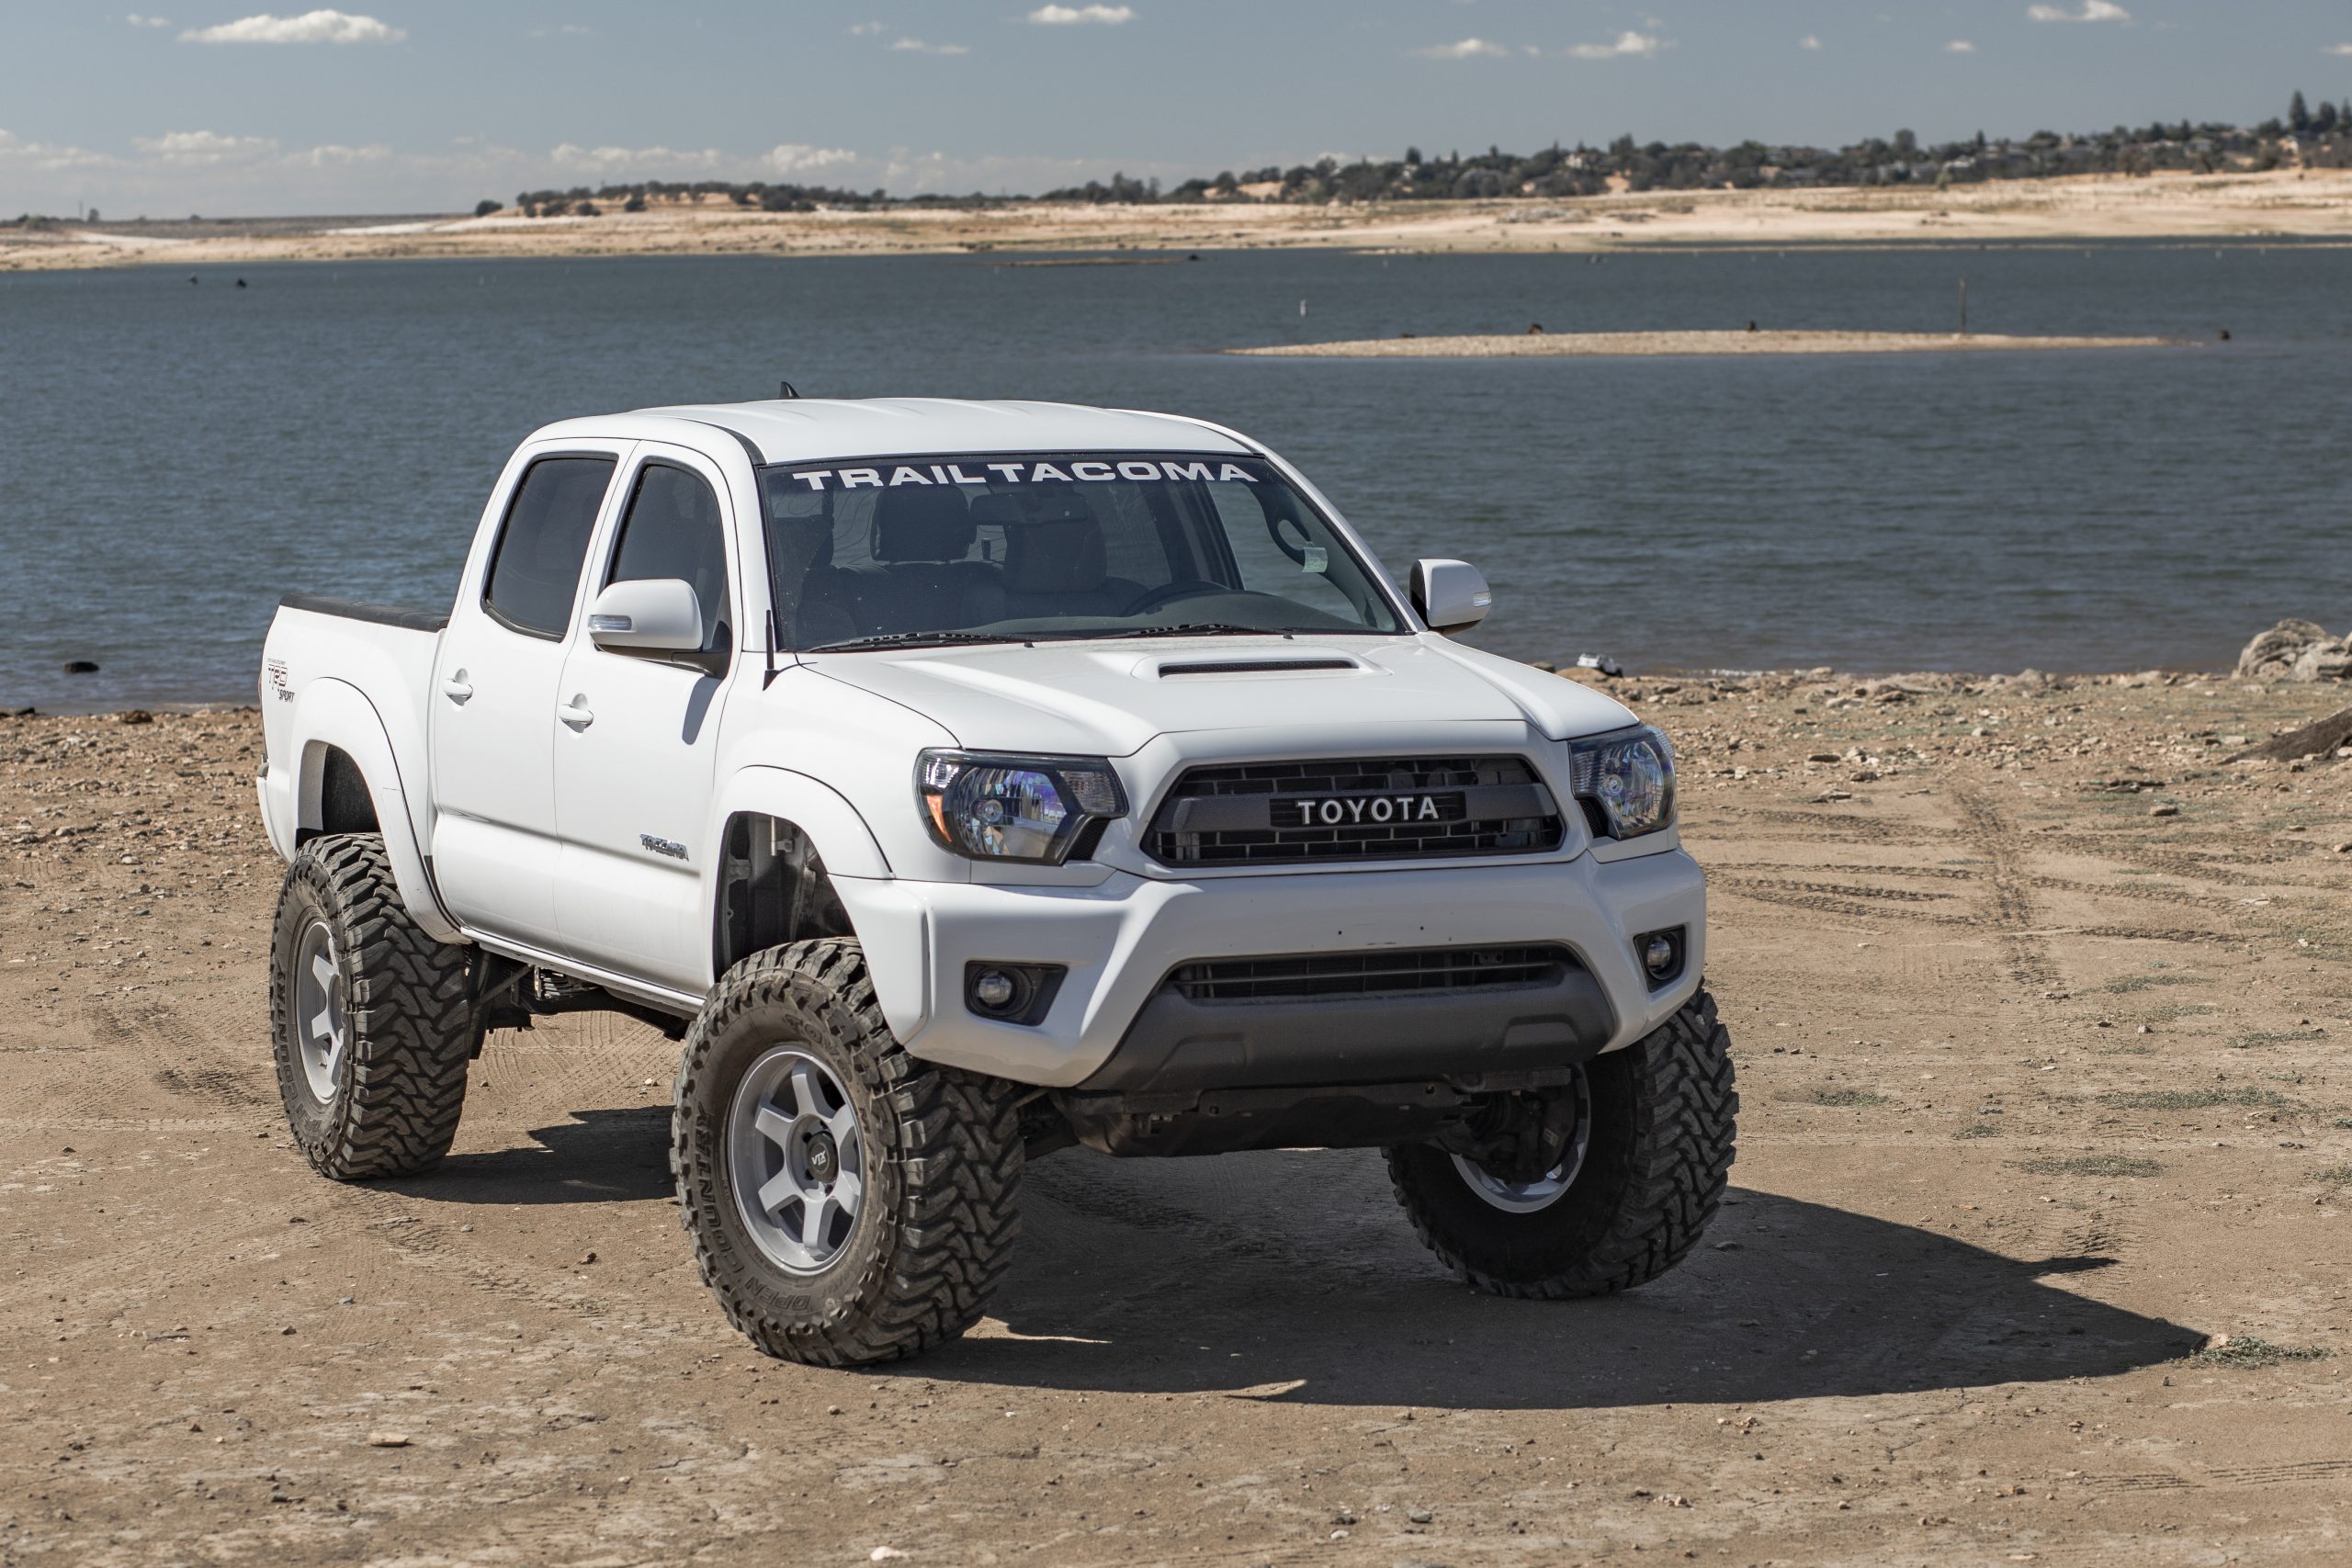
Final Ride Height


Great job, she’s gorgeous. What size wheels and tires? Thanks
Picked up a Lexus GX460 with the BP-51s and SPC adjustable control arms already installed. Do you know the minimum lift height that I can adjust these down to?
When you adjusted pre-load to the BP-51 coil using the wall-mounted compressor, did you run into any difficulty getting the coil to release from the collar without using ARB’s proprietary VM80020001 tool?
Many thanks! All you articles are most appreciated. BP51’s going on my truck this week! My own weekend warrior engineer thoughts were to leave the preload and do shims but thought maybe I don’t know what I’m talking about. Feel soooo much better now reading this. Thank you sincerely✌️
Was going to do 2 shims on driver side and 1 on passenger for lean but maybe I’ll start with 2 on each and see how she sits.
I have two on each side and it sits great. Sometimes I have lean when the gas tank is full, and If I’m loaded heavily on one side of the bed, but for the most part the Tacoma sits pretty level on both sides.