
If you’re new to the scene, you may be looking to add more lighting to your vehicle.
One of the most popular and effective ways, to brighten up the trails at night, is to add ditch lights to your vehicle. With all the available lights and hardware on the market, it can be hard to decide what you need. The following is an in-depth review and installation guide for the low-profile ditch light brackets from Cali Raised LED.
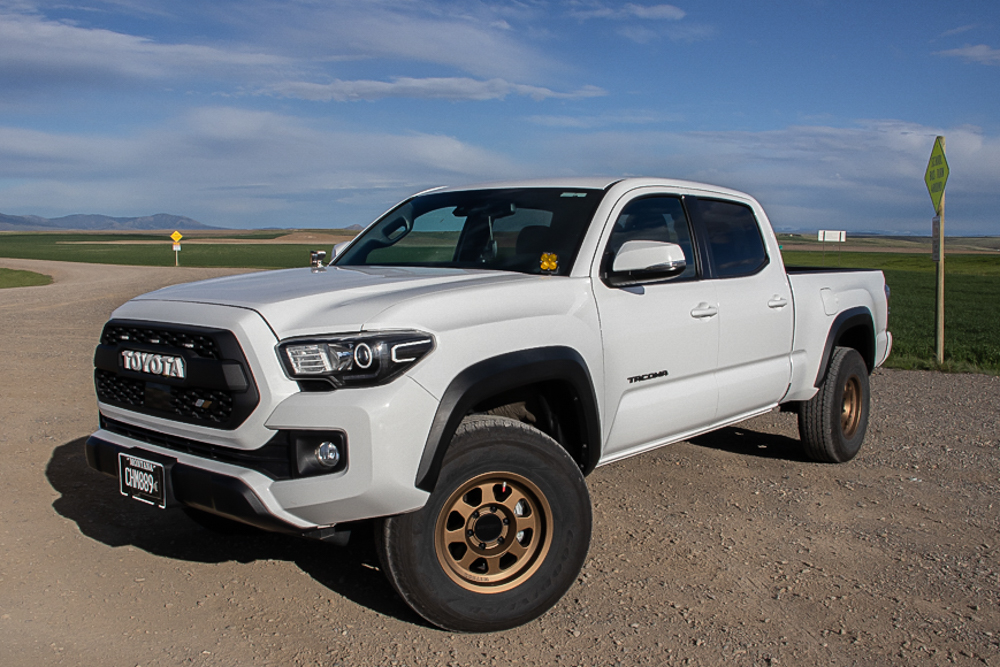
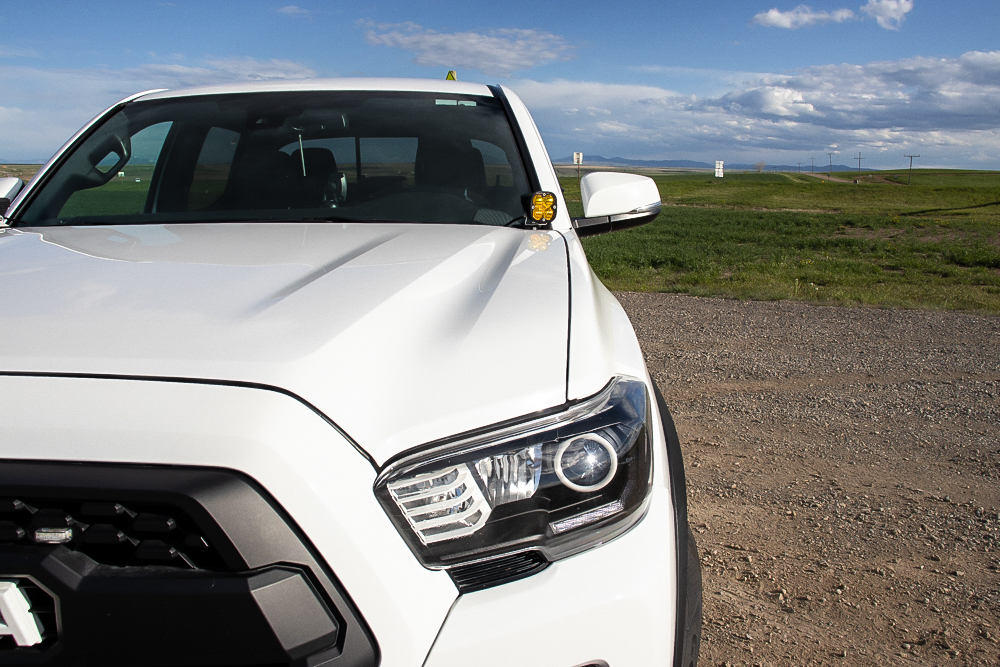
In my search for a ditch light mounting solution for my 2019 Toyota Tacoma, it was important to me to find a rugged product that would hold up to off-road driving, while maintaining my everyday driving comfort.
The ditch light brackets from Cali Raised LED do just that – they’re designed to be low profile to protect the lights and to allow for an unobstructed driver and passenger seat view. They are also powder-coated to hold up to the most extreme conditions and fit virtually all ditch lights on the market, with room to spare.
Table Of Contents
Step 1. Assemble Lights
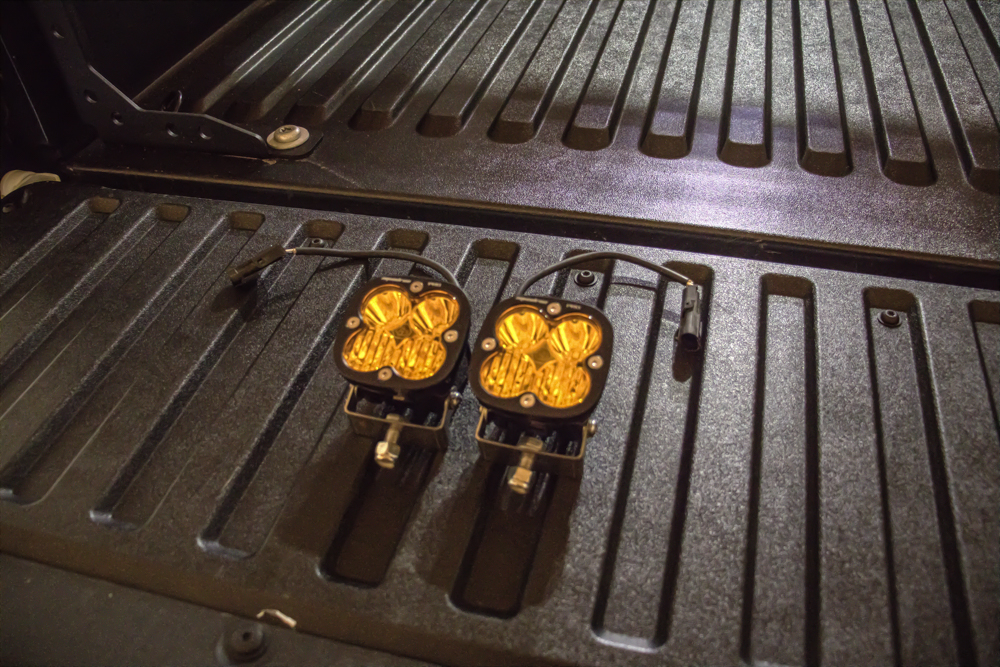
The first step in this installation is to mount your pod lights to their mounts. The installation process for my lights may be different than others on the market, so tools required and specific steps may be different, but the premise is essentially the same.
The mounts for the Baja Designs Squadron Pros are reversible to allow for more vertical articulation. The mounts attach to the Pros at two points on the exterior of the lights.
Find It Online
- Cali Raised LED Ditch Light Brackets: Check Price
- Baja Designs Squadron Pros (pictured here): Check Price
- Cali Raised LED Pods: Check Price
- KC FLEX Lights: Check Price
First, you should place the provided washer between the Pros body and the mount, then place the locking washer on the outside of the mount and screw the 2.5mm hex screw into the light. This will have to be repeated on the other side as well. It is important to note that you do not need to overtighten these screws, and loosening them will allow you to articulate the light vertically (up or down) to your preference.
KC also makes a ton of really cool options for ditch lights, including their popular FLEX light. They also make a Tacoma-specific mounting kit.
Step 2. Attach Lights To Brackets
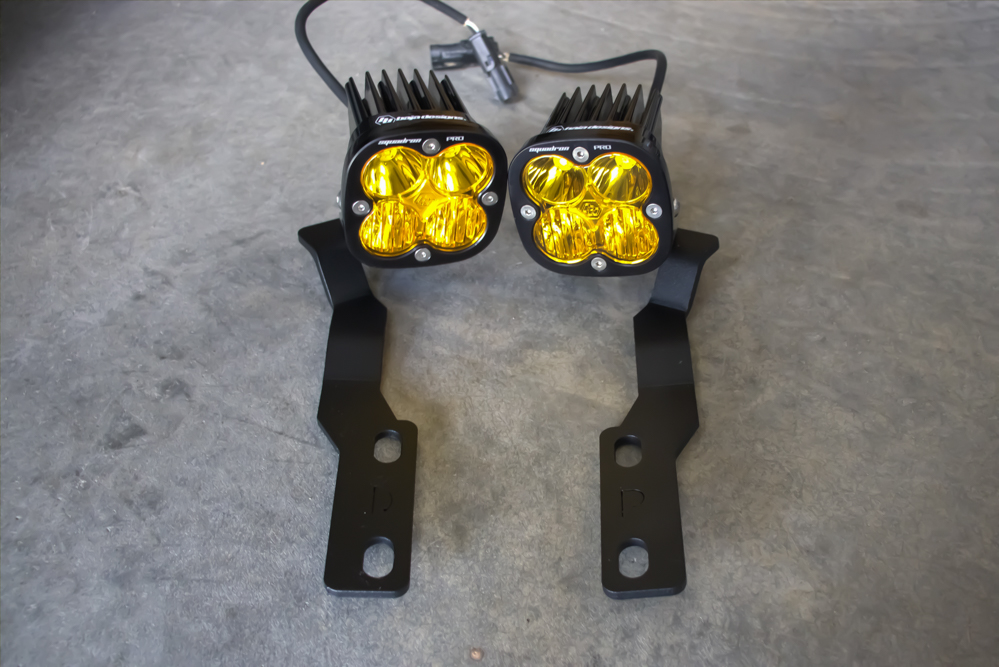
After your lights are attached to their mounts, it is then best to attach them to the low-profile ditch light brackets. The space between the brackets and the hood is tight, and you don’t want to risk scratching your paint by attaching them later.
First, place your lights on the ditch light brackets with the bend facing upwards. The light should be elevated and be able to spin 360 degrees around the bracket. Face the light towards the rest of the bracket, and tighten the 12mm lock nut onto the bolt with the washer underneath the bracket.
Again, these do not need to be overtightened but should be attached securely to the bracket. Loosening this bolt will allow you to articulate your light horizontally (left to right) to your preference. You should follow a similar procedure with other lights.
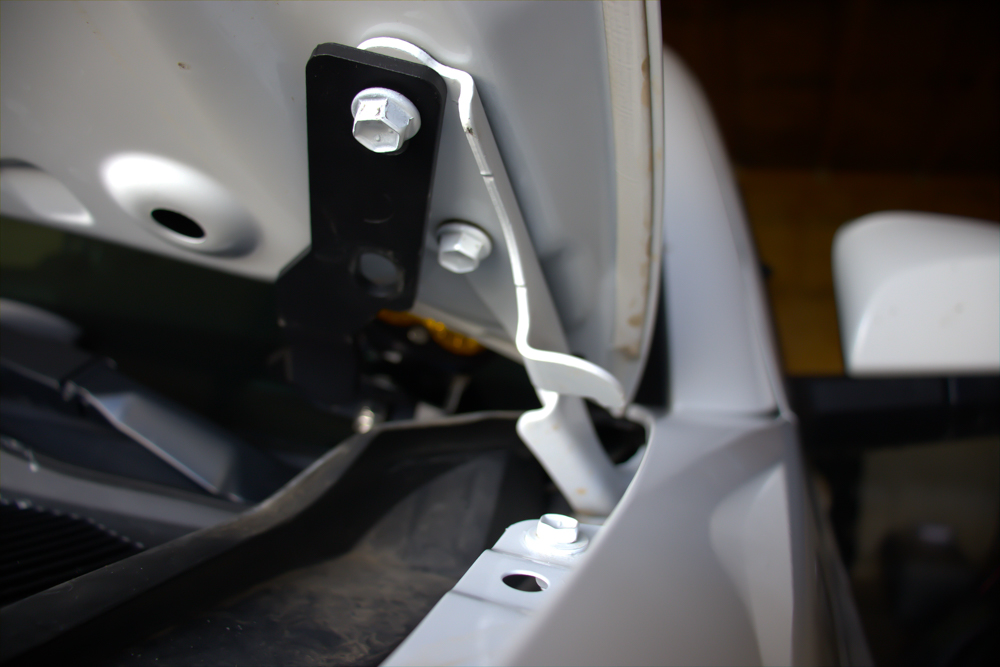
Step 3. Attach Brackets To Hood
For this step, you can finally pop the hood of your Tacoma.
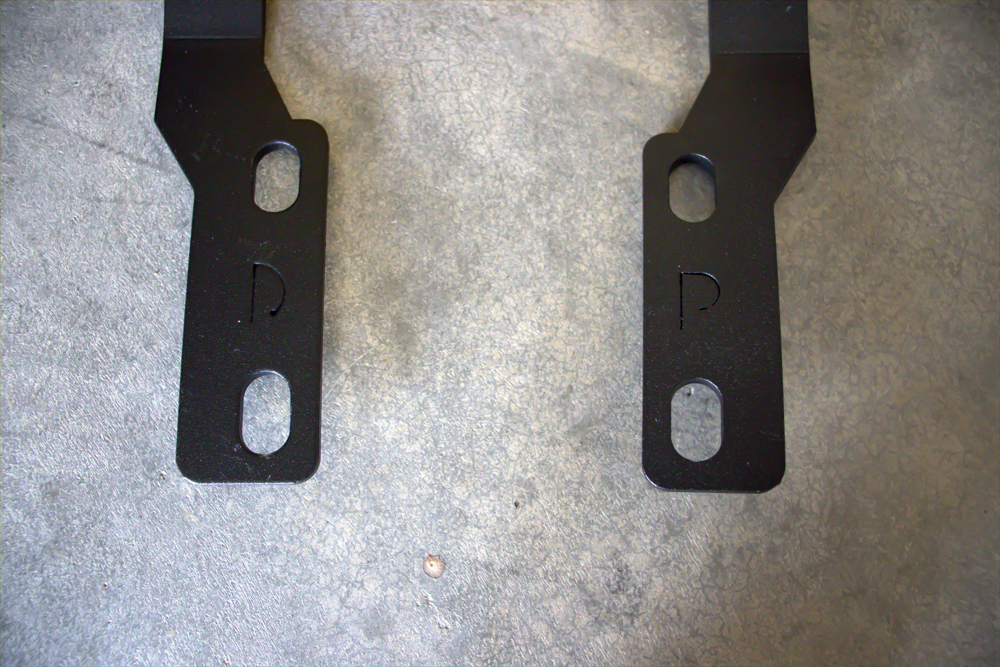
Your ditch light brackets are marked with a D or a P to indicate driver and passenger side orientation. Make sure you know which side goes where to avoid any unnecessary frustration or difficulty with installation.
To keep your hood aligned, you should only fully remove one bolt at a time. Removing all the bolts can easily cause the hood to become misaligned and add extra work to your project.
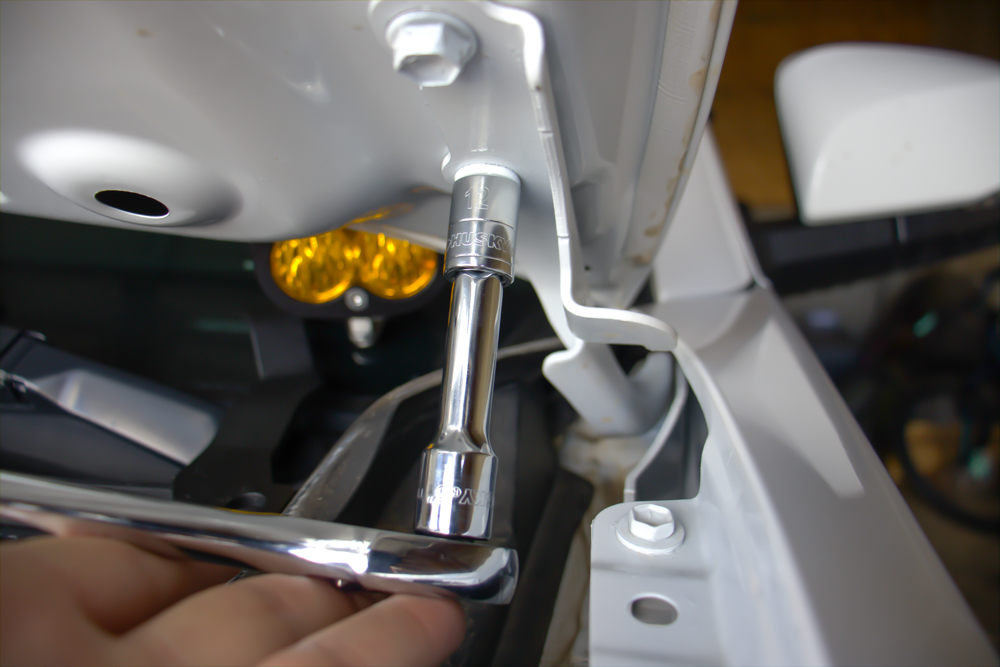
To install the brackets to your vehicle, you should first remove the front 12mm bolt on your hood mount with your 12mm socket and ratchet.
These bolts are snug but are easily removed once broken free. To get your ditch light bracket to fit correctly, you may need to loosen your second bolt and manipulate your hood into place. Do not remove the second bolt entirely.
Once the correct bracket is lined up with the first bolt hole, hand tighten the bolt into the hole until it is secure.
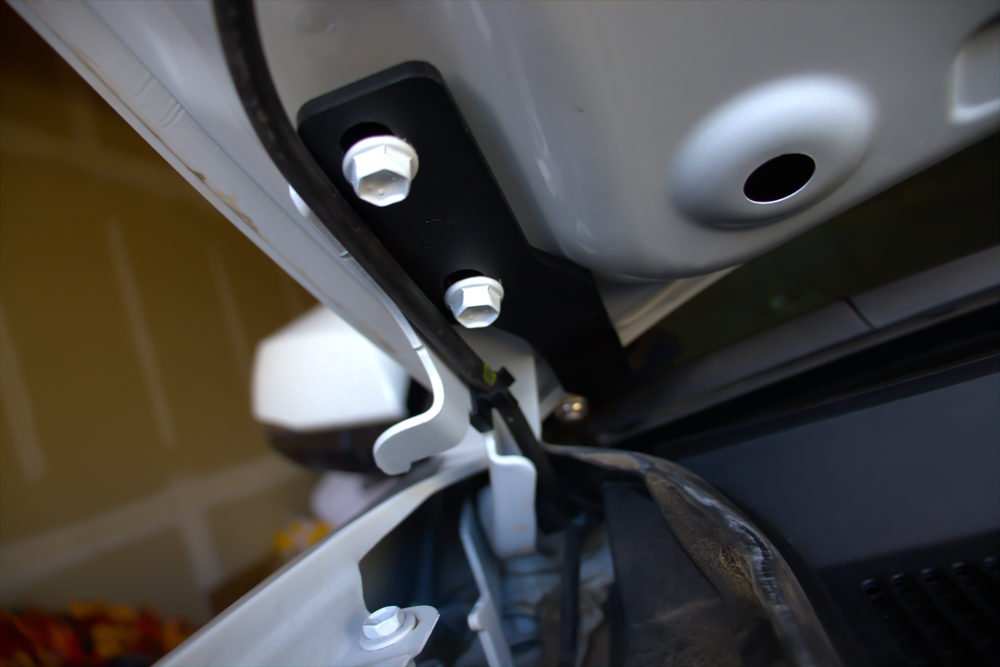
You can then remove the second bolt and swing your bracket in-line with the hood. Place the second bolt back into your hood and hand tighten both bolts, then using your 12mm socket and ratchet, tighten the bolts into your hood until snug.
You may need to move your ditch light bracket forward or backward to get both bolts aligned – in my case, the brackets needed to be slid forward to get the second bolt in. After these are tightened down, you can repeat on the other side.
You should check to ensure your hood is still aligned properly, and make any necessary adjustments.
Final Thoughts
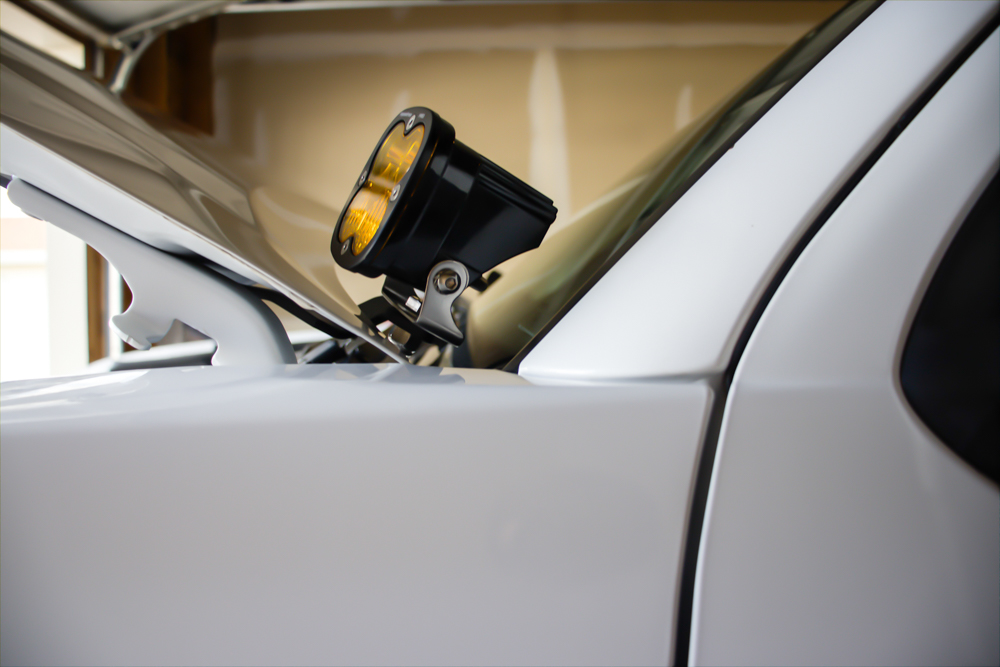
Your ditch lights are now fully mounted to your vehicle using the Cali Raised LED low profile ditch light brackets! These brackets do not touch any part of your hood or windshield, and provide clearance for most ditch lights on the market, even when your hood is propped up.
Quick, simple and easy. Even if you’re a beginner, this is one install you should feel confident to tackle on your own.
You may now use your preferred method of wiring to power your lights and adjust them for maximum off-road capability. I will have another post on wiring and installing the Cali Raised LED OEM switch panel.
These ditch light brackets fit perfectly on the 3rd Gen Tacoma and provide a secure and durable mounting point for your new ditch lights.
For more details, check out the Bandit Off-road video on YouTube below.
The install is slightly different, but still a great video guide. He utilizes Cali Raised LED lights instead of Baja Designs but it gets the point across. The Cali Raised lights are a cheaper but still effective solution. You can find them linked above in this article.
