
Bed stiffeners do exactly what they sound like. They stiffen the bed of your truck.
More specifically, they greatly enhance the structural integrity of your bed for carrying gear like a topper or rooftop tent securely. They do this by adding a supportive layer of ~3/16” steel plates to the outside of your bed near the tailgate.
Truck beds are made of thin-wall sheet metal which flexes and contorts with the frame when doing hard offroading. That flex will be transmitted into your camper shell, tonneau, or rails and anything resting on them. Think of applying lateral and downward pressure to a cardboard box; it will bend and twist.
Now, if you’re carrying weight on top of that box, you jeopardize your goods in the short term and your ride in the long term. This is where bed stiffeners come in. You will want their added rigidity when carrying heavy loads that sit atop your bed structure.’
Find It Online
- 4 Wheel Parts Bed Stiffeners (2005-2023): Check Price
Table Of Contents
Why 4WP
There are lots of bed stiffeners out there. So, why these new ones from 4 Wheel Parts?
Other brands like Total Chaos, AOD, and almost all other designs sit on the inner side of the bed, taking up some space from moving in and out of the bed’s already limited bed area.
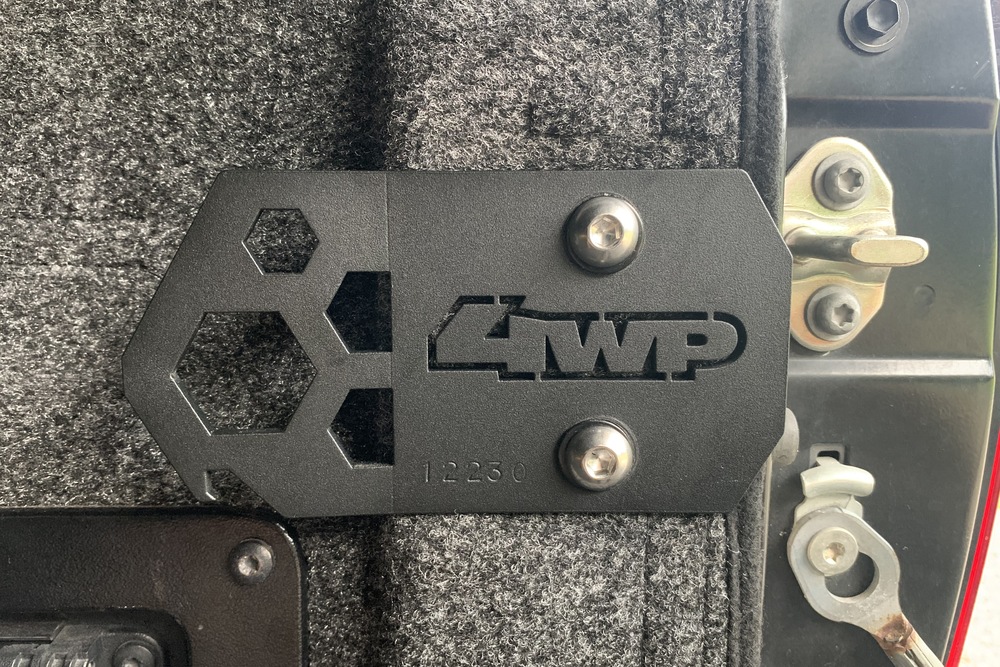
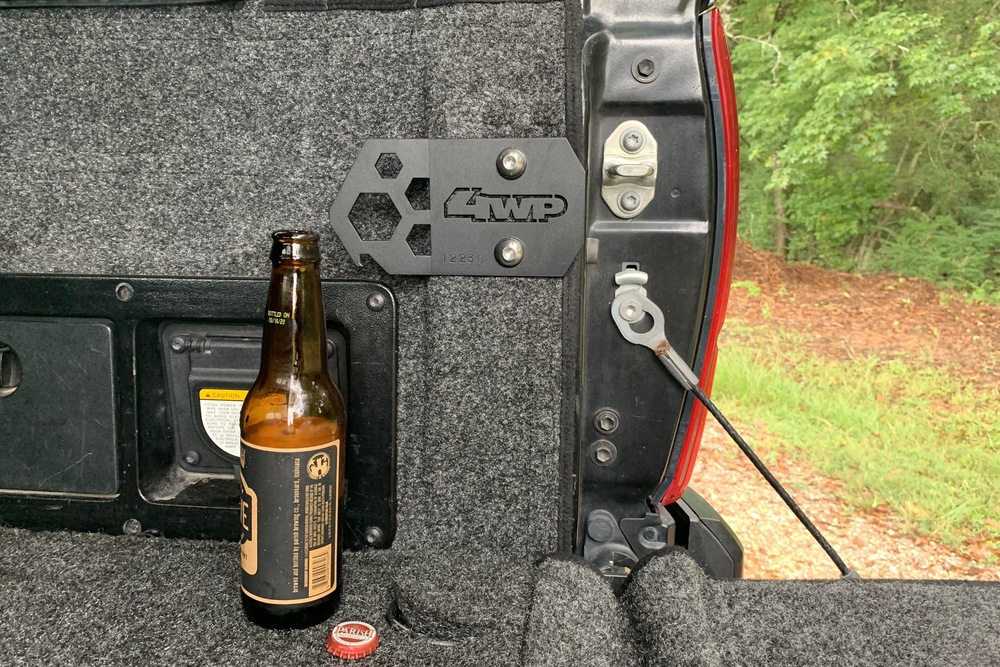
This doesn’t sound like a big deal until you scrape your shin, stub your toe, or can’t quite fit that load of gear just right. The great thing about the 4 Wheel Parts option is that they install behind and underneath the bed, out of sight – except for a cool tie-down and bottle opener. In addition to the bottle opener, they still offer tie-down points like the traditional design. Now let’s get to the installation.
Tools & Materials
- Power drill (corded preferred)
- 13/32” (or 7/16”) and 1/8“ drill bits
- Allen wrench set
- Tape measure
- Marker
- 10mm socket
- 16mm socket
- Wrench for sockets
- T30 torque driver
- Rust preventative spray paint (optional)
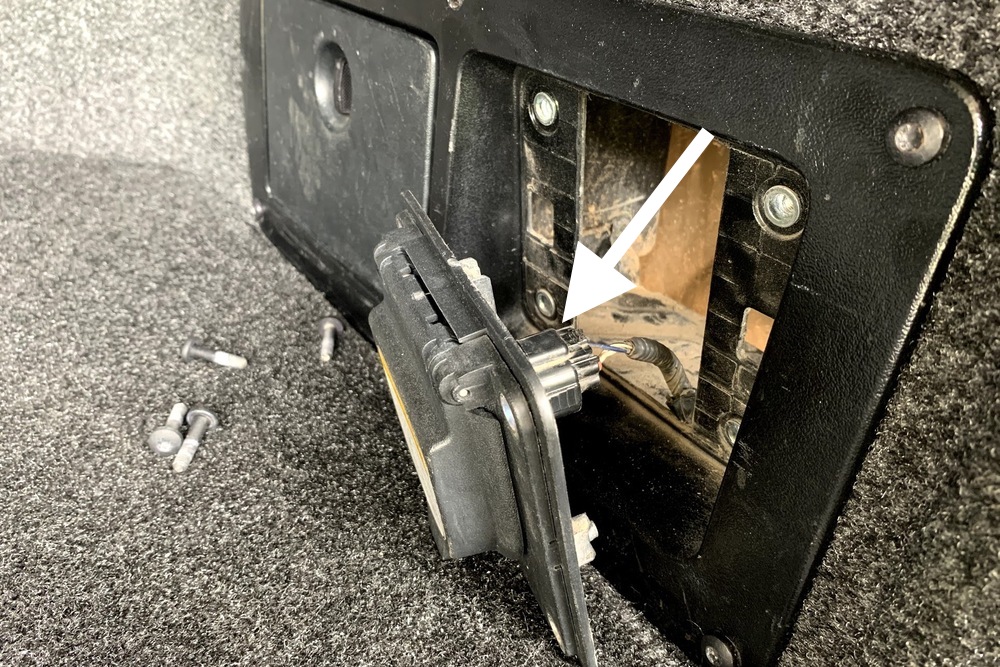
Step 1. Remove Taillights

Let’s get to it! Using the 10mm socket and wrench, remove the two screws circled in green.
The same step applies to passenger and driver’s side tail lights.
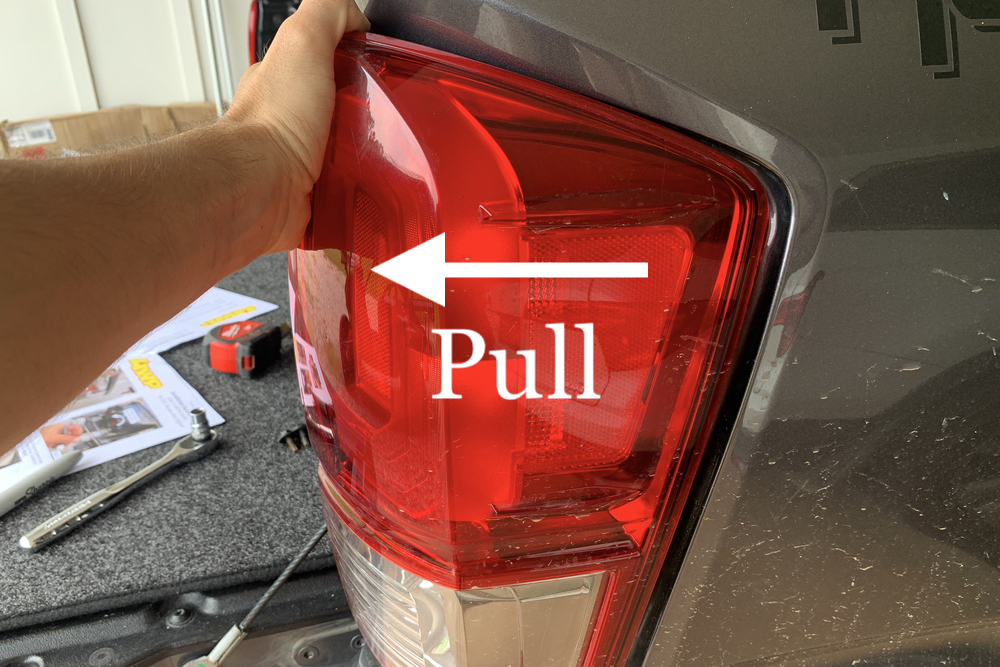
Next, remove the taillight itself by pulling backward to unseat the pins.
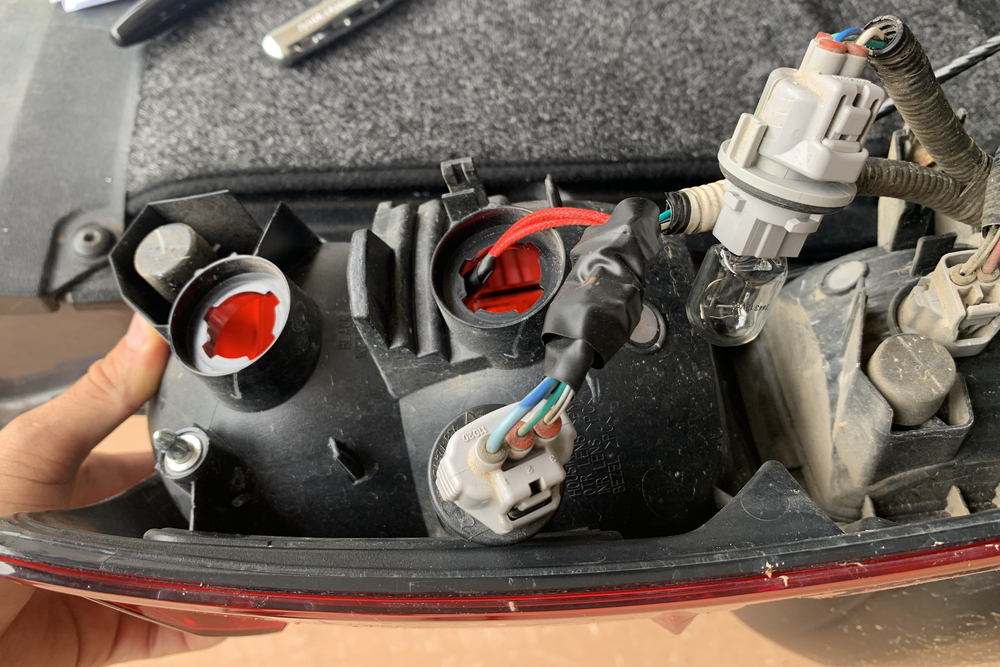
As part of this step, it is helpful to remove the light and wiring harness.
This allows more room to work and less chance of damaging your taillights. It’s best to have a clean working space.
Step 2. Remove Rear Inverter
This step applies only to the passenger side and only to those vehicles equipped with a passenger’s side inverter.
The inverter’s interior harness needs to be taken out of the way. Use the T30 torque driver to remove the four screws holding the cubby hole inverter in place. Then, unseat the harness from the inverter itself.

Next, go inside the tail light cavity and remove the inverter harness, paying attention to the position of the clip.
Lay this harness down and to the outside of this cavity.
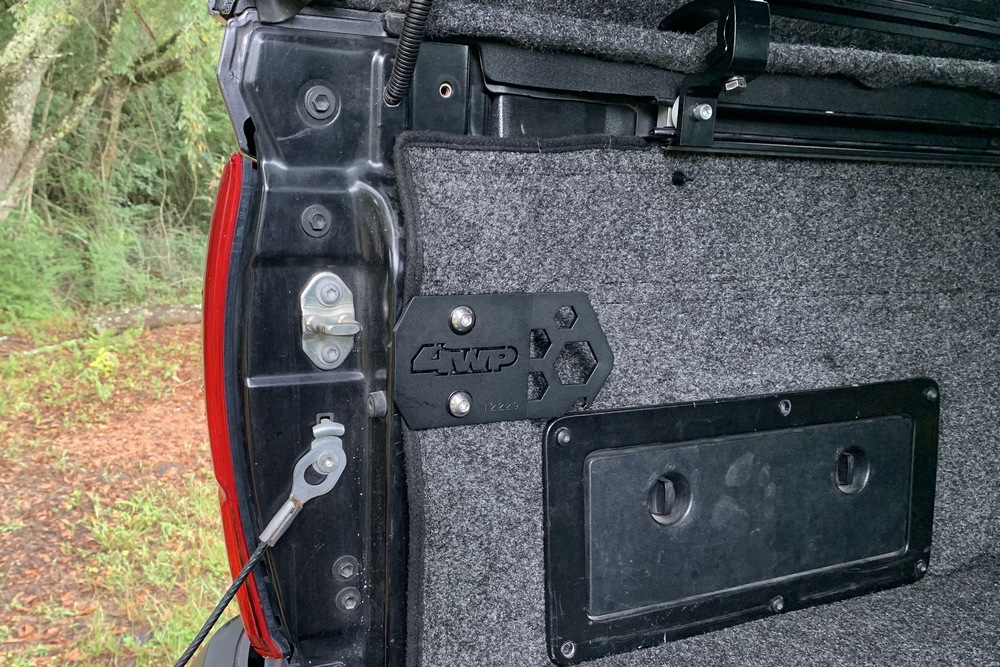
Step 3. Install Tie Down Brackets

The first step in this process is to measure the support pillars. You will need a thin tape measure. Place this carefully on the cross member and measure upward.
The plastic floor/liner of the bed sits on top of this metal cross member. Your tape measure should be sitting on this exposed metal area shown above. The same procedures are to be followed for both passenger’s and driver’s sides.
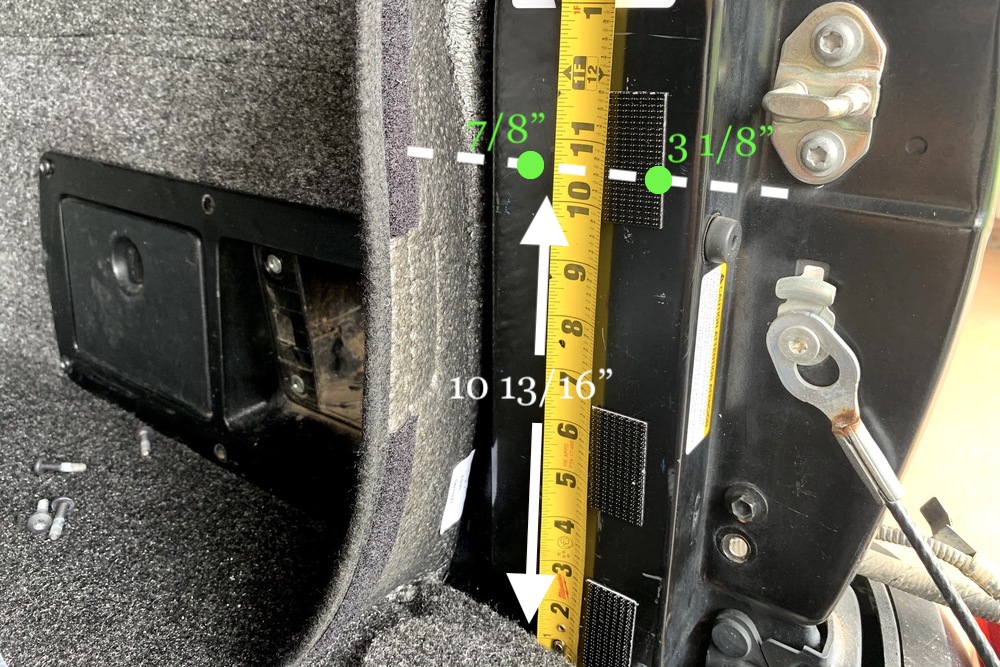
If you’re installing the tie-down bracket vertically, then measure upward 10 13/16” from the cross member. Then, at this height, use the marker to mark a spot at 7/8“ and 3 1/8“ as measured from the forward edge of the verticle bed side.
When I say leading edge, I’m referring to the forward edge of the support pillar nearest the front of the truck. These marks will serve as the location of your pilot holes (green circles denote the location of pilot holes).
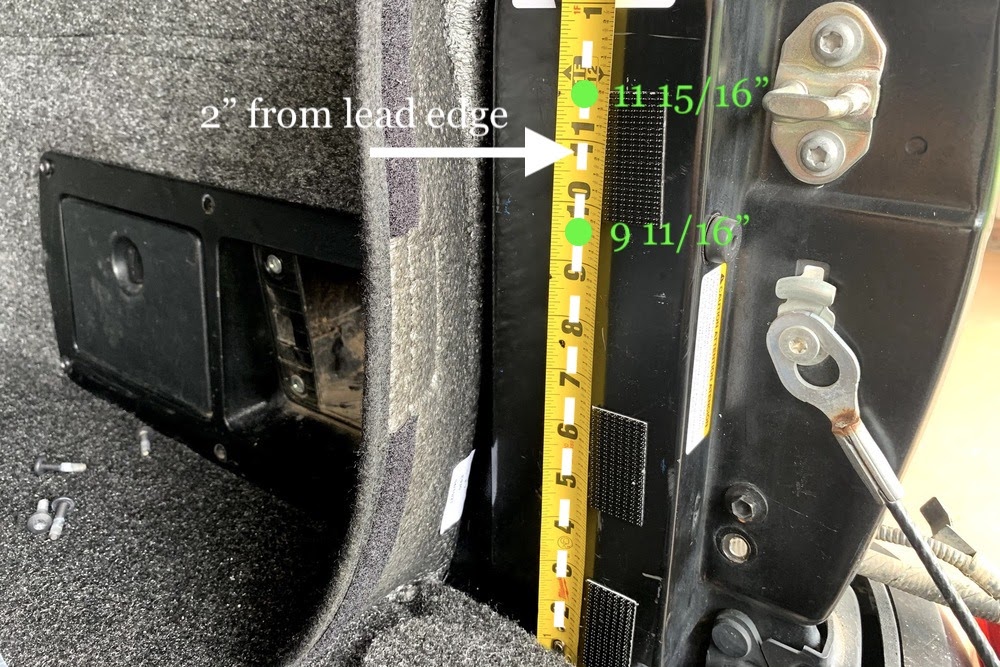
If you’re installing the tie-down bracket horizontally, then measure 2” from the forward edge of the support pillar. This acts as the center for the next measurements. Then, measure upward from the cross member to 9 11/16” and to 11 15/16” (green circles) on that 2” center.
Now, you’re ready to drill the holes for the mounting bracket. It’s always best to begin with a pilot hole. So, use a 1/8“ drill bit to drill your first holes on the locations indicated by the green dots above. Measure those pilot holes again. If they check out well, then use a 13/32” or a 7/16” drill bit to drill the final holes.
With those holes drilled out, now align the corner bracket behind them inside the tail light cavity.
It should fit pretty flush with the surrounding bed frame; so you may have to maneuver it in at different angles.
Next, install the tie-down bracket and backing plate on the front-facing side of the bed. Use the stainless steel button bolts and the Allen key set for this bracket. Don’t use the black hex bolts. They’re for interior use. Looking good so far!
Special note. My bed has a bedrug, so I left the backing plate out and mounted the tie-down bracket directly atop the bedrug. It holds strong and looks clean.
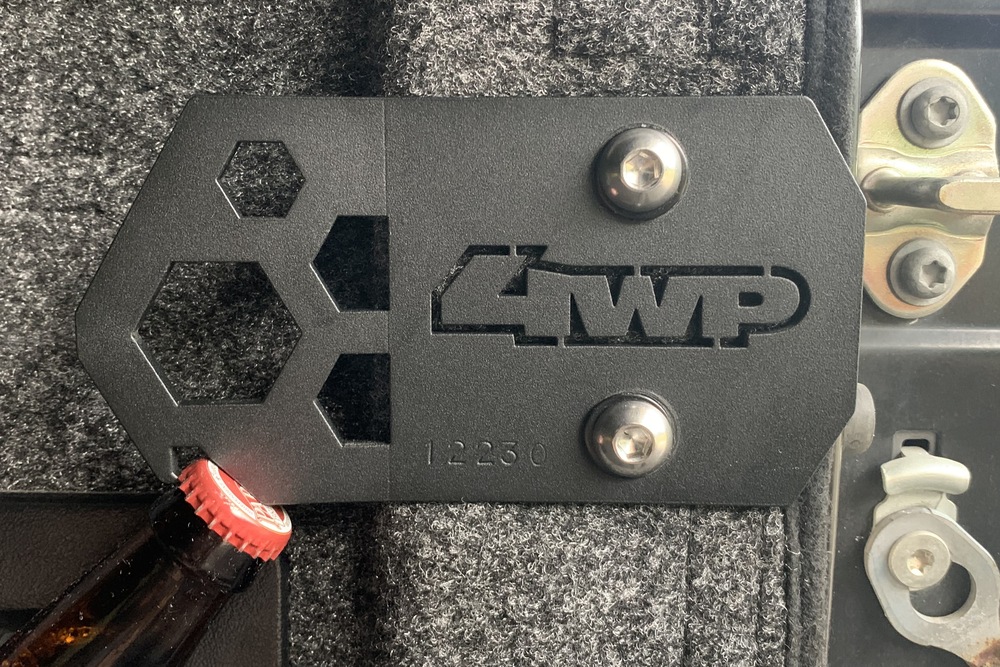
This is also a great time to take a break and make use of that bottle opener. Thanks, 4WP!
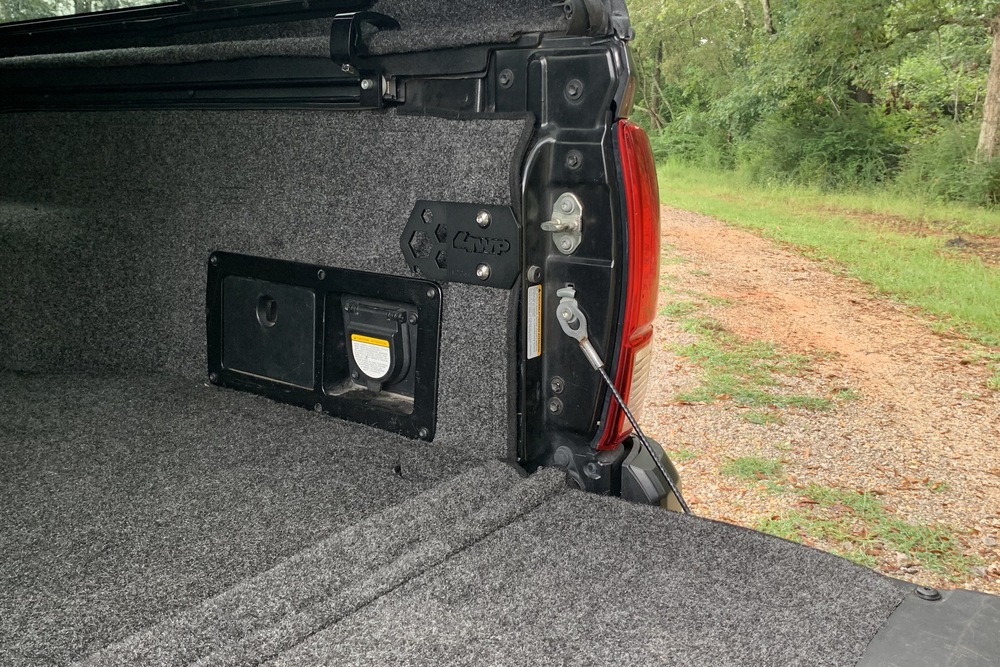
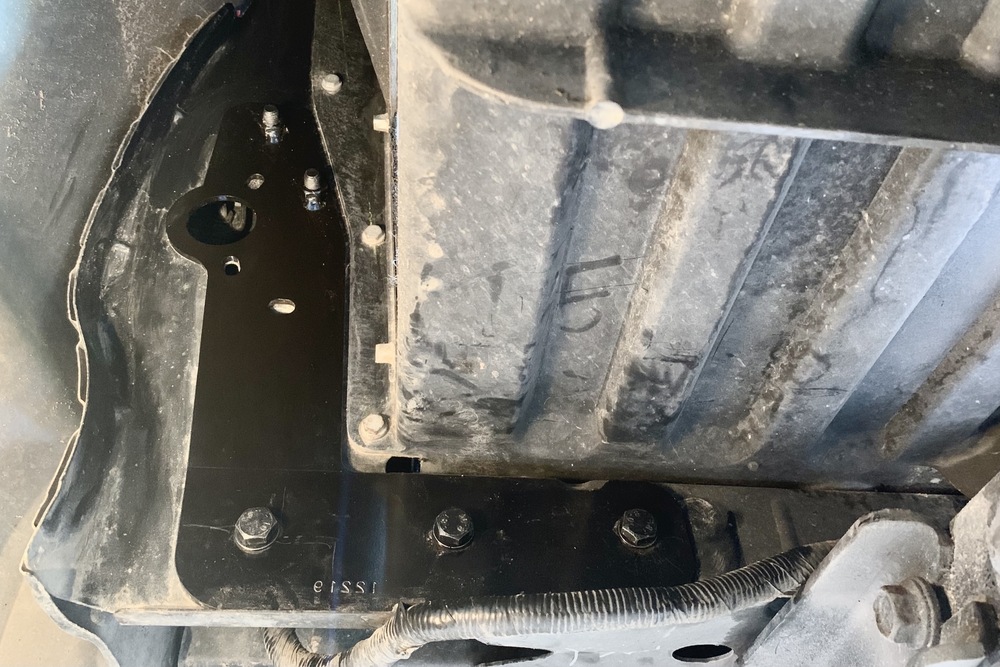
Step 4. Install Brackets

To begin installing the bed stiffener brackets, you will need to drill a total of five holes in your truck bed and/or frame. I suggest spraying some rust-preventative paint after you drill the holes.
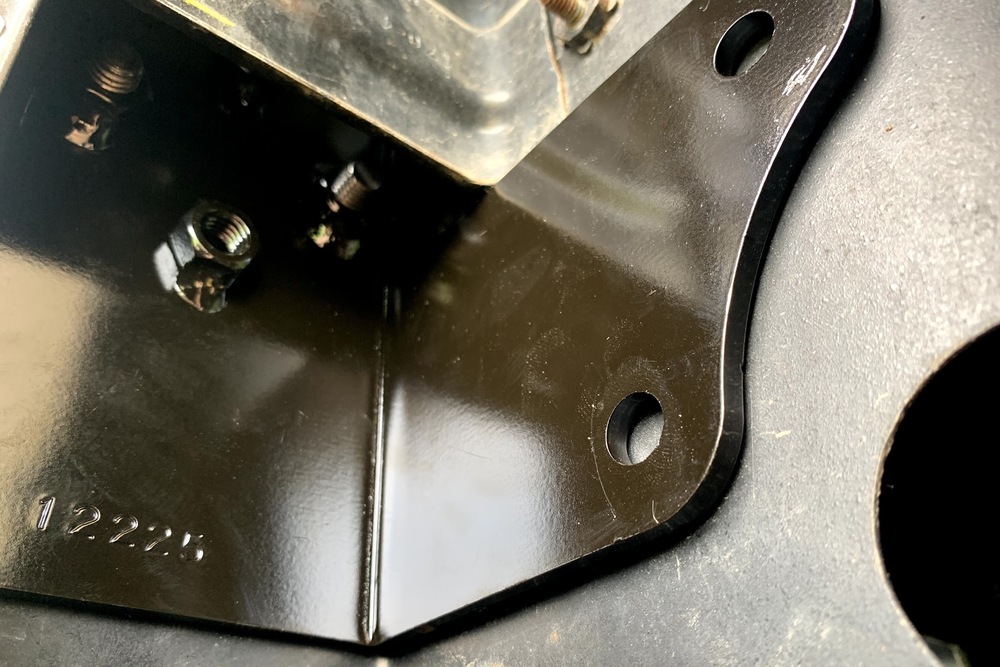
First, go back to the corner bracket inside the taillight cavity and locate the two holes marked in the above image. Drill out these two holes with the 13/32” or 7/16” drill bit. I suggest using a corded drill for this operation. In my experience, a battery-operated drill will slip loose on the drill bit when the bit catches jagged metal. Also, a corded drill just has more power behind it.
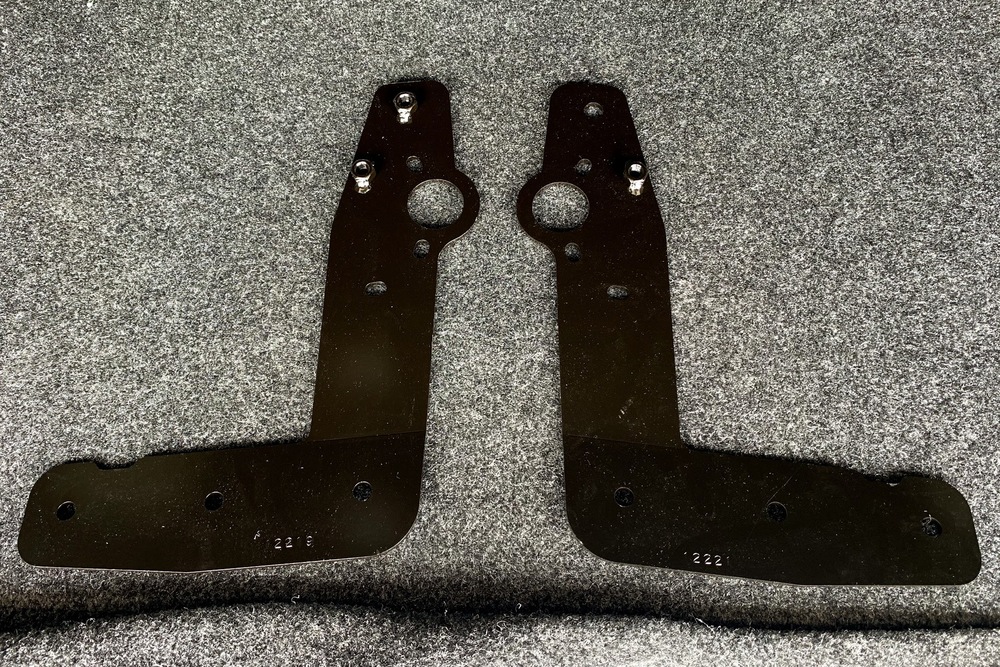
You’ll notice that the right-side bed stiffener doesn’t have two threaded nuts like the left side.
I’ve contacted 4 Wheel Parts about this and will update this article when they respond. I’ll cover what I did to fix this below.

Now, grab the corresponding bed stiffener and two black hex bolts with washers. Get underneath your taillight cavity and face the backside of the holes you just drilled out. This is where it goes.
Use a 16mm socket and wrench to install the black hex bolts and washers. The torque value for all hex bolts is 45 ft/lbs. Don’t have a torque wrench? 45 ft/lbs is a weight of 45lbs on the end of a foot-long bar. Think of curling a 45lb dumbbell. That much umpf.
To solve the missing welded nut on my passenger side, I opted to install a nut and washer from the local hardware store and tighten both sides down. It works just fine.
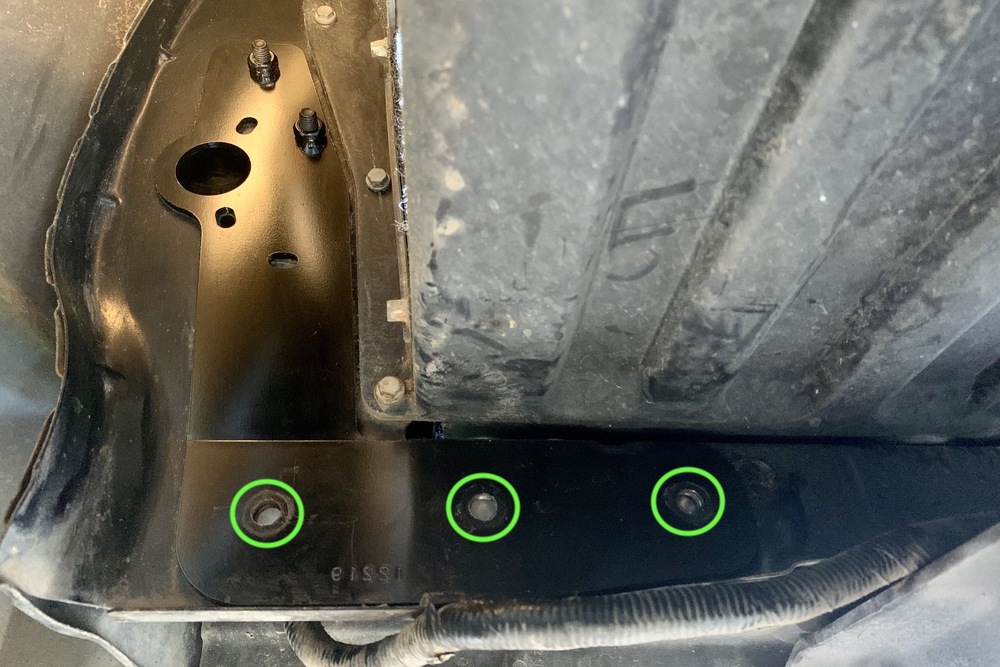
Next, you will need to drill out holes along the bottom of the bed stiffener using the 13/32” or 7/16” drill bit. You can either drill through the opening or mark the hole centers, remove it, and then drill.
Give either option some consideration, as this is a low-clearance, compact area. One problem to avoid is drilling at acute angles that cause the backplate to misalign. Take your time and get it right.

Install the bracket above (long and thin). Align the bracket behind the holes you just drilled out.
Loosely install the three hex bolts and washers per side, checking to make sure alignment is satisfactory. Then, torque them all down to the same value as the bed stiffeners.
Now you can reinstall the cubby hole inverter (six bolts and T30 torque driver) and both tail lights (two bolts each and 10mm socket), and you are finished!
Final Thoughts
These are heavy-duty, unobtrusive, and clean looking.
They come nicely painted and add a 3/16” layer of tough steel to the frame of your bed – and we all know that the Tacoma can use stiffening here and there!
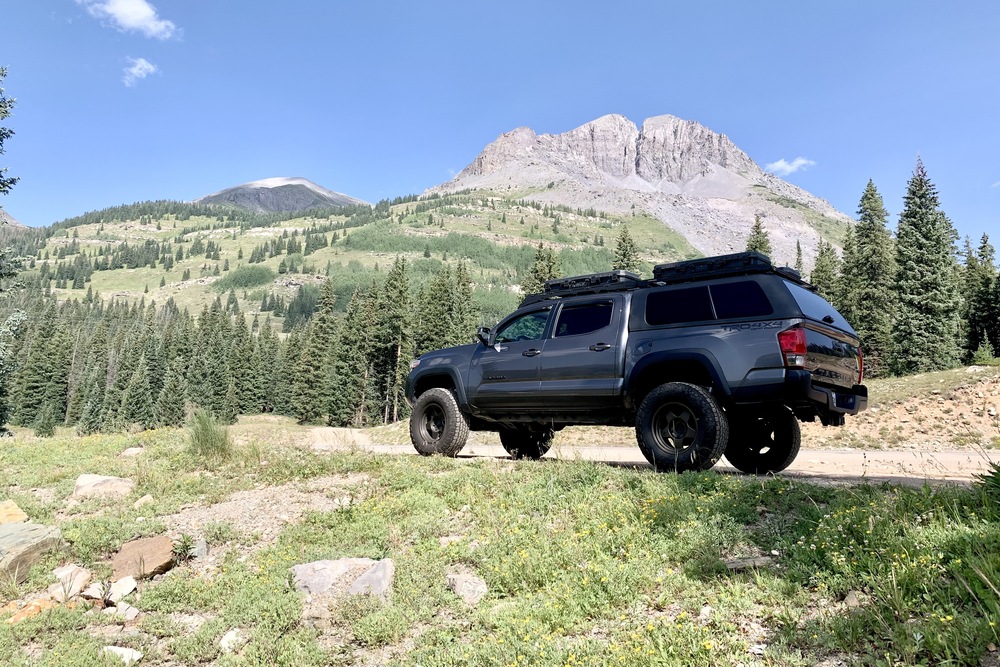
I took my Taco overlanding in Moab and San Juan right after installing these, and my camper shell, racks, and loaded bins handled well.
The bed stiffeners give me real peace of mind when taking my heavily-laden Tacoma off-road over and over. They make for one less thing to worry about when you’re far out, deep in, or high up.

Did they send a new bracket with the nut welded on?