

If you aren’t familiar with 4 Wheel Parts (4WP), they specialize in off-road vehicle modification and are a major dealer for many top brands in the industry. 4WP currently has almost 100 stores nationwide, so check out their store locator to see where the nearest one is to you! 4WP is a go-to for installations with a team of qualified technicians.
In late 2021, 4WP announced its new factory lineup of Tacoma-specific products. Their lineup comprises front/rear bumpers, rock sliders, and bed stiffeners. In addition, their bumpers can also be upgraded for ultimate functionality. Check out our post on the 4WP rock sliders and 4WP low-profile bed stiffeners as well!
This comprehensive install will guide you along the process, ensuring your bumper install goes smoothly. To preface, I had the opportunity to get my bumper installed at 4WP by one of their techs – that option is available when purchasing anything from 4WP, whether online or in-store!
Find It Online:
- 4WP Factory Low-Profile Front Bumper: Check Price
Table Of Contents
Features & Specifications

This article will focus solely on the low-profile front bumper without the high clearance wings. The front bumper is a replacement for the black plastic front valance piece with minimal cutting involved!
Low-profile front bumpers are excellent for those looking to keep an OEM+ look while gaining the functionality that these bumpers can offer.
There is the option to add additional high clearance wings to this bumper which is essentially like an armored viper cut for added protection and a sleek look.
With this bumper, you can run a winch, have two 2″ light pods, a 20″ light bar under the bull bar, and get upgraded recovery points along with a slimline bull bar. These awesome features at such an awesome price point make this bumper unique compared to other options on the market.
General Specifications:
- Fits 2016+ (3rd Gen) Toyota Tacoma
- Winch capable of up to 12K lbs. rated winch
- Integrated low-profile bull bar
- Two square light pod cutouts + mounting locations
- 20″ light bar mounting point
- Powder coat finish
- Two chamfered D-ring/recovery points
- Customizable 4WP logo plate
Tools & Materials:
- Assortment of metric sockets
- Assortment of Allen wrenches
- Cutting wheel (Dremel, grinder, etc.)
- Trim removal tool or flathead screwdriver
- Another person to help lift bumper
- Impact driver (optional)
Unboxing

The bumper came packaged in a large box with Styrofoam, plenty of bubble wrap, and protective plastic to ensure the bumper doesn’t get scratched or damaged when in transport! The package will include the front bumper, hardware box, and the parts required for installation. Make sure to double-check all your parts before getting started.
While we won’t cover this section here, the first step is to remove the front grille. It’s a relatively straightforward process and can be found here.
Step 1. Remove Clips

A handful of clips must be removed, and the fog light harness is shown in the center. Using a trim tool or flathead screwdriver, remove all the pins. These will be reused. There are also a handful of screws on the bottom of the bumper.

There are also two splash guards on either side of the radiator – they’ve got two clips and some push pins holding them into the engine bay.
Step 2. Remove Fenders + Cover

The fender isn’t going to come off of the truck completely; only about half of it will be pulled back to get enough access to get the front bumper cover off.
Two clips and one screw need to be removed to get the fender back.

The fender is stubborn and does require a fair amount of force to get it to separate. Pull straight out to ensure you don’t pull the clips incorrectly. Peeling back the fender liner can also help gain access to the clips on the inside making removal easier.

Once all the clips are removed and the fender is separated from the bumper, the bumper is free to come off. Having two people during this step would be great, but it can be accomplished with one person.
If clips give you resistance, stop and work on that portion to ensure you don’t break anything.

Set the bumper aside; we’ll be coming back to trim.
Step 3. Remove Crash Bar

With the front end exposed, now is the time to remove the crash bar and plastic support piece. Note that none of these pieces will be reused with the exception of the bolts that hold the crash bar to the frame.
Plastic clips hold on the plastic support piece; remove those by hand or with needle nose pliers.

Each side of the crash bar has a total of six bolts. Loosen the two bolts inside the front support brace to provide more room to work with.
Note: The six bolts you remove by the frame will be reused when attaching the new 4WP bumper. You can technically remove the whole crash bar in one piece if you remove where it attaches to the frame.
Step 4. Cooler Relocation Brackets

Start by unscrewing the two bolts that hold the oil cooler to the frame. Save these two bolts as they’ll be reused for installing the oil cooler relocation brackets.
The OEM power steering cooler bracket will be relocated with the provided bracket by 4WP. There is only one bracket on the passenger’s side.
Since my suspension has external reservoirs and mounts that sit on the frame where the relocation bracket goes, we had to modify it to accommodate both the reservoir mount and relocation bracket.
The reservoir bracket was removed to install the new relocation bracket and then reinstalled back into its original place.

The two cooler relocation brackets point towards the back of the truck and move the cooler back about an inch to compensate for where the new bumper will sit.
Step 5. Remove & Cut Valence

The black valance piece will get removed from the stock bumper to cut where the new 4WP will sit. The backside of the bumper exposes all the clips required to pop the valance out.

Time to trim up the bumper. Leaving the bumper off the truck on a stand or loosely setting the bumper back onto the truck will help accomplish this cut successfully.

Following along the seam of the bumper and valance mounting area, make a consistent and straight cut. This step requires using an air compressor saw, Dremel, grinder with a cutting wheel, or something similar. A hand saw can accomplish this but will be tedious!
Step 6. Cut & Install Trim

Since it’s a rough cut, there will be some clean-up required. Using either sandpaper or a mechanical sander, lightly sand the imperfections of the cut. It doesn’t have to be 100% perfect, as 4WP provides weather stripping that’ll cover the cut to protect the paint and help with the cleanliness.

There’s just enough length on the weather trim for about an inch of excess on either side, so make sure to use it wisely. Starting from one corner, work the trim all the way to the other side, pressing it onto the part that was just cut.
Step 7. Prep For Install

If installed, the factory tow hook has to be removed to accommodate the new 4WP bumper.

Now is the time to install anything you want onto the bumper before you mount it onto the truck. I decided to run a winch, so the winch and fairlead were both installed onto the bumper. Later, we’ll be taking a detailed look at the Smittybilt X20 GEN3 10K winch, which was my weapon of choice to pair with the 4WP bumper.
Step 8. Install Bumper Cover

The bumper cover will be loosely reinstalled onto the truck – just enough to hold it on without assistance and in the proper place to line the bumper up.

The three factory studs on each side of the frame will be the first point of contact when mounting the bumper to the truck. Apply thread locker to these studs.
Step 9. Install 4WP Bumper

It is highly recommended to have a second set of hands to assist the process since the bumper is awkward and heavy.
Line up the bumper to the cutout, lift it up, and drop the front of the bumper towards the ground at a 45-degree angle to be able to get it up and under the cut. If this isn’t done and the bumper is brought straight onto the truck, it will come in contact with the stock bumper and make your life harder.
Once lined up with the studs, grab the six factory nuts used to secure the crash bar to the frame. These bolts will be reused to attach the bumper to the studs.

Before securing everything down, ensure the bumper is aligned and make any fine adjustments as needed.
Step 10. Spacers

You’ll notice a gap between the bumper and stock crash bar supports on the frame. An additional plate will be installed to close the gap and help with the rigidity and support of the bumper.

Two half-inch holes must be drilled into the crossbar to accommodate the mounting plate bolts. Once drilled, install thread locker onto the bolts and tighten them down to the plate. This will help suck the bumper up, allowing you to move to the main bolts located in the engine bay. Once everything is where it should be, tighten down to spec.
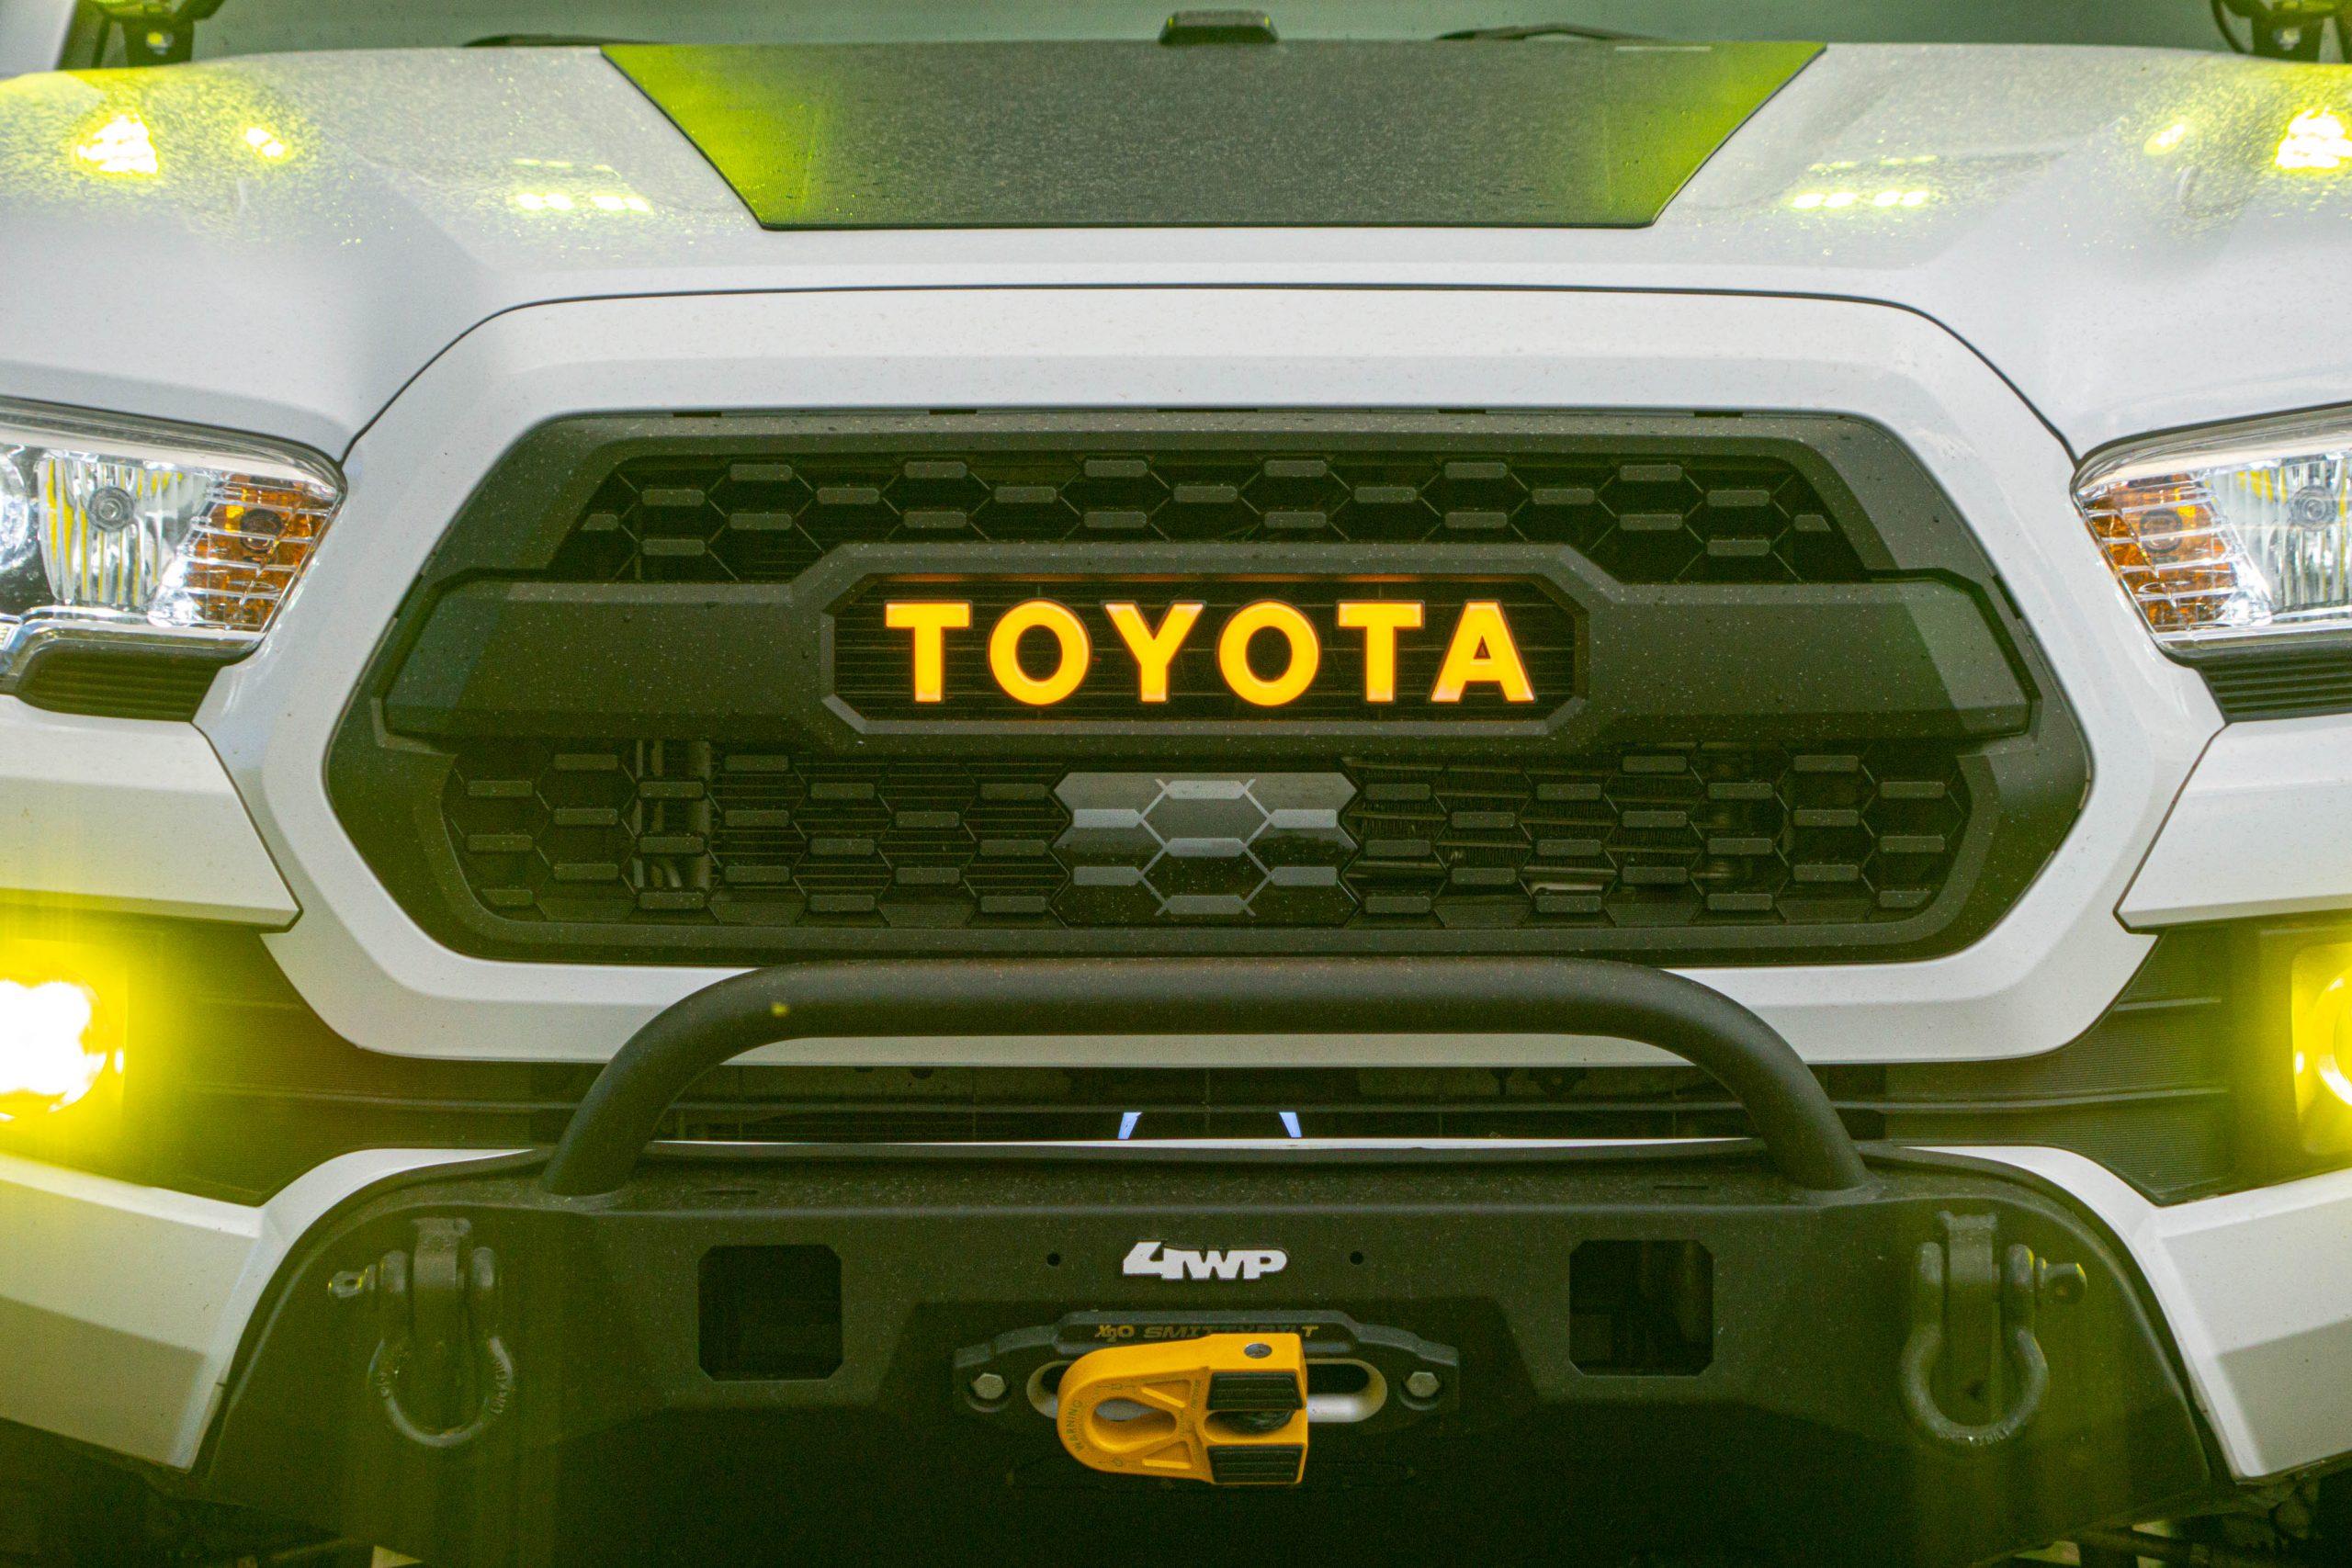
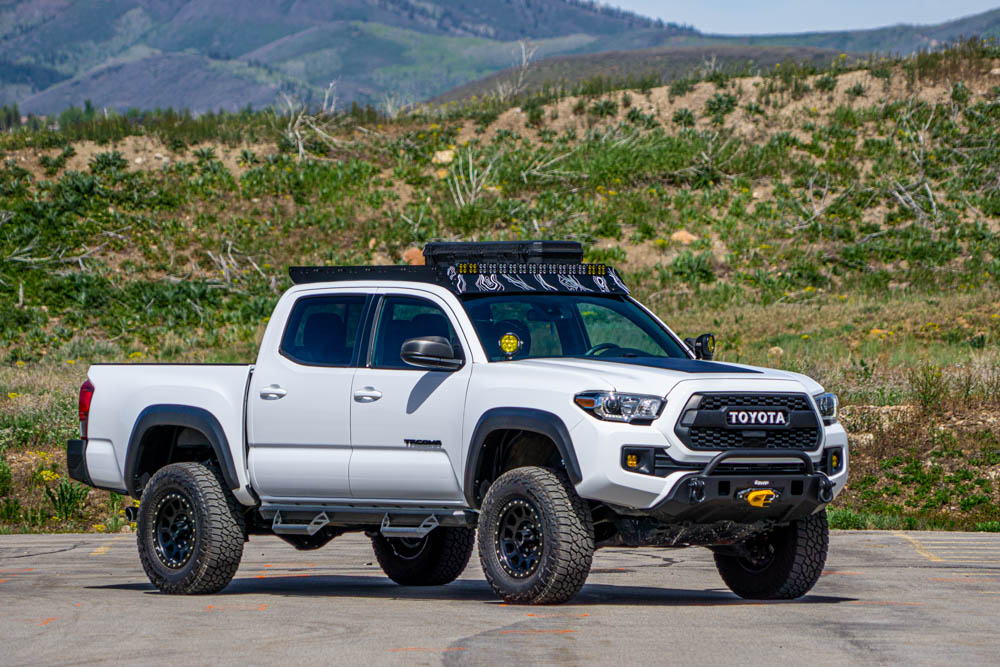
Final Look

All done! It looks so good with a Smittybuild winch as well!
Fit & Finish

Featured above are the two cutouts for 2″ light pods and the two slits to add a 20″ light bar! Furthermore, the added holes for the optional front license plate and customizable 4WP logo.

The light pod cutouts also offer a place to access the winch if your bumper is equipped with one.

The bumper contours well, following the lines of the stock skid plate.
Overall Review
After running the 4WP bumper for a couple of months (and counting), it has left me nothing short of amazed.
First, let’s talk about looks. As someone who has always loved the OEM+ builds, this bumper ties in very nicely to that “factory” look I’ve always wanted to keep but still gives me the functionality of a bumper.
The fit and finish couldn’t be better. From the welds to the powder coat, it shows that corners weren’t cut in the development or manufacturing process. If you run an aftermarket skid plate, there may be some issues with fitment, depending on the brand.
This bumper has been a great fit for my truck with the upgraded recovery points, winch cradle, and low-profile bull bar that doesn’t interfere with the cruise control sensor. If the state you live in requires a front license plate, then two predrilled holes exist to add a flip-up license plate frame.
One of the minor negatives about the bumper applies if you’re running a winch. If a winch isn’t something you have, or don’t plan on running, then this isn’t a problem.
If the light pod cutouts are utilized for lights, then the only access to the winch is from inside the engine bay. While some may not see this as a big deal, opening your engine bay can be an extra step in a situation where a winch is needed immediately. Some additional cutouts or another place to access the winch would’ve been nice – but again, not a huge deal. Also, if you install a winch, the working room is tight, so be patient.
Final Thoughts

The 4WP low-profile front bumper is awesome, and you can’t beat having it backed by such a reputable brand. Having another option on the market at such an affordable price and often readily available makes it highly intriguing for many people. Thanks for following along, and I hope you consider the 4WP front hybrid bumper when you’re bumper shopping!
Happy Trails!

Any chance you can measure the distance between the bumper and hoop. Like this pic. Really appreciate it.
Looking to put some light pods in and the bumper is delayed
Ryan!
The gap is about 4″, I haven’t personally tried to put pods in that location before but I’ve seen people put slimline light bars instead of pods. The cutouts on either side of the fairlead are a great place to add pods if that’s the route you want to go!
Thanks
Sean
Really appreciate it.
Are there beefed up support frame brackets for this bumper that you can purchase or do they come with the bumper I noticed All the other aftermarket bumpers recommend this
Chris,
There aren’t any additional frame supports, just what was provided in the kit!
Thanks
Sean
Truck looks great! Did the weight of the bumper and winch drop the front much, if any? I would guestimate the combined weight would be around 150 pounds. I am currently running the Eibach stage one setup on the first clip and didn’t know if this setup would be heavy enough to justify placing the the spring setup to the second clip.
Jack,
Sorry for the delayed response, It’s about 150LBS total and in the shock setup picture the spring rate was 650LBS. I didn’t notice a HUGE drop in the front at most an inch or so with a decent amount of preload that I had on the front shocks.
Thanks
Sean
I want to buy one how
The 4WP Website has them in stock!!!
Really appreciate this guide. Do you think it would be difficult to install the light pods through the engine bay after the bumper is installed? I received the bumper and am waiting on my lights.
Might be a little tricky but with some help I don’t see it being impossible!!