
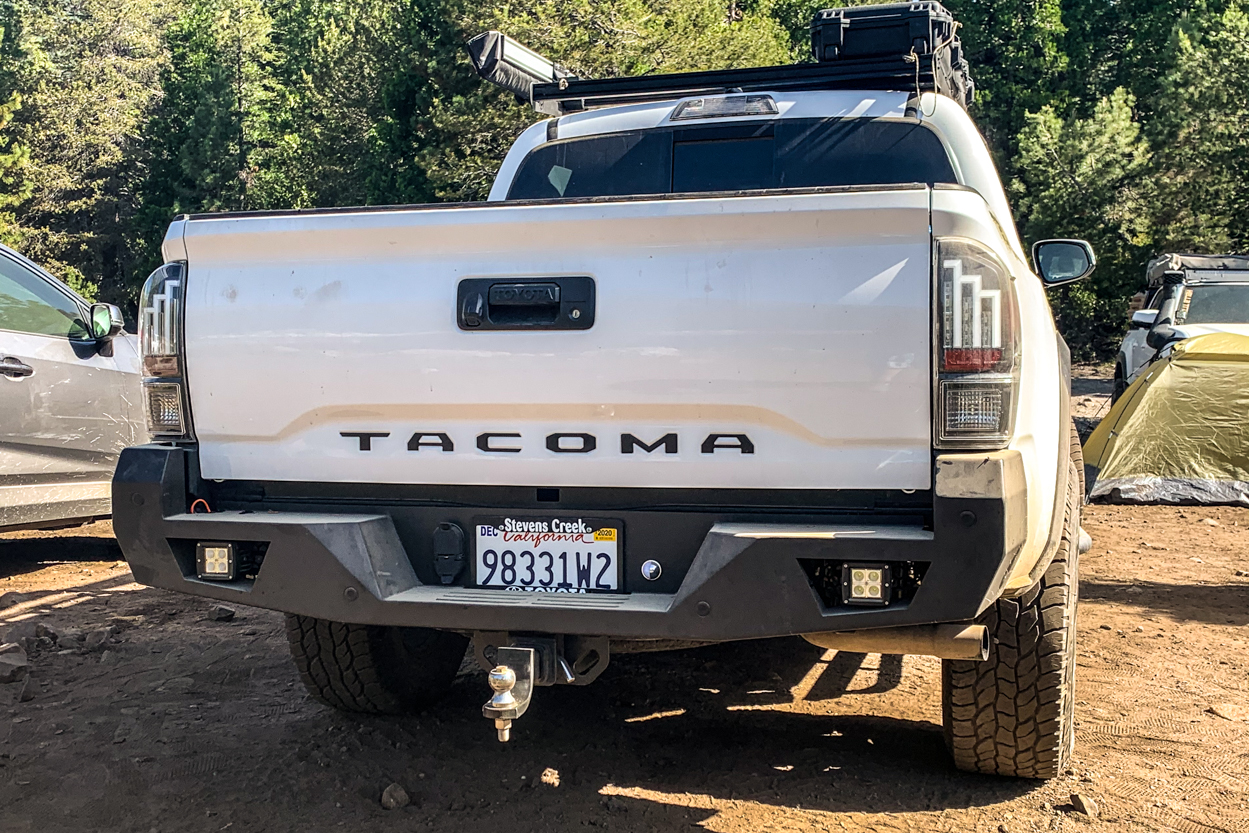
Have you been eyeballing a bumper for your Tacoma? I know that from the moment I did the first modification to my truck, I have been wanting more. I wanted to install lights, wheels, a roof rack, and most definitely, a bumper!
Extreme Terrain came in and hooked it up with the Barricade HD Rear Bumper with LED lights. I was stoked since I have never had an aftermarket bumper before, let alone a high clearance, tough-as-nails bumper. This article will focus on the install and my initial thoughts on the bumper itself.
Let’s get into it.
Find It Online
- Barricade HD Rear Bumper: Check Price
Table Of Contents
Packaging

Upon receiving the bumper, it was extremely well packaged and noticeably well built. Great first impression.
Mind you, I have never installed a bumper on a Tacoma before. I was expecting it to be difficult to a certain extent. When I removed the bumper from its packaging, I immediately referred to the instructions and the ever so useful YouTube videos.
Having a method of reference put me at ease. Equipped with all of that, I was ready to begin! If you’d like to see the YouTube video I used, we linked it at the bottom of this guide.

The provided instructions were lacking and some pages were faded or too dark to read.
I was able to call Extreme Terrain when I had questions and they were able to walk me through certain aspects of the install. I really appreciated how quickly they responded and how willing they were to help. That kind of service is tougher to come by nowadays.
Work Area

It was a hot day, so I set up my work station. You need to be comfortable when working on your rig. An awning is a simple yet effective method if you don’t have a garage or workshop at your disposal.
Make sure you hydrate!
While you are at it, go ahead and stage your tools. This will allow for a smooth install. Staging the parts included in the box such as hardware and the bumper itself makes finding everything simple.
What’s Included

In the box, I found all sorts of goodies.
What’s Included
- The bumper (of course)
- Hardware
- Bumper brackets (if you have a factory hitch, you won’t need these)
- License plate lights and zip ties (for parking sensors)
- Plugs for parking sensor holes (if your Tacoma does not have them)
- Double-sided tape
- 2 LED light pods with tool and wiring harness
The LED light pods are not included with the bumper. Those need to be bought and installed separately.
Required Tools

The tool list is fairly simple. If you do any kind of DIY projects, you likely have most of these already.
- Impact Wrench OR Breaker Bar (I used this option)
- Mechanic’s Tool Set
- 12mm Socket
- 18mm Socket
- 19mm Socket
- Ratcheting Wrench
- Open/Closed Wrench Set
- 19mm open and box end wrench
- Allen Keys
- Screwdriver Set
- Phillips screwdriver
- Flathead screwdriver
- Pliers
- Wire Cutter/Stripper/Crimper Tool (a must for any toolbox)
- Alcohol Wipes
- Knife or Scissors
Step 1. Remove License Plate & Trailer Connection

I started off with the easiest part. I removed the license plate and the trailer connection.
The license plate requires different tools depending on the hardware holding it down.
The trailer connector was simple; all you have to do is apply pressure to the clips that hold the wire harness to the connector and separate the harness from the actual plug. Once that is done, simply pop out the socket from the hole. Save this inlet since you will use it again on the new bumper.
Step 2. Remove Bumper Panels & Caps

Next, it’s time to start removing the bumper panels.
To begin, there are push lock plastic connectors that secure the bumper caps which need to be removed. Using a trim removing tool or a flat-head screwdriver (as seen above), remove these connectors on both sides of the bumper.
You will also need to remove the plastic bumper step pad. This can be easily removed by prying one edge at a time and lightly pulling to release the clips.
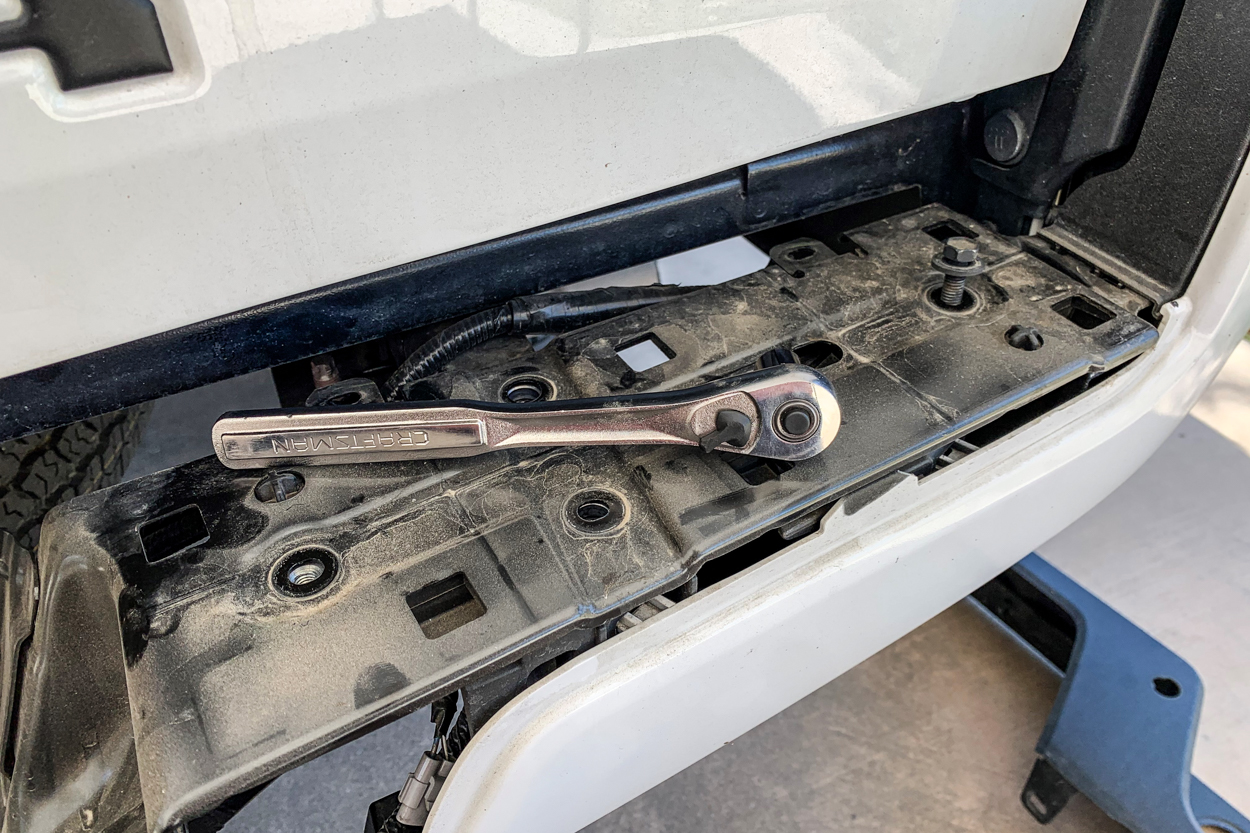
Once you have the corners off, there are two 12mm bolts on each side that need to be taken out.
Once you removed these two bolts (pictured above), then the bumper will be completely free. Once you take the bumper off, all that remains is the hitch. This will be staying on the truck as the new bumper is compatible and does not have its own receiver.
Step 3. Remove Parking Sensors

When you go to remove the bumper, you must make sure that you unplug the wiring harness to the trailer hitch and remember to be gentle if you have parking sensors.
These parking sensors are very fragile and are crazy expensive, ask me how I know… I broke the crown on one of them and you don’t even want to know how much Toyota wanted to replace one of these.
Moral of the story? Just make sure you take your time. Be gentle and finesse them out. For those without the sensors, you are at the home stretch. For those of us with them, hold on to your seats, we’ve got a few extra steps.
Step 4. Remove Harness

Now, we need to remove the OEM harness for the sensors. This harness will be reused in the new bumper. You will need to pop the retainer clips off that hold the wiring harness to the stock bumper.
I found it to be easiest using the pliers to press them out one by one. Any quicker and you risk breaking something.

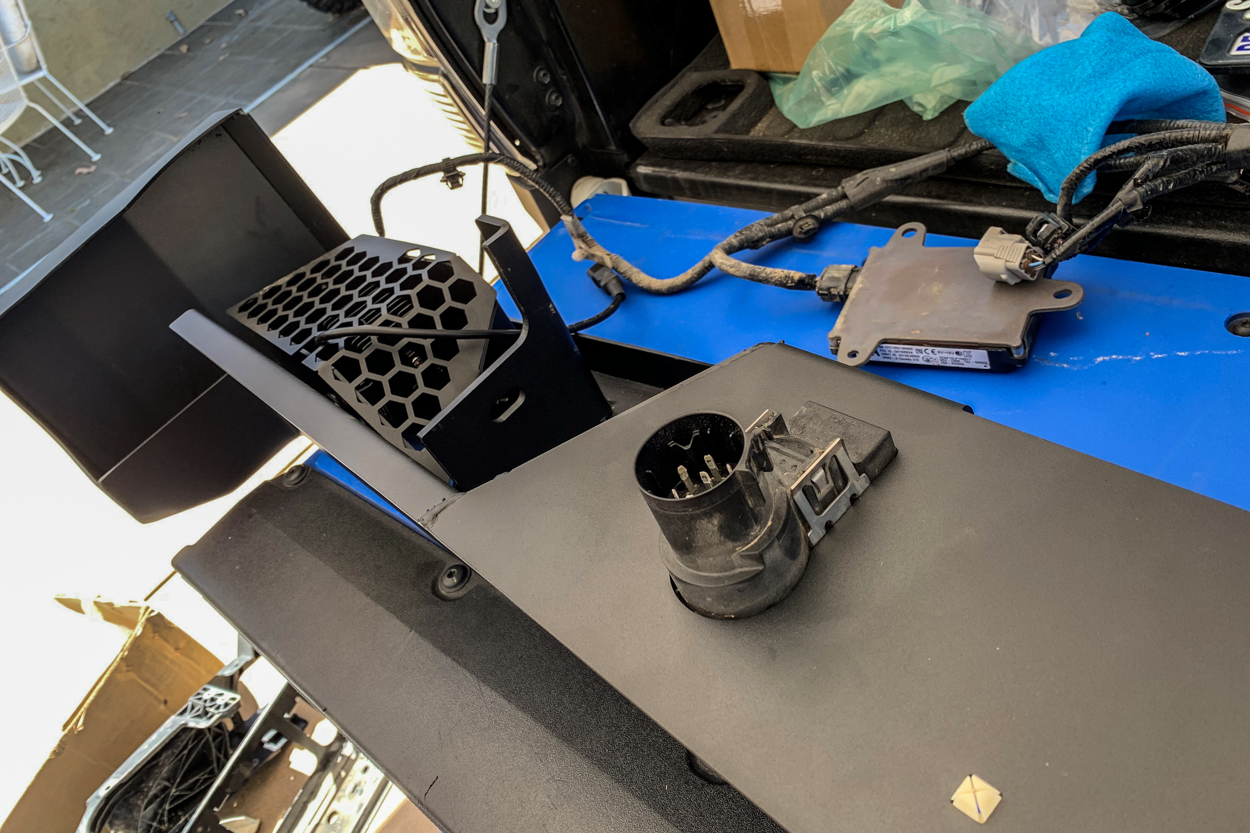
Finally, after you manage to remove all of the retainers, this should be the end result. A big ole harness which you’ll need to relocate to the new bumper.
Before you move onto the next step, you will need to remove the controllers for the parking sensors as well.

There are two of these controllers within the OEM bumper.
I found out from Toyota that left and right don’t matter, in case you mixed them up after removing them from the truck. Just to be safe, I did mark them left and right.
Step 5. Install Harness

It is now time to install all of the sensors and mount the controllers to the new bumper.
The sensors go back in the reverse order of how you removed them. The bumper even has set screws to hold them into place. Make sure not to overtighten them since the sensors are very fragile.
This part is where I encountered my only real gripe I had about the design of the bumper. The bumper doesn’t have assigned spots for the parking sensor controllers. Also, the instructions were not clear on where and how to mount the controllers so I had to use my imagination.

The bumper came with double-sided tape and some zip ties.
Instead, I used some higher quality tape to mount the one controller to the inside of the bumper. The orange Paracord is just in case the controller manages to break free.

Use alcohol wipes to make sure all surfaces are clean and free of dirt or oils before you try to mount anything using the tape.

FYI, the harness is not long enough to place the second controller on the opposite inside corner of the bumper. Instead, I used the tape and zip ties to mount the second controller
It may not look like much, but I guarantee this one isn’t going anywhere. Using the paracord as tethers and the zip ties to make sure it’s doubly secured gives you peace of mind for sure. After a few bumpy trails, they have yet to move, so I am confident they are secure.
Step 6. Install Pods

If you purchased some lights for the cutouts, now is a great time to install them.
To install the light pods, you must first assemble the brackets
For the pods, the assembly is straight forward. Use the included Allen wrenches and hardware to install the bracket and mounting screw.

Once the pods are assembled simply remove the two screws holding the honeycomb covers on and then mount the lights
You can adjust the lights later on once you have mounted the bumper. The honeycomb cover has a cut out so that you can run the harness out from the back.

Above, you can see the LED pods installed.
Step 7. Install Trailer Harness
Next, you can reinstall the trailer harness and install the new license plate light.
They both simply press into place and have retainers to keep them firmly in place.
Step 8. Wire New Lights

When I spliced in my license plate light I used one of the hot wires in the harness that was already provided from my OEM lights.
As you can see in the picture, I spliced the red and black wires using the gator clips provided. Once the wiring is done the provided license plate light simply pops into place on the new bumper. Now that everything is mounted and in its place use the zip ties to manage all of the loose wires and clean everything up.
Step 9. Install Bumper
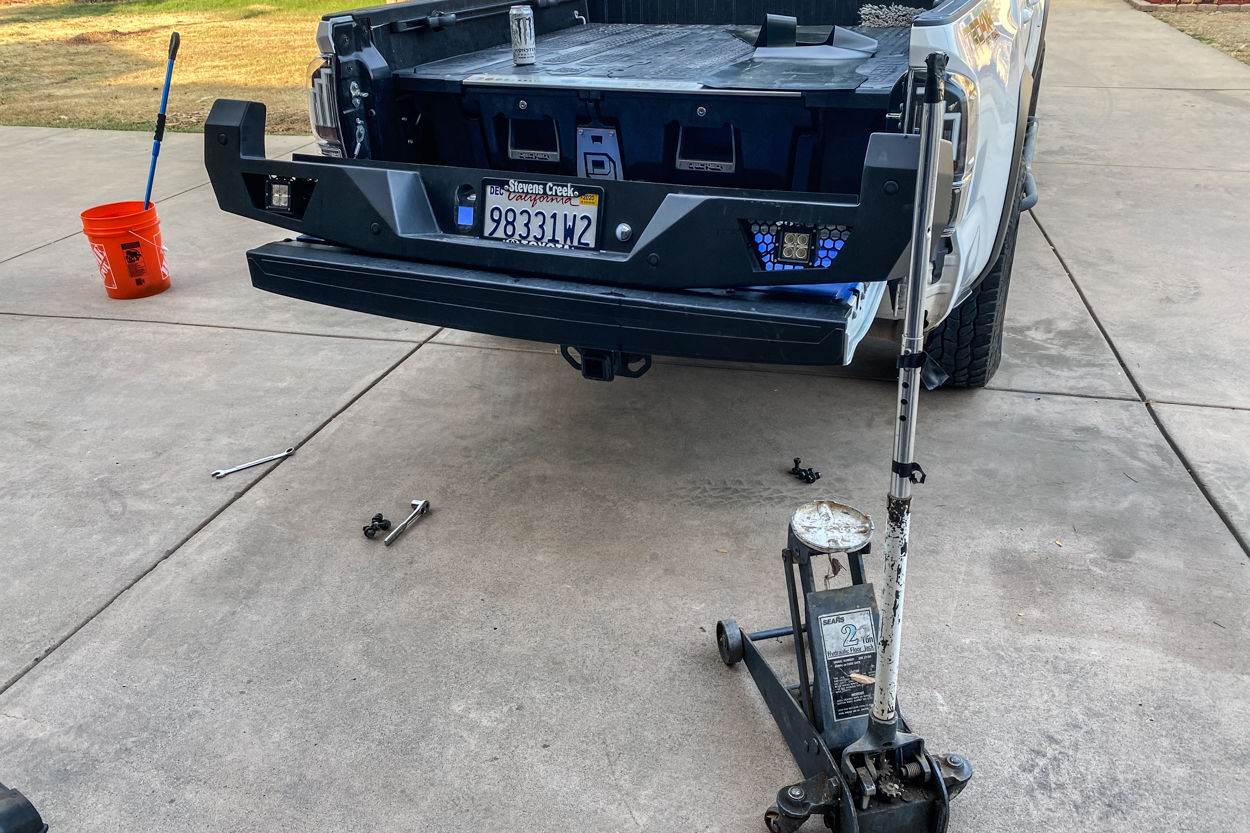
In this part of the install, you will need a second person to help you lift and align the bumper.
Alternatively, you can use a jack to assist you.
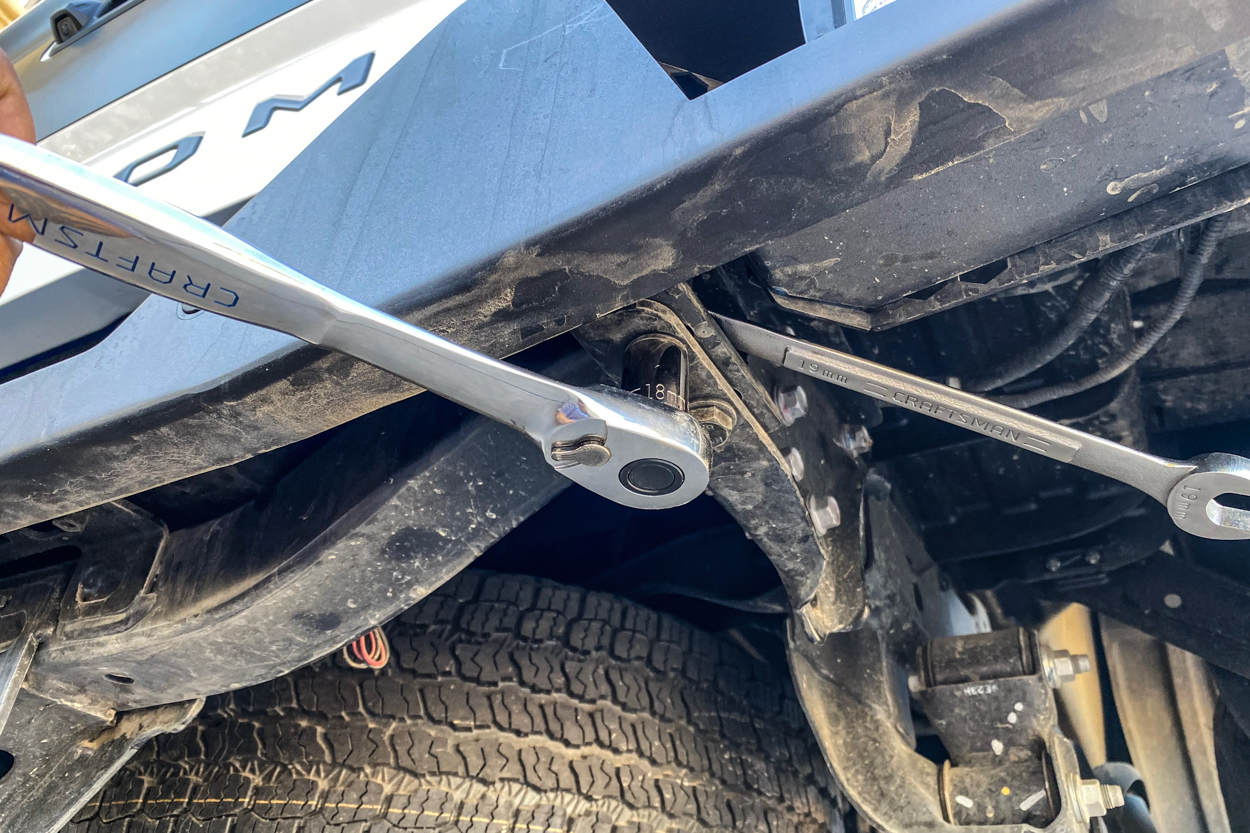
The bumper attaches to the frame with a total of six nuts/bolts, three per side. You can see two of them above. The last one is hiding inside the frame rail.
With the mounting hardware and your impact wrench, grab the 18mm socket and the 19mm open-end wrench and get to tightening. I wasn’t able to get a torque wrench under the bumper so I tightened it down as hard as I could.
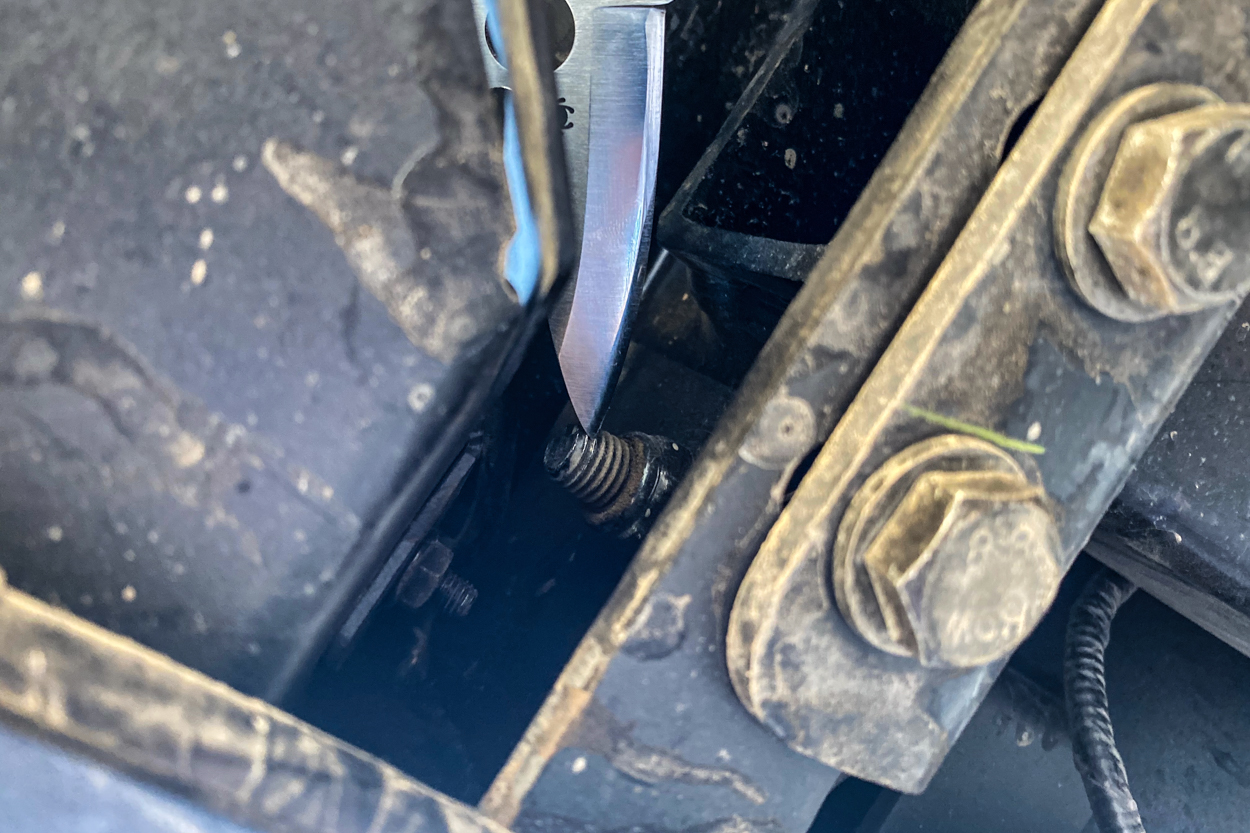
You can see the one hidden bolt above.
Step 10. Connect Harnesses

You can see the trailer harness above, connect the two ends.

Finally, reconnect the OEM parking sensor harness.
Once, you’ve reconnected these, you’re done! If you have lights installed, wire them up as you see fit and you’re good to hit the trails.
Finished Product

This bumper looks great and the install was fairly easy.

Considering that I had to snap some images, it only took me about 3.5 hours to install. Not bad at all.
Final Thoughts

The bumper is well made and can definitely take a beating. It looks great and for the most part, was easy to install.
I’ve had a chance to take the Tacoma out with the new bumper, and although I didn’t bang it up too badly, it held up well. I look forward to testing it more in the months and years to come.
Below, you’ll find an extremely detailed install video from the team at Extreme Terrain. I referenced it several times during the install and it was a huge help.
