
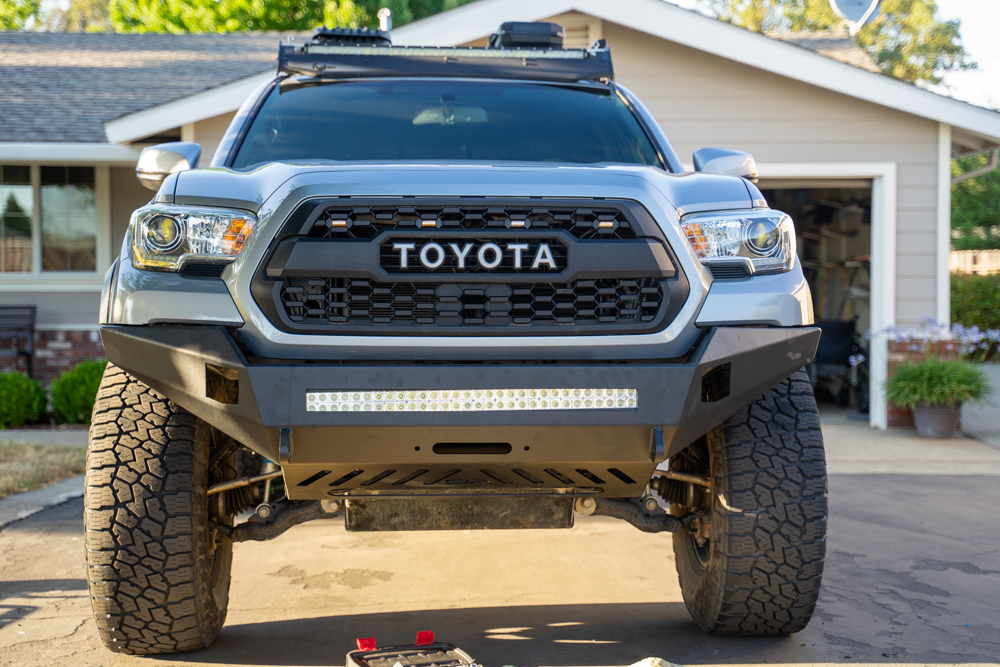
Body Armor 4X4 has released its full lineup of bumpers for the 3rd Gen Tacoma. In the always-growing, never-ending aftermarket support for these trucks, they have joined the competition with this very stout and well built Pro Series.
Most 3rd Gen Tacoma Bumpers do require cutting right above the fog light line of the OEM Bumper and Body Armor decided to do that as well with this version.
Find It Online
- 2016-2023 Toyota Tacoma Body Armor 4X4 Pro Series Front Bumper: Check Price
Table Of Contents
Specs
- 3/16″ Steel Construction
- 10,000lb Winch Capacity
- High Clearance Design (accommodates OEM or aftermarket skid plate)
- 30″ Dual Row Light Cutout
- (2) LED Light Pod Cutouts
Installation
We had access to air tools for this project but I understand that not everyone has air tools, so you can also do this install with the tools below.
- Painter’s Tape
- Oscillating Multi-Tool: Check Price
- Half Moon Blade: Check Price
- Mechanic’s Tool Set: Check Price
- Body Panel Remover (Optional): Check Price
The install is pretty straight forward and almost all other aftermarket bumpers make the same cut so there are plenty of “how-to” videos online for reference.
Unboxing
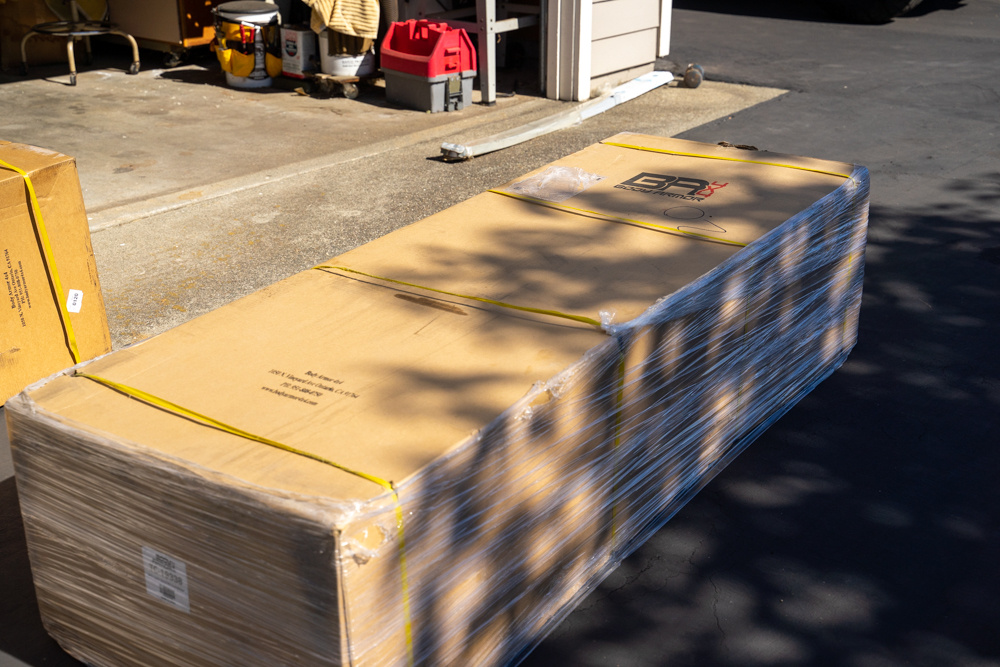
After ordering the bumper, it came quickly and arrived in great shape.
The box was neatly wrapped and delivered to us on a pallet with no damage to the box.

I was very happy with the condition the packaging came in.
Body Armor 4X4 really goes the extra length to ensure your bumpers are properly packaged to avoid any kind of mishaps. So far, so good.

The bumper came well protected and nicely wrapped.
Each end of the box also had protective styrofoam to ensure shipping quality.

The bumper came out pristine with no visible scratches and the powder coat was impeccable.
Although we were a little skeptical, this bumper, especially in person, is pretty freaking awesome.

There aren’t a ton of bolts and hardware to install; this makes life so much easier.
Here are the bolts, light bar brackets, and trim that was inside of the box. Body Armor 4X4 gives you absolutely everything you need to install your bumper. That includes edge trim to cover your cuts on the OEM bumper.
No running to the auto parts store to grab extra parts. Always a plus.
Step 1. Prep For Cut
Measuring the cut line is the most important part.
Luckily, the bumper trim right above the fog light is the body line you have to follow. This makes it quite a bit easier to ensure a clean cut.
The instructions state to measure 2-7/8″ (2.875) from the body line.

We made the measurements and referenced other bumpers to make the best decision on where we should cut.
Remember, you are able to use the trim provided with the bumper to clean up the aesthetics of the cut bumper when you are done.
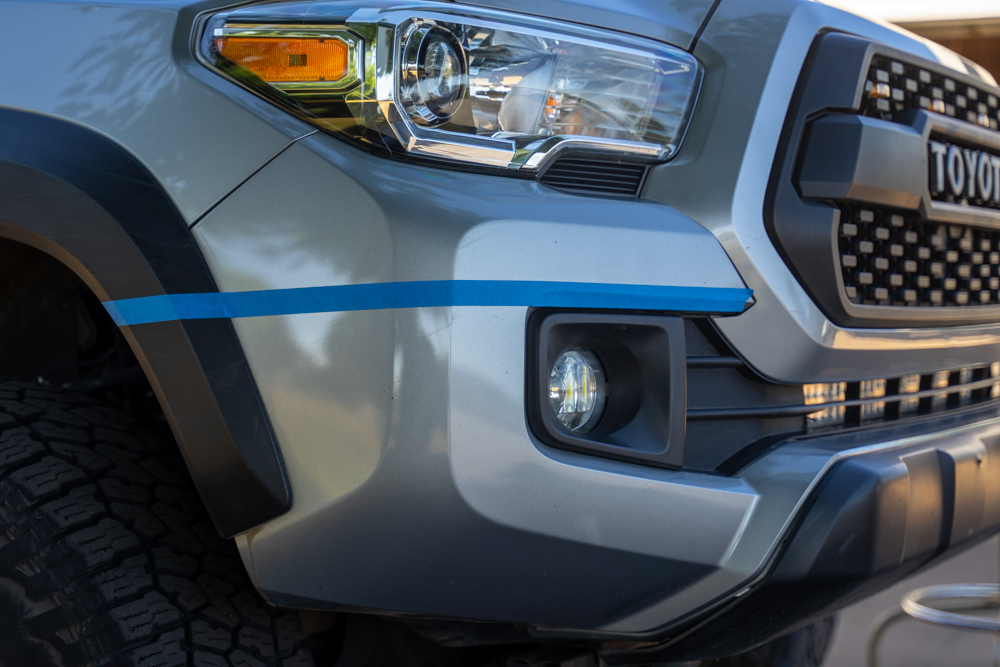
Once you are done taping off the cut line, it should look something like the image above.
The bottom of the painter’s tape is where we are making the cut. Take a look at it a couple of times and have a beer, make sure it’s absolutely straight and level. There’s no way to add plastic back on if you cut off too much of the bumper.

Before cutting, we started by removing the front of the fender liner underneath the truck.
This will allow you to have visibility behind the bumper.
Step 2. Disconnect Wires

We then disconnected the fog light from the housing and carefully checked that we would not cut anything vital behind the bumper.
If you have wires in the area for aftermarket lighting, make sure they are tucked away.

We also removed some of the bolts holding the bottom part of the bumper to the crash bar underneath.
You should make sure these are all removed so taking off the bumper will be an easier task.
Step 3. Cut OEM Bumper

Drink another beer, put some PPE (personal protective equipment) on and start cutting away!
Take your time with this and cut below the tape. If you create any small imperfections, you are able to use a blade afterward to make the cut smoother.

We used an air tool for this portion, so it made the cutting process much easier.
Step 4. Remove Extra Parts

Now it’s time to take some bumper parts off so that they are not in the way of the install.
After you’re done cutting, don’t remove the bumper just yet.
On the bottom side of the bumper, right where the skid plate mounts, use a socket to remove the frame cap ends.
Next, remove the OEM tow hook.
The tow hook is only held on by two bolts, so this part is easy.

Now, remove the front bumper trim/valence. Pry the bumper along its edges and it should pop right off.
This portion is likely black but your Tacoma may have a color-matched one.

At this point, the plastic crash cushion will now be exposed.
Go ahead and remove it, use a flat head if some parts are jammed up. This should make removal a bit easier.
Take it off completely and throw it to the side, you won’t be needing this part anymore.
Next, start removing the aluminum OEM crash bar.

It may take some wiggling and elbow grease but should come out pretty easily.
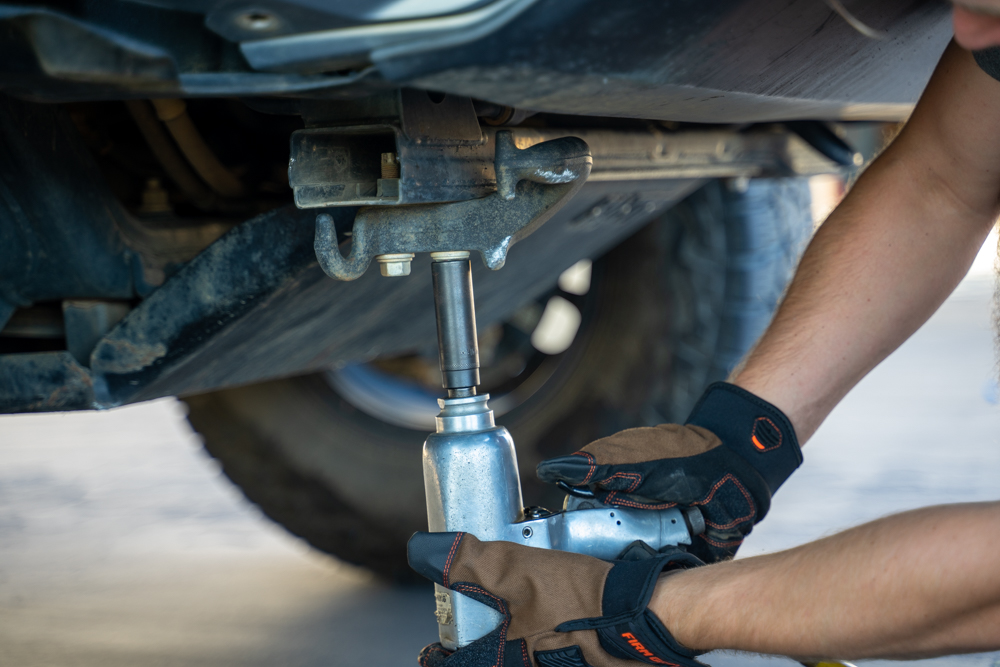
Now remove the aluminum bumper bar spacer blocks. Use your impact to remove the bolts.
The blocks will come off as seen above.
Step 5. Remove Front Grille

To make these next steps easier, remove the front grille.
You can use the body panel kit and a Phillips head screwdriver.

This will give you better access to the front of the radiator and bumper mounts.
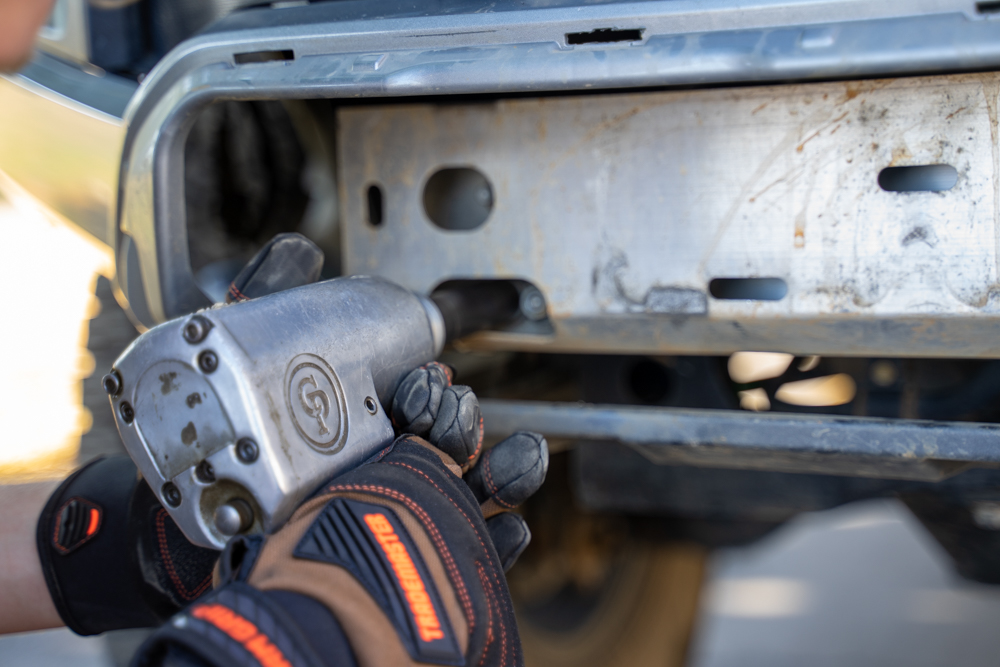
Step 6. Remove Lower Bumper

Remove the bumper that you had previously cut.
We removed the fog light housing before we removed the bumper.

This is what your cut and your removed bumper should look like at this point.
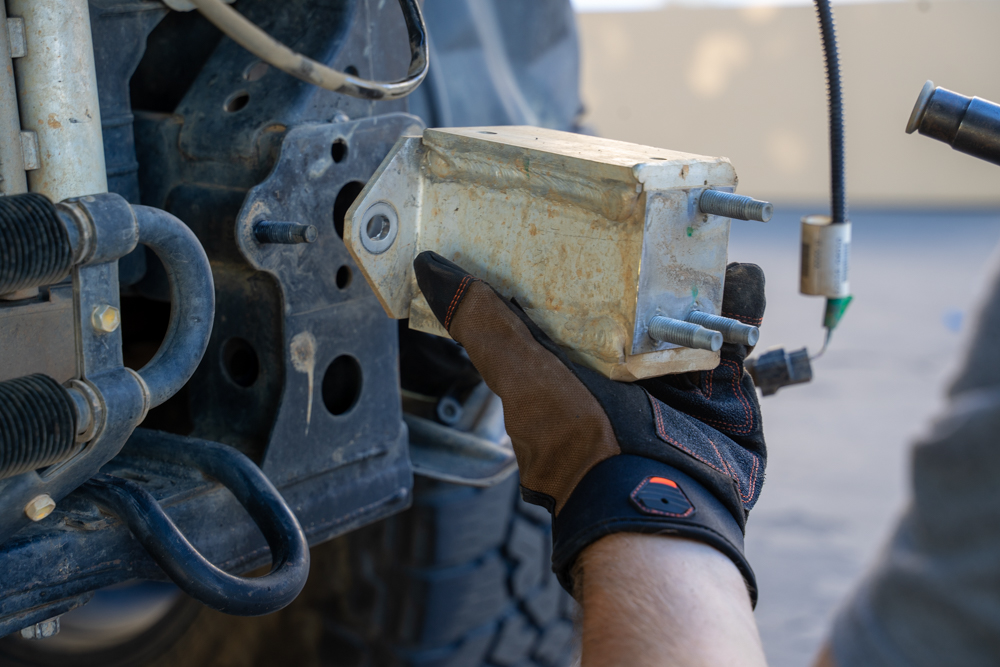
Step 7. Relocate Cooler

There is a radiator/cooler bracket that must be removed so it can be placed farther back.
Remove the bolts from both sides of it.

You’ll be sliding the cooler back to made room for the new bumper.
To create room for this, there is a bolt-on the passenger side that must be removed for the cooler to go farther back. It is on top of the frame rail, pictured above.

Use the brackets supplied with the bumper to move the cooler back on both sides.
You will have to hand tighten and use a wrench for the bolt. Move the cooler back and screw in the OEM bolt to the new bracket.

Final placement will be a little sideways, the bracket will not fully go back towards the cab, it is shifted back at an angle.
Step 8. Install Bumper

You’re almost there!
Have a friend help you line the bumper up onto the frame bolts and screw in the 2 outside nuts and then the one on the inside on both sides. It would not be a bad idea either to throw some Loctite on these bolts.
The last thing you want to do is lose your bumper.
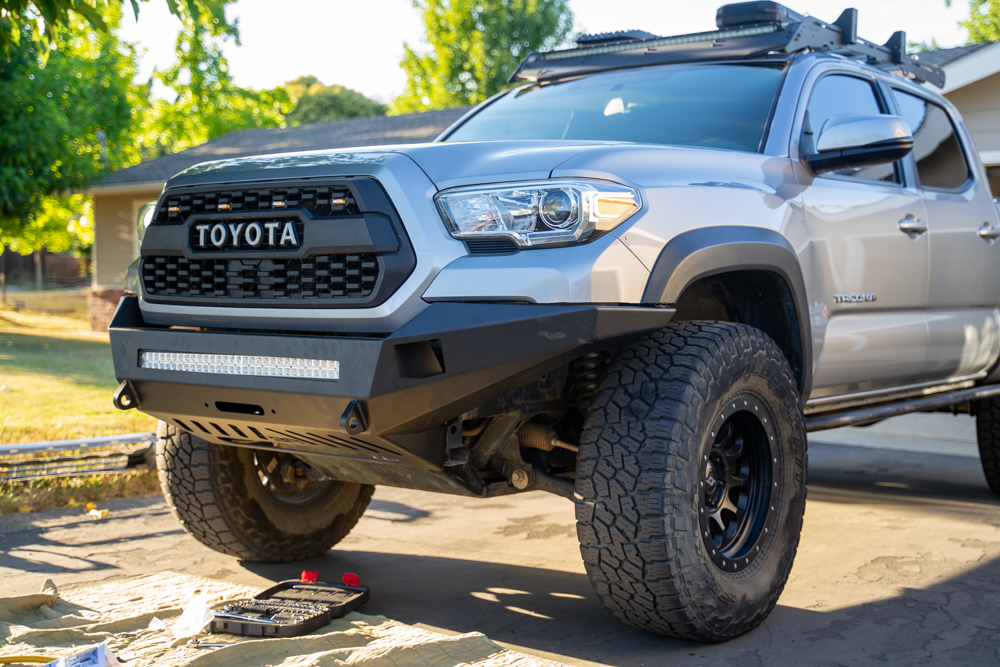
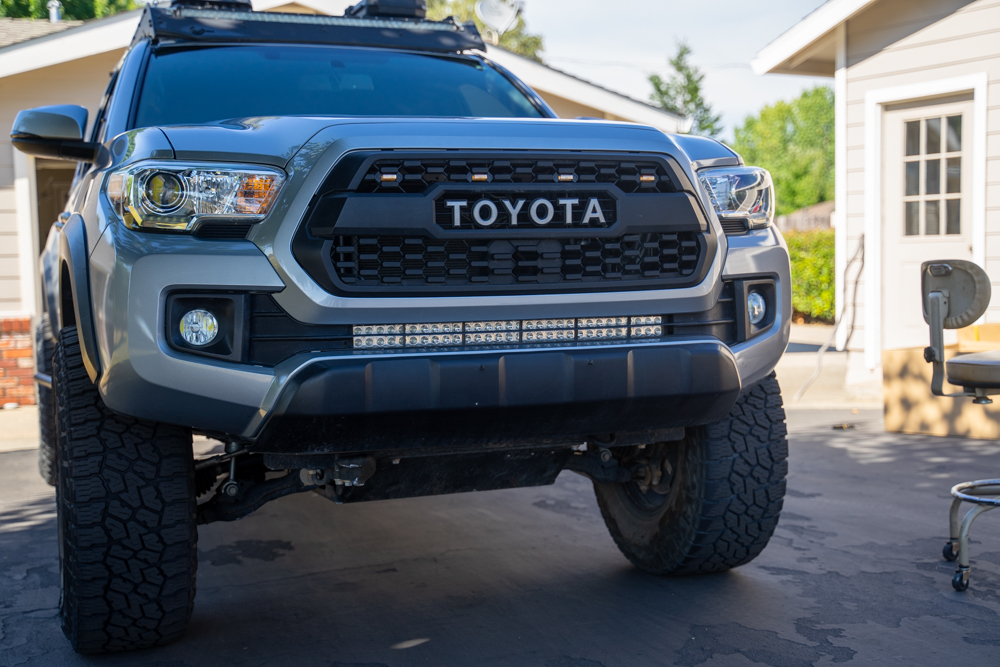
Take a step back and take in your new front end!
Here is one of the first pictures we took of the bumper completely installed on the truck. It looks great and the lines match really well.
Review
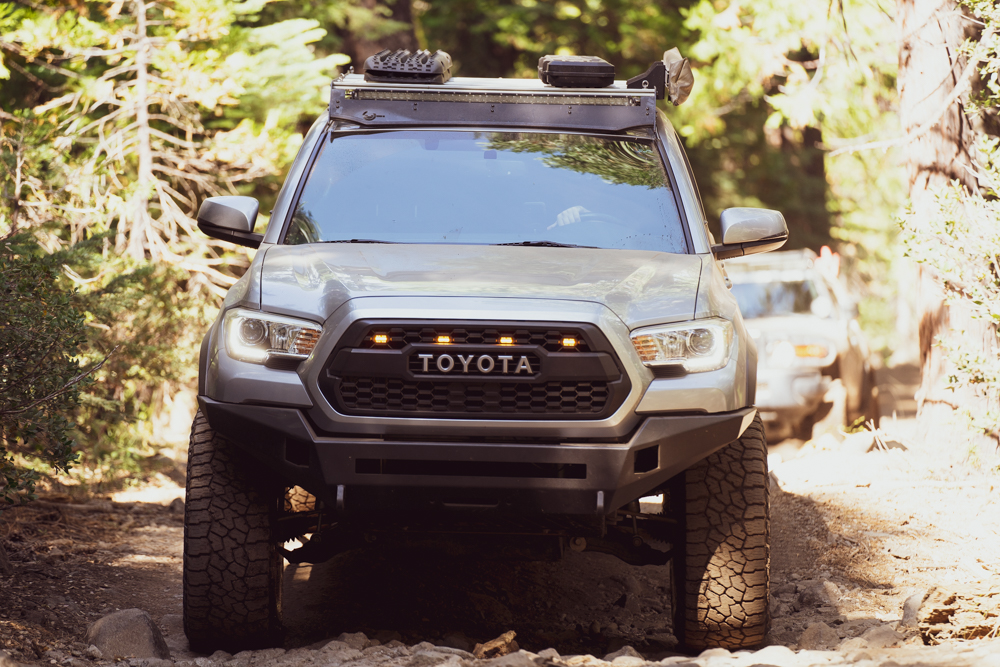
The bumper is very well built. Body Armor did a great job blending the welds on the outside to give it that seamless look.
I also noticed that the recovery point clevis was welded through the plate and reinforced which gives it more strength. The bumper lines really match the OEM aesthetic well.
We did install a light bar on the bumper that came from the previous bumper, it was really easy and Body Armor provides brackets to ensure proper fitment.
Final Thoughts

This is a steel bumper so don’t expect it to save you any weight. I would recommend buying the correct spring rate for your application if you decide to run a winch and this bumper.
BodyArmor 4×4 is coming out with a lot of great overlanding related armor and products recently.
After a shakedown run, I can say that this bumper is a solid contender for aftermarket front bumpers. Don’t sleep! They’re definitely on to something.
IMO It looks best with a their blacked out light bar.
Thank you so much for this detailed page of installation. It helped me out a bunch!!!
Great looking bumper! I love how low-profile it is, it is exactly what I’m wanting to put on my truck. Thank you for the amazing article, very descriptive and helpful. I also really dig the light bar in the bumper.
Great looking bumper, especially like how it blend with the tires. Love the way they made it easy to install.
It’s a great option for the 3rd Gen Tacoma for sure!
What Light Bar is in the 3″x30″ slot???
Nothing special. I just bought and put on an eBay light bar and it’s worked perfect for me for years. The bumper however would work for almost any light bar from the mounting hardware it comes with.