
So… you were probably cruising the internet looking at parts to increase the value, performance and reliability of your 3rd Gen Tacoma on the trail. While you might not think of lower controls arms as your first modification, there are many reasons why you should seriously consider the upgrade.
I am going to make some bold claims…
- First, I think that this set of lower controls arms (LCAs) is the single best option for the vast majority of Tacoma drivers due to its practicality, compared to others on the market.
- Second, this is one of the most underrated modifications that serves as a foundational upgrade for the factory suspension for off-road travel.
- This whole install and learning experience has taught me that these are probably the single most overlooked aspect of Tacoma front end suspension – very few people run these. Finally, with that being said, this is a modification you don’t want to, and shouldn’t go without.
Find It Online
- 2nd & 3rd Gen Lower Control Arms: Check Price
Use code “DIRTKING5” when ordering from TacomaForce!
Table Of Contents
Overview
In this post, I’ll quickly highlight who Dirt King Fabrication is, go over the specifications and back up the bold claims I made above, as well as cover a step-by-step install for these lower controls arms.
This article will serve as a complete guide to these aftermarket LCAs but can serve as a guide for just about anyone looking for detailed instructions for replacing factory lower control arms on a 2nd or 3rd Gen Toyota Tacoma.
While this install will be on a 3rd Gen Tacoma, DK builds these controls arms for all Tacomas from 2005 and onward, for both 2WD and 4WD. Let’s see what these bad boys are all about.
Company Background
The team at Dirt King Fabrication has been around for quite a while now. Their short-term and ultimately long-term success seems to be a certainty.
These guys have been building quality suspension parts for years, and they exploded in popularity more recently – with good reason. The team is focused, organized and they work quickly. They’ve got all the elements to create a company that stands out due to extremely high-quality standards and serious attention to detail.
Dirt King designs, develops and fabricates first-rate suspension components for several makes and models. I had only heard good things about these guys, so I was extremely excited to run their products.
The LCAs I’ll be covering in this article are just one of the many product offerings from DK. They also carry upper control arms (UCAs), that I’ll be covering in a separate article, suspension parts, spindle gussets, long travel (LT) kits and even lights. With the knowledge this team has, they can be your stop for suspension, accessories and beyond.
Company History

We spoke with Dustin, one of the owners of the company, and he gave us a bit of history on how Dirt King became the brand it is today.
Dirt King was founded in 2008 by a pair of brothers, Dustin and Nick. 12 years later, it’s pretty obvious they’ve built quite a name for themselves.
The company was started in their parent’s garage in high school. In 2010, the guys subleased a 500 sqft section of shop space. There was barely room for one truck and tools. Dustin stuck around and worked in the shop most of the time, and Nick went to school for engineering. Nick dropped out of school once he knew the basics and self-taught himself the missing pieces.
After a few years in the industry, Dustin and Nick began to see exactly why companies failed and capitalized on every opportunity to grow and build. They put themselves out there, taking on jobs that other companies wouldn’t, and made the products the other guys were missing. The duo also made sure each and every customer was satisfied. If there wasn’t 100% satisfaction, every effort was made to address the issues. This ultimately led to better products and the best customer service.
The team is laser-focused on its name and reputation. Dustin and Nick are off-road enthusiasts and extremely passionate about their work. As they have had the opportunity to hire, they’ve found others with a similar set of values. All of this led to the growth of the brand.
Since 2010, Dirt King Fabrication has been in the same building and outlasted or bought out all the other tenants to expand to a 15,000+ square foot facility. Today, they are the fastest-growing off-road company and have no plans to stop. The team is always working on new product development to further their goal of having the best products in the industry.
Why Upgrade?
As you’ll see during the install portion, the Dirt King lower control arms are WAY stronger and have a better design than the factory control arms. Keep reading to see the side-by-side comparisons.
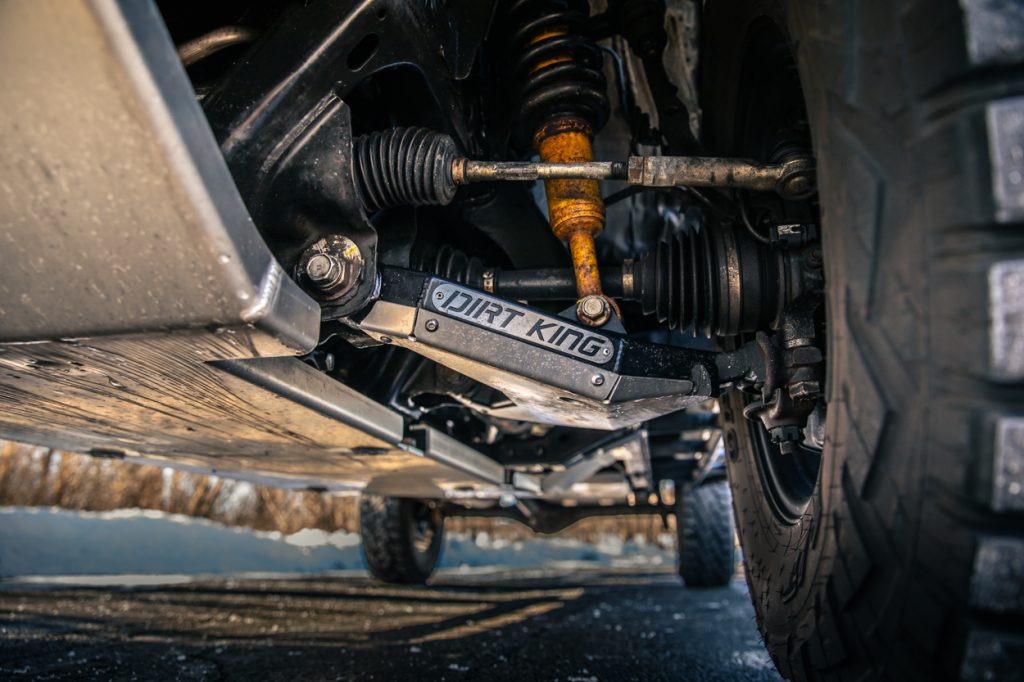
As the lowest hanging part of your front end, you will end up hitting your LCAs at some point. This aftermarket replacement will take more of a beating and has several other important features that are key for those of us who routinely wheel our trucks, or alter the suspension in one way or another.
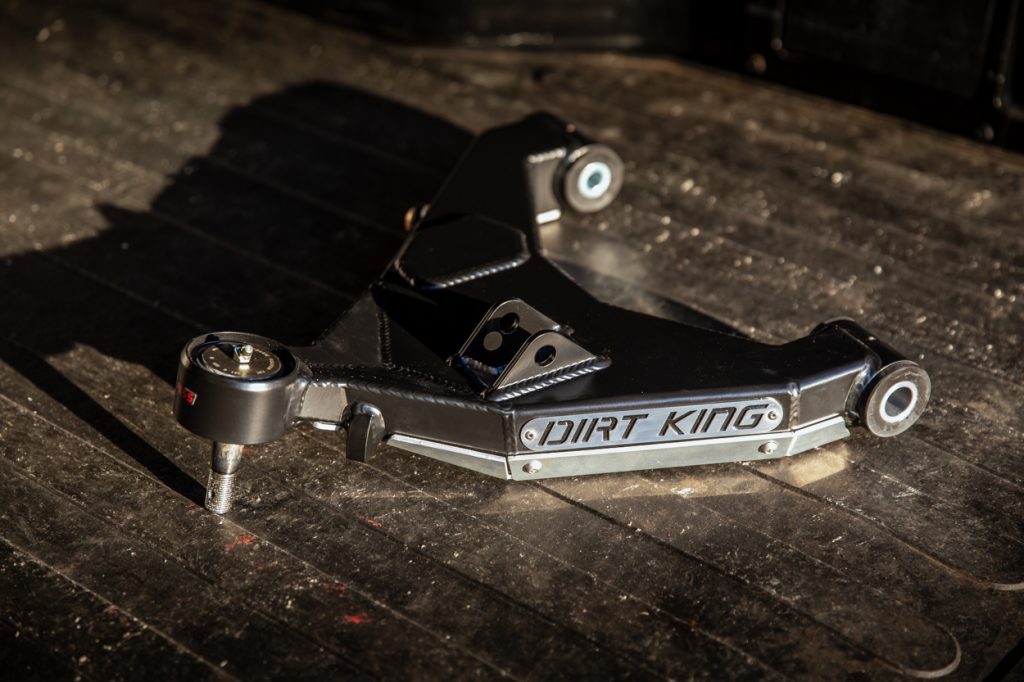
These control arms not only offer a robust design, but they have grease-able bushings and ball joints. This is big for those of us who live in harsher climates. Not to mention the integrated aluminum skid plates and a spot for mounting a limiting strap. I’ll elaborate on all of those features in the following sections.
My truck’s bushings were shot. Beyond shot. It’s fairly well known that Toyota bushings can wear prematurely, especially if the suspension goes through a lot of abuse. I needed to replace my bushings, and on my previous builds, I had never taken the extra step to dial in my front suspension with a set of aftermarket control arms.
To a point, I didn’t understand why they were so important. To be completely honest, in the past – I was a “lights before lockers” type of guy. Experience has shown me that function needs to be prioritized over form. Not to say the two are mutually exclusive. So, I took the situation as an opportunity to take my Tacoma build to the next level and really fine-tune the front end of my truck.
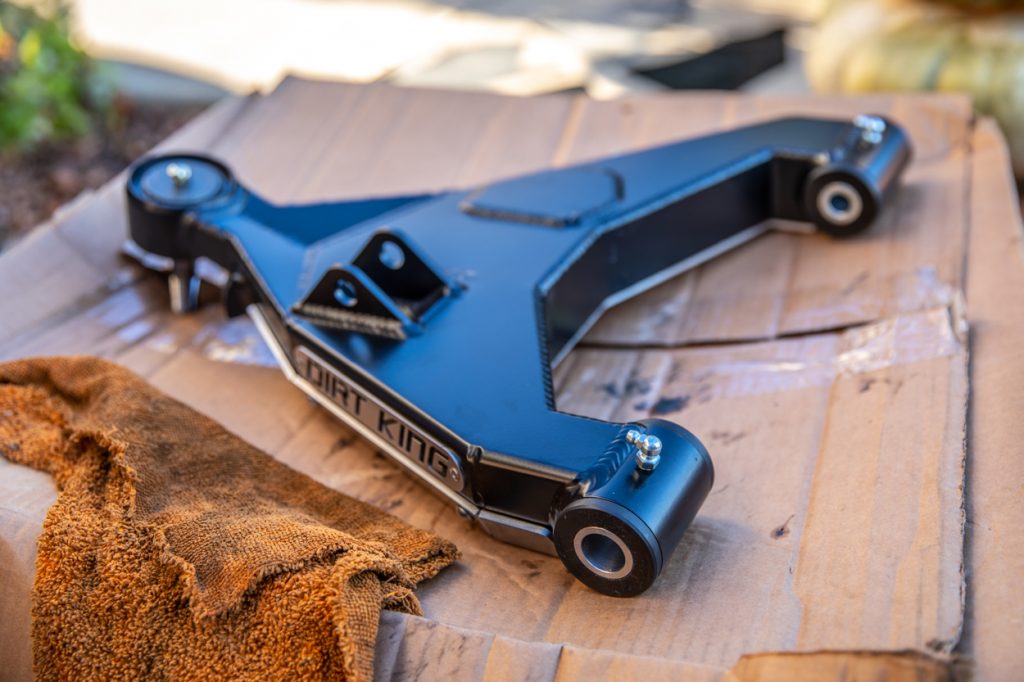
Features & Specs

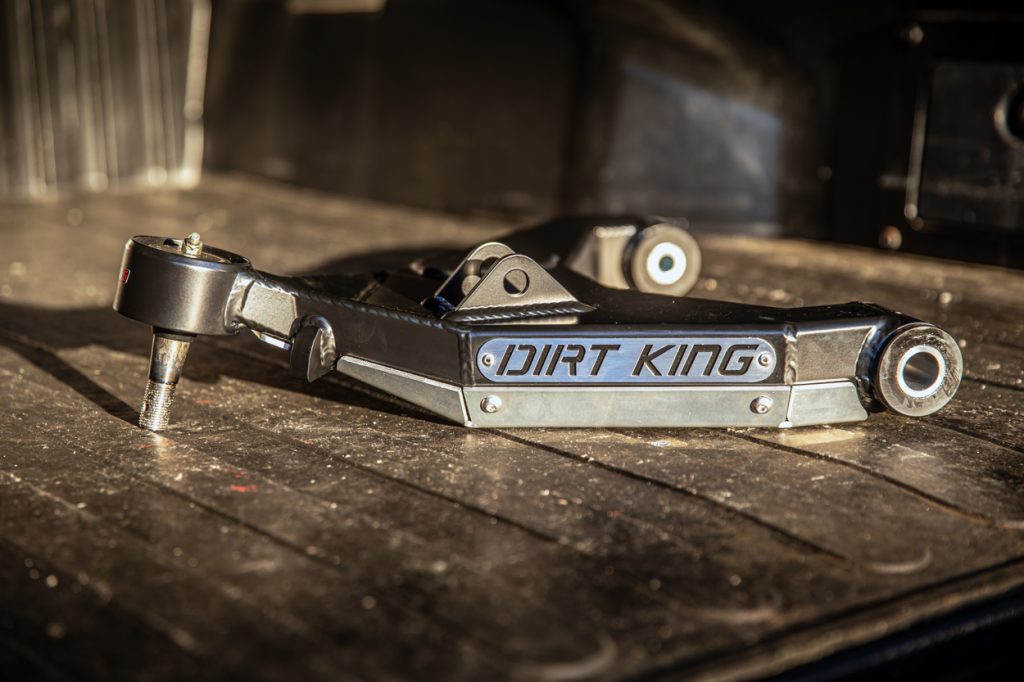
As you can see from the close-up, the guys at DK sure know how to drop a nice bead of welds. Too clean!
What’s Included
- Boxed plate lower control arms
- 1/8″ aluminum skid plate
- Delrin bushings
- Grease fittings
- Moog ball joints
- Brushed stainless steel logo plates
- Grade 8 mounting hardware
- Zinc-plated inner bushing sleeves
- Zinc-plated bump stop spacers
- Durable black powder coat finish
- Dirt King swag
- Installation instructions
Alright. Better hang on to your seat. This is the more technical stuff. All the essentials on why the Dirt King LCA is an excellent choice.
Abuse and off-roading are two things that are inseparable. By taking your truck off the pavement, and pushing its capabilities on the trail, you increase the strain and therefore decrease the longevity of your parts. If you want to build a reliable truck that can handle a lot of abuse, you need to be properly equipped.
No Compromise
These Dirt King Performance Lower Control Arms are over-engineered to hold up to everything you can throw at them, without losing the on-road capabilities that the truck was originally designed for. They are designed in CAD to guarantee the best fitment. The factory arms are not only in a vulnerable spot, but they could much be much stronger. The DK LCAs have increased ground clearance, and a skid plate, just in case. If you do really nail one of them, the internal ribbing ensures protection for a vital component that keeps your truck on the road to your final destination.
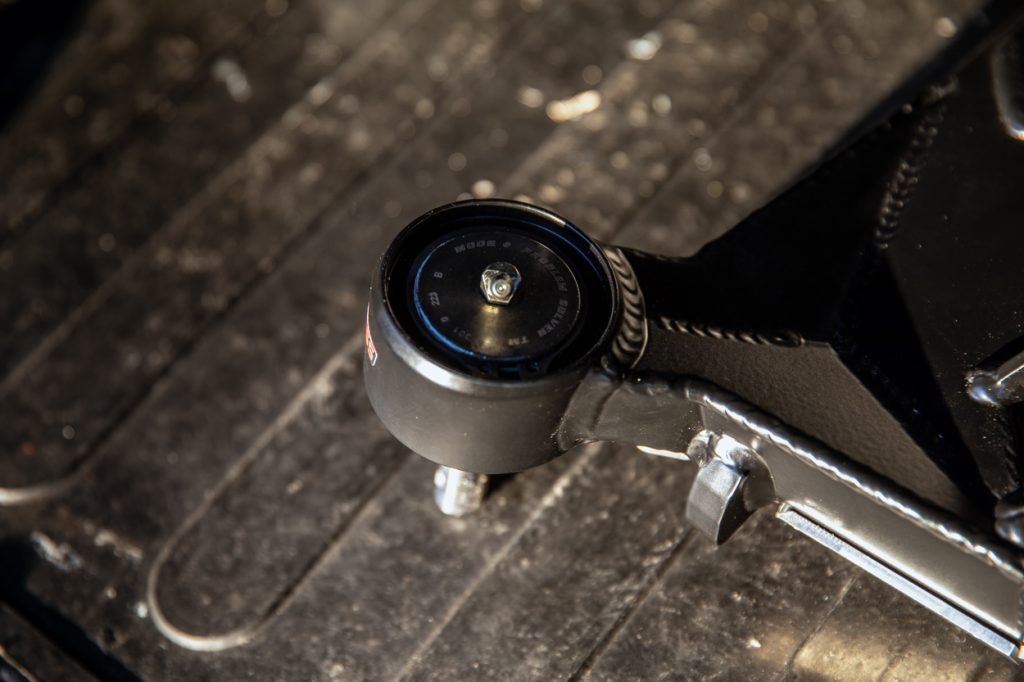
Ball Joints
The factory ball joints are upgraded to heavy-duty Moog ball joints that require little maintenance and can be serviced without difficulty. To ensure the absolute best final product, Dirt King tested the Moog ball joints against the industry stand 1″ uniballs. The tests showed that the Moog ball joint helped to keep the vehicle tracking better on the asphalt, the sealed housing reduced noise, had a longer overall life span, and, to top it off, these ball joints are easy to find at your local auto parts store. Those are some serious benefits.
Bushings
DK chose Delrin bushings for the inner mounts. When determining the best option to use for these LCAs, the team had to choose between vulcanized rubber bushings, polyurethane bushings and uniballs. The vulcanized bushings (similar to OEM bushings) were seen to restrict suspension travel. The polyurethane bushings were not hard enough, and wore out prematurely due to the amount of force applied to the LCA. Uniballs get filled with dirt incredibly fast, which caused more noise, reduced the life span and they’re more expensive to replace.
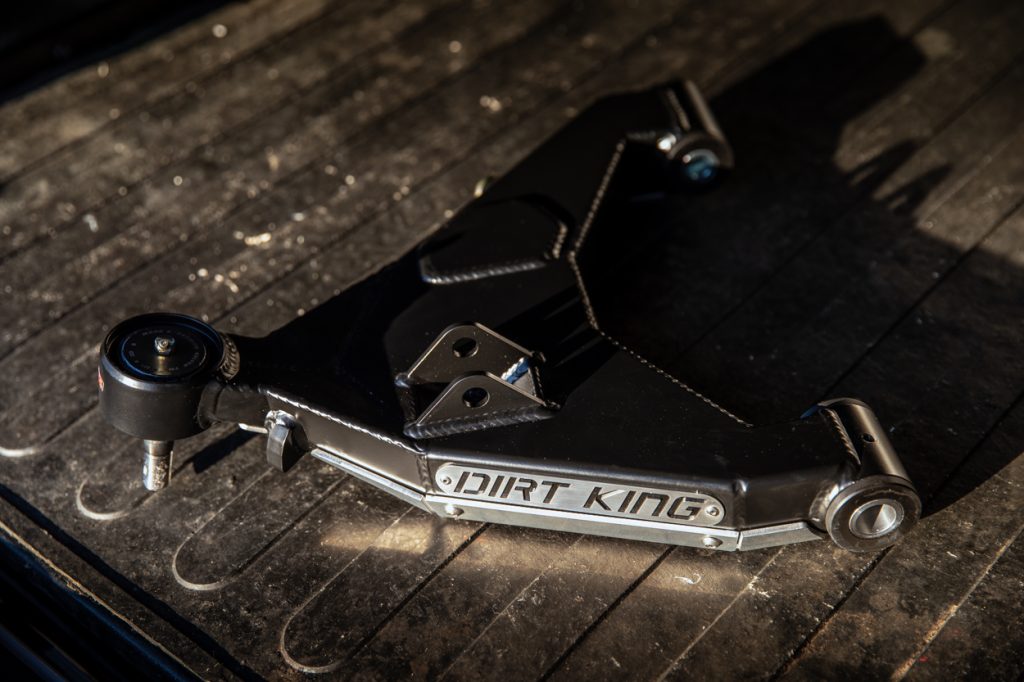
Recessed Mounts, Stops & Limit Straps
The control arms also feature a recessed shock mount and a conveniently placed drain hole. These arms are made to fit any and all shocks built for the Toyota Tacoma. The arms come with a progressive steering stop that can properly control the suspension while it articulates, for optimal steering while avoiding excess strain on the CV axles or tie rods. These work well with bump stops and have a spot for mounting a limiting strap.
Bolt-On, Well-Priced
This kit is completely bolt-on. There are no modifications required and all the necessary hardware and directions are included. They come coated with a tough satin black powder coat and the parts that will degrade over time are all replaceable. That means these control arms will probably outlast your truck. Now that’s winning. Oh, I forgot to mention, these are the best-priced LCAs on the market, by $500.
Details Summarized
- CAD Designed
- Increased Ground Clearance
- Built-In Aluminum Skid Plate
- Internal Ribbing
- Heavy-Duty Moog Ball Joints
- Delrin Bushings
- Longer Lasting
- Durable Construction
- Bolt-On Application
- Limit Strap Ready
- Hardware Included
- Serviceable/Grease-able
- No Assembly Required
Heavy-Duty Moog Ball Joints
Delrin Bushings

1/8″ Aluminum Skid Plates

Unboxing & Packaging

I have to say, Dirt King has some of the most impressive and dialed packaging I’ve ever come across.
The control arms come wrapped in plastic wrap and are surrounded by a shape conforming foam. This ensures that your parts are perfectly packaged and that they won’t get damaged in transit, no matter how poorly the delivery company handles them. This might seem like a small detail, but it’s important. I’ve been disappointed more than once. When you spend a lot of money on quality parts, this is the level of attention and care which you should expect.
Dirt King also organizes its hardware and instructions really well. There is a dedicated bag that also comes with some swag. The instructions are extremely refined, down to every last torque spec you’ll need. I think I’ve made my point here. Dirt King… they do not cut corners. Whatsoever. Big props.
Installation
Required Tools
- Metric Shallow/Deep Socket Set
- 17mm
- 19mm
- 24mm
- Metric Wrench Set
- 19mm
- 3-Ton Floor Jack
- 3lb Sledgehammer
- Vice Grips
- Torque Wrench
- Suspension Grease
- Grease Gun
- Anti-Seize
- Jack Stands
- Wheel Chocks
- Red Loctite
- PB Blaster (optional)
- Shop Towels (optional)
I thought it was important to note something about alignment before I get started on the install. A lot of people will argue that you should, or could, mark the alignment cams to keep as good of an alignment post-install as possible.
Anytime you mess with your suspension, especially major parts, you’re going to need a new alignment to fine-tune everything. You can’t get around it. Knowing this, I don’t mark my cams. I know the alignment will be trashed after the install, and the short drive to the alignment shop, about 10-15 miles, is not enough to ruin any relevant amount of tread on the tires. However, the choice is yours. I just personally choose to skip this step.
One final thing to note. Depending on the amount of corrosion you have, you may need to use some sort of rust penetrant to aid in removing the various nuts and bolts. If you have a lot of rust, it’s wise to soak the bolts in the days leading up to your installation.
Alright, enough talk. Let’s jump into the install process.
Step 1. Lift Truck
The first step, as you might imagine, is easy.
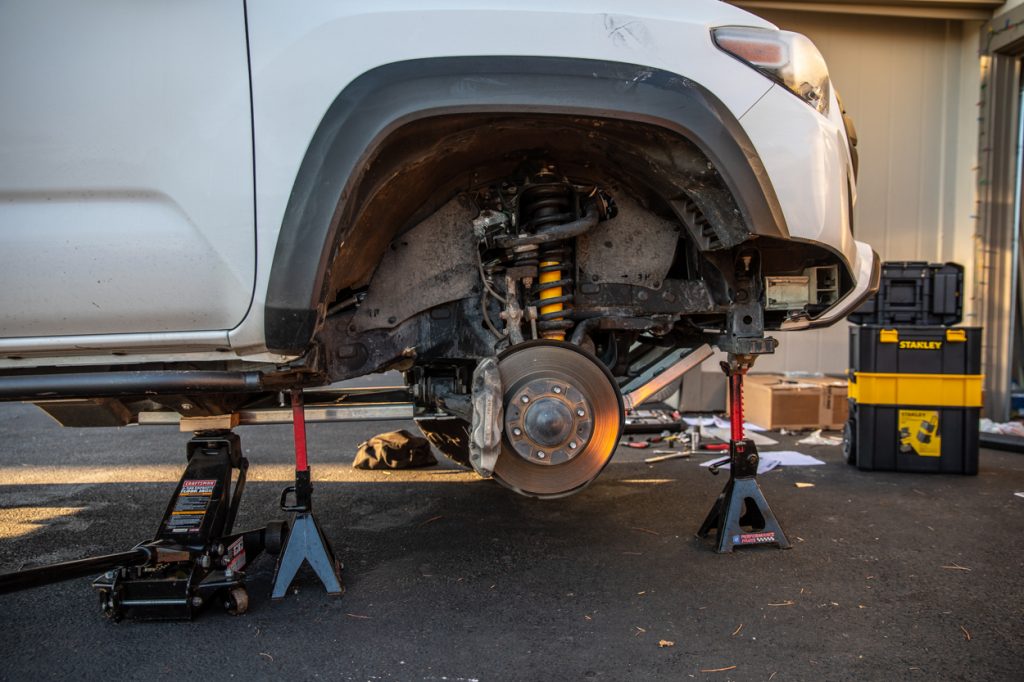
Park your Tacoma on level ground, set the emergency brake, throw a wheel chock behind the rear tires (for good measures), and remove your front tire.
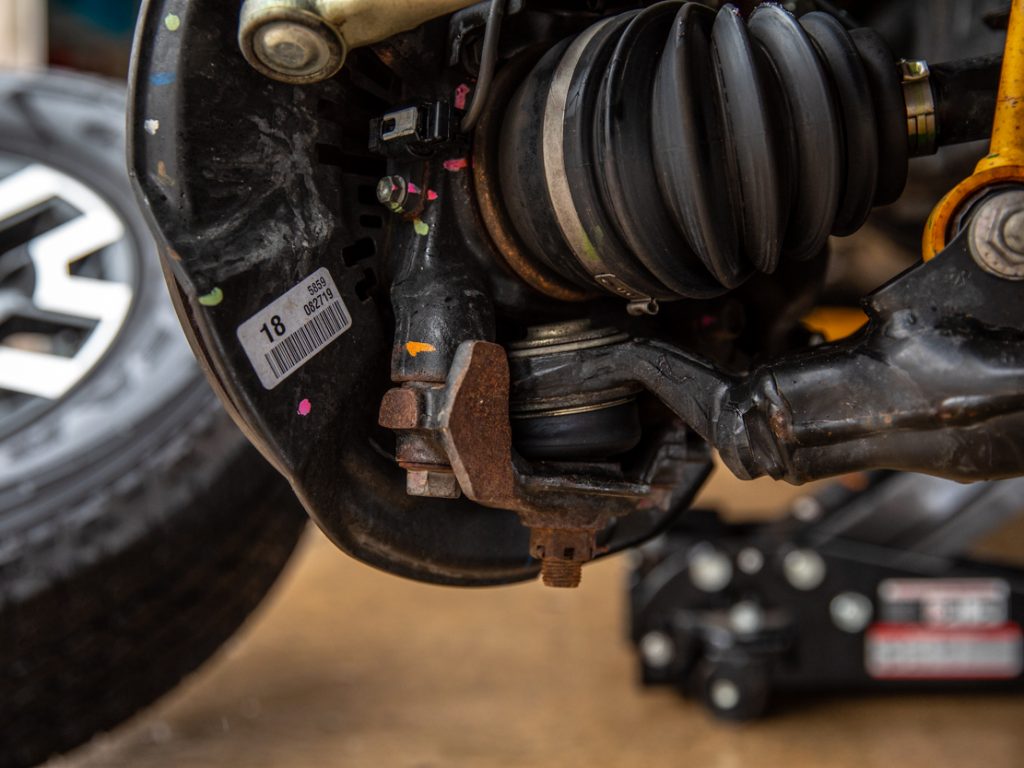
Next, set up a couple of jack stands at reinforced points on the frame. I left my hydraulic jack to hold some weight, with most of the weight on the black and red jack stand towards the rear of the truck. The front jack stand was placed under the front skid plate cross-member, just in case. If you wanted to be super safe, you could take the tire you removed and toss it under the center of the car as well.
Step 2. Disconnect Swaybar
To start, you could leave the swaybar attached. It limits the travel of the front suspension at full droop, so I chose to remove it. For the record, I have done an LCA swap both ways, without a ton of extra work. So this part is up to you. You could always try to keep everything attached and remove it if absolutely necessary. My intention was to not run the sway bar after this install, so I chose this time to remove it completely.
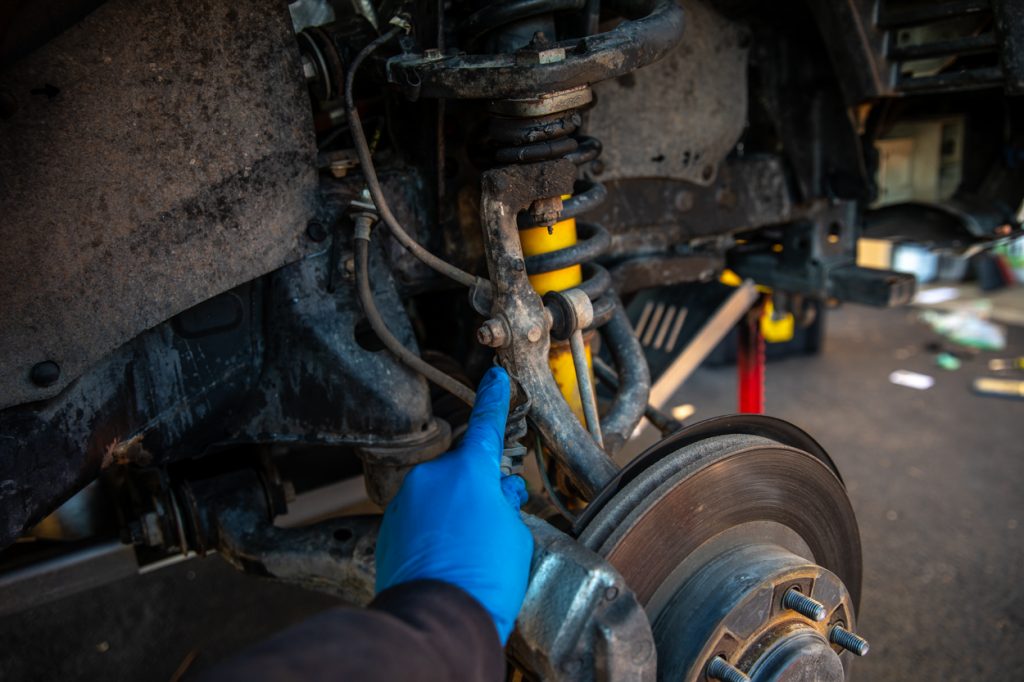
The sway bar attaches to the spindle, between the upper and lower control arms. Grab your 17mm socket and ratchet and loosen this bolt.

It’s very likely that the end of the swaybar link will start to spin and it will be difficult to break the nut completely loose.
In my case, I had to bust out the vice grips. I grabbed the shaft of the swaybar end and was able to easily loosen the nut. Some models may have a swaybar link that has a slot for an Allen key to make removal easier.
Technically, the vice grip was gripping the area where the swaybar end has a boot to keep grease inside the end link. You could argue that this might damage the boot, but this is the easiest way to prevent the assembly from spinning. I was going to remove my swaybar permanently, so this didn’t bother me in the least. Even so, not a huge deal.
Once the nut is off, you’ll likely need to give the sway bar bolt a good whack to free it from the assembly, especially if there is any corrosion in the connection. I had to give mine quite a few solid hits to remove it.
It’s important to note that to protect the threads on the end link, you could reinstall the nut backward, only partially threading it on, thus giving you a safe surface to swing away at to free the sway bar.
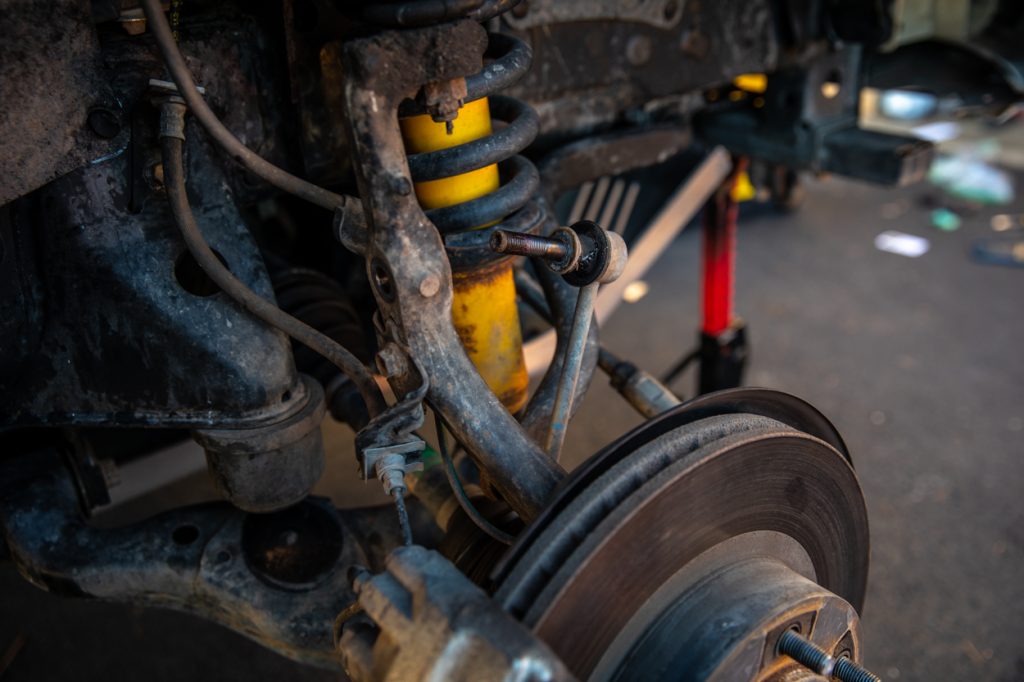
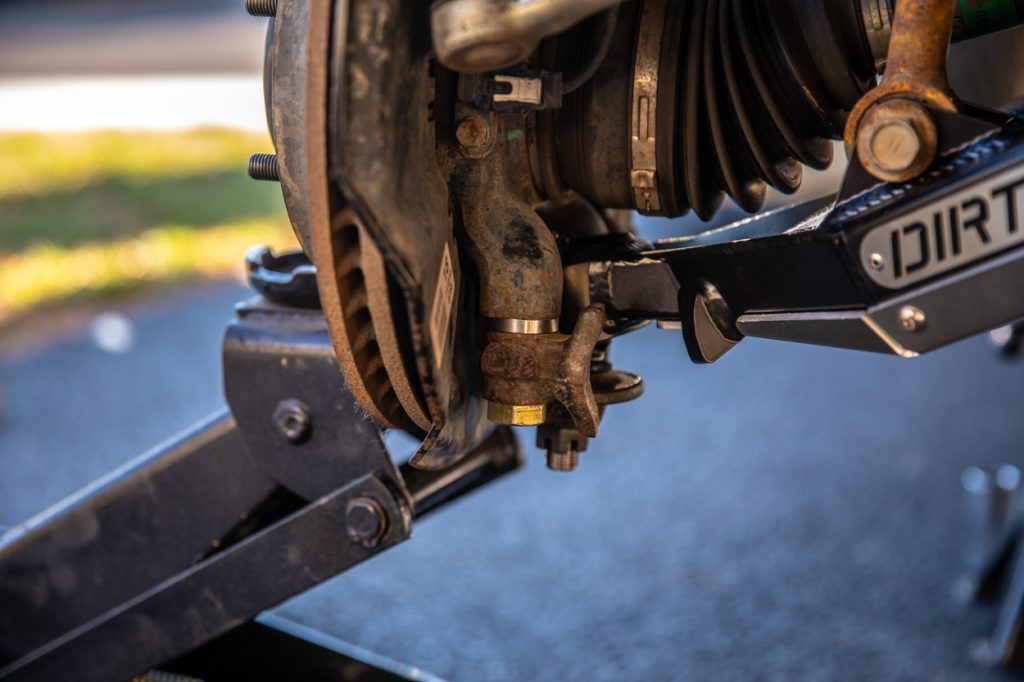
Step 3. Disconnect Lower Shock Bolt

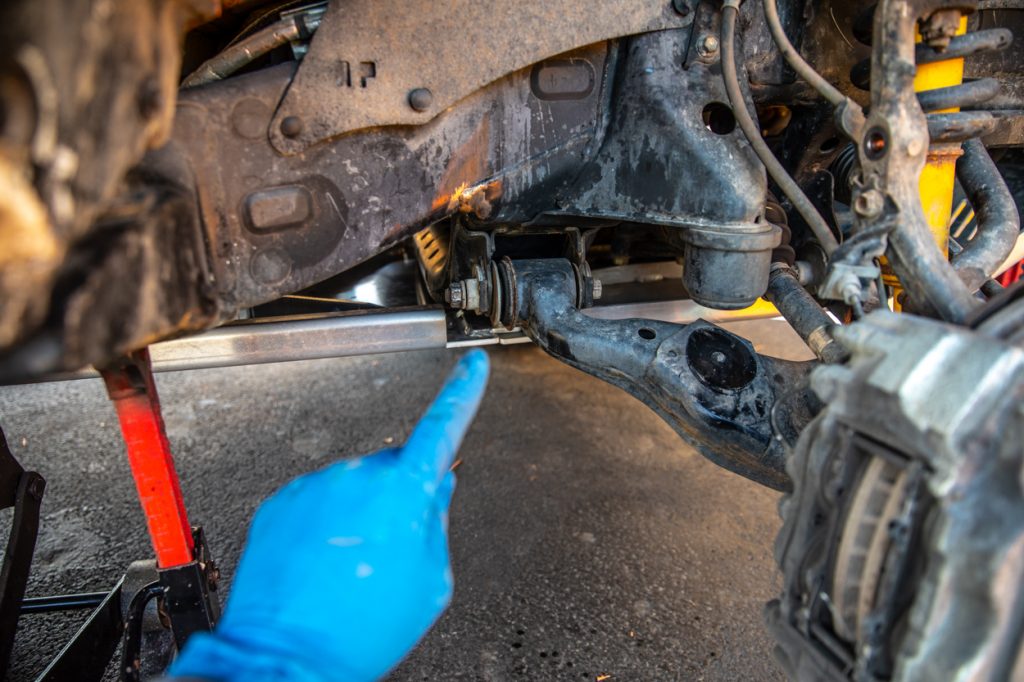
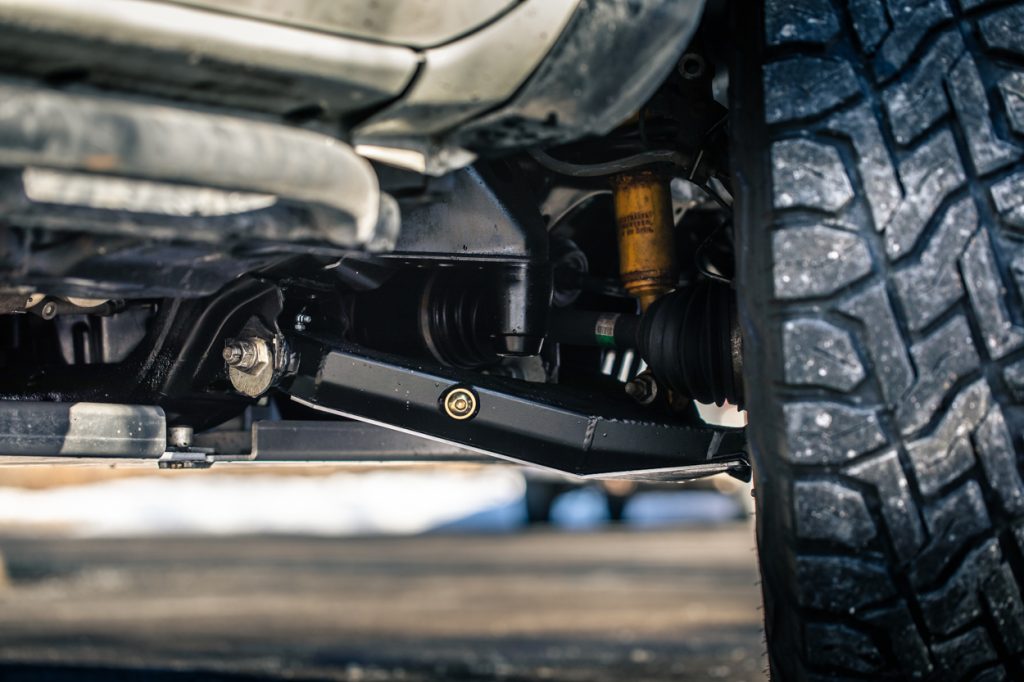
At this point, the limiting part of the suspension is the shock. I missed this shot while doing this install, so I grabbed a shot from my brother-in-law’s stock 2020 Tacoma. Just in case you’re wondering why the undercarriage looks a bit different than the other shots.
To remove this nut grab your extension and 19mm socket, or your 19mm wrench, along with another 19mm socket. You’ll need to hold one end of the lower shock bolts while you loosen the other, to prevent the bolt from spinning.
Once removed, you’ll likely notice the control arm will droop a bit more. At this point, the lower control arm is only attached to the frame at the two alignment cams/bolts and the two nuts connecting the more narrow portion to the bottom of the knuckle.
Step 4. Remove Spindle Bolts
There are two bolts that attach the lower control arms, via the ball joint and ball joint bracket to the knuckle/spindle.
Before you remove the alignment bolts and cams, remove these two 19mm bolts, and the control arm will pivot on the attachment points on the frame. While the control arm is still attached, this is a good time to remove the cotter pin and use your 24mm socket to loosen the castle nut on the ball joint.
Step 5. Remove Alignment Bolts/Cams
Remove the rear bolt, cams and sleeve. You’ll need to first loosen the 19mm nut towards the rear of the truck. If the entire assembly spins, you might need to use an open-ended 19mm wrench on the head of the bolt.
When the main bolt is removed, you’ll be able to slide out all of the remaining pieces. The control arm will not fall out when you do so, so no worry there. You’ll still need to remove the same thing on the front pivot point.

Repeat the process from the rear bolt, on the front one. This one does not have a locking nut, so there’s one less step.
Once these two bolts and cams are removed, the lower control arm will drop right out. Be careful here to not overextend the inner portion of the CV on the axle. Don’t be too quick to get rid of your OEM LCAs, you’ll need to salvage the ball joint and knuckle mounting piece. This piece is officially referred to, by Toyota, as the ball joint bracket. Remember to save your alignment bolts, sleeves and cams, you’ll also need to reuse them.
With the control arm removed, now is a great time to swap in a new bump stop, or add the bump stop spacer from Dirt King. Since I already have extended DuroBumps front bump stops, I skipped this step. If you are keeping the factory bump stop, install the spacer now.
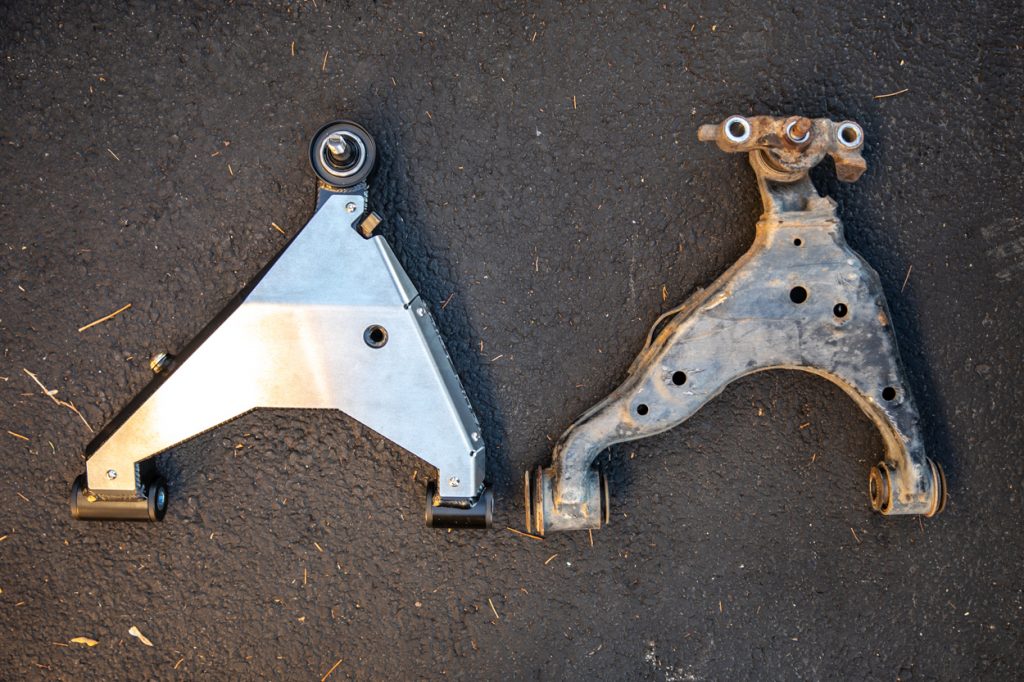
OEM LCA Vs. Dirt King LCA

Check it out. When I got the control arm out, it was easy to lay the OEM arm side by side with DK arm. The above image really highlights a lot of the differences between the OEM and Dirt King LCAs.
For one, it’s not hard to see that the Dirt King LCA is much larger. The factory LCA is not necessarily designed to hand the loads of a built truck that sees a lot of action off-road. The steel is thinner and certain design aspects, like the holes, can contribute to corrosion over the long term.
A smaller, but important feature, the mount for the lower shock bolt on the factory control arm collects all sorts of gunk. Dirt King saw this flaw and added a dedicated hole to help drain anything that might build up in the area.
Again, from the bottom, you can see the difference in the amount of material and ultimately strength. Not to mention that shiny skid plate for extra protection. It’s a no brainer, this LCA is significantly superior to the factory one.
Let’s continue with the install.
Step 6. Prep LCA
As I mentioned before, the control arms come preassembled with the bushings and ball joints.
The first step you need to take is installing the grease fitting, being very careful not to over-tighten; if you do, you’re going to have a bad time and one heck of a headache. The second step is actually greasing each of the fittings. This included both pivot joints and the Moog ball joint.
Grab your grease gun and your favorite suspension/driveline grease, and pump enough in until you see the bushings extrude slightly and the grease come out of the ball joint housing. You could do this when the control arm is installed, but this way is much easier, at least as far as my experience went.
Dirt King includes grease for this step, in a couple of small tubes, but I went the extra length to grease them all with my grease gun.
Step 7. Transplant Bracket

Pictured above you can see the ball joint bracket. This is the part that needs to be transplanted to the Dirt King lowers. I had already removed the cotter pin and the castle nut. You’ll need the previously mentioned 24mm socket for the castle nut.
It’s likely that this part will be seized onto the factory ball joint. You’ll need to find a way to wedge the bracket on a piece of wood, or otherwise, and bang away with a sledgehammer until you’re able to free it. A good method here would be to grab two 2X4s, lay each end of the bracket on the wood, so that the end of the arm is floating, and swing away until the bracket is freed. It took me quite a few hits before the pieces separated, and my truck is relatively free of rust.
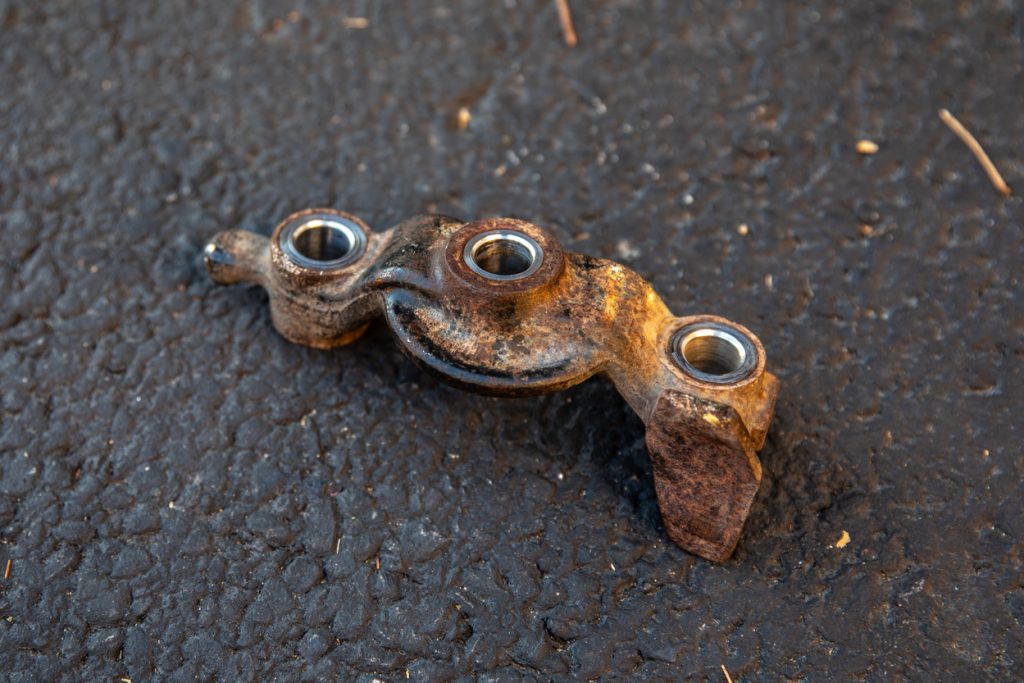
Here’s a shot of the removed bracket. The next step is to attach it to the Dirt King LCA.
Step 8. Install LCA

First, you can see where the factory ball joint bracket is attached to the new control arm. Make sure it is properly oriented when installing on the Dirt Kings.
Install your new control arm in the reverse order of how you originally removed the factory one. It’s important to note, that especially if you live in an area where corrosion is prevalent, that you should apply copious amounts of anti-seize or rustproofing grease to the alignment cams and bolts.
This should help to prevent expensive failures in the past. Ask me how I know… If you don’t take good care of your undercarriage, the bolt will “freeze” to the cam sleeve. This is where the metal on metal contact creates a tight bond between your truck’s parts and there’s not much you can do to separate them. You won’t be able to align the truck, and you’ll have to use a reciprocating saw to cut the bushings out. What a mess!
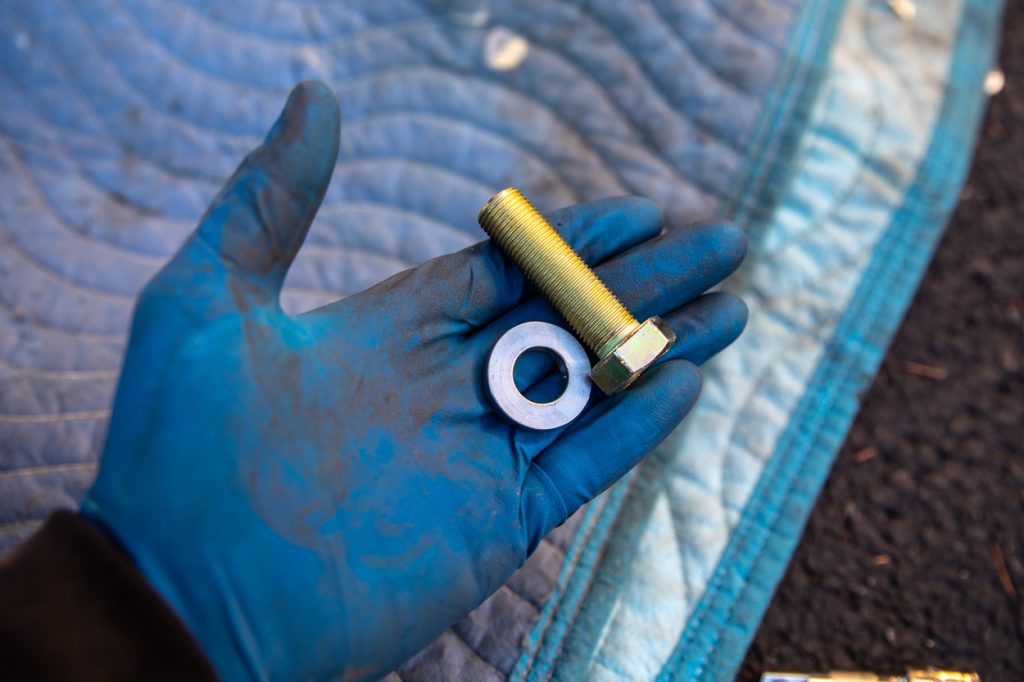
To mount the ball joint bracket to the knuckle, you’ll need to grab the above bolt, as well as the spacer.
The new bolts and spacers are installed in a specific order, so make sure it looks like it does above.
If you forget to install these or install them in the wrong order, you’ll have to take everything else apart. Matching the lower control arm with the knuckle can take some finagling, so take your time and eventually, you’ll be able to thread the bolt in properly. Dirt King recommends that you use red Loctite on the spindle bolts.
Finally, add the new cotter pin on the ball joint castle nut. This will help to ensure that this nut does not come loose, which could spell disaster. Do not miss this portion!
Step 9. Torque To Spec
I always leave my bolts finger tight, maybe a touch tighter, until pretty much everything is reinstalled. Once I confirm everything is attached properly, I grab my torque wrench, and I torque all the bolts to their proper specifications.
Torque Specifications
- Lower arm castle nuts: 103 ft-lbs
- Alignment cam bolts: 100 ft-lbs
- Spindle bolts: 120 ft-lbs
- Shock bolts: 65 ft-lbs
- Sway bar end links: 41 ft-lbs
- Lug nuts: 83 ft-lbs
That’s it! With that final step, your new Dirt King LCAs are installed. Drive over to your favorite alignment shop and get the truck ready to roll.
Initial Review
If you’ve read my articles before, you’ll know that my first impressions always start with how the product looks. And, I mean, come on, these Performance LCAs? They’re next level! They look so good. Like stupid good.
I absolutely love how they improve the look of the front end. In the grand scheme of things, it’s not a super noticeable modification. But those of us that build trucks know that a build that stands out is all about the details. This is one of those details. Function might be more important than form, but Dirt King has blended the two pretty perfectly.
Among all of the other benefits, the option for a limit strap is super cool. I have never run them, but I’m well aware of the need for them, especially if you use your truck hard. Consider them cheap insurance. Limit straps protect your Tacoma’s suspension and drivetrain. Limit straps help to mitigate forces associated with unsprung weight. This applies to the forces your truck experiences while cycling the suspension quickly when going over rough terrain and when jumping the vehicle. The need for limit straps is increased with these LCAs because the Delrin bushings allow for better articulation.

On the street, especially considering the fact that I had blown bushings, the ride felt incredible. No more clicking, clanging or banging. All those noises were starting to drive me wild. I haven’t had a chance to take them out on the trail yet, but in a few months when we head out West, I’ll keep everyone updated on the performance. It might sound crazy to some people, but I can’t wait to bang these up. A few big hits should really show where these bad boys shine.
If you’re wondering about my alignment specs, the guys at the shop had no issues with aligning the truck. Everything went quickly and easily. I wasn’t expecting any problems, but it’s good to note. Now, I’ll need to upgrade my suspension to a system that really takes advantage of the Dirt King LCAs.
Maintenance
The main maintenance that these arms require is periodic greasing of the outer ball joint and inner pivots/bushings.
As a general rule of thumb, I would recommend you grease the lower control arms every 25,000 miles, or if they start to get noisy. If you use your truck heavily, or in various extreme conditions, it would be wise to grease the LCAs every 10,000 miles.
It’s important to note that when you grease the inner Delrin bushings, you need to loosen the alignment bolts. Failure to do so will damage the bushings.
Final Thoughts

So, to summarize. These are well-priced, they’re serviceable, have easily available options for wearable parts, they provide a great foundation for a dialed suspension and the company who builds them crushes it. And those are just a few of the main points. I won’t repeat myself for the 10th time haha. I think you get it by now.
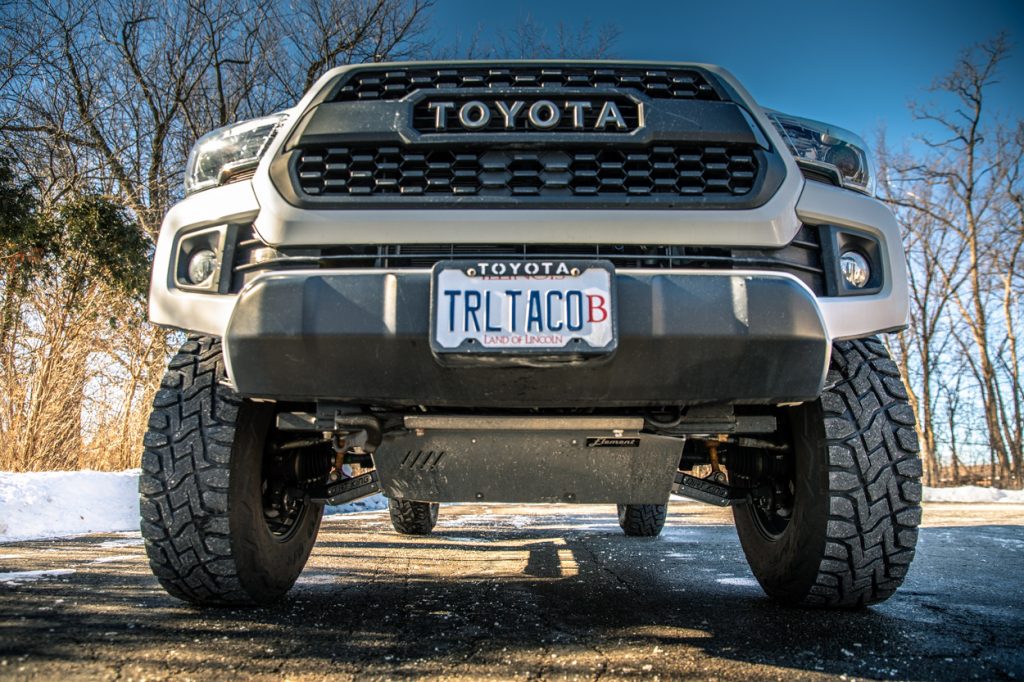
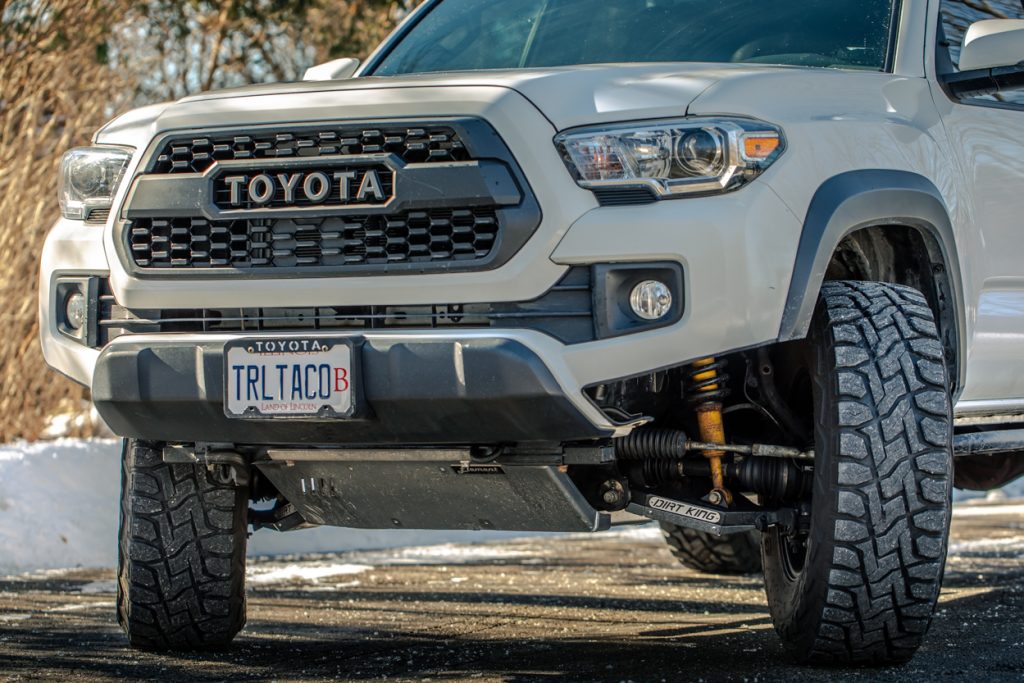
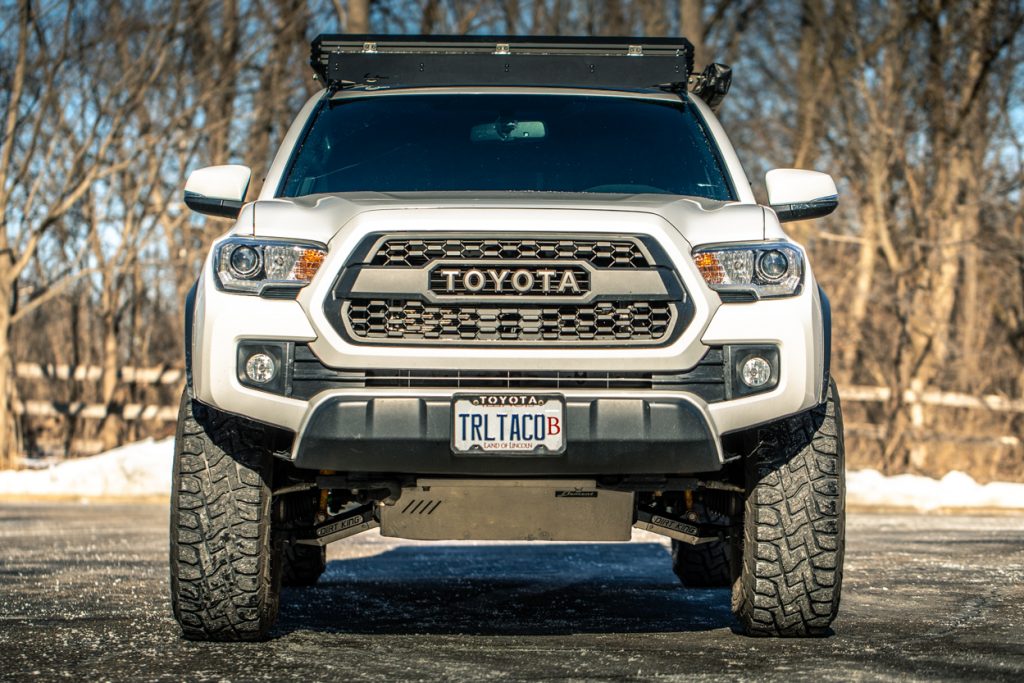
I know the final images aren’t the most glorious. I’m from the Midwest, and I got everything on right before the snow came. We have plans to hit some local parks soon and grab some new shots.
As soon as we hit summer, the Trail Tacoma truck will be out exploring the wilderness again, and I’ll be sure to post some new shots. I’m really stoked to keep testing these and seeing how they perform during this year’s wheeling season.

Fantastic write up. So how are they performing? Would love an update!
Thanks, Ben! I have zero complaints. Everything on the front end is rock solid. I’ll be doing some off-road testing in April. These things are so stout, I have no doubt as to how they will perform on the trail.