

So, you’re thinking about installing a snorkel. By now, you have surely been sucked into the rabbit hole of Instagram, watched every install video on YouTube, lost sleep over cutting into, and drilling the holes in your fender. You want to install a snorkel but you are still asking yourself, is it worth it, and what happens if I screw up?
I’m here to help put your mind at ease. Take the proper precautions, follow the guide, and just go for it! It’s a little nerve-racking but 100% worth it.
A snorkel might not be a high priority modification (honestly, it wasn’t for me) but it is easy and potentially damage-saving install for your 3rd Gen Tacoma.
Find It Online
- Dobinsons Snorkel (2016-2023 Tacoma): Check Price
Table Of Contents
Why Add A Snorkel?
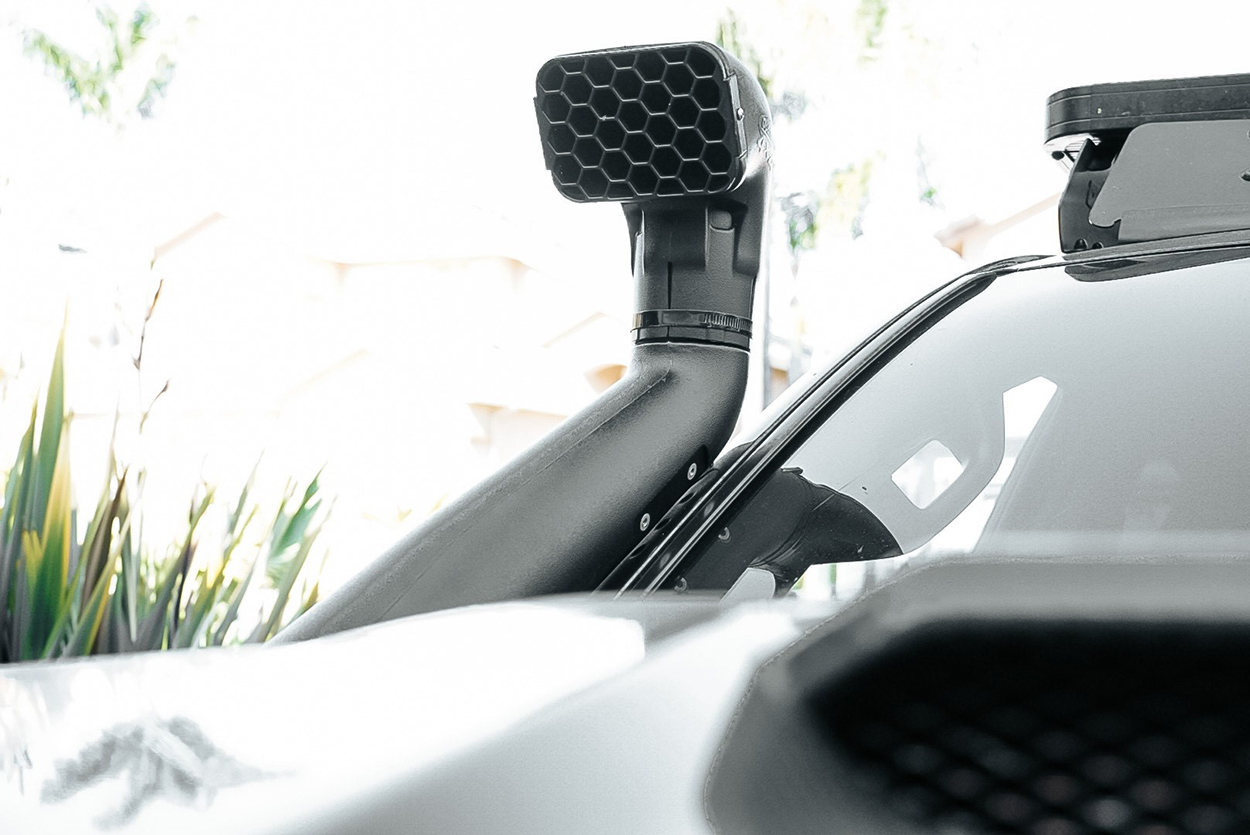
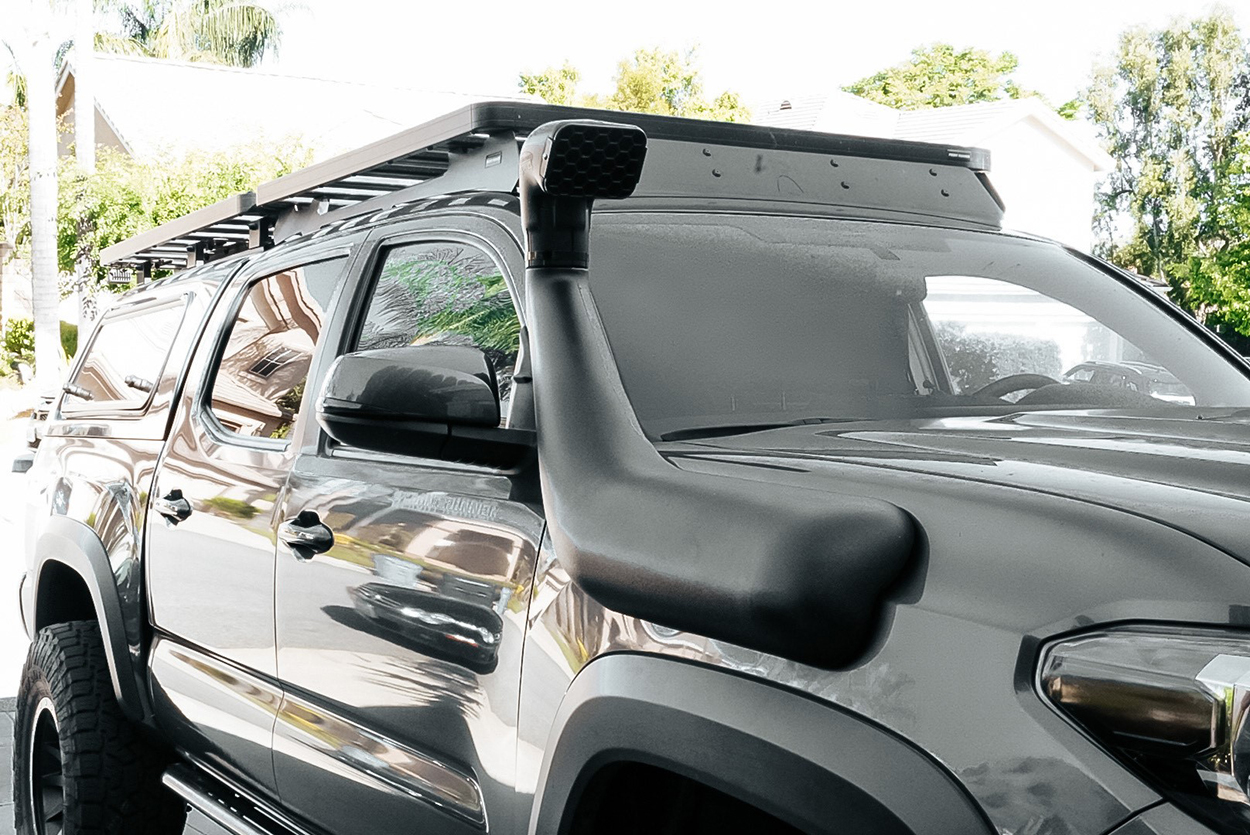
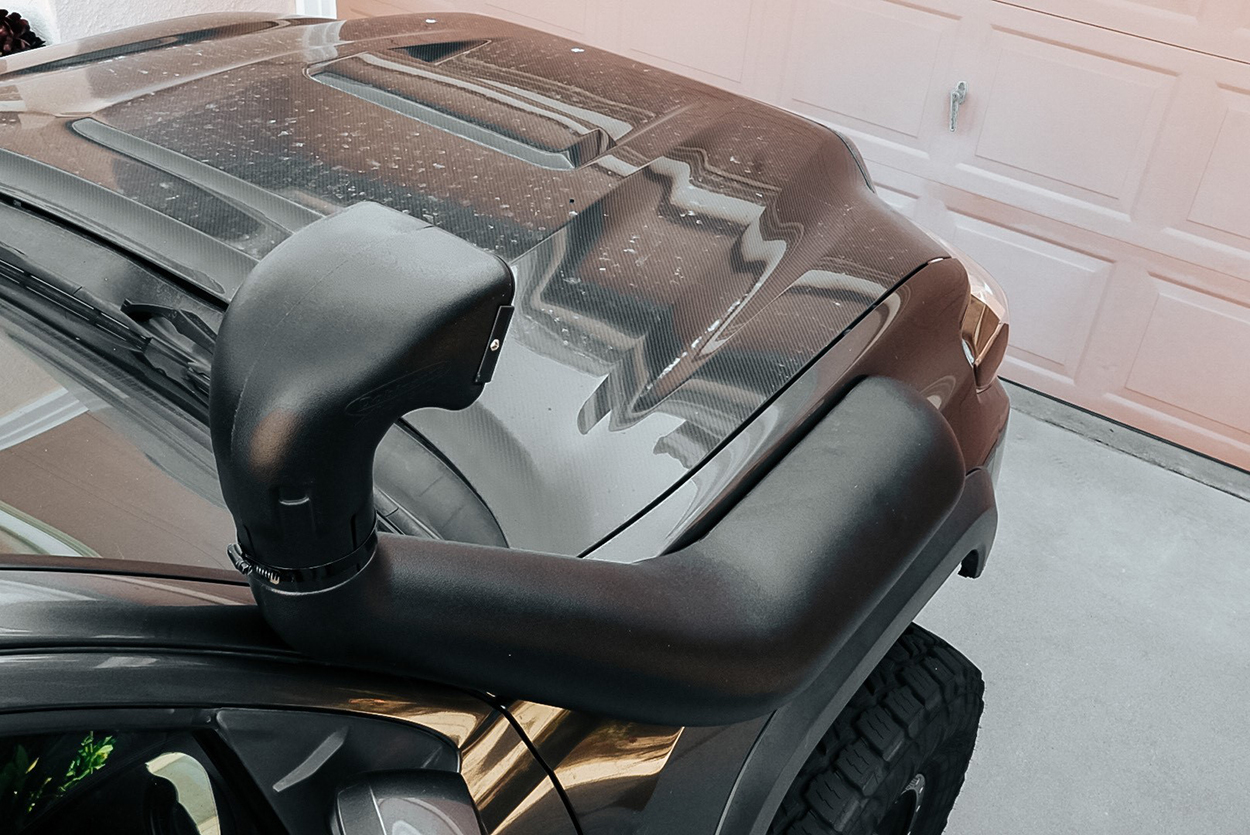
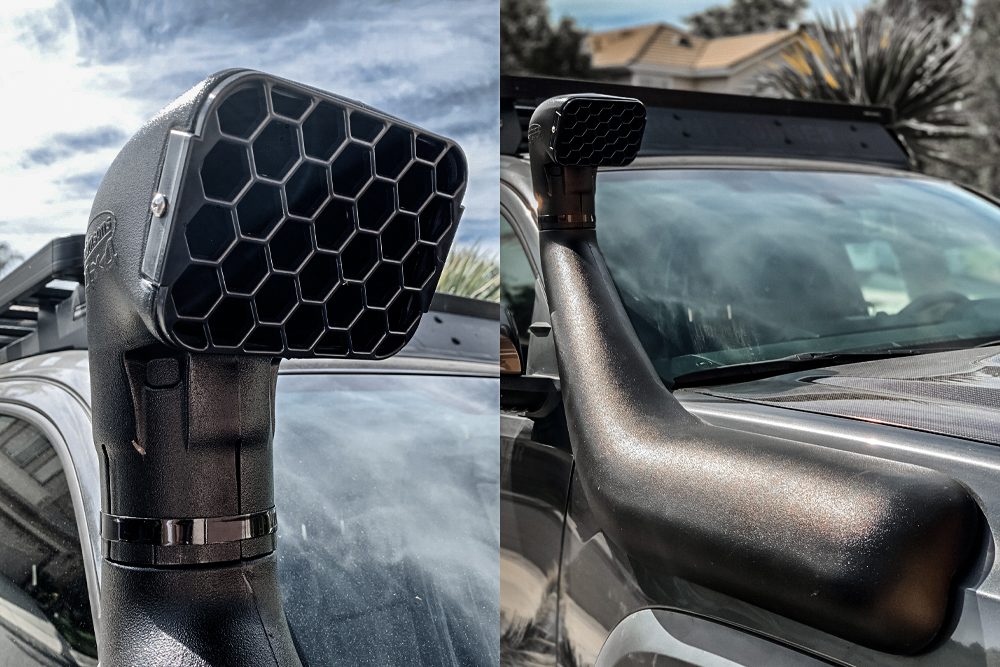
Whether you are interested in submerging your truck in water, looking for that little bump in MPG, or doing it strictly for the looks, I personally think the Dobinsons 4×4 Snorkel is the way to go.
The air entering your truck after installing a snorkel will be slightly cooler and cleaner. And with cleaner air running through your engine, it is bound to improve the engine performance over the lifetime of your truck.
After I decided to throw some 35-inch tires on my truck, I ripped out the fender liner to help with rubbing and, SURPRISE, there was the inlet for my air intake (no I did not look this up prior to tearing it out). I knew that a fair amount of dirt, water and rocks could potentially be kicked up, causing a bigger issue, so I decided that a snorkel was the best option to remedy the situation.
Dobinsons Vs. ARB
After doing my research, it came down to two companies – Dobinson and ARB.
I went with Dobinsons snorkel strictly for the look and the lower cost. After looking through the forums I saw that most everyone was happy with their Dobinsons snorkel and that it was very similar to the ARB Safari, but for a fraction of the cost. The main difference, and one of the deciding factors for me, outside of the cost, was the smaller inlet, head and body. The Dobinson option is much sleeker overall. Running $300 while the Safari is pushing $550, it is hard to pass up saving $250.
Looking through all the photos of the two brands, in my opinion, if you are looking dead-on, you can’t tell the difference. What got me was the sleek look of the Dobinsons snorkel from the side, it does not have a huge branded imprint, and for me, it looks much better.
Check out – ARB Safari Snorkel install and review.
Install Guide
I can say that a lot of my installs on this truck have been a first for me. This one was definitely the most nerve-racking one yet. This was mainly due to the potential to screw up and need a new fender.
If you mess up, all you have to do is buy a new fender, right?
Like anything else you cut on your truck, once you start, there is no turning back. Here are the steps I took to install the Dobinsons 4×4 Snorkel.
Getting Organized
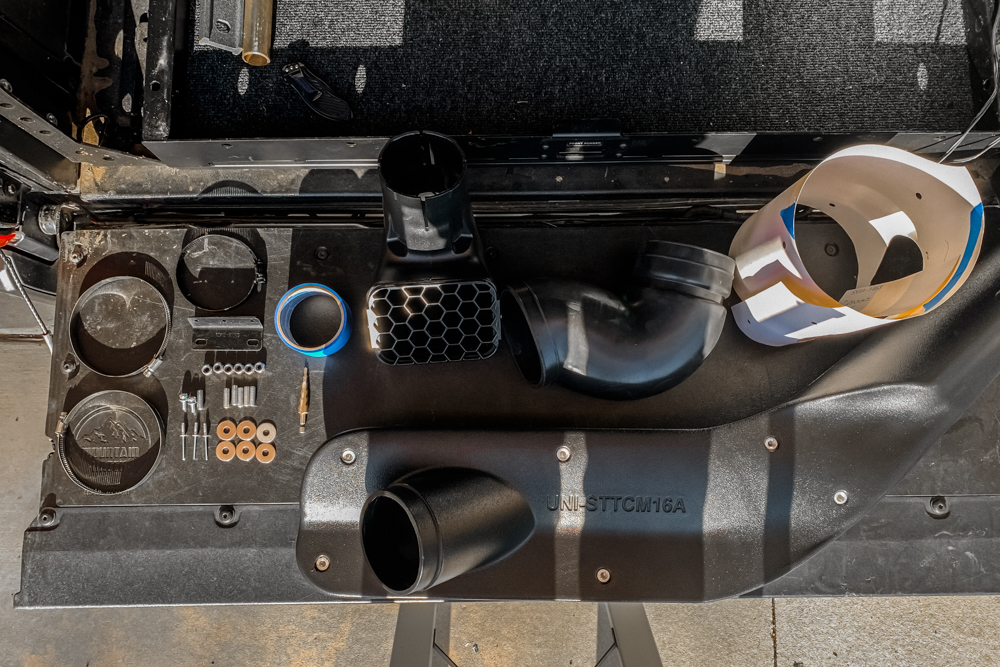
Materials
- Snorkel (Included)
- Template (Included)
- Nuts, Bolts & Washers (Included)
- Hose & Hose Clamps (Included)
- Loctite
- Masking Tape
- Touch-Up Paint and Brush
Tools
- Drill, Drill bit, Step Bit
- 13mm Wrench/Socket
- Flat Head Screwdriver
- Allen Key
- Hole Saw Bits
I used an angle grinder to cut the main hole because that is what I had, but I do not recommend it. If you want a nice clean cut, I would recommend a rotary tool, hole saw with bits designed to do this kind of work.
Step 1. Remove Airbox/Filter

Begin by loosening the hose clamp and disconnecting the airflow sensor before the whole process.
You will then unlatch the clamps to your airbox, remove the air filter and begin loosening the bolts to your airbox using the 13mm socket wrench.
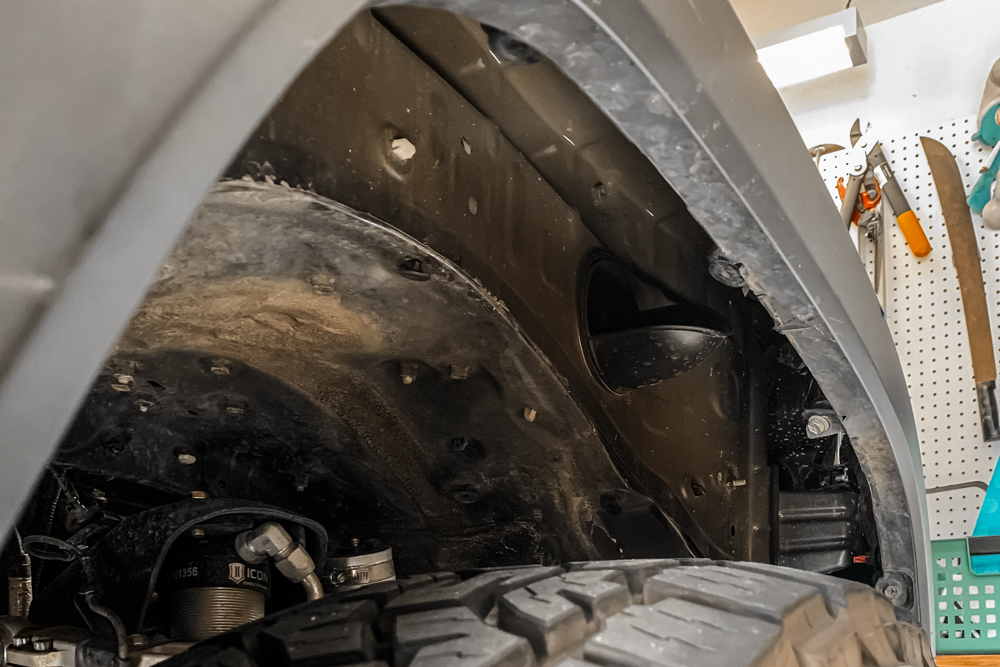
You can throw away that pesky inlet, seen above, that started this whole process, you won’t need it anymore.
Step 2. Use Template
Here is where the palms start to get a little sweaty and you begin to question yourself yet again. Just keep going, everything will be just fine.
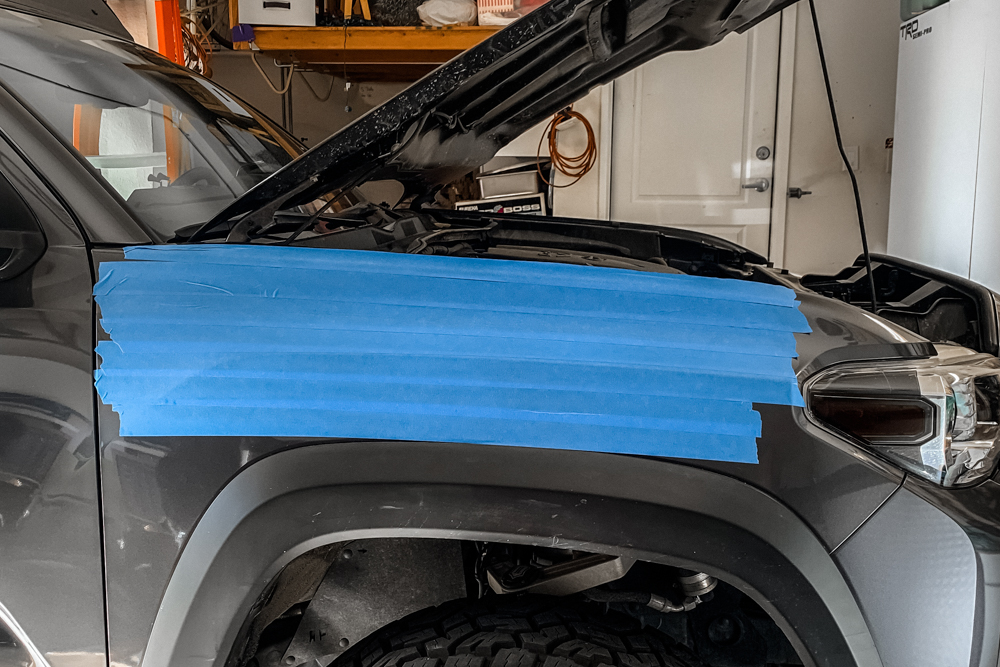
Don’t be shy or skimp on this step, lay down enough tape to cover the fender, this will help with vibration and damage to the paint when drilling and cutting the holes.
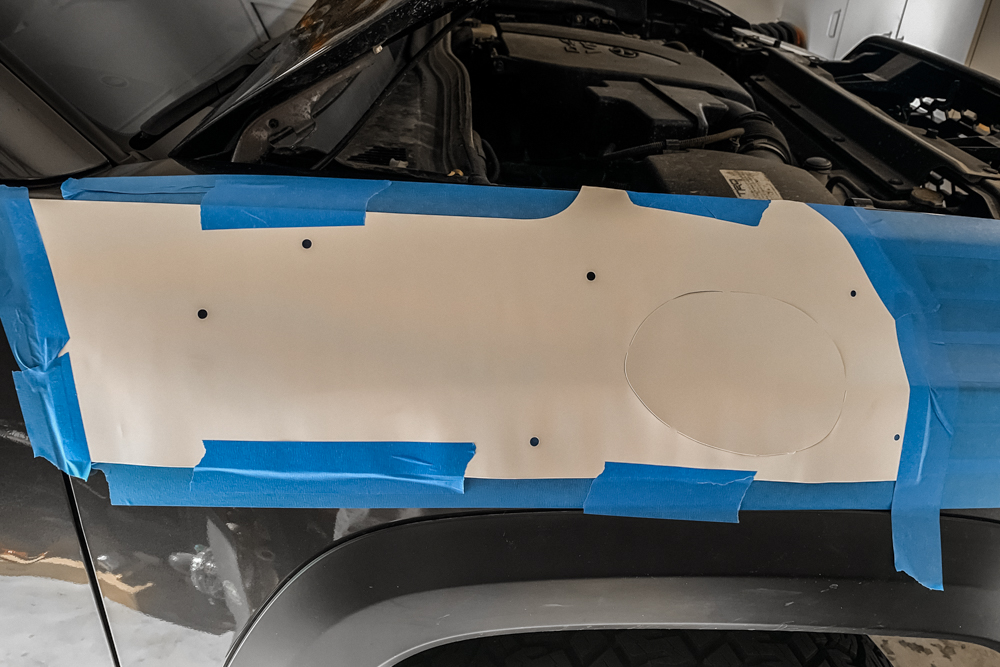
Lay down your template, pull it up, lay it down again. Go watch your reliable YouTube video, lay the template back down, mark your holes.
This step is crucial in ensuring that your snorkel fits without further modification.

I did read that the Dobinson’s templates are known to be slightly off but easily fixed. This problem seems to have been fixed over time because I did not encounter any issues with lining up the snorkel once everything was drilled out.
Step 3. Cut/Drill Holes
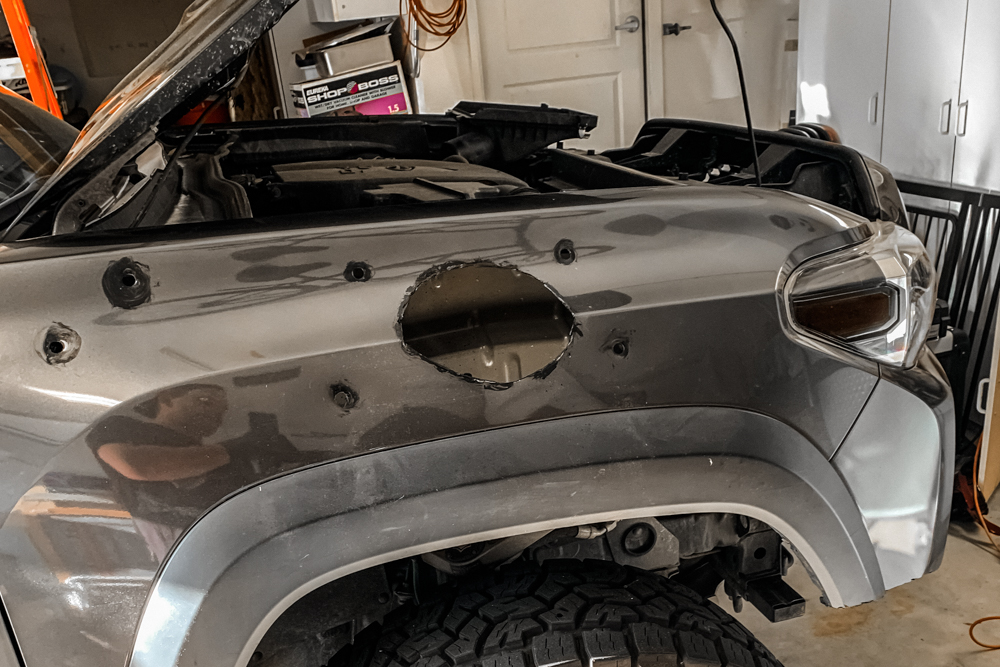
At this point, you might want to go grab your favorite ice-cold beverage.
If you are happy with the way everything looks, with your small drill bit, begin drilling the 6 pilot holes and then remove your template. Using your step bit, drill out the same 6 holes to at least 1/4-inch wide to allow the bolts for the snorkel to pass through the fender and keep the snorkel nice and tight to the body.
Here is where I recommend using a rotary tool or hacksaw, not an angle grinder! It’s time to cut the largest hole that you can’t stop thinking about. You can drill out a few holes to mark a few spots and just begin cutting the hole that your snorkel will feed through.
Like I said, first time doing this and using an angle grinder, my hole did not come out that clean, but once you go through and get rid of all the burs, you will be ready to begin mounting up the snorkel. Don’t forget to paint all the holes to prevent rust, you can be generous with the paint since everything will be covered up by the snorkel.
Step 4. Mount Snorkel
Now that there is officially no turning back, time to see why you did what you just did.
First, clamp the top portion of the snorkel to the body using the black hose clamp given in the kit and tighten it with your flat head screwdriver. Then, place all of the bolts, with Loctite, in the backside of the body of the snorkel with the Allen key insert facing out so you can tighten them up.
Next, loosely fit the snorkel to the body of the truck using the supplied washers and nuts and connect the new inlet to the body of the snorkel, I recommend putting the hose clamps on before any of this to avoid any frustration.
Step 5. Fit Hose To Airbox

You’re almost there. Finish up your beverage, if you haven’t already, and get ready to take a step back to enjoy what you have done.
You will notice that there are a few nubs that surround the inlet on the airbox, use your grinder to shave these down to fit hose around the airbox and feed the hose into the engine bay, this will allow you to connect the hose to the airbox. Once you fit your airbox in the engine bay and connect the snorkel hose to it, tighten up the bolts to secure the airbox and hose clamp. Get your air filter back in there and re-connect your airflow sensor.
Finally, go back and tighten up all of the nuts on the inside of your fender well, make sure they are nice and tight to avoid vibration. Last but not least, lay a piece of 3M tape on the groove of the snorkel and firmly press it to the a- pillar. I have had it this way for a few weeks now and have not noticed any vibrations and I am happy with the result. I did keep the original hardware just in case.
THAT’S IT, YOU’RE FINISHED!
Final Thoughts
Honestly, if you are thinking of doing this install yourself, go for it.
I psyched myself out on this one for a while thinking I would ruin my fender. The install process is really easy, even for a beginner. After driving the truck around for a few weeks now, it does seem to run slightly smoother.
It could be the placebo effect, but for the article’s sake, we are going to table that option. It does make the truck look like a beast and I truly look forward to really putting the Dobinson Snorkel to the test in the coming months.

I just did mine today and this was BY FAR the most frustrating, annoying, hard install I’ve ever done lol. And I’ve done hundreds of different mods to my truck! Never doing a snorkel install again haha.
Love how the bed shell looks on this gen3, can you share specs of it?
This is an ARE classic for the short bed.