

Jumping into suspension and all of its components can be overwhelming. There are a plethora of moving parts that although separate, collectively work together. For the layman, suspension loosely means shocks and struts, but many other parts go into building a durable suspension system that’s capable of handling the toughest terrain.
Bump Stops
When I built my rig and upgraded my suspension, I knew ahead of time that I wanted to swap out the OEMs that came on it. They served their purpose, but only to an extent. They were not designed to handle big impacts regularly.
They were built to decrease the lesser impacts that you would face on the road like potholes and speed bumps. It’s also important to note, the factory bump stops are only meant for stock length suspension. To prevent damage, and improve your ride, you’ll need to upgrade.
Although my Tacoma is my daily driver, I try and travel off-road regularly. The OEM ones just weren’t cutting it for me, and I knew I needed to upgrade. Just to reiterate, you should upgrade whenever you upgrade your suspension.
U-Bolt Flip Kit
Off-roading is usually a game of clearance too. A lift and tires can significantly help with that, but there are several other things you can do to increase the distance of your truck’s components from the ground.
One of those things is a U-bolt flip kit. This kit changes how your leaf springs attach to your rear axle to gain clearance near the rear axle. It’s also important to note, that the OEM U-bolts, which hold the leaf springs to the axle, as well as the rear bump stops, also have their limitations. The bulkier mounting plate of the factory U-bolts mounts beneath the axle, and adding a flip kit can add useful clearance.
Table Of Contents
Company Overview
DuroBumps is a U.S. based company that designs, engineers and manufactures all of its products in the U.S.A.
The company is located in Arizona and they focus on creating the best quality bump stops on the market for the off-road circle, with a strong focus on Lexus and Toyota.
Their kits are built tough and vehicle specific. All products are also compression/strength tested before leaving the production facility. Some of the other supported models besides the Tacoma include the 4Runner (front bump stops & rear bump stops), Tundra, Land Cruiser, and a few more. More kits are always in development.
Find It Online
- 2nd & 3rd Gen (2005-2023) Tacoma
- Front: Check Price
- Rear
- No Lift Required: Check Price
- 2″+ Lift: Check Price
- U-Bolt Flip Kit: Check Price
These are made to help prevent bottoming out, while at the same time, not interfering with shock valving and dampening. Rest assured, if you decide to go with these guys, you won’t be disappointed!
Complementary Mod

As I previously mentioned, building a decent suspension system isn’t just about swapping out the shocks and struts. Granted, that’s the largest and most important component to improve, but it’s not the only one. Upper control arms along with lower control arms play a major factor in the travel of your suspension.
Furthermore, an important upgrade that many might overlook is the importance of bump stops. There are various types and styles on the market, and they all serve a slightly different purpose depending on what your needs are. From beefier rubber options to hydraulics, their purpose is the same. They limit travel and absorb impacts, and by doing so, they prevent damage to expensive parts and provide a smoother ride.
Aftermarket options are designed with off-road drivers in mind. The drivers who constantly flex their suspension under full articulation repeatedly. They limit the suspension just enough so that you aren’t bottoming out on your shock and damaging your suspension components.
Choosing the DuroBumps Kits
My main goal was to not break the bank, yet find a decent bump stop that will satisfy my needs. DuroBumps caught my eye with their U-Bolt Flip Kit as well. They utilized the same mounting points as the OEM, and the price wasn’t over the top.
A lot of companies require different mounting points for their products, but because DuroBumps reused the original mounting points this meant the install process was going to be that much easier. I’ll break down their key features later on along with my thoughts about the product, but I want to cover the install process first.
Key Features
This kit has some key features that caught my eye, especially for their price tag.
- U-bolt Flip Plates measure 3/8” x 3″ x 7.75″
- Powder-coated to prevent corrosion
- Made with Dual Durometer Rubber
- Offers three sizes to accommodate vehicles with or without lifts
- No loss of up travel
Installation
The install process is as simple as removing a few bolts. You will need a decent socket wrench set, along with a large wrench to remove the front OEM bump stops. I used a monkey wrench for the front, and it did the job.
You need something large enough to give you enough leverage to give them one good turn to loosen them. A heavy-duty pipe wrench works really well here. Once they are loosened, you can unscrew them by hand the rest of the way. You will also need a jack and jack stand. I used a hydraulic jack, and the jack stand is just for added safety.
Find It Online
- Mechanic’s Tool Set
- Heavy-Duty Pipe Wrench: Check Price
Step 1. Remove Front Tires

The first step is simple, but not necessary. Just remove the front tire from the vehicle. You don’t have to remove the tire to gain access to the bump stop.
You can turn the tire to the opposite side of the vehicle depending on which side you are working on. Removing the front tire though will provide you with much more space to work. I highly recommend saving yourself the pain of working in a cramped space and just remove the tires.
Step 2. Remove OEM Bump

Locate and remove the OEM bump stop. It will be located behind the brake caliper on the frame of the vehicle.
Using a wrench grasp onto the top metal portion, and turn it until it is loose enough to remove by hand. It should only take a few turns until you can do it by hand.
If you live in an area with harsh winters, this step might be a bit more difficult. Spray the inside of the frame where the welded nut for the bump stop is with penetrant beforehand.
Step 3. Install Front

Durobumps must be installed using the PROVIDED blue thread locker along with the provided hardware. It is not a suggestion or optional. All mounting hardware and a single-use blue thread locker are provided in each kit, per the instructions it is required to apply the blue thread locker to the mounting bolts prior to installation
Then hand tighten the bolt and bump stop to the vehicle until you can no longer hand tighten it. Using a socket wrench fully tighten until it is secure. Now place the tire back on, and repeat the process for the opposite side of the vehicle.
Step 4. Assemble Rear
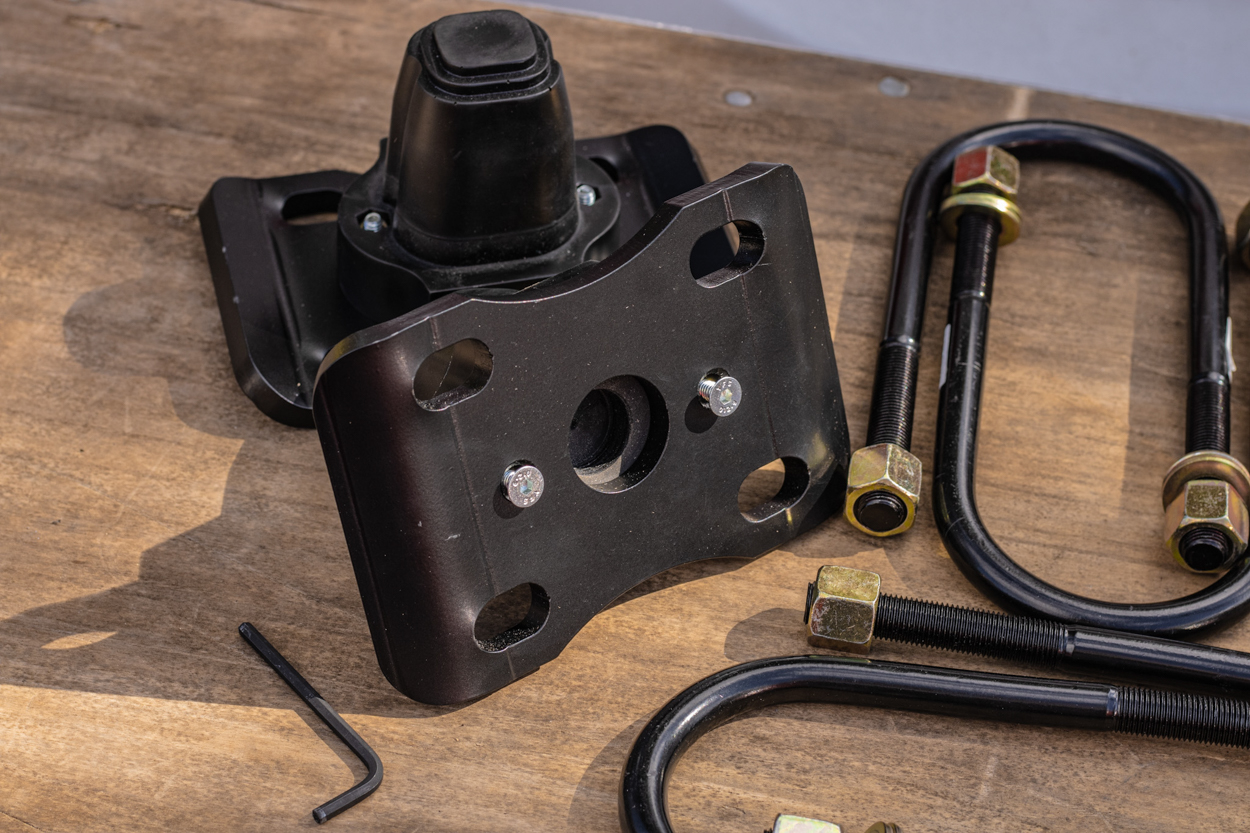
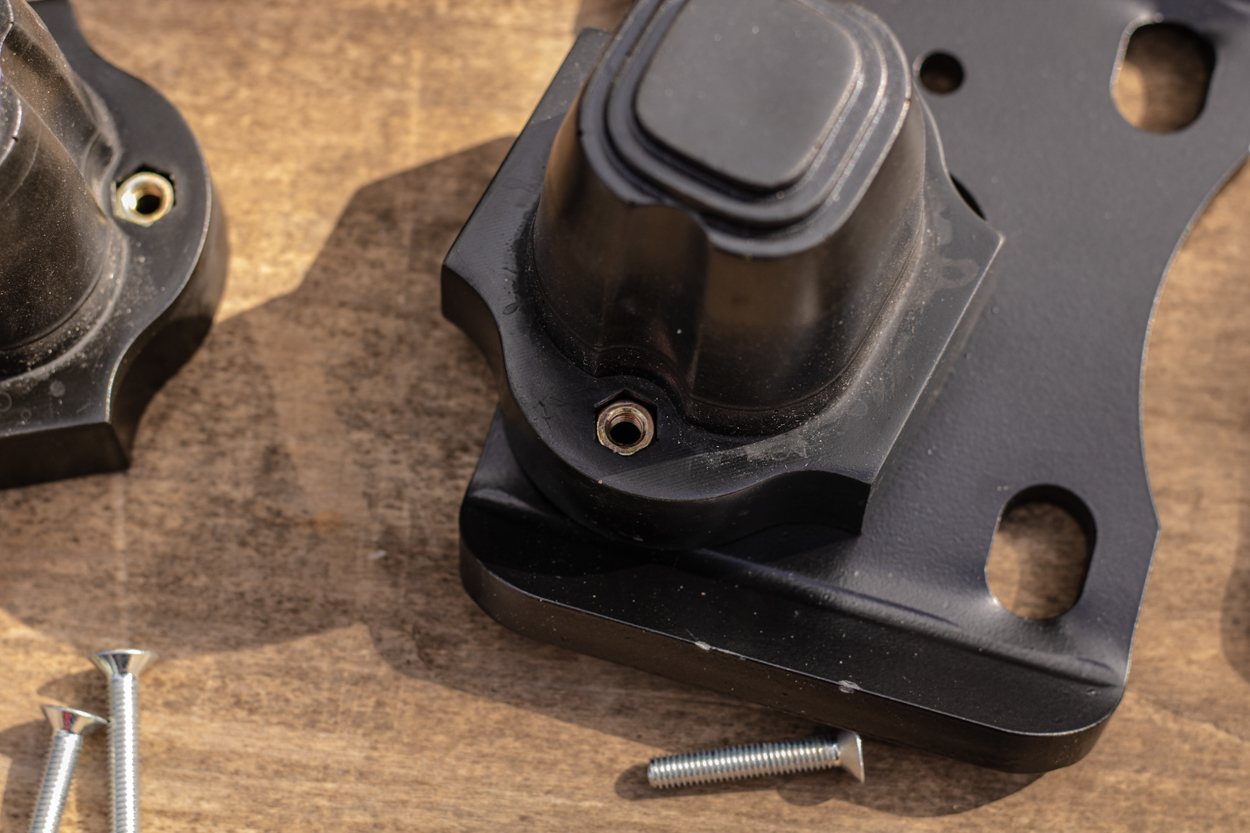
DuroBumps provides you with two rear bump stops, two 3/8” steel plates, and four nuts and bolts to mount the bumps to the steel plates. Take the bolts, and remove the nuts from each of them.
Place the nuts in the holes on top of the base. The hole will be shaped just like the nuts and will house them perfectly. Next, place the bump stops on top of the steel plates, and slide the bolt through the bottom of the plate.
Tighten the bolts with the provided Allen wrench to secure them to the plates. This step is pretty simple, once you have your hands on the kit, you’ll know exactly what to do.
Step 5. Remove OEM Bump

Like step one, remove the rear tires from the vehicle. Again, it is not necessary to remove the tires, but it will offer you much more space to work. I highly recommend removing all the tires.
Locate the OEM bump stop that is resting on top of your vehicle’s leaf springs. It will be secured to the vehicle by four nuts located on the bottom of the leaf springs under the plate below the rear axle.
Loosen all four nuts, and you will then be able to remove the plate. Once the plate is off you can now remove the two U-bolts and bump stop. The U-bolts and the bump stops are mounted together.
Step 6. Install Rear
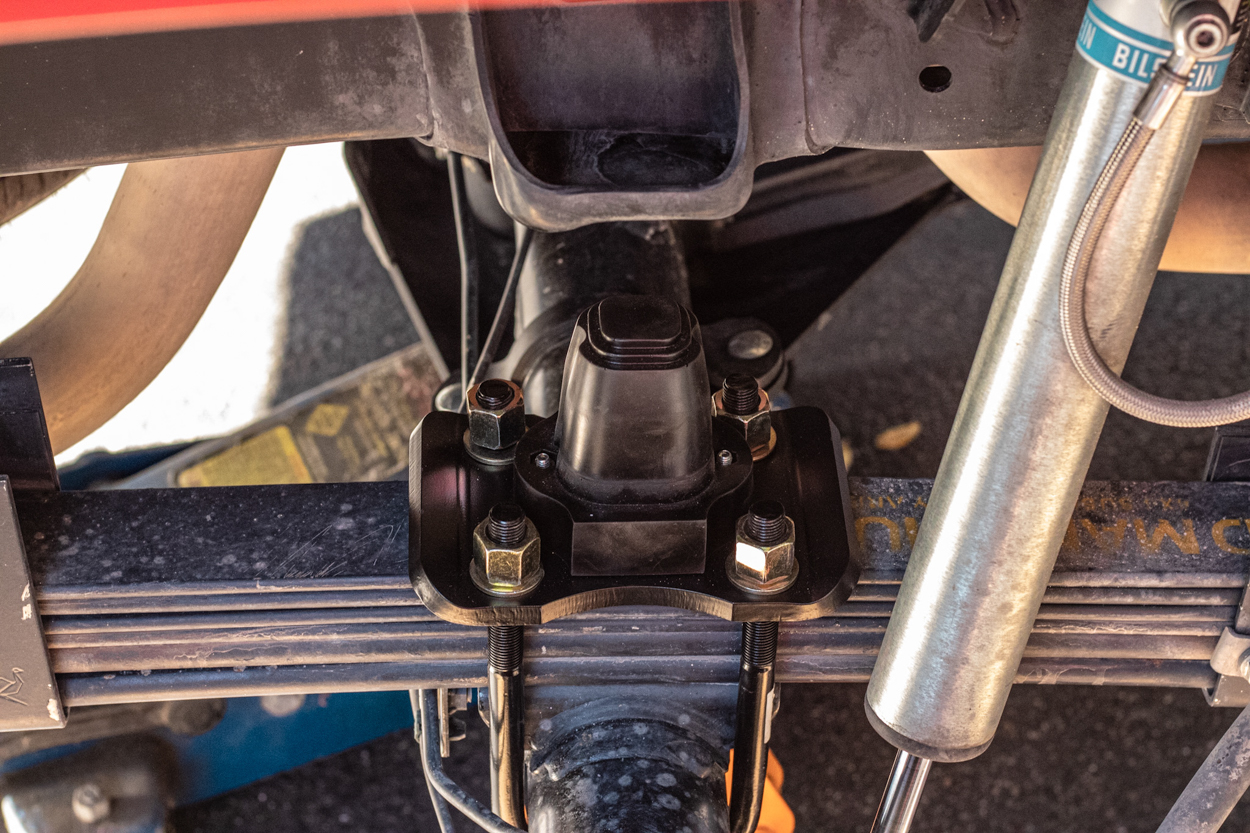
With the OEM rear bump stop off you can now install the DuroBumps. Place the rear in the same place that you removed the OEM one.
Using the provided U-Bolts slide them upwards around the axle, and through the holes in the steel plate. Apply the washers followed by the nuts, and tighten fully until the bump stop is secured to your vehicle. Repeat the process for the other side.
YouTube Video
Final Thoughts

I installed these just before my trip to Big Bend National Park, so I got to run them through the wringer. They performed exceptionally well and helped cushion the larger impacts.
I noticed a substantial difference with a much smoother and faster rebound. Under full articulation with the suspension flexed to the max, I noticed much smoother up travel. The dual durometer rubber definitely dampened the impacts much better than the OEM setup.
This is a great product for the active off-road user. It is not a hydraulic bump stop, so I really can’t compare the two. They are in two completely different ballparks for functionality, but the DuroBumps showed up to work!
For the application that I was looking for these did the job. If you’re in the market for a quality bump that will do the work you demand, without breaking the bank, then look no further.