
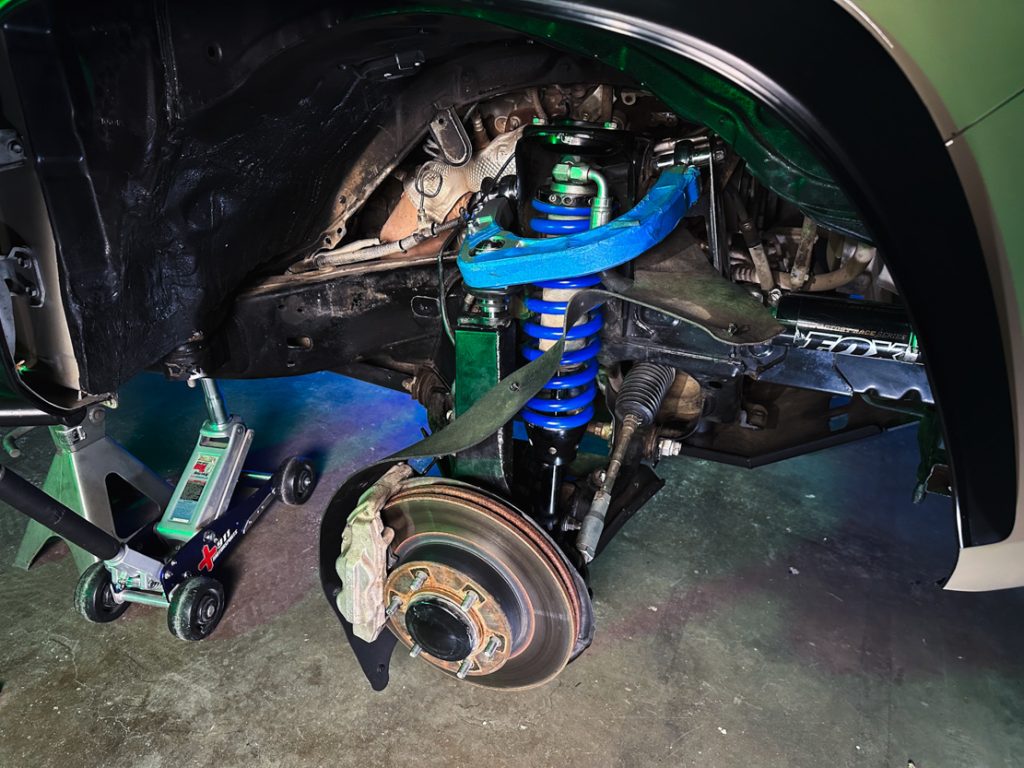
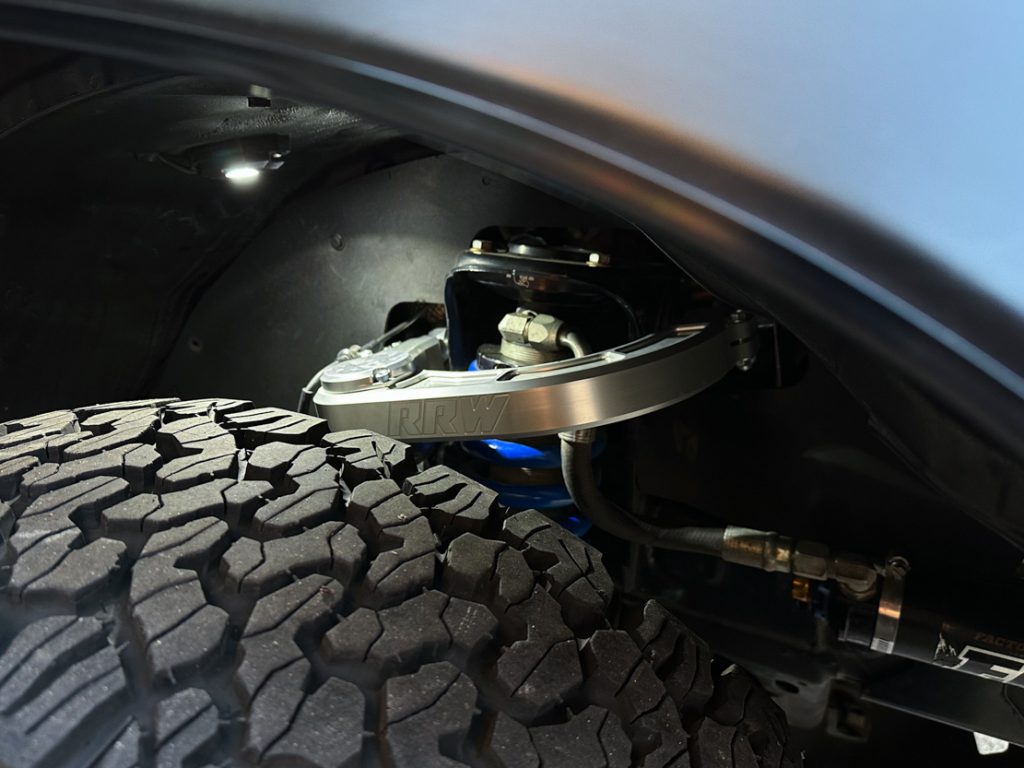
One of the most important suspension components to upgrade when lifting your Tacoma are the upper control arms. Lifting the truck forces the stock arms into a constant downward angle, decreasing the caster and increasing the positive camber. With their shorter length, the factory arms can also hit the coilovers when the suspension cycles.
The factory arms were not designed to accommodate a constant change in angle. This creates premature wear on the ball joints, accelerated tire wear, and worsened handling. Aftermarket upper control arms address these issues, correct your alignment, and have better clearance for coilovers.
Table Of Contents
Different Types
Most aftermarket options built for lifted applications are designed with a relocated ball joint position to allow for less bind, more wheel travel, and correct suspension geometry. The arm’s construction and hardware are much stronger to accommodate off-road driving.
The UCAs on the market pretty much come down to four design options.
- Forged – The weakest and cheapest option. This should be avoided since these options are usually poorly manufactured and won’t last as long as factory parts.
- Tubular & Boxed – The most popular options on the market. Boxed is the stronger of the two. Both tubular and boxed fabricated arms are extremely strong and can be found in most mid-travel and long-travel kits.
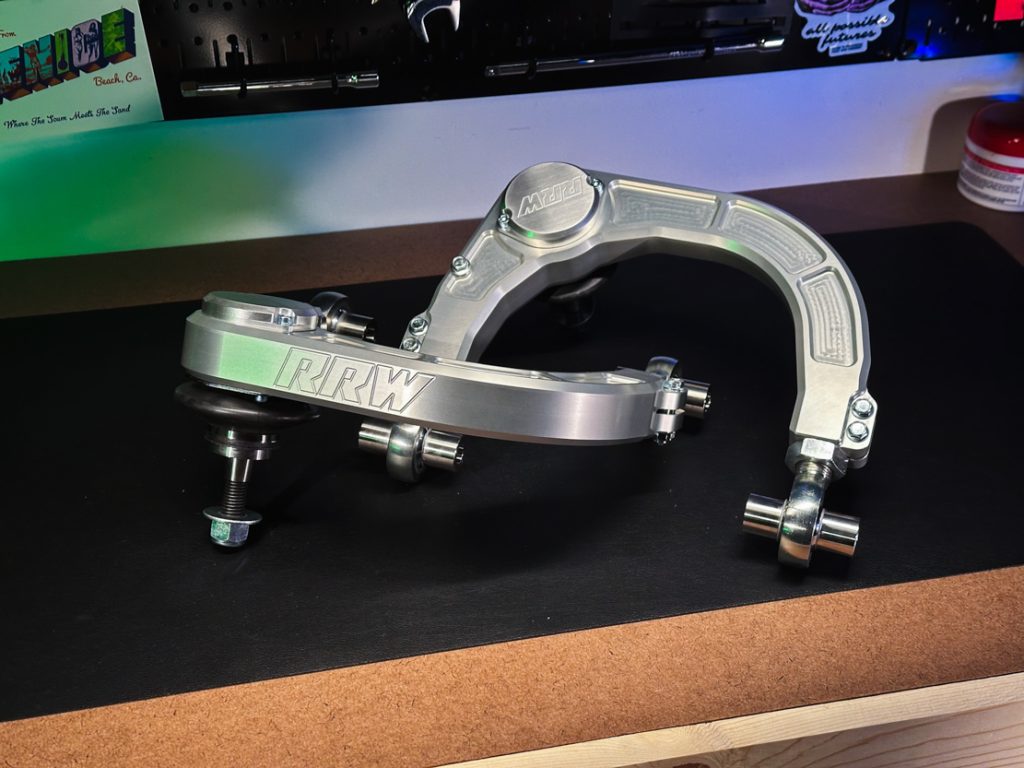
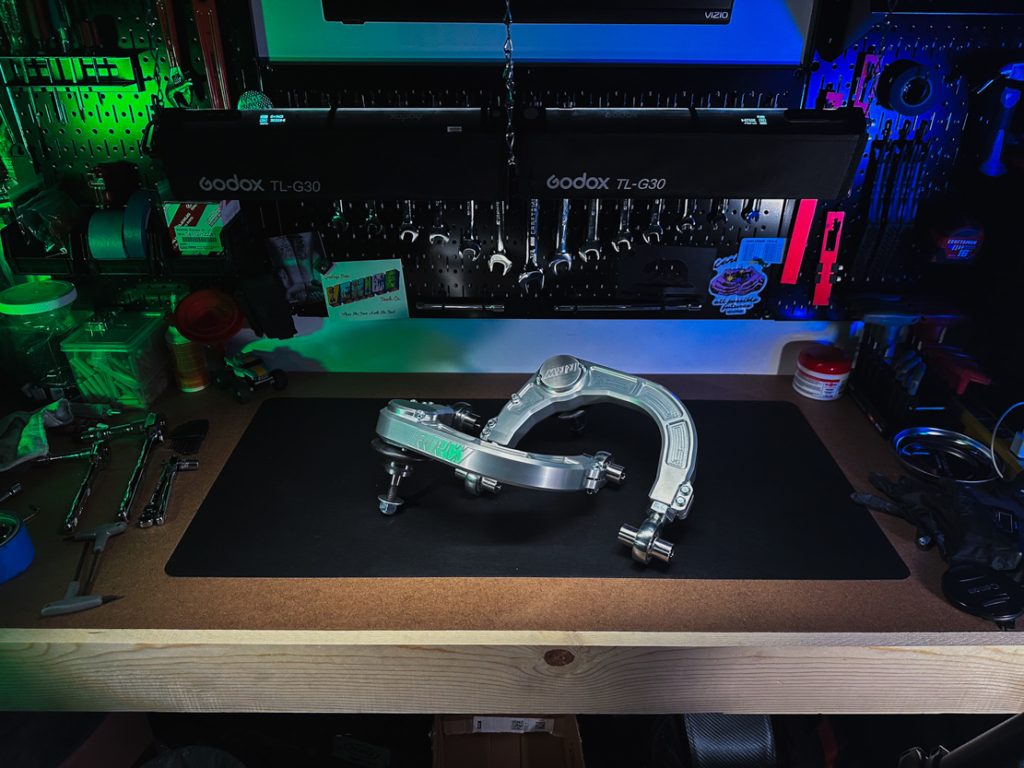
- Billet Aluminum – The strongest and most premium option. Machined out of a solid block of aluminum, it is the strongest and longest-lasting. There’s virtually no chance of breaking and only routine maintenance is required. The RRW UCAs fall into this category.
Features
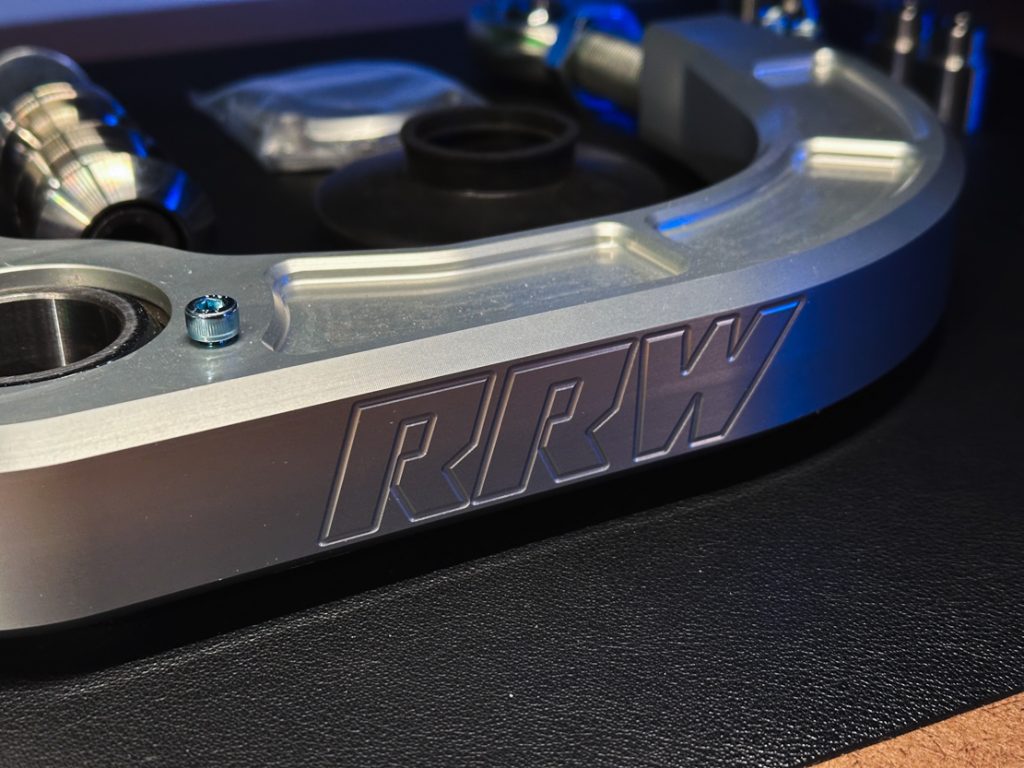
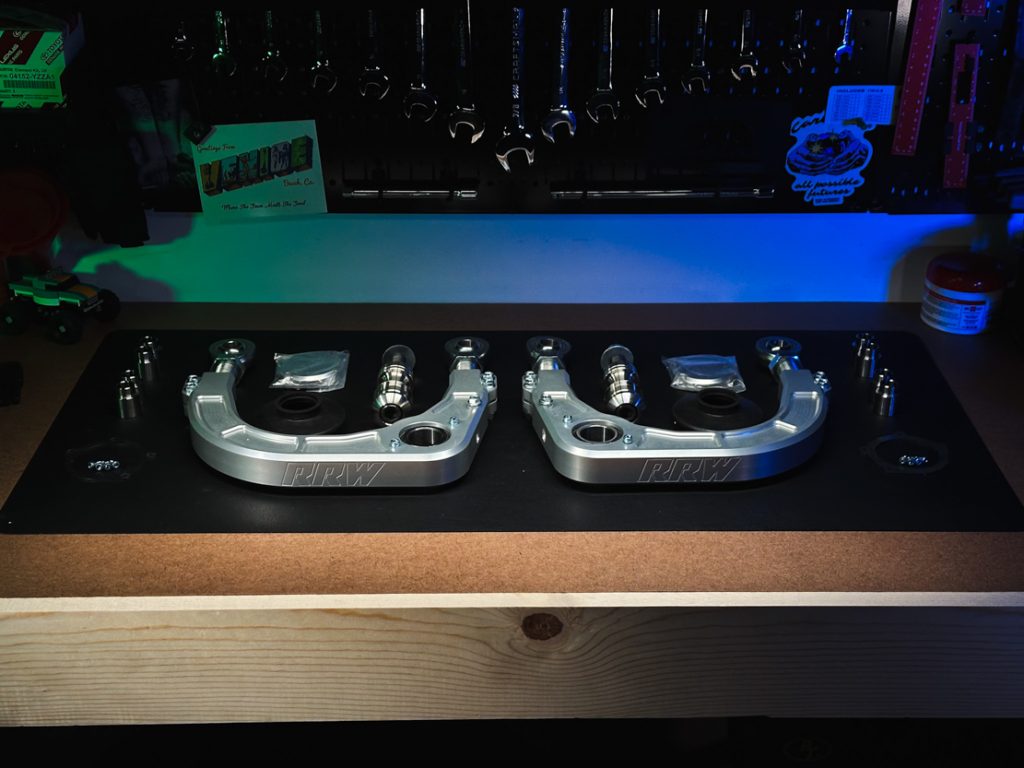
After months of R&D, RRW has released these. They’re designed to work with lifts of 1.5-2.75” and are machined from USA-sourced 6061-T6 billet aluminum and clear anodized.
Components

- 1.25” PTFE lined FK uniballs (spherical bearings)
- 7/8 ” PTFE lined FK rod end bearings
- Stainless Steel CNC machined misalignment spacers
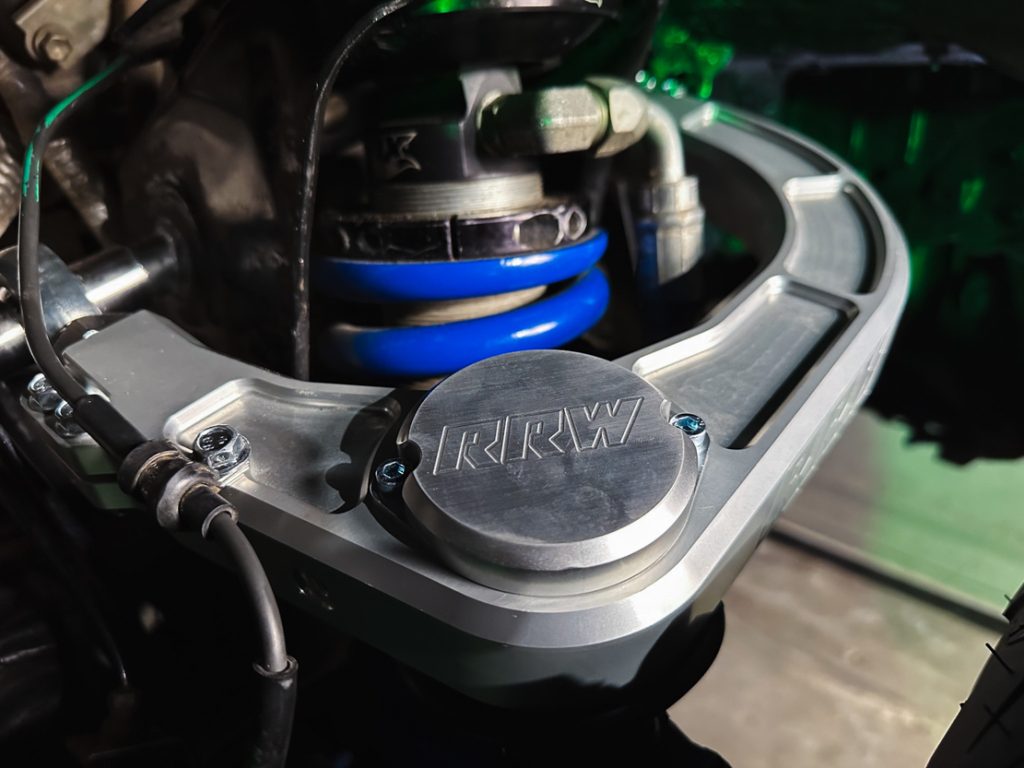
- Billet dust caps
- Proprietary rubber dust boots that enclose and seal the uniball from the elements
- Black or clear anodized
These control arms are beefy! My current arms are tubular uniball arms with bushing pivots. They’ve worked well with my suspension setup but the bushings have worn out twice. The uniballs squeak from being exposed to the elements and need to be constantly lubricated.
Fully Protected Uniball
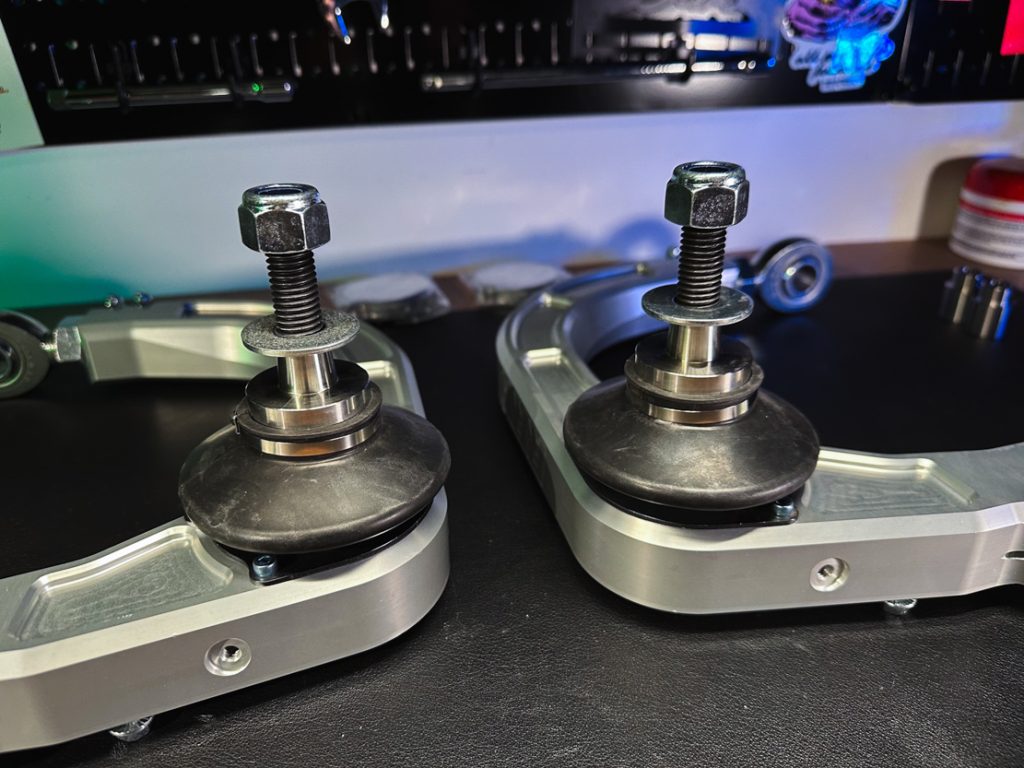
One of the features I’m looking forward to the most from the new RRW arms is the uniball dust boots and caps that protect the top and bottom. RRW is the only billet UCA that offers a fully protected uniball joint.
Installation
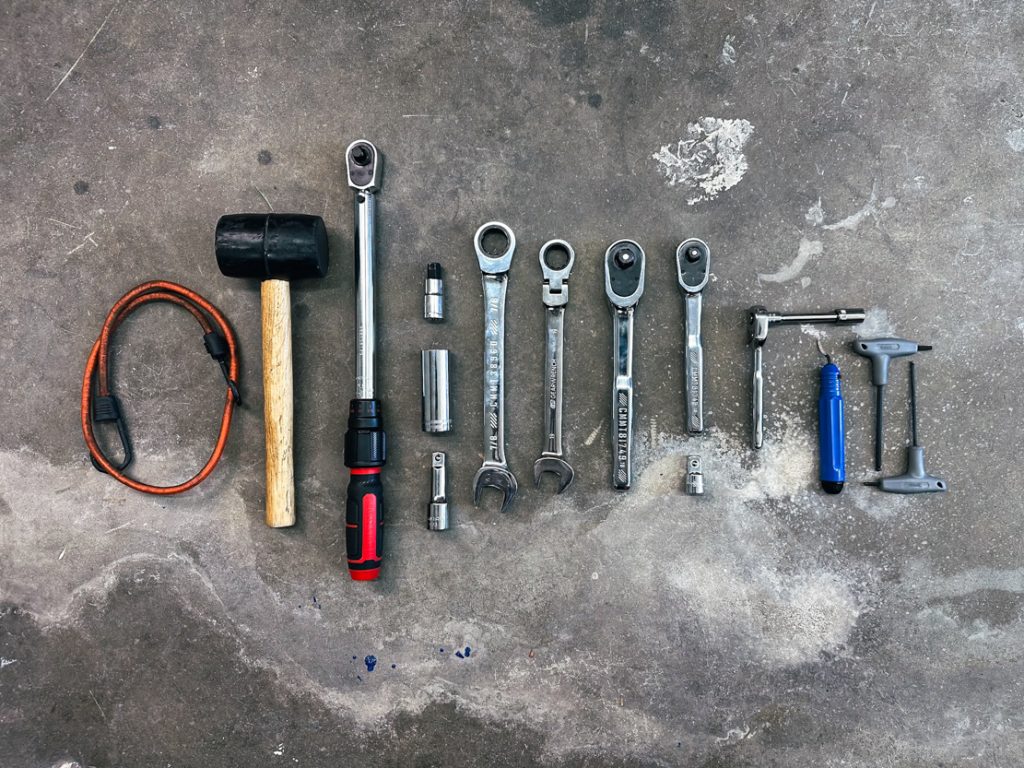
Tools & Materials
- 7/8″ Wrench
- 19mm Wrench
- 19mm Socket
- 7/8″ Deep Socket
- 12mm Hex Bit Socket
- 3/8″ or 1/2″ Socket Wrench
- 10mm Socket/Wrench
- Torque Wrench
- Rubber Mallet
- Deburring Scraper Tool
- 1.5-3 Ton Car Jack
- Jack Stands
- Wheel Chock
- Anti-Seize
- Blue Loctite
- Red Loctite
Optional
- Painters Tape
- Spare UCA Pivot Bolts
- Steel Cable Tie
Step 1. Remove Tires

Park on a flat surface and set a wheel chock behind one of the rear tires. Loosen the lug nuts on the front tires and then jack up the front of the truck. Use jack stands behind the front wheel well under the frame rail for safety.
Positioning the jack stands this way will give you a lot of room to work inside the wheel well. Once the jack stands are set, remove the lug nuts and wheels.
Step 2. Disconnect Spindles
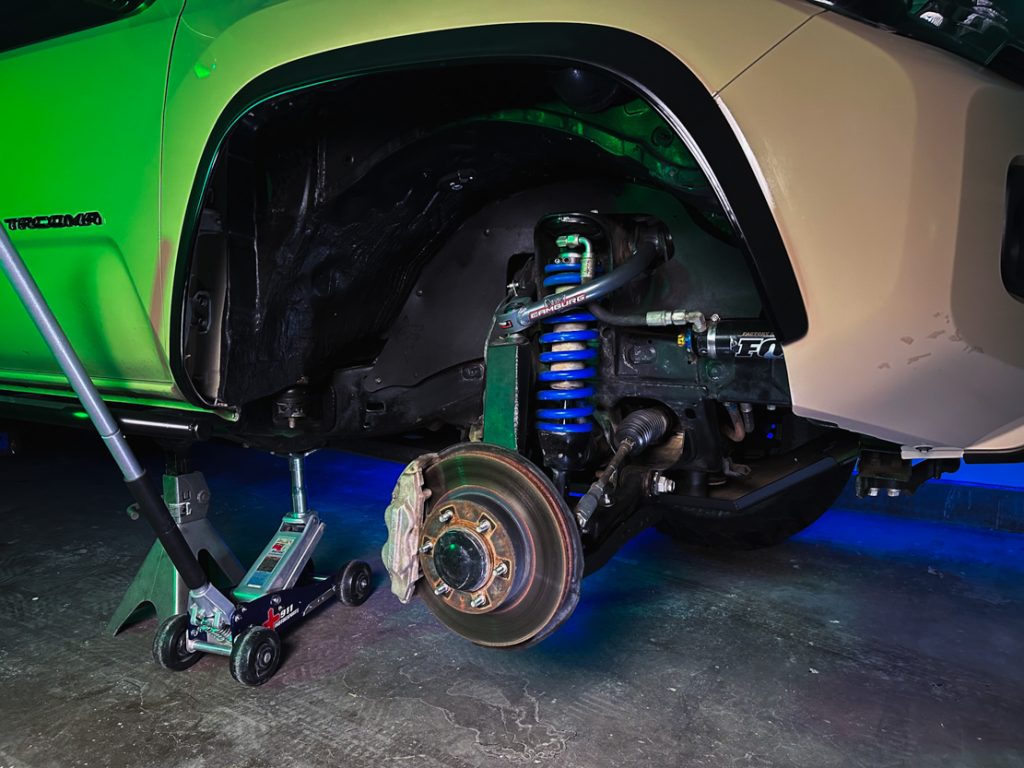
Next, remove the engine splash guards to expose the inner pivot points and disconnect the ABS wire attached to the arm with a 10mm. If you still have a sway bar, remove the link from the spindle with a 17mm.
Use a 19mm socket to loosen the ball joint stud from the top of the spindle but do not fully remove the nut. If you’re removing the stock arms, there’s a cotter pin that needs to be removed before the castle nut can be loosened.
Strike the top of the spindle with a rubber mallet multiple times to release the ball-joint stud. Once the stud is loose, you can remove the nut and disconnect the spindle.
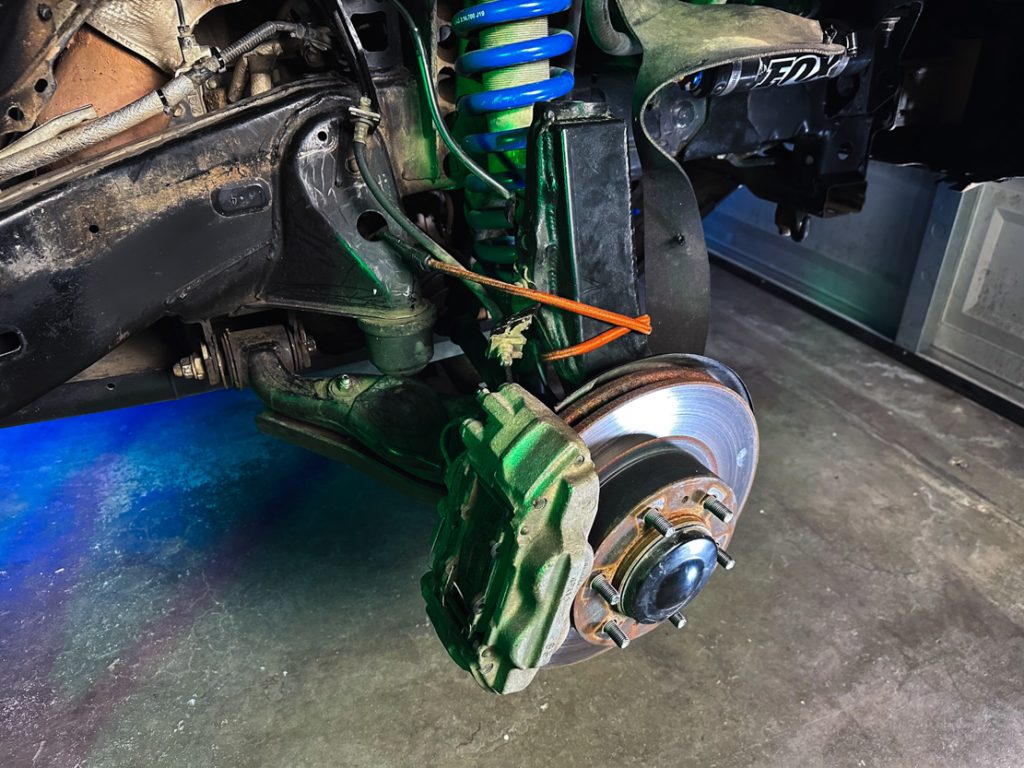
Support the spindle with a bungee cord so it doesn’t pull on the brake line. On 4WD models, this also prevents pulling out the inner CV or straining the CV boots and axles.
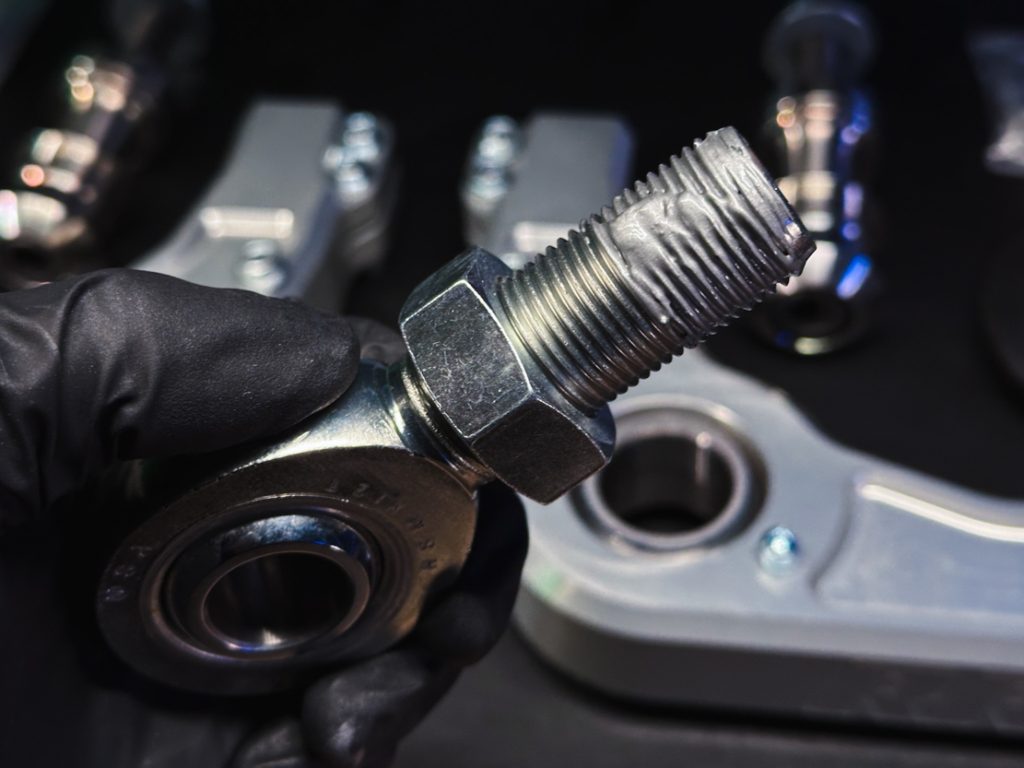
Remove Pivot Bolts
Using a 19mm and 7/8″ wrench, remove the UCA bolt. The length of the bolt can make it a little tricky to remove. You may need to bend or trim the inner fender for more clearance. Officially, you’re supposed to cut the bolts in half and replace them with new OEM bolts. I bent the inner fender back and used a hammer and punch to knock the pivot bolt head out.
Step 3. Stock Spindle Prep
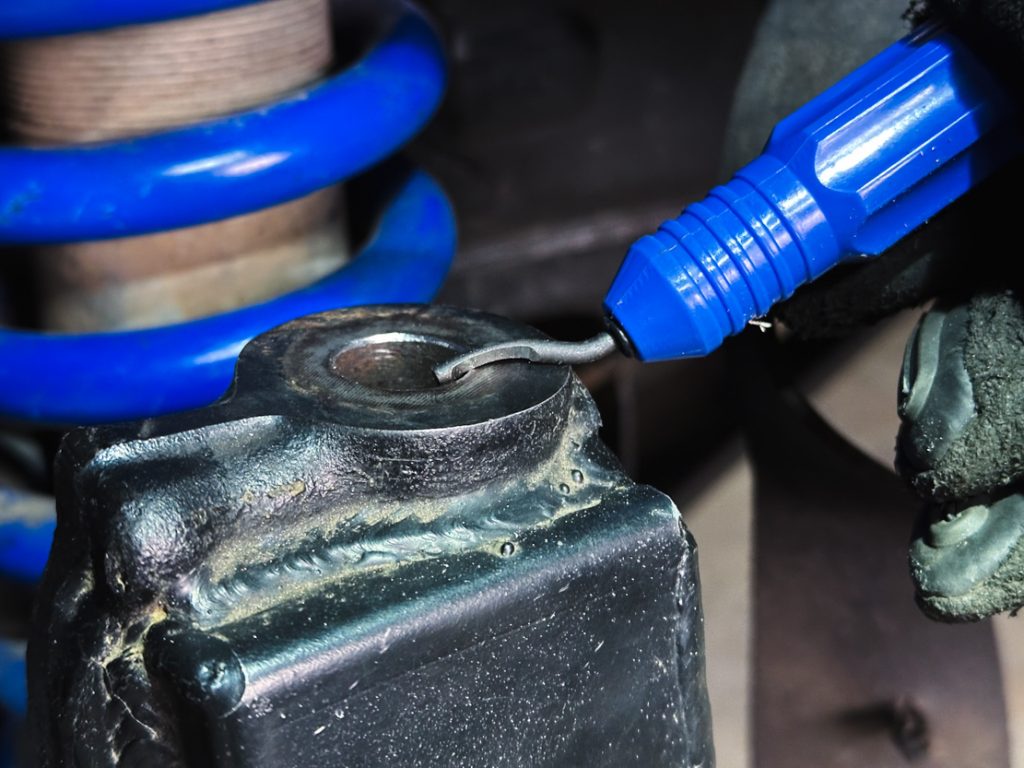
Use a deburring scraper tool and slightly chamfer the top hole edge of the spindle. This will allow the spacer to fully seat when tightened and eliminate possible stress on the risers. Clean the hole of metal shavings when you’re done.
Step 4. Arm Pre-Assembly
RRW recommends wrapping the arms with painter’s tape to protect them during installation. You don’t want to scratch those shiny and expensive arms!
If you received your arms with heims preinstalled, skip to Step 5.
If not, thread the 7/8″ jam nut onto the heims and apply anti-seize to the exposed threads. Install the heims on the arms so that they are facing vertically and the jam nut is making contact with the arm. Make sure less than one thread is exposed above the jam nut.
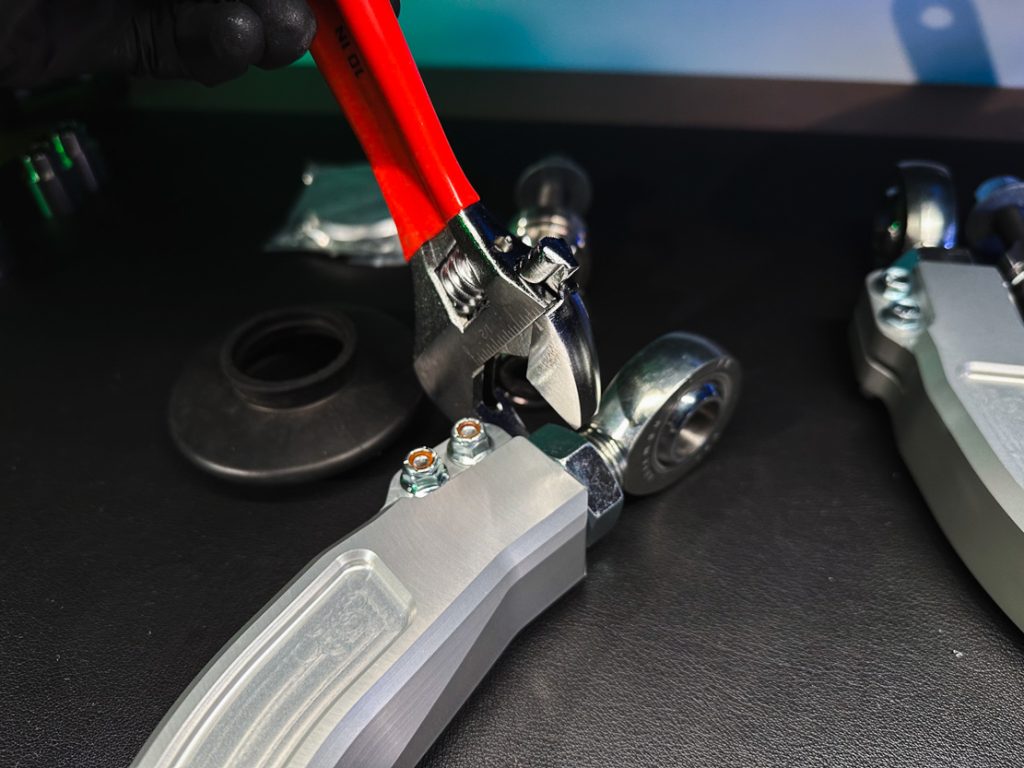
Use a 1-1/4” open-end wrench to fully tighten the jam nut while using an adjustable wrench to hold the heim in place.
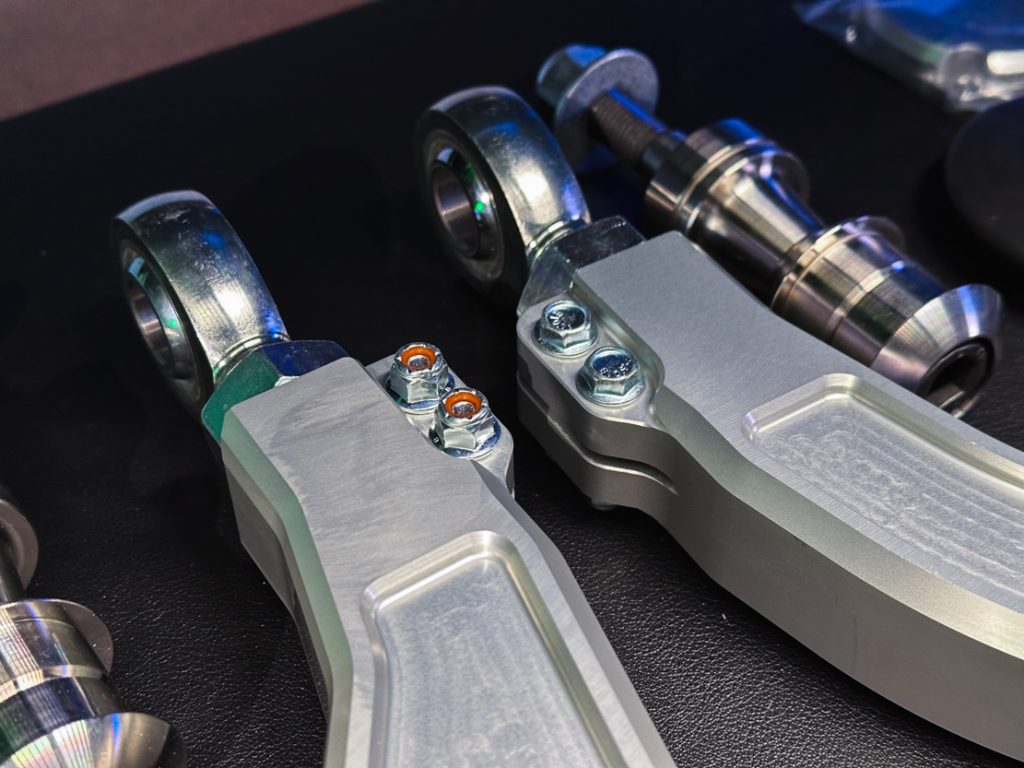
Next, install the heim pinch bolts into the arms.
Step 5. Mount Dust Boots
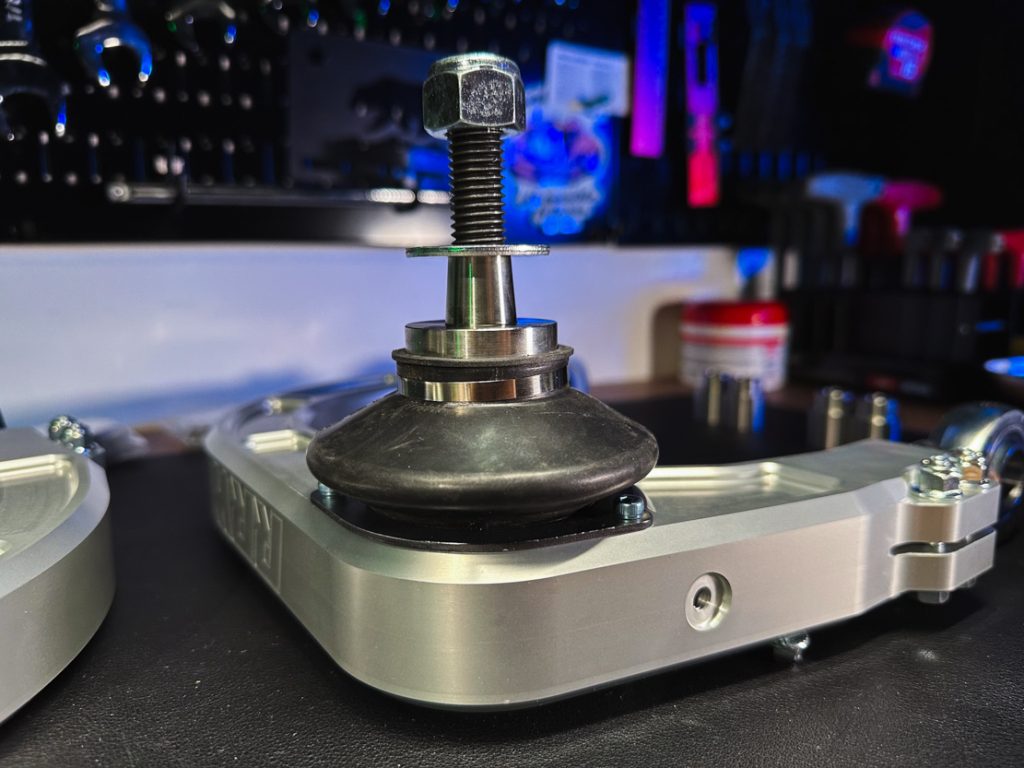
Assemble the uniball and dust boots. Starting with the uniball spacers, apply anti-seize to the surfaces making contact with the uniball and install them into the top and bottom of the joint. Make sure both spacers are fully seated.
Next, insert the spindle bolt through the misalignment spacers to help hold them together in the joint, and turn the arm over to install the dust boot.
Align the wider opening of the boot over the bottom of the uniball joint against the surface of the control arm. Use the boot bracket and four screws to mount the boot to the control arm. Make sure the bracket sandwiches the lip of the boot with the surface of the arm and tighten the screws evenly.
Use a steel cable tie to fasten the other end of the dust boot to the bottom of the lower misalignment spacer.
Apply anti-seize on the surface area of the pivot spacers that insert into the heims. Finally, install the spacers onto either end.
Step 6. Install New UCA
Install the upper arms using your old or new UCA bolt. You will not be re-using the large bolt washers. Clean the threads using brake cleaner and install the washer and nut with red Loctite. Then, torque to 85 ft/lbs.
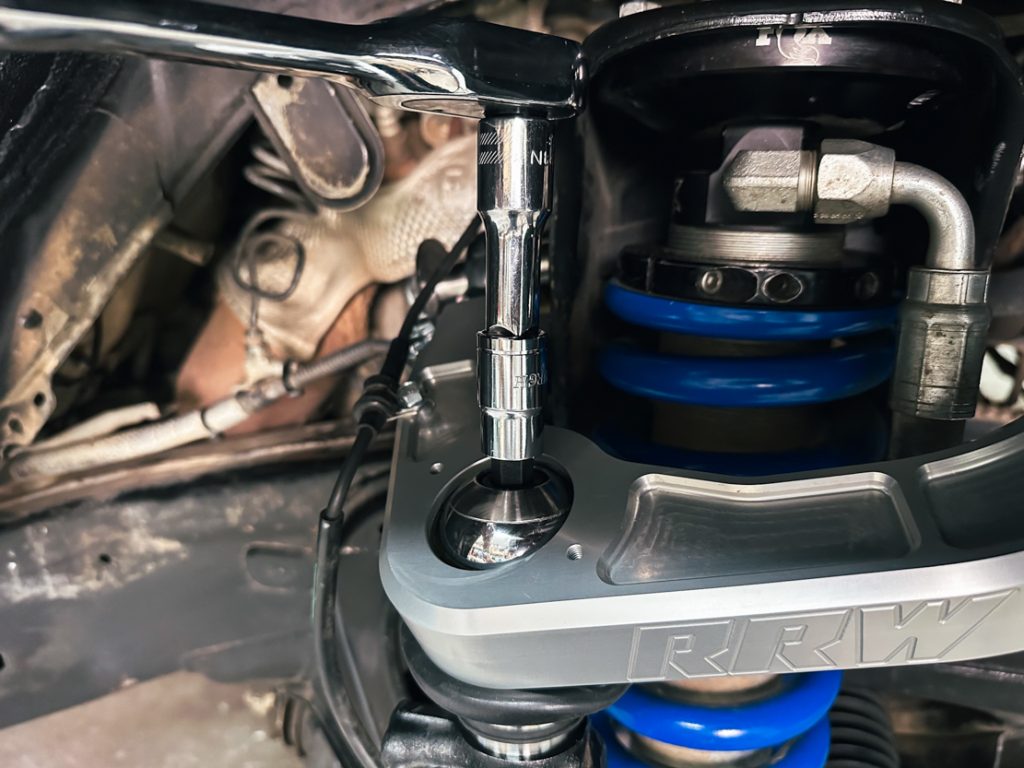
Install the spindle bolt with a 12mm hex bit socket, 7/8″ deep socket, and a drop of red Loctite. Slide the spindle bolt through the spacers and attach the upper arm to the spindle. You may need to jack up the lower arm and adjust the angle of the uniball joint. Ensure the lower spacer did not pull out slightly from the uniball or damage will occur. Torque this to 100 ft/ lbs.
Attach the ABS wire to the upper arm with a 10mm using the OEM wire clamp.
Install an O-ring inside the uniball cap. Then, apply a small amount of lube to the top of the uniball. Position and center the cap over the uniball and install the two cap screws.
Mount Front Wheels & Alignment
Remount the front tires and hand-tighten the lug nuts. Then, remove the jack stands, lower the truck, and torque the lug nuts to 82 ft/lbs.
Finally, you’ll need an alignment done at a qualified shop. Instruct the shop to max out the positive caster and set camber and toe to factory specification.
Impressions & Review
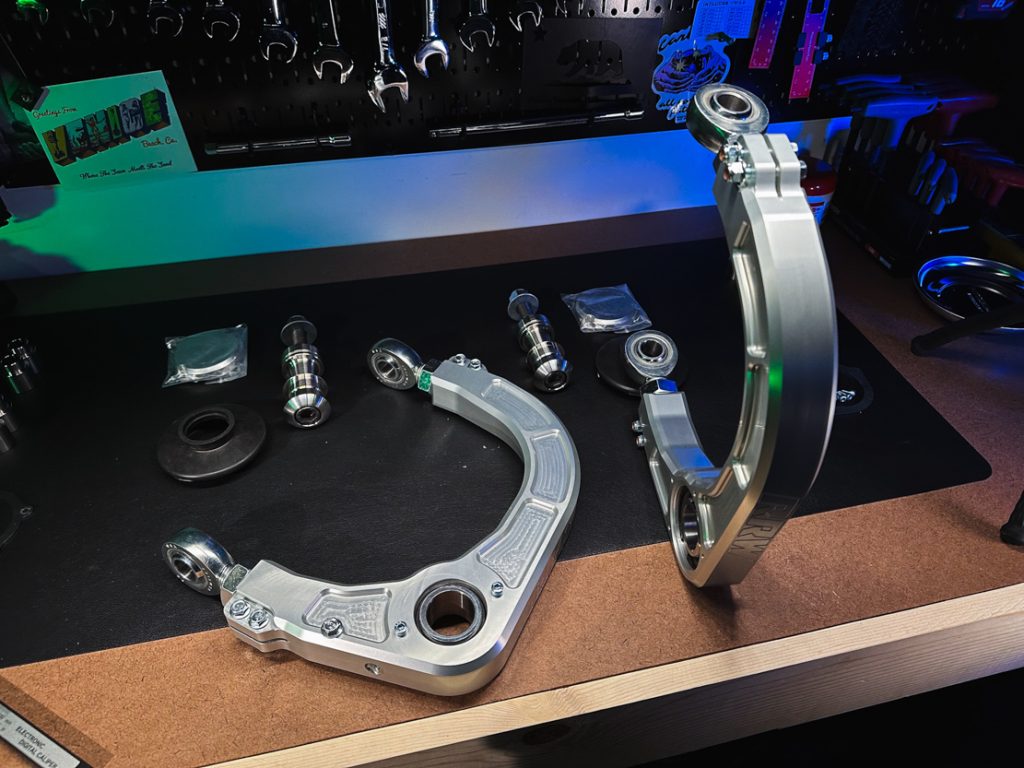
These billet arms are awesome – the beefy machined block of 6061-T6 aluminum looks great inside my wheel well. More importantly, they feel like a solid upgrade from the tubular arms I had before. Moving from polyurethane bushings to rod end heim joints makes a huge difference in handling performance and feels much more responsive.
I really like the fully sealed uni-ball caps and boots. The lower boot is a feature I haven’t seen before on this type of joint. This complete seal around the uniball will lower overall maintenance time and prevent that annoying squeak that can sometimes develop when they get dirty.

Overall, the arms have a premium feel, noticeable handling performance gains, and a strong, lightweight design.
Final Thoughts
With all that being said, they are not cheap. While they’re competitively priced with similar arms from other brands, it’s still considerably more money than popular tubular control arms. However, the improved handling is felt every time you drive the truck.

They could very well be the first and last pair of upper control arms you’ll ever need for the lifetime of your truck.
I love that RRW has had a good run in so many different product categories. They’ve always made wheels, but their rock sliders were dope, and neat to see high-end suspension components now.