
There is no denying that some parts of our trucks should have been built differently from the beginning, and by differently, I mean that they should have been upgraded or sturdier. But, we all know some corners have been cut.
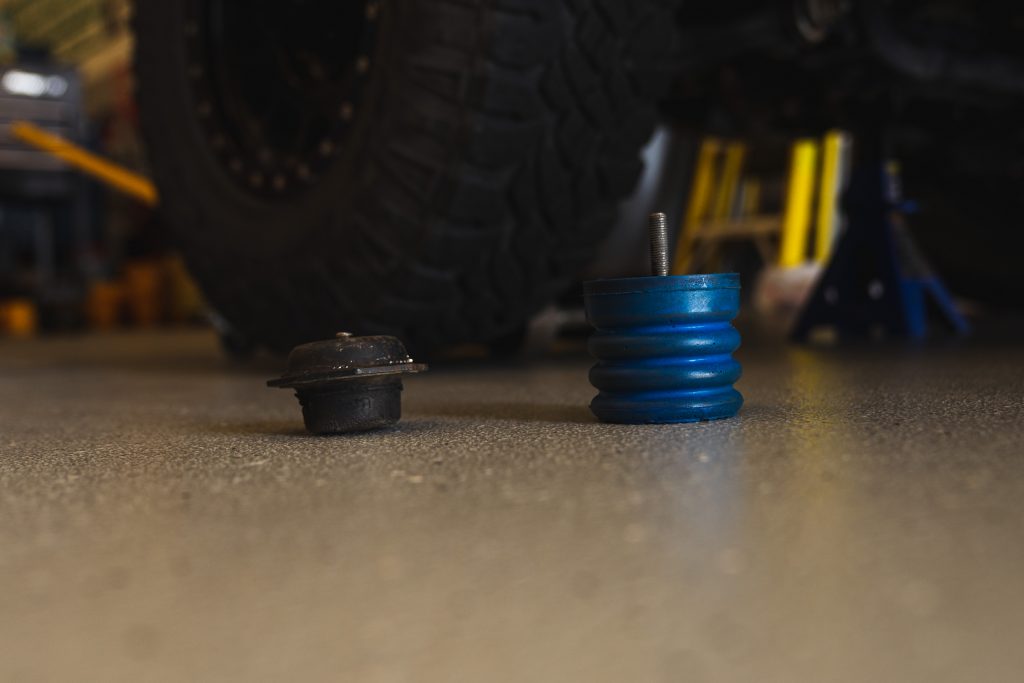
For example, the front and rear bump stops are almost useless in terms of comfort. The OEMs are incredibly small and the material that they’re made of is not the best when it comes to absorbing road forces. There have been many instances where I’ve bottomed out, and as many of you would know, it’s not a great feeling. To smoothen out your ride, you can change out your front coilovers and be done, but at the end of the day whenever you hit some serious bumps you will still want the assistance of upgraded front bump stops to complement your suspension.
The easiest remedy for the rough ride is to upgrade your current setup, and one solution is the SumoSprings Kit. These upgraded bumps are a no-hassle install and you’ll be glad you have them later down the road. If you’re thinking about the rear, SSI has you covered there too.
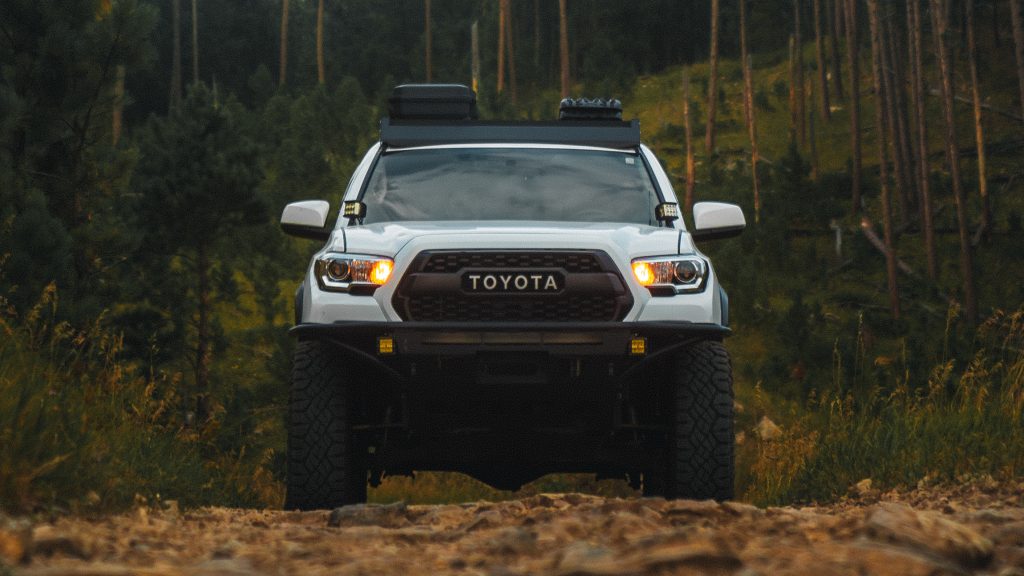
Although this post is centered around the 3rd Gen Tacoma, these fit the 2nd Gen Tacoma and several other Toyota/Lexus models.
Find It Online
- SuperSprings Bump Stops For (2005-2023): Check Price
Table Of Contents
Product Overview
SSI is a company that started in 1996, offering maintenance-free suspension products, backed by a lifetime guarantee. They have been innovating the suspension market for many types of vehicles. SSI offers their sturdy bump stops made out of microcellular polyurethane, and their products range from bump stops to coil springs. But in this article, we will be discussing their front kit.
SSI has made it easy for consumers to differentiate what they will need. In the case of rear, they decided to color-code by assigning the color blue and black to resemble the weight capacities. For the front, however, I ended up receiving the blue ones, which improve the ability to carry loads to an impressive 1,400 pounds at 50% compression. At this time, they only offer the blue option, but near as I can tell, it should cover 99% of the needs of those of us who drive Tacomas.
Installation
For this install, there are not many things that are required to get the job done, other than some basic tools and elbow grease. Although, I must point out that in my experience, stuff didn’t go as planned.
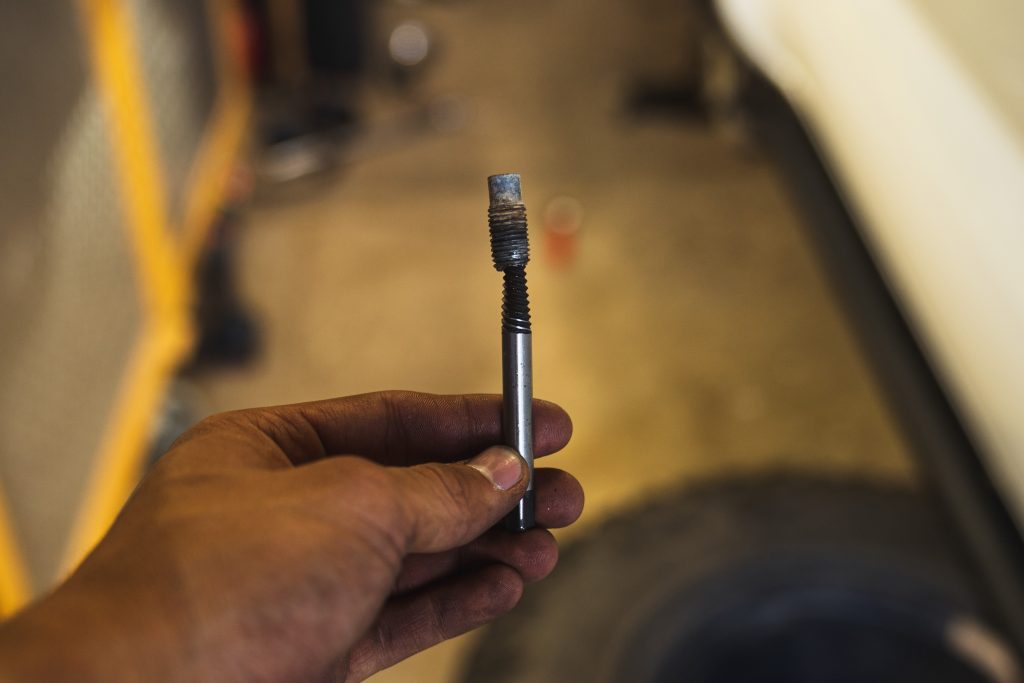
Thing is, I had both of the old bolts break while I tried to remove them. Which led to multiple hours of trying to find a way to remove those broken bolts without trying to drill through the whole surface. But, thanks to the internet, I was able to find a tool that made stuck bolt removal a walk in the park, and that tool was a screw/bolt extractor. Have you ever seen a screw pull out another screw/bolt? Well, that’s what a screw/bolt extractor does, and this was my first time using one.
I would recommend having this tool around because as you know, it saved me a ton of hassle. Moving on, my assumptions on why the old bolts broke are not clear, but they are more than likely the result of pressure built up over time, which caused it to overtighten. Corrosion likely played some role as well, since I live in a harsher climate. I may be wrong, but at the end of the day just know that if your old bolts break, it’s not the end of the world.
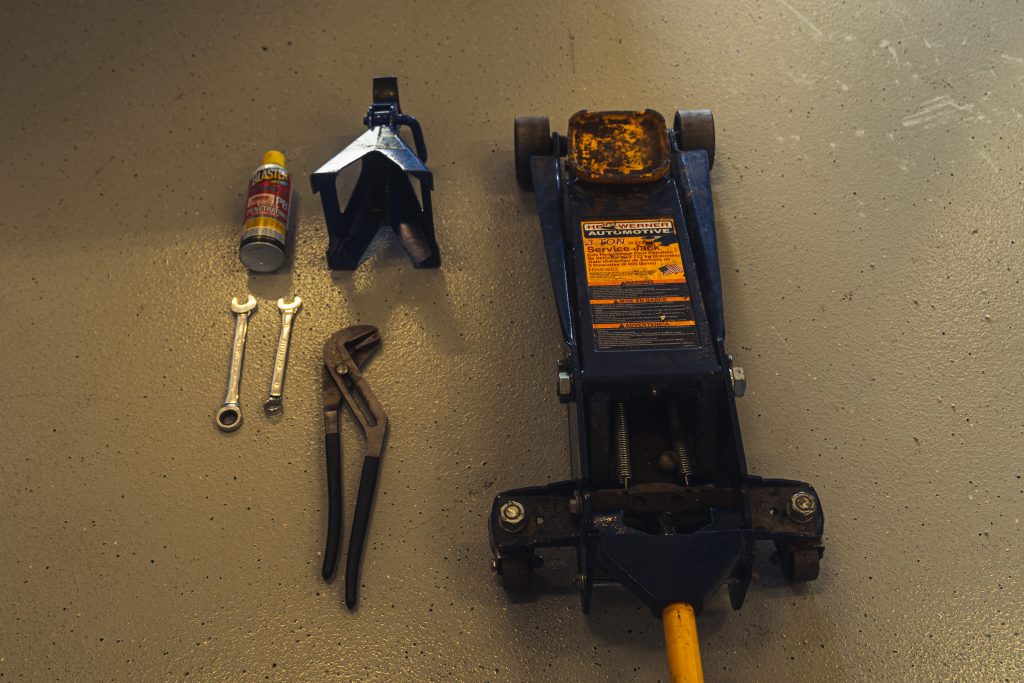
Tools & Materials
- 3-Ton Jack
- Jack Stands
- PB Blaster (optional)
- Adjustable Wrench (optional)
- Mechanic’s Tool Kit (17mm or 11/16 wrench)
- Screw Extractor (a must if your screw breaks)
- Right Angle Drill Attachment (a must if your screw breaks and don’t want to remove your lower control arm)
Let’s get to the install!
Step 1. Lift Truck & Remove Wheels

First things first, you don’t need to jack up and remove the tires from your truck to get this install done, but it is recommended if you want to have the most room possible to fit those large channel lock pliers that will assist in removing your old ones.
Step 2. Place Jack Stands & Locate

Once you get the truck jacked up with the tires removed, place the jack stands somewhere stable before you go under your vehicle.
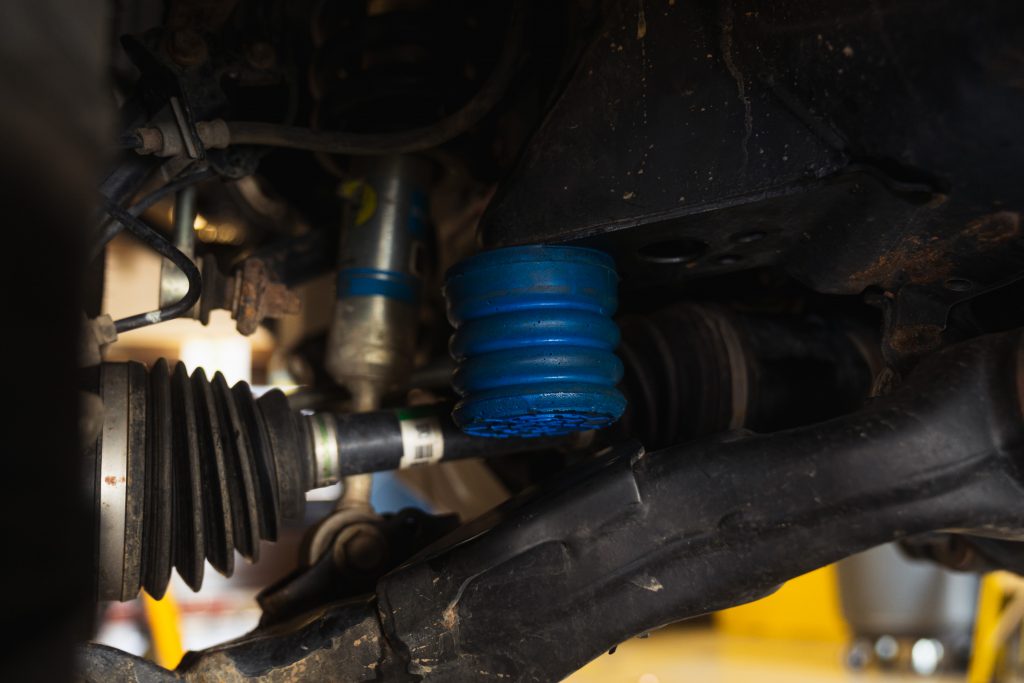
Then proceed to locate the old bump stops which are behind your front CV axle.
Step 3. Remove OEM Bumps

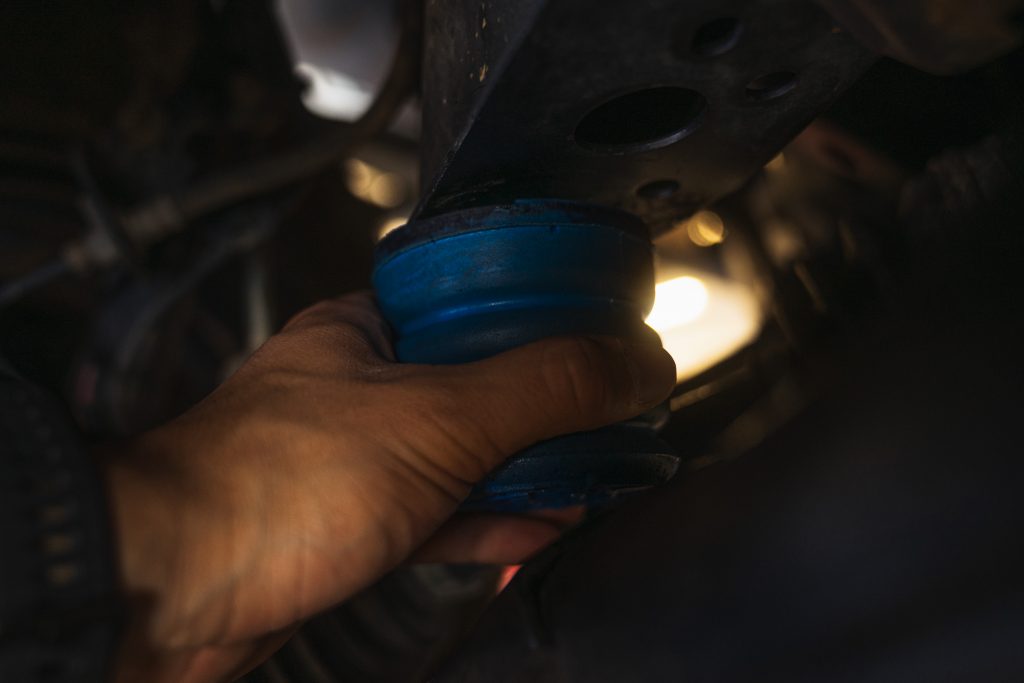
After having the truck lifted and checking your work area to make sure it’s safe, go ahead and get your large channel lock pliers and place them on the top steel part so that you have a solid grip on it.
The reason why you want to do this is that it becomes difficult to get a hold on the urethane foam part as it compresses, the harder you press on it, so I found it easier to just place the pliers on the upper steel part of it.
Once you get ahold, start unscrewing it.
Step 4. Prepare SSI Kit
Now to the easiest part of the install. Once you take out your old ones, you’re clear to begin getting your new set prepared.
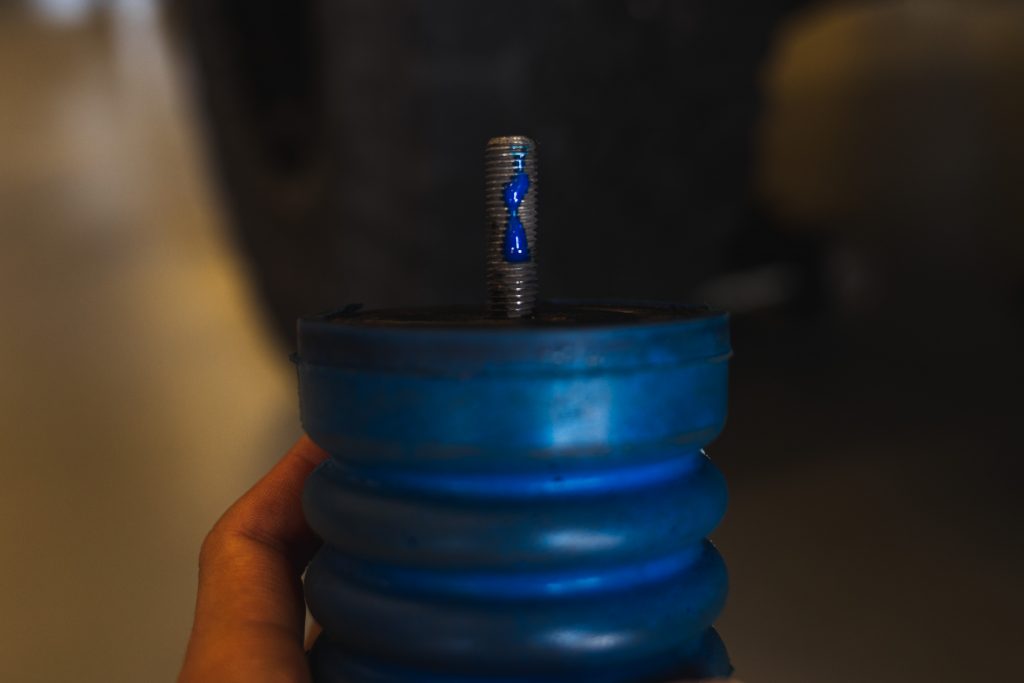
Before installing those SumoSprings though, remember to apply some of the included threadlocker on the screws so that your new stops do not become loose down the road due to vibrations.
Step 5. Install New Bumps
Finally, after applying threadlocker, you’re ready to go and screw in your brand new SumoSprings by hand until you feel that they are snug.
Note: Just a heads up, your kit comes with an included nut and washer that measures 17mm. The reason why these items are added to the kit is for situations where the old screw bracket breaks which in my case, did happen. So be prepared to encounter this as well.
Step 6. Admire Your Work
Now that you have the SSI fronts installed, take your truck for a trial run around the block.
Then go ahead and grab a cold one, because you earned it!
Installation Tips

As I mentioned before, I ran into a complication, leading me to an important question – What do I do if the old one breaks?
This is the point in the install where things became difficult for me because the factory bolt broke as I was trying to remove it. The fact that my Tacoma is a 2017 may be a reason why it must’ve been harder to take out the old one. It would make sense for that bolt to become tighter and/or build up rust over the past 4 years it’s been on the road.
My advice would be to spray some WD-40 or PB Blaster to help loosen up the old bolt so that it comes out smoothly. But regardless of what technique you use, these screws tend to break when being removed, so be prepared, just in case the same thing happens to you.
To begin, I used a right-angle drill set because it’s almost impossible to fit a regular drill without having to drop your lower control arm. To save me from dropping the control arm, and potentially needing another alignment, I got a right angle drill and used a drill bit with a similar diameter as the bump stop screw, and started drilling.
Once I had a decent-sized hole, I got the extractor and started by hand tightening it before I applied an adjustable wrench to get it to drive deeper into the snapped bolt. After the screw extractor got enough hold on the broken bolt, it started unthreading, and bingo, just like that it’s out!
Final Thoughts

In conclusion, what I thought was going to take me 30 minutes to install, but it took me hours, as I wasn’t expecting the old bump stop bolts to break and get stuck while removing them, so this was definitely an obstacle for me. Since I wasn’t prepared for this to happen, I had to take the time to look for ways to remove the screw without having to drill out a new hole and lower the control arm.
I hope you find this article helpful so that you’re prepared to take the necessary steps if things go wrong during this install. This install might have been a hassle, but it was worth the hassle because the ride quality on my Tacoma was noticeably improved on the first bump I hit after the new SumoSprings were installed.
SSI did a solid job designing these, and it’s not their fault that I had to go through the hassle of broken screws as this is a common problem for many people that have switched out theirs in the past. I hope that this article cleared things up, if you have any questions about this review, feel free to ask away! Cheers.