

If you haven’t already stumbled upon them, True North Fabrications makes a number of different DIY and bolt-on bumpers and sliders for off-road Toyota’s and Lexus trucks.
With a focus on precision True North delivers a quality American-made product that’s built using high-grade materials and serious welding skills. Using laser scanning technology to ensure the best fitment, the designs coming out of their shop are certainly head-turning.
It’s worth mentioning True North provides a couple options for the 3rd Gen Tacoma including a DIY hybrid kit (save money if you can weld), a full plate (currently DIY only), and a hybrid bumper without the grill guard.
You can also opt to have it shipped powder coated or in raw steel, which they recommend for the DIY guys. We went with the hybrid bolt-on so there was no issue having it powder coated from the factory.
For reference, I’m also running the TNF bolt-on rock sliders, which are super beefy. They also make a weld-on version as well, which is a standout option, since the vast majority of the 3rd Gen rock slider market is bolt-on only.
Find It Online
- Welded & Assembled: Check Price
- DIY: Check Price
Table Of Contents
First Impressions

When the bumper first landed on my driveway I peeled off the wrapping and was instantly drawn to the quality of the welds, it’s like art, someone definitely took pride in their work here. The powder coat was flawless and I really liked how the angles looked now that I could see them in person.

The approach angle really makes it stand out among the crowd here. It feels tough and though it’s not light, it’s definitely not as cumbersome as some other bumpers out there, the hybrid design helps save on some poundage and adds to the aggressive style.
Features & Specs
- Laser Scanned Fitment
- 11 Gauge Hot Rolled Pickled & Oiled (HRPO) Steel (frame mounting plate, winch plate, skid supports)
- 1/4” Thick Steel Vertical Supports
- 1.75” OD 11 Gauge Electric Resistance Welded (ERW) Steel Tubing
- ~90-100 lbs. (depending on configuration)
- 4 Accessory Mounting Points (for lighting)
- Built-In Winch Cradle with Universal Access Slots
- High Clearance Design
- Amazing Approach Angles (designed to maximize approach angle – one of the highest available)
Installation Guide

To start, park your truck on a flat surface where you’ll be comfortable working for a couple hours. If you can, solicit the help of a friend and get everything staged to start prepping for install.
Tools Needed
- Metric Socket Set
- Metric Deep Socket Set
- Metric Wrenches
- Small Screwdriver or Pry Tool
- Small Angle Grinder
- Oscillating Dremel Tool (or other preferred)
- Masking or Painter’s Tape
- Marker
- Paint Pen or Car Correction Paint
- Boxcutter and (Optional) Deburring Tool
- Zip-ties
- Gloves & Eye Protection
- Rags & Cleaning Products
Prepare & Remove OEM Bumper
Let’s start with our first section below. Removing the OEM bumper.
Note: It may be helpful to remove your grille and front skid plate to have more room to work.
Step 1. Remove Fasteners

Start by going around the perimeter of your OEM bumper and remove all the fasteners (like the bolt seen above) to release the bumper shell.
I already did a viper cut, so I’m missing several of these already, but you get the point.

Another example of a bolt you need to remove, by the fender flare.
Step 2. Remove Fog Lights

Pictured above is the harness for the fog lights, disconnect this one first.

I have aftermarket fogs, but only a handful of screws hold in the lights. Remove them and the lights entirely.
Step 3. Remove Plastic Covers

Remove the main center valence plastic cover. If you’re not saving your cover, then you can toss this section.

Remove the fog light surround. This will make it easier to do quick and rough cut in preparation for the final one.
Step 4. Roughly Cut & Remove Plastics

As you can see on the right side of the bumper, we quickly cut it in half for more room to work. This is also a good time to remove any remaining trim pieces that might also be in the way.
You need access to the crash bar next, so removing the plastic is also helpful here.
Step 5. Remove Crash Bar

Once the crash bar is exposed, you can remove the entire unit in one piece. Sure, you can disconnect all the components, but why give yourself extra work?
The crash bar attaches to the main frame via six nuts with built in washers. You can see two of them towards the right of the aluminum bar, and another is hiding right on the other side. Save these nuts, you will need them to attach the new bumper.
The crash bar might need some persuasive hammering to remove, depending on the corrosion and truck age. Just give it a good whack with a hammer, and it should come free.
Step 6. Remove Frame End Cap & Tow Hooks

The crossmember where the skid plate attaches has end caps on each end. They are held in with a single bolt on each side. Remove both of them. You can choose to leave this on, but we opted for the most clearance possible – and removed them both.
You will also need to remove the OEM hooks and tow points on the passenger’s side.
Trimming OEM Cover
This is where most people will get intimidated. Rest assured, with this being my first install, I’ll guide you through everything. It’s not as bad as it sounds.
But wait! There’s also an alternative. If you decide that you want to sell your OEM cover (recoup some costs), or potentially save it in the case of returning the truck to stock, you can purchase R4T bumper caps. These caps come in unpainted and painted versions, so you can choose what works best for you. If added peace of mind is what you’re looking for, these are a great option.
If you’re ready to cut… let’s walk through the process.
Step 7. Taping Your Lines

Now… the real question. Where and how do you mark and cut your bumper? There are a couple of reference points to consider.
First, as seen above, on the right side of the tape, we used a beveled edge inside the fog light pocket as the starting point for the tape. If you look closely and compare to your truck, you’ll see the tape starts exactly on the beveled edge and then makes its way over to the flare.
Keep in mind, the cover is uneven, so you’ll have to evaluate your tape lines to make sure they are straight across.

When you get to the flare, use the removed bolt as a guide. We chose to end the tape roughly 1/4″ above the ever so slightly raised edges, seen above.
You could technically cut a little less, but you definitely don’t want to cut too much more, since there are attachment points for the cover behind your cut. You will inevitably cut through some of them, but going any higher may impact how the parts all connect tightly together.
Step 8. Body Cut Line

Once you’re happy with all the measurements and taping, its time to cut! I used a Dremel, but you can use your cutting tool of choice.
As with all cuts, just remember, you can always cut more. It’s better to be cautious and cut twice.
Add Edge Trim, Cut Fender Liner
Use a razor blade or utility knife to clean up your edges. If you’d like (I did), add edge trim to protect the edges and cover any uneven cuts. Edge trim is pretty forgiving. Some people opt for a clean cut – that’s totally up to you.
The fender liner will now hang way below the bumper. Trim to fit as you see best, and secure any loose portion with zip ties.
Preparing New Bumper
Before you install, now is the time to add your winch and other accessories like lights.
Step 9. Mount Winch & Lights

I picked up a 12k Badland winch from Harbor Freight, we installed the winch and fairlead first. The lights were installed after the fact, so it is possible, just a little more tedious.
Installing New Bumper
Alright! You’ve made it this far. Last thing to do is clearance a few small things, and mount your bumper to the truck.
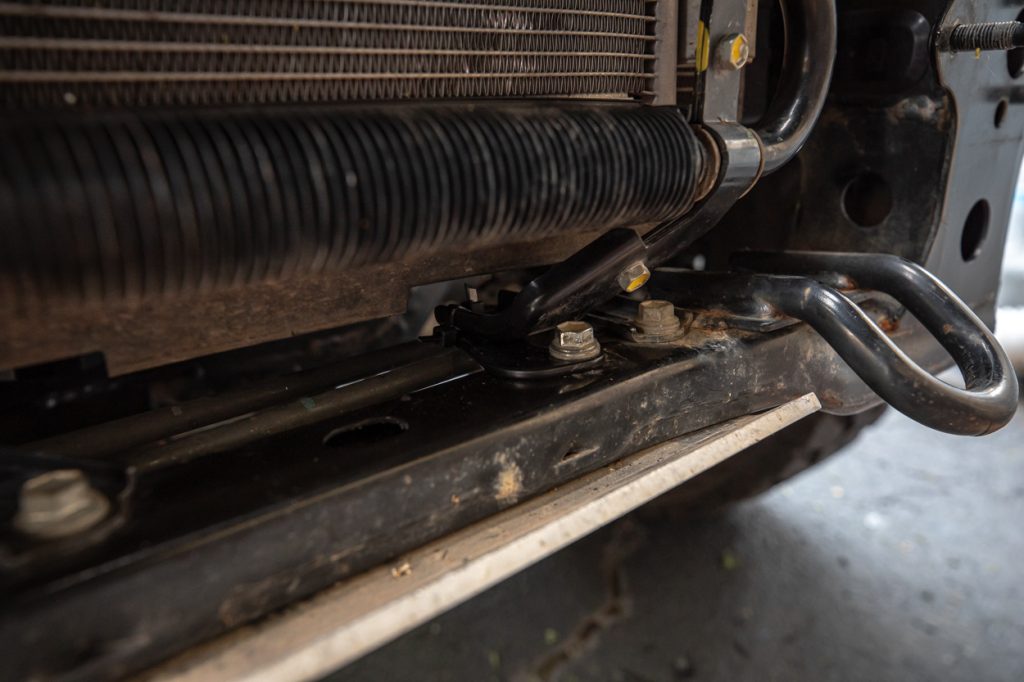
Step 10. Relocate Power Steering Cooler

As with most bumpers, you will need to relocate your power steering cooler. There are two bolts that hold it to the crossmember. You can see one roughly in the middle of the photo above. Remove both of these.

The cooler lines are also hard mounted to the passenger’s side frame, right behind the splash guard. Seen in the middle of the photo above, just to the right of the rubber guard, mounted to the top of the frame rail. Remove this bolt. It will not be reconnected. Removing this bolt allows the cooler assembly to shift backward.

TNF provides two brackets and hardware that secure the cooler bracket a few inches towards the radiator. In the photo above, you can see one of the brackets.
We had a tough time getting the holes to align for the second bolt, so we just used a zip tie on the far end. The cooler is pretty secure in this position, and we weren’t worried about the extra play. You could likely mess with this to get both to fit perfectly, but we didn’t find it necessary.
Step 11. Notch Body Bracket (Optional)

If you install a winch with a larger control box, you either need to relocate it, or notch the support seen above.
You can see where we roughly outlined the cut we needed in the accumulated dirt.

You can see the rough cut above, with some Steel It to protect the metal. You can make this way cleaner, but this gets the job done. We used an angle grinder here.
Step 12. Install Bumper

From the photo above, you can see the three main mounting studs on the frame, and the hole left over after you removed the end caps.
Of course, test fit before you install all the hardware to make sure you are happy with fitment and clearance. You will need to do a final alignment with the hardware loosely installed, as the bumper will need some side-to-side and up-down adjustment for each truck.

Above, you can see the main three nuts we saved from crash bar removal.

This is lowest mounting point above. We installed the provided spacer later on. The spacer is absolutely recommended, otherwise the connection isn’t as strong, and the metal begins to bend as you tighten the nuts and bolts. Since each vehicle is a bit different, you might have a smaller gap. Perhaps you won’t need the spacer. But it is provided if you do.
Install Complete

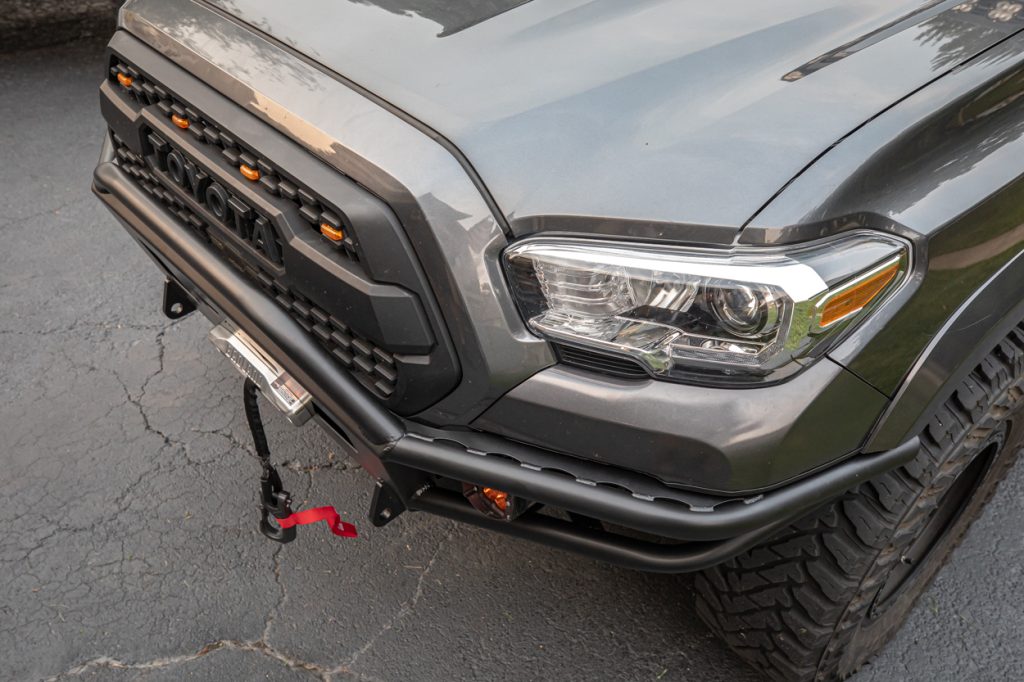
All buttoned up and it looks awesome, I really like how the hybrid design ties everything together. There’s so much added clearance here. This was immediately after we finished tightening all the hardware down.
Impressions & Review

I’ve been running this bumper for a few months now and have already put it to the test. Immediately after installing it, we went on a trip to the local off-road park and hit some obstacles and rock gardens. I was able to roll into the trails with the added confidence of finally having some armor protecting the front end.
We hunted down some sketchier spots and I was thrilled with the approach angle and how much clearance was created. Considering the level at which most people wheel, this one is more than adequate. In fact, it has so much extra clearance, even through some sketchy spots, the bumper has never touched a rock. Not saying it never will, but even with super steep approaches (which you can see me crawling out of one above), I’ve had plenty of room.
Most other full front bumpers on the market stick out a ways from the front end. This is normal, but adds length to your front end – impacting overall approach angle. With the True North version, it hugs the body so close, I don’t think you could get any closer. It’s a game of inches, so this is super helpful. One of the reasons this is possible is that there is no light bar mount above the winch, and the winch cradle itself is extra tucked. I may not get to run another light bar, but I have plenty of auxiliary light, and saved some money there too.

True North also has a killer powder coat. I live in the Midwest, where the winters are tougher on parts, and after a year of running their rock sliders, and months of running their bumper, it has held up really well. Surprisingly well, actually. Whoever TNF uses for powder coating knows what they’re doing. The coating looks and feels super thick and durable. Nothing but good things to say here.
For anyone wondering (I have a 2022) – yes, it is compatible with factory TSS sensors. That goes for the standard version, as well as the low profile grille guard (what I chose). Oh, and the bull bar doesn’t block the Toyota logo on my TRD Pro grille. Truck aesthetics on point!
In terms of lights, it comes with four brackets in the hybrid portions that could easily hold one light each. I finally and recently added two pairs of Baja Designs fog lights too. You could build a quick bracket if you really wanted to squeeze in three. But I’m happy so far.
Most recently, about a month ago, we hit the Express Rally event – Overland Ozarks. After a few days hitting the back country hills of Arkansas and Missouri, I’m super confident that the bumper will continue to do well. I haven’t had to winch out of anything yet, but I’m sure it will hold up. TNF should also be working on additional frame reinforcements in the future.
Final Thoughts

From the design, to the welds, to the relatively straightforward installation – this bumper is really impressive. The hybrid fabrication and the aggressive angles totally transformed and completed the look of the truck. Getting the powder coat from factory was definitely the right option for me as well.

This is another great product put out there by True North, I’m really looking forward to their future products and designs.