
A great upgrade for your Tacoma’s exterior lighting game is the VLEDS Dual Brake Tail Light Conversion Kit.
This kit transforms each of your 250-lumen single stock lights into 800-lumen brake/park dual lights. This means you’ll be utilizing both upper and lower red sections of your taillights, for increased visibility and a unique look. The VLEDS conversion also upgrades your reverse lights to dual-function white reverse/amber turn signal lights – which are also super bright! All in all, the way your taillights operate will change for the better.
If you’re looking for a simple LED modification to improve your truck’s appearance and overall safety, this might be the perfect modification for you.
Find It Online
- VLEDS Dual Tail Light Amber: Check Price
Table Of Contents
Why VLEDS?
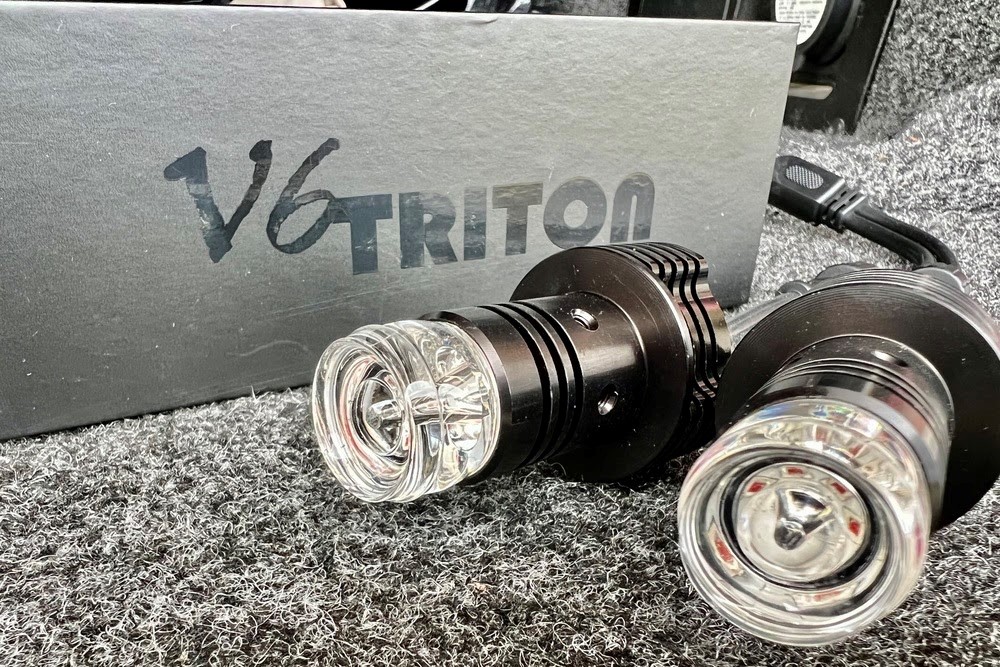
This top-quality VLEDS kit comes with Triton V6 lights set in optical grade polycarbonate lenses, anodized CNC aluminum housing, waterproof connectors, and all the tools and hardware you need for install.
The look and feel of the lights speak for themselves. With a near plug-and-play install, your brake lights and turn signals will really pop.
Installation
Tools & Materials
- Tool Set
- 10mm Socket
- Ratchet
- Heat Gun or Hair Dryer
Step 1. Wiring Assembly
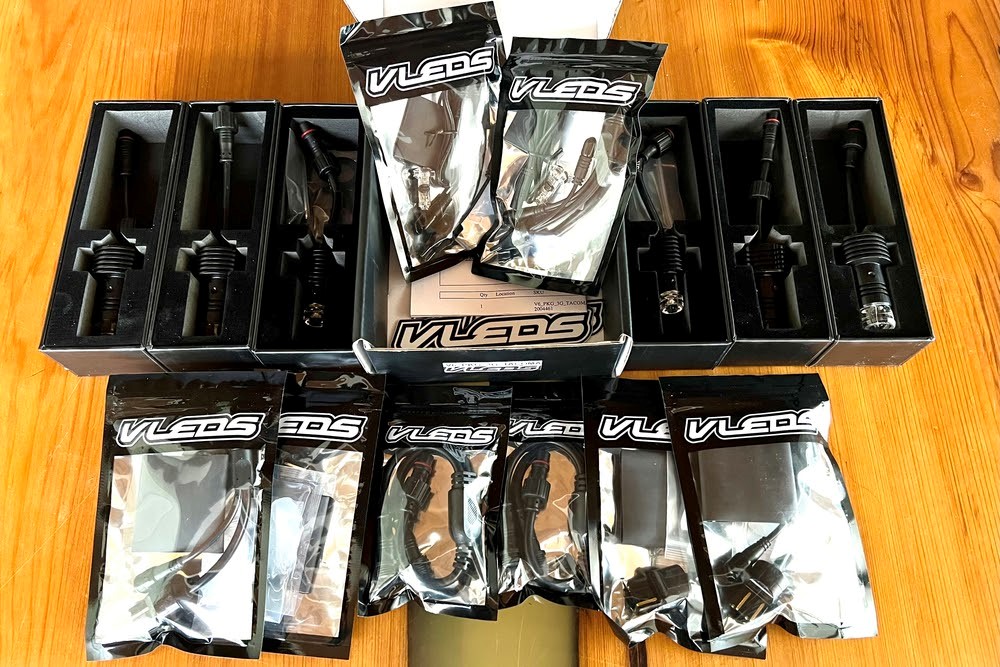
VLEDS makes modular lighting accessories for many vehicles. So, you’ll need to plug a few cables together to form the wiring assembly.
Follow these simple steps to get the wiring ready for install. The image above is for the reverse/turning light. Find the packages with the numbers corresponding to those above and mate their connectors together. There should be two sets of each, one for the left and the right reverse/turn light. Assemble both sides, then move on to the next assembly.
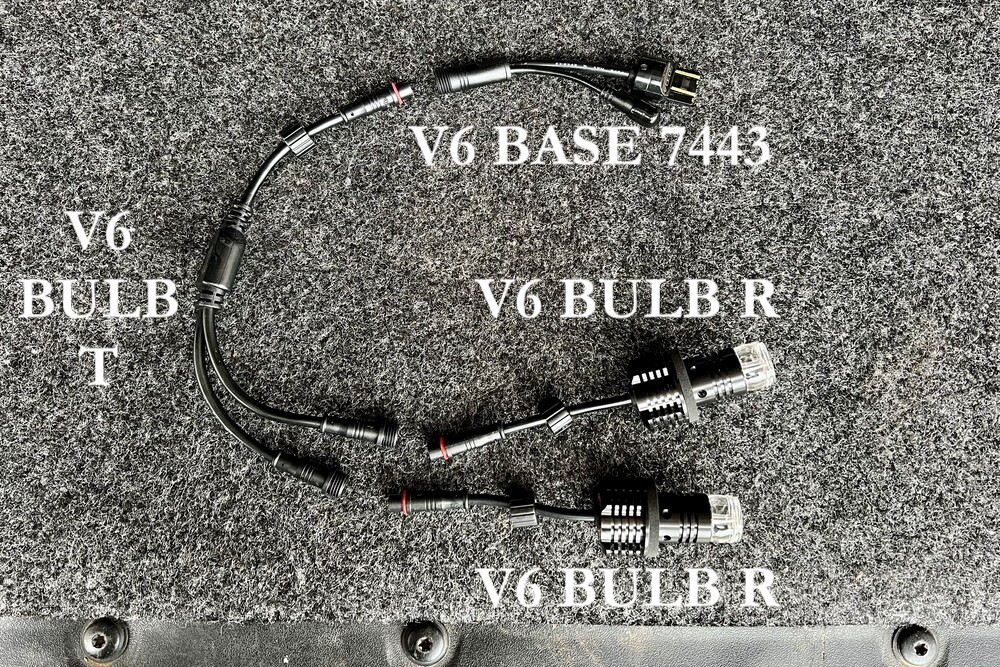
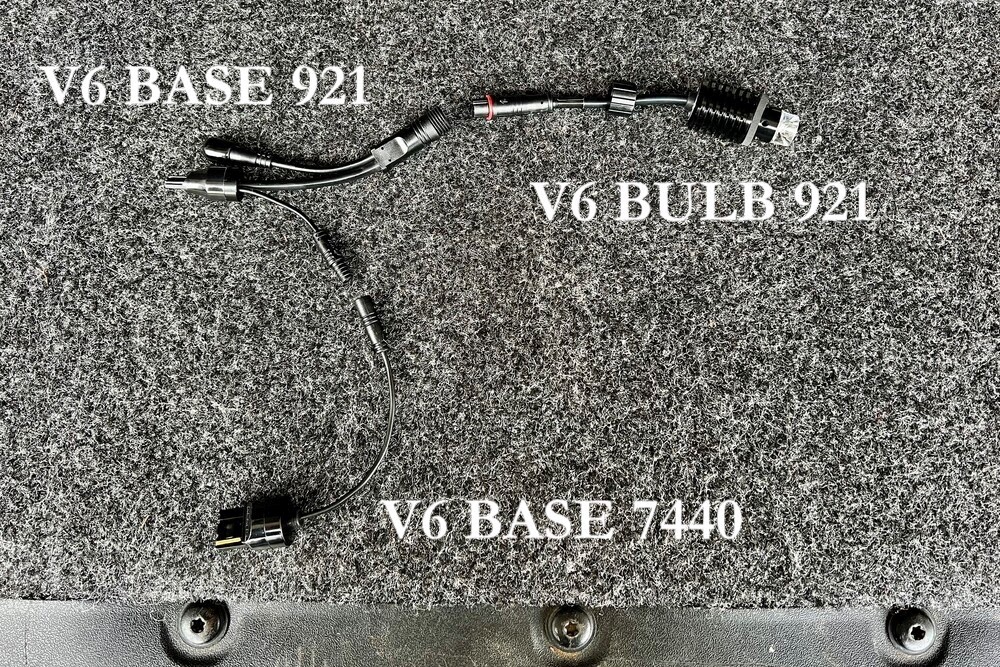
The image above is for the tail/brake dual light assembly. Find the corresponding numbered packages and mate the connectors as shown above. Do this procedure for both left and right light assemblies.
Upon assembly, you will have leftover parts such as sealing gaskets, screws, gel packets, wires, heat shrink, and so on. This is normal since VLEDS modular assemblies adapt to various vehicles. For the Tacoma, you will need to keep the heat shrink, screws, and sealing gaskets.
Step 2. Light Assembly
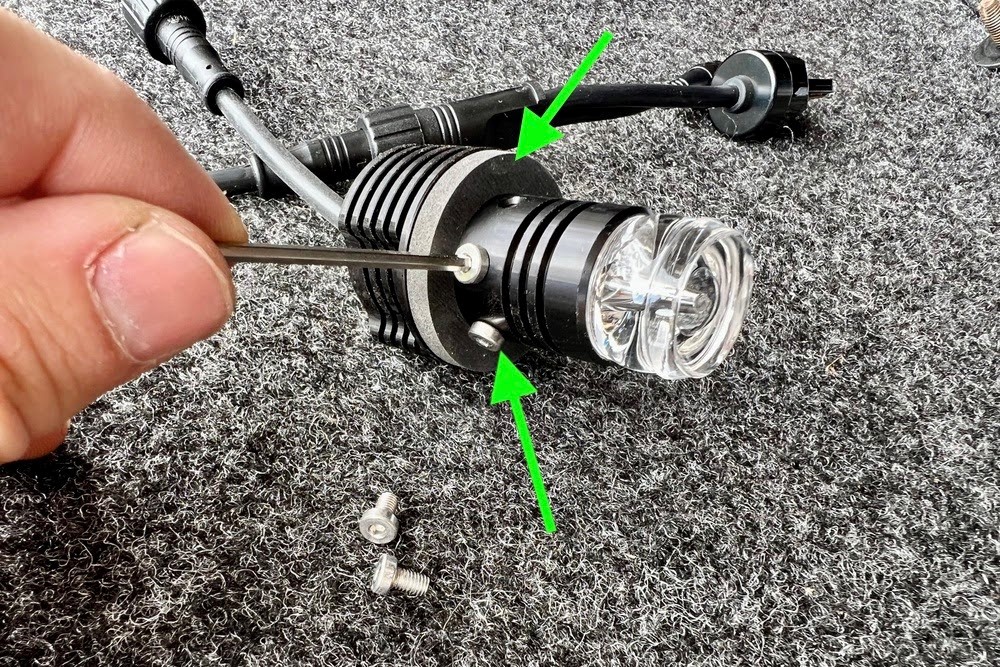
Next, we’ll need to slide one sealing gasket over each light assembly.
Don’t skip this step, or the seal won’t keep out moisture and the fitment might loosen and rattle off. Also, use the supplied hex wrench to install the supplied notch screws. Make sure to match the pattern of the original bulb sockets (see below).
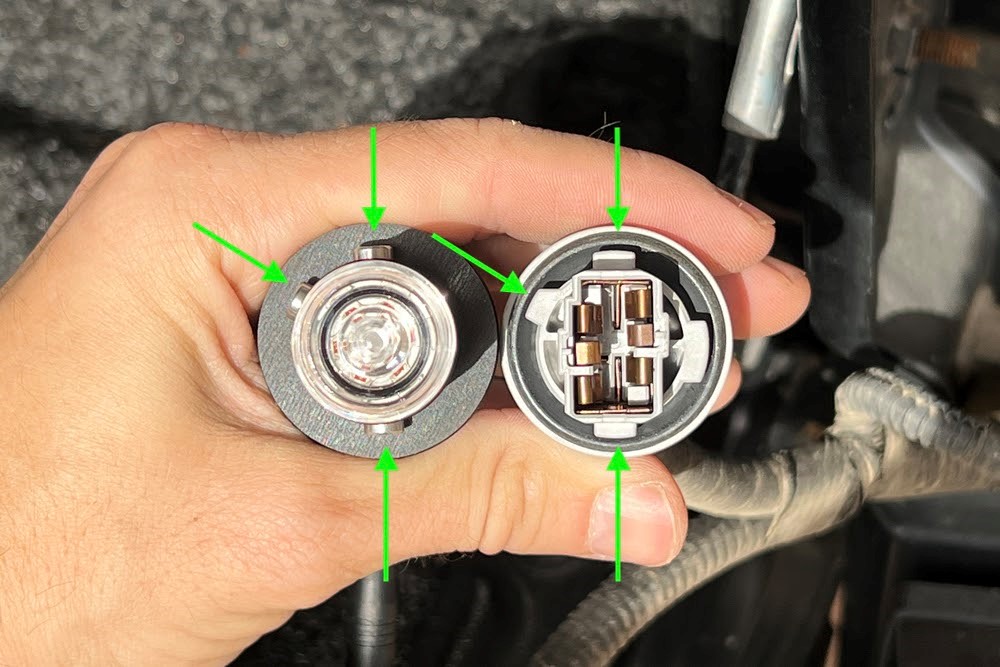
As mentioned previously, VLEDS supplies modular components for many vehicles.
For the Tacoma, the screw slots fit three out of four of the required slots. However, this did not affect fitment. I seated the new fixture onto the housing body snug and tight. Follow this step for all six of the lights.
Step 3. Assembly Installation
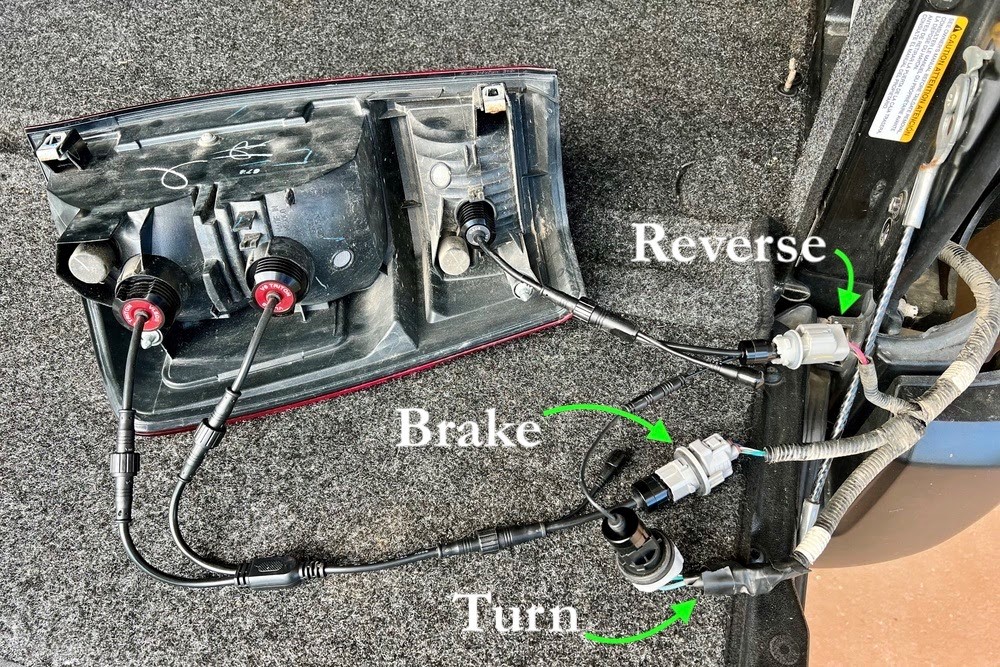
The lights are polarity-specific, meaning that you’ve got to insert the male VLEDS connector into the female Tacoma plug the correct way for the lights to work. It can be cumbersome plugging in six lights and running up to your truck each time to check if they’re working. Matt, an engineer at VLEDS, gave me a useful tip for this step.
First, plug in all the lights according to the diagram above for just one side at a time. Leave one side stock and confirm the first side before installing the second side. You can get weird results if everything is backward and the bulbs are interacting with each other due to flipped grounds side to side.
Second, put your truck in ACC (accessory) mode. Then turn on your running lights and your hazard flashers. This will cause all three rear lights in each tail light assembly to come on (brake dual lights and turn signal light, which also functions as reverse). Now, go back to your taillights and try the VLEDS male plugs until you get the right polarity.
You’ll know it when it lights up properly when the two red lights on both sides illuminate and the amber turn-signal lights begin to flash. This means your running, brake, turn, and hazard lights all function properly.
Depending on your model TRD, SR5, etc. you may need resistors. If your truck has mirror turn signals (top trim models) and stock bulbs up front you will not need the VLR15 load resistors. If you do need them, VLEDS sells these which can be installed at the V6 BASE 921 TRN 2 pin plug that is capped off.
Once you’ve got the polarity figured out, you’ll need to put the supplied heat shrink wrap around the connectors where they mate with the original female plug. Another helpful tip here is to disconnect the bulbs at the threaded connector and not the socket so you don’t mix them up. Slide the heat shrink over the wires from the top and it can be cut down as needed to fit the sockets nicely.
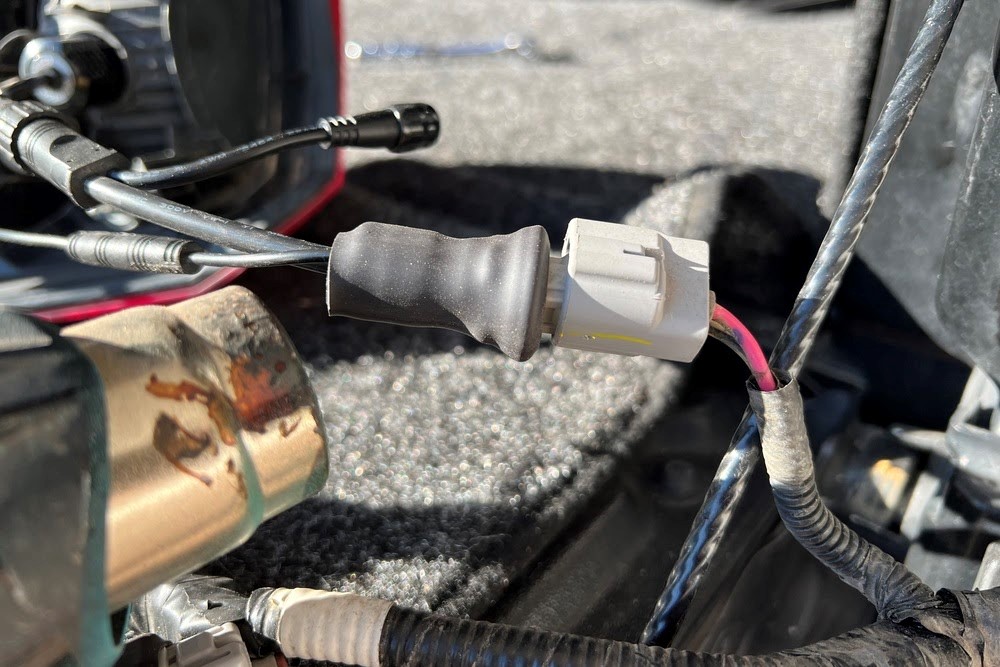
In particularly corrosive environments, you can use the included dielectric grease in the sockets before using the heat shrink. Use the blow dryer or heat gun to shrink the wrap down into a waterproof seal.
I’m going to tell you not to use a lighter, but some of you are likely to use one anyway. So, here’s some advice from a guy who may or may not have used a Bic lighter to heat-shrink wiring harnesses on F-35s… This is a fat piece of heat-shrink, with a lot of surface area to heat up; and a direct flame may make it shrink but then bubble back up. So, keep the flame off of the heat-shrink about 1” or so and oscillate it back and forth. Let the indirect heat eventually do its work. Be patient. You don’t want to explain to the captain why you grounded the entire fleet with a Bic lighter.
Now, you’re finished with the install. Carefully stow the wiring harness as you reinstall your tail lights. Let’s check out the final product.
Light Output – Running Lights
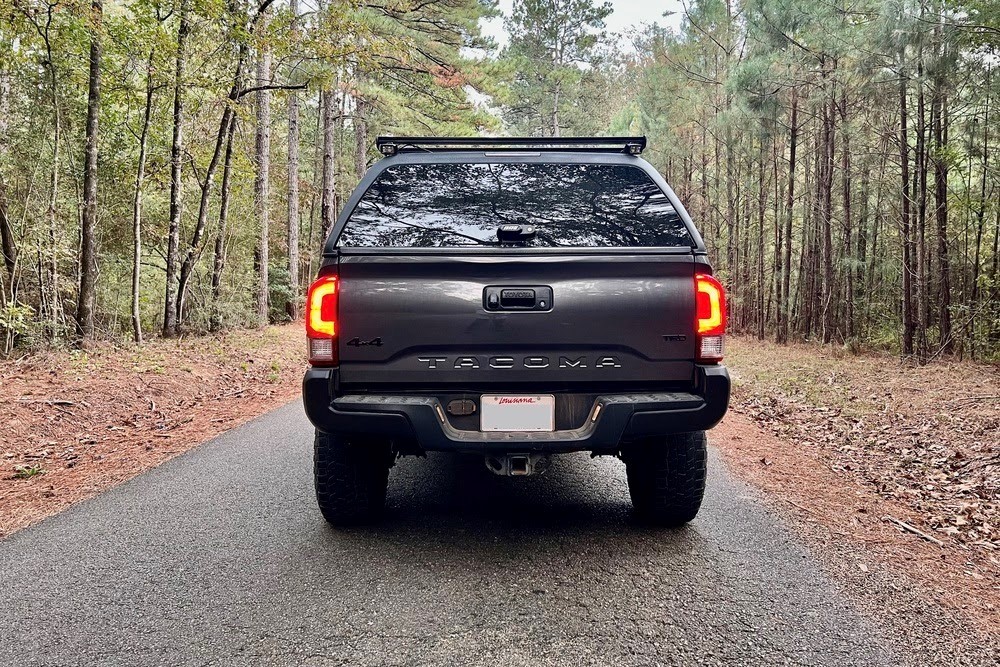
The image above is the normal running lights (without the brake being pressed).
The running lights are much brighter than the OEM brake lights.
Light Output – Brake Lights
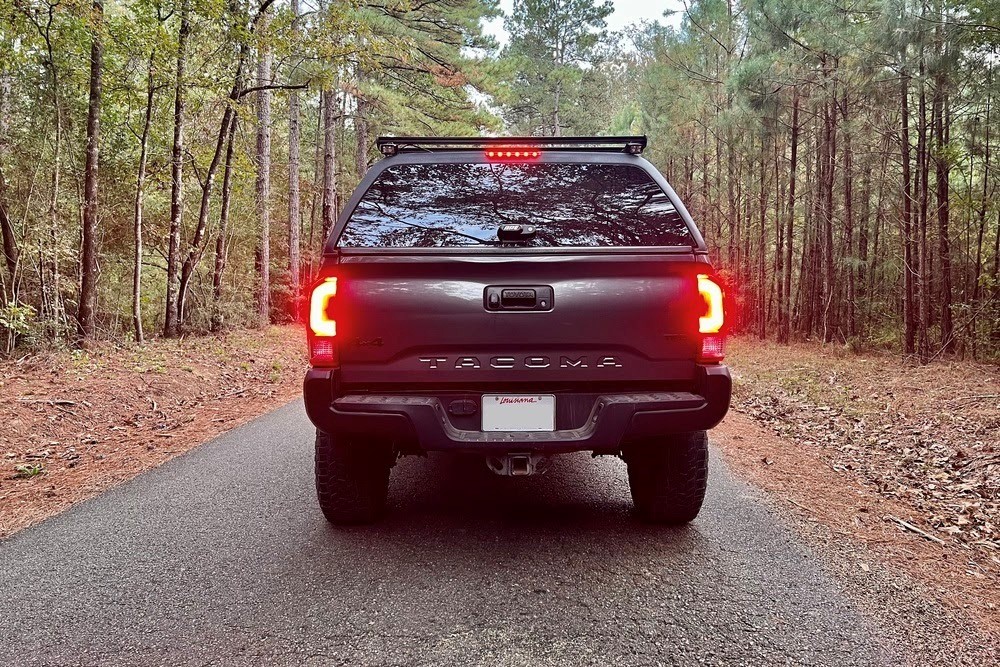
The brake lights are so bright that you don’t want to look at them closely, even in broad daylight.
I had been considering a tint on my taillights but was concerned about them being too dim. This won’t be a problem now.
Light Output – Turn Signals

A warm amber glow without the permanent amber-colored reflectors – best of both worlds.
Light Output – Reverse Lights
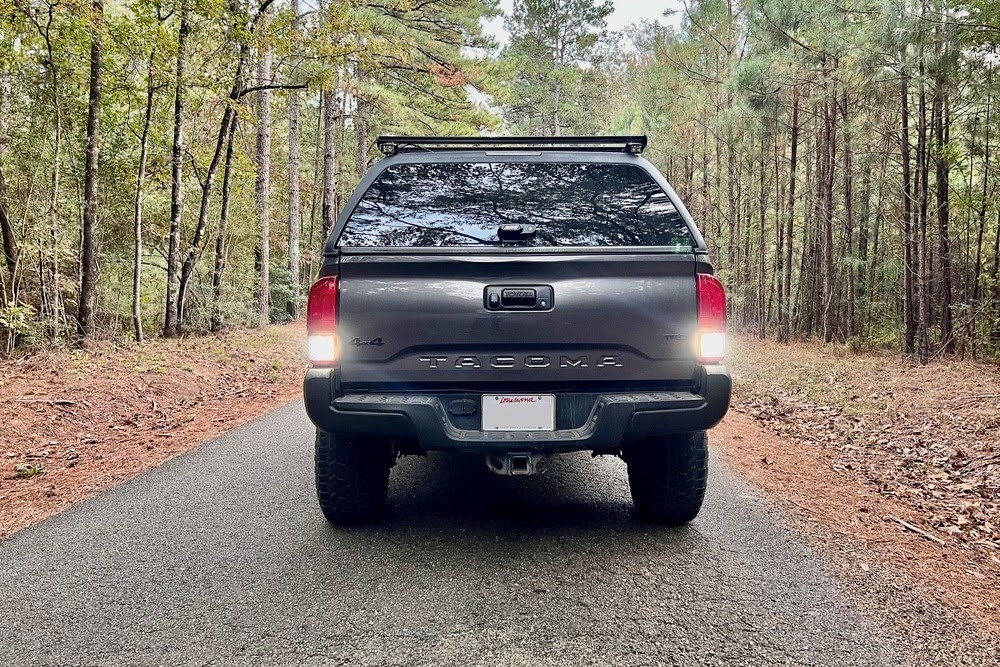
I chose the warmer 5k light. VLEDS also makes a cooler 6k version, which you can choose upon checkout.
You can tell just from seeing them in daylight that they’re bright, but let’s look at some night shots.
Night Output – Reverse Lights

The Tacoma’s factory reverse lights leave much to be desired.
I had previously installed some rear-facing Rigid lights on my camper shell’s Prinsu roof rack. They work well, but leave a blind spot directly behind the trailer hitch area. However, these VLEDS reverse lights throw light over the entire surrounding area. Honestly, they are stunningly bright. Like spotlight bright.
Final Thoughts

Overall, the install was straightforward, and the light output is much brighter than factory lights. Above you can see the output directly behind the vehicle at the tailgate level. That young tree is about 8 feet high and 25 yards away.
I have enough low-level rear lighting now for extended camp, work, and maintenance environments. I like to set up my rig both for utility and for appearances. VLEDS has added these qualities with a great product.