
—
*** Update 11/11/21 ***
Since this post was published, AL has completely redesigned this roof rack. Many of the features have been updated for a much stronger and better rack.
Check out our latest post on the new AL Offroad HD Roof Rack.
—
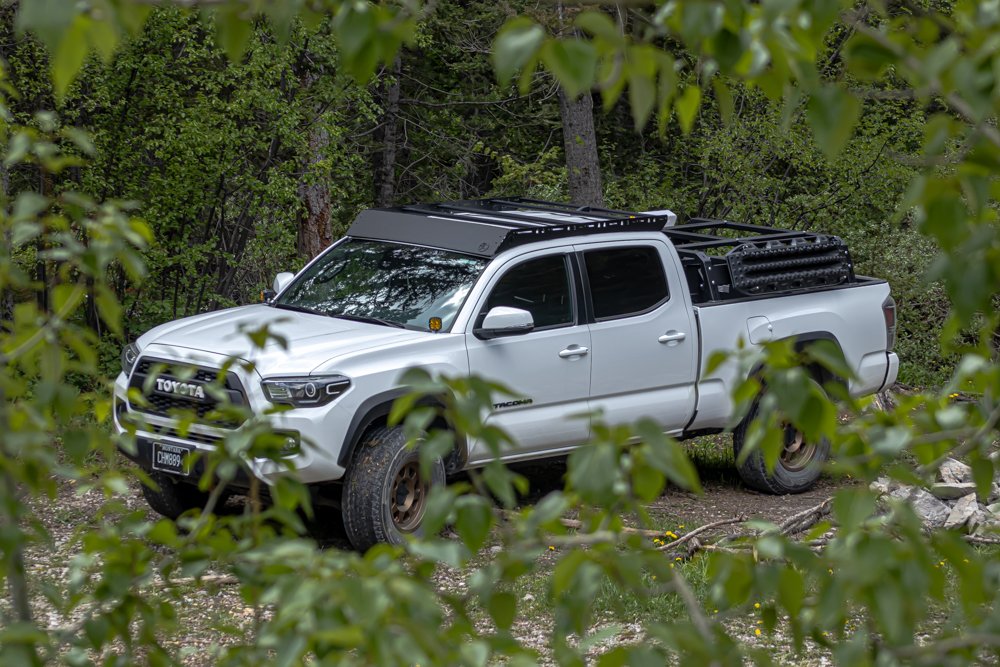
Anyone in the market for a roof rack for their Toyota Tacoma knows the big-name brands like upTOP Overland, Prinsu, and Front Runner – just to name a few. All these racks incorporate great features and can mount a variety of accessories.
For a full overview of some of the best choices for roof racks, see the roof rack buyer’s guide.
New companies, however, pop up all the time. One of those new companies is AL Offroad. They offer a high quality, budget-friendly alternative to what’s out on the market today. Their 2nd and 3rd Gen Tacoma roof racks are completely made from aluminum and come with stainless-steel hardware. This means the rack itself weighs less than 30lbs and will never rust!
The rack also has brackets that mount directly to the roof, unlike most competitors who require the use of a spacer. This bracket design means the rack has a higher static and dynamic weight rating, making it one of the toughest racks for the 2nd and 3rd Gen Tacoma to date!
This article will go in-depth into install and specifications of the new AL Offroad Tacoma roof rack.
Find It Online
- AL Offroad 2nd/3rd Gen Tacoma Roof Rack: Check Price
Before we begin, it’s important to note that although this article covers the 3rd Gen roof rack, the process and the design is almost identical in the 2nd Gen version.
Discount Code
The team at AL has extended a discount code good for 12% off any order on their site.
Use code – trailtacoma – at checkout.
Table Of Contents
Install Tools

Tools & Materials
- Ratcheting Wrench
- 10mm Socket
- 11mm Socket
- 10mm Wrench
- 11mm Wrench
- 4mm Allen key
- Screwdriver or Knife
- Thread Sealant (Teflon Plumbing Tape)
- Clear RTV Silicone Adhesive Sealant
Step 1. Unpack Your Rack

The first step is to unpack the rack and separate the pieces.
I would highly recommend putting a moving blanket or sheet down on the ground to use as your work area. This gives you plenty of room for the install without having to worry about damaging your new rack.
AL Offroad goes the extra mile with their packaging. All the parts are individually wrapped in bubble wrap to protect the powder coat, and then the box is filled with packing peanuts to ensure they don’t rattle around. I have personally received damaged products because of inadequate packaging, so seeing proper steps taken to make sure the rack was protected was impressive.
Step 2. Lay Out Parts
After everything has been unpacked, lay the two side members parallel to each other so you can begin attaching the crossbars.
The rack has six slots for crossbars, but unless you ordered the rack with the extra bar option, you will only be using five slots. I laid each of the four 1X2 crossbars out next to the first four slots, and the 1X1 crossbar next to the last slot. It is important to lay them all out with the t-slot openings facing upwards.
The first, third, and fourth crossbars attach the rack to the brackets, so each one of these is going to receive a hex bolt in each of the bottom channels.
You should have six bolts per side of the truck. Each bolt should be inserted 3-4 inches into the bars for proper alignment. These bolts can be a bit finicky, so using a screwdriver to push them is recommended.
Step 3. Rack Assembly

Each crossbar attaches to the rack with a 4mm Allen bolt. A plastic spacer caps each end of the crossbars, and a plastic washer is used between the Allen bolt head and the rack.
This is used to prevent damage to the powder-coated rack. With the t-slots facing upwards, insert all the Allen bolts into the crossbars and leave them loose. It is important to be able to adjust the rack once it is on the roof, so do not tighten any of the bolts down completely just yet.
Step 4. Wind Fairing

After each crossbar is loosely attached, you can mount the front wind fairing.
The fairing attaches to the front of the side members with two 4mm Allen bolts on each side. Place a washer between the bolt head and the front of the air guard, and a washer, lock washer, and 11mm nut on the back of the bolt. This air guard is also adjustable, so leave this loose as well.
Step 5. Prepare Truck

Now it is time to prepare the truck.
Remove the weather stripping from both sides of the roof. The weatherstripping should be held on with 3M tape, so this will need to be scraped out of the channel.
Once removed, locate the three points that the brackets will attach to. Using a screwdriver, carefully poke holes in the soft spots of the tape to reveal the mounting holes. Taking some extra time to clear out the tape from the holes is recommended so nothing plugs the holes. There should be five holes per side; two in the front, one in the middle, and two in the rear.
Step 6. Attach Brackets

Before you attach the brackets to the truck, you should use a thread sealant on each of the ten 11mm bolts.
This sealant will help prevent water from entering the holes and ensures a tight connection.
You can also take it a step further and add a dollop of clear RTV Silicone Adhesive Sealant directly over the hole before you thread your bolt down or you can do this later. It’s up to you on when you want to add sealant but you should add it for sure.

You can now attach the labeled brackets to the roof of your truck.
Each bracket is labeled and should be oriented as shown in the photo. Take your time and be patient, this part may take a little longer and require some tweaking.

The two holes face outward and the slot faces upwards, with the slot oriented towards the middle of the truck. You can see the proper orientation above.
This will allow you to place the bolts into the slots and gives you superior adjustability. I found it helpful to loosen the top of the adjustable brackets so I could level the rack.
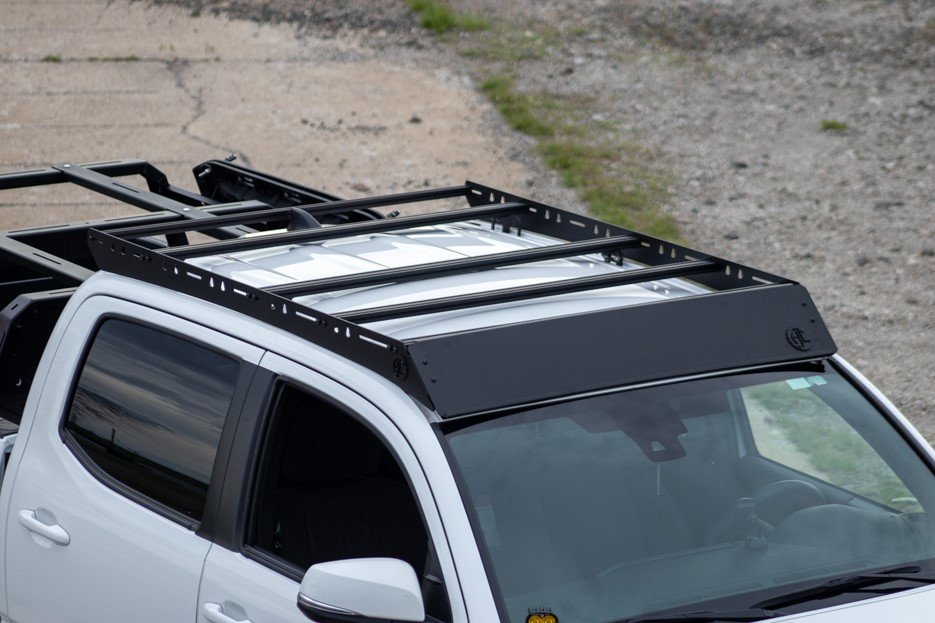
Step 7. Place Rack On Brackets
With the help of a friend, you can now lift the rack onto the truck. You may wish to put some tape down to protect your paint, but the rack will clear all parts of the roof if you are careful.
Using a screwdriver, make any necessary adjustments to the hex bolts in bars 1, 3, and 4 to line them up with the slots in the brackets. This is also the point you should center the rack width-wise on the roof. You may need to move the bars to line everything up, and it is extremely helpful to have one person on each side for this step to ensure the rack is centered and level.
Once it has been centered, place a washer, lock washer, and 10mm nut onto the hex bolts and hand tighten. This will ensure the rack does not move left to right while you adjust other parts of the rack.
Step 8. Tighten Down
Once the rack is level, tighten the 11mm nuts on each of the brackets. The clearance is tight, and you may want to put tape down to prevent scratching your paint with your hand tools. I found I was able to use a socket for these bolts, but an 11mm wrench is also handy.
Step 9. Adjust Rack Fitment
Now that your rack is secured to the brackets and is level, you can adjust the rack lengthwise on your roof to your liking. I found that to clear my rear fin, I needed the first bar moved all the way forward and the last bar moved all the way backward.
I then tightened these down. Once the position of the first bar is set, the positions of the third and fourth bars are also set, since they are attached to the brackets. I tightened these down to the rack with the 4mm Allen key and adjusted the position of the second bar about halfway between the first and third bars.
Step 10. Adjust Fairing
All parts of your rack are tightened down except for the air guard.
This can now be adjusted up or down to suit your needs. It is recommended that it be adjusted as far down as possible to reduce wind noise, and it comes with some rubber trim to protect your windshield and paint. I found this air guard to be very snug against my windshield as I adjusted it all the way down.
This helps reduce the amount of air going under the rack and keeps the noise to a minimum. Once it is in your desired location, tighten the 11mm nut onto the 4mm Allen bolt. I could not fit a socket into this space, so I used an 11mm wrench.
Step 11. Apply Sealant

It is crucial to apply some sort of sealant around the bolts on the brackets to prevent water from entering the cab.
I applied a silicone sealant generously around the base of the brackets to prevent any water from getting in. After the sealant sets, you can then modify and replace your weatherstripping to fit over the brackets.
I did not do this step because I damaged my weather stripping, but AL Offroad highly recommends replacing it to maximize your protection from the elements.
Final Thoughts
I’ll admit, I was a bit skeptical about this rack before I received it.
However, I was impressed and pleasantly surprised. The quality of the materials is top-notch, and I was shocked by the attention to the packaging. Nothing I’ve ordered for my truck has come packaged as well as this rack.
It also seems very sturdy. I was skeptical of the brackets and thought they would bend or flex, but the whole rack feels bombproof and has so far accommodated two full storage cases and my Maxtrax, without any issues.
The use of the t-slot bars also allows you to mount endless accessories like bike mounts, cases, and RAM balls, which allows for camera and phone mounting solutions on the rack. It also features cutouts for tying items down and possibly grab handles.

In the future, I would like to see mounting solutions for exterior lighting, like side pods and front light bar capabilities.
Most other racks on the market have these options, albeit at a premium. As the rack sits, you can easily attach accessories, but it would be nice to see a dedicated cutout and/or mounting solutions.
Overall, this rack is an unbeatable value. Most other racks are far more expensive, so if you’re looking for a budget-friendly, entry-level rack, the AL Offroad rack is for you!
To top it all off, the rack looks incredibly good! I can see AL Offroad becoming a go-to option in the off-road and overland industry.
AL Off-road tacoma rack.
Ordered rack on 12-11-2021 and have not received it yet. I tried calling and texting the company and only got recording and automated messaging starting my order awaiting fulfillment. Anyone else having a problem getting you order filled?
Is there a shorter version for an access cab?
Ron,
I’m sure Scott at ALO could give you an estimate as to what one would cost and when it could be made. While not a standard option, it may be in the works in the near future!
Adam
There currently is no option for the access cab, as far as I know.
No packing peanuts no black hardware and gaudy AL stainless pieces on sides and front. Might want to update this review.
Jim, Konrad recently covered their second, updated version of the rack on the site, and I’ve since upgraded mine too. The “Onyx” edition of the rack (that I received) came with all black hardware and blacked out ALO logos. Their standard edition of the rack comes with unfinished logos. The rack I reviewed here was packaged well – everything was secured with shrink wrap and tape to prevent any surfaces from rubbing together, and there was no damage. They’ve since upgraded their packaging as well, and the new rack I received a short time ago was also in excellent condition!… Read more »
Yeah, they have definitely done some serious upgrading and beefing up since this was posted. We’ll have a post soon on the new HD rack. With the changes, it’s looking more like one of the strongest racks available. I just added one to my truck. We’ll link within this post to the new one as soon as it’s finished.
Looks great! I am curious if you can transport items longer then the actual rack, such as 2×4” lumber etc if necessary, or would they end up resting on the wind fairing instead of the cross bars? I just picked up an 17’ trd off-road and was thinking about some Thule load bars with their standard mounting feet, but like the sleek look of this rack. Thanks!
Ivan,
This rack is more than capable of handling the weight of large pieces of lumber and other construction material. There are some nice integrated tie-down points on the rack, and the wind fairing, if adjusted all the way down, sits about level with the crossbars!