
Cold air intakes are a controversial topic. Some people say there’s no point since the factory airbox is pulling in cold air, thus making it a cold air intake. Why would you upgrade if you’re already running one from the factory?
OEM VS Aftermarket
Well, let’s back up a second. The factory airbox is running a cumbersome setup designed around extreme carb-compliant and EPA emission standards. Aftermarket units typically run fewer components with less airflow restriction with upgraded filters, which allows more airflow through the throttle body with a richer air/fuel ratio, thus creating more power during the combustion process… in theory.
CAI Functions
Aftermarket intakes are designed to increase airflow and horsepower – all while improving gas mileage. Some people will argue that airboxes do none of these things. Maybe they don’t want to spend the money, maybe they didn’t read the RWHP (rear wheel horsepower) or dyno reports, who knows.
The fact is, certain airboxes do increase airflow and increase horsepower. They can also improve gas mileage depending on your skinny pedal preference. Every aftermarket airbox, including Volant, has its dyno reports showing the hp gains and potential mpg improvements, however, these are typically done in the most ideal testing environments, and they don’t do them for every single make and model.
Real World Expectations
Many factors go into real-world horsepower gains and, more importantly, rear-wheel horsepower gains; elevation, GVWR, unsprung rotational tire mass, etc. Some trucks can pull 15hp, and some can pull 3hp with the upgrade. It just depends on the bigger picture but the point remains – cold air intakes can improve horsepower, that is a fact.
You need to ask yourself whether or not you’re willing to spend $300+ for around a 3-10hp increase, a different sound, and the potential for better gas mileage. Let’s face it, the Tacoma is not fast and an upgraded airbox alone won’t push your build over the edge. But they sound amazing (to me personally) and bring much more oxygen into the air/fuel combustion process which is one of the necessary ingredients for increased power.
Find It Online
- Volant Intake (2012-2015): Check Price
Table Of Contents
Installation
Tools & Materials
- Metric Sockets
- 3/8″ Ratcheting drive
- 12″ Extension
- 6″ Extension
- Needle nose pliers
- Diagonal Cutting Pliers
- Zip Ties
Step 1. Engine Cover
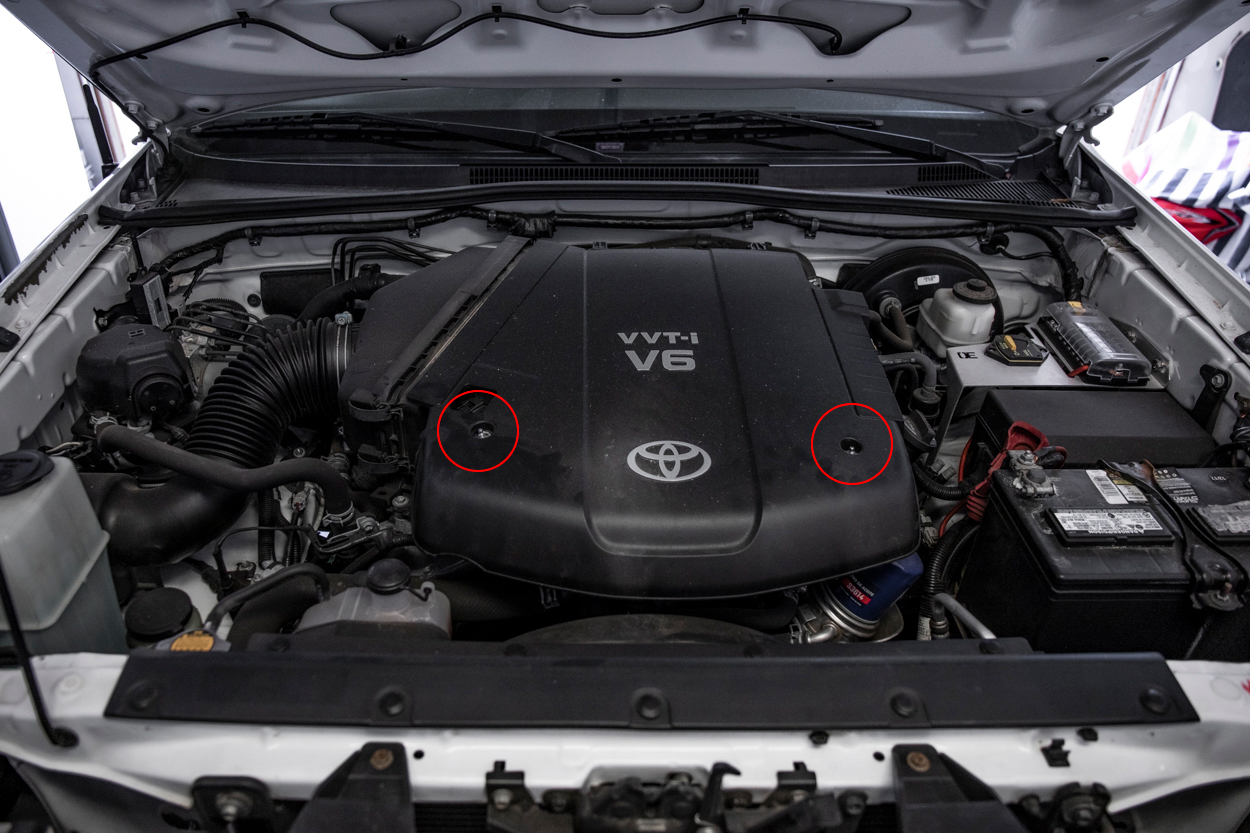
Remove the two 10mm bolts holding the engine cover in place then remove the cover. Set to the side, you will place this back on later.
Step 2. Factory Box
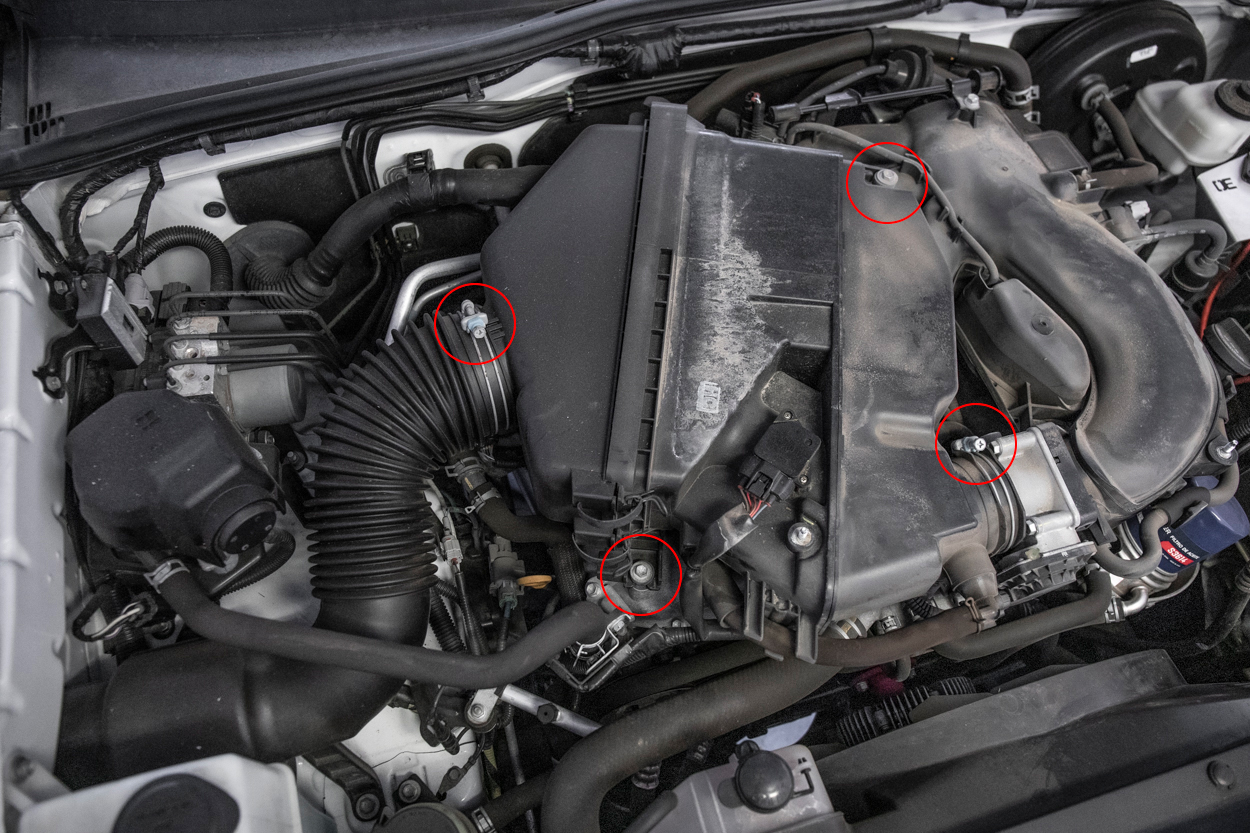
There are a few clamps and 10mm bolts holding the factory box on.
- Loosen the clamp holding the air box to the throttle body
- Loosen the clamp holding the air inlet tube to the air box
- Remove both 10mm bolts
- Remove the 1/8th hose on the air box (this is on the backside of the box close to the firewall).
- Loosen the air duct to the air box and remove the ducting off of the air box
- Unclip the air box and remove the filter
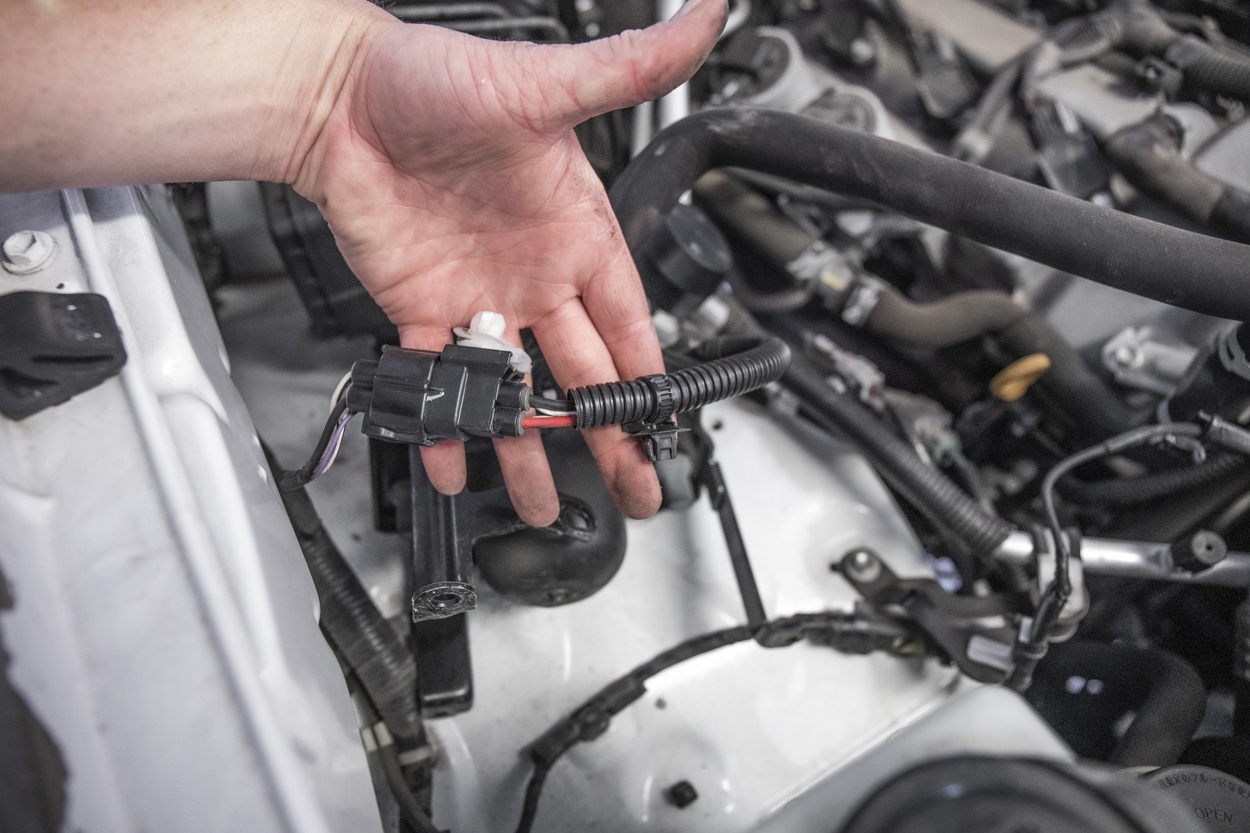
Step 3. MAF sensor
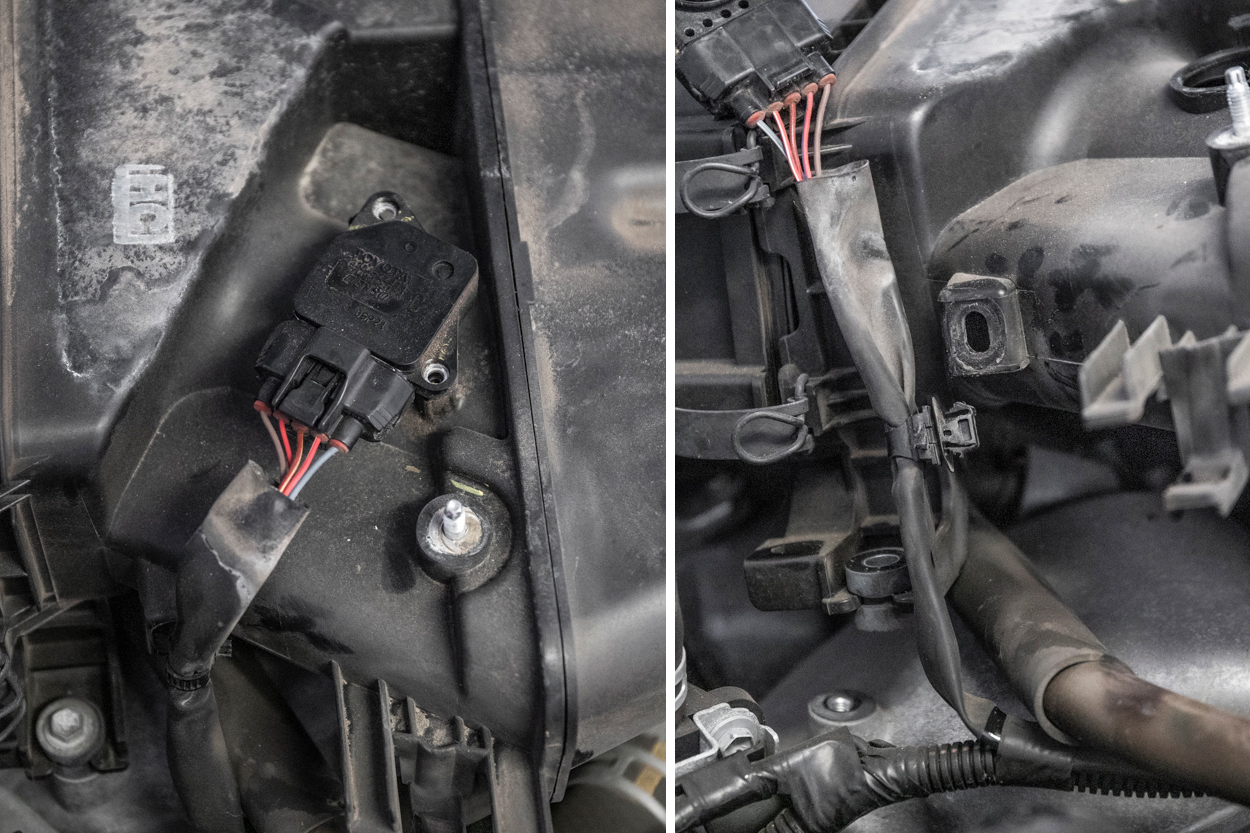
Remove the MAF sensor and harness from the air box. The mass airflow sensor is bolted into place with two Phillips head bolts and then also clipped on using a factory clip on the harness. You will not reuse it unless you plan on re-installing it.
Step 4. 5/8″ Hose
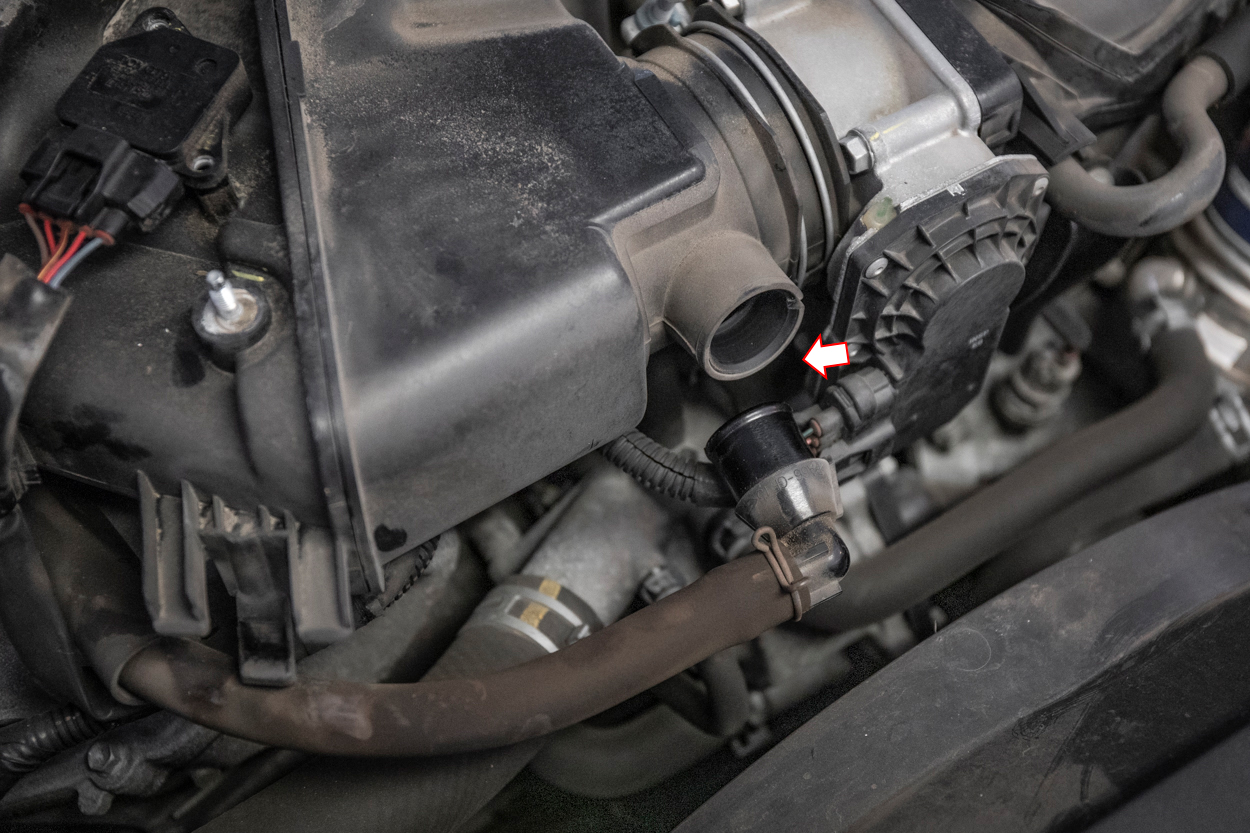
Remove the 5/8″ breather hose for the air box near the throttle body. You can discard this elbow as you will not reuse it unless you plan on re-installing the factory unit one day.
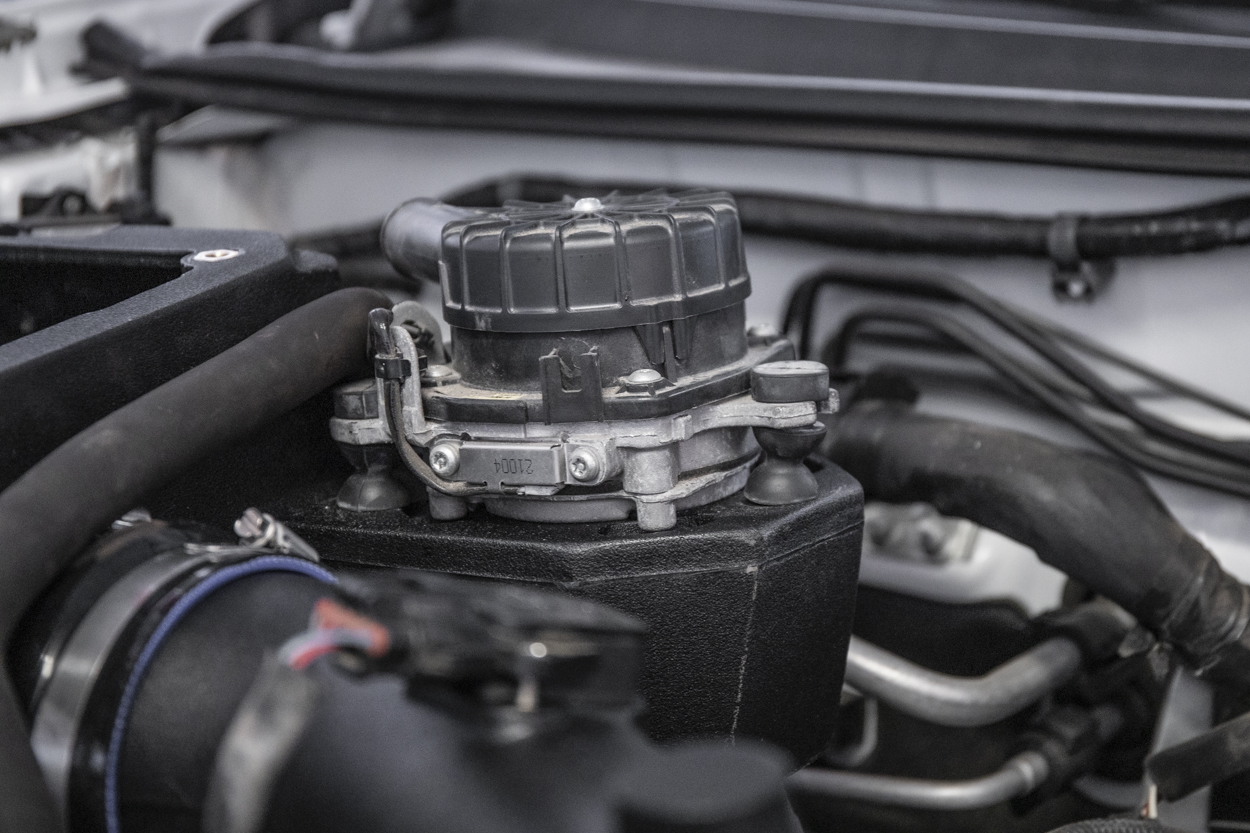
Step 5. Air Injection Pump Cap
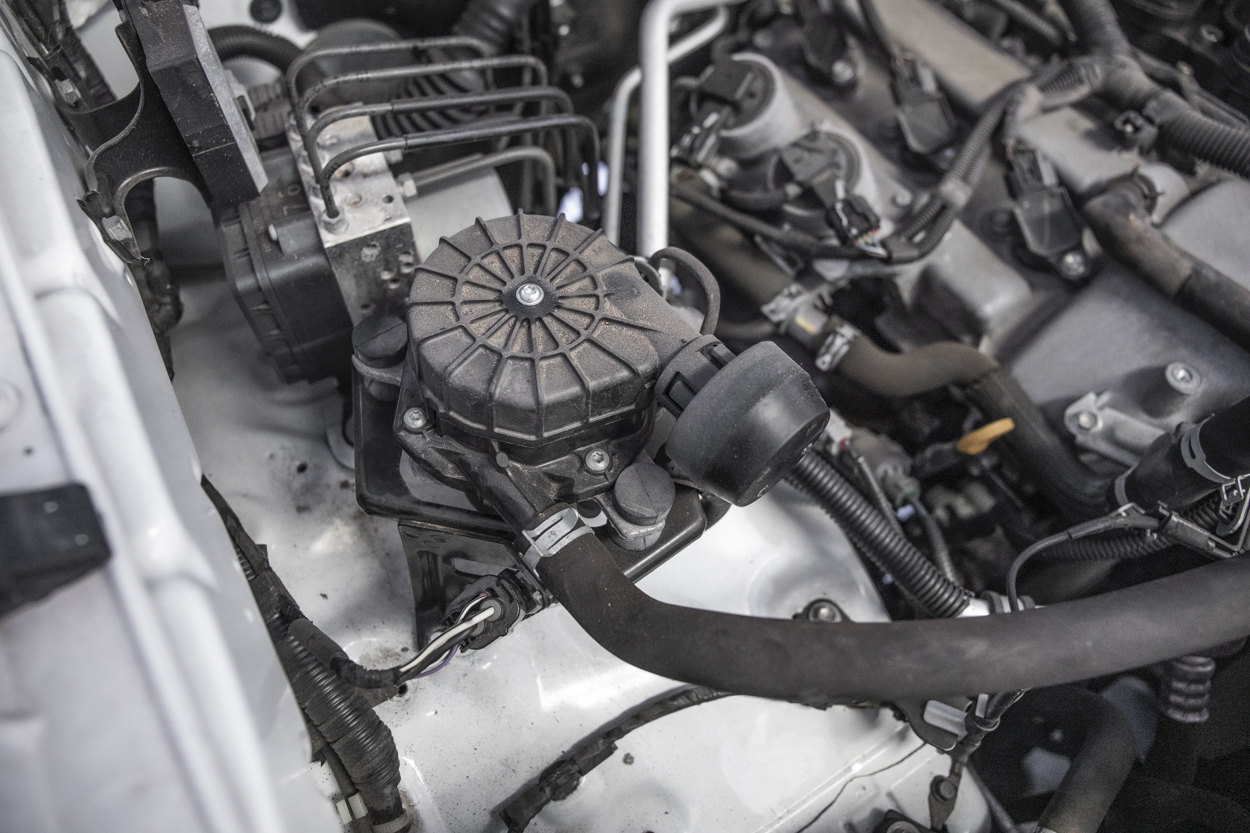
Remove the Air Injection Pump cap. There are two tabs that hold the cap on. You can simply pull this outwards on both sides and the lid comes off.
Step 6. Air Injection Pump Harness
Using a pair of needle-nose pliers or bent needle-nose pliers, you can remove the clip that is holding the wiring harness onto the bracket.
Step 7. Air Injection Pump Bracket & Isolators

Remove the bracket. Remove and set the isolators to the side. You will re-use these for installing the air injection pump onto the intake.
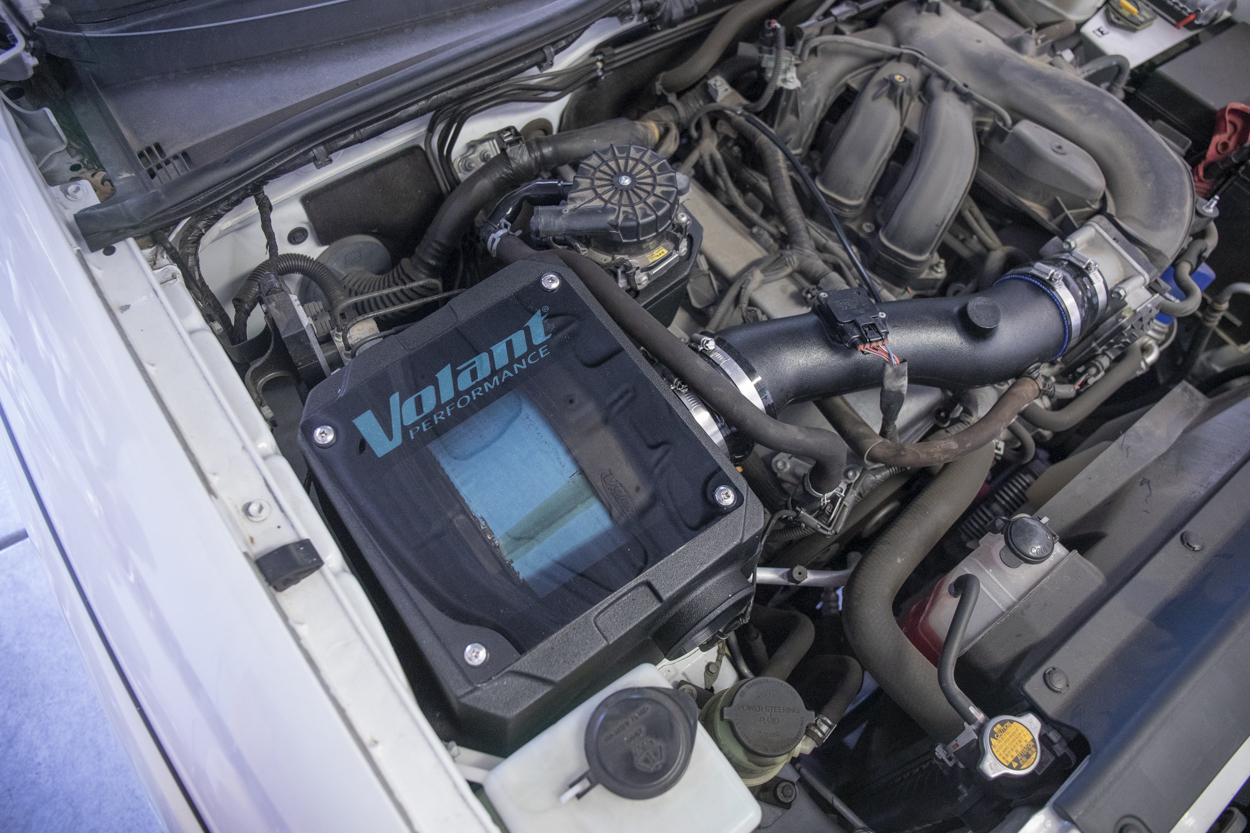
Step 8. Mount Air Box
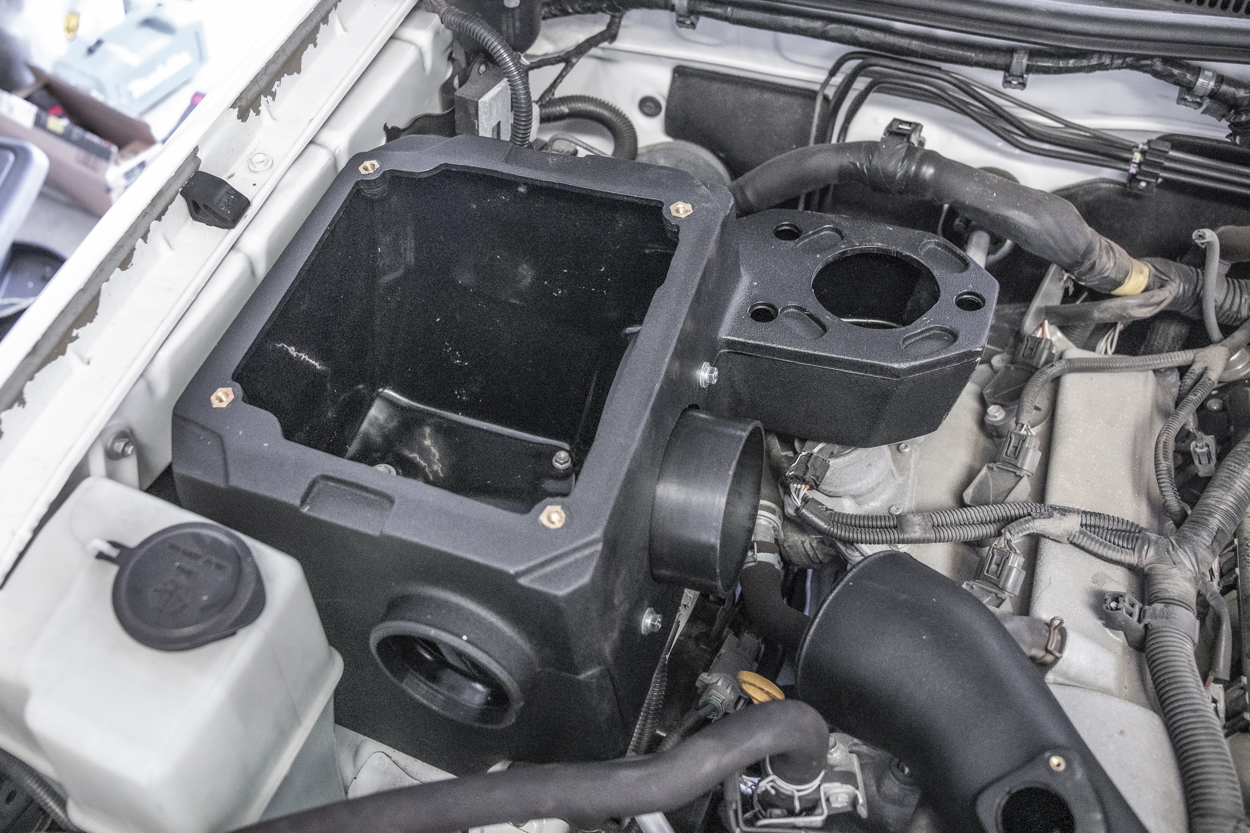
Using the to factory 10 mm bolts, secure the air box into place.
Step 9. Mount Rubber Isolator Feet
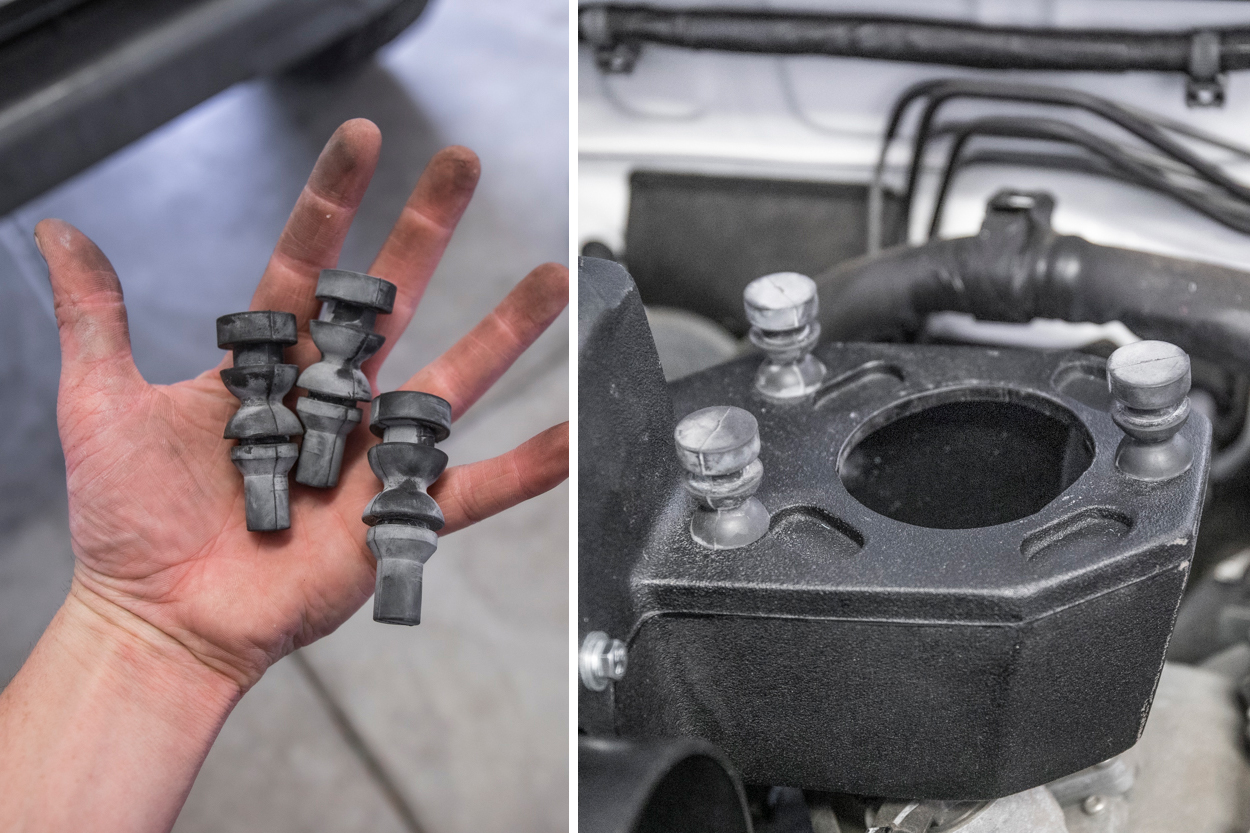
Compress the rubber isolator pump mounts into the Volant air box then mount the pump onto the Volant air box.
Step 10. Mount Air Injection Pump
Step 11. Re-Route 5/8″ Breather Hose

Connect the factory pump line with the supplied elbow fitting and breather hose.
Step 12. Mount Inlet to Air Box
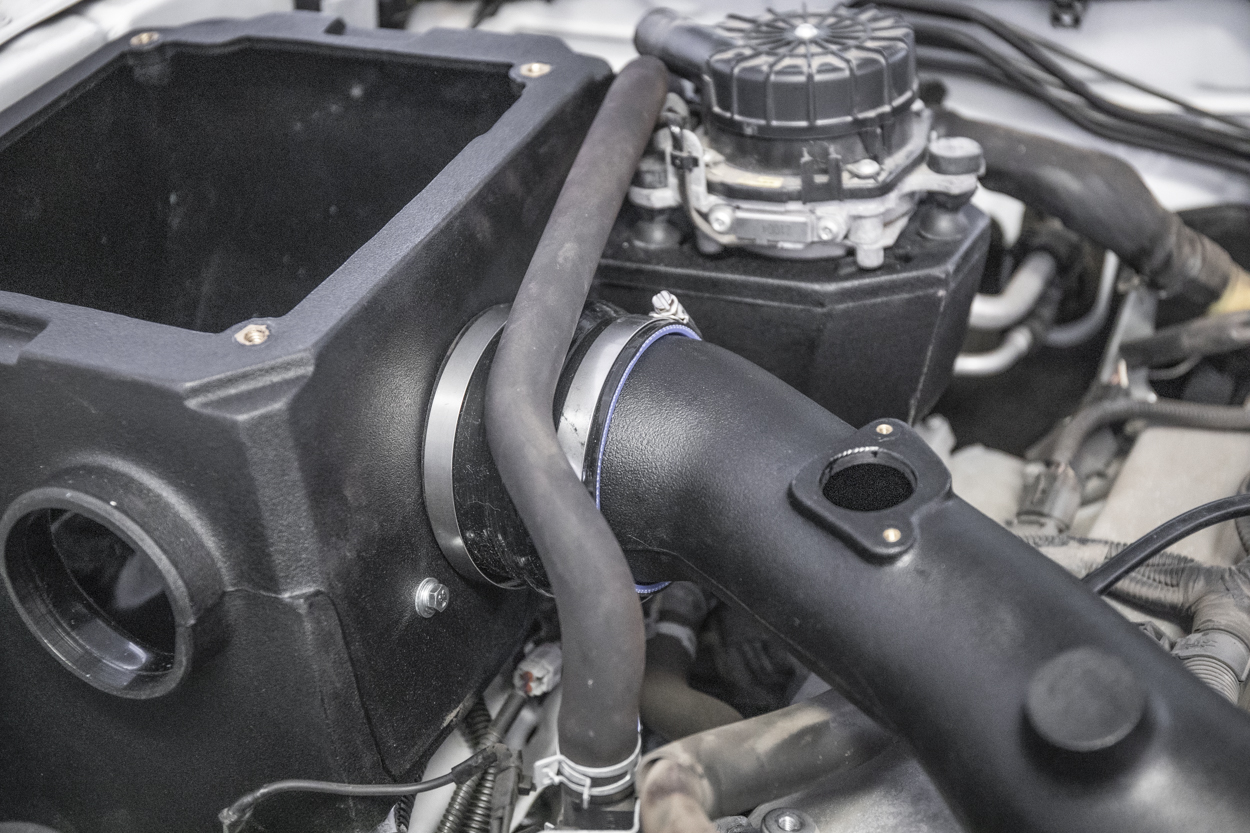
Attach the inlet to the Volant filter box and tighten with two #64 clamps. Leave loose for now, you can come back, position these and then tighten down. Make sure that when you tighten these down you tighten them in an orientation where you can easily access them if you need to remove the box. The same goes for all hose clamps on the box.
Step 13. Mount MAF on Inlet
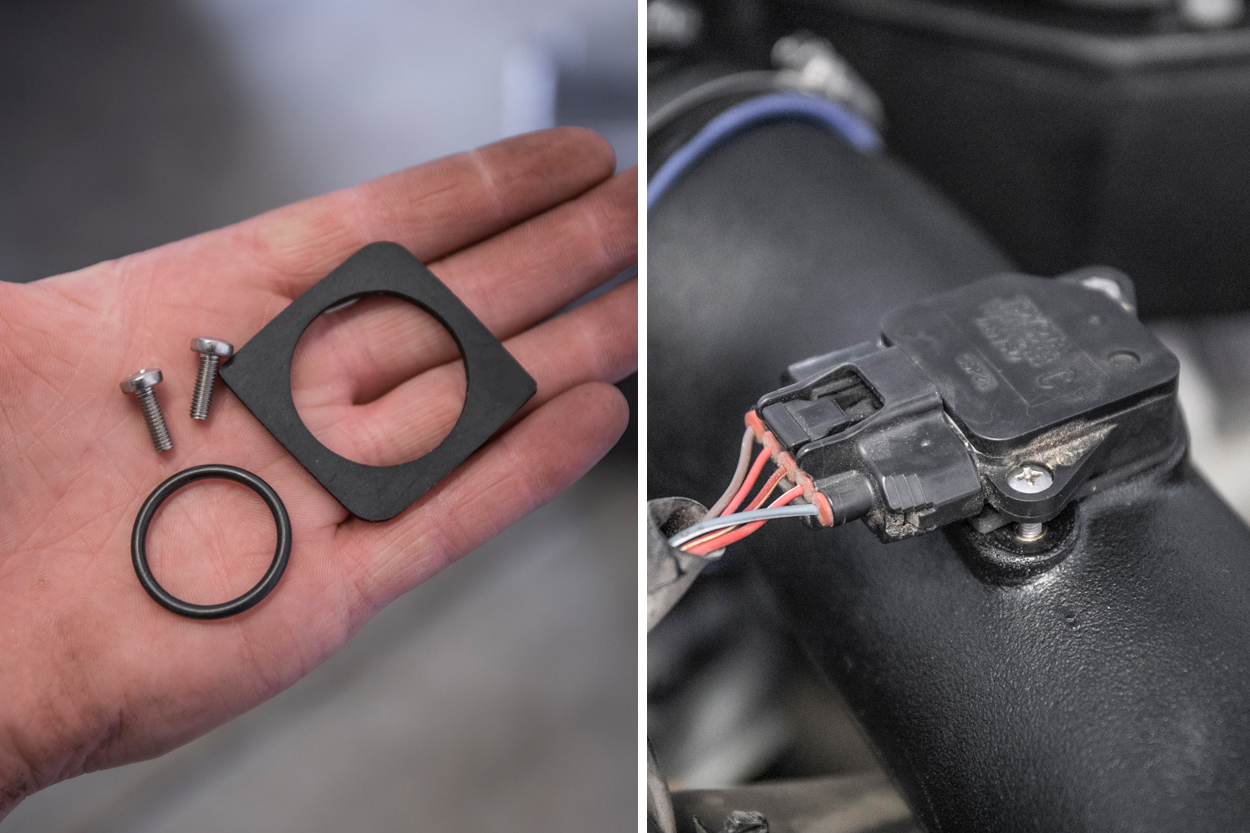
Remove the factory o-ring from the MAF sensor and replace it with the supplied o-ring and new hardware.
Step 14. Position Air Inlet to Throttle Body
Attach the 3 1/2″ to 3″ reducer to the Volant duct and tighten with a #56 clamp. Then connect 5/8″ breather with the elbow.
Step 15. Connect 1/8″ Breather Hose

Press the 1/8 x 12″ breather hose to the duct and attach it to the factory line with the supplied fitting.
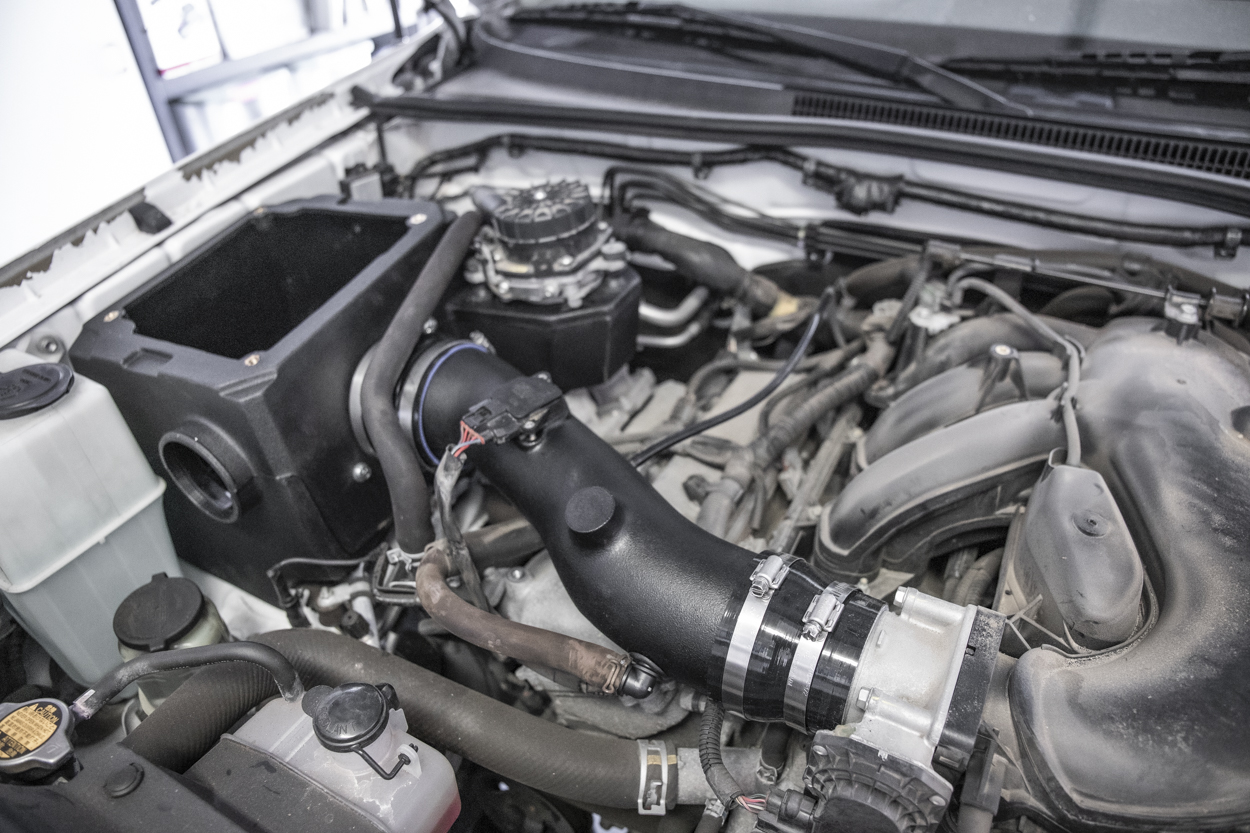
Step 16. Choose Lid Color
- Install the supplied filter and air box lid.
- Reattach the negative battery cable and engine cover.
Final Thoughts
Over on Trail4Runner.com, I have installed a handful of CAIs including the TRD, aFe, and Volant. After running a handful of them, it’s pretty clear that they do make a difference in engine performance.
The challenge and general argument is that many Toyotas come with factory-installed CAIs and for the most part, very few drivers will notice the difference in horsepower or fuel economy after installing aftermarket kits because the gains and improvements are minimal.
I can tell you first-hand though, that I will always install an upgraded airbox in my Toyotas if not for sound alone. Aftermarket boxes paired with an exhaust just make a sexy-sounding truck. There is nothing like listening to a throaty 4Runner or Tacoma roll out of a parking lot.
We need help in the performance department so any hp gains are good hp gains.
Budget
If you have the budget to spend $300+ for a few hp gains all while giving you a deeper sound, then go for it. If a deeper more throaty sound and the potential for a few hp gains aren’t worth the cost, great. If you don’t want a better sound, and any hp gains – don’t buy it.
It’s not a mod for everyone but it’s definitely for me.
Nice. What was install time?
Thanks for the thorough post! Is the process similar for earlier models (2006)? And what exhaust would you recommend pairing with it?
Did you notice a HP gain? Also have you tested actual air intake temperate before and after install? This would let you know if it’s truly colder. As stock does actually run cooler than a KnN CAI.