

As you likely already know, skid plates are an important addition to any overland rig as they protect some of the most vital vehicle components underneath the vehicle (engine, transmission, transfer case, etc.).
The stock plates are super flimsy and aren’t really meant for trail abuse. That’s why I decided to replace them with a set of steel ARB plates. I got this set from Mudify, who have been super helpful and easy to deal with.
In this post, I’ll go over everything you need to know.
Find It Online
- ARB Under Vehicle Protection Kit (2005-2023): Check Price
Table Of Contents
Who Is Mudify?

I got these ARB Skid Plates from Mudify.com. They have grown in popularity over the last few years and sell a wide array of high-quality off-road and performance parts for many makes and models.
Mudify is a one-stop shop for off-road parts, with a large selection of vehicle armor, wheels, lighting, tires, snorkels, fridges, suspension – you name it.
They make finding parts for your vehicle easy and hassle-free, and I highly recommend using Mudify for your next part purchase.
Features & Specs

- 4 panels total provide full-length underbody belly protection
- Durable 3mm construction provides high strength protection yet saves weight over other options
- Zinc plating and powder coat protect the steel from rust and corrosion
- Direct fit for 2005-2023 Tacoma – bolts directly to the chassis and cross members
- ARB 2-year factory warranty gives peace of mind and confidence in a quality product
- The total system weight is only 90 lbs.
Installation

Like I said, this is a pretty straightforward, easy installation that requires few basic hand tools. Everything is bolt-on using factory bolt holes, with the exception of 2 additional holes for 2nd Gen, which I will go over below. While this can easily be done in your driveway with a floor jack, I chose to use a lift to allow you to see the installation from underneath (I also needed an oil change which made things easy). Overall, this install should only take about 30-60 minutes to complete (depending on your skill level).
I will note that since the plates connect together, only hand tighten the bolts until the end of the installation to ensure everything lines up properly.
Here are the tools you will need:
- basic metric socket and wrench set
- floor jack/jack stands (if not working with a lift)
- ball peen or other type of hammer
- (preferably) A torque wrench
Since install on a 2nd Gen. requires the drilling of two additional holes, you will also need:
- 8mm or 9mm metal drill bit
- Power drill
- Center punch
Step 1. Remove Factory Skids
The first step is to remove any stock or preexisting skid plates you may have, whether you have the factory ones, TRD Pro plate, or something else. Simply remove the bolts and set aside, these will not be reinstalled and the hardware will not be reused.
Step 2. Bend/Cut Mounting Hook

The factory skid uses these little hooks to hold it in place when disconnected. Presumably, to keep it attached to the vehicle for easier service/maintenance.
You will need to either cut or bend the hook to help with plate clearance.
Step 3. Mount Front Skid Plate (Front Portion)

Now, using a jack stand or having another person to hold it up, screw in the front two bolts to the factory holes in the front crossmember. The two front bolts are 25mm M8 bolts with a flat washer.
Now, secure the back 2 bolts, which are slightly longer than the front 2 (35mm M8 bolts with flat washers) into the rear factory bolt holes. Do not tighten any of these bolts until the end.
Step 4. Mount Front Skid Plate (Rear Portion)
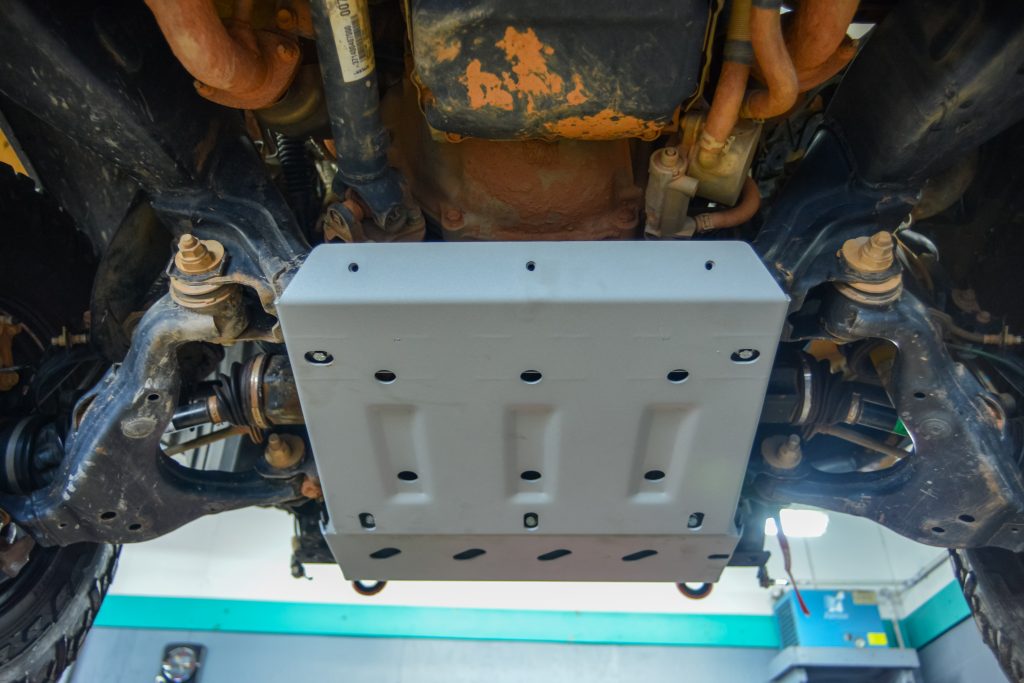
Now, hold the second panel up to the first. Use (3) 25mm M8 bolts with spring washers and flat washers to secure the 2nd panel to the 3 holes that align with the first panel.
With the front of the panel secured, using (2) 35mm m8 bolts with lock and flat washers, secure the back to the 2 factory bolt holes at the rear of the panel. Do not tighten any of these bolts until the end.
Step 5. Install Crossmember Brace

Use a jack to support the center crossmember and remove the two bolts on both sides holding it. Install the crossmember brace for the 3rd panel on the front of the crossmember.
Be very careful here. this support bar has the weight of the engine/trans resting on it. When you disconnect these bolts, the assembly will want to sink down.

This brace will reuse the factory bolts on both sides, but add an included flat washer to each to account for the added space of the support bar.
Step 6. Mount 3rd Plate

With the crossmember brace installed, hold the 3rd panel up to the 2nd. Use (3) 25mm M8 bolts with spring washers and flat washers to secure the 3rd panel to the 3 holes that align with the 2nd panel.
Then, use (2) 30mm M10 bolts with lock and flat washers to bolt the back of the 3rd panel to the crossmember support installed in the previous step. Do not tighten bolts until the end.
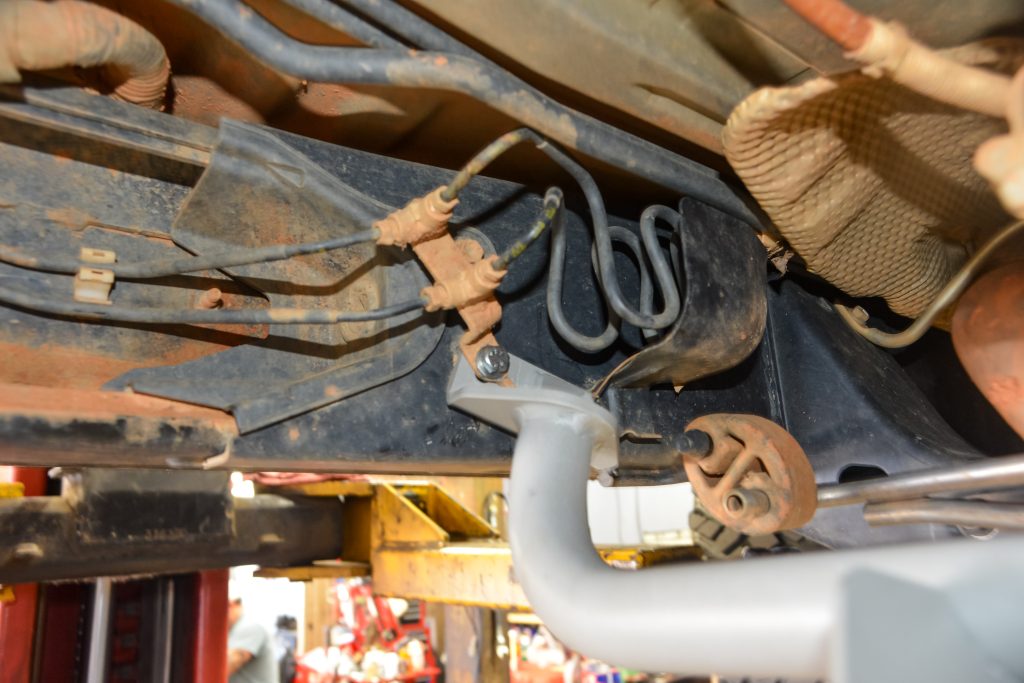
Step 7. Disconnect Brake Line Bracket

Remove the 2 bolts securing the brake line bracket and cover shroud to the frame as shown in the picture above.
Note: Some variants of this truck do not have the cover. Discard these fasteners and pull the lines away from the frame to allow space for the 4th panel.
Step 8: Drill Holes For Last Plate (2nd Gen Only)
For 2nd Gen trucks, the forward most hole is not predrilled into the frame of the vehicle. Using the 4th panel and crossmember as a template, mark these holes. Use a center punch to punch the metal so that the drill bit can catch in the correct spot. With an 8mm or 9mm drill bit, drill these holes.
Step 9: Install New Crossmember/4th Plate
Mount your new crossmember with supplied hardware. You can see the driver’s side above. The brake line bracket is on top of the new support.

In the shot above, you can see the passenger’s side.
You will fasten it on both sides with 25mm M8 bolts and locking and flat washers. For the 2nd Gen (where you drilled your holes), you will need to use the flange nuts on the back of these holes to secure the bolts.

Once the new cross piece and skid combo is fastened to the frame, use (3) 25mm M8 bolts with spring washers and flat washers to secure the 3rd and 4th plates together.
Step 10. Torque/Tighten All Hardware

With all of the panels installed, it’s now time to tighten all of the bolts. Use a torque wrench to ensure that the bolts are set at the appropriate torque value. All of the M8 bolts should be torqued to 16 foot pounds, and the 2 m10 bolts should be torqued to 32 foot pounds.
Review & Impressions

Overall, I think this is a great choice for anyone looking for a quality set. Most companies typically make steel skid plates 3/16″ (5mm) thick, and aluminum sets 1/4″ (~6mm) thick. This steel set is 3mm thick, giving you the protection and advantages of steelfa, while weighing much less than many other options.
I wanted a good middle ground between weight and strength, and I think this set delivers that perfectly. The coverage is great, and should be more than sufficient for how I use my truck. While ARB doesn’t currently offer fuel tank skids, that portion of the undercarriage typically see less impacts. If you’re looking for that coverage, you will need to supplement the kit from a different company.
Final Thoughts

ARB is one of the best in the business, and these skid plates are certainly top notch. They fit perfectly making for an easy installation and the gray powder coat looks great underneath the vehicle.
In my opinion, there are only two downsides to this set. For one, there is no removable plate to access the oil filter. This means you have to remove the front two plates every time you need to change your oil. Secondly, like all others, these seem to sit reduce my ground clearance by about an inch. However, I’m happy to give up an inch of ground clearance knowing that my vehicle is fully protected.
Let me know if you have any questions!