
The Toyo Steering Billet Steering Rack is a great upgrade for 2nd Gen and 3rd Gen Tacoma owners running larger tires, who actually wheel.
This is a pretty straightforward installation overall, especially if the truck is on a lift, but it can still be done in your driveway. A lift just makes access easier when removing the factory rack, lifting the motor slightly, and sliding the new billet rack into position.
For this install, the most important part is making enough room to get the new rack into place. Once the factory steering rack is out, the process is very simple.
The installation of the new Toyo Steering Billet Rack is much easier than the old modified Tundra racks with eccentric bushings and/or 200 series Land Cruiser racks. The entire install is 100% bolt on with an optional weld-on 3rd tab, which we’ll show here.
The installation can be done in a driveway, but a lift will make your installation go much smoother.
Just remove the skid plates, remove the factory rack, remove the oil filter, disconnect the passenger side motor mount bolts, and lift the motor slightly on the passenger side with an under hoist jack stand to get the new rack in. It really is that simple.
If you need help with your installation, our shop, Stellar Built in Sacramento, can help you out anytime. Give us a call or send us an email.
Table Of Contents
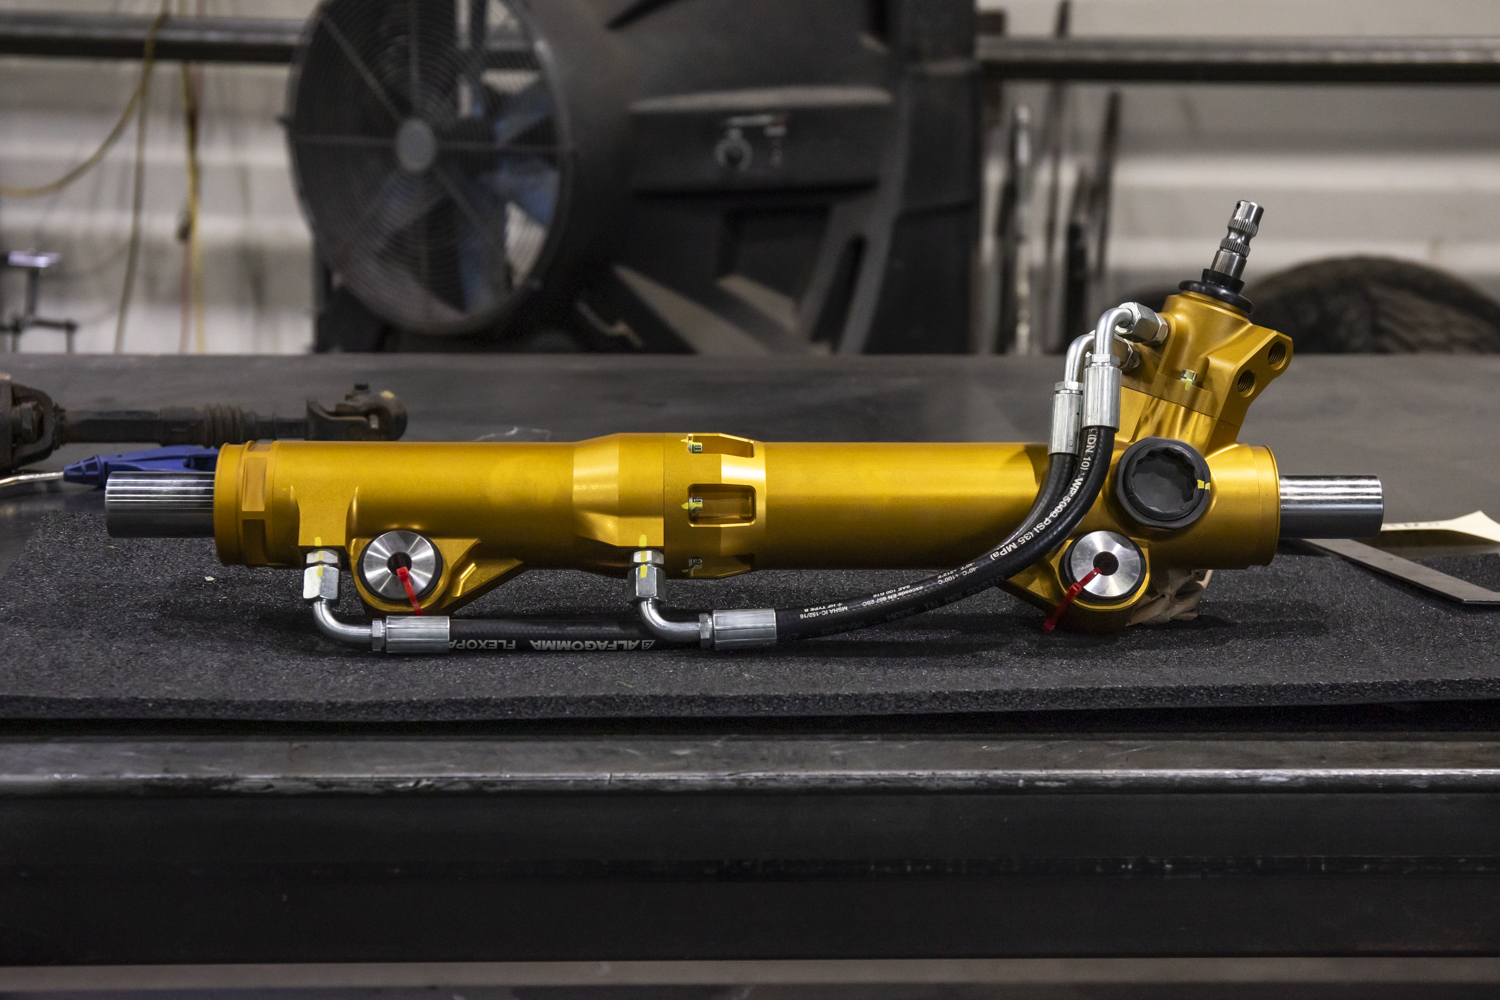
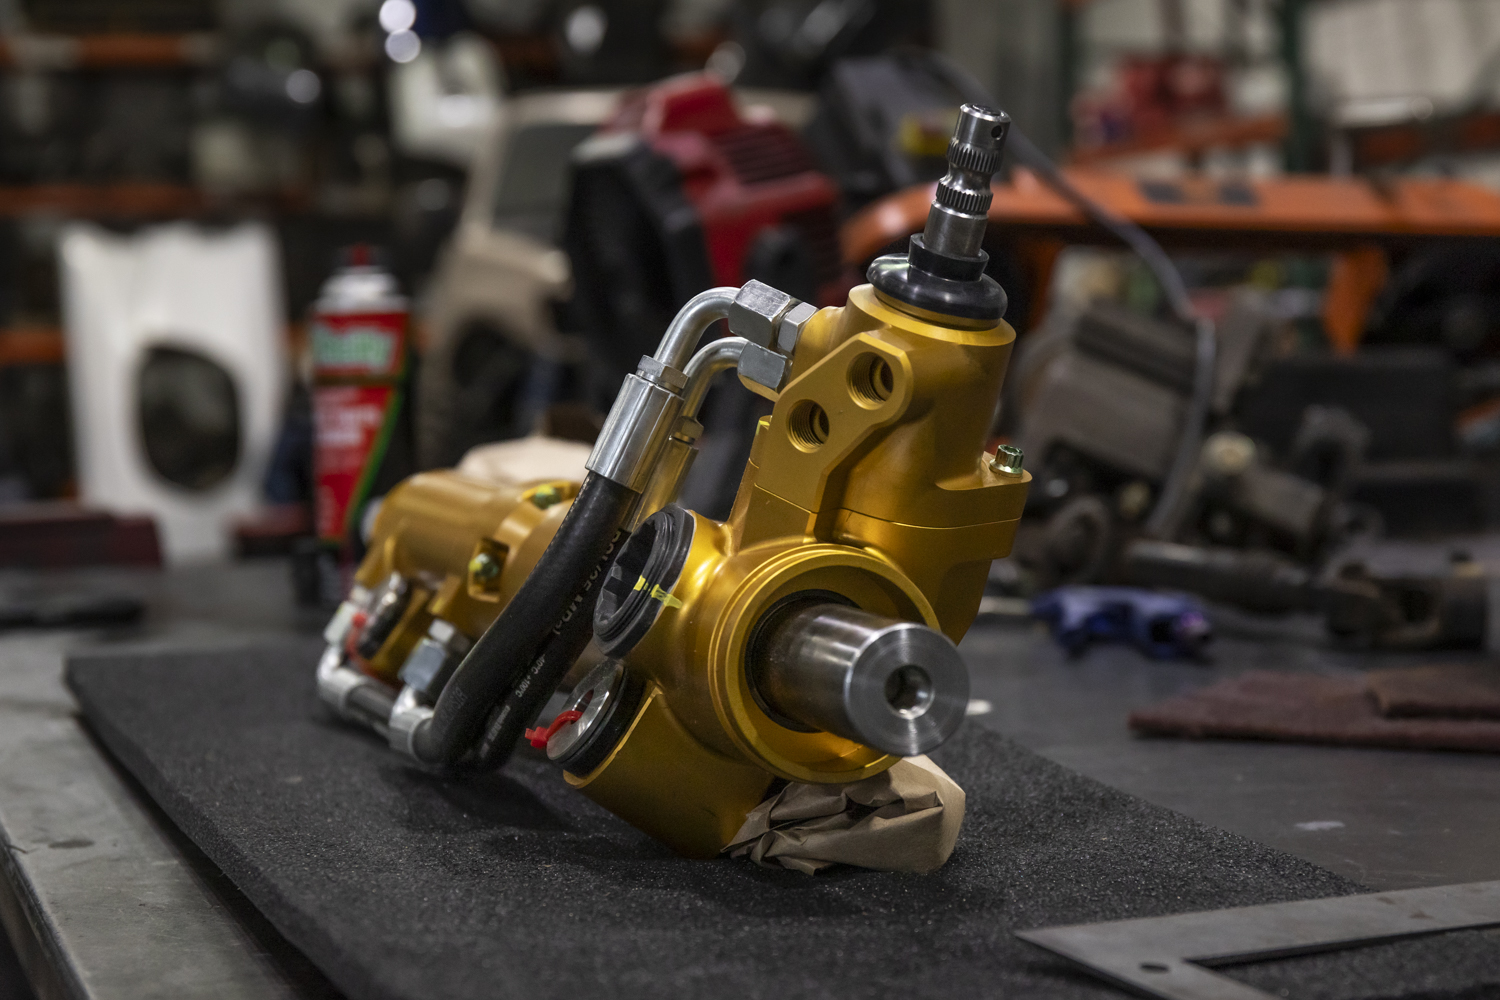
Toyo Billet Tundra Rack Overview
Bore Axis Location: The rack gear has been repositioned correctly relative to the mounting points. There are no eccentric bushings or relocating mounts. Proper tie rod clearance is maintained at the coilovers.
Pinion & Angle: Moved closer to the center of the rack, which improves u-joint alignment. It also eliminates frame interference.
Rack Support & Strength: Uses bronze bushings. Tight tolerances help prevent deflection under load.
Rack Housing: Made from 6061-T6 aluminum. This provides correct geometry compared to modified Tundra racks.
Hardware: Uses 12-point hardware. Includes mil-spec fasteners with cadmium plating. This improves strength and corrosion resistance.
Hydraulic Lines: Rated to 5000 PSI. Built to heavy equipment standards. Designed to handle sustained loads and pressure spikes.
Bushings: Made from Delrin and 17-4PH stainless steel. Includes a flanged sleeve. Eliminates metal-on-plastic wear.
Seals: Uses OE-grade seals throughout. This ensures reliability and easy serviceability.
Step 1. Prep for Install
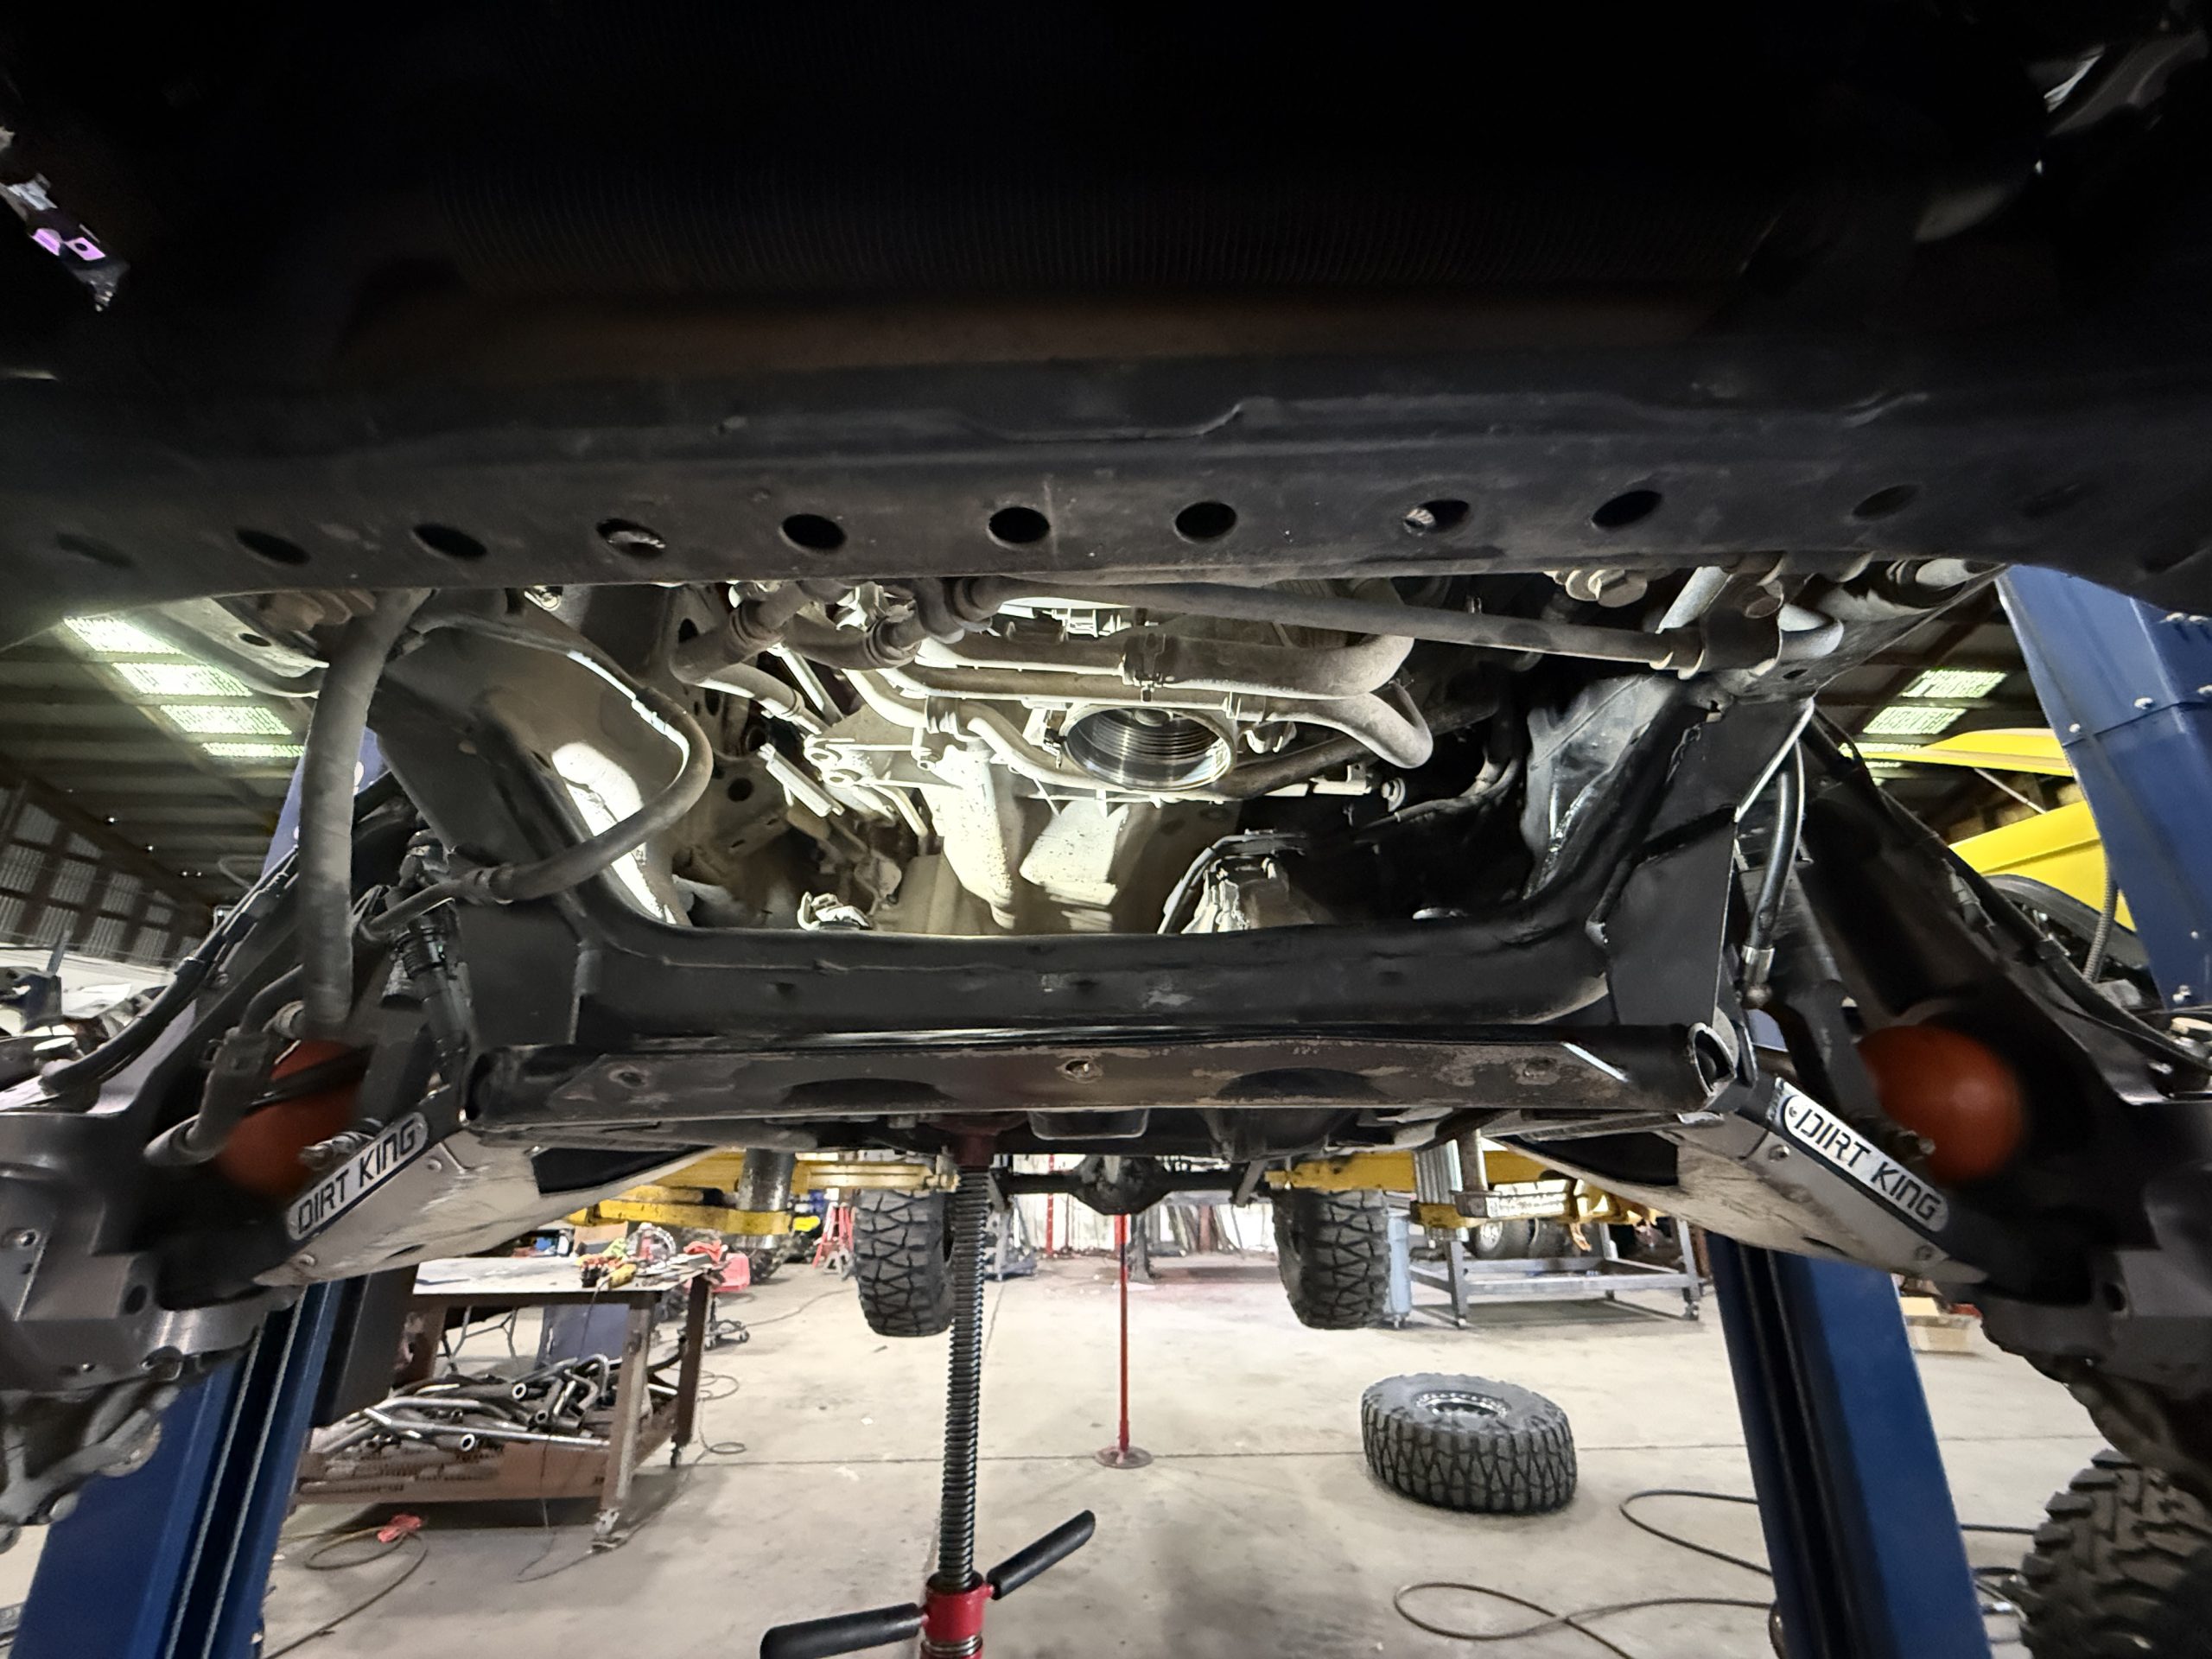
Remove all skid plates and anything else blocking access underneath the truck.
Remove the factory steering rack.
You will also want to remove the oil filter at this stage to create additional clearance.
Once the underside is opened up and the factory rack is out of the way, the rest of the job becomes much easier to manage. If you are working on jack stands at home, this step takes a bit more effort, but the process is still very doable with patience and enough room to move around under the truck.
A lift in a shop will make this job much easier.
If you need assistance with your install, please give us a call anytime at the shop or contact us for more information on our website: https://stellarbuilt.com/.
Step 2. Remove Passenger Side Motor Mount Bolts
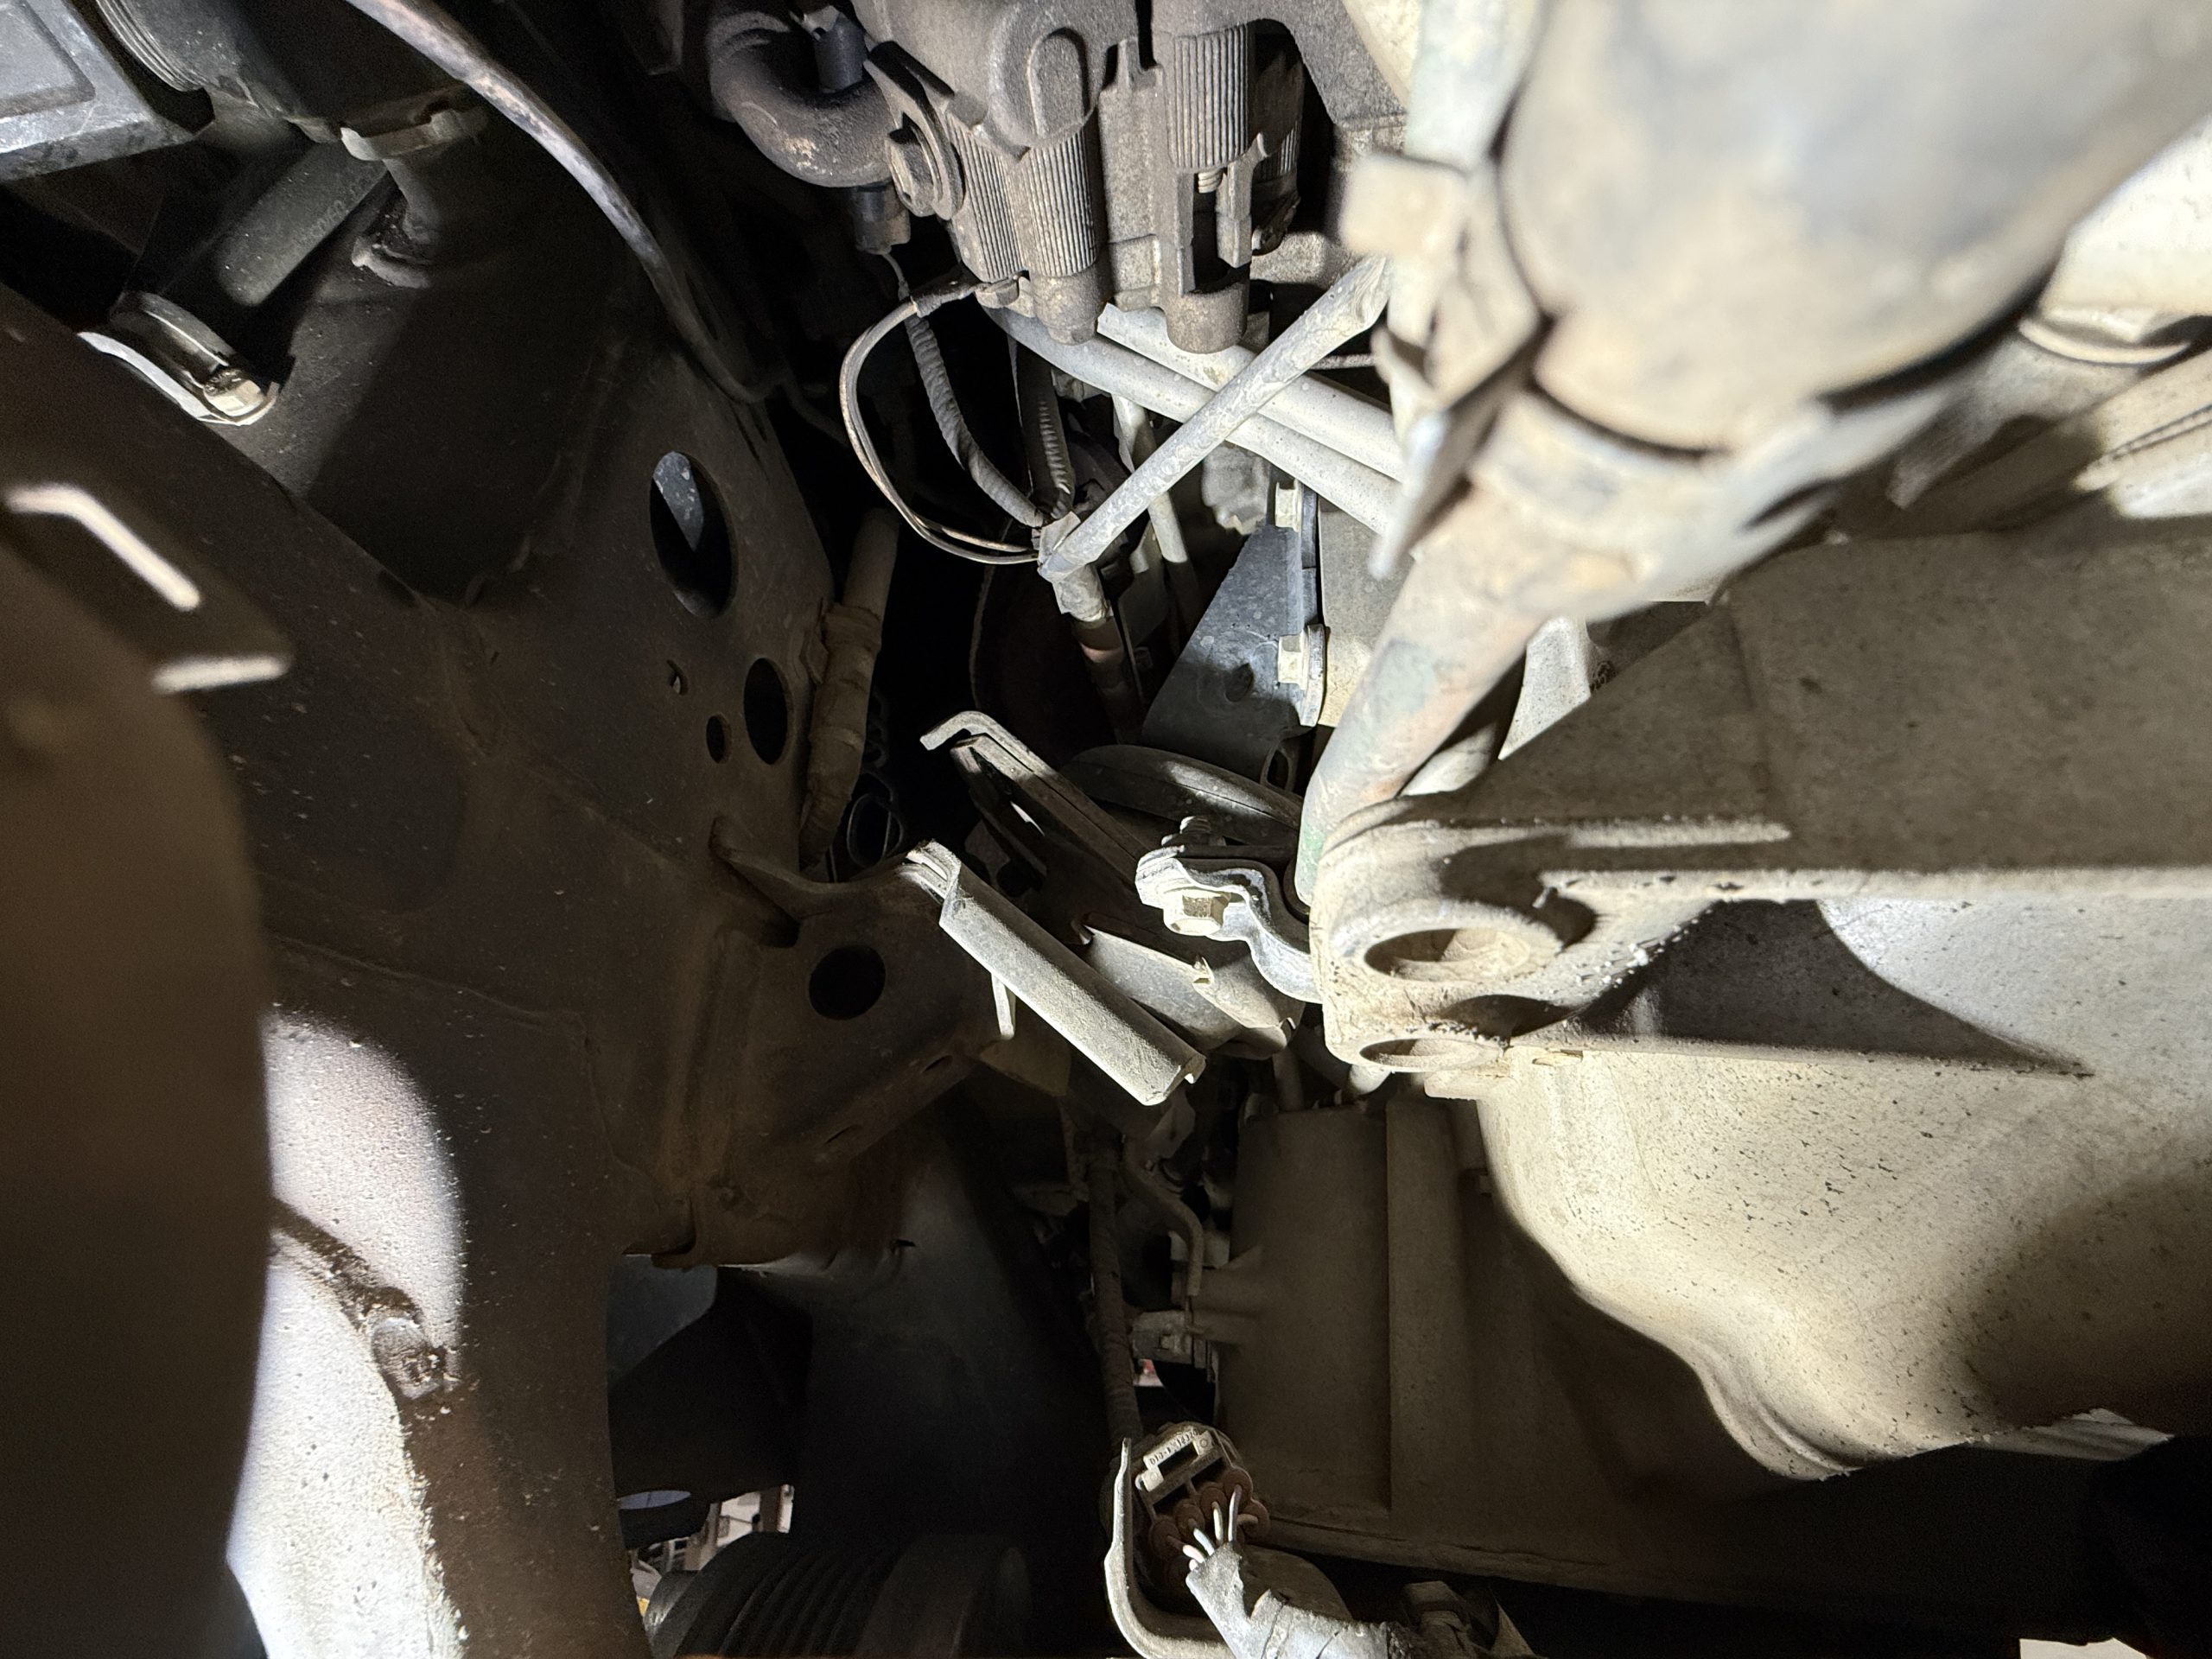
With the factory rack removed, take out the passenger side motor mount bolts.
Step 3. Lift Motor Up
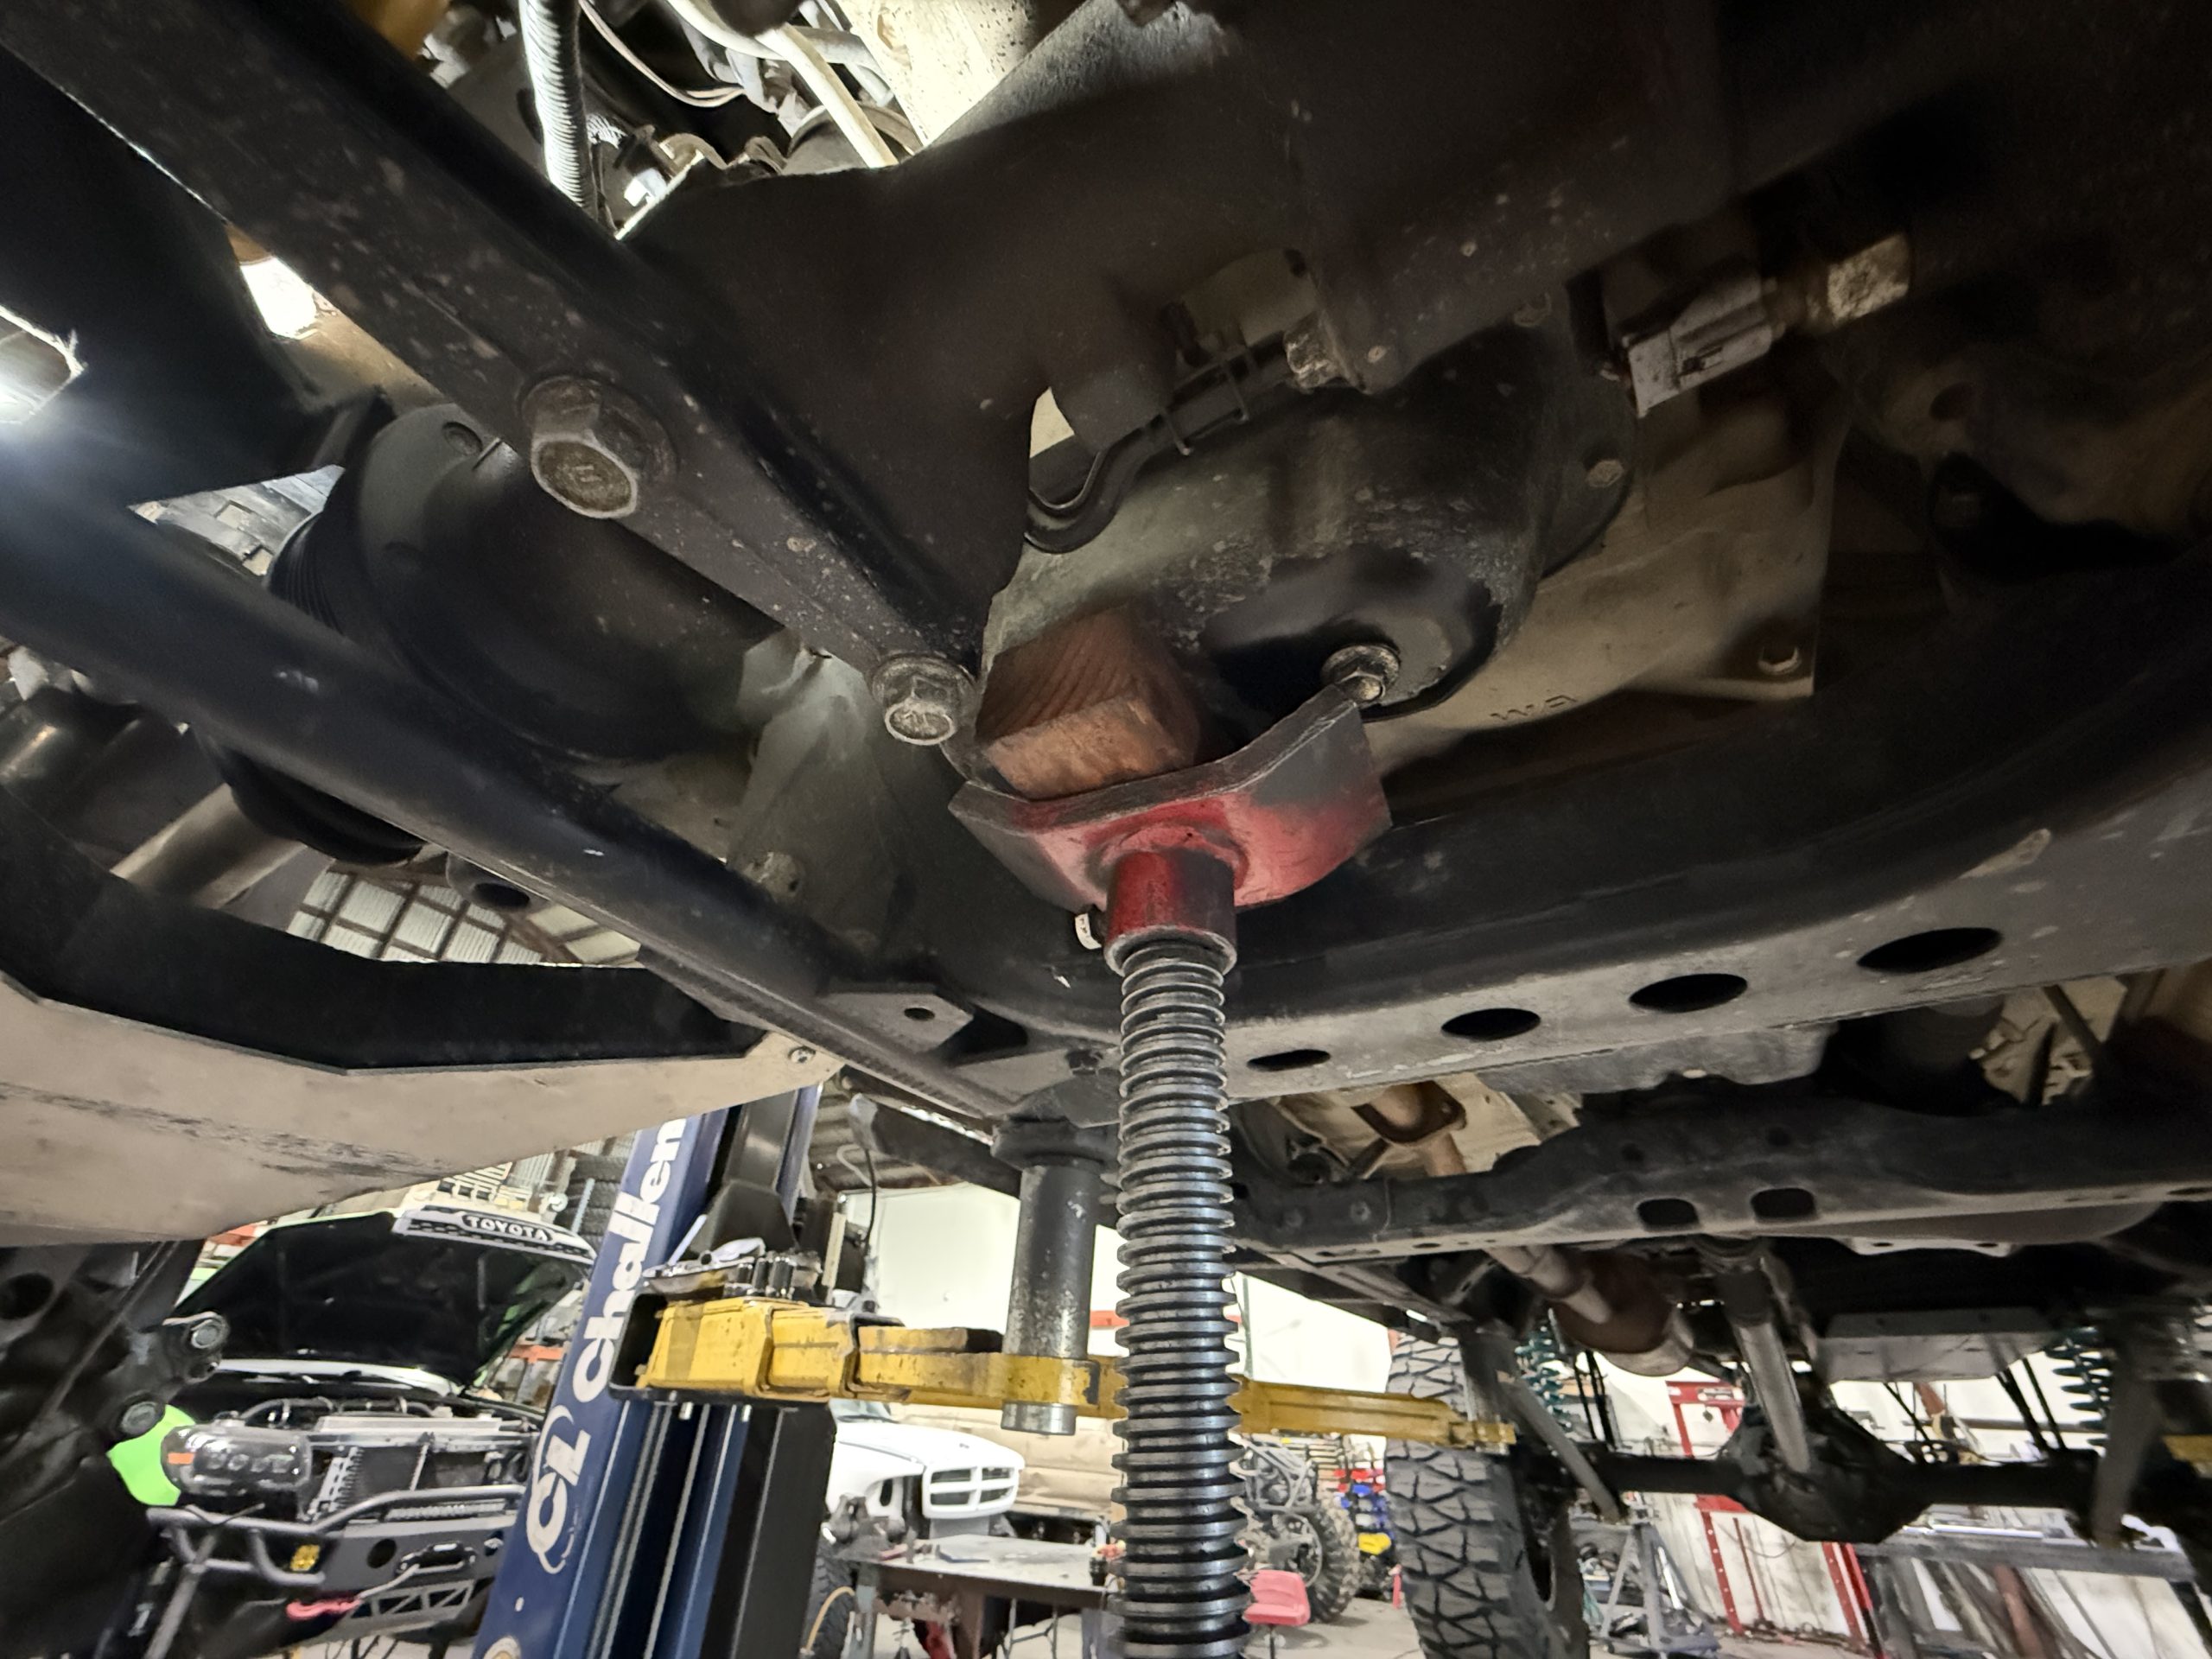
Use an under-hoist jack stand to lift the motor slightly on the passenger side. You do not need to raise the engine too much. Just enough lift to create the clearance needed to slide the billet rack into place.
Combined with removing the oil filter, lifting the motor slightly opens up the space needed to work the new rack into position.
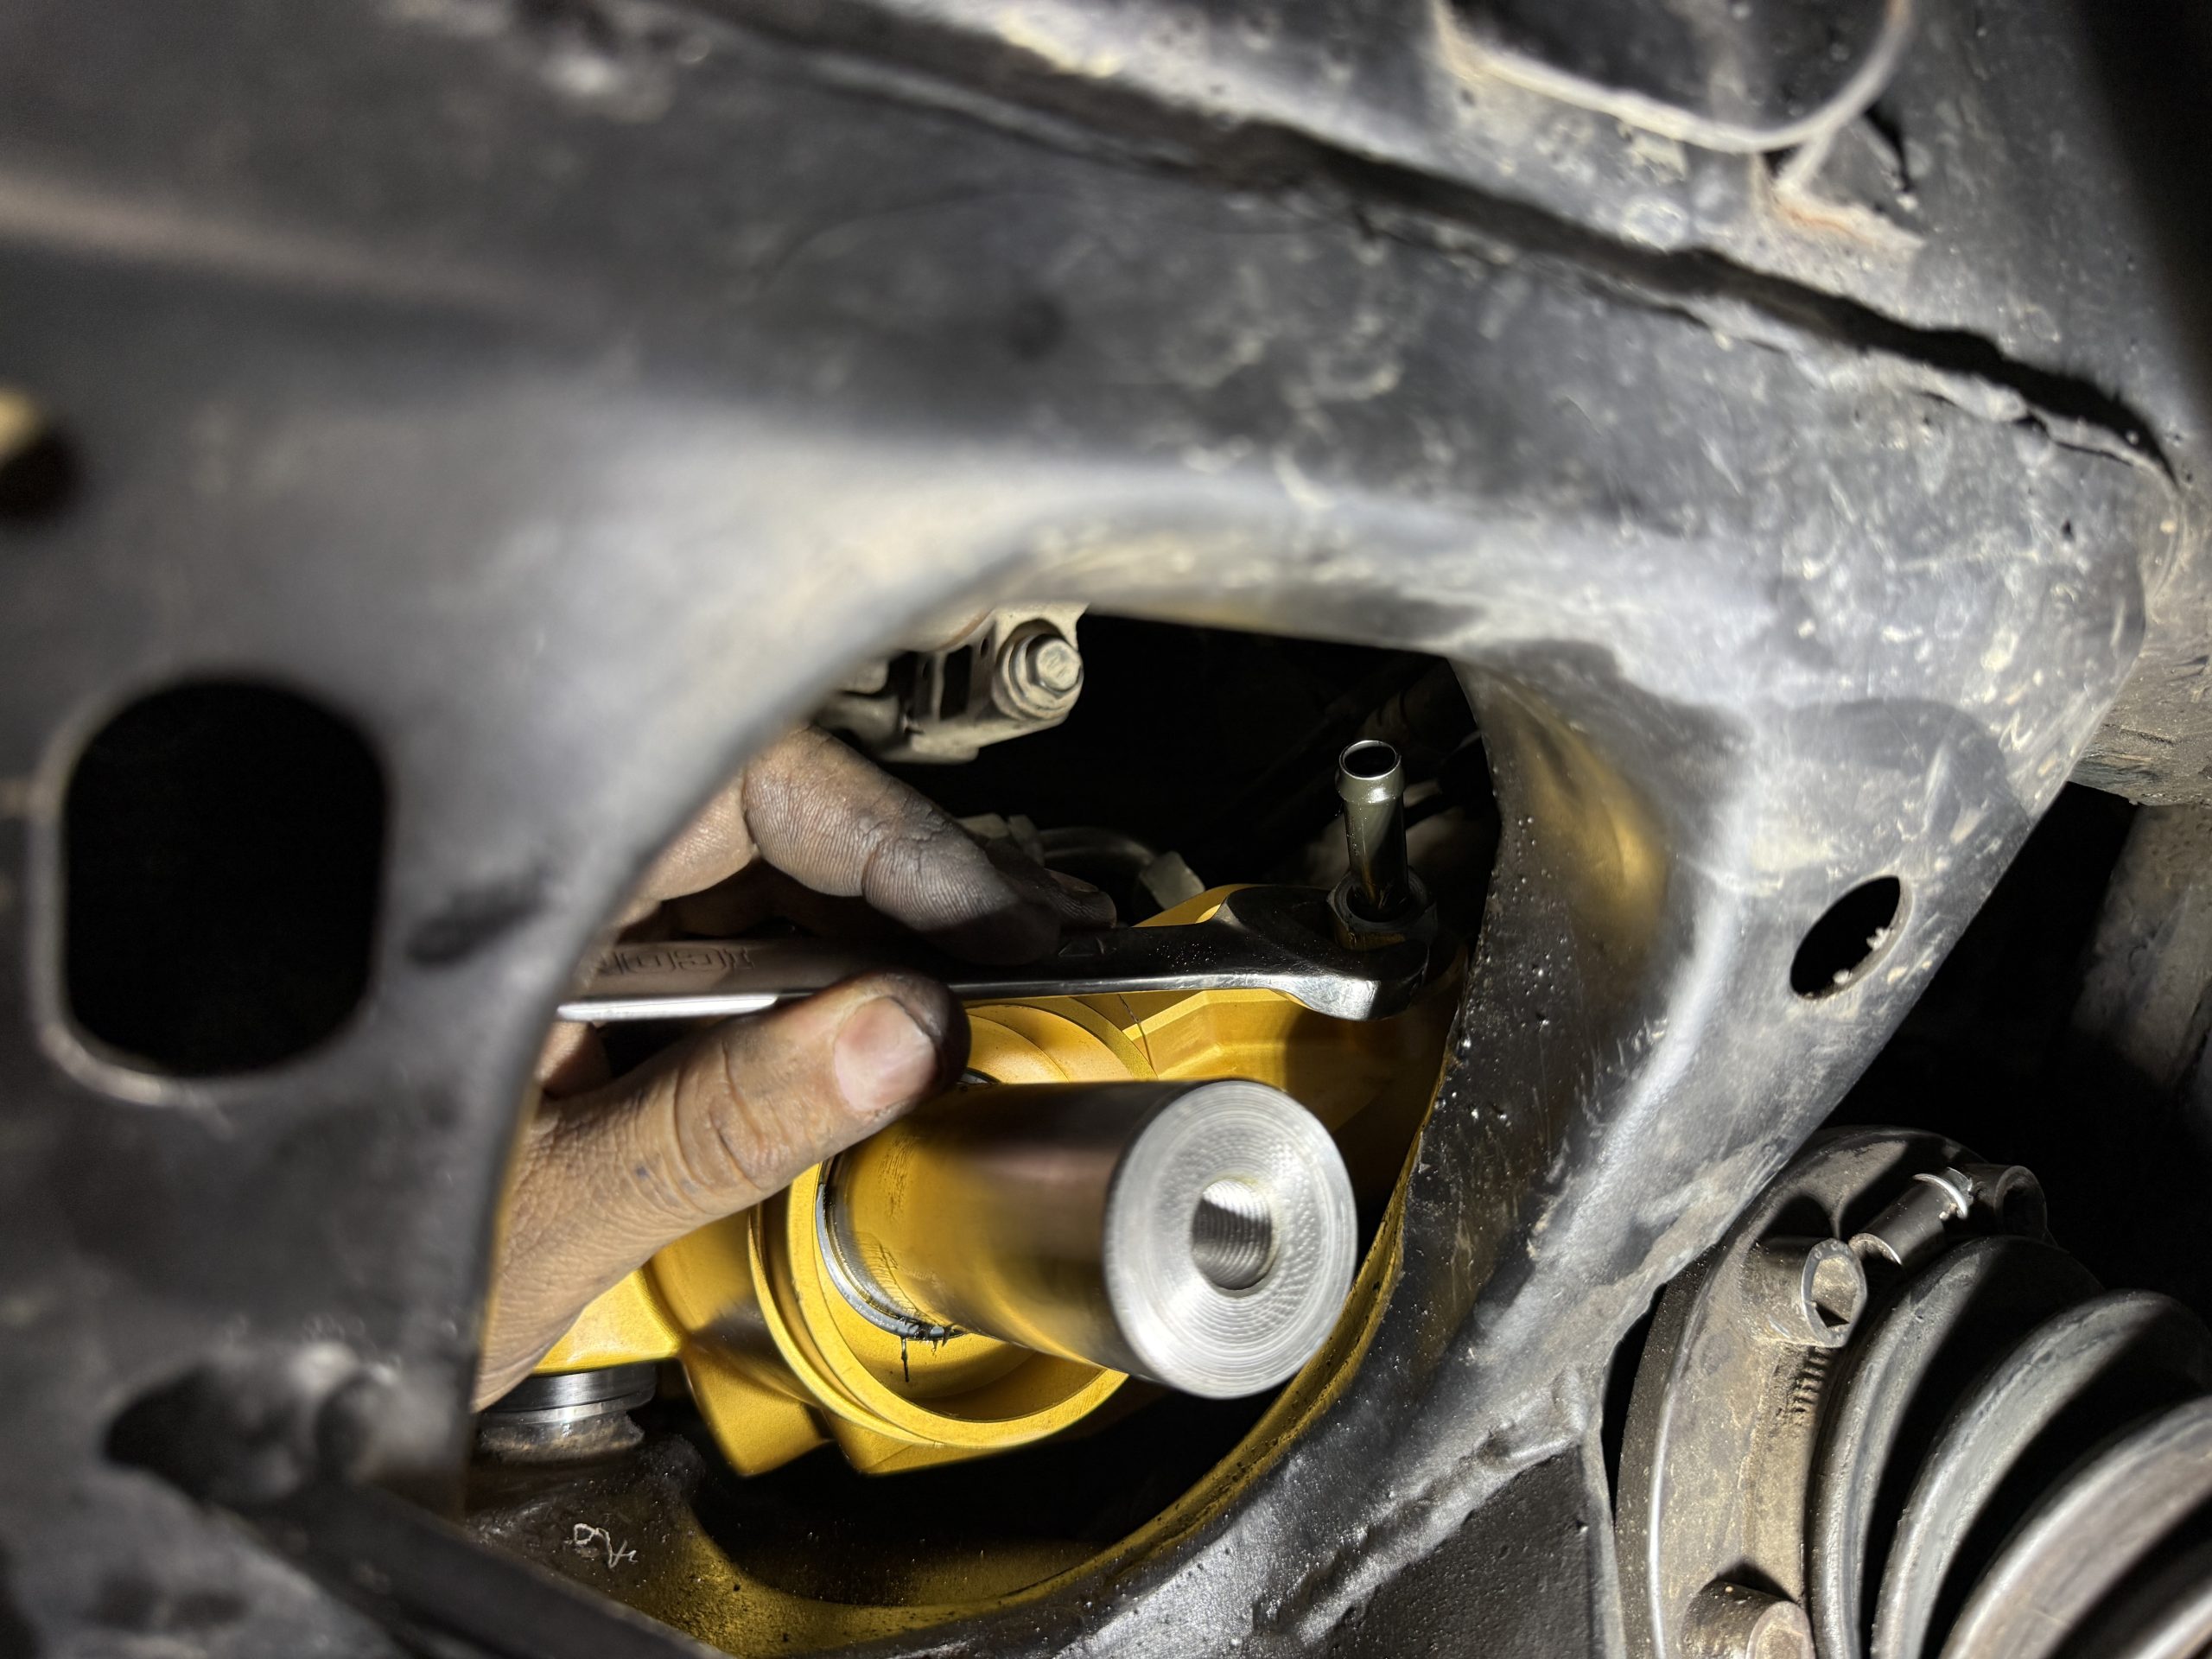
Step 4. Slide in the Steering Rack
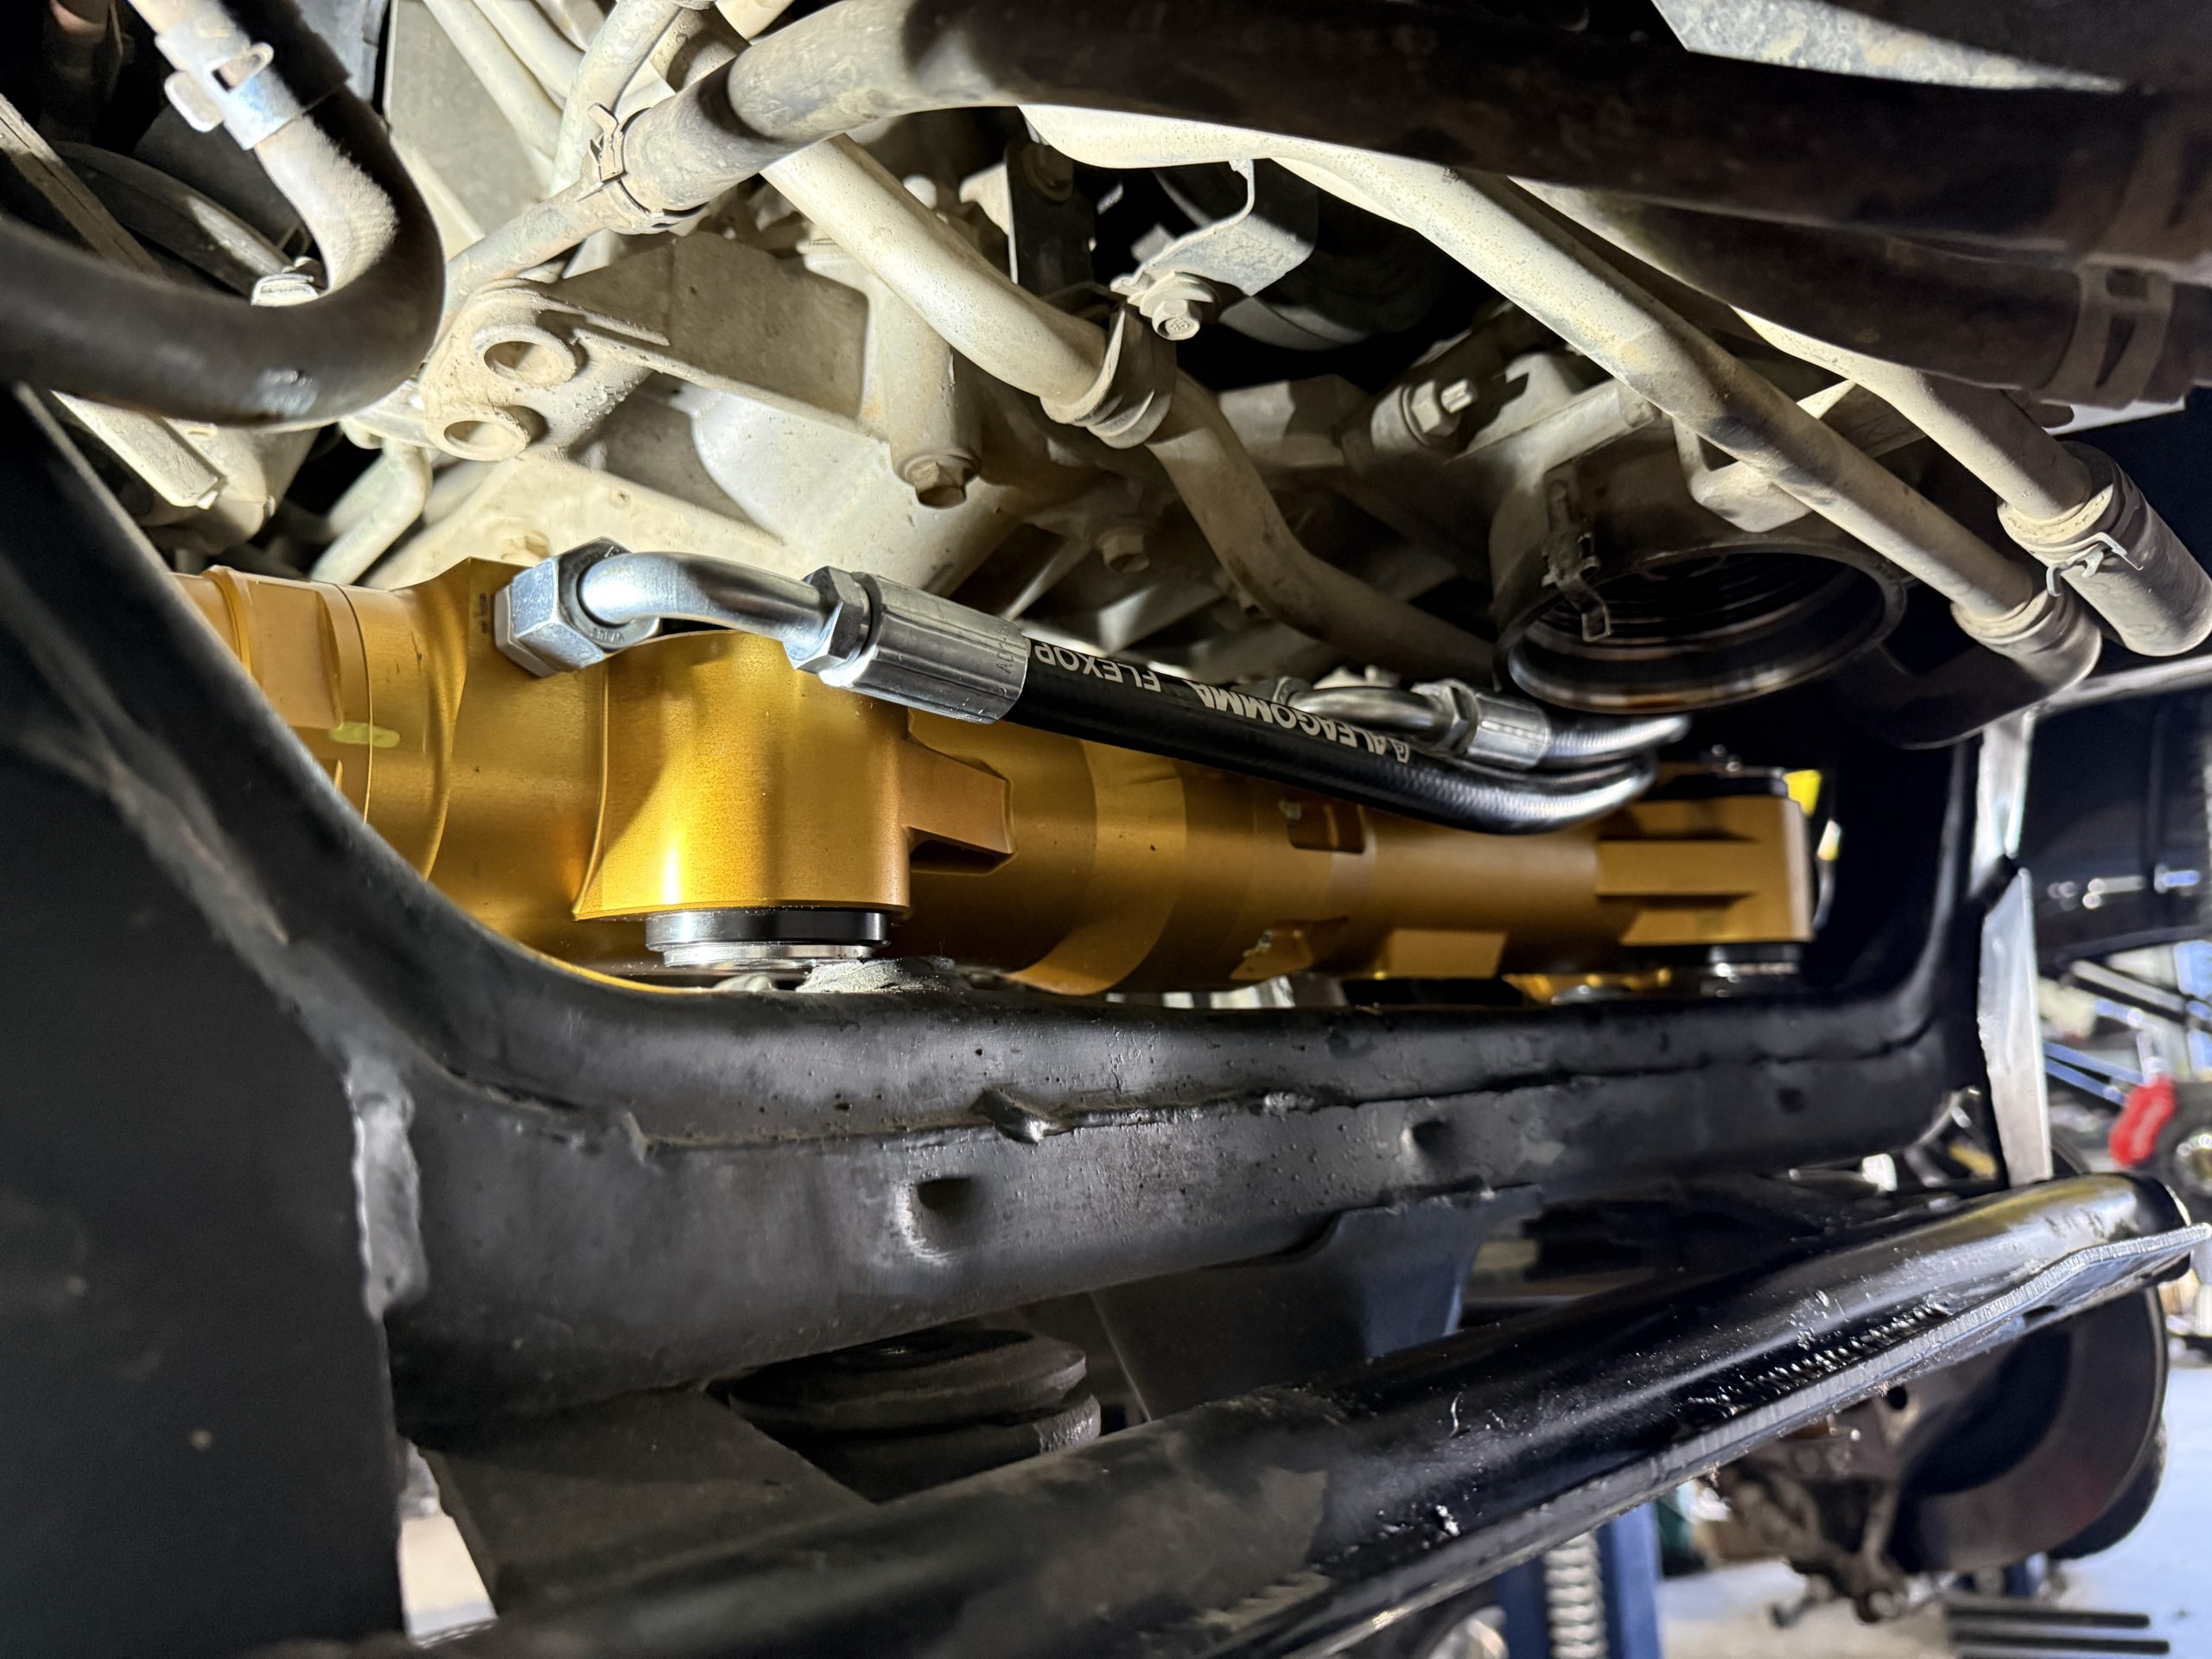
Once the passenger side of the motor is lifted, start sliding the new steering rack into place. Begin with the driver’s side first, which is the pinion side, and then guide the passenger side into position.
Take your time here and work the rack in slowly so you do not hang up the hydraulic lines on anything.
Once the driver’s side is started, the passenger side can be moved into position.
Step 5. Drill the Driver Side Mount
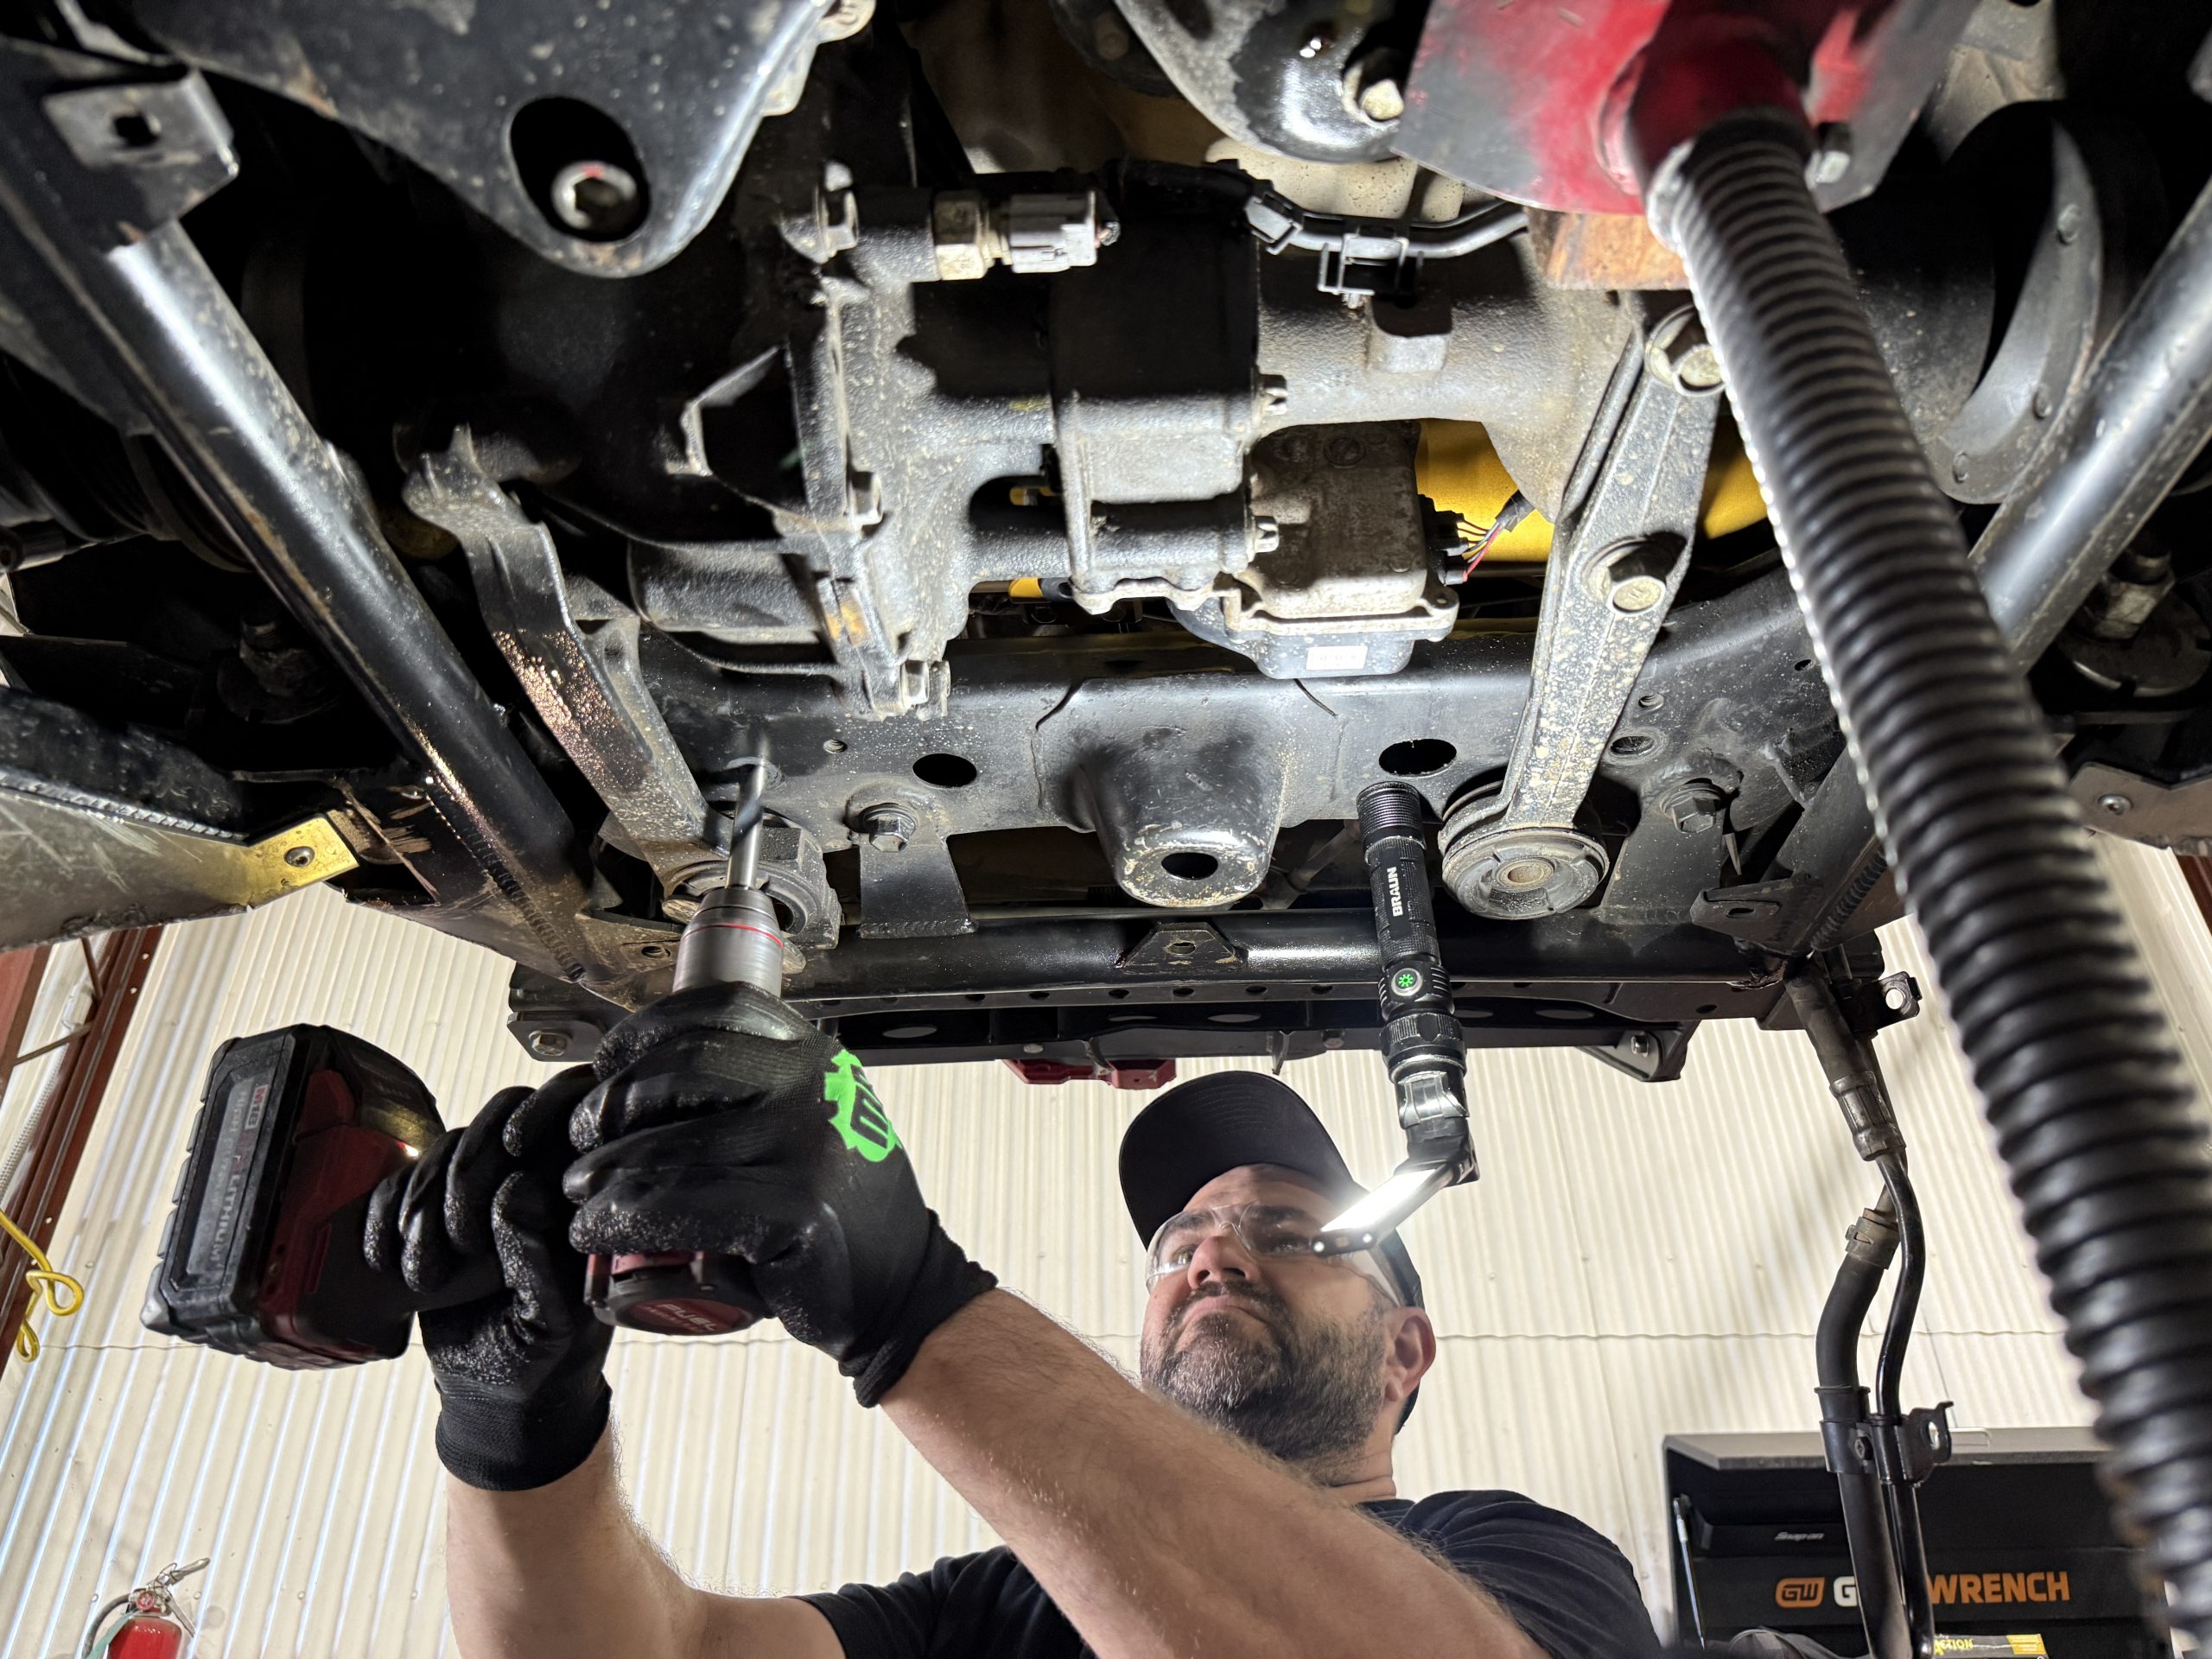
The driver’s side bolt hole is narrower than the passenger side.
To correct that, use a 1/2″ drill bit and open up the through bolt hole so the 6.6″ length hardware fits properly.
Take your time and make sure the hole is opened up evenly.
Step 5: Temporarily Mount the Steering Rack
Before installing the optional 3rd mounting point, temporarily mount the steering rack in place. This helps you locate the tab position for the billet bracket and weld on tab. Do not final torque anything yet. At this point, you are just using the rack’s installed position to confirm where the optional bracket system needs to sit.
This temporary mounting step is important because it lets you mock everything up before welding. You want the rack sitting where it belongs so the locating tab can be positioned correctly on the crossmember.
Step 6. Toyo Steering Weld on Bracket
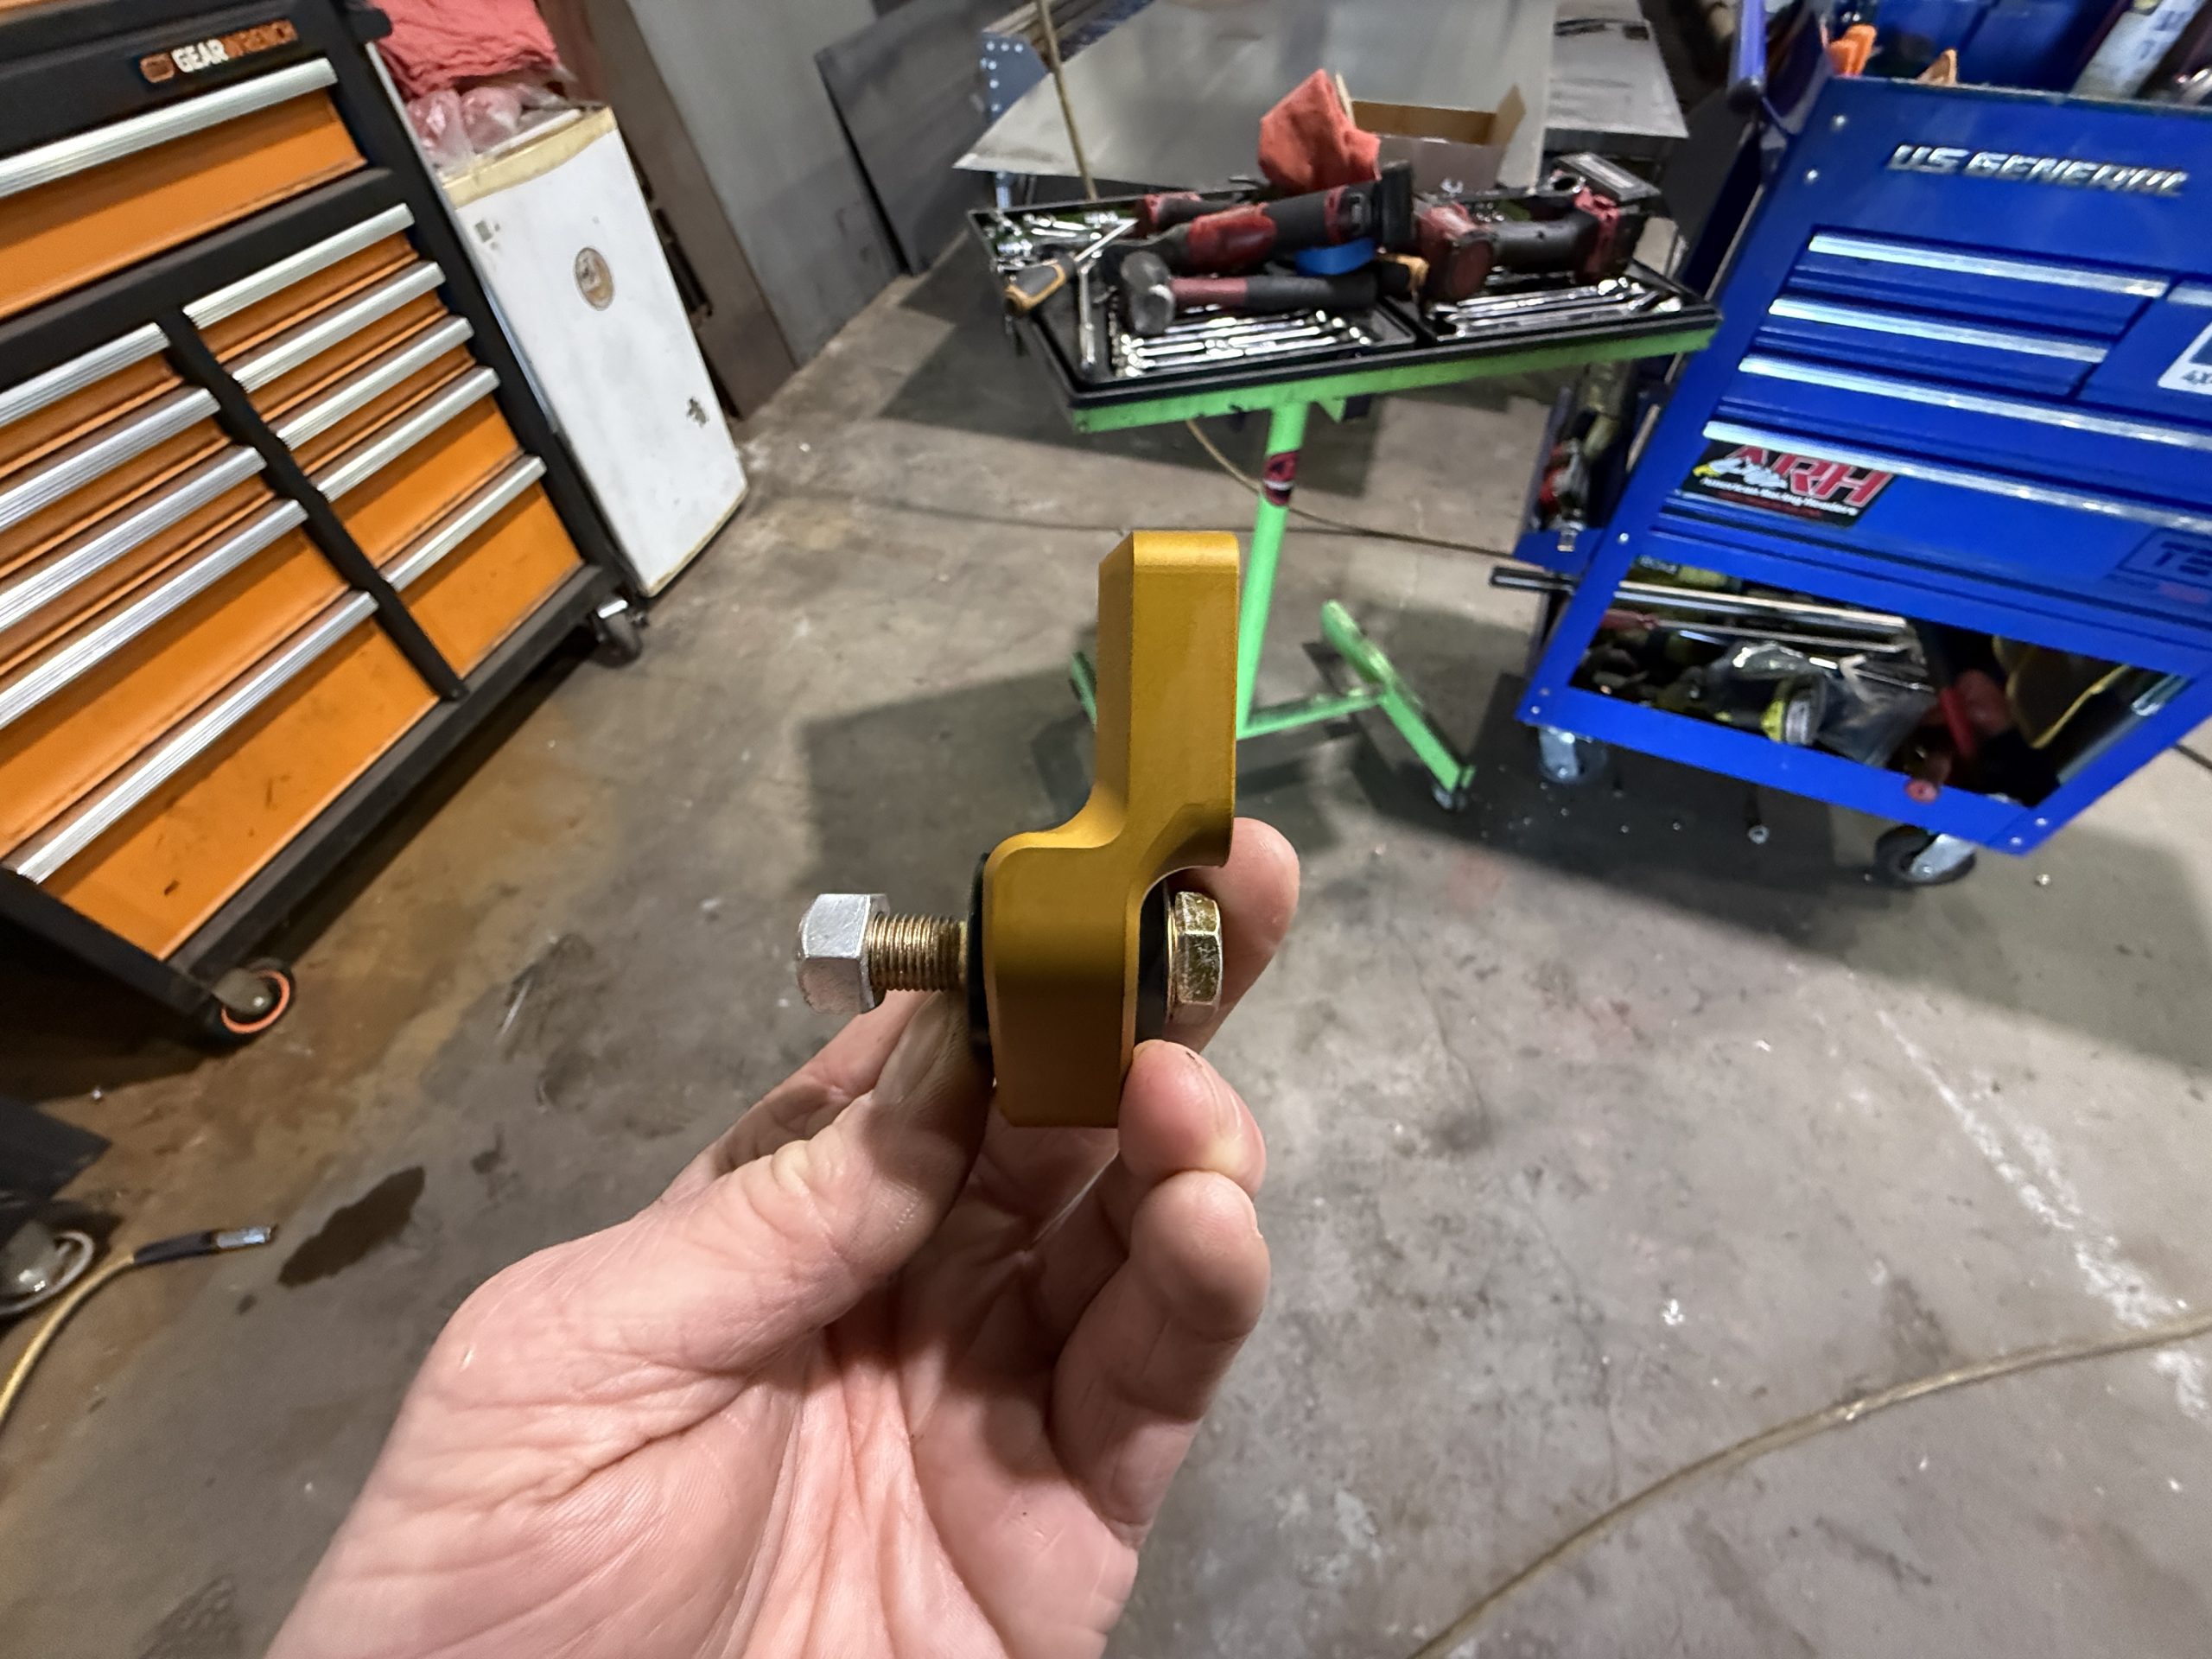
Toyo Steering includes a billet bracket and a metal tab for the optional 3rd mounting point.
The billet bracket bolts directly to the billet steering rack housing, while the metal tab gets welded to the crossmember. This gives you an added mounting point beyond the factory-style mounting locations.
Locating Tab
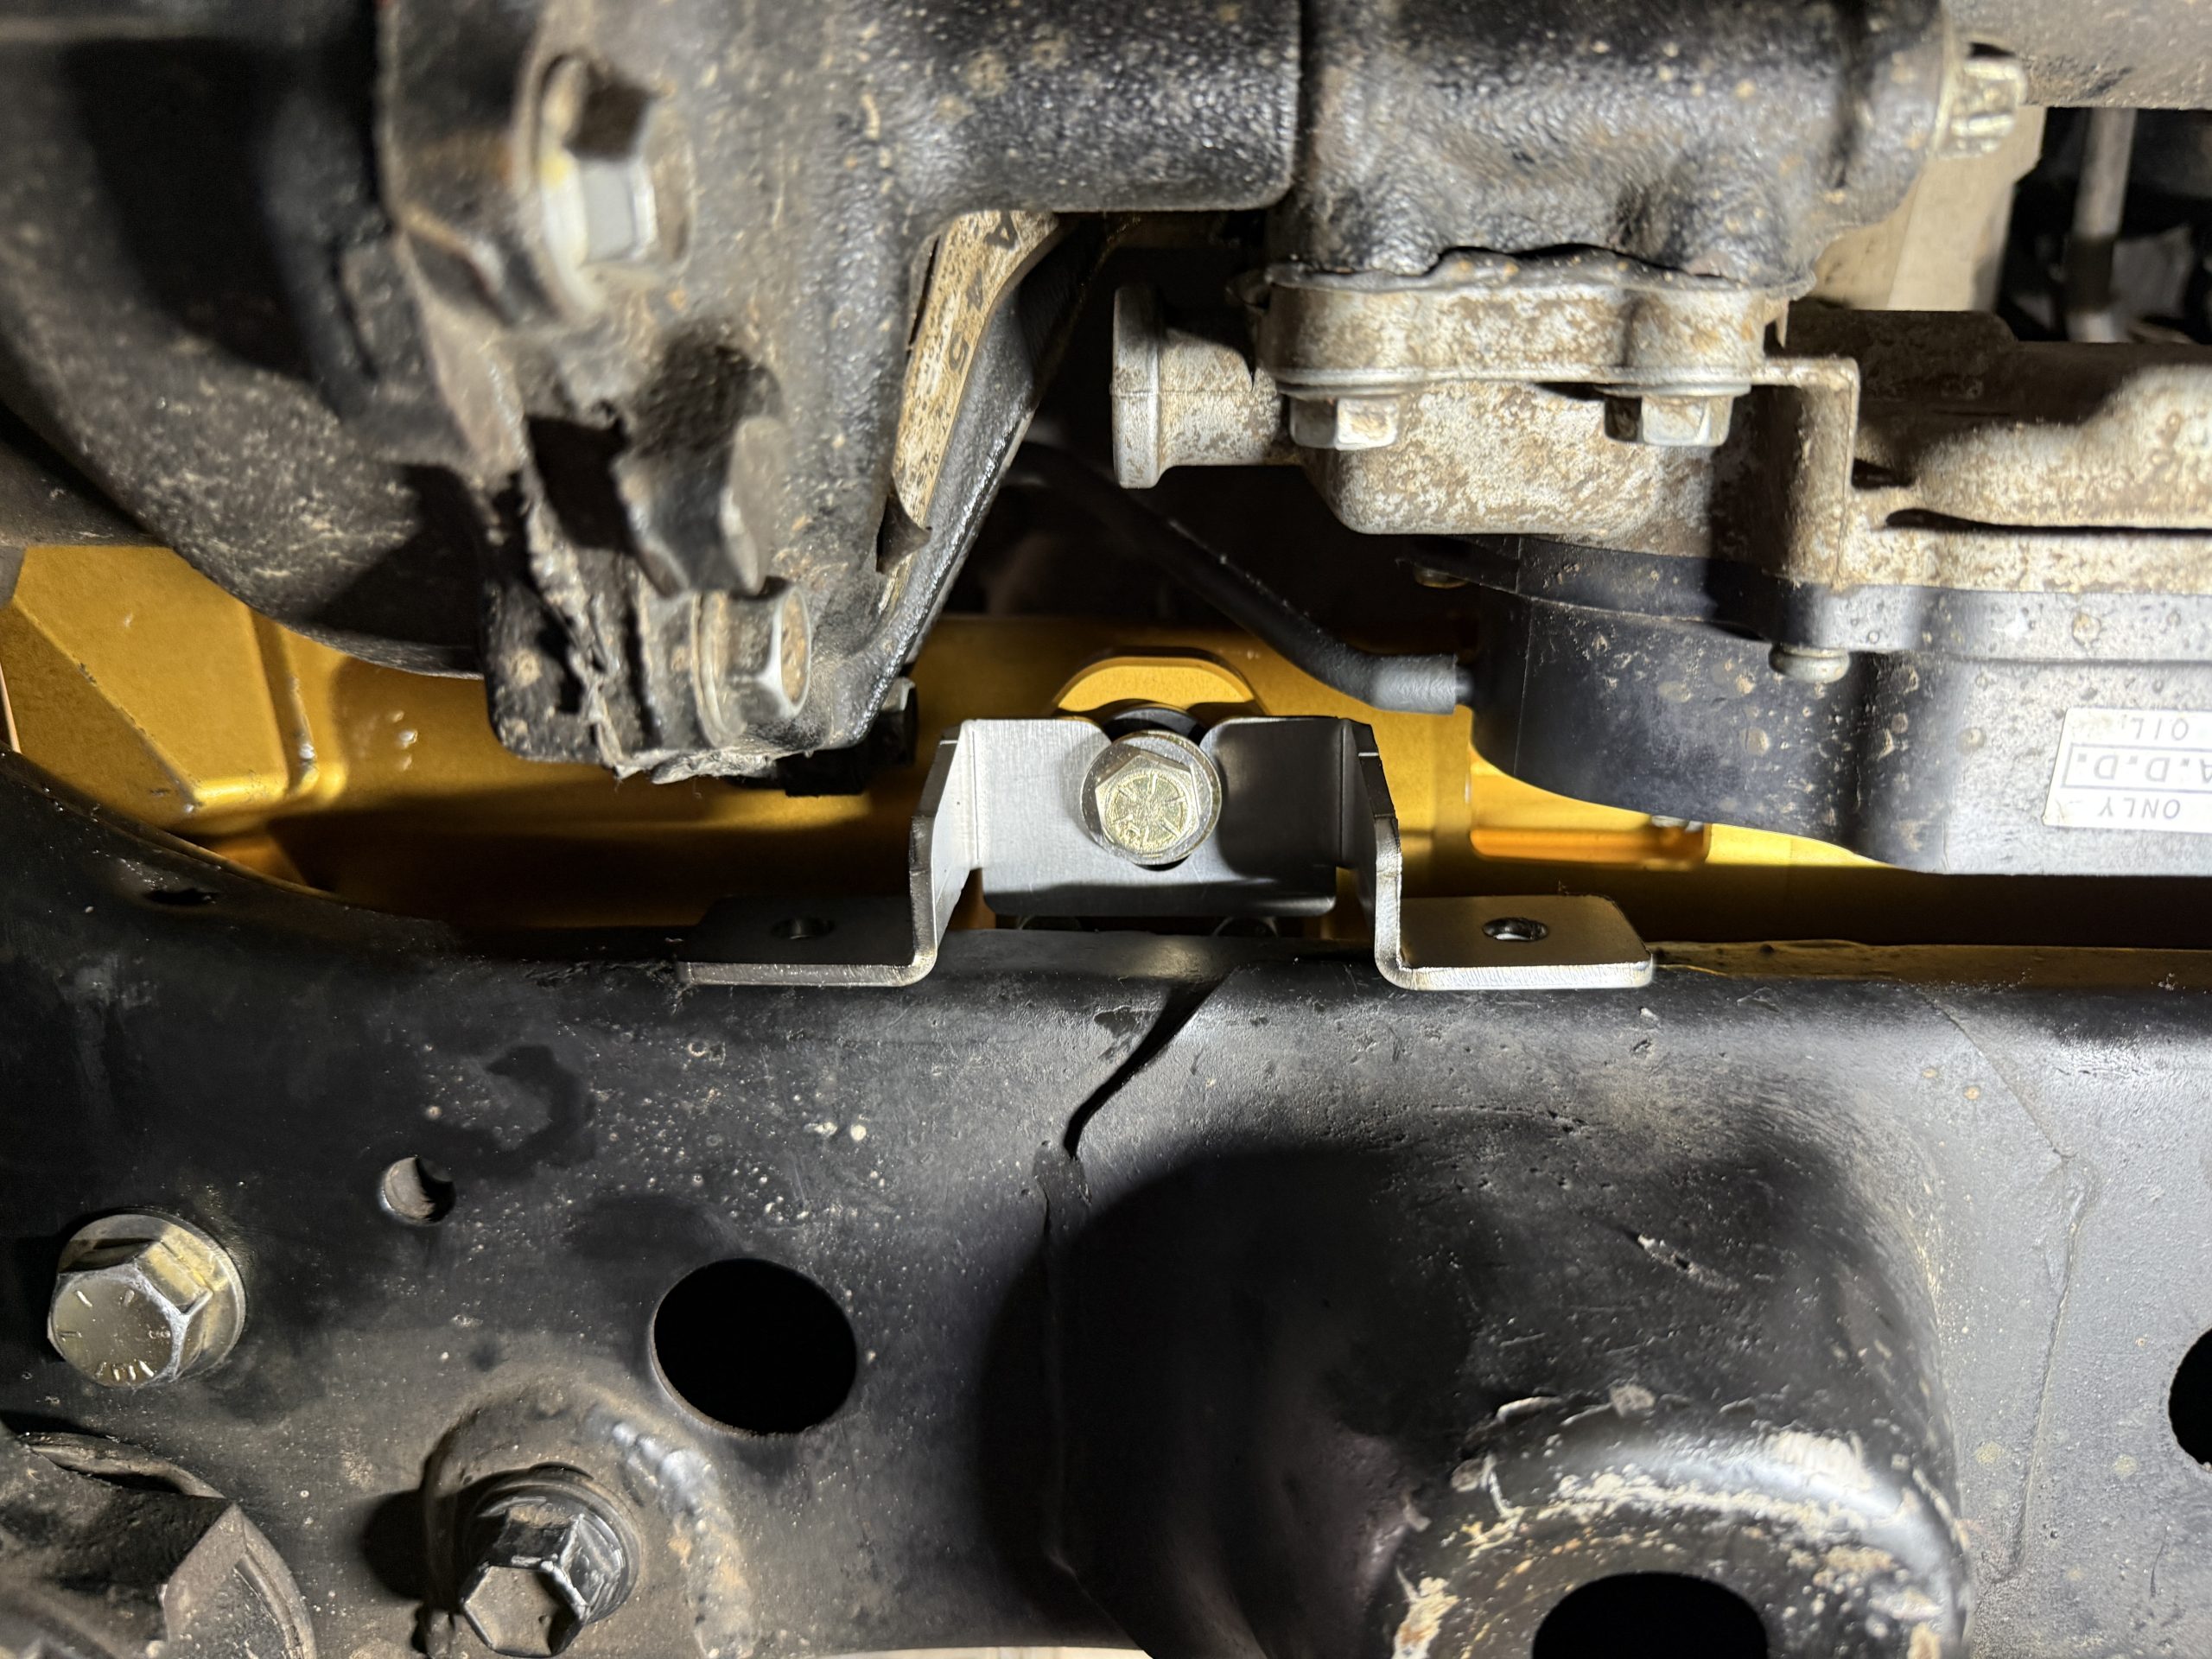
The bracket/mount is designed to add more support to the rack assembly, especially on trucks that see hard use.
Before anything is welded, confirm that the billet bracket is positioned correctly off the housing so the tab can be aligned where it needs to land on the crossmember.
If you don’t want to weld the tab in place, you can also add Rivet nuts at the locations of the two holes (pictured above) on both sides of the tab. Just know that if you intend on installing rivet nuts instead of welding, you will need to drop the differential in order to get a rivet nut gun in position.
Step 7. Weld on Locating Tab, Optional
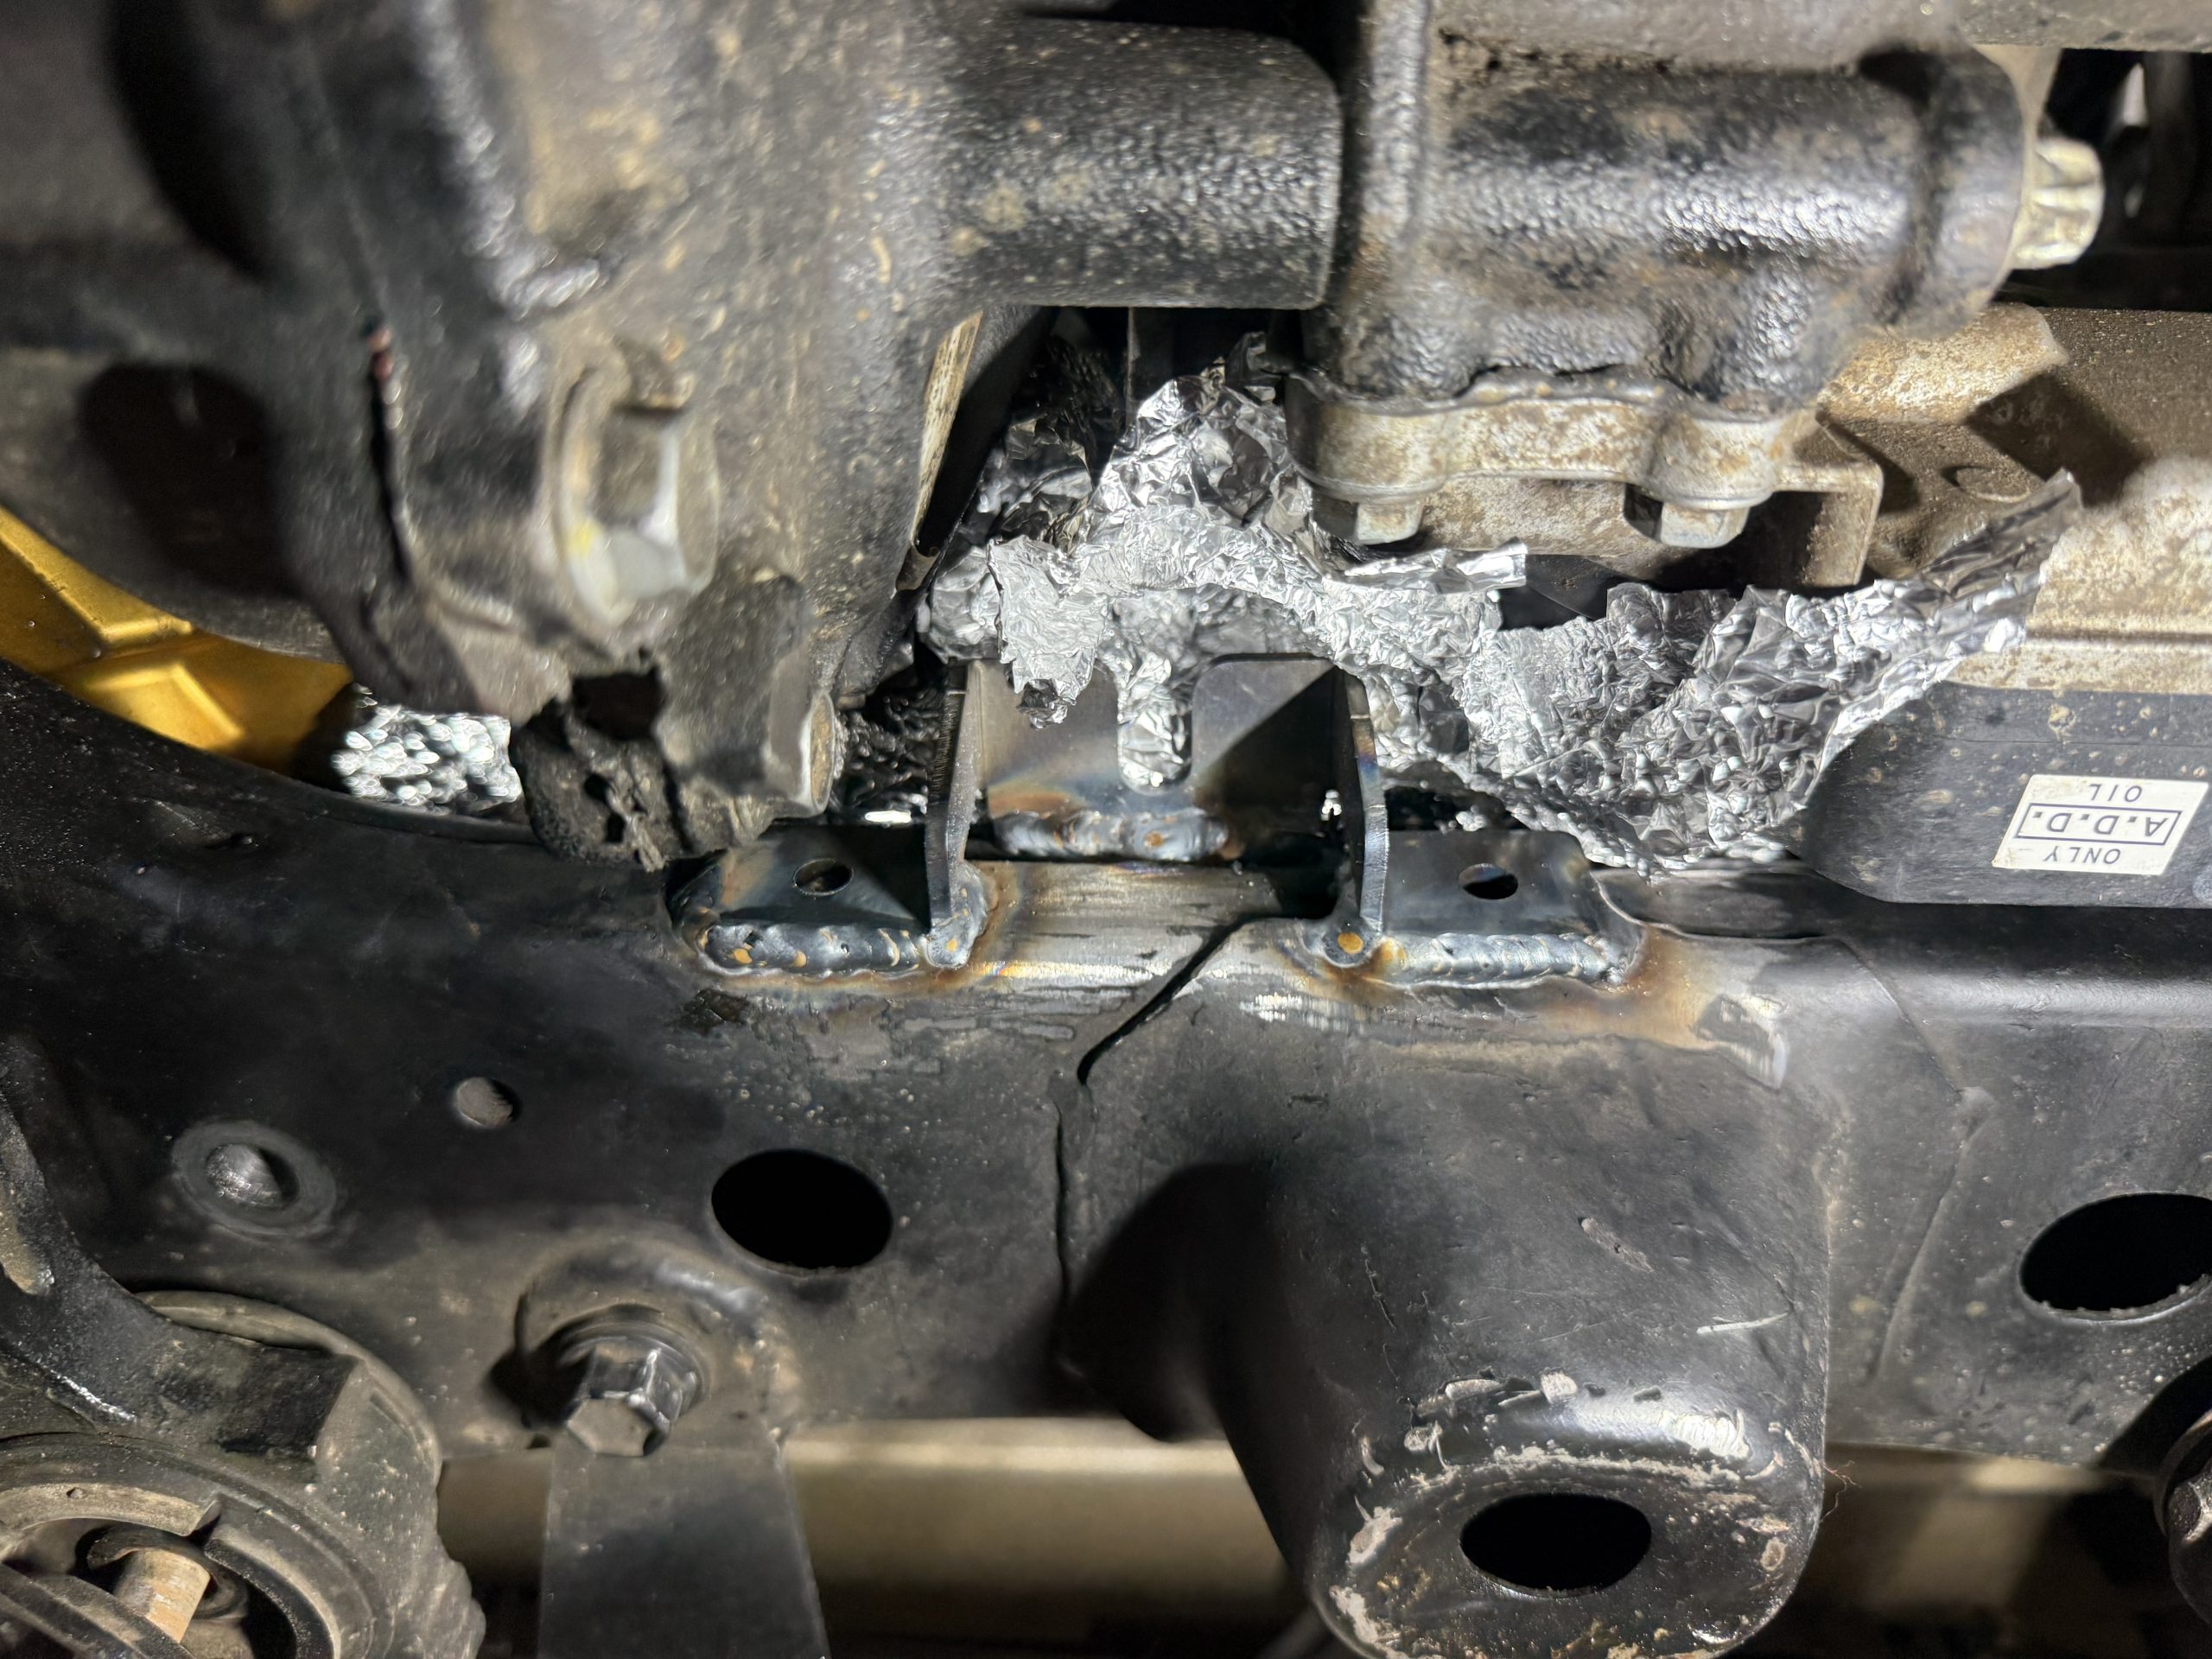
Once the rack is temporarily mounted and the bracket is located correctly, weld the metal tab onto the crossmember. This creates the final attachment point for the added bracket support.
If you plan to use the 3rd mounting point, make sure the billet rack housing is fully bolted into place so that everything is aligned before welding. You want the bracket and tab to line up cleanly so the final bolt in the process goes in without any stress or misalignment.
Step 8. Bolt on the 3rd Mounting Point
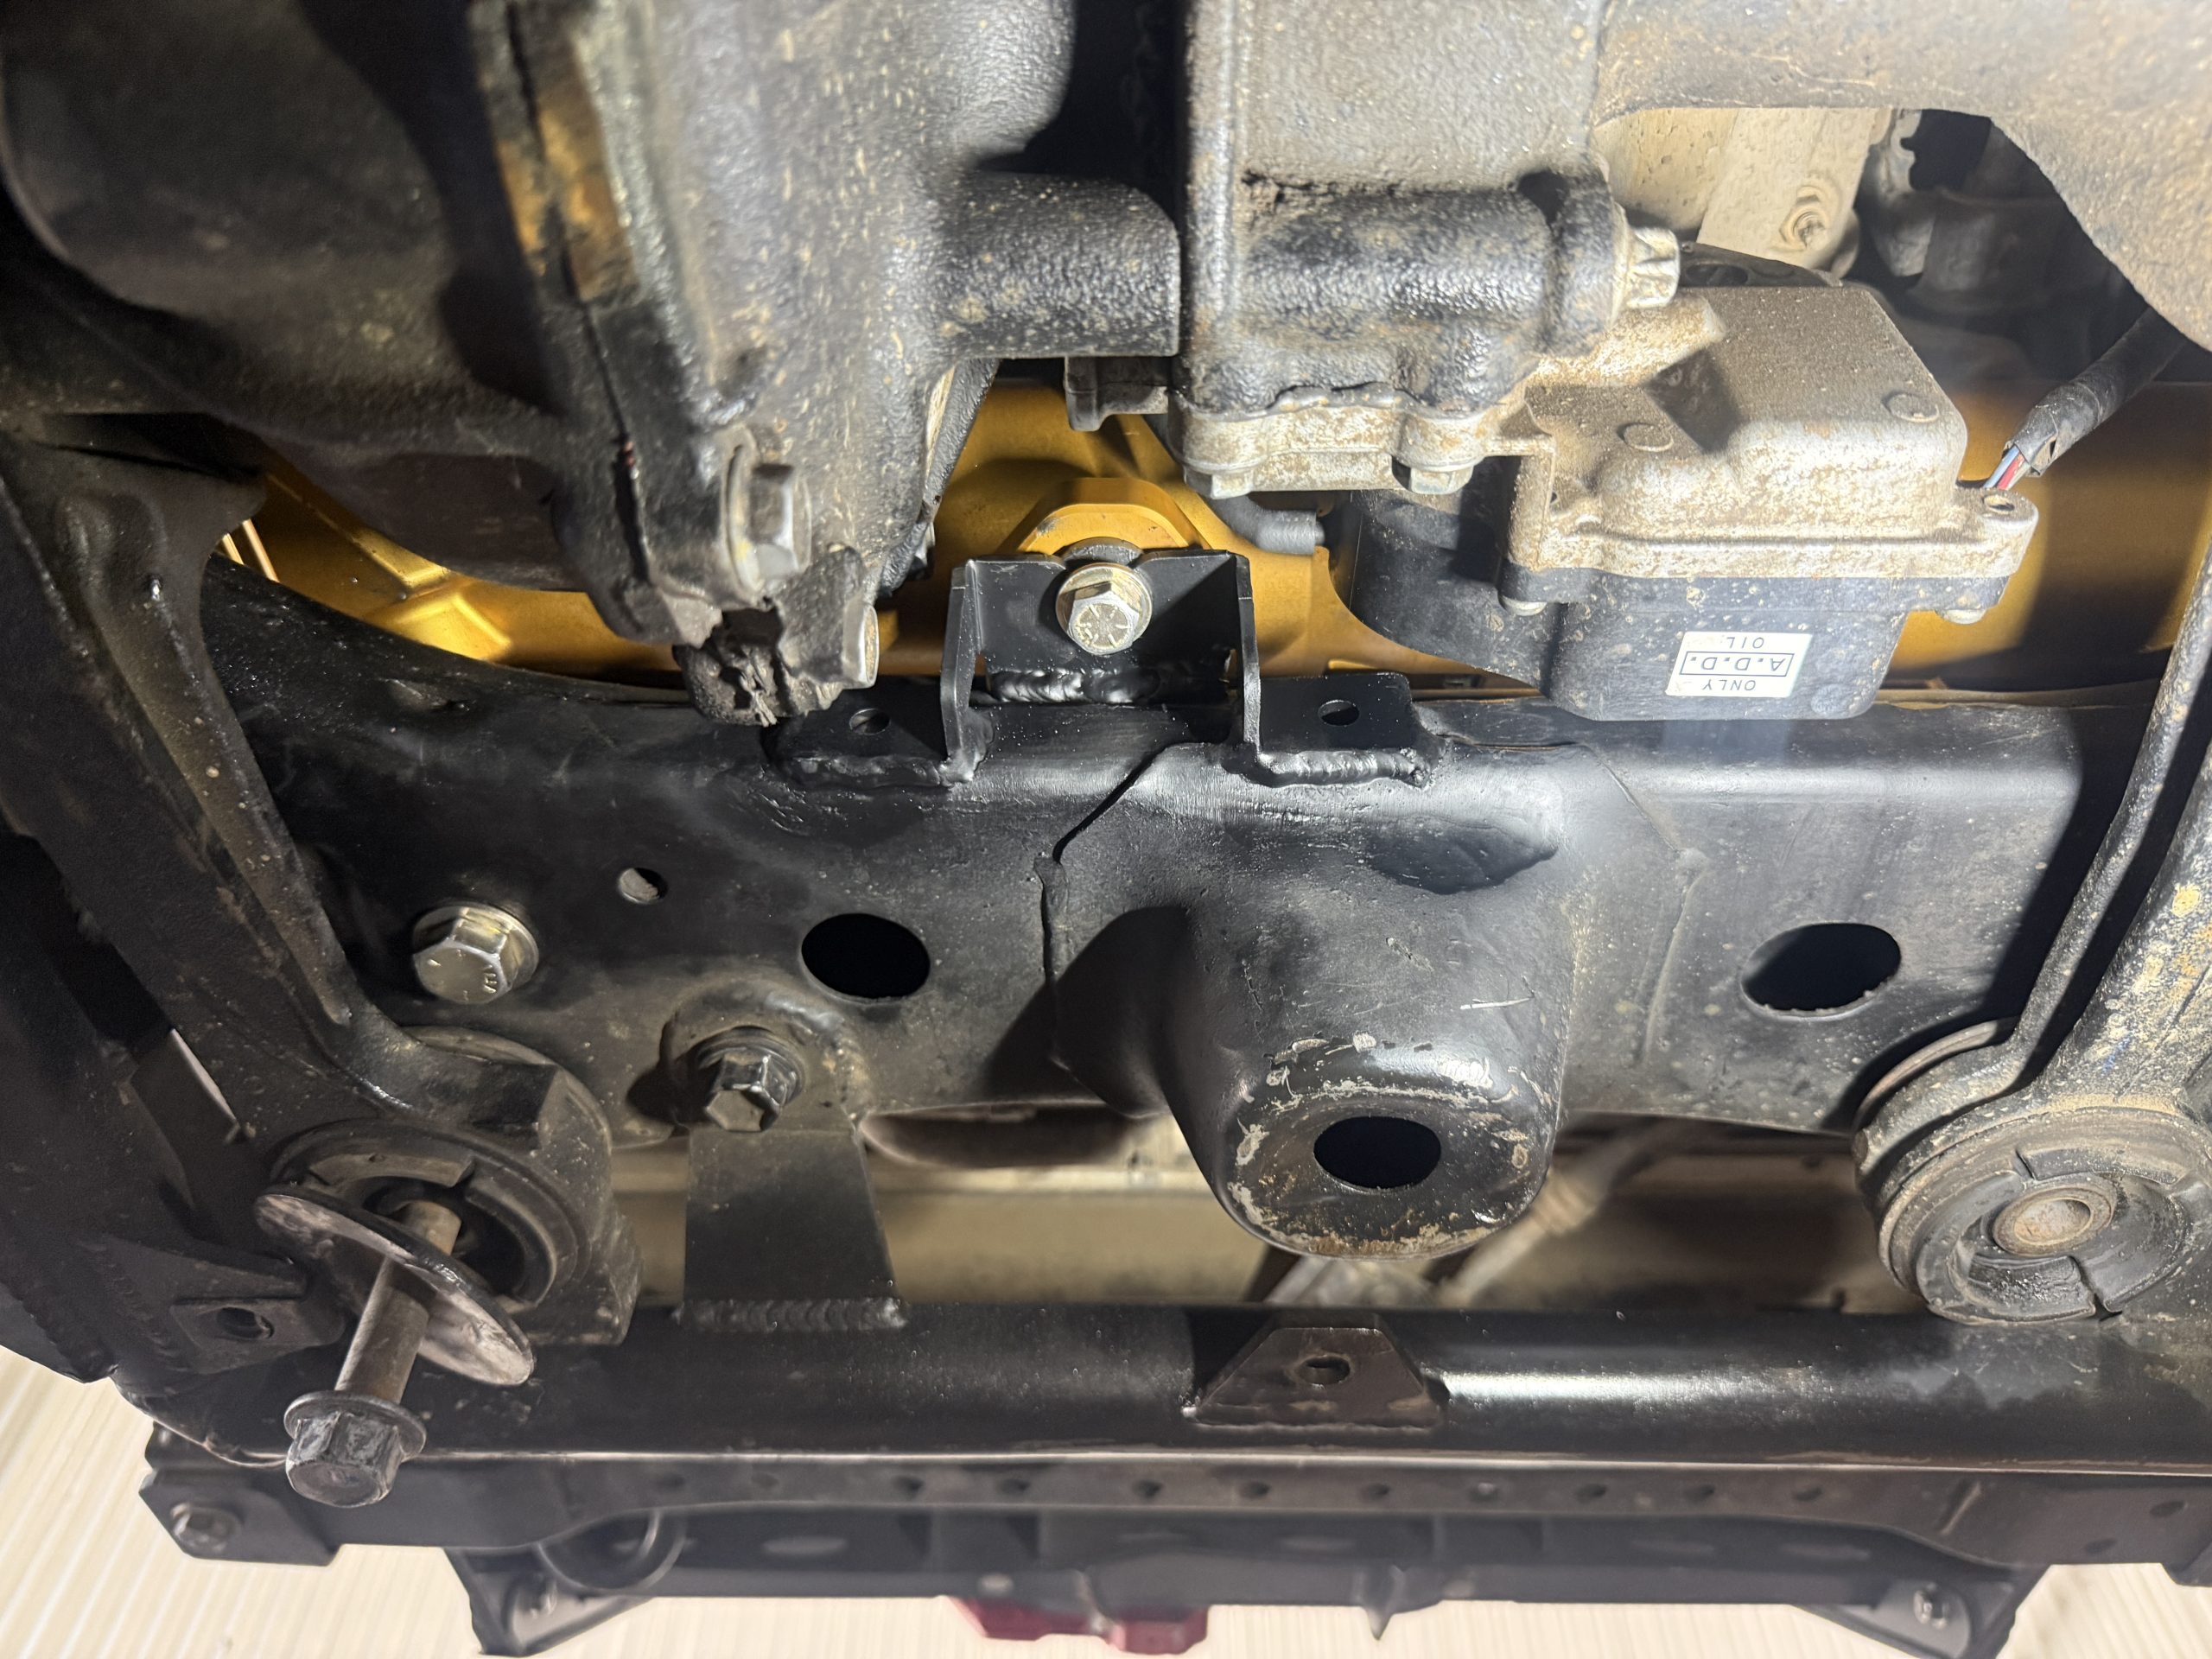
After the locating tab is welded in place, bolt the rack to the 3rd mounting point and confirm that everything fits correctly with all three bolts in place. At this stage, the rack should be sitting in its final location.
Leaving the hardware loose for now makes it easier to connect the pinion to the steering column linkage and reconnect the hydraulic lines before everything is locked down for good.
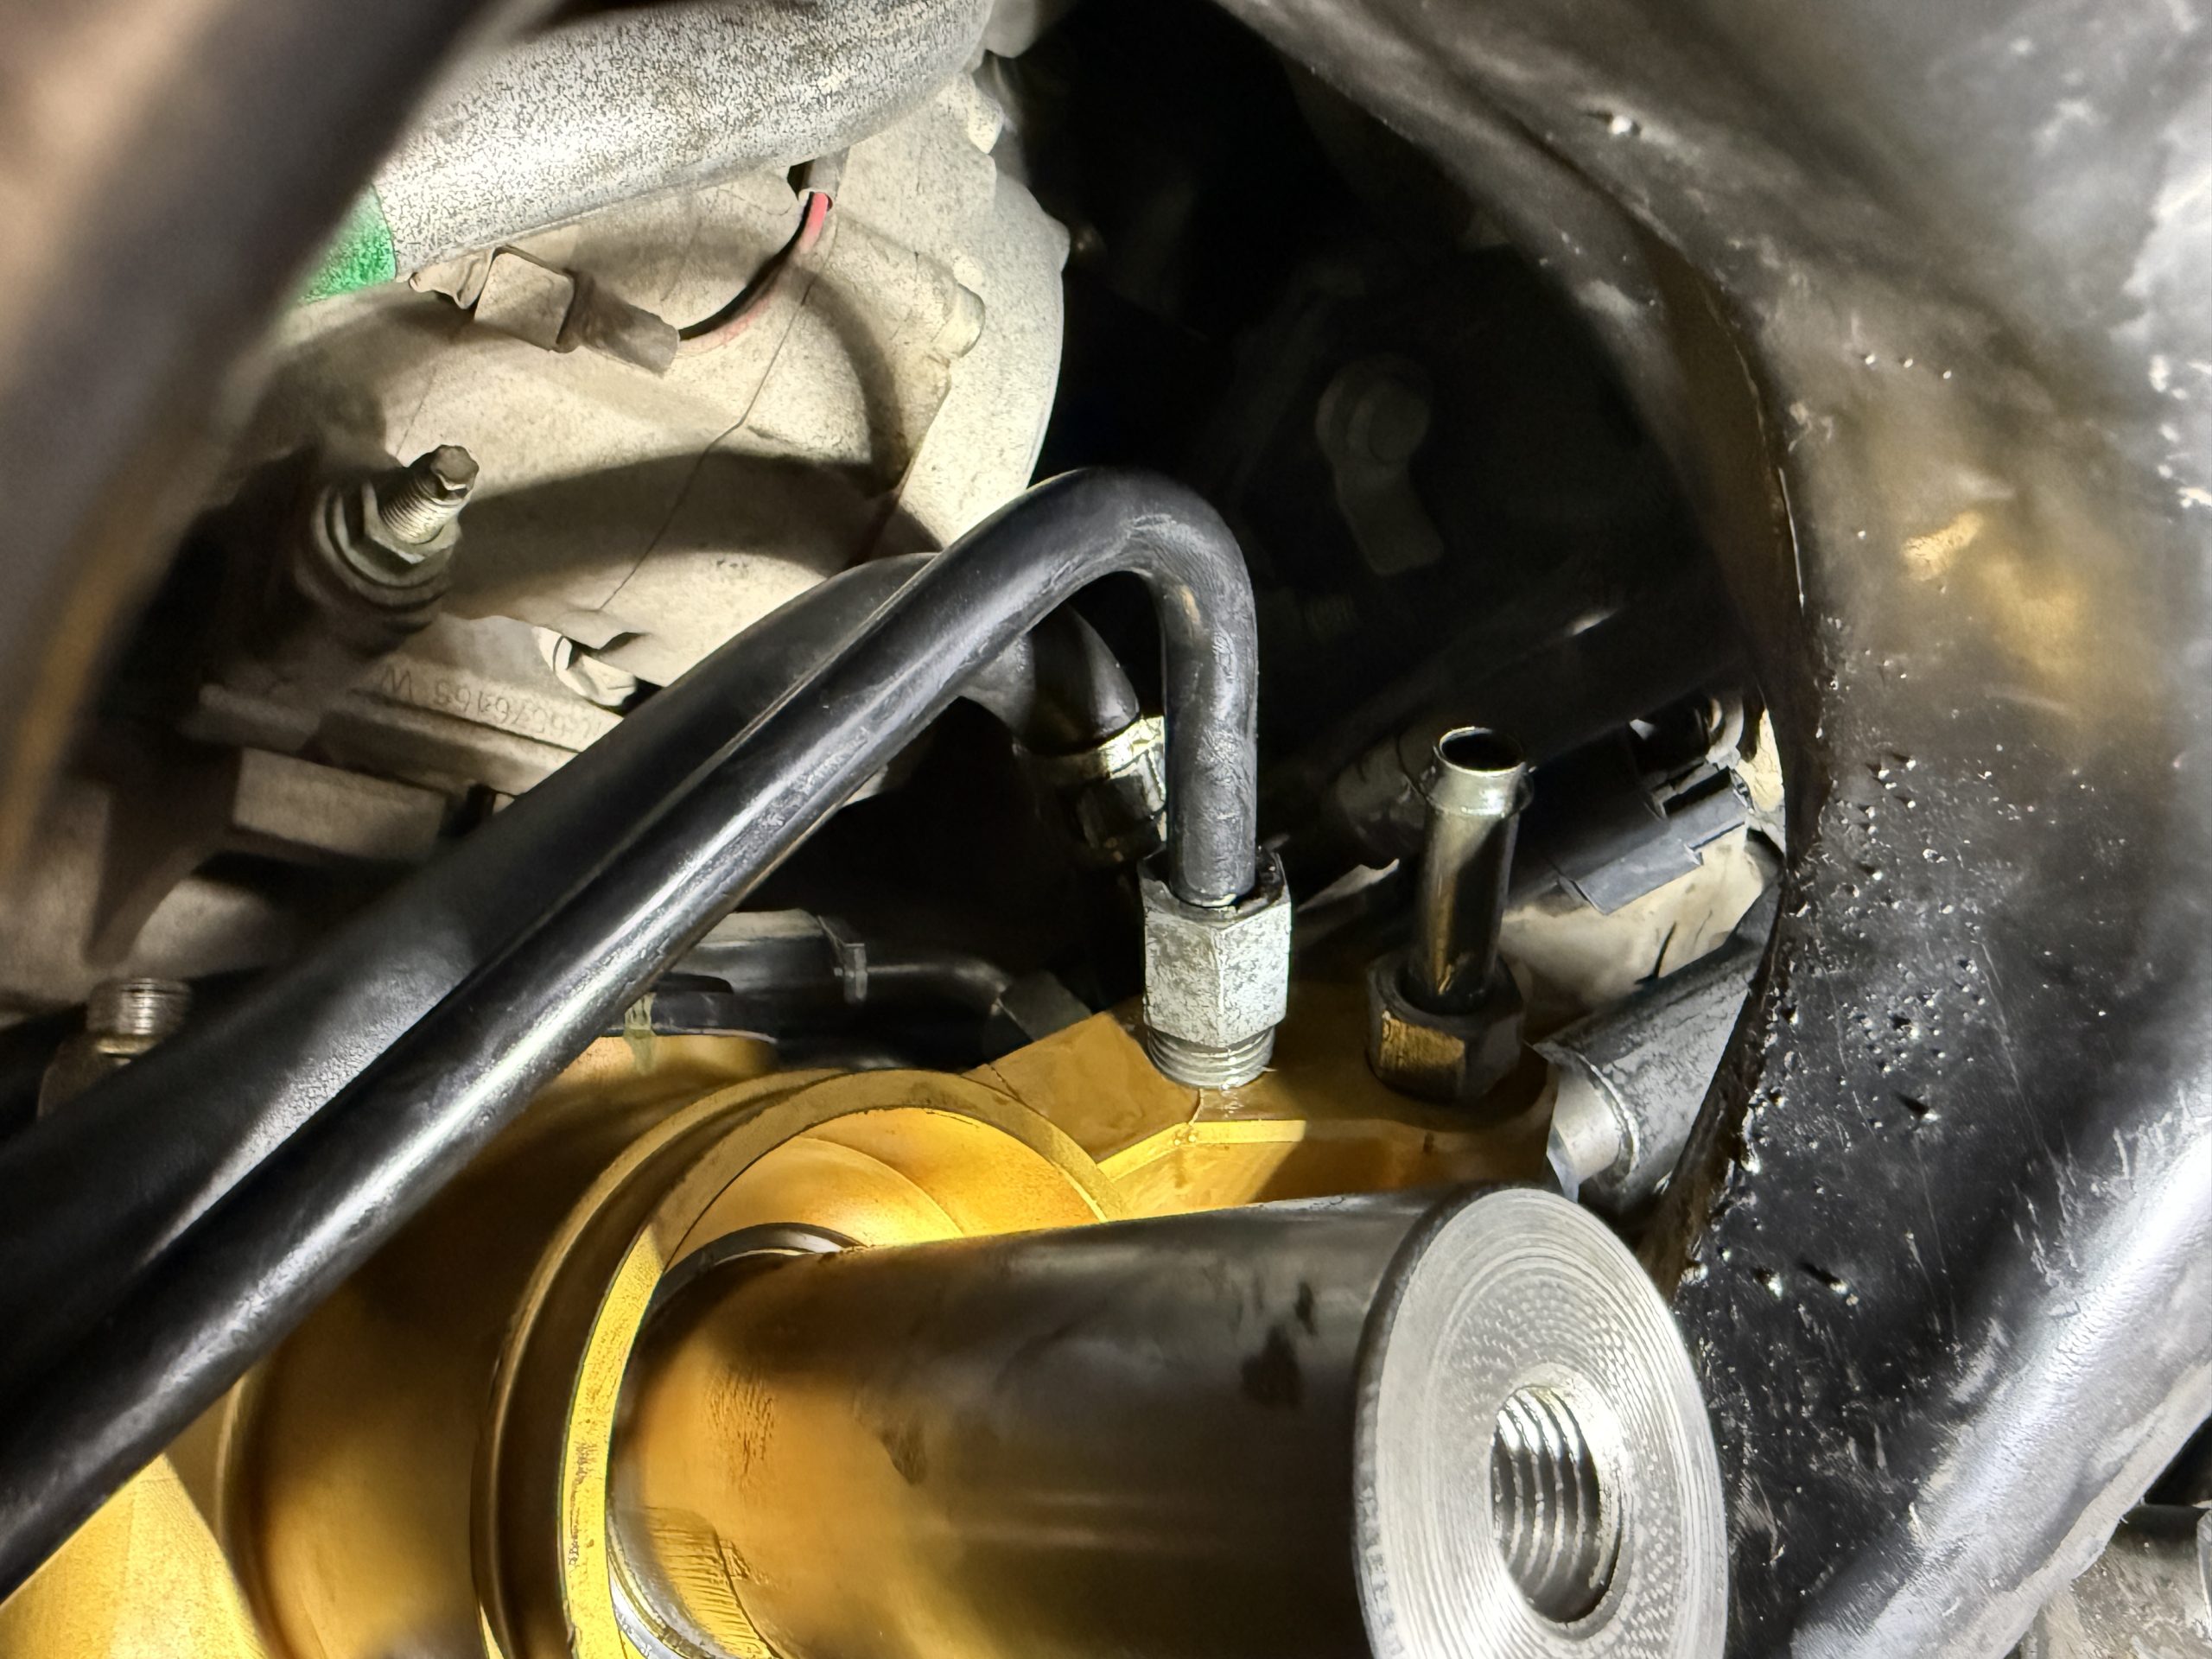
Step 9. Factory Low Pressure Line Fitting
Take the factory low-pressure hydraulic line fitting from the original steering rack and thread it onto the new Toyo billet steering rack. This transfers over the needed fitting so the hydraulic system can be reconnected correctly.
Make sure the fitting starts cleanly by hand and does not cross-thread. Once it is seated properly, you can move on to reconnecting the rest of the hydraulic lines.
Step 10. Connect High Pressure Lines
Now reconnect the high-pressure hydraulic line to the new steering rack. Double-check routing and make sure all fittings are seated properly before tightening them down.
This is a good point to confirm that nothing is under tension and that all lines have the clearance they need around the rack and crossmember.
Step 11. Measure Rack Gear Length
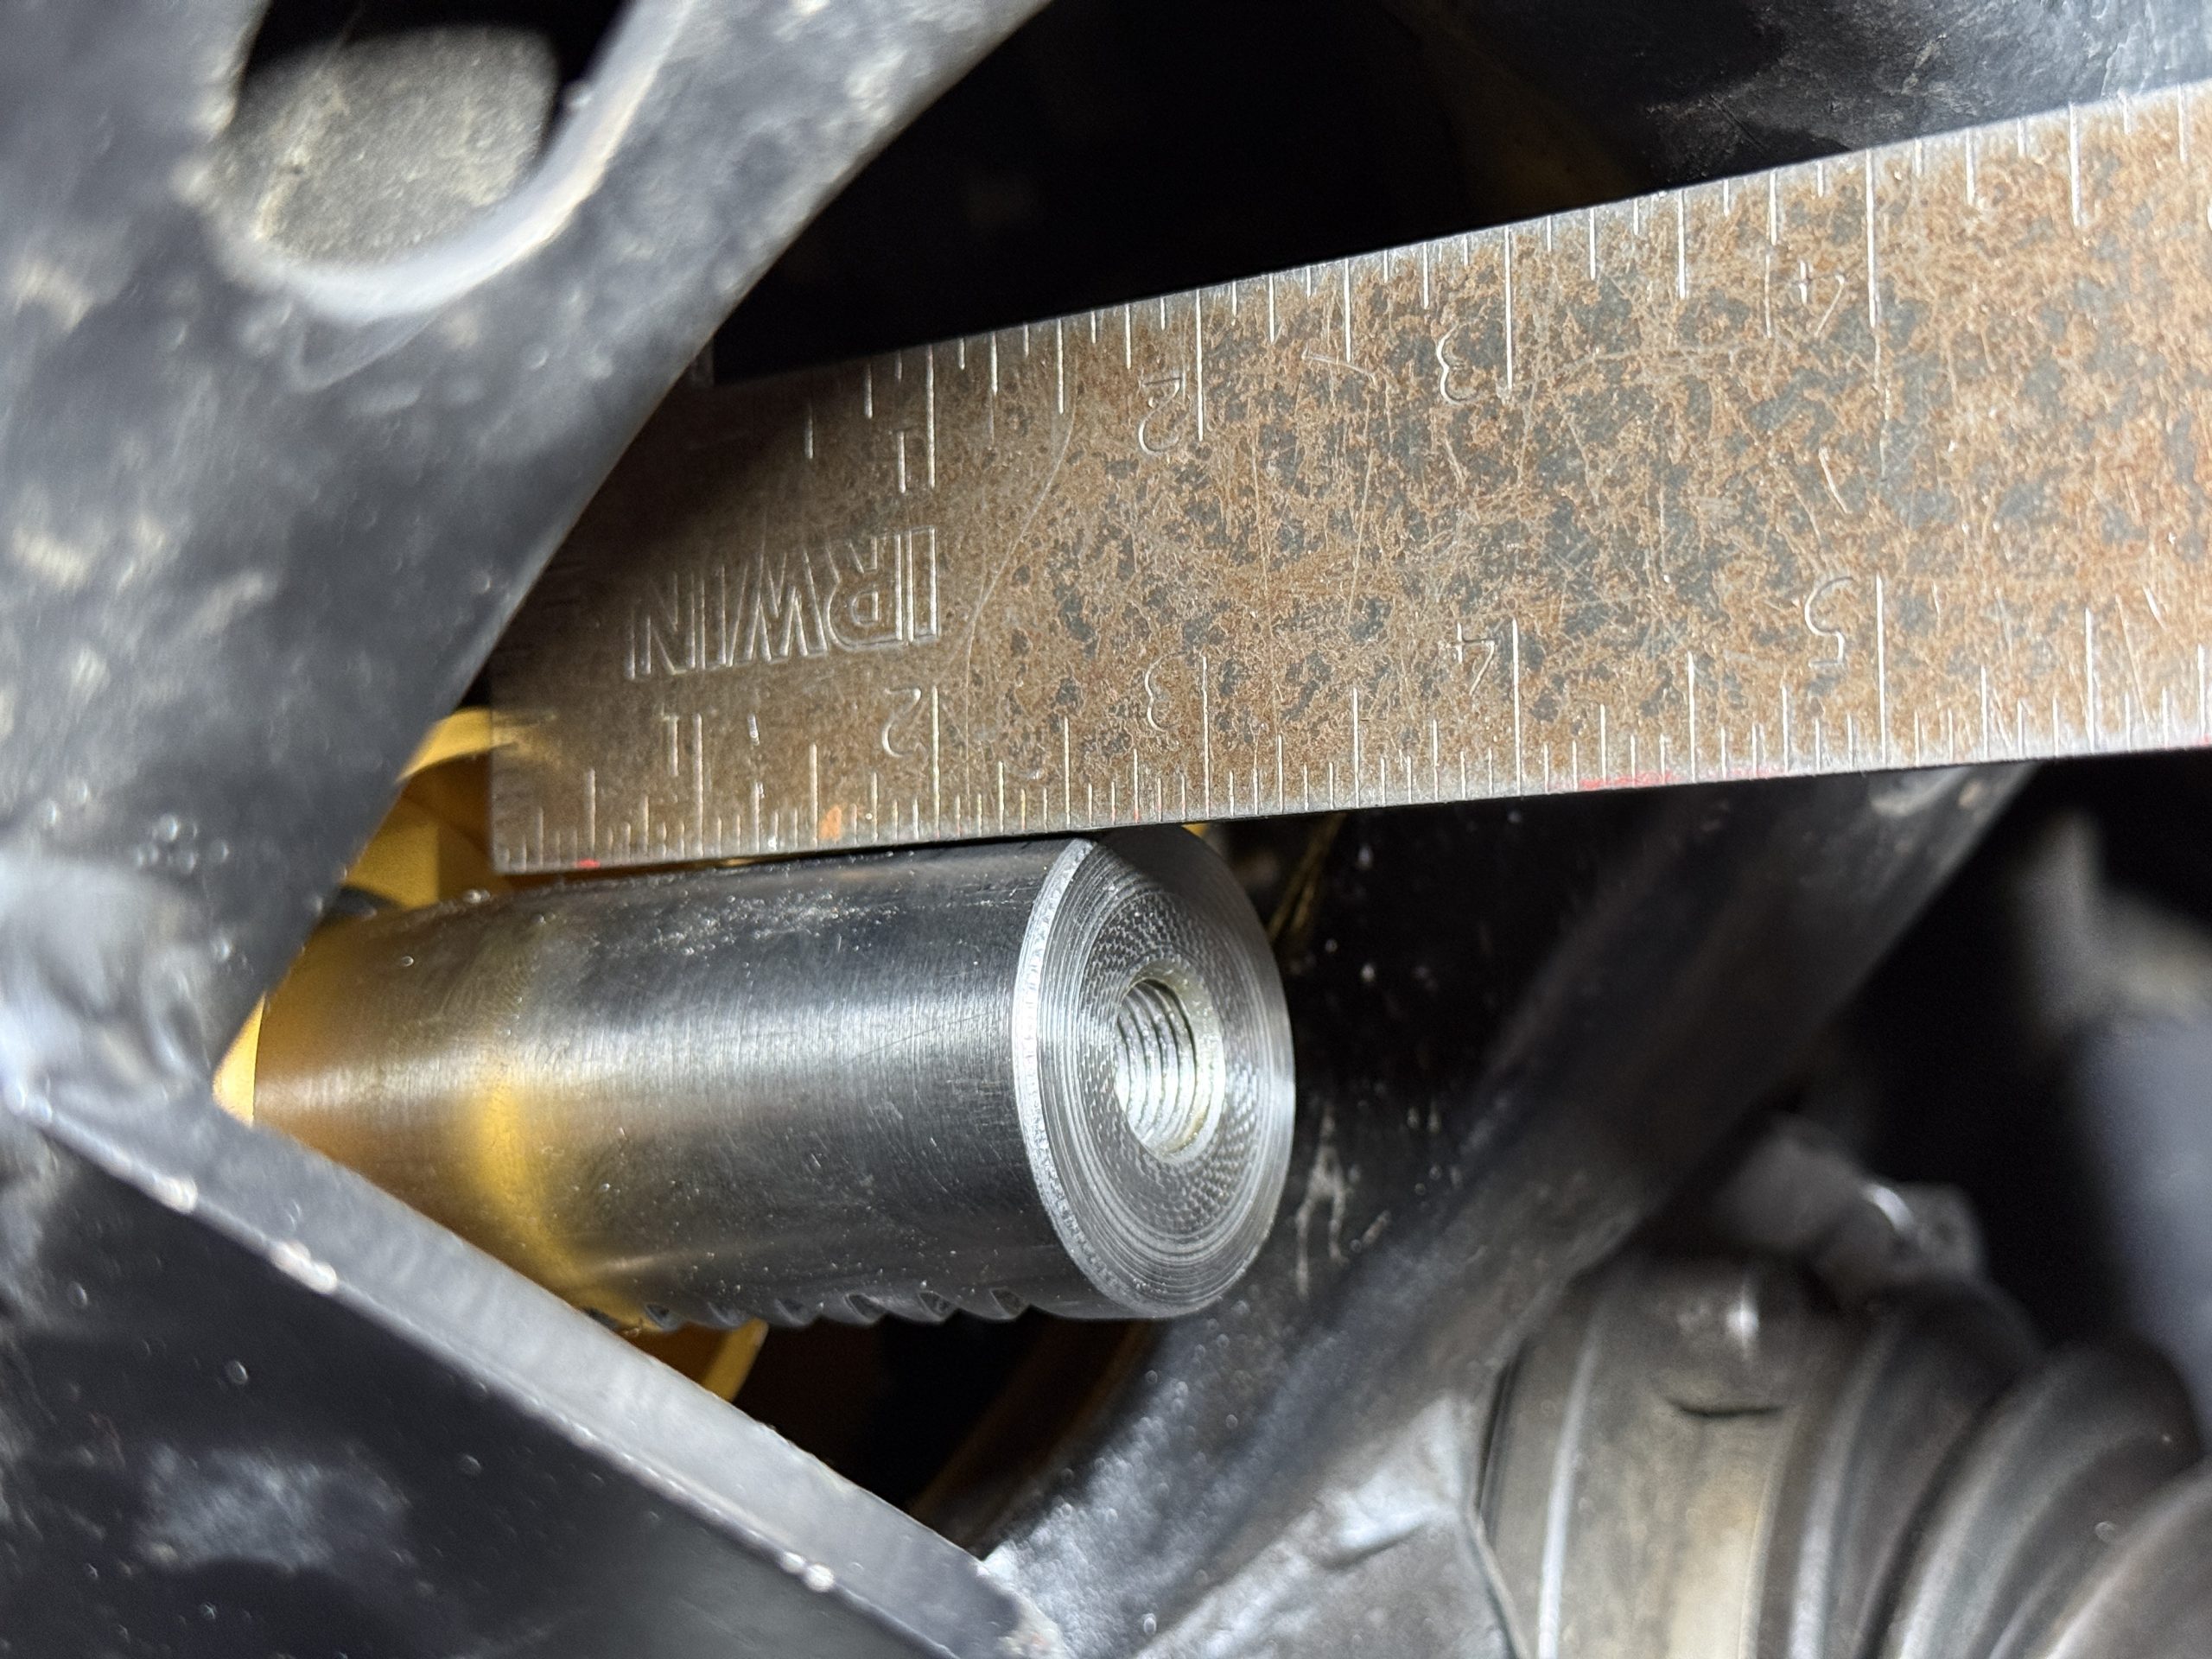
Before connecting the steering column linkage, center the rack gear from side to side.
You want equal distance showing on both sides of the rack gear. On our install, the measurement was about 2.5″ from the end of the billet housing to the end of the rack gear on both sides.
Getting the rack centered here is very important. This ensures the steering linkage is connected in the correct position and helps keep the steering system aligned properly before everything is tightened down.
Step 12. Connect the Steering Column Linkage
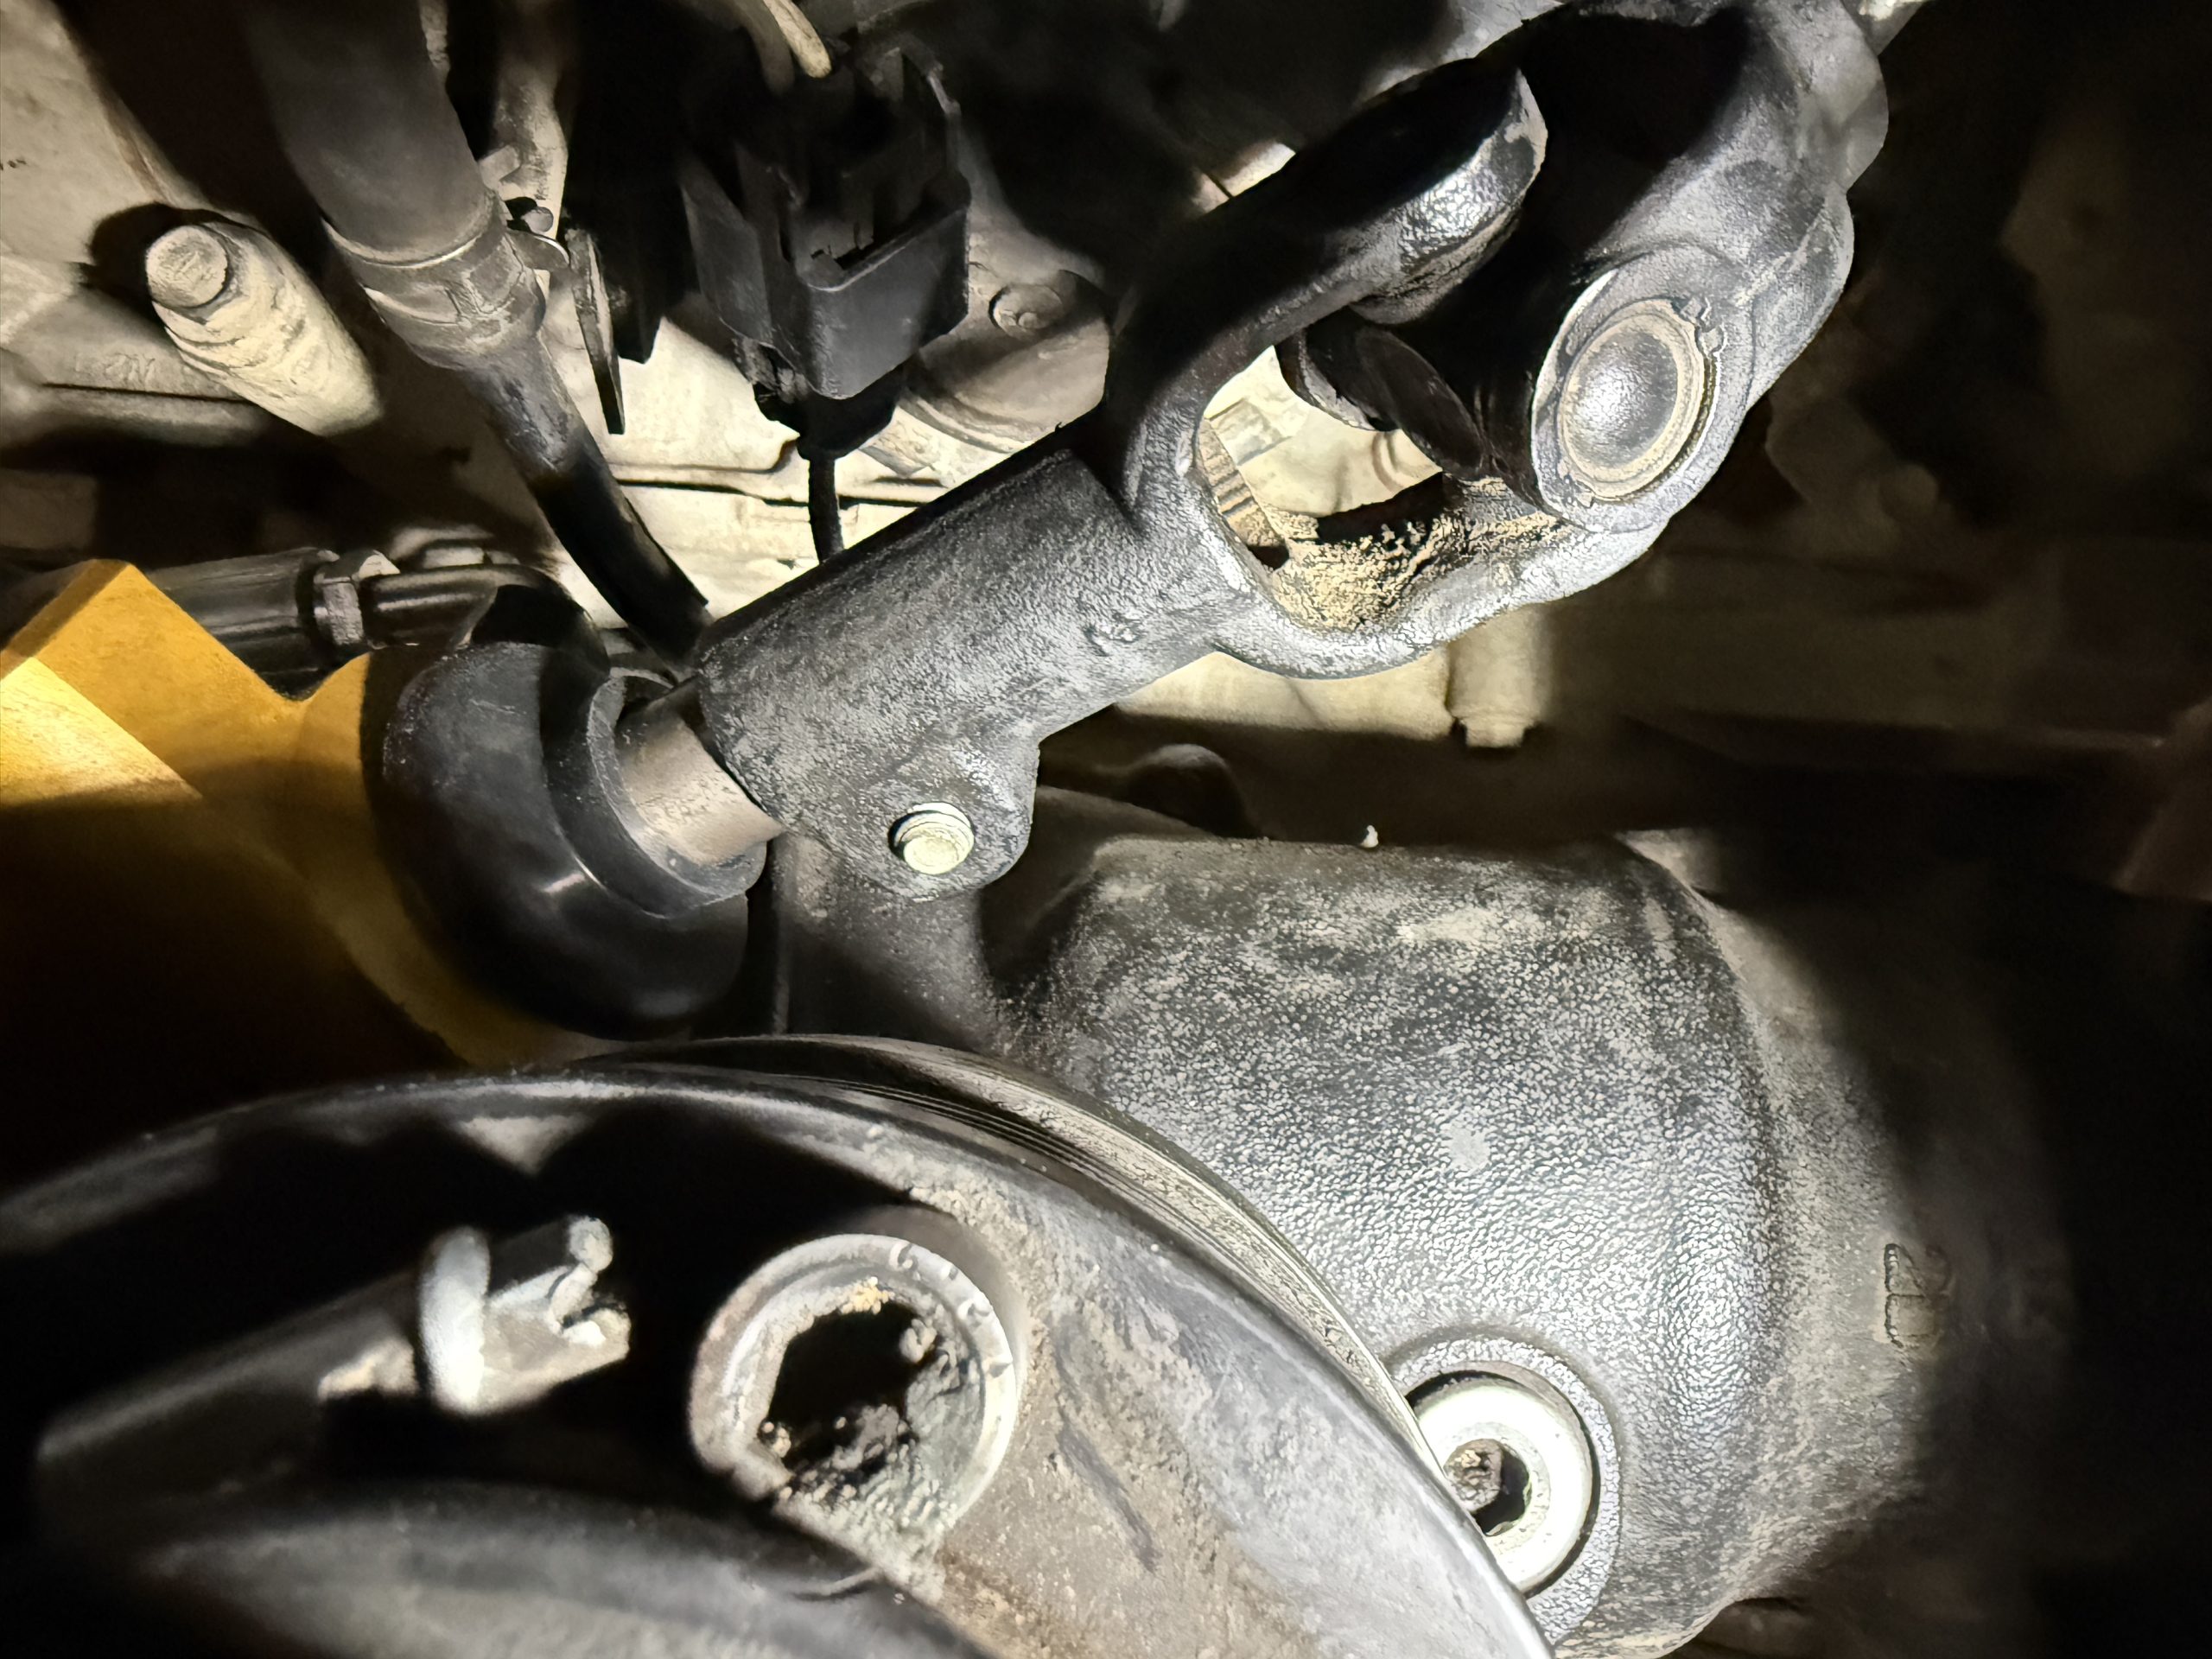
Once the rack gear is centered, connect the steering column linkage to the pinion gear.
Slide the linkage over the pinion gear and into place far enough for the bolt to slide into position. It is okay if there is a gap between the end of the linkage and the rubber bushing on top of the billet housing.
The important thing is that the linkage is properly seated on the pinion and that the bolt can be installed cleanly.
Step 13. Torque the Steering Rack in Place

Now that the rack is centered, the optional 3rd mounting point has been welded and bolted in place, the hydraulic lines are connected, and the steering column linkage is installed on the pinion gear, you can tighten all mounting hardware down. Final torque the steering rack once everything is sitting where it should in its finished position.
After that, reinstall anything removed during the prep stage, including the oil filter, skid plates, and any other components or braces that were taken off for access. Before driving the truck, inspect all hardware, confirm hydraulic fittings are tight, and make sure the steering system moves smoothly through its range.
Why Upgrade to the Toyo Steering Billet Steering Rack?
For 2nd Gen and 3rd Gen Tacoma owners running larger tires or suspension built for more aggressive off-road trails, this steering system is a very important part of the overall build.
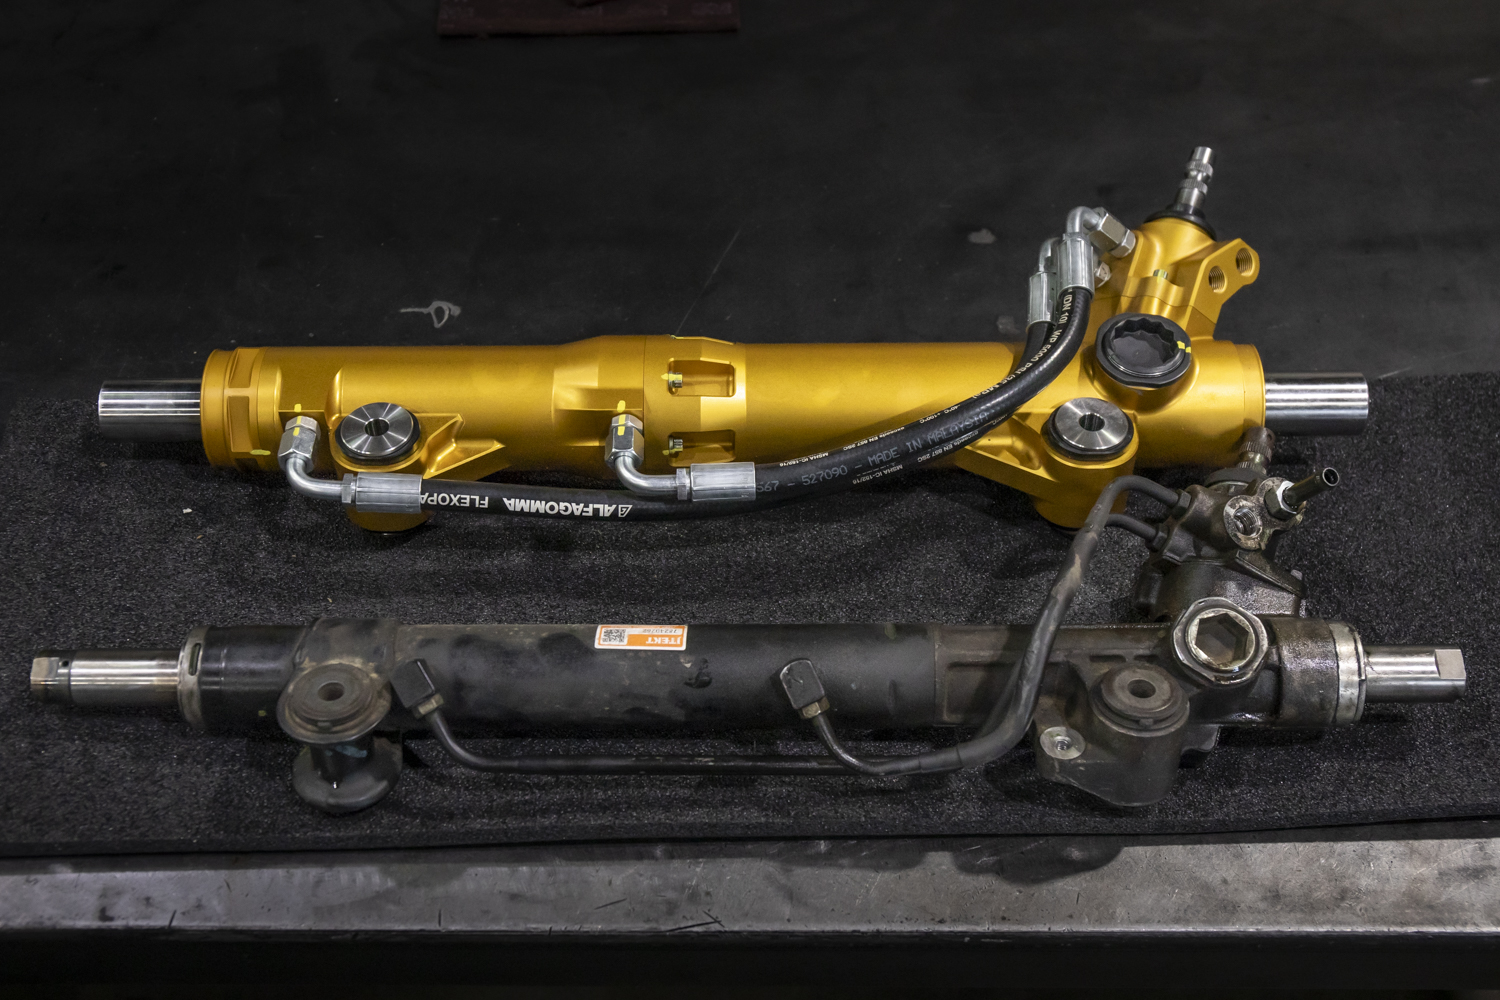
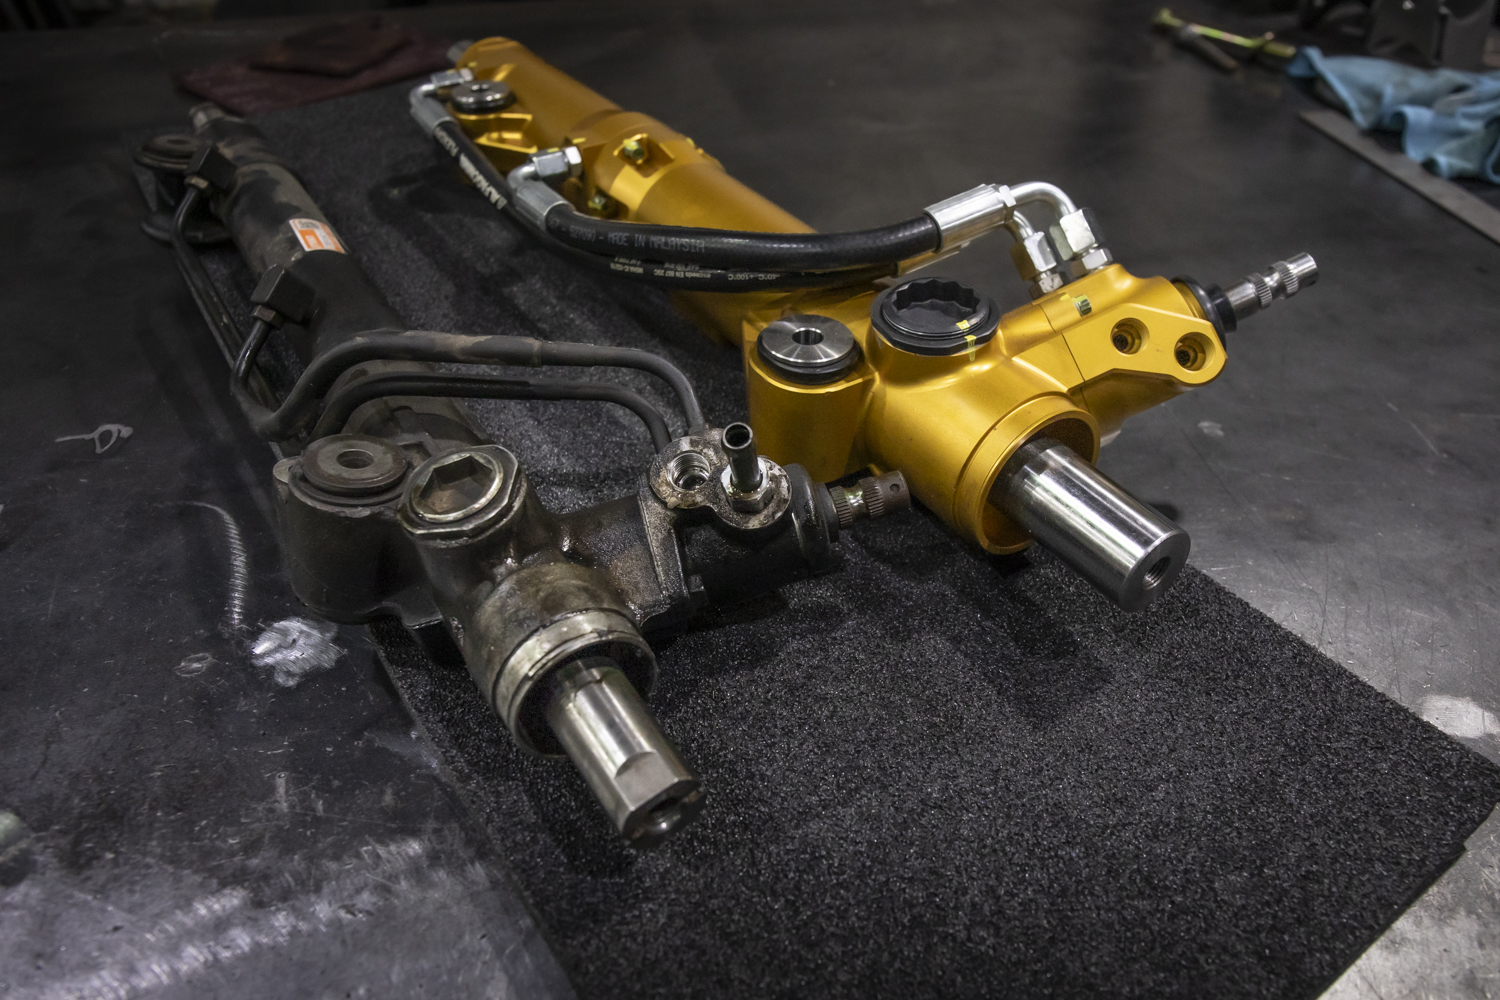
The Toyo Steering Billet Rack is much more refined than the previous modified Tundra steering racks on the market. We’ve installed many modified Tundra racks and 200 series Land Cruiser racks on Tacomas, 4Runners, and GX builds… this new rack is miles beyond the previous offerings on the market.
Modified Tundra racks are bigger, more difficult to install, and come with a variety of challenges after the install. This new Toyo Steering Billet Rack is miles beyond what’s been on the market for the last few years. Just incredibly impressed all the way around. No more dealing with eccentric bushings, a housing cut to the exact width of the Tacoma, corrected Pinion angle, the rack gear now sits closer to the mount bushings, which provides better clearance around suspension components, and more.
Just very impressed with this Billet Steering Rack from Toyo Steering. We’ve seen thousands of parts here at the shop, and we have a feeling that in the coming years this will be a consistent fan favorite and frequent install.
Final Thoughts
After years of looking for a good steering solution, we think we might have found one in this Toyo Steering Billet Rack.
On the surface, it has addressed all the problems previously found in the Modified Tundra Steering Racks and LC200 rack swaps.
We are running this rack on our personal Shop truck here at Stellar Built, and after seeing a few of them in person, we knew we had to have one on the shop truck. This Tacoma sees a lot of technical terrain out here in Northern California; Rubicon, Fordyce, and even a few trips out to Moab for Pritchett Canyon.
We will put this rack to the test this season. Follow @StellarBuilt on Instagram for updates.