
Not too long ago, I covered an initial post on this rooftop tent from Guana Equipment. You can read that install, setup and initial review post here.
In this article, after a few months of testing, I’ll give you my long-term experiences and thoughts on this setup. Let’s get right into it.
Find It Online
- Guana Equipment 3-Person Wanaka 55″ RTT with XL Annex: Check Price
Table Of Contents
Company Highlight
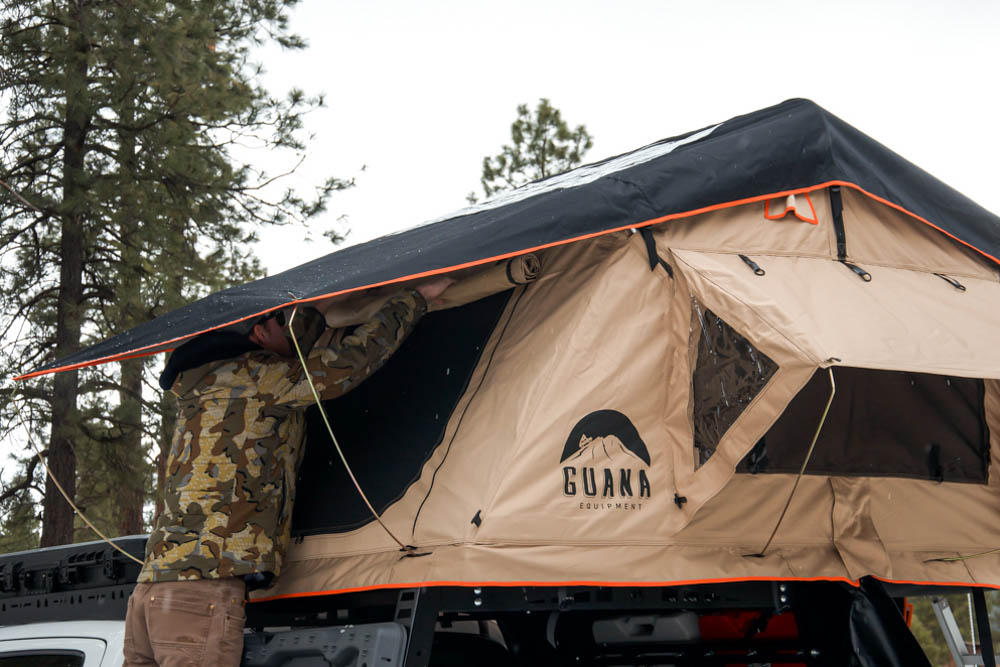
I recently had the pleasure to get to know a little more about Guana and their backstory.
Guana is an American and Costa Rican company that started with a passion for traveling and exploring the world. The two owners Gianluca and Karsten have known each other for almost 20 years. Through their friendship, they tested tents and eventually started selling them. With the knowledge that they gained from testing, they compiled their likes and dislikes and eventually started making their own.
Being both an American and Costa Rican company they test their tents all around the world in different environments ensuring the customer is getting the best of the best. Their mission with Guana is to – “Inspire others, and facilitate or make it better for them to go out, explore, enjoy the outdoors and have real adventures… they are made for exploring so that’s what we try and do.”
Guana offers a lineup of rooftop tents all the way from 2-3 person tents to 4+. Not only do they offer rooftop tents, but also annexes to go with the tents, as well as awnings, both 270-degree options, and traditional 180-degree ones. With all the accessories they offer it is ensured your camp setup will be dialed!
Why Buy a Rooftop Tent?
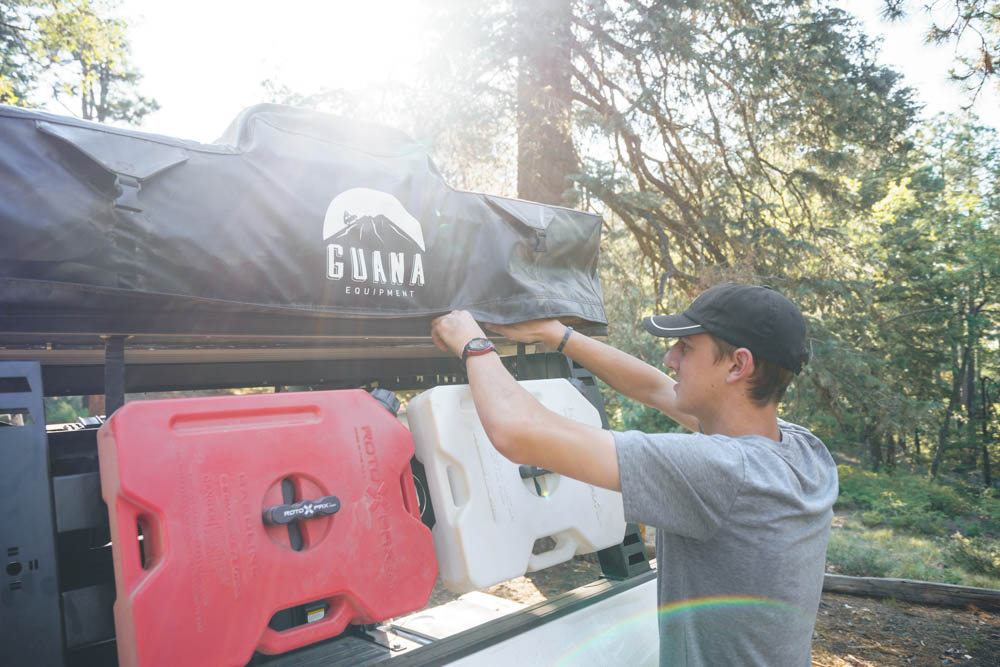
Rooftop tents are one of the fastest-growing parts of the overloading scene and are here to stay. The luxury of having a comfortable elevated sleeping area out of the elements is what gravitates many people towards purchasing one. Ground camping can sometimes be uncomfortable and cold when you don’t have all the necessary equipment to be comfortable.
When out camping, you want to enjoy your time as much as possible and spend as little time messing with your gear as possible. Ground tents are notorious for being tedious and hard to operate and that is the last thing you want to do when you pull up to or roll out of camp.
The ease of access and setup is another huge draw to the rooftop tent lifestyle. Having it mounted on your vehicle and opened and or closed within a few minutes or less is a huge benefit and convenience.
Softshell VS. Hardshell
The two main types of rooftop tents on the market are soft shells and hard shells. Below we are going to discuss the key factors in rooftop tents, specifically softshells and hardshells. Those being; weight, height, space, set up time, and price.
Weight
RTTs are a heavier accessory, no doubt. On average, tents usually weigh anywhere from around 100 to 150 lbs. Sometimes, when it comes to weight, hardshell tents weigh more, and that is because of all the added extra solid material. A softshell tent replaces the hardshell structure with heavy-duty canvas material which can cut the weight. On the other hand, hardshell tents, depending on the style, more evenly distribute the weight over a larger footprint on the vehicle. Alternatively, a softshell centralizes all their weight into a smaller area.
Height
If you have researched or even seen both softshell and hardshell rooftop tents before, then you have most definitely seen the height difference. One of the largest deciding factors in the rooftop tent scene is height. And we all know what height means…MPG. The hardshell tent selling point is the height. They can be anywhere from 6 inches to just about 12 inches, depending on the make/model. On the flip side, soft shell tents average 10-15 inches in height, so a little thicker on average. Depending on your mounting system this can play a big role in wind noise, and of course MPG.
Space
When camping, you lack a fair amount of space. You try and get as much as you can but sometimes it doesn’t always work out that way. Softshell tents typically offer more space. The overall height difference alone allows you to pack more material and square footage into the platform. With hardshell tents depending on the style, you’re limited with height and width due to the actual hardshell construction.
Set-Up Time
Set-up time is an important factor with rooftop tents. When it’s cold, windy, freezing, and/or scorching hot and humid, setup time matters with how quickly you’re going to be able to warm up or cool down and hit the road. Softshell tents take a while to set up and break down. By “a while” I mean 7-15 minutes depending on your skills. This may not seem like a lot of time, but it is when you’re either freezing cold or super hot and all you want to do is go home. Hardshell tents take 15-45 seconds to set up… no seriously, that fast. It is quite the luxury to have that fast of setup and breakdown time – meaning you’re on the road that much faster.
Price
The cherry on top deciding factor when it comes to rooftop tents is the price. The unfortunate truth is they are far from cheap and you might be thinking it’s hard to justify the cost. Softshell tents have always been the cheapest option out there for RTTs. Depending on the style and size of the tent they range from the $800-$2500+ range. While hardshell tents usually start at $2,000 and go all the way up to around $4,000.
Bottom Line
We all have different wants and needs. When shopping for your rooftop tent, take your time, do your research and make sure you get what you want because the investment is not something you want to cut corners on. There are tons of resources out there to help with your decision, but feel free to reach out with your questions.
Specifications
Let’s dive into the nitty-gritty specifications of this tent and annex.
Tent Specifications & Features:
- Tent body made out of 600D waterproof canvas equipped with taped seams and PU coating
- Rainfly is made out of 600D waterproof canvas as well
- Heavy-duty 1200D PVC travel cover
- Diamond Plate – Anti-scratch tent base
- 1″ inch thick interior poles
- All alloy brackets
- 304 stainless steel hardware
- YKK Zippers
- 3 person capacity
- 4 seasons
- Utility net under tent base
- Anti-condensation mat
- 2 shoe bags
- 3″ thick mattress with washable cover
- 1 LED interior light strip
- 2 skylights
- 4 bungee cords (to pull tent sides in)
Annex Specifications & Features:
- 3 entrances with doors that fold out to become awnings
- 6 poles included
- Annex Walls 600D waterproof canvas with taped seams and PU coating
- Heavy Duty 1200D PVC tent floor
Tent Dimensions:
- Tent Open: 56.3″ W x 122″ L x 49.5 H
- Tent Closed: 56.3″ W x 48″ L x 12″ H
- Tent Weight: 123.5 LBS
Annex Dimensions:
- Annex Room: 100″ W x 100″ L x 75″ H
- Annex Weight: 11 LBS
Exterior Features
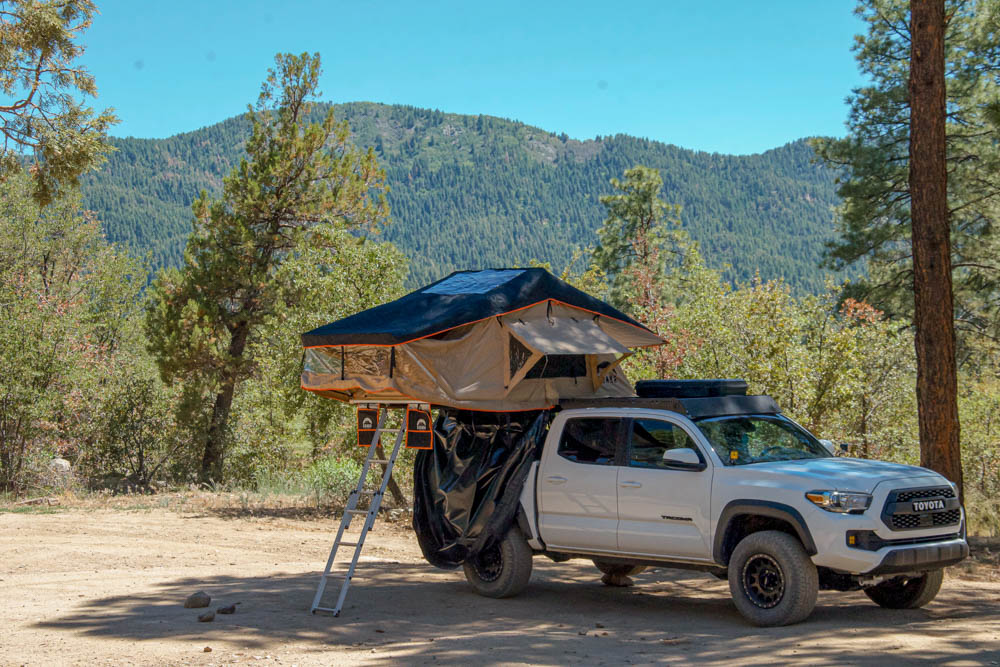
This tent is loaded with features both on the exterior and interior.
Right now we are going to focus on the exterior features!
1. Doors, Windows & Sky Lights
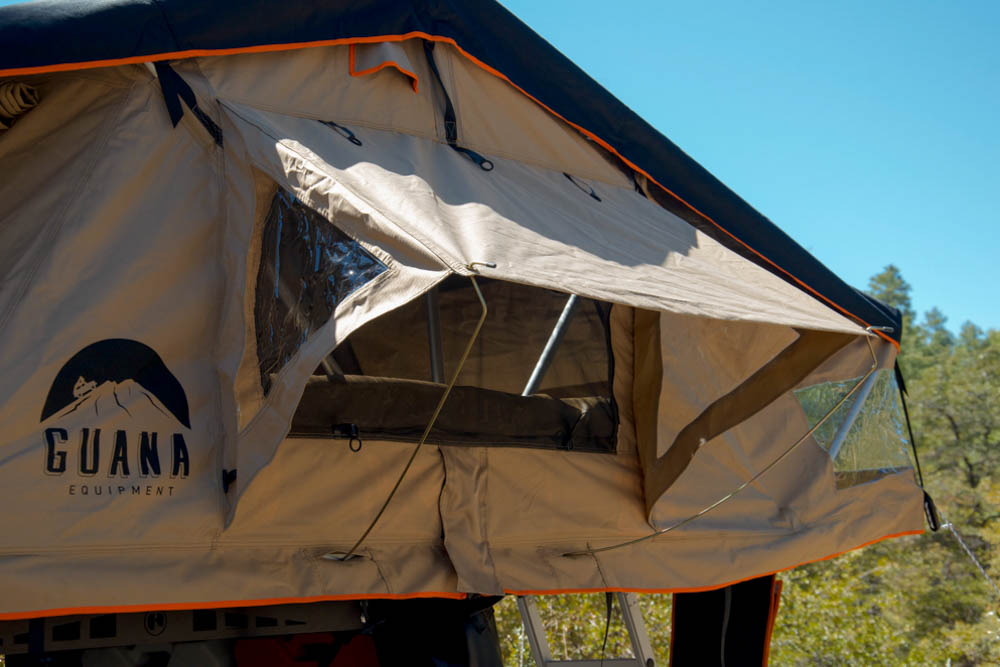
This tent has an astonishing total of 2 doors (main entrances), 2 side windows, 2 skylights, and an entrance window. Talk about natural lighting!
All entrances, windows, and skylights consist of a solid canvas zip-up door and bug net/mesh material. The two main entrances have a zip-up canvas door on the outside and a bug net/mesh on the inside. The two windows are similar to the entrances they just have the bug net on the outside and the canvas material on the inside.
The skylights share the exact same characteristics as the side windows with the canvas being on the inside and the bug net on the outside. If the rainfly is on the tent then there will be an extra layer of clear canvas over the skylight windows still allowing light to come in, but with an extra layer of protection from the elements. All canvas doors and bug nets roll up and have their designated T-loops to hold them up and out of the way.
This tent has a unique entrance with how the material extends over the ladder and the main door giving you a proper overhang and protection from the elements.
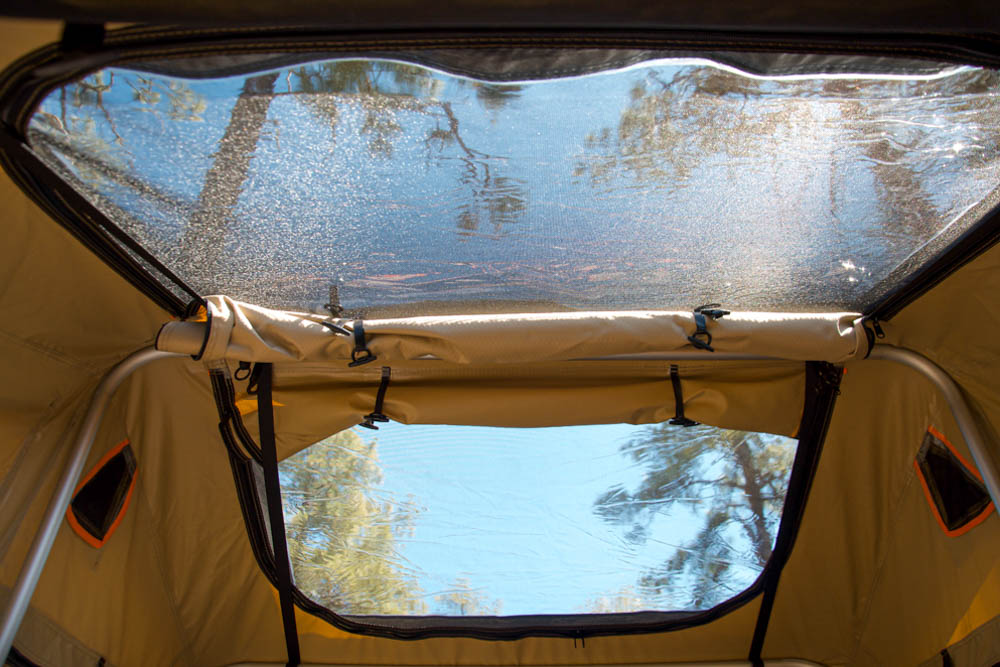
The two massive skylights let in tons of natural lighting and can be great for stargazing during clear nights. The rainfly can be removed to allow better ventilation as well. Removing the rainfly will also remove the clear windows just leaving the screen and main door on the skylight openings.
All windows and doors have YKK zippers with a pull tab on both the inside and outside to allow closure from the inside and outside of the tent. This tent is extremely dark when everything is closed up. Inside the tent during the middle of the day feels like nighttime, allowing minimal light in.
2. Air Vents
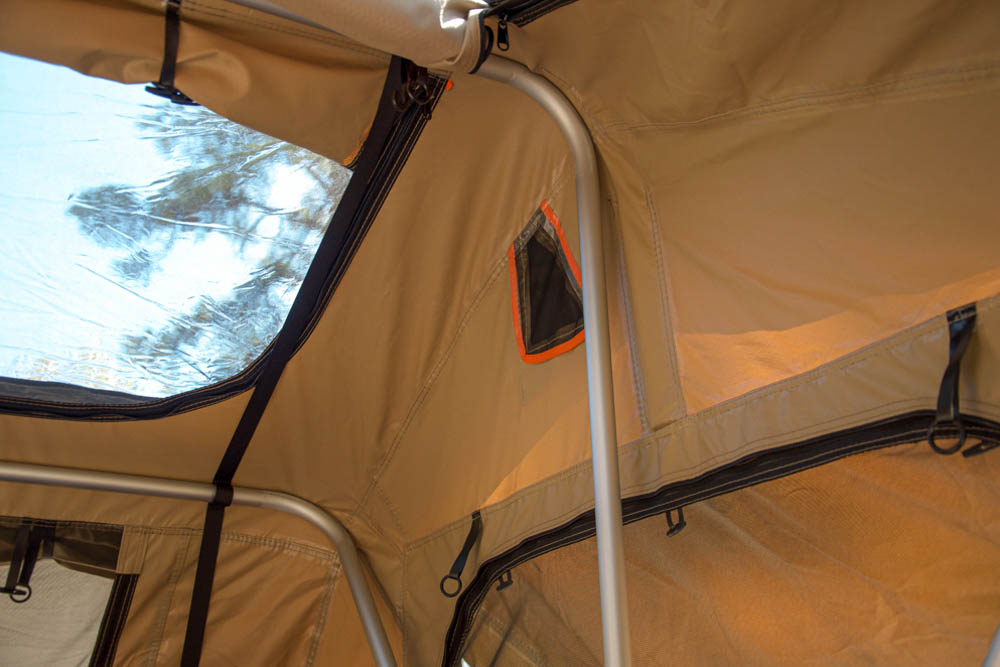
Featured on the inside of this tent are two vents. They are located up at the highest point and each position on both sides. These vents allow proper ventilation with all types of temperature changes and ensure minimal moisture build-up.
Whether you have all the doors and windows closed or open, this tent has great airflow and ventilation. Having plenty of windows allows you to optimize your air flow during all seasons.
3. Rainfly

Standard with all rooftop tents are rain flies. This tent of course has one, and as the name implies it prevents rain from getting into the tent. It’s got two clear window cutouts for the skylights and it extends over all surfaces of the tent both at the main entrance and secondary entrance.
The rainfly can be removed by detaching the velcro straps from the frame. This may be of interest on the warm summer days where ventilation is key.
After spending multiple nights in the wind with the tent I tended to hear a scratching/flapping noise. My determination was that it came from the rainfly not being tight. I would suggest going around and tightening the buckles around the rainfly to prevent any sort of flapping in the wind.
4. Telescopic Ladder
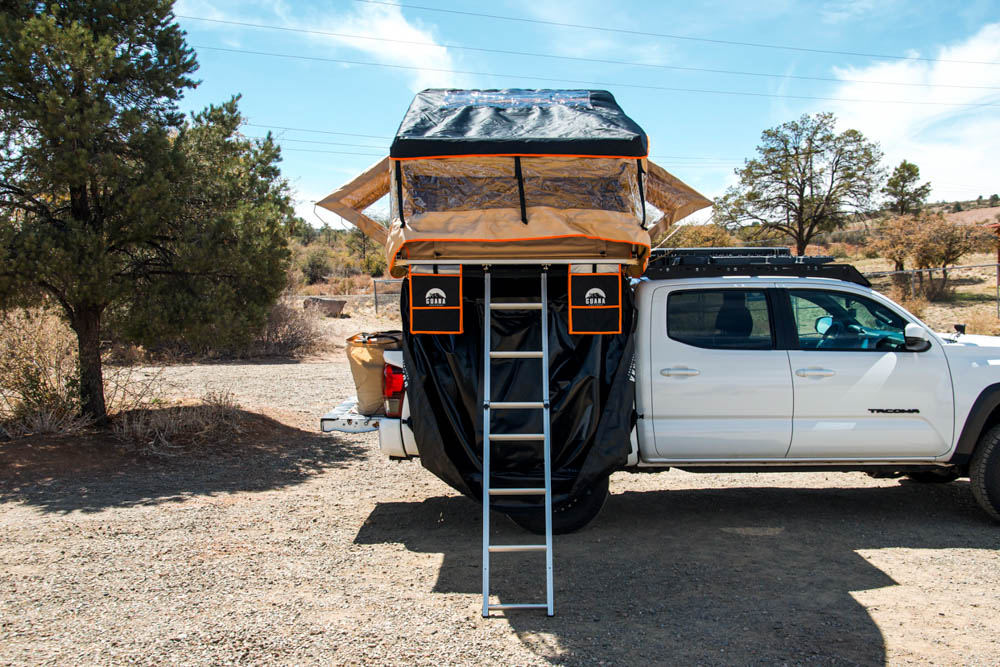
The ladder on this tent is a standard RTT sliding telescopic ladder.
It features 3 position holes depending on the angle you want and the height of your vehicle. It collapses and velcros to the top of the tent when it’s all closed up. Furthermore, the steps that run span-wise are at an angle so when the ladder is extended the steps are level and flat with the ground.
I do wish there were a handful more hole options for the ladder as there are times I wish it wasn’t at such an angle. To solve the problem I may drill an extra couple of holes higher up. But still, not a huge deal-breaker.
Interior Features
Just like the exterior, this tent is loaded with features on the inside. Let’s dive into them!
1. Storage
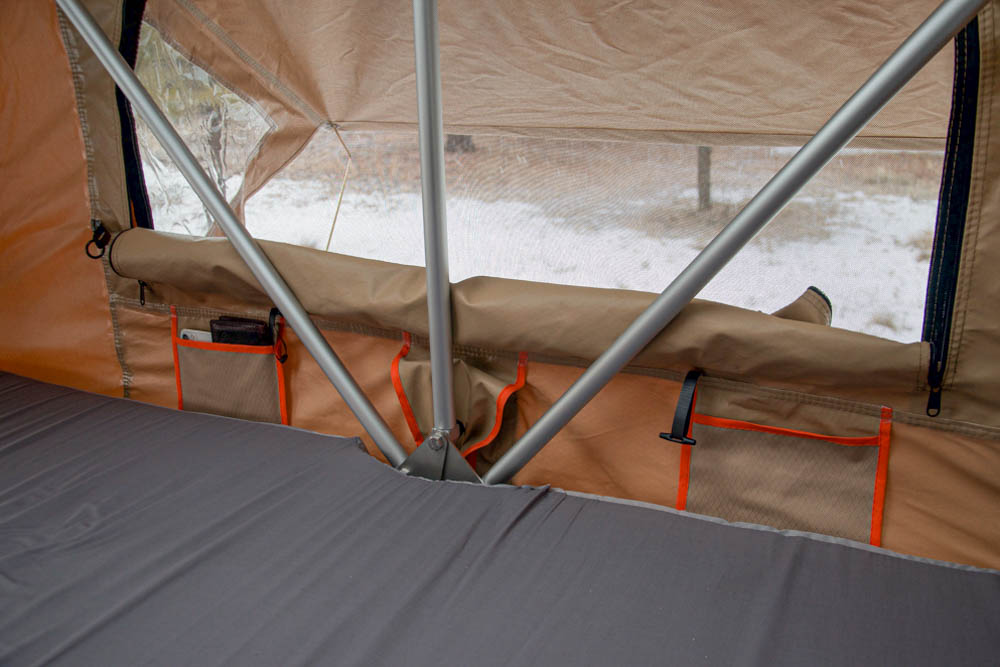
On the interior of this tent, there are 4 storage bags (2 on each side) located under the windows. They provide handy storage for anything from your phone, wallet, keys, to portable battery banks. They are approximately 5 inches deep by 5 inches wide.
Around the tent are loops of all sorts where you can hang lights, water bottles, clocks, etc. too.
2. Interior Lighting
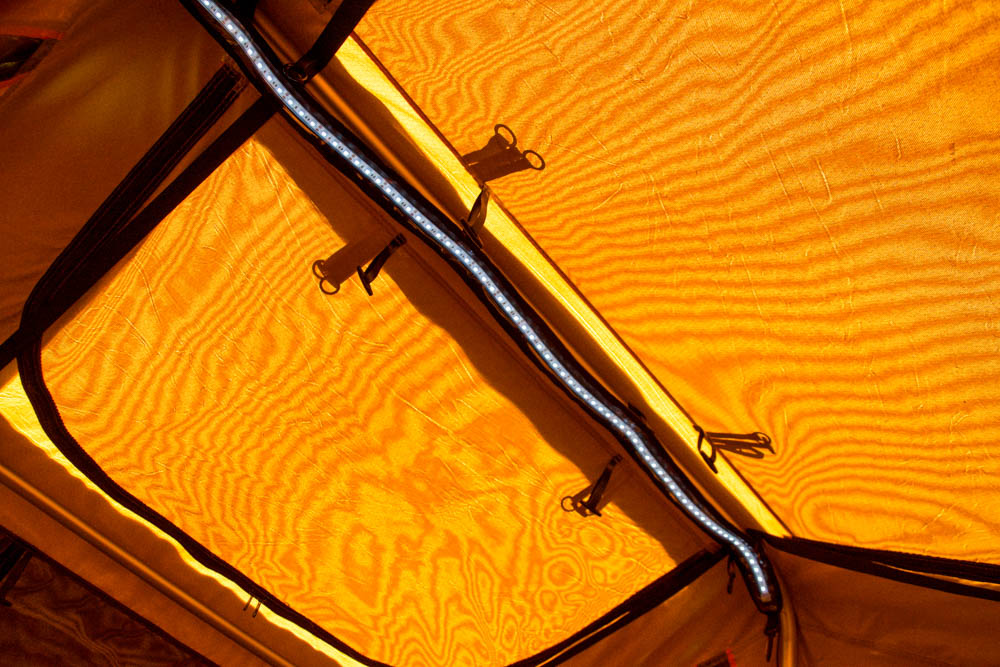
Guana included this super handy LED light strip that velcros to the center strut and gives out loads of lights! It’s got both the option for a 12V adapter and alligator clips, depending on your source of power. Furthermore, it also has clips along with the housing so you can have the option to clip it anywhere in the tent or even outside the tent to provide camp lighting when lounging outside.
I had mine hooked up to a Goal Zero solar panel via the 12V adapter and it did the job great! Once it got dark out I had no source of power for the light since at the moment I don’t own a power station. This is something to be wary of when using this light. But, this is a great additional feature to have that is up, out of the way and provides optimal output in times of need. It’s definitely a nice touch that Guana provided such an addition in the tent kit.
3. Mattress
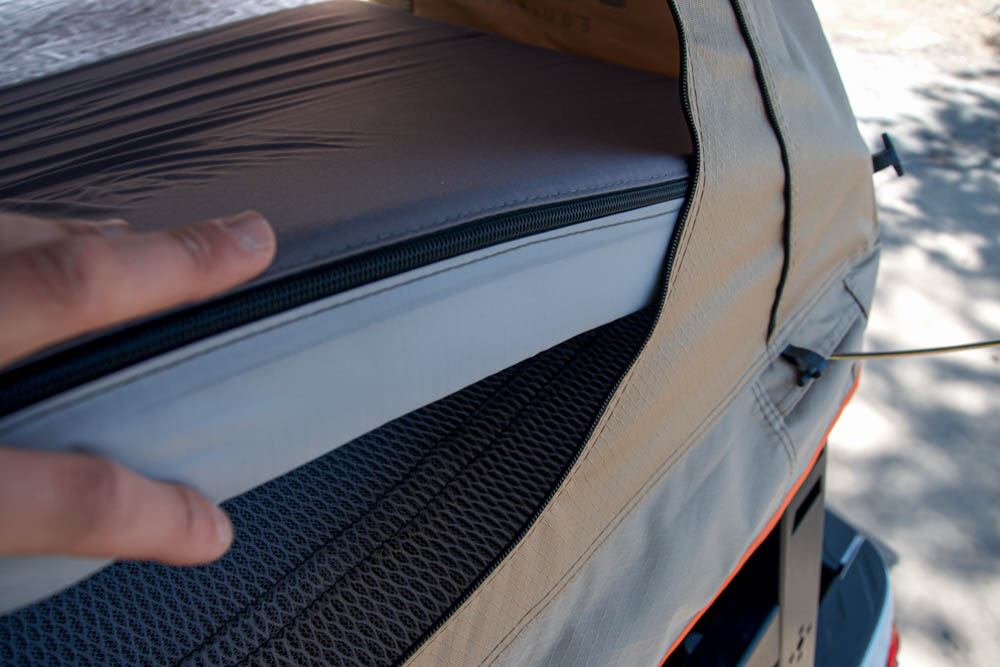
Included in this tent is a 3″ foam mattress with a washable cover. Another plus of this mattress is it does not have a folding seam in the middle of it. Meaning it is one solid piece of foam and will eliminate the problem of having an uncomfortable seam right in the middle of the sleeping area.
It is a little firm for my taste but does the job quite well compared to an air mattress or a sleeping pad in a traditional ground tent. You could always add some blankets to make it comfier.
4. Anti-Condensation Mat
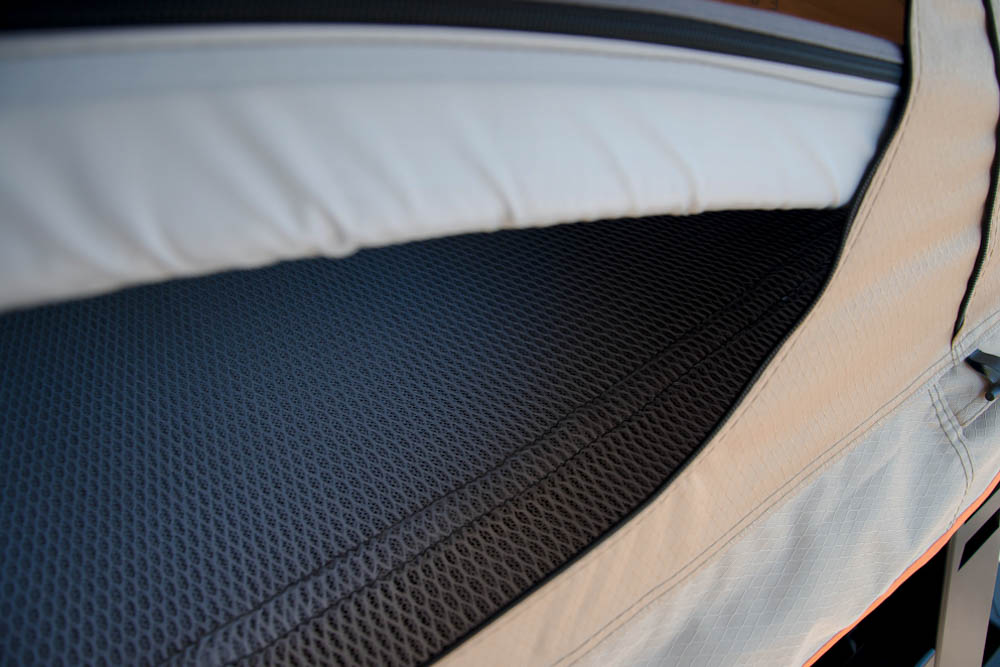
These come in handy with preventing any sort of condensation that may form on the floor and come in contact with the mattress. It is removable and attaches with velcro.
Tent Materials
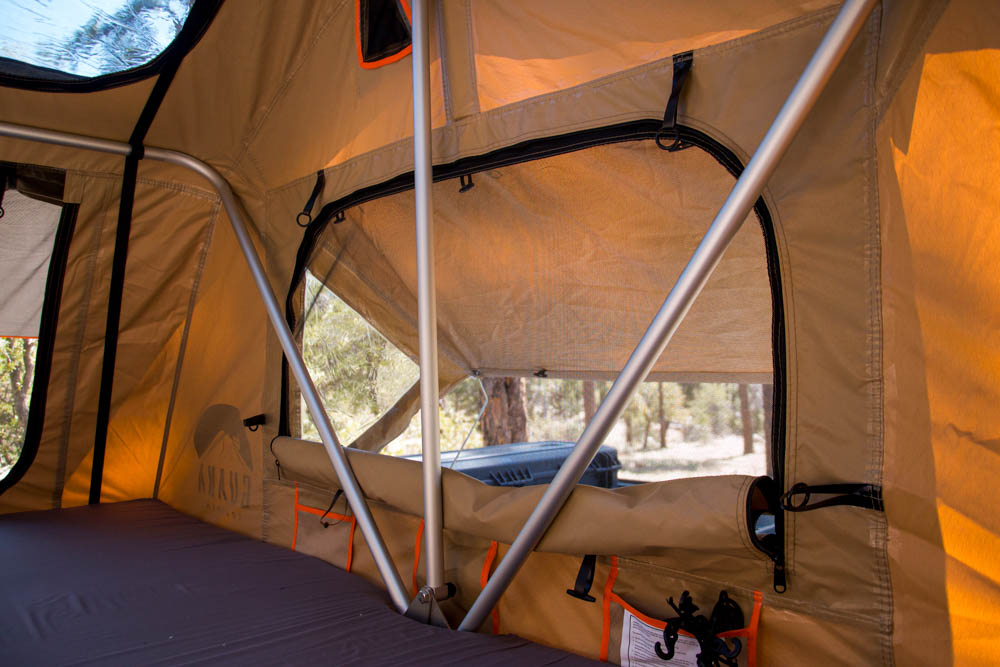
The materials on this tent are 600D waterproof canvas with taped seams and a PU coating. This means that it is super durable and weatherproof. It is also easy to clean if it gets dirty at any point in time. Taking a warm washcloth and some cleaning solution will do the job.
All zippers on this tent are YKK with pull tabs both on the inside and outside of the tent. These are very high quality and won’t get stuck when zipping. Furthermore, all the hardware is stainless steel and the poles are made out of aluminum. Both strong and lightweight materials have been used in the construction of this tent.
RTT Setup & Takedown Time
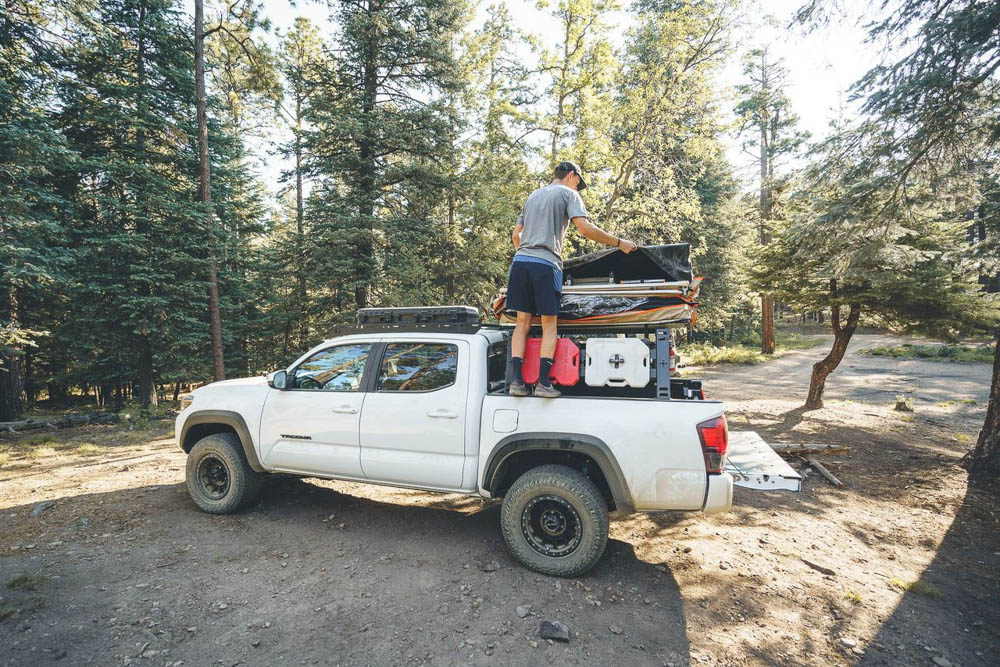
Since this tent is a softshell tent, the setup time is quite a bit longer than if it were a hard shell tent. After setting the tent up multiple times you start to develop a system working around the truck that works best for you! The times shown below are with 1 person, every window and door open on setup, and the tent completely zipped and buckled on teardown.
Average tent setup time in minutes:
- 7:25
Average tent teardown time in minutes:
- 8:10
As time shows it isn’t extremely fast when compared to the fastest options around. The setup and breakdown can be tedious in the cold when it is wet and everything is frozen especially when it comes to zipping the cover back on. This is a good example of when it is handy to have an extra set of hands or some warm water which will cut the time in half. Furthermore, developing the best method of working around your truck and reaching all the high points is the best plan of attack I found to master the process. But let’s be honest, less than ten minutes to set up or break down a sleeping arrangement like this one, is no big deal.
A tip for when closing the tent is to put your body weight on the corners to help compress the tent more while velcroing down the sides. This will make zipping the transportation cover go way smoother when moving around the corners. Remember to open and air your tent out after a weekend of camping!
XL Annex
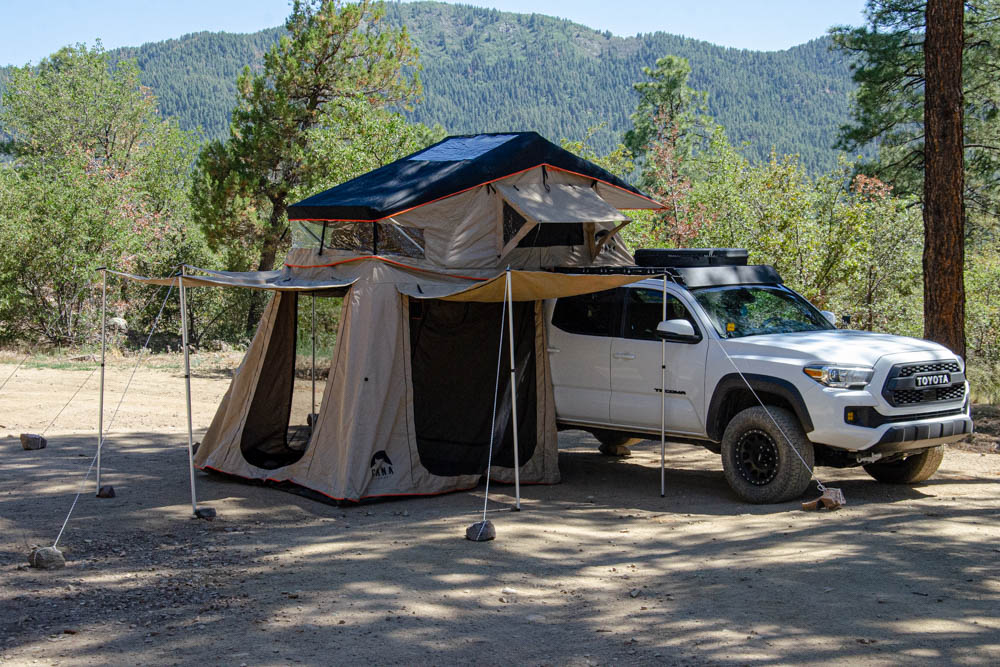
Included with the tent combo is the XL Annex. And boy oh boy let me tell you it is XL – no question. After setting up the annex and opening up all the doors and windows you can see the versatility and size of this space. Annexes are starting to become more and more popular with the option of adding significantly more sheltered space. Since they can be tedious and slow to set up, they are more frequently used when staying at a campsite for more than a night.
Below we are going to dive into the details about this annex and all the features that it offers!
1. Exterior Space
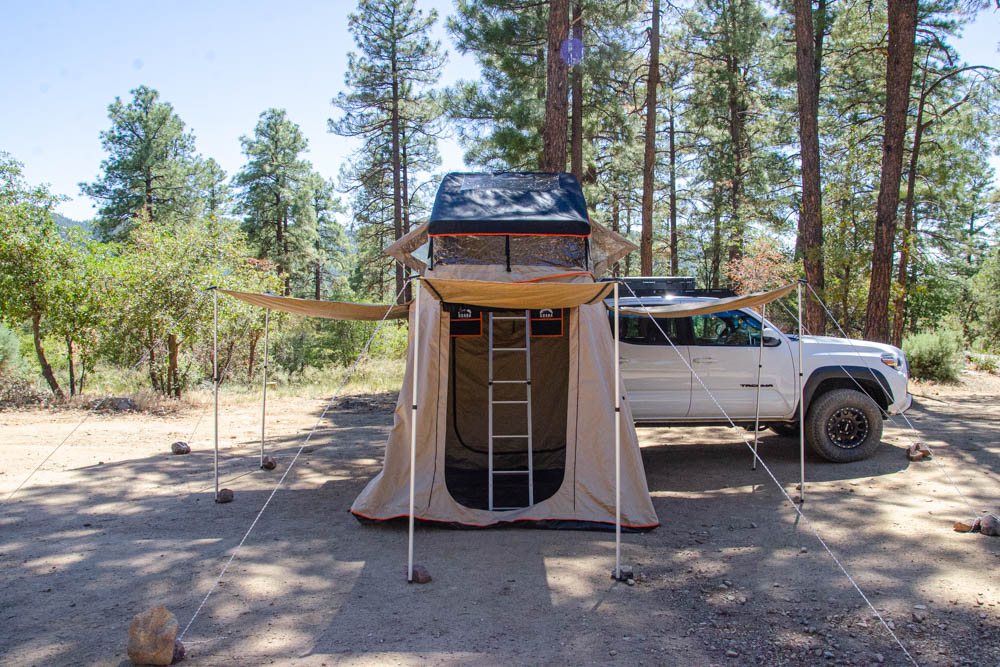
Let’s start off with exterior space. What a game-changer this annex makes when it is all opened up. The doors open into awnings on all 3 sides and provide premium shade for lounging.
Depending on the size of your lift and the height of the poles you have chosen, optimal headspace is provided between your head and awning. With the provided telescopic poles you also have the option to change the height of the awnings to shed water or block sunlight in times of need.
Having a variety of sheltered spaces makes a great place for hanging out and cooking while also staying out of the elements.
2. Interior Space
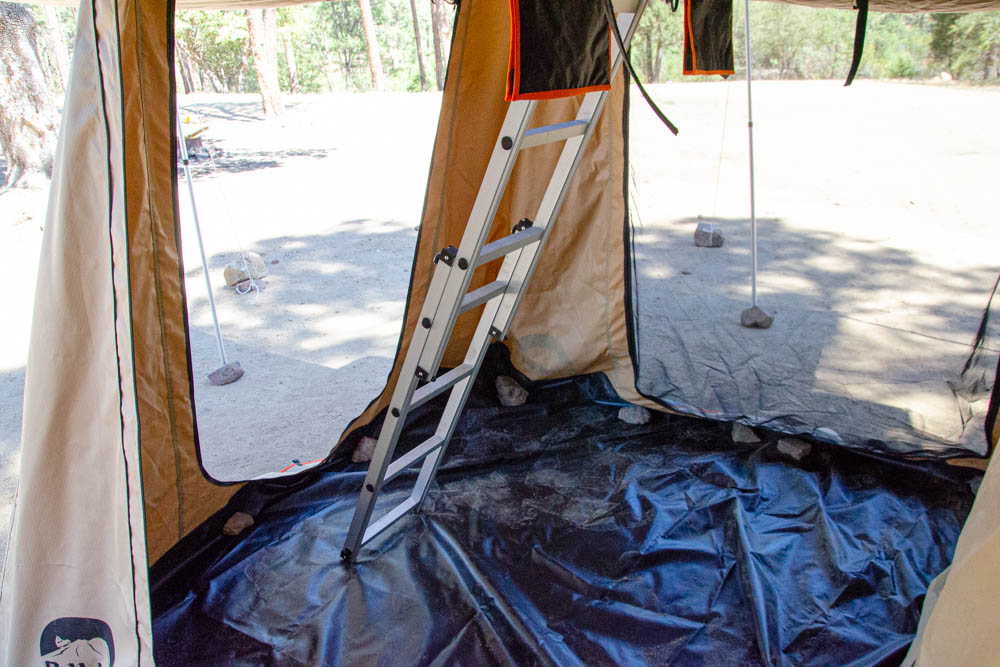
Annexes add tons of extra shelter from the elements. The large footprint of this annex allows for the option to add a sleeping cot or two for adults with extra space to move around left over.
The annex is a great place to get out of the weather, get dry, and remove wet clothes and gear after a long day of exploring. The floor is made out of the same material as the transportation cover so it provides a heavy-duty surface to stand on. Since it is made out of a smooth material, it can get pretty slippery when wet and is something to be wary of when in the snow or rain.
If you hadn’t noticed already, there are 2 massive side entrances and a large front entrance as well as a large door up against the cab side of the truck that can be opened in order to reach gear and accessories that may be in your bed or rack. With the large doors and screens, outside air is able to move through the annex.
3. Attachment Points
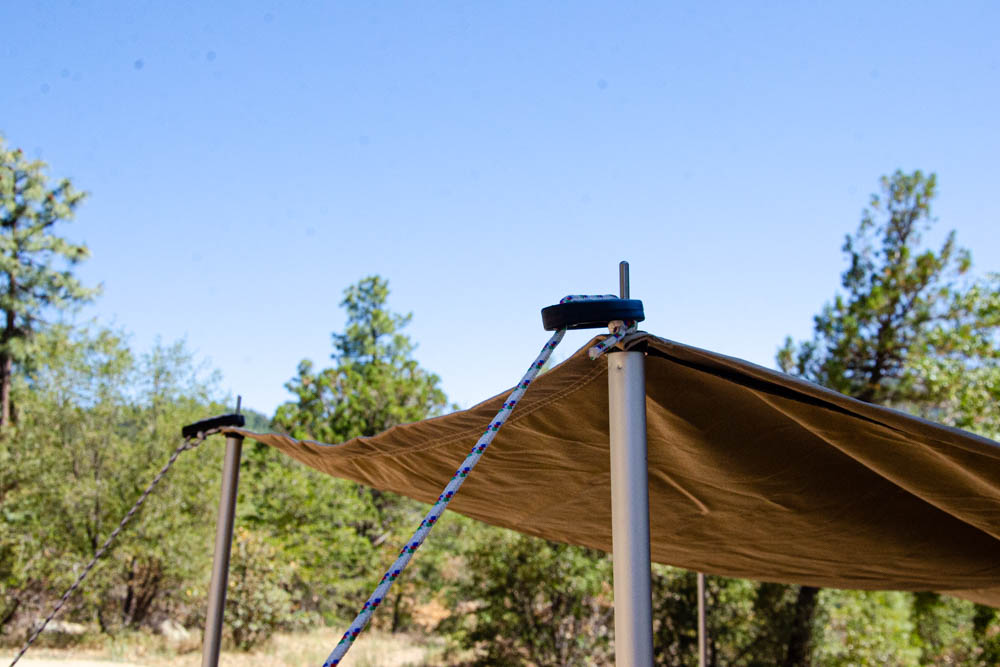
The annex walls have the ability to open up and be held up with the included poles. When doing so they act like awnings to provide even more sheltered space. The poles are telescopic and offer an adjustable height depending on your wants and needs. Once the right height is found sliding them into the eyelets at the base of the wall will hold them upright.
Furthermore, depending on the environment you are in, placing the provided stakes into the ground or rocks may be necessary to hold up the poles and tension rope. Having endless adjustability options really leaves the ability to configure this setup to your desires when out camping.
Annex Setup & Takedown Time
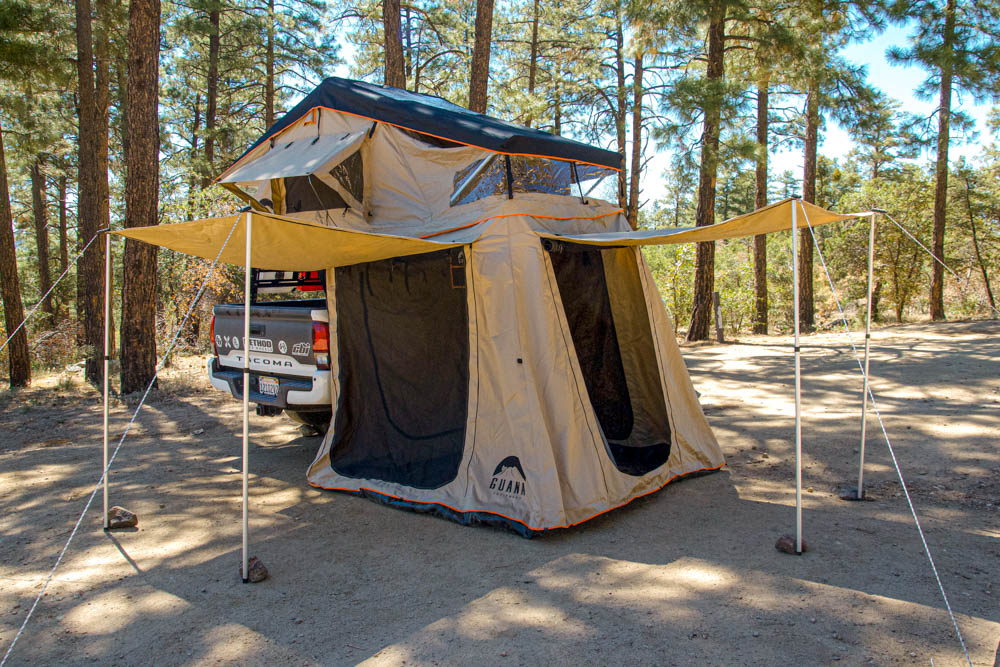
As you may have noticed, this annex is very big and weighs quite a bit. So as you can figure, the setup time is far from fast. Just like setting up the tent, after doing it a handful of times you find the best method of working around the truck and annex to be the most time-efficient. Having two or even three sets of hands can make the process go significantly smoother, but for the sake of the times below the setup was done with one person.
Note: Setting the annex up in the wind can be tricky, finding a sheltered space or using rocks/stakes as anchors will help support the annex.
Average annex setup time in minutes:
- 20:45
Average annex takedown time in minutes:
- 17:05
These times aren’t speedy but they are an average of one person to fully open and fully closed and packed. The times of course will speed up with an extra set of hands or two.
Annex Impressions
After spending some time with the annex I started to see the significance and potential it has. Whether you are looking for more sheltered space from the weather or have more people to sleep with, this annex opens up a whole new world of options. It is made out of the same heavy-duty materials that the tent is made out of which ensures its durability with continuous use.
Overall I am impressed by it and see the benefit it will have in a lot of my camping scenarios and trips. Guana provides this annex in the package when purchasing the tent which means not having to spend the extra cash down the road to buy one separately. Having an annex in your camping arsenal is definitely a must-have!
Overall Impressions
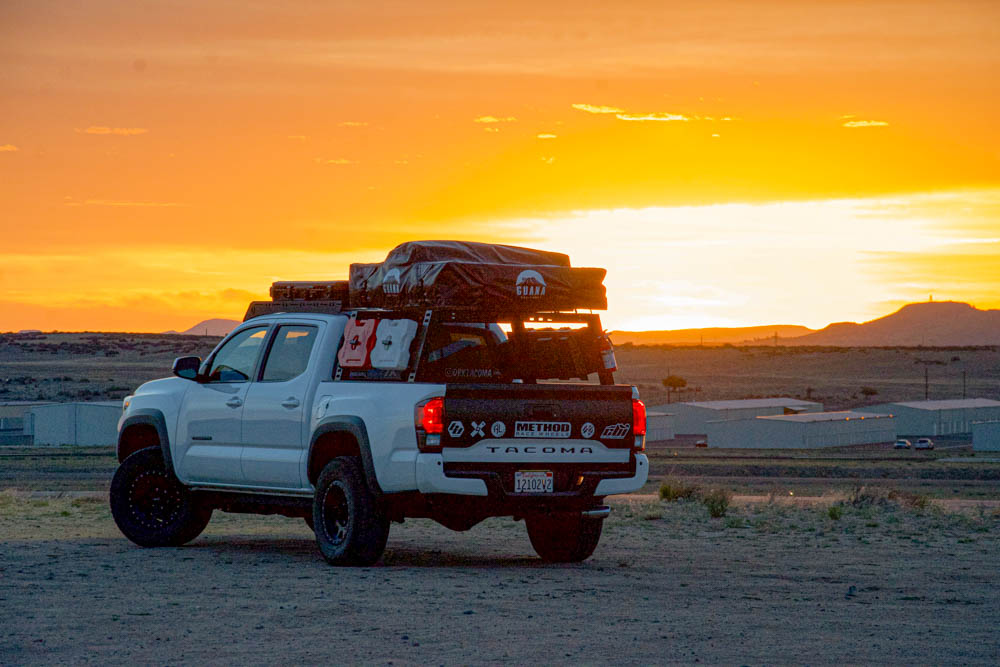
After having this tent on my truck now for a few months, and having spent a handful of nights in it, I have learned a lot about this tent and the RTT lifestyle.
Down below I am going to highlight some of the main talking points and the experiences I have had with the tent.
Wind Noise & Gas Mileage
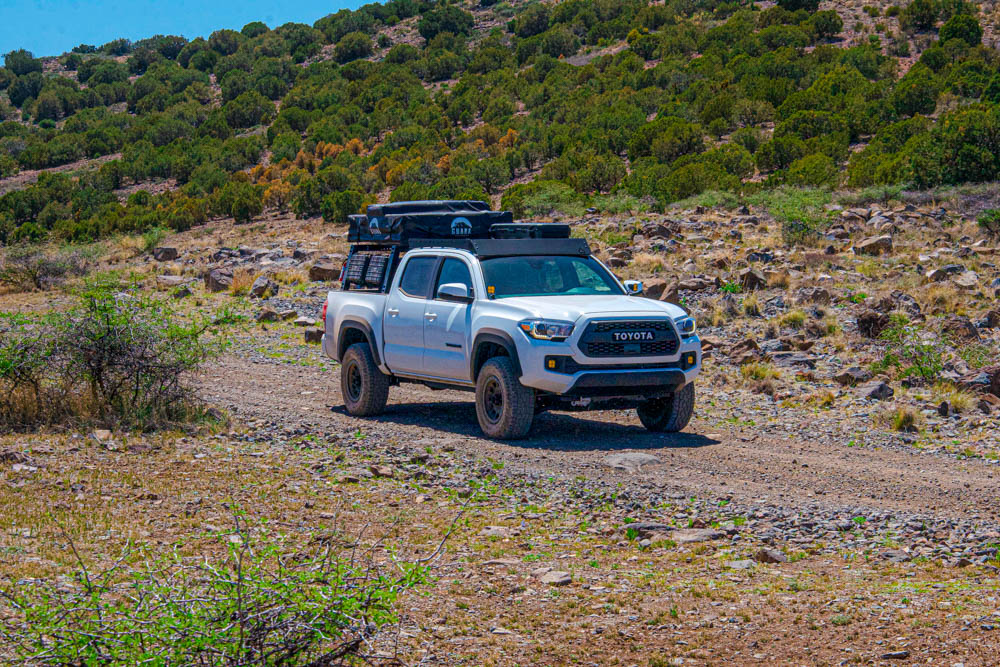
As you may have noticed my tent is mounted on a cab height bed rack. The two main questions I receive are, “How noisy is it?” and “Does it kill your gas mileage?”
Indeed it does stick up over a foot above my roof rack but I have barely noticed any wind noise coming from it. I receive the majority of wind noise from my recovery boards and case on my roof rack which may muffle the noise of the tent. Depending on if you mount your tent at cab height or mid-height will play a factor in determining the wind noise.
In terms of gas mileage, I have noticed a little drop in gas mileage but nothing serious. Before the tent, I was averaging anywhere from the low 17s to mid 19s when driving in town, and low 20s with highway driving. Now with the tent, I am in the mid 16s to low 17s in town, to high 18s on the highway in a good scenario.
Note that I am on stock suspension and stock tire size so the effects will vary with bigger tires and lift. Just like with wind noise, gas mileage will vary if the tent is mounted above or below the roofline.
How Does It Feel With The Added Weight?
Driving with the added weight in the bed (100 lb bed rack, 130 lb tent, + 25 lbs of gear) hasn’t drastically affected the driving feel, since the majority of the weight is over the rear wheels – which makes it more noticeable when going over bumps and rocks.
With the tent mounted up high, going around corners you can feel the body roll but nothing to be concerned about if you don’t drive like Ken Block around the corners.
Sleeping Comfort
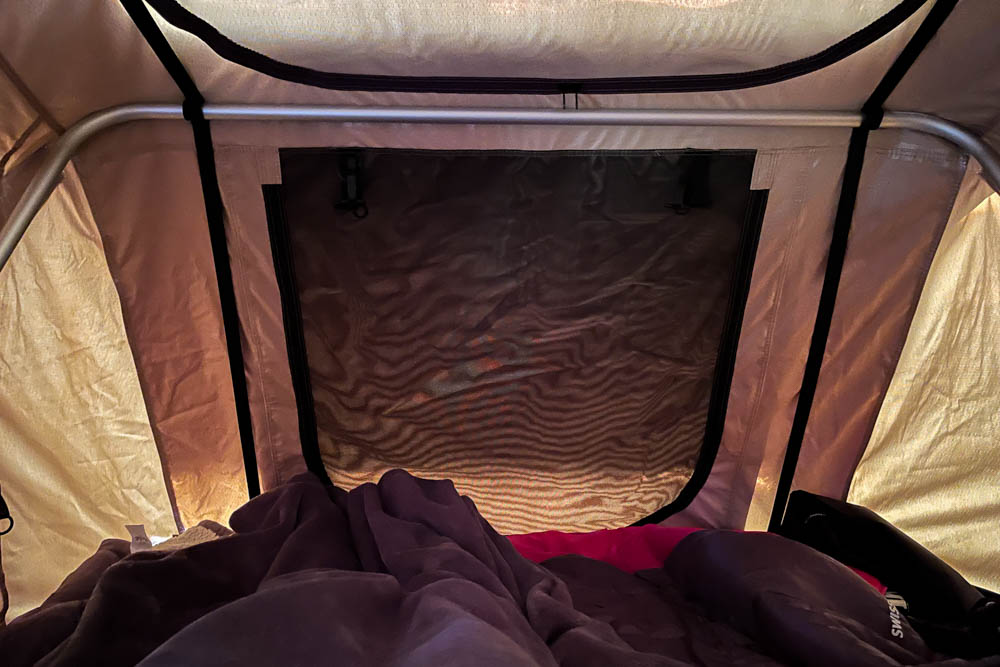
This setup is night and day compared to a ground tent. Coming from someone that usually has a miserable night’s sleep in a ground tent, to having a solid comfortable 6+ hour sleep in this tent, goes to show its perks. Being elevated off the cold ground and on a legitimate mattress is a big positive.
The mattress is quite a bit firm for my taste but adding a pad of some sort is something I see myself doing in the future. Adding sleeping bags, blankets, and pillows increases the comfortability significantly. Plus having plenty of airflow during those warm summer nights is also helpful.
How Well Do We Fit?
I myself being 6′ and some of my friends being up to 6’2″ – we have plenty of room both lengthwise and widthwise. Having a huge length of 122″ provides optimal head and foot clearance with maneuvering space. Being on our knees is about as much as you can do in terms of height.
While they do market this as a 3 person tent I would say it is more of a 2 adult + small child and/or dog in the tent. The annex also has the capability of potentially holding another 2 adults.
Durability
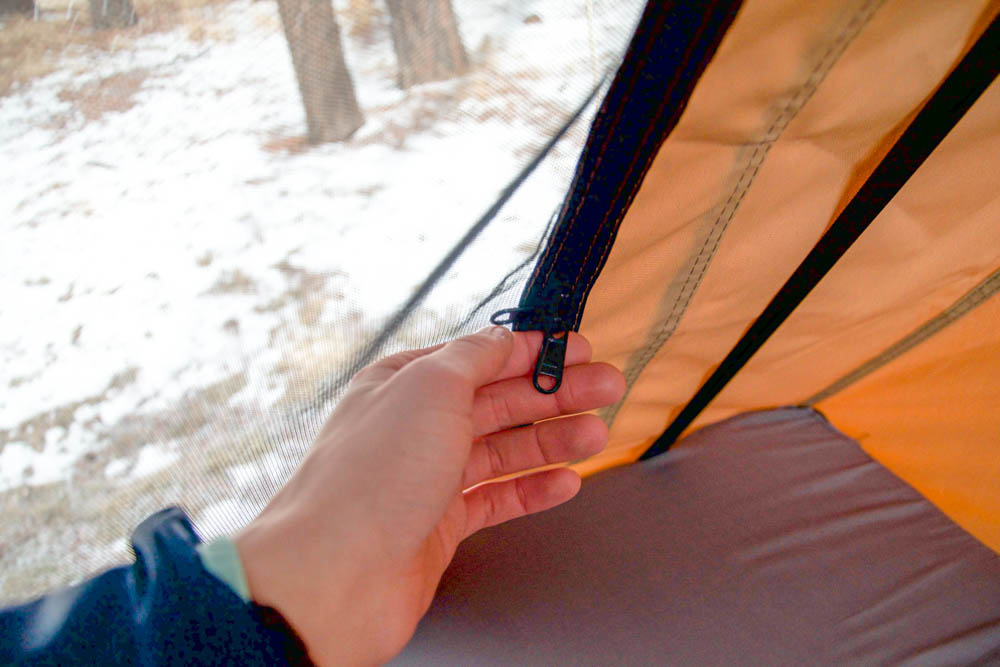
Between the aluminum poles, stainless steel hardware, alloy brackets, and waterproof canvas this tent is durable, to say the least. The diamond plate top and bottom add a rigid base for all operations during use and transit.
Furthermore, interior features like the YKK zippers go to show the attention to detail for quality materials. In all of my use, in plenty of different environments, I haven’t had any durability issues with ripping or tearing.
Final Thoughts
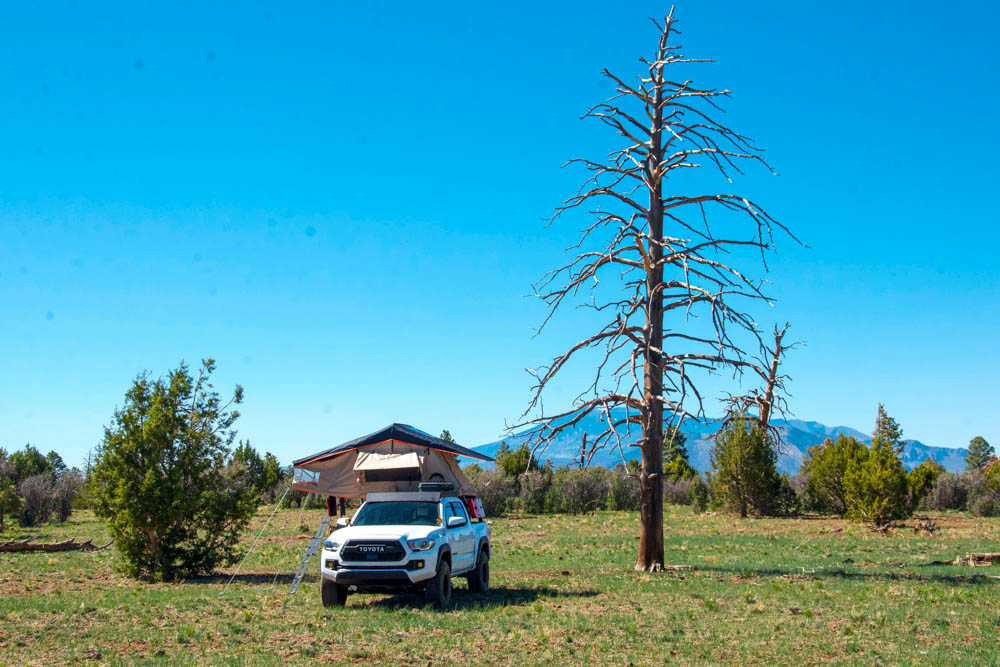
Phew, that’s a lot of information. What’s the consensus you may ask?
I would say convenience! Having your tent mounted on your truck always ready to go is a huge game-changer. No more packing around an extra pain in the butt ground tent. While compared to a hardshell tent this isn’t the fastest RTT around, but it is jammed packed full of features that you can’t beat for the price.
“Buy Once, Cry Once”
Indeed this is a very true statement. Rooftop tents are notorious for being extremely expensive. It is hard to shell out the money to drop on one of these things, but you will be happy you did in the long run.
An RTT provides a safe and comfortable sleeping area that allows you to be that much closer and enjoy the outdoors that much more. As compared to hotels, VRBOs, cabins, and paid campsites this will save you money in the long run.
If you’re an avid camper then a rooftop tent is an option that should be looked at. Furthermore, RTTs are known for holding their value quite well and go for a decent amount of money on all selling platforms if the condition is good.
There are tons of options for RTTs on the market and I encourage you to do your research and find out what the best one is for you! If you’re in the market for an affordable quality softshell rooftop tent look no further than Guana Equipment. They provide all different sizes of tents and accessories to suit your needs. Happy camping!


