

When deciding how to begin or continue the build-out of your Toyota Tacoma, the suspension is almost always one of the first mods that come to mind. As much as we would all love to have a custom-fabricated long travel kit or brand-new Kings on our rigs, sometimes that’s not economically feasible, or practical.
Still, if you’re taking your truck off-road or want a mean-looking stance when you’re picking up groceries with the family, there are other options to get a little lift out of your Taco.
Leveling kits and spacers get a lot of hate on Tacoma-related forums, but still, it’s an excellent route to go for some of us. In this post, I’ll dive into everything you need to know about leveling your truck and how to install the kit.
Before we continue, it’s worth noting that this process is the same on a 2nd Gen Tacoma (2005-2015) and this kit can be used for any 2005+ Tacoma.
Find It Online
- 3/2 Leveling Kit (2005-2023): Check Price
Table Of Contents
Leveling Kit vs. Mid-Travel
A leveling kit has no suspension upgrades. It simply adds a spacer between the suspension and the vehicle, giving it a slight lift. It does give you better ground clearance and the ability to fit larger tires.
Spacer kits do reduce the amount of down travel your Tacoma has by the size of the spacer. Suppose a stock vehicle has five inches of up travel and five inches of down travel, and you add in a three-inch spacer. In that case, you reduce the amount of down travel by three inches, so it only has two inches of down travel, not because your springs can drop the additional three inches, but mainly because your stock suspension wasn’t designed to drop eight inches.
So you must be asking yourself, why would I want a spacer leveling kit? The simple answer is, it’s a very inexpensive lift. Fancy suspension lift kits can cost thousands of dollars, with some cheaper ones like the YotaMafia Bilstein Lift Kit – starting at around $750. I will probably be upgrading to this exact kit very soon. If you’re looking for a list of great quality, budget-friendly suspension lift kits, check out this post.
If you’re looking to learn even more about the variety of available lift kits, and the components within them, check out this guide to 2nd & 3rd Gen Tacoma lift kits.
What Is a 3/2?

3/2 leveling kits refer to the amount in inches the kit will lift your Tacoma. The equipment we are installing today lifts the front of the truck three inches and the rear of the truck two inches. This levels the Tacoma because there is almost a one-inch difference between the ground to the fender for the front and rear of the Tacoma.
You might be wondering why the front suspension spacer is only 1.5 inches thick, and the rear one is 2 inches thick. This is because the front spacer is not a 1:1 ratio. It’s very close to 2:1. The spacer is placed on top of your coilover, and the coilover is inboard from the tire mounting surface. It’s almost perfectly halfway between where the tires mount and where the suspension attaches to the frame. Because it’s halfway inboard, it can be half the size, but the effect is to make it twice as tall as the spacer.
The rear spacer is a simple 1:1 ratio with the spacer going directly underneath the leaf spring adding the exact amount of lift as the height of the spacer.
What Comes With The Kit?

Kit Contents
- (2) 3″ aircraft billet front coilover spacers
- (2) 2″ aircraft billet rear lift blocks
- (4) extended zinc-plated U-bolts
- Installation hardware & instructions are included.
Suggested Additions
- Bilstein 5100 Rear Shock: Check Price
- (8) Lock Washers for the U-bolts
Potential Add-Ons
- Diff Drop: Check Price
- Sway Bar Brackets: Check Price
- Drive Shaft Spacer: Check Price
- Extended Brake Lines: Check Price
- Front Bump Stops (stock ones should still work): Check Price
- Small shim to make up the half-inch difference
Tools & Materials
- Mechanic’s Tool Set
- Needle Nose Pliers
- Torque Wrench
- Pry Bar
- Blue Loctite
- Floor Jack
- Jack Stands
- Gloves
- Eye Protection
This install is easier than you might expect and can be done by anyone that feels comfortable around a truck, floor jack, and some jack stands. You can do this install with the most basic automotive tools. Take your time, double-check your work, and it will take you and a buddy 4-8 hrs to complete.
Installation Video
My truck is a 2016 Toyota Tacoma TRD Off-Road. The truck has never had any suspension upgrades, and I am excited to see how well this kit works.
I chose one of the cheapest 3″ front + 2″ rear leveling kits I could find on Amazon ($90). The reason I didn’t go with the cheapest is that the rear blocks didn’t look like they were quality, and I wanted a solid chunk of metal. I also didn’t see the need to buy anything expensive as they all look the same.
Keep reading until the end, and you’ll see the YouTube video I created for this product too.
Step 1. Remove Front Wheels
Make sure to park your Tacoma on level ground and set the e-brake for these first steps. Break the lug nuts loose before lifting the truck into the air. Slide a floor jack under the truck and lift from a designated jack location (see owner’s manual if you don’t know where). Once the tires are off the ground, slide the jack stands underneath the frame and lower the truck onto them. Then you can continue to remove the lug nuts and remove the front tires.
Note: Placing the tires underneath the truck while it’s in the air is a good place to store them. If in the unfortunate event the truck slides off the jack stands, it will fall onto the tires instead of hitting the ground.
Step 2. Remove Coilover

On the top of the coilover, three 14mm nuts must be removed.
The one in the rear is the most difficult and I have found it best to use a 14mm ratcheting wrench since there isn’t a lot of room. Do not adjust the center nut that is located on the top of the coilover.

On the lower end of the coilover, there is a large bolt with a 19mm nut that also must be removed.
Simply remove the nut at this time and do not worry about pulling the bolt out. Make sure to keep all hardware from the coilover as they will be reused.
Step 3. Disconnect UCA & End Link

On the top of the upper control arm, there is a 10mm bolt that holds your ABS wire in place. Remove the bolt and let the ABS wire and bracket dangle. Whenever possible I like to place the hardware back into its location so that I do not lose or misuse it.
Next, there is a 12mm bolt that holds the brake line to the spindle. That bolt should be removed as well and when you pull the bracket out of its location you will need to lift it up as there is a little metal tab that holds it in place.

The ball joint nut is called a castle nut because it looks like the little parapet around it. These little gaps are where the cotter pin passes through.
To remove the cotter pin you need to pull out the end that is stuck into the parapet and then pull out the long section that is stuck through the bolt completely.

Next, you are going to strike your spindle with a hammer until the spindle drops down and lands on top of the loosened castle nut, which prevents it from completely springing loose.

Place a floor jack under the lower control arm to prevent the entire system from dropping out while you undo the castle nut the remainder of the way.
Be careful as the upper control arm will spring upwards as soon as it comes free.

Now you need to remove the sway bar to make it easy to remove the coilover. I recommend that you remove the upper part that the arrow is pointing to. It takes a 17mm to remove the nut. If the shaft of the ball joint is spinning, you will need a 6mm hex head to put into the end of the shaft to prevent it from moving.
Next, maybe a few taps with a hammer to help it come loose and pass through the spindle. You will need to do this on both sides so you can push the sway bar up and out of the way.
Step 4. Remove Coilover & Install Spacer

Now it’s time to remove the coilover from the vehicle. To start, you can easily pull out the bottom bolt that was holding the coilover in place while you did all the work.
Then it should be completely free to wiggle out. Sometimes you need to move the spindle to best fit your needs.

Place the black spacer on top of the coilover. Reusing the factory hardware, screw the three nuts down over the new spacer onto the studs. Adding a little blue Loctite to the three studs will help to ensure that they do not come loose.
Tighten the 14mm nuts down to factory specifications of 47 pound-feet (lb-ft) The way I did this was by placing the base of the coilover into my vice to hold it still while I tightened the nuts with my torque wrench.
Step 5. Re-Install Coilover & Connect UCA

Now that the spacer is attached to the top of the coilover, we have to put everything back together. This starts with placing the coilover back into place. There is only one way to put the coilover in. Because of the slot on the lower controls arm, you can align the eyelet in two different directions, but with the bolt hole locations on the top, there is a right way and a wrong way.
In this system, you want to have it aligned so that the coilover fits into the slot on the lower control arm and there is a factory stud and nut pointing straight out. You might need to lift the sway bar out of the way to get you more room. If you have a friend around it’s a huge help to have them push down on the lower control arm with a 2X4 to make enough room for you to fit the coilover with the spacer into place.

While the 2X4 is still in place, it’s a good time to slide the lower coilover bolt back in and loosely tighten the new bolts through the top hat and into the new spacer.
Make sure to use the provided lock washer and flat washer, and if you want to be safe, some more blue Loctite. Tighten the three bolts on the top to 47 lb-ft and tighten the lower bolt to 61 lb-ft.

I like to use the floor jack underneath the lower control arm to lift it and help me get the upper control arm’s ball joint to slide through the spindle.
Then you can place the factory castle nut back onto the ball joint. Take note of where the hole is located in the ball joint threaded shaft, so you know where you need to put the cotter pin.

With the 19mm, tighten the castle nut to 81 lb-ft and tighten slightly more as needed to expose the hole for the cotter pin.

Now is a good time to place the sway bar back into place (if you have completed the other side), and tighten the 17mm nut down to 52 lb-ft.
The brake line bracket has a little tab so make sure to place that into the hole then tighten the 12mm bolt down to 9 lb-ft, and the 10mm bolt for the ABS line on top of the UCA can be tightened down to 9 lb-ft as well.
Disconnecting the Rear Suspension
To place the spacer between the axle and the leaf spring you need to be able to separate them. This can be done in a few different ways. I chose to support the axle with some jack stands, and then lift the body of the truck higher to separate them. This can only be done if you have tall jack stands and floor jacks.
If you don’t have a tall floor jack and jack stands you can remove the tires, and lower the vehicle onto some smaller jack stands and that will help when you have to lift the body of the vehicle.
Step 6. Remove U-Bolts

Once you have the vehicle on the jack stands, you can start to remove the four 19mm U-bolt nuts that are located underneath the axle cradle. Make sure to wear some sort of eye protection as this is a common place for dirt to collect.
Underneath each nut, there should be a washer. Once the nuts and washers are removed you can lower the cradle off of the u-bolts. To remove the U-bolts, lift them up and over the leaf springs be careful not to hit the brake lines.

On the top of the leaf springs is where the bump stop is located. When you’re removing the U-bolts you might accidentally knock them off. Don’t worry, they are very easy to put back into place as they have a small hole on the underside that goes over the center pin of the axle.
Also, note how the U-bolts go over the metal part of the bump stop. You will need to do this when installing the new ones.
Step 7. Remove Shock Bolt & Separate Leaf from Axle

Now that the U-bolts and cradle are removed, you can remove the 17mm lower shock mount bolt.
I recommend removing the 12mm brake line bracket bolt as well (these are the red arrows). The reason I recommend removing the brake line bracket is it will help prevent the brake lines from stretching when you lift the vehicle.

Now is the time to raise the body and frame of the vehicle which will pull the leaf springs away from the axle. This will give you the room to place the spacer in between them, giving you the rear lift.
To do this you need a tall floor jack. We placed ours on the receiver hitch on the back of the truck. Lift the back of the truck slowly and watch the brake lines, making sure they are not getting too tight. We noticed the emergency brake lines did get a little tight as well, but this does not affect the install.
Take note how the bottom of the leaf spring has that little centering pin protruding from it, and the center of the leaf spring perch on the axle has a hole for that pin.
Step 8. Install Rear Spacer Block

On the bottom of the spacer, you will notice a centering pin just like the leaf springs, and on the top of the spacer, there is a hole, just like the perch. Once you get the truck lifted to create a gap large enough to fit the spacer between the leaf springs and axle, you can slide the spacer in. Make sure the centering pin on the spacer drops into the hole in the leaf spring perch.
You can do this one side at a time if you choose but you would need to still separate the U-bolts on both sides to give you the slack needed to separate the truck from the axle.
Once both spacers are placed into the axle, you can lower the truck back down and align the centering pins on the leaf springs to fall into the hole in the spacers. This was a little tricky because when you’re lowering the truck onto the axle sometimes things don’t quite line up. We had one side drop right in, and the other side took a little bit of work to get it back together. We ended up using a pry bar to push against the leaf spring and the wheel to push it inwards and then the pins aligned.
Step 9. Install New U-Bolts

With the truck sitting on the axle, you can place the provided longer U-bolts over the top of the leaf springs and slide them next to the axle making sure to not hit the brake lines. The kit provided flat washers, lock washers, and new nuts for you to use for reassembly.
Before you start zipping everything together, make sure that the bump stops are in place, and the U-bolts are over the top and are held in by the little clips. When you tighten the U-bolts make sure to tighten them in a crossing pattern, tightening them evenly. You should also make sure the cradle is level and not drastically higher towards the front or back. It should be as level as possible. You will tighten the 19mm U-bolt nuts up to 52 lb-ft.

We did notice that the stock shocks are not long enough to use for this kit, and if you plan on taking your truck off-roading, we do advise you to get different rear shocks.
- Cheap Rear Shocks: Check Price
- The rear shocks I’m going with: Check Price
Since we don’t have the rear shocks yet we are going to reinstall what we had, put the old hardware back in, and tighten the 17 mm bolt to 43 lb-ft. This is also a good time to reinstall the tiny 12mm bolts that holds the brake line bracket and tighten it to 9 lb-ft.
Double-check that everything is tightened and you can lower your truck down to the ground and check it out.
Additional Install Notes
We used the stock UCA in this install and after taking the truck to the alignment shop they told us to get an upgraded UCA for a 3″ lift to get the vehicle back to stock wheel alignment spec.
The stock bump stops will work fine on the rear, but you should consider getting new ones for the front.
You will probably want to get extended brake lines as these get very tight when you are at full droop, and it would be a good idea to get a differential drop kit as well.
Final Thoughts

All in all, I hope I have given you a clear idea of the install process for a leveling kit such as this one.
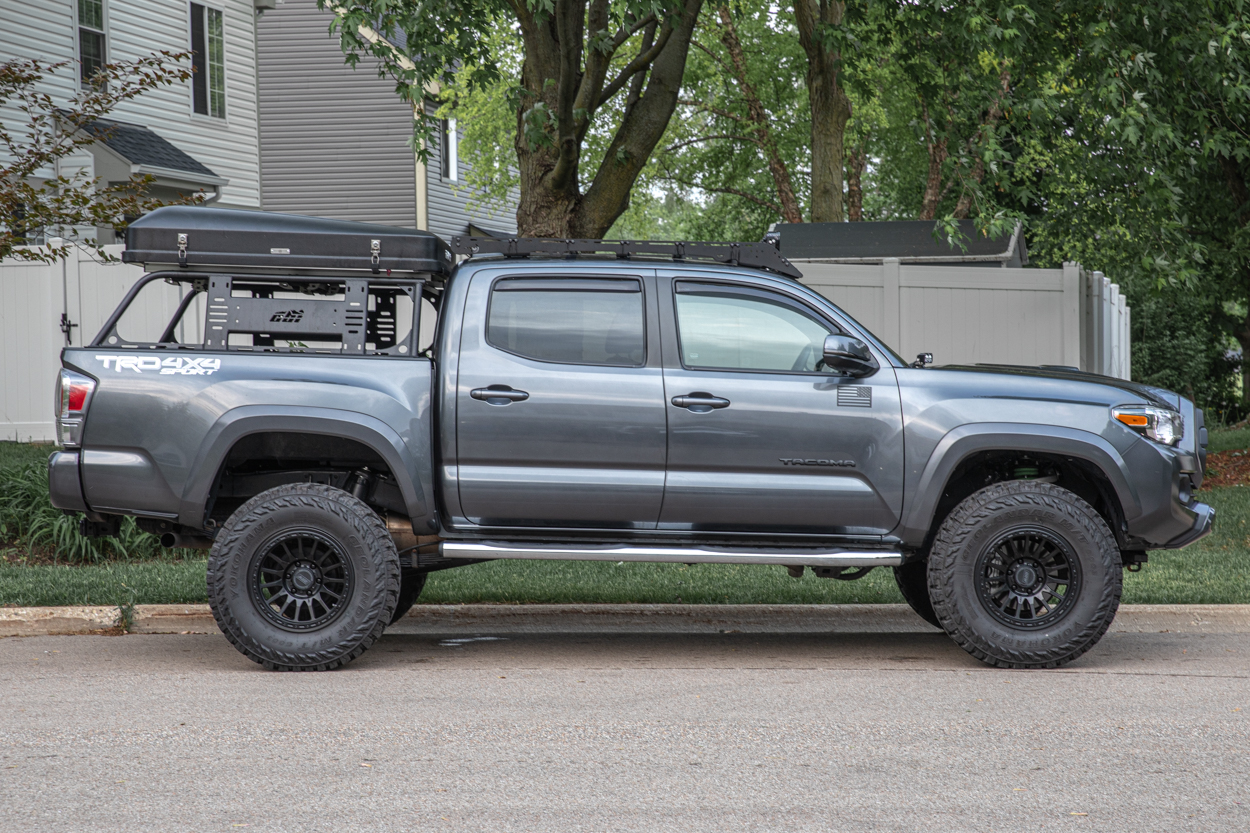
As you can see above, the height and stance of the truck are a lot better. Feel free to reach out with any questions you have!
What size and brand tires are on your truck?
Thanks for the write up and recommendations. I just got an ‘21 SR5 and have been wanting to level/lift it, but trying to decide on whether just to add a 2” spacer up front and not mess with the rear, or add 3” up front and figure out the rear layer, or just do 3/2 and get it over with. Is there any harm to just having 3” up front and not touching the rears? And I’ve been looking at the various kits on Amazon trying to figure out which brand/quality, either KSP or MZS or Torch kits? I see… Read more »
Is any drop spacers needed or recommended for this kit
Will, not required but possibly recommended. I haven’t had any issues with the suspension binding while driving around on the road, but maybe if I took my truck off-roading more often I would want to add a diff drop spacer. I do have friends that advise putting a diff drop spacer on anything that is lifted over 2.5″ and this would defiantly fall into that category.
Where does it say how to level a 3” kit?
Dan, not sure exactly what you’re asking? The post is about how you can lift and level a factory Tacoma. 3″ in the front and 2″ in the rear. Due to the slight amount of rake, more height in the rear from the factory, adding 3″ in the front would only need another 2″ in the back, in order to “level” the truck.