
Outgear Solutions has made a name for itself in the off-road community with its popular high-clearance rear bumpers and sliders. What started as one-off designs quickly turned into mainstream products to meet the demand of the community.
Now, they’ve decided to venture into designing high-clearance front bumpers. Their objective was to incorporate all the necessary features a high-clearance bumper should have while complementing the design of their popular tube-style rear bumpers. This meant something simple, stout, lightweight, and able to winch/recover if needed.
Editor’s Disclaimer: Outgear Solutions has had some issues surrounding communication and lead times. While we are unable to verify each and every claim, buy at your own risk/discretion. We are not looking to hurt their business, but also don’t want to be held responsible for negative experiences.
Table Of Contents
Initial Impressions
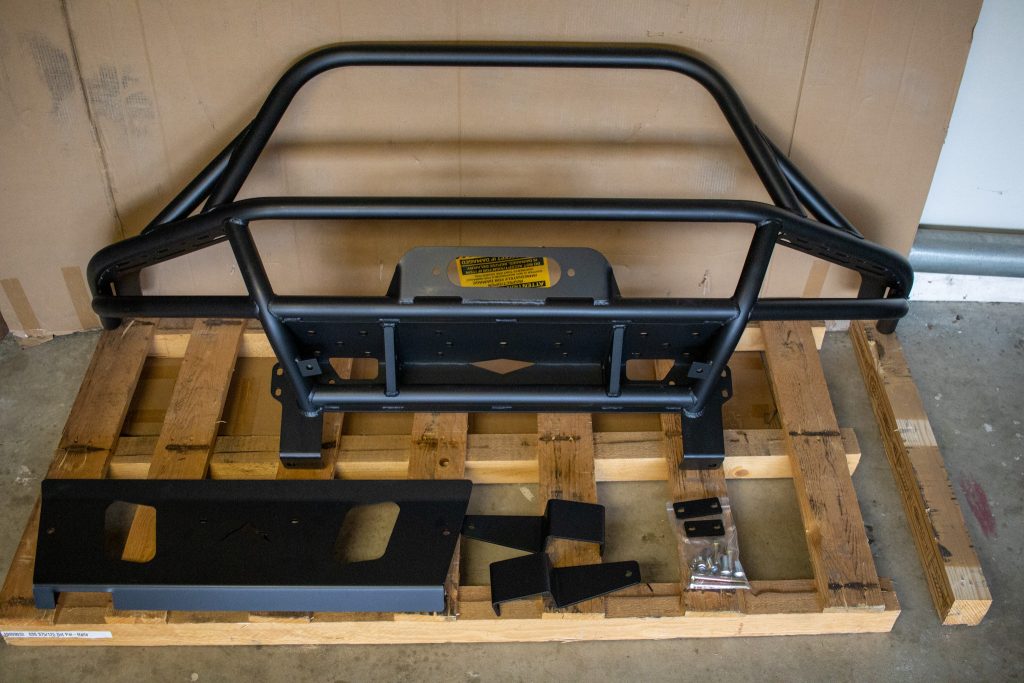
Features & Specs
- Weighs 85 lbs. (base bumper)
- Recessed recovery mounts
- 11G slotted section to mount lights (up to three lights per side)
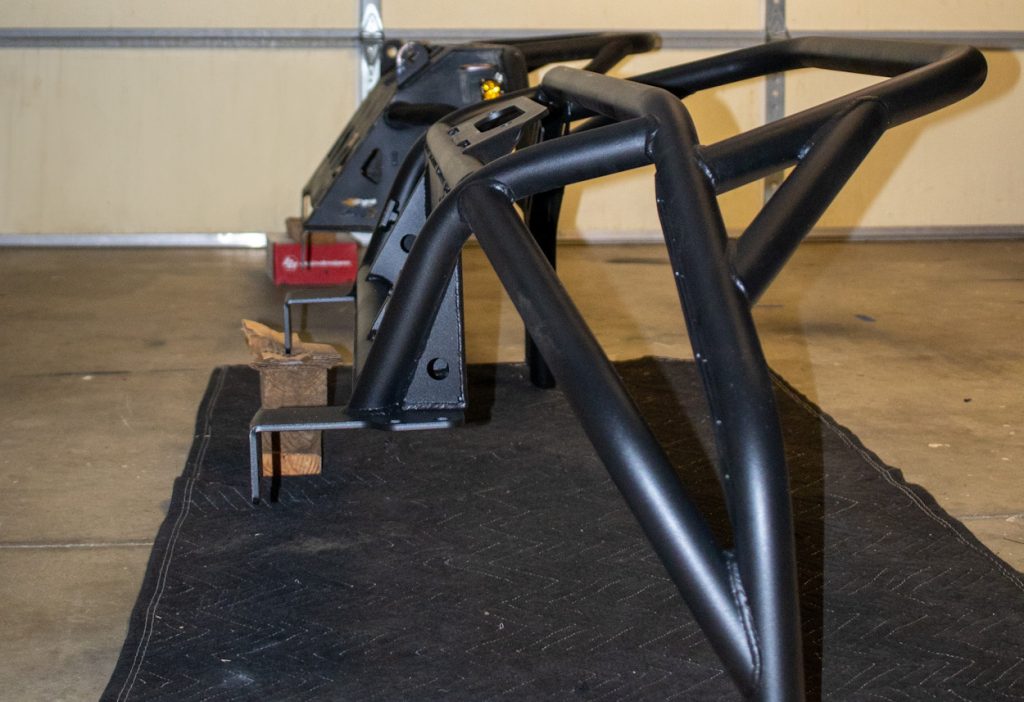
- Available in no hoop, small hoop, and high hoop (TSS compatible)
- Choice of steel/aluminum removable panel
- Comes with reinforcement frame support brackets
- 1.750″ DOM .120″ round tubing throughout
- .250″ HRPO steel winch deck (formed in one piece) supports up to a 10k winch
- Can be modified for cut fenders/flares and fiberglass on request
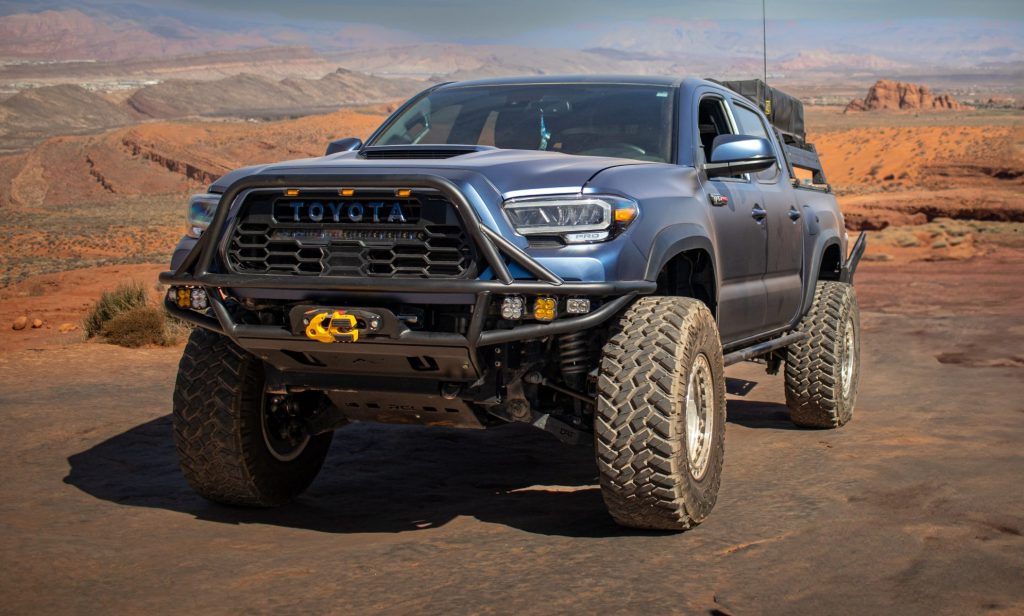
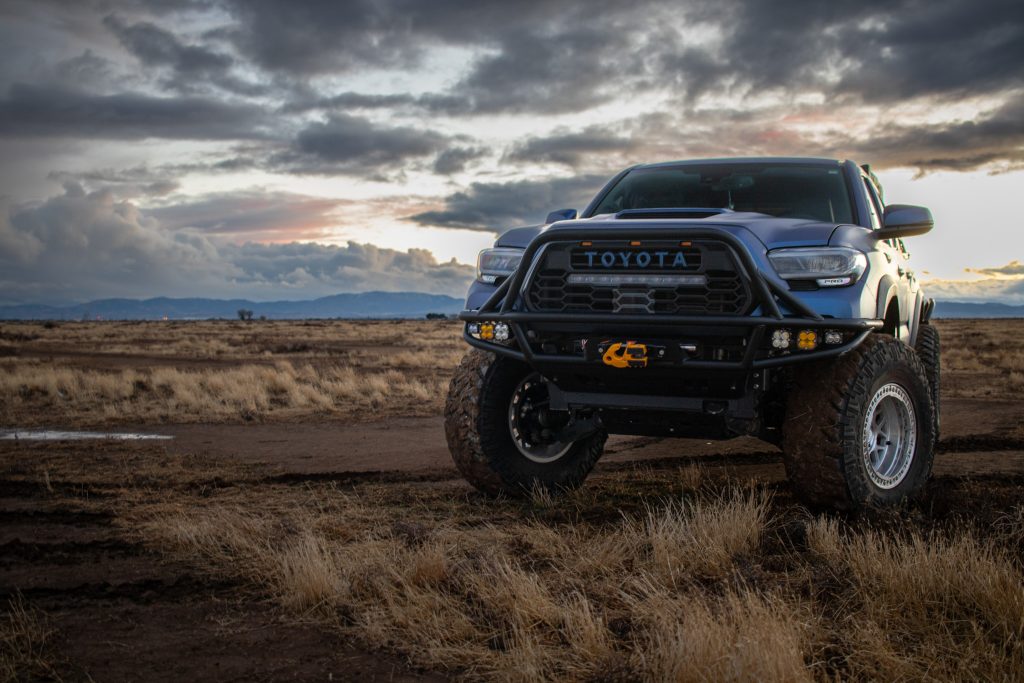
Right out of the box, we can see one of this bumper’s biggest selling points: a better approach angle without having to do a front cross-member chop. The photo above shows that the Outgear Solution uses the same mounting points as a traditional high-clearance bumper. However, the rest of the bumper starts ~3 inches higher. This drastically increases the approach angle, allowing you to bring your front tires closer to the obstacle you might be trying to climb.
Another thing that immediately stands out is the recessed recovery points. Most high-clearance bumpers have their recovery mounts protruding outwards, making them the first thing that makes contact when approaching larger rocks. By removing these potential points of contact, we are again able to move closer to an obstacle where that additional inch or two can make the difference between your front tires making contact first.
Lastly, there is the weight difference. The bumper only weighs 85 lbs. (starting weight without hoops), probably making it the second lightest bumper in the market behind the C4 Rock Runner bumper. Most options in the market weigh between 100-135 lbs. Adding lights and recovery gear quickly adds up and can require stiffer coils to handle the additional weight, so having a light but stout bumper is an all-around win.
Note: I was initially quoted a lead time of one month and it ended up taking 5 months. To be fair, new lead times are now advertised at 11-14 weeks.
Installation Caveats
One thing to note is that this bumper’s additional clearance does come at a cost. As stated earlier, this bumper starts 3 inches higher than most traditional designs. Therefore, everything else sits much higher, including your winch if you are going to be running one.
To make the winch fit, you will be required to do three things…
1. Relocating Winch Control Box

For this, I used the RCI Winch Control Box Relocation Bracket. It allowed me to easily relocate the control box from the top of the winch to in front of the radiator.
2. Trimming Radiator Support Brace
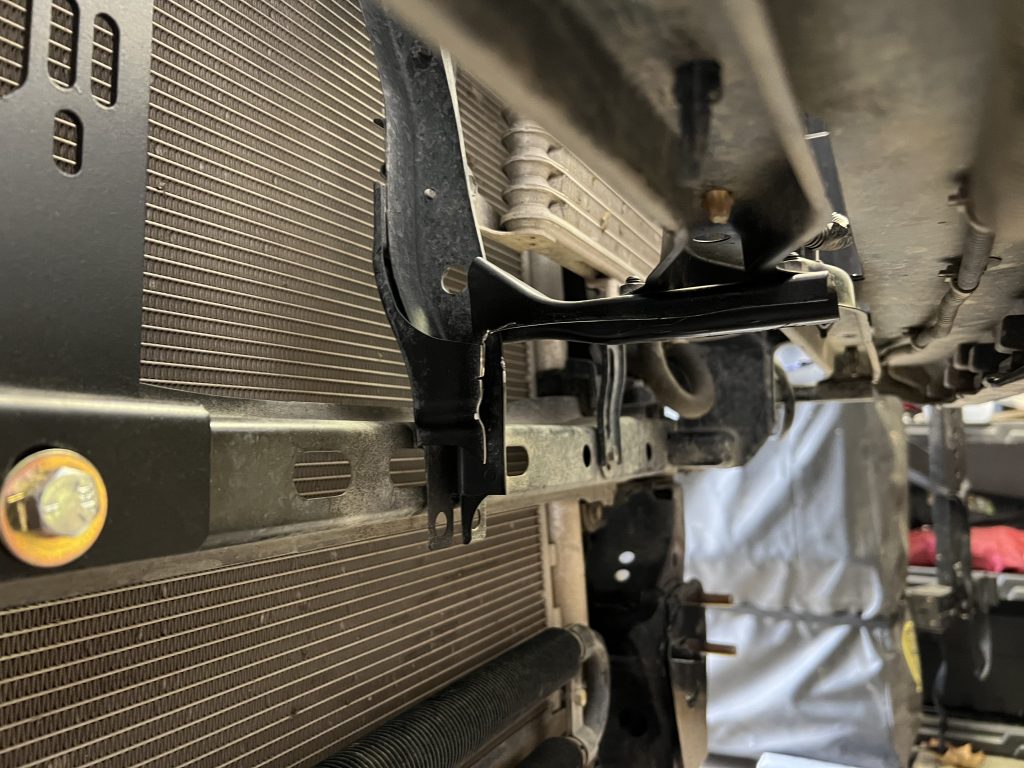
Even with the winch control box being relocated, there still isn’t enough clearance for the winch without trimming the radiator support brace. I trimmed as much as I could from the brace without completely destroying it, but it still was a tight fit, with some possible rubbing with the top of the winch.
3. Accounting For Winch Clutch
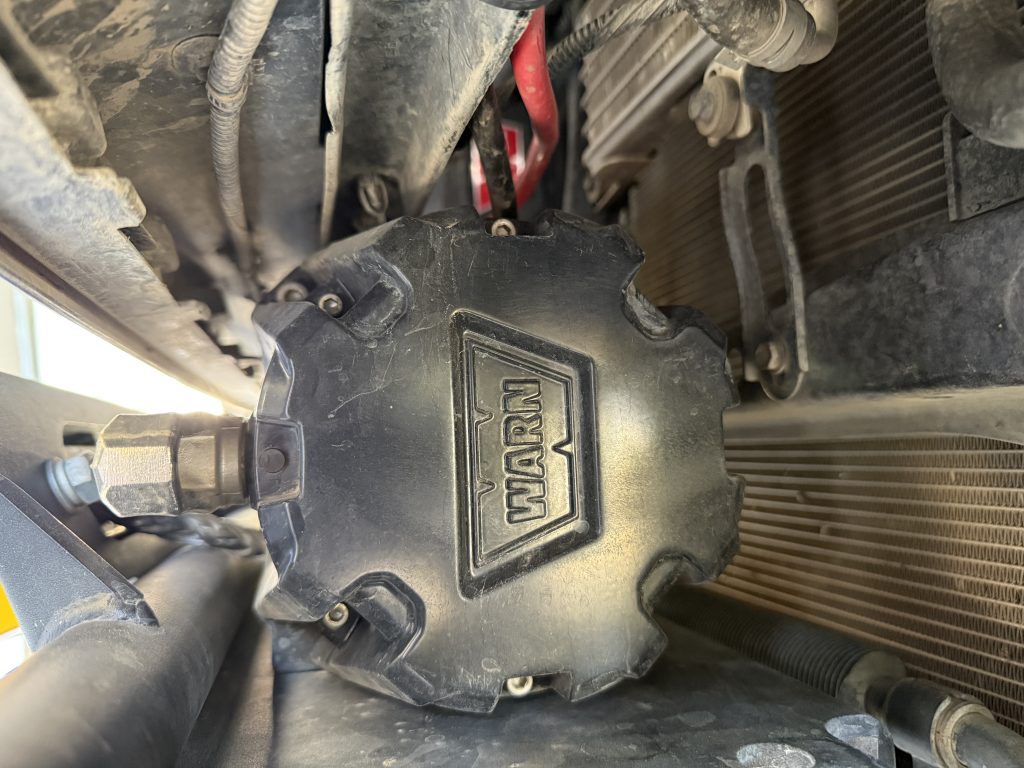
As you can see from the picture above, the clutch lever still does not completely clear the radiator support. You have two options to remedy this: shave off a bit from the radiator support or take your winch apart and rotate your clutch lever forward.
Whichever route you decide to take, make sure you make all the necessary adjustments before installing the bumper, as it is ten times harder to work them out once the bumper is on.
Cons
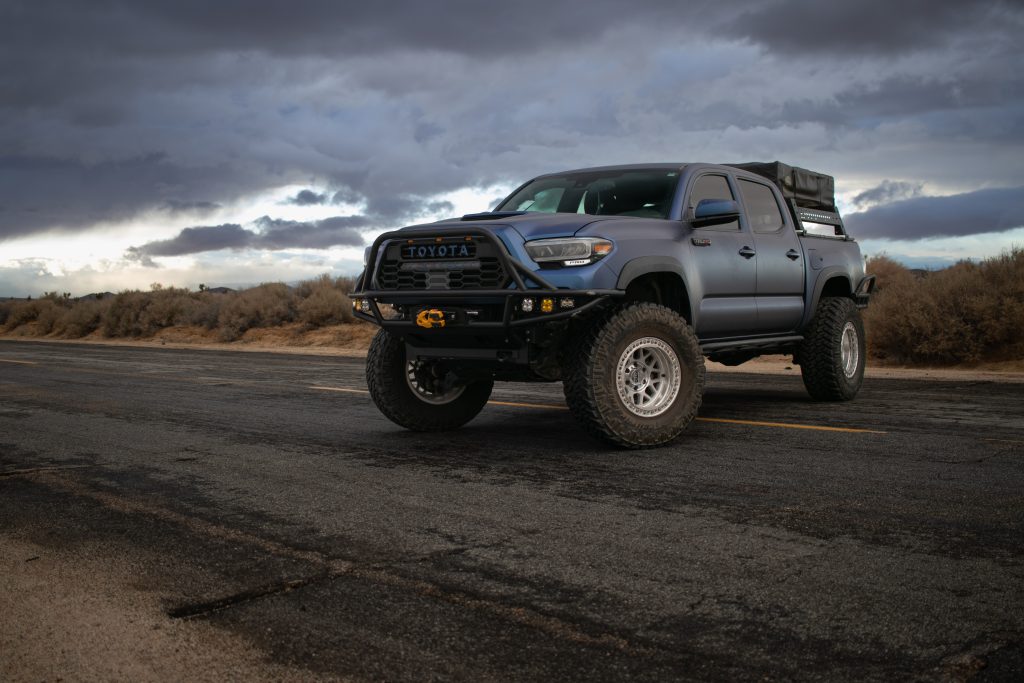
Again, since everything is sitting much higher, there is no room for a light bar. You can possibly weld your own mounts and squeeze one in between the winch and the top tube. However, that would likely require shaving off the lower portion of your front grille.
If you’re not willing to do that, you can do what I did and pair this bumper with a YotaVerse Pro Grille & LED Light Bar Kit. I installed this grille in anticipation of losing my light bar on my front bumper, and I really like how they complement each other.
Final Thoughts
Overall, I am happy with my bumper choice. It delivers on its promise of providing a better approach angle without the need for a cross-member chop. I recently came back from a trip to Sand Hollow in Utah, where I put those claims to the test. With my previous bumper, I would normally get hung up on the same obstacles.
I like that the bumper is made of the same 1.750″ DOM .120″ rounding tubing as my sliders and rear bumper. Not only does it tie everything together, but it also provides peace of mind, knowing that it can take a beating.
It would be nice if Outgear Solutions provided some sort of installation guide. After my installation, I was left with a few bolts that I couldn’t figure out where they went. The only thing that helped me through the installation process was my experience with my previous bumper. Anyone doing this installation for the first time would have to resort to finding videos of other bumper installations to use as a reference.
That said, once the bumper is on, it is solid and a great-looking piece of armor. All my Outgear Solutions gear has served me very well throughout the years and has been proven to take a beating on the trails, and I expect nothing less from this front bumper.