
Rock sliders have become an increasingly popular armor upgrade over the past few years, and for good reason. They protect some of the most vulnerable parts of your vehicle, primarily, your rocker panels.
Damaging a rocker panel can weaken your vehicle. Fixing that damage can be difficult and expensive – potentially costing you thousands. For these reasons, any serious off-roader or overlander should seriously consider adding high-strength rock sliders such as those from True North Fabrications.
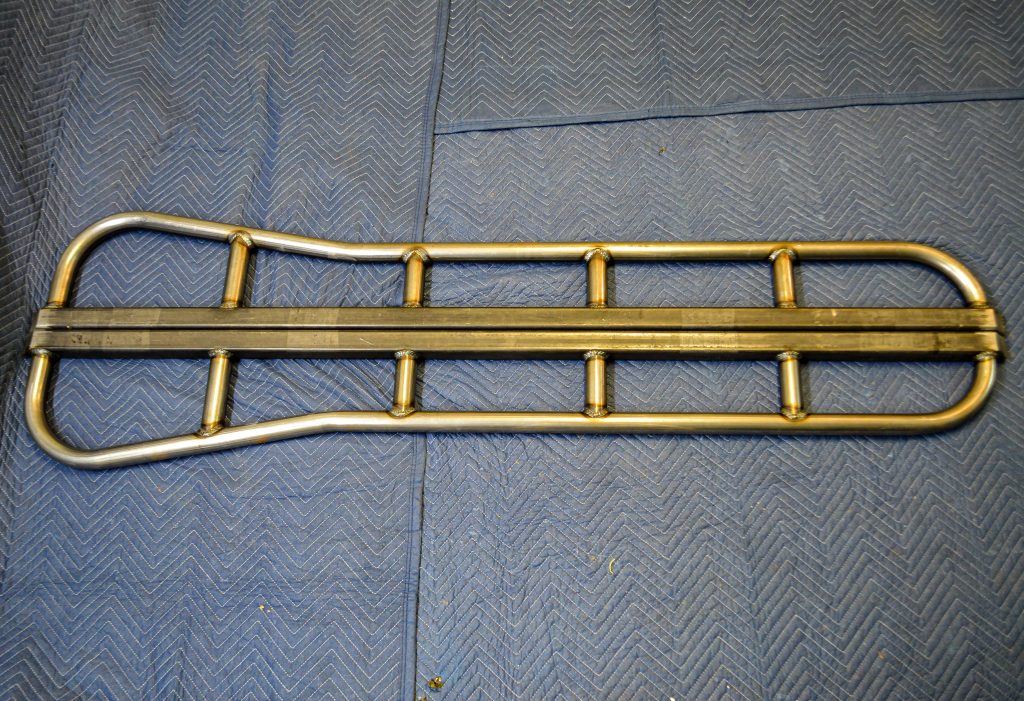
I opted for their weld-on version. This DIY kit comes with all of the materials you need to assemble and mount your sliders. The main body of the sliders is pre-welded, leaving the legs, frame plates, and gussets to be welded on. Each component is 11 gauge, high-grade ERW steel and is tough enough to tackle any terrain.
Find It Online
- True North Weld-On: Check Price
- True North Bolt-On: Check Price
Table Of Contents
Rock Sliders Vs. Running Boards
Many people mistakenly group nerf bars, running boards, and rock sliders together. However, there are important differences between each.
Running boards and step bars offer the least protection. In fact, they may even increase damage to your rocker panels if they take a big enough hit. They are typically bolted to the body rather than the frame and made out of thin steel, aluminum, or plastic. These are only intended to help with the entry and exit of the vehicle.
For off-road purposes, I’m not a big fan of running boards or side steps, especially low-hanging styles. They can easily get caught on obstacles and tear off, in addition to damaging the body and tires and likely getting you stuck.
Nerf bars are made out of similar materials but are slightly stronger than running boards. They can take small impacts and provide minimal protection. Some newer versions may be better than others.
Basics
On the other hand, rock sliders offer the most protection for off-road applications. They are typically bolted on or welded directly to the frame and are made from high-strength steel.
Typically, they are more expensive than nerf bars or running boards because they are made out of heavy-duty materials and require fabrication. Using high-grade steel is essential, as rock sliders are meant to bear the weight of your vehicle without bending or breaking.
Bolt-On Vs. Weld-On
You will typically find two options: bolt-on and weld-on. True North Fabrications has both options available for purchase.
Bolt-on attach directly to the frame using (mainly) factory holes. Since they are bolted directly to the frame with heavy-duty hardware and are made of the same high-strength steel, they are strong enough to withstand moderate to severe impacts but are not as strong as their weld-on counterparts. However, this means they are easier to install and remove.
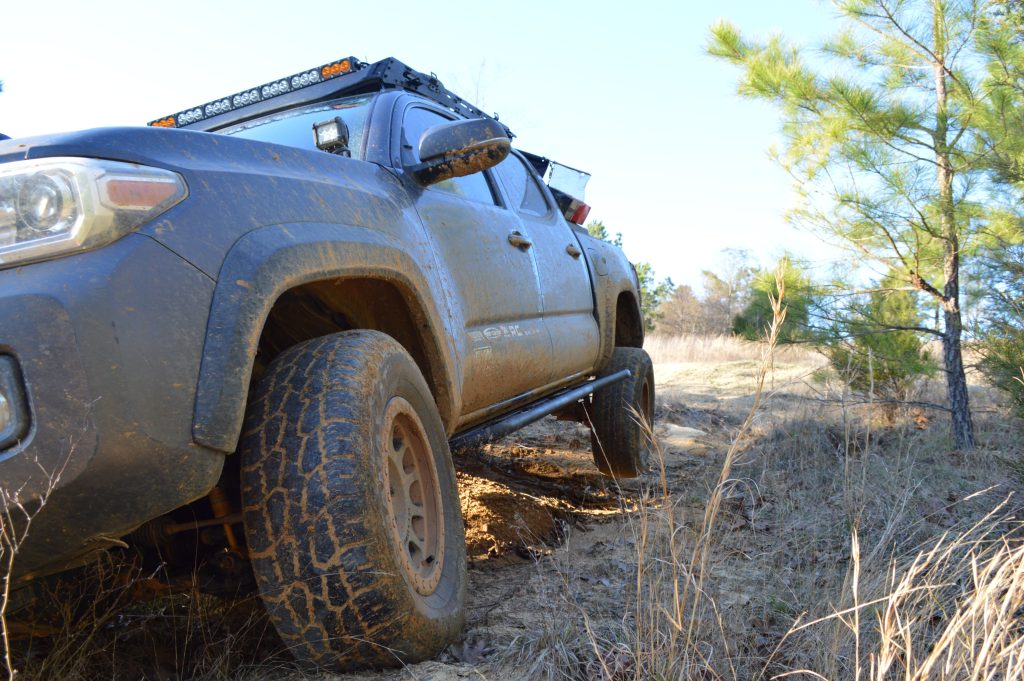
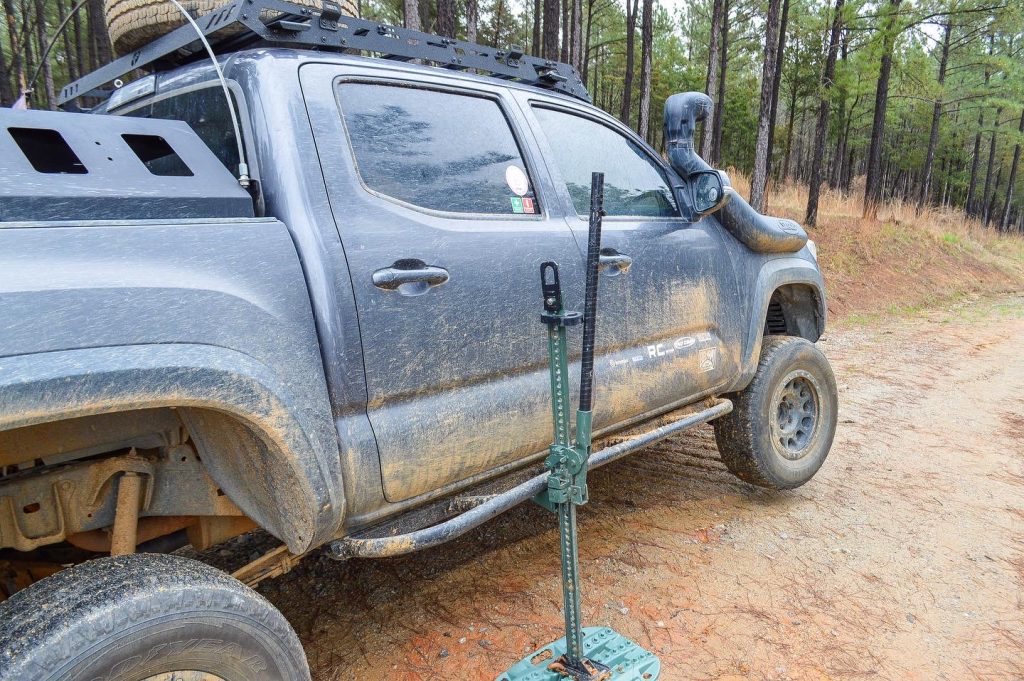
On the other hand, weld-on are stronger and can take repeated heavy impacts. One of the benefits of getting a weld-on kit like mine is that you can customize them to fit your style. You can have them sitting flat, angled, and closer or farther from the frame.
DIY weld kits are generally cheaper as well. However, if you outsource the labor, shops generally charge anywhere from $100-500 to weld them for you. Further down, I’ll detail this installation process as well as the materials and tools I used.
Off-Road Application
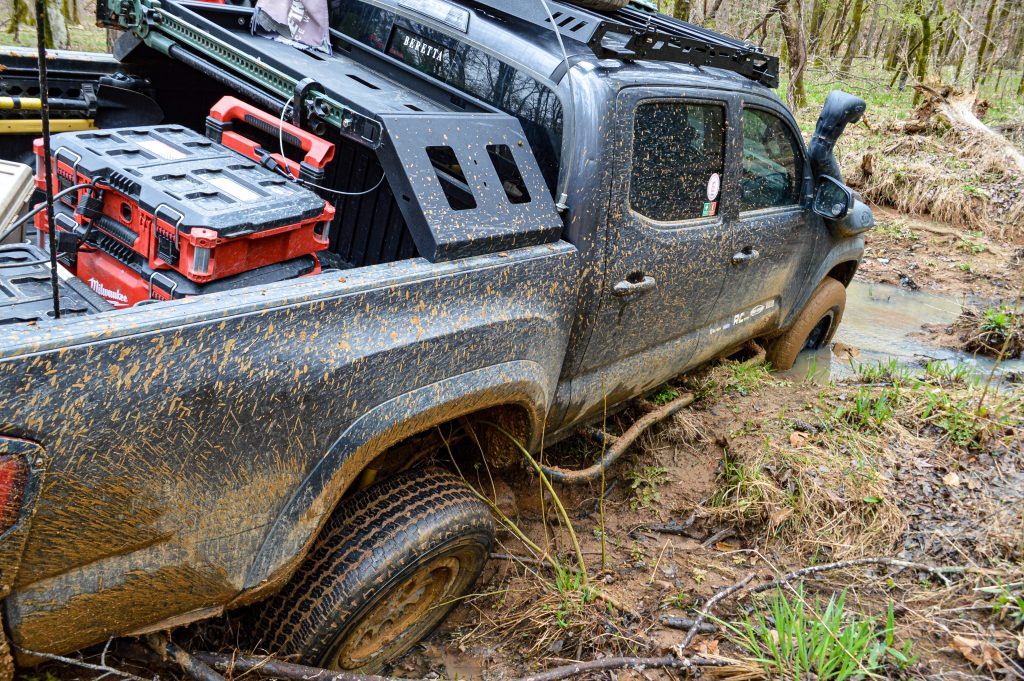
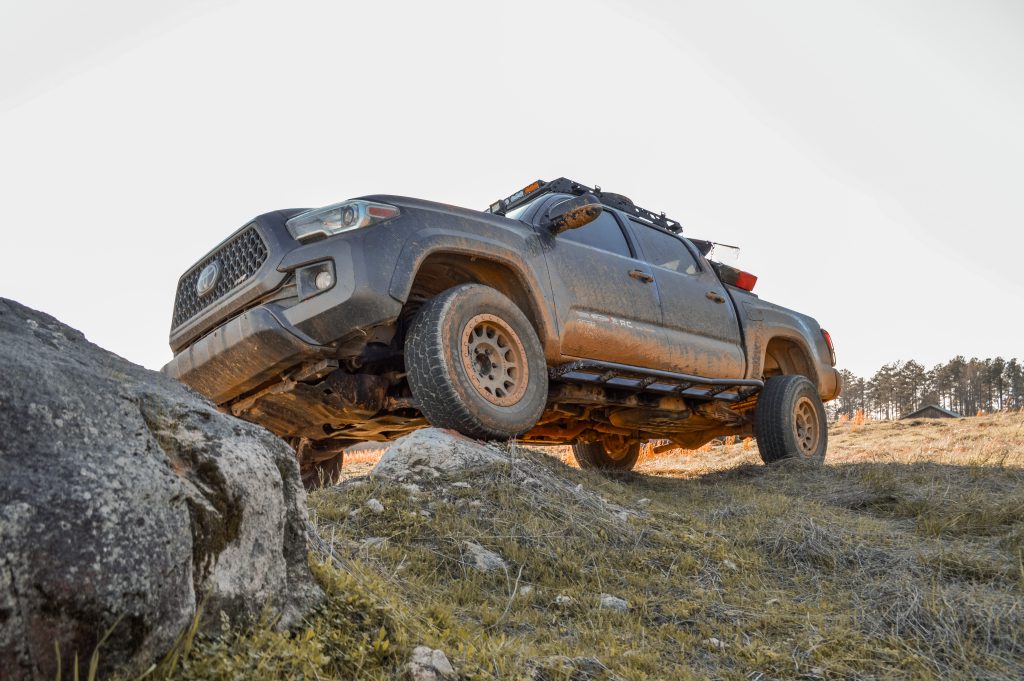
As the name suggests, rock sliders support the vehicle while sliding over rocks and other harsh terrains while protecting your rocker panels.
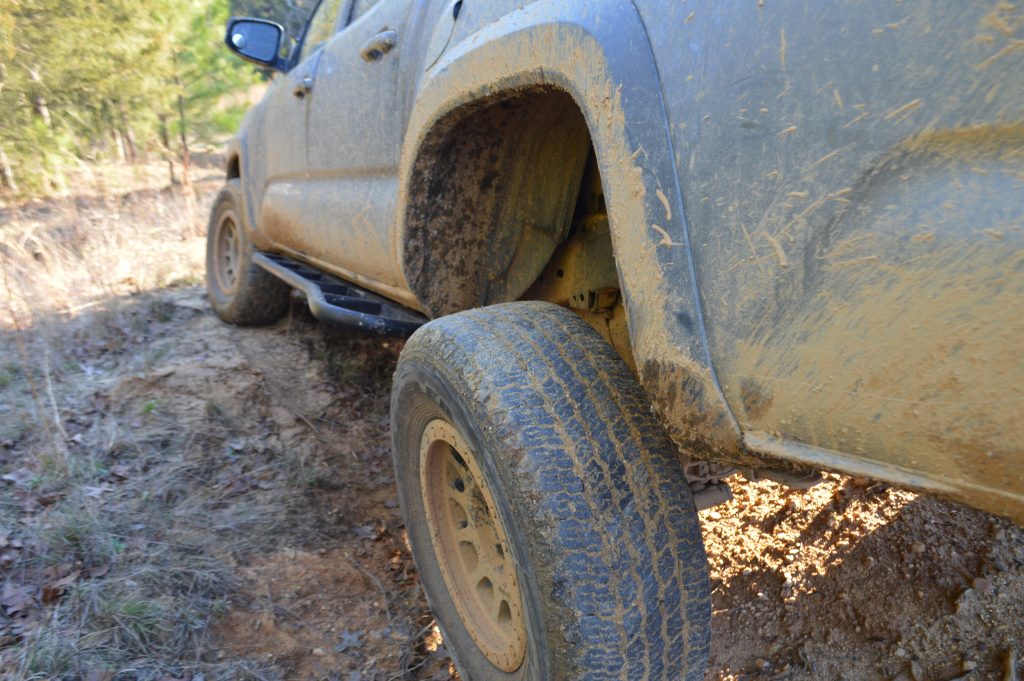
Not only do they serve to protect your vehicle, but can help you maneuver around difficult obstacles. They can be used as a pivot point to execute sharp turns around obstacles on tight trails. A rear kick-out (the flared-out section) can also help deflect obstacles away from your vehicle.
Rather than bottoming out on one side or another and getting stuck, they allow you to slide and teeter on objects without taking away from ground clearance.
Furthermore, they are strong enough to be used as a recovery point. You can use them to pull yourself sideways or in the unfortunate event of a rollover, pull your vehicle upright.
They can also be used as a jack point with an off-road jack like a Hi-Lift for repairs. Lastly, like running boards and nerf bars, they can be used as a step. Since they run the full length of your rocker panels, you can shimmy along them to avoid stepping in water or mud.
Features & Specifications
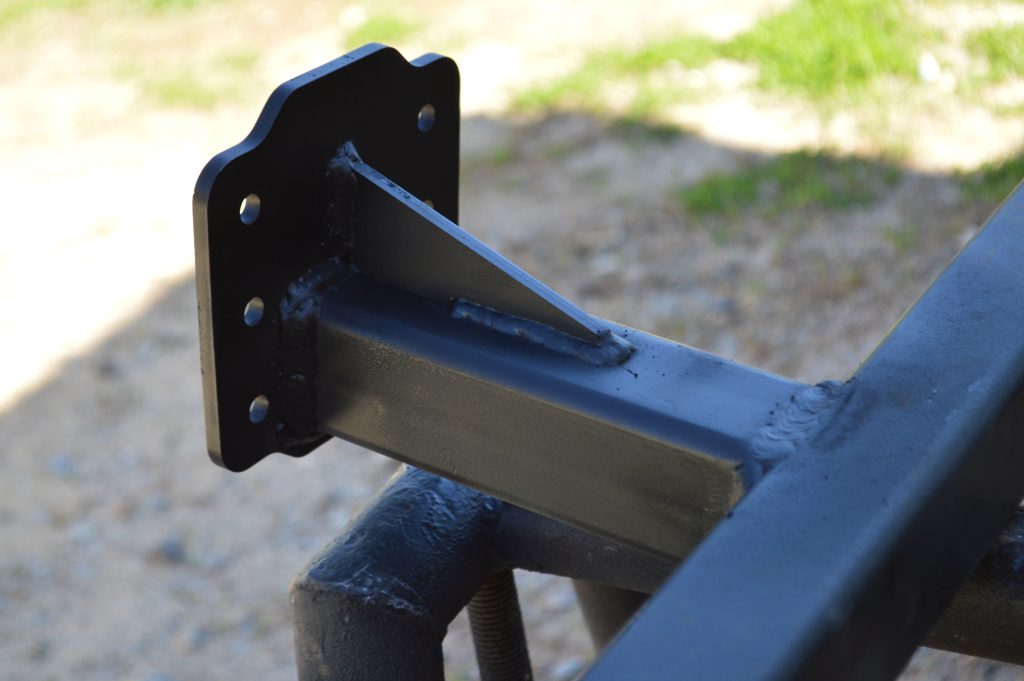
All rock sliders from True North Fabrications feature 11 gauge round steel tubing with a 1.75″ outside diameter, 11 gauge square tubing measuring 2”x2”, and 1/4” thick plates and gussets.
Many people do not realize that round tubing is stronger than square tubing. True North compensated for this by sizing up the square tubing, which also makes welding to the frame easier. In my opinion, these dimensions are the perfect balance between strength and weight.
Furthermore, they are constructed of HREW (Hot Rolled Electric Resistance Weld) steel, which is known for its strength. Check out our post – HREW vs. DOM rock sliders. True North Fabrications also offers a variety of different options.
Raw Vs. Powder Coat
True North Fabrications offers its rock sliders in either a powder coat finish or raw steel. As is the case with bolt-on versus welded sliders, there are pros and cons to each.
To begin, a powder coat is more durable than spray paint because it is done through an electrostatic process. In this process, powder granules are electrically charged to adhere to the metal surface and form a strong bond. For this reason, powder coats also have a more even, level, and consistent finish.
On the other hand, painting raw steel also has its advantages. While you could always pay to have sliders professionally powder-coated or finished with bed liner, this can cost an additional $100-$300. That’s why I, like many others, chose to spray paint them ourselves. This is cost-effective, requires no additional equipment, and can be easily done at home.

A downside of powder coating is that it is much harder to color match when touching up scratches. Powder coat granules are made to order in limited production runs with specific plastics that cannot be color-matched like paint. Spray-painted ones are much easier to touch up.
Additionally, with a weld-on kit, you will have to remove some of that powder coat prior to welding. Not only will the high temperatures of welding ruin the powder coat surrounding your welds, but welding painting surfaces can pollute your beads making them weaker; and can emit toxic fumes.
The downside to spray paint is a less durable and inconsistent coat. Paint drips can result if done improperly as well.
Installation

Weld-on options can be daunting to install. I have found that even many with sufficient welding experience are apprehensive to take on this task. I’m here to tell you that it’s a fairly simple process with the right equipment.
Not only does the True North Fabrications kit include everything you need for assembly, but the main body of each slider comes pre-welded, leaving only the legs, gussets, and frame plates to be welded.
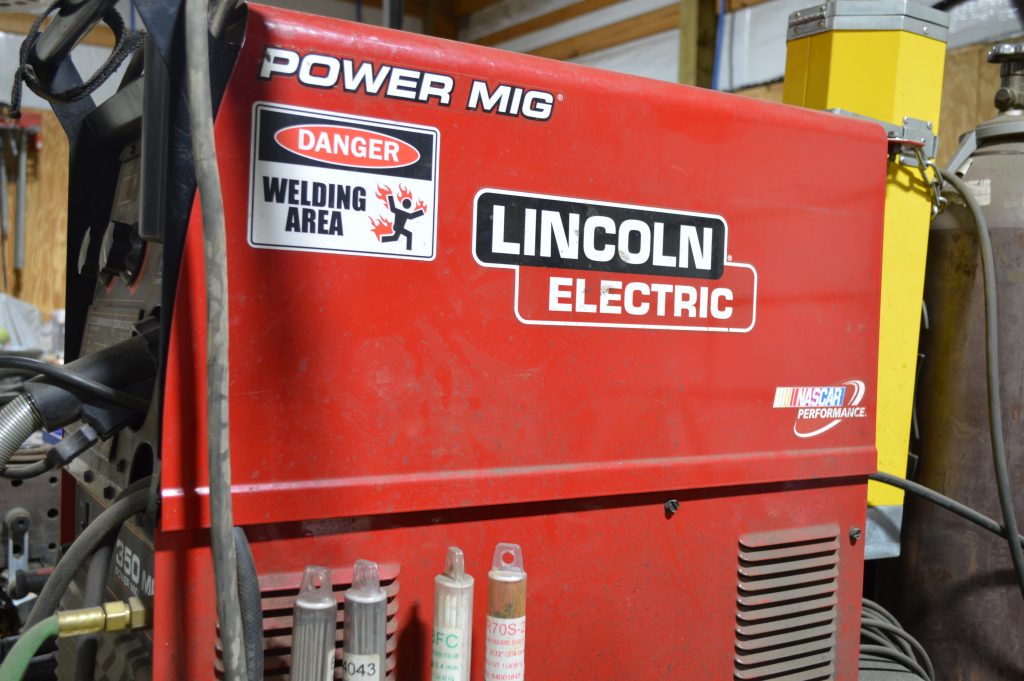
MIG (metal inert gas), TIG (tungsten inert gas), and stick welding will all be strong enough to weld your rock sliders. I used .030 wire to MIG weld mine.
Painting
In this section, I go over my process for painting my raw steel. Skip this step if you opted for a powder coat finish.
Materials
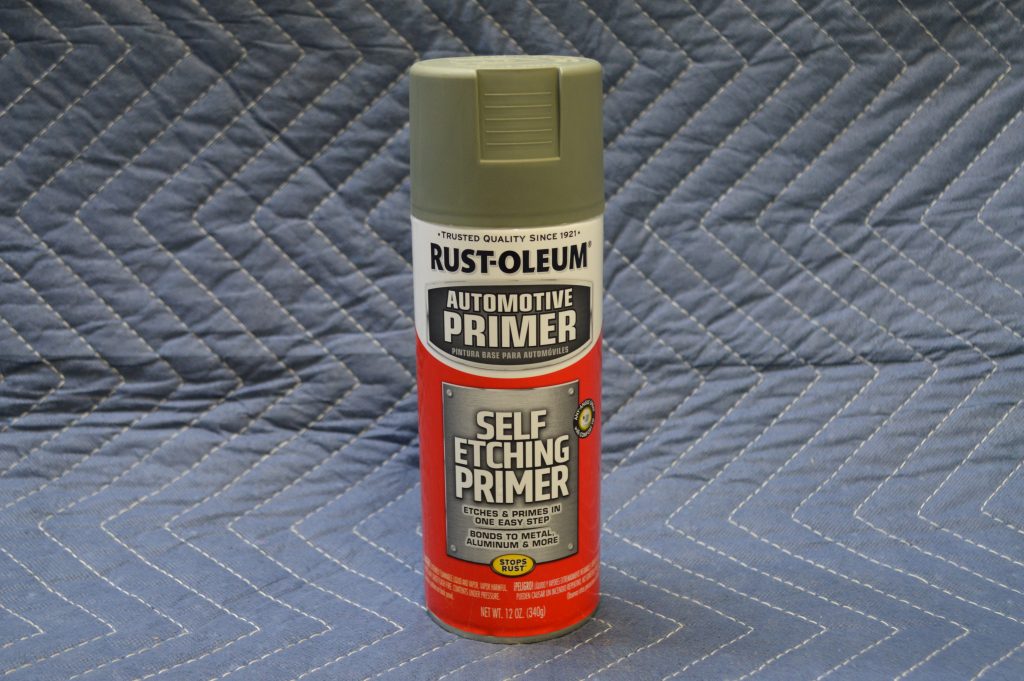
- Rustoleum Self-Etching Primer – (3) 12oz cans
- Rustoleum Truck Bed Coating Spray – (3) 15oz cans
- Acetone
Prepping

These sliders come with a thin layer of oil to protect against rust. There will also often be additional dirt and residue from the factory welding process. All contaminants must be removed before painting.
With latex gloves on, pour acetone onto a clean rag or Scotch-Brite pad. Rub down each individual part with the acetone until all residue is removed. Lightly sand the surface with 400-grit sandpaper for even better adhesion.
Note: Steel can rust fast without a protective coating of paint or oil. Paint quickly after cleaning.
Do not prime or paint the ends that need to be welded. I highly recommend a self-etching primer for this application. This will etch the surface, creating a rough layer that promotes maximum adhesion for paint.
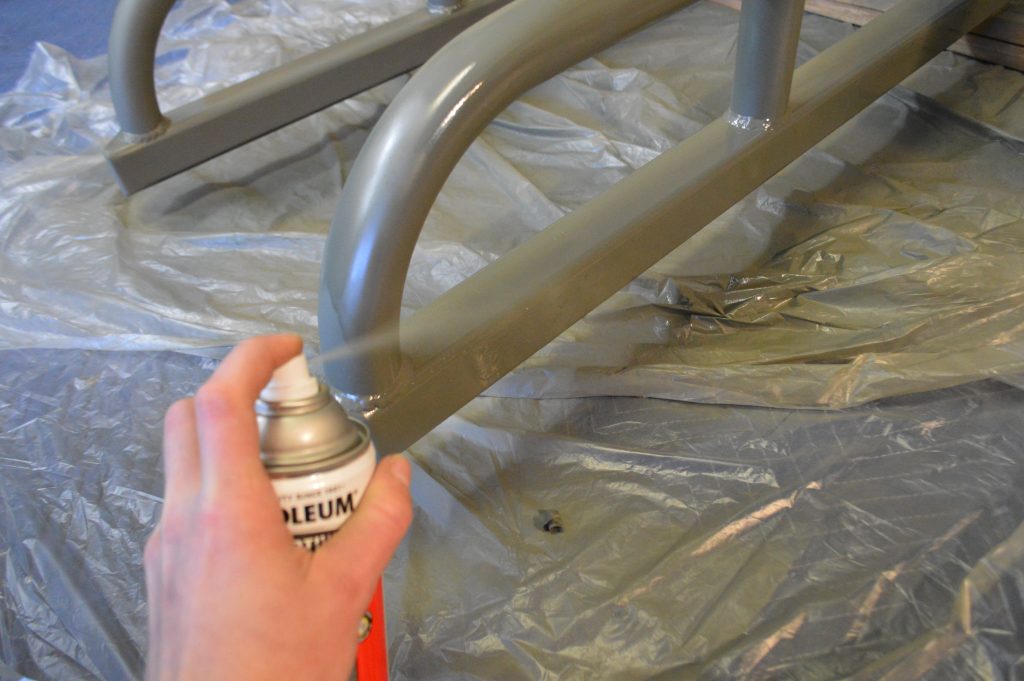
Suspend your sliders (I used sawhorses) and prime all surfaces with a thin, even coat, ensuring there are no drips.
Apply 2-3 additional coats, waiting 5 minutes between each coat. Wait 1 hour before applying the final coat of primer. Finally, wait 3-4 hours before lightly sanding with 400-grit sandpaper. I used roughly 1-1.5 cans per slider.
Apply your spray paint in a similar fashion to the primer. I used a spray bed liner that doesn’t require sanding between coats. This textured paint self-levels relatively well, but it doesn’t hurt to have a foam paint brush handy to smooth out any high spots or drips. Rustoleum also makes an applicator kit for this paint that includes a foam roller, but this is not necessary for application. Apply several coats and allow the top coat to dry for several hours before handling.
Welding
Now that the sliders are painted, it’s time to weld them onto the frame.
Materials
- Welder
- MIG Wire
- Jack Stands
- Grinder
- Wire Wheel
- Mechanics Tool Set
- Hex Bolts & Washers (Optional)
Step 1. Clean/Prepare Frame
To start, use a wire wheel and grinder to clean your frame where the frame plates will mount. Also, grind off any paint where your weld joints will be.
Also, take the electronic wiring module mounted on the passenger side of the frame off. You can either leave this hanging to put back on afterward or you can mount it on the inside of the frame as I did.
Step 2. Measure & Cut Gussets/Supports
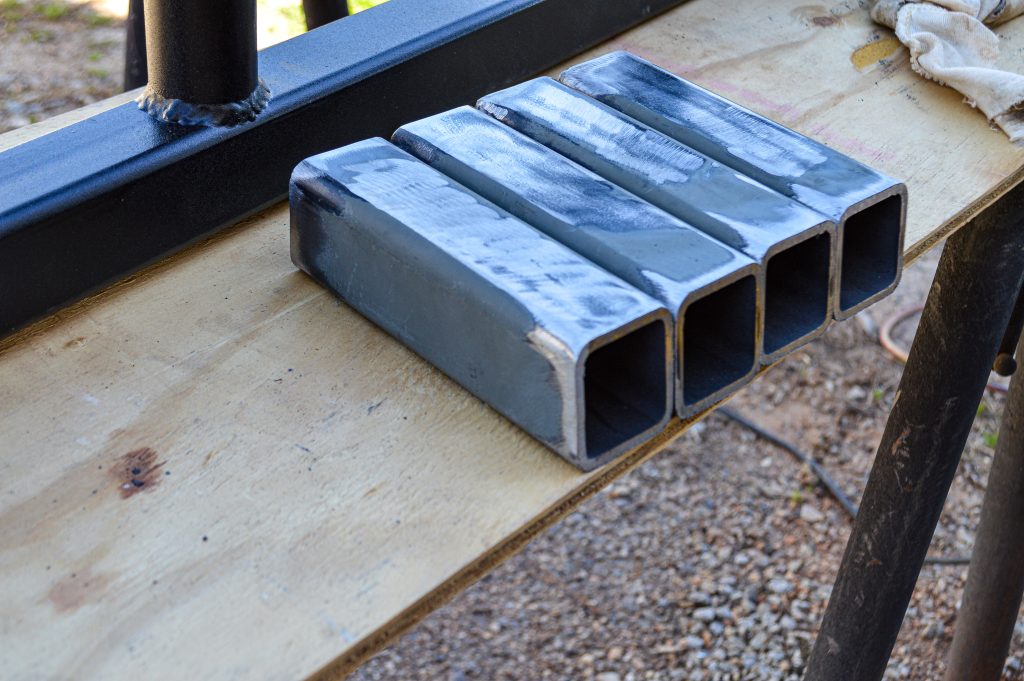
Grab your 8 lengths of square tubing (gussets). If you want your sliders to look like the bolt-on kit, True North Fab recommends cutting your square tubing down 2” inches at a 15-degree angle on one side. I opted to only cut 1.75” off mine at a 10-degree angle to have a flatter appearance. To judge for yourself, measure out where your front and rear supports will be.
First, tack weld the front and rear support to your sliders. Next, tack weld the frame plates on the ends of the tubing. Now, you can hold it up to the frame and see how far you want your sliders sticking out. I chose to have the inside of each slider stick out roughly a quarter inch from the body.
If you opt for an angle greater than 15 degrees, ensure that your sliders are not angled too high and prevent your doors from opening.
Step 3. Calculate Spacing
Now that you have a basic understanding of how your sliders will sit, calculate the spacing between your frame plates and legs. Start by lining up the front and rear plates on the ends of the frame and measure between them. While it would be easy to divide this measurement by three to get your spacing, there are several places on the frame with bolts or cutouts that cannot support a frame plate.
I found the most even spacing to be 16” between the front/rear plate and the middle plates, and roughly 12” between the middle plates. This gave me about 21” between the front/rear plates and the middle legs, and 14” between both of the middle legs.
I ended up shaving a 1/4″ inch off of the third frame plate from the front so I could secure it between two sets of bolts.
Step 4. Weld Sliders Together
After figuring out your spacing and angles, it’s time to weld your sliders together.
Ensure your gas tank is running to your welder and secure the ground clamp to the opposite end of the material you are welding. Always wear proper PPE, including a welding mask and welding gloves. You should also keep a fire extinguisher on hand in case of a fire.
Check the chart found on your welder to calculate the appropriate material (steel), voltage, gas composition, and wire. Using your .030 MIG wire, begin to tack weld each joint. I would start by centering your tubing on your frame plates, and then tacking the tubing to the inside of the sliders. Make sure the sliders of facing right side up and that your angled cuts are flush with the face of the frame plates.
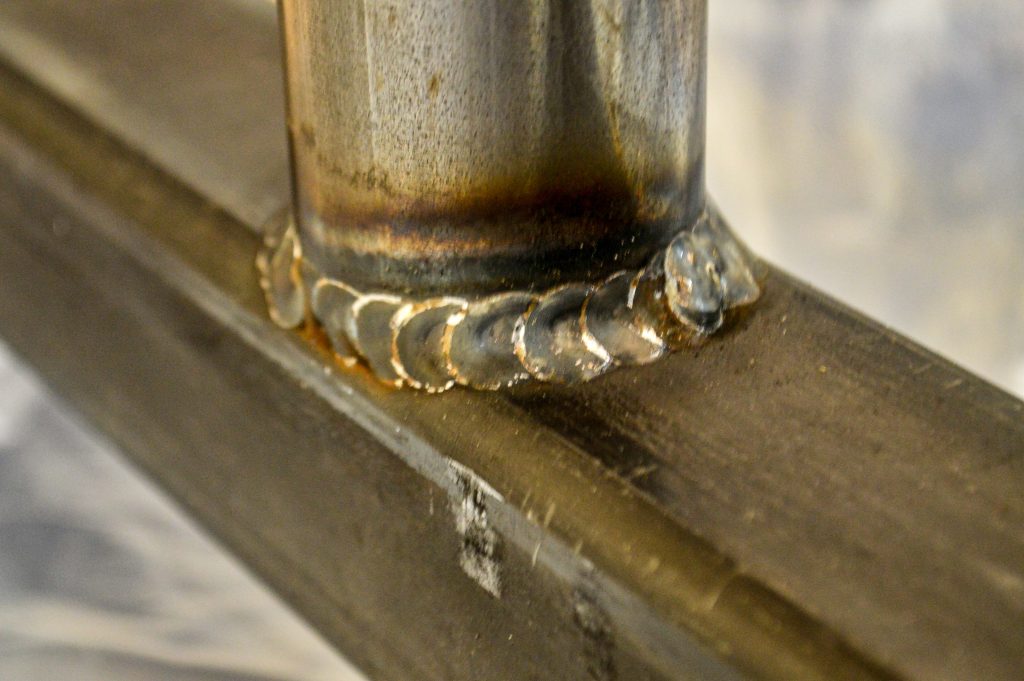
After double-checking that your spacing is correct, begin welding beads around each joint. Maneuver your torch from the top down, laying the beads in a back-and-forth or circular pattern 1-2” at a time. Finish with welding the gussets from the frame plate to each leg.
Step 5. Tack/Bolt Into Place
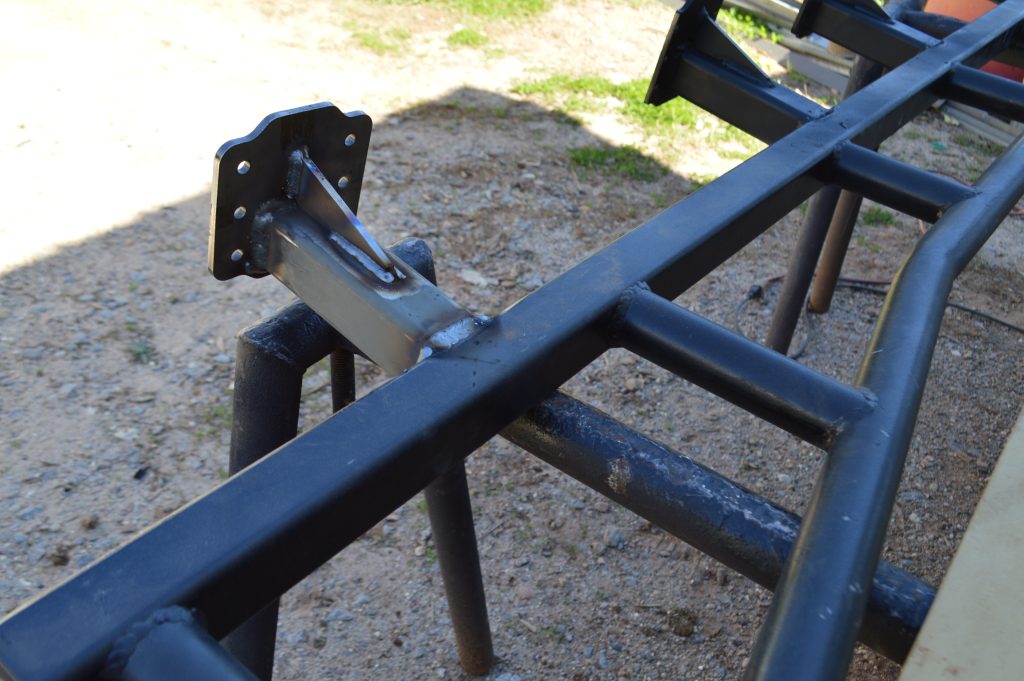
Before welding the frame plates to the frame, you will want to attach them via tack weld or bolts. This is so they are positioned correctly and won’t move while you weld them.
You can hold them up with jack stands or have a buddy help you lift them into position while you attach them. Also, you’ll notice each frame plate has six pre-drilled holes (three on each side). I lined each frame plate up to where I wanted them to sit and then drilled holes out using the plate as a template. This allowed me to bolt my sliders up rather than tack welding them in position – just in case I needed to make last-minute adjustments.
However, this did require nearly 50 holes to drill with nuts and bolts for each, which took longer than tack welding. Leaving the bolts installed provides extra strength, but the welds alone would not have any issue supporting your sliders. The very front and rear of the frame are double-layered, and I had trouble running bolts all the way through. Instead, I used heavy-duty self-tapping screws.
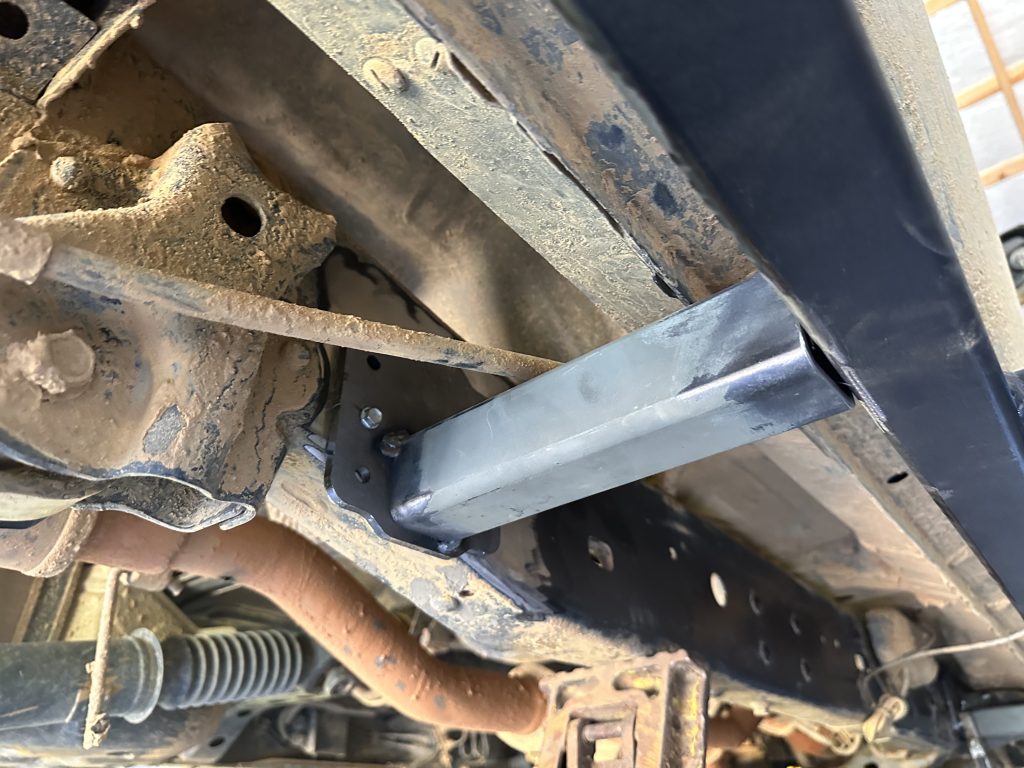
Step 6. Welding To Frame
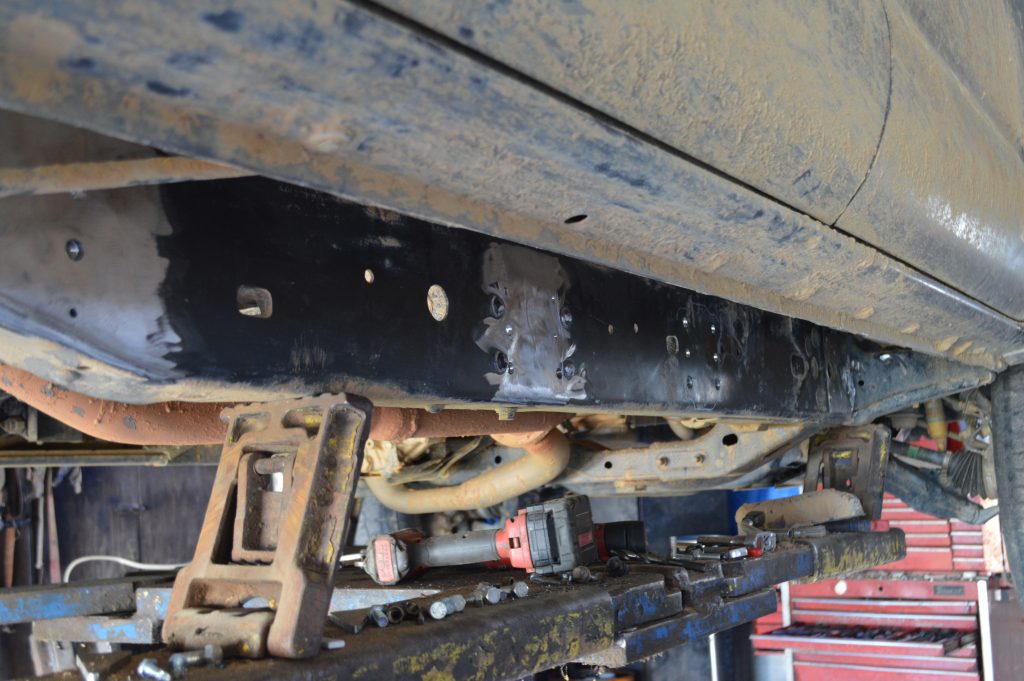
With the sliders secured to the frame, you can now begin welding them on. Only weld the frame plates at the top and bottom using the same technique explained in Step 4. This is because your truck chassis will slightly bend while driving (especially off-road and with heavy loads). Those slight bends will cause vertical welds to crack.
It’s also important to note that you will be welding close to wires, electrical components, and even your interior carpets. So, make sure to have a spray bottle of water nearby to cool down your welds so that these components won’t melt, burn, or catch fire.
Step 7. Clean Welds & Paint
Slag is excess weld material that sits on top of your welds. While slag is typical of stick welds with more dots than MIG or TIG welds, chip off any slag you may see. Then, use your wire wheel to clean up your beads and re-weld any sections that may need it.
Finally, take a can of black spray paint and paint any exposed metal on the frame. Any exposed metal on the frame or sliders can easily rust, so ensure you get full coverage when painting.
Final Thoughts
Overall, I would readily recommend these rock sliders from True North Fabrications to any serious off-roader or overlander looking to protect their rig off-road.
I like how this weld-on kit includes everything needed for installation and even has pre-drilled holes for bolting them into place. After having them on for a few months, I’ve had no complaints and I trust they are durable enough to last the lifetime of my truck. The 11-gauge HREW steel is stout, to say the least. I also appreciate how True North Fabrications beefed up the square tubing.
I love how far out they sit, keeping obstacles away from my body panels. With the DIY weld kit, you can also choose how far they stick out depending on your preference. Having them sit farther out gives me a wide step for easy access to my roof rack or bed as well.
While the DIY weld kit may not be for everyone, it was surprisingly easy to piece everything together once I pulled measurements, and I am confident in the strengths of the welds.
If you are a competent welder, you likely won’t have an issue installing these sliders over the weekend. Even if you outsource the welding to a shop, they’re still a great option if you want a cost-effective and customizable set of rock sliders.
This is the first i have heard about not doing verticle welds on the frame plates. How did you ensure the bare metal underneath was protected and that water would not get in? I am in MN where road salt is used to corrosion protection is a MUST.