
When I first got into off-roading, I did not have any fancy tools for the trails. I would air down my tires with a cheap tire gauge that could be found at any local auto parts store. You know what I’m talking about, the chrome-looking pen-style tire gauge that has a spring-loaded stick.
Once I got tired of using this to let the air out of my tires (not to mention how slow it was), I needed another way to perform this quicker and more efficiently.
With budget top of mind, I set out to build my own DIY 4-way tire inflation and deflation kit.
Update… I ultimately ended up with a MORRFlate kit. Read my post – MORRFlate vs. DIY hose kit.
Table Of Contents
Jaco Rapid Deflation Gauge
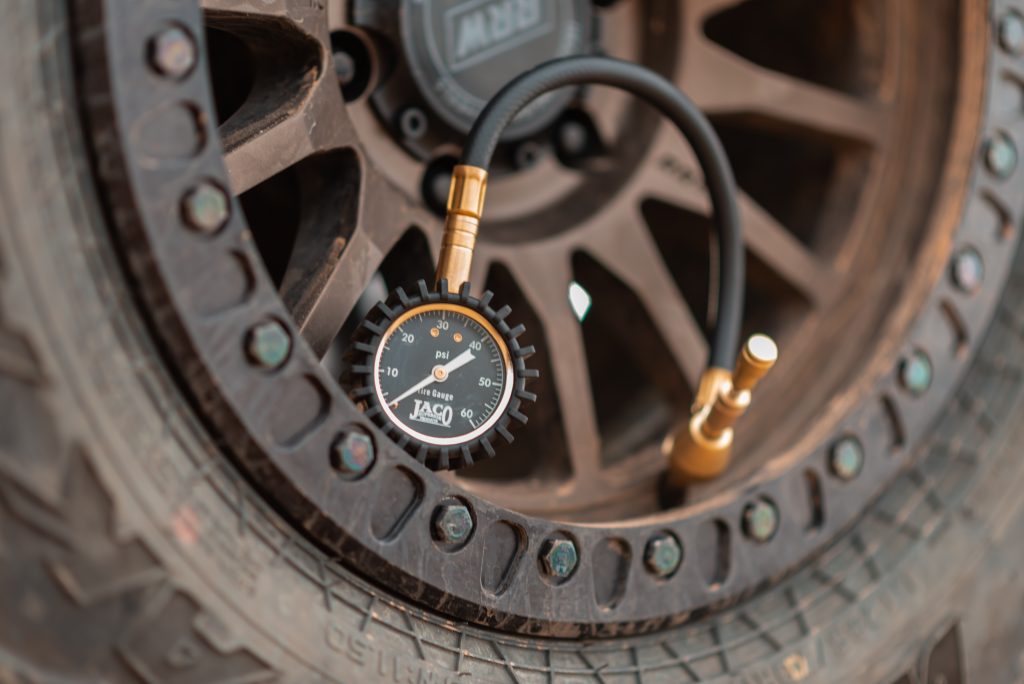
First, I found a rapid deflation tool made by JACO. This tool worked much faster than the pen-style tool. I even convinced many of my friends to buy one for themselves. It was a very efficient tool that cost less than $30.
I used the JACO rapid off-road air down kit for about 6 months. While I never had an issue with it, I felt like it was time for the next upgrade.
The next step up from a single-tire rapid air-down kit would be a 4-way inflation and deflation air hose kit. There are many well-known companies (such as MORRFlate) on the market that make these kits. However, being a DIY kind of person, I wanted to create a custom kit for my needs and wants.
Find It Online
Parts List
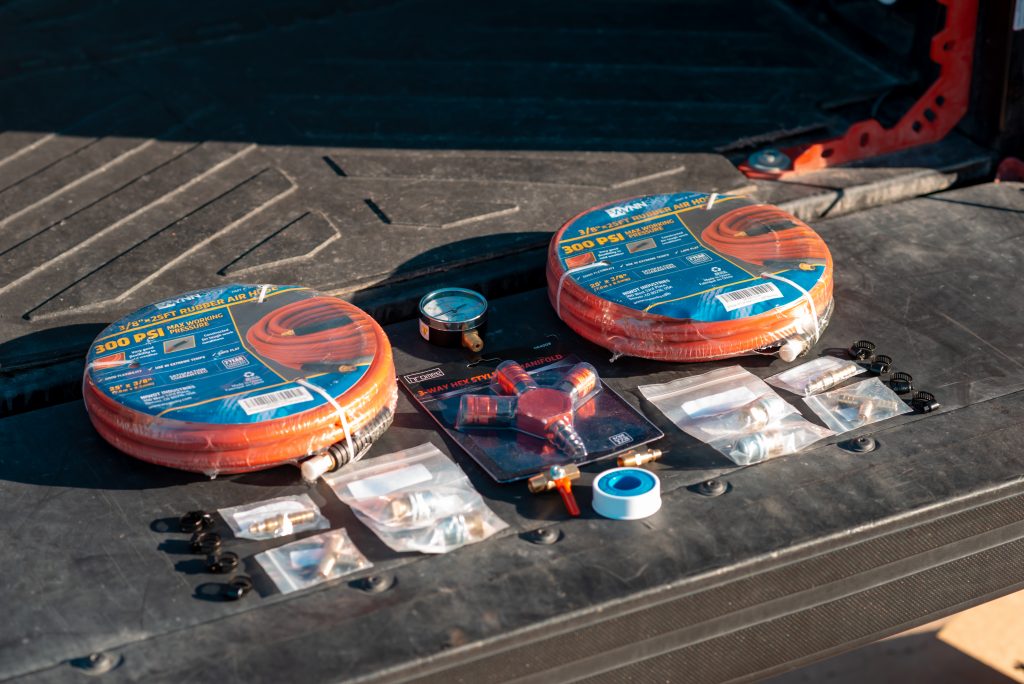
To build my inflate/deflate kit, I was able to purchase all the needed parts through Amazon.
This list is the items I bought to create my setup, you can either copy this exact setup or swap out items to better suit your needs.
Parts List
- 2x – WYNNsky 3/8″X 25ft Rubber Air Compressor Hose
- 4x – Standard Bore Lock-On Air Chuck
- 2x – Joywayus 3/8″ ID Hose Barb Tee 3 Way Union Fitting
- 2x – 3/8″ barbed brass fitting to 1/4″ quick connect air hose
- 1x – Hromee 3-Way Air Manifold with 3 Steel Couplers and 1/4″ Male NPT Plug
- 1x – 1/4 Inch Shut Off Ball Valve NPT
- 1x – Quick-Connect MNPT, 1/4-Inch NPT Male Thread
- 1x – Winters 2-1/2 inch, Dry Pressure Gauge, 0-30 psi, 1/4 inch NPT Bottom
- 1x – 20pcs Black Hose Clamp,3/8″-5/8″(10-16mm)304 Stainless Steel
Tools Needed
- Flathead screwdriver
- Sharpie or marker
- Thread seal tape “plumber’s tape”
- Cutting tool (I used PVC pipe cutters)
I wanted a kit that reached all four of my Tacoma’s tires with only a little extra hose. Keeping the overall hose length as short as possible makes storage easier. I also used quick connects to a manifold where both sides of the hoses come together. This gives me the option to run this kit as either a 2-way or a 4-way kit.
As of right now, I’m not exactly sure where I will be installing my air compressor once I get one. Since that variable is unknown, this guide will only cover the air hose portion of the setup. Later, I will be adding an individual air hose that can be connected to the 4-way kit or to help a friend air up their tires.
Step 1. Measure Hose Length
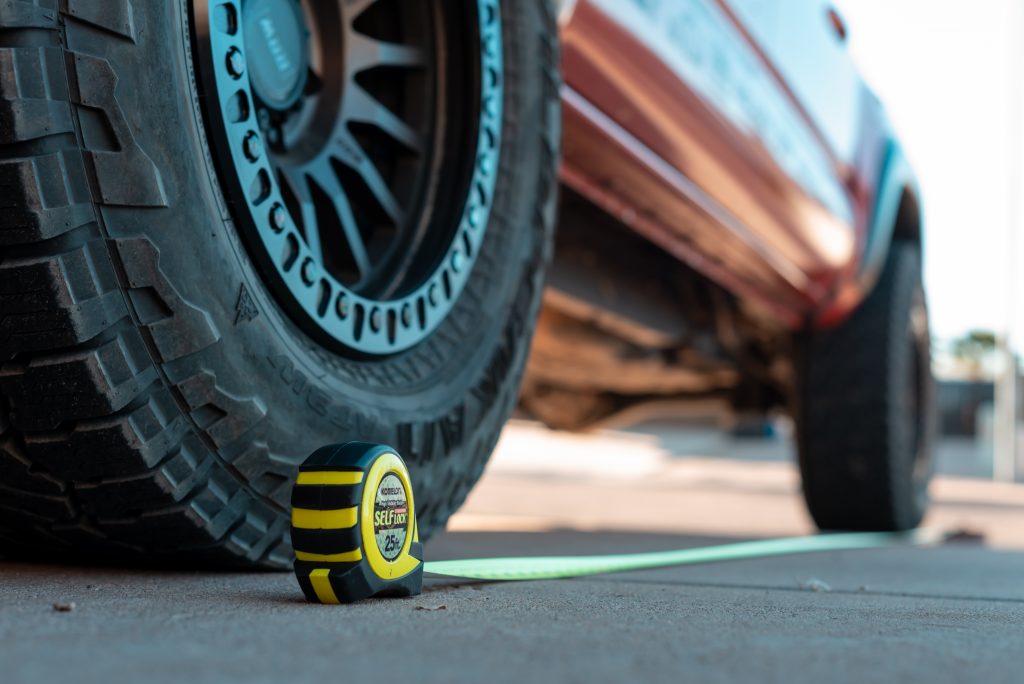
I started off by measuring the distance from my front wheel to my rear wheel. This will be for the longest hose length in your 4-way system. My measurement came out to 12ft and I added an extra foot so nothing is too tight.
The second measurement needed is for the section of the hose that goes from the main hose to the valve stem. For this, I measured 2ft from the highest point of the rim to the ground.
Step 2. Mark Your Cuts

I bought two hoses instead of one big hose so all of my hose ends would match and have pre-installed threaded ends. This results in less work to do and a more uniform-looking hose system.
Most people who build 4-way systems just buy one 50ft roll of hose. With a 50ft hose, you would have only two threaded ends and you would have to add two threads for four tire connections.

Take one of your 25ft rolls of hose and lay it out flat. You might need to use something to hold it down since it will want to coil up from being packaged. Lay out your tape measure next to the hose so you can transfer the measurements we already took onto your hose.
Using a sharpie and the tape measure, I made two marks on my hose so I know where to cut. I measured and marked 13ft from the threaded end for the first cut. On the opposite end of the hose, I measured and marked 2ft for the second cut.
Step 3. Cut Air Hose

I ended up using a PVC pipe cutter to make the cuts on my rubber air hose. The PVC cutters are strong enough for a plastic pipe, so they cut through the rubber air hose like butter.
Using whatever cutters you have available, cut both of the marks we made from our 13ft and 2ft measurements. You will now be left with three separate hose sections. We will use the rest of our hardware to connect these three pieces to make one-half of our 4-way air hose system.
Step 4. Begin Assembling 4-Way System

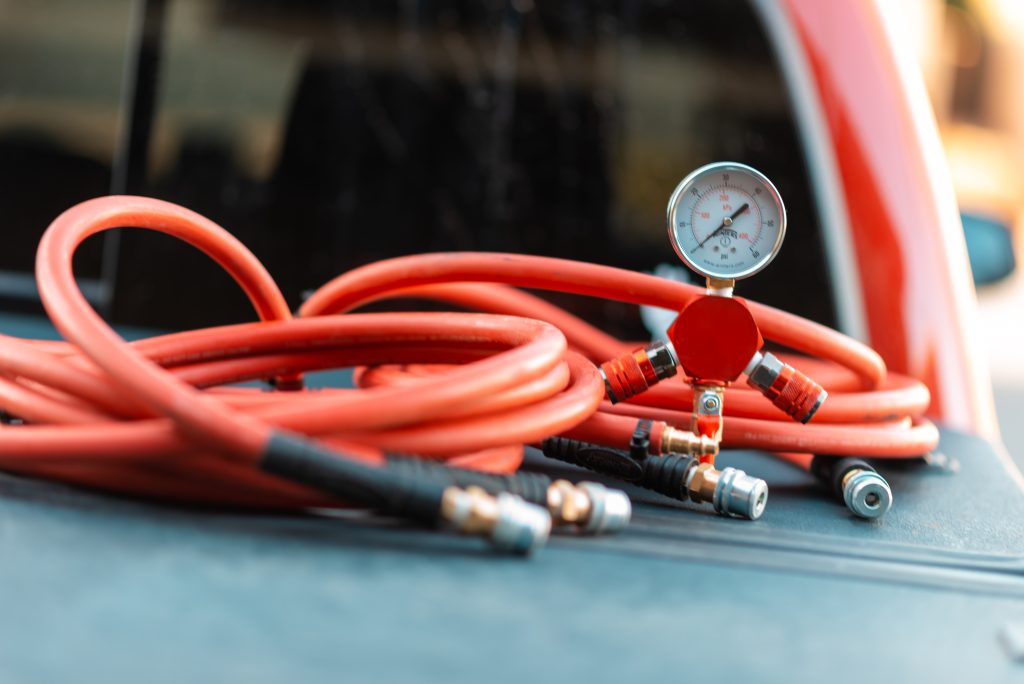
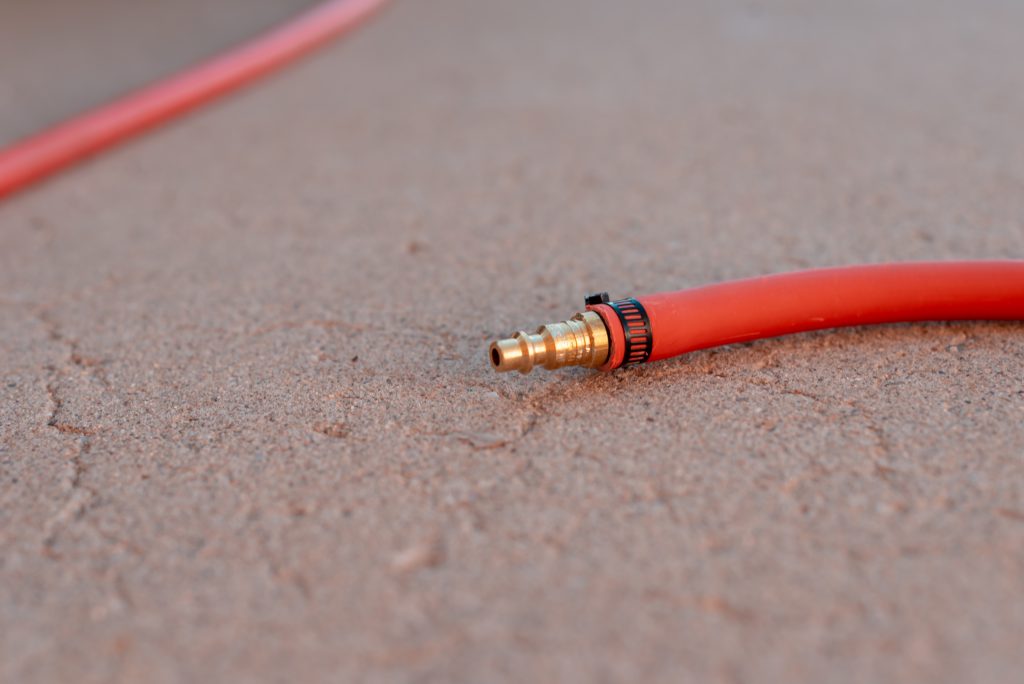
For the first part of the hose assembly, we are going to connect the 13ft hose to the middle section of the hose which should be about 10ft in length. You will connect both of these sections together using a 3/8″ brass barbed T joint and secure them tightly with two hose clamps.
Tip: Use a bottle of soapy water to spray on the barbed T joint before trying to slide the hose end over it. Without lubrication, it will be tough to slide the hose over the barbed fitting.
Connecting Hoses To T-Joint

Make sure you attach both of these sections to the barbed T joint so they make a straight line and not the perpendicular tip of the T joint.
With both of those sections attached to your barbed T joint, attach the 2ft section to the perpendicular end of the T joint. Secure the fitting using a hose clamp.
Attach Air Chucks To Threaded Ends
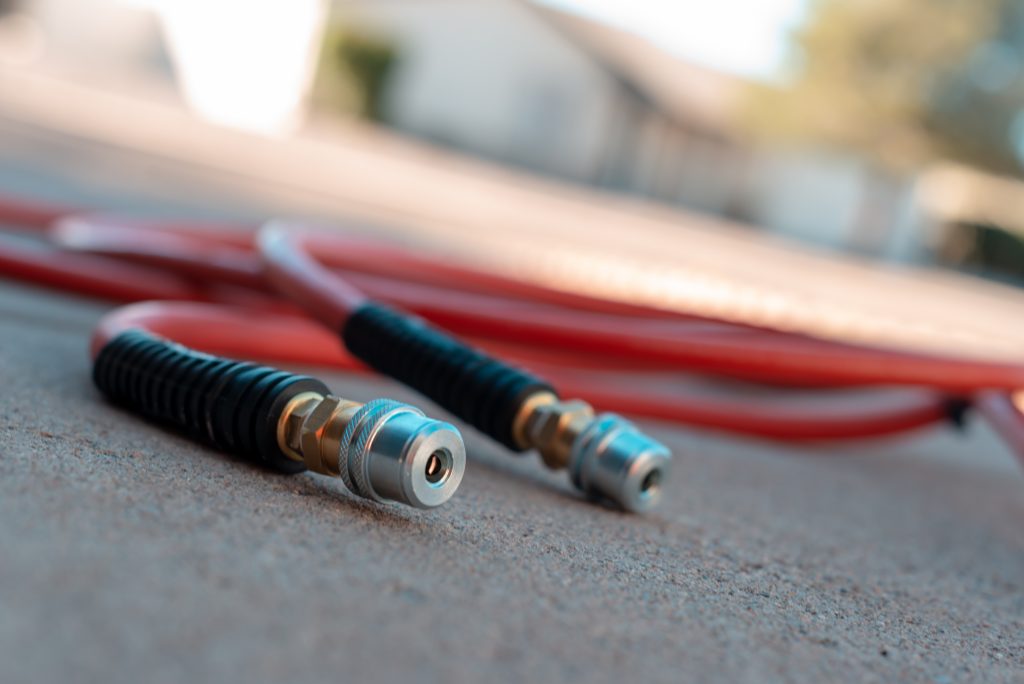
At the threaded ends of the air hose, you will need to attach your air chucks. Before you jump ahead and just screw these air chucks on, apply a layer of thread tape to both threaded ends of the air hose. Then, twist on your air chucks making sure to tighten them for a secure fit.
Attach Quick Connect Fitting
To finish up the assembly of one side of your 4-way air hose system, attach a 1/4″ quick-connect hose fitting to the remaining end of the hose. Apple soapy water to the fitting before trying to attach it to the bare hose end.
You have now created one side of your DIY 4-way tire inflation and deflation system. If you only need a 2-way air hose system, you can stop here. Else, you can copy the above steps to make a second 2-way system to complete your 4-way air hose system.
Step 5. Assemble Manifold
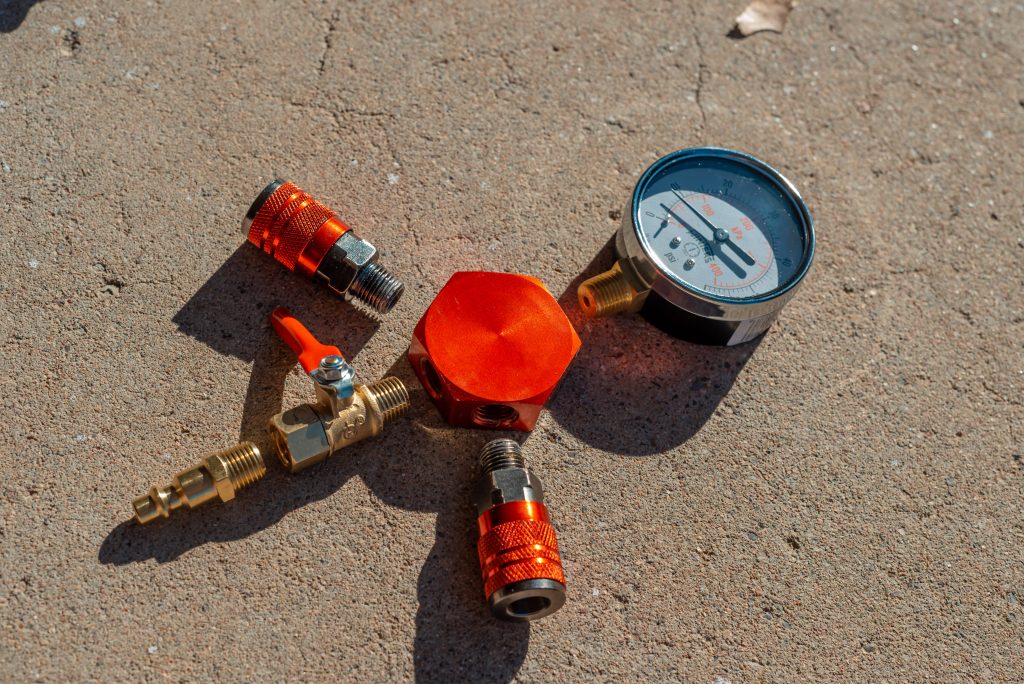
The 3-way manifold system I bought from Amazon was perfect for my needs. However, I wanted to change the layout just a little bit for my setup.
All four fittings that are attached to the center manifold body are glued in and I had to use some elbow grease to get them loose. I completely removed all fittings from the manifold body so I could change its layout. I also wanted to apply thread tape to all of the threads instead of the glue that the manufacturer used.
For my setup, I’m choosing to install two of the supplied quick connects that will point downward. At the very bottom of the manifold, I will be adding a control value easily open and close airflow.
Next, I’m adding a 1/4″ quick-connect air hose fitting to the end of the control valve to connect to an air compressor.
Lastly, at the top of the manifold, I will be adding a 1/4″ 0-60PSI pressure gauge so I can get a reading on the current PSI in the tires. I chose to use an analog pressure gauge over a digital one because I didn’t want to worry about batteries.
Step 6. Test System

After getting your DIY 4-way tire inflation and deflation system assembled, test it for any air leaks. Be sure to test both deflation and inflation. Before connecting the system to your tires, make sure the main control valve is closed.
Go around to each connection and see if you can feel or hear an air leak. Another good way to test for leaks is by using the soap/water mixture you had earlier for the hose assembly. If you have an air leak, you will see the soapy water bubble.
You should also verify that your pressure gauge is working properly and displaying the correct PSI. Momentarily close your control value to get a reading from your gauge. Then, disconnect one of your air chucks and use a different tire pressure gauge. You should get similar readings on both.
Final Thoughts
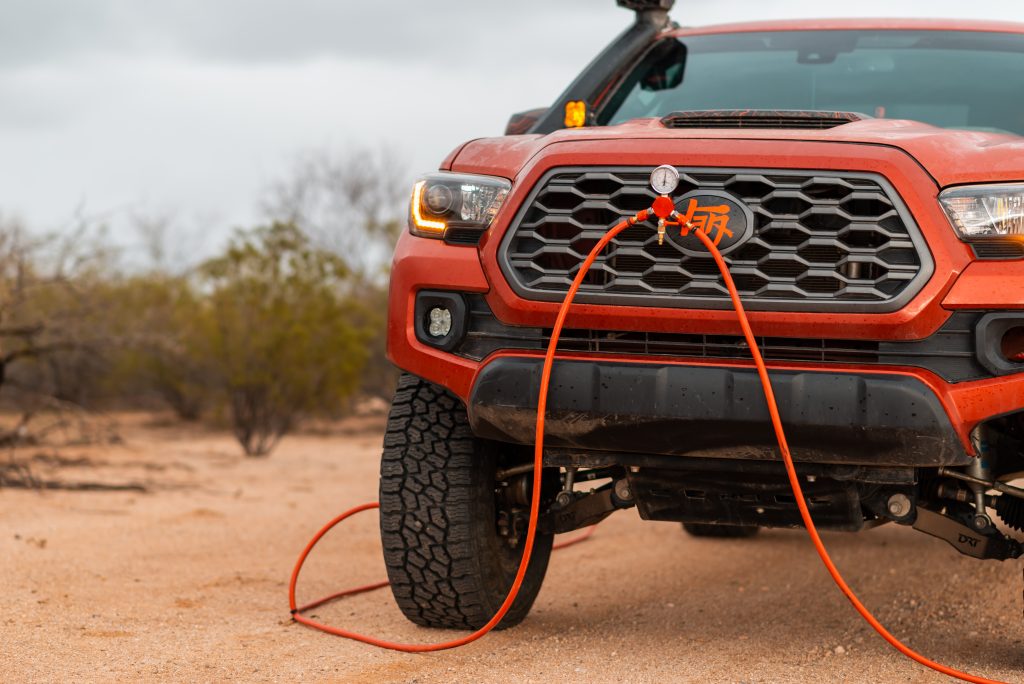
The first time I used my 4-way tire inflation and deflation system out on a trail, it worked just as I expected. Connecting this system was fairly easy compared to using my old system. The locking air chucks make attaching the system to my valve stems quick.
After I have everything connected, I open the valve and air starts to rush out through the bottom of the manifold. Before, I would use the pen to air down and would let too much air out of my tires while talking to a friend. This would lead to inconsistent PSI across all four tires.
Unfortunately, I don’t have a strong enough air compressor to run this system for airing up yet. So, I only use my 4-way system for airing down on the trail right now. At home, I connected the system to my garage air compressor and was able to air up my tires pretty quickly.
I highly recommend adding a 4-way tire inflation and deflation system to your setup. On top of adding a highly useful tool, the DIY route is way more fun in my opinion. I love building and creating my own stuff when I have the time or skills to do so!

Hi Chris, could the hot air from your air compressor damage the hose over time? Thanks in advance.
Honestly I’m not sure. The hose I bought is designed for compressed air so I would like to think it won’t damage it, but it all depends on the quality of hose you use.
Awesome write up! What did the parts end up running you?
Thank you, I ended up spending between $160 – $170 for everything
I run a morrflate but this is an awesome post for reference on building whips and hoses for other NPT leads around the house. Well done.
It was fun to build and I hope it helps others make their own. I appreciate the feedback!