
Lifting my Tacoma has been the most rewarding modification that I have done to my truck to date. You probably already know the answer to this question, but why is that?
The first few trails my truck went on were fun but there were more challenging trails I wanted to try out. However, I didn’t think my factory suspension would be able to handle them. Lifting my Tacoma not only increased my ground clearance but also boosted my confidence in my truck’s abilities.
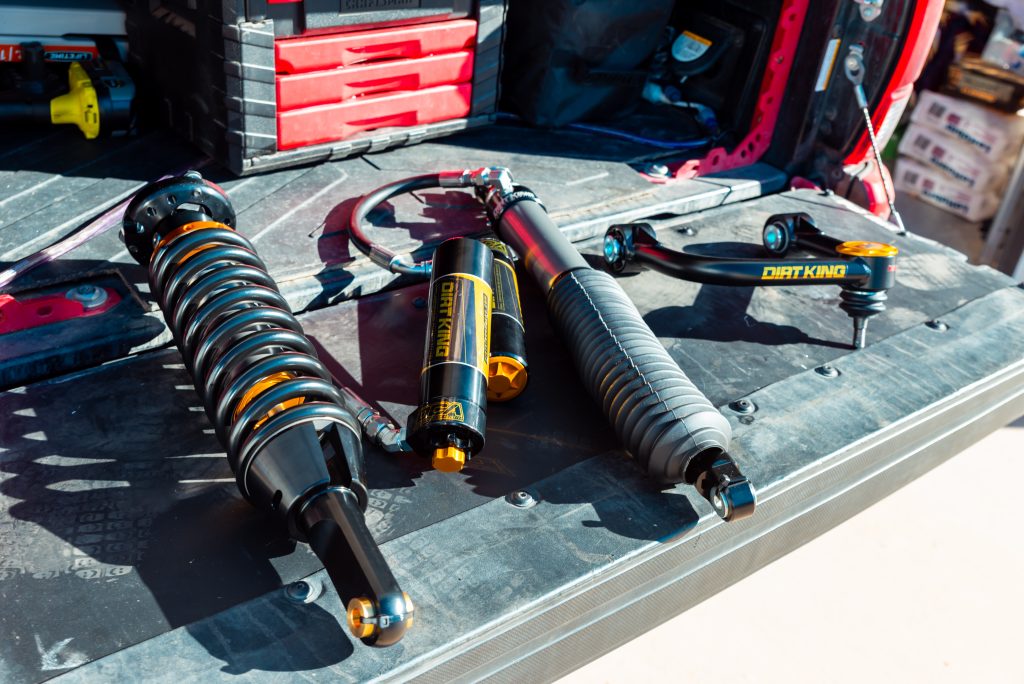
If you are familiar with the off-road aftermarket scene, I’m sure you have heard of Dirt King. They have been doing off-road fabrication for quite some time in the form of control arms and more. Now, they’re entering the suspension market with their brand new Dual Compression Adjuster (DCA) Series. For now, this is only available for factory geometry setups, but the plan is to release LT options down the road.
Read Konrad’s launch article and initial review here.
Before this release, you would have to pair DK’s components (UCA & LCA) with other suspension brands. Now, you can run one cohesive setup that performs and maintains color and branding for a sleek look. Not to mention being able to deal with one company directly for all your suspension needs.
I’ll be covering the 2.5s in this post, but they also released a 2.0 – more to come there soon.
Find It Online at TacomaForce
- 2.5 DCA Coilovers: Check Price
- 2.5 DCA Rear Shocks: Check Price
Use code “DIRTKING5” when ordering from TacomaForce!
Table Of Contents
Features
- 2.5″ Hard-Anodized 6061 Aluminum Shock Bodies
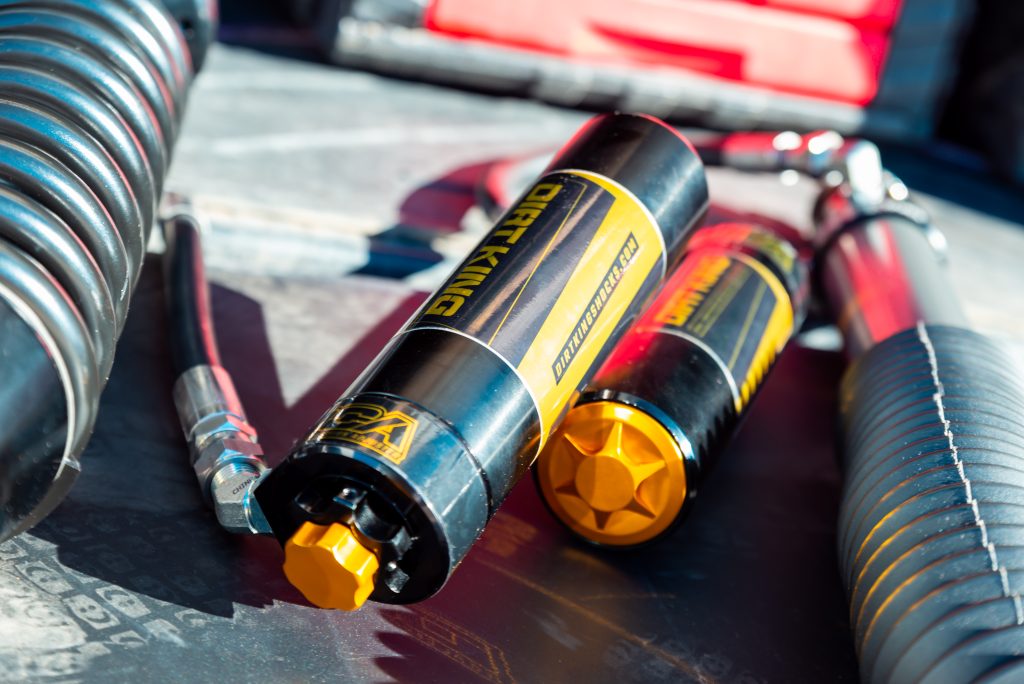
- Dual Compression Adjusters w/ 10 Adjustments (High & Low Speed)
- Induction-Hardened 3/4″ Shafts
- Provides Up To 3” Of Lift (paired w/ aftermarket UCA)
- More Suspension Travel
- Vehicle-Specific Valving
- Direct Bolt-On Upgrade
- Rebuildable & Serviceable
Installation

Tools Required
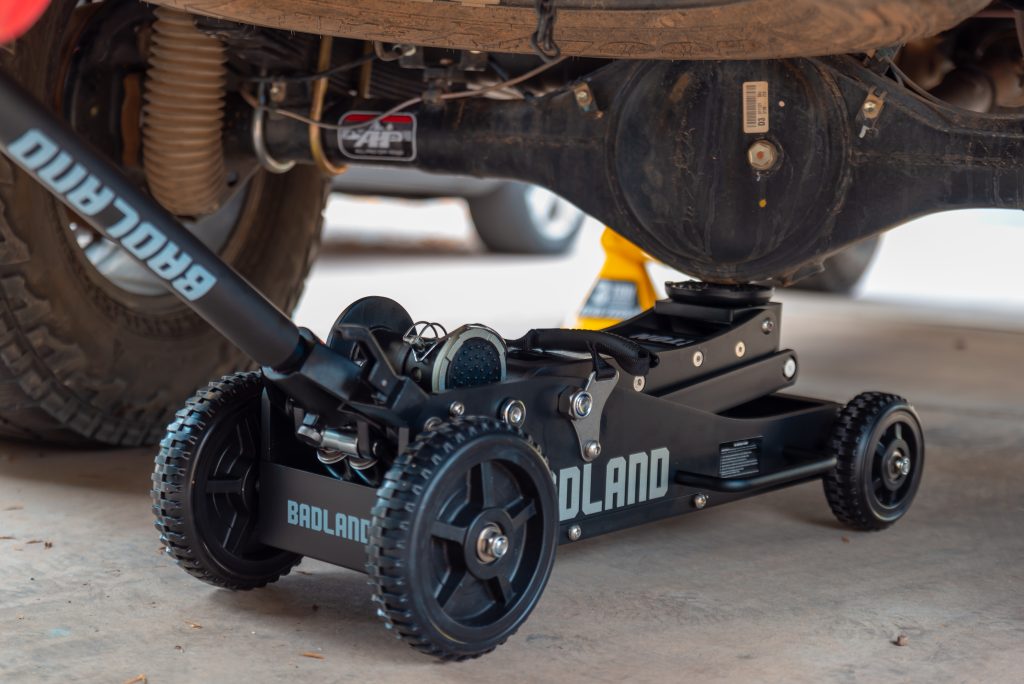
- Floor jack
- Jack stands
- Breaker bar
- 3/8″ ratchet
- 10mm, 12mm, 14mm, 17mm, 19mm Sockets
- Needle nose pliers
- Allen wrench (8mm)
- Torque wrench
This installation guide will cover the 3rd Gen Tacoma but applies to the 2nd Gen as well. Steps 1-5 are for the front and Steps 6-10 are for the rear suspension.
Step 1. Front End Preparation
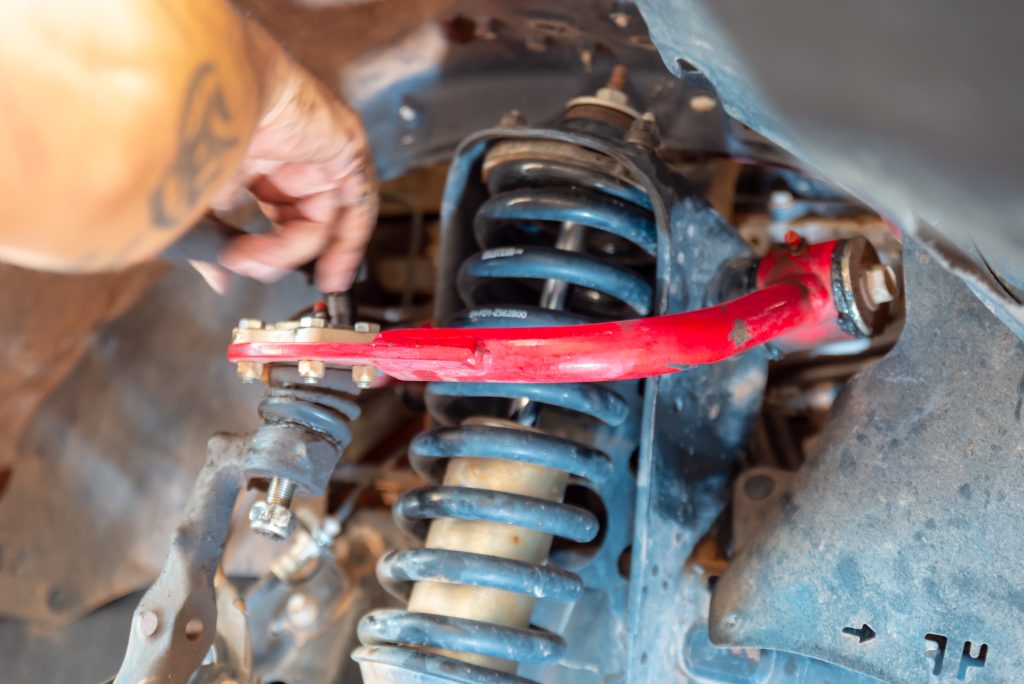
To begin, break all your front wheel’s lug nuts loose before you lift the tire off the ground. Then, lift the truck with a floor jack and place a jack stand under the frame of the truck just behind the front wheel well. I chose to lift the truck from the lower control arm. After the truck is lifted and stable, remove all the lug nuts and pull the tire off.
You’ll also need to disconnect your front sway bar from the front spindles, this won’t be shown as I had previously removed it.
If you plan to remove it completely, you’ll need to unbolt both the driver and passenger side brackets and may need to drop your skid plate as well.
Step 2. Remove Front Coilover
For my install, I removed my UCAs to replace them. Technically, for coilovers alone, removing/disconnecting the UCA is not necessary.
You can usually maneuver the assembly in and out with the sway bar disconnected and potentially the tie rod.
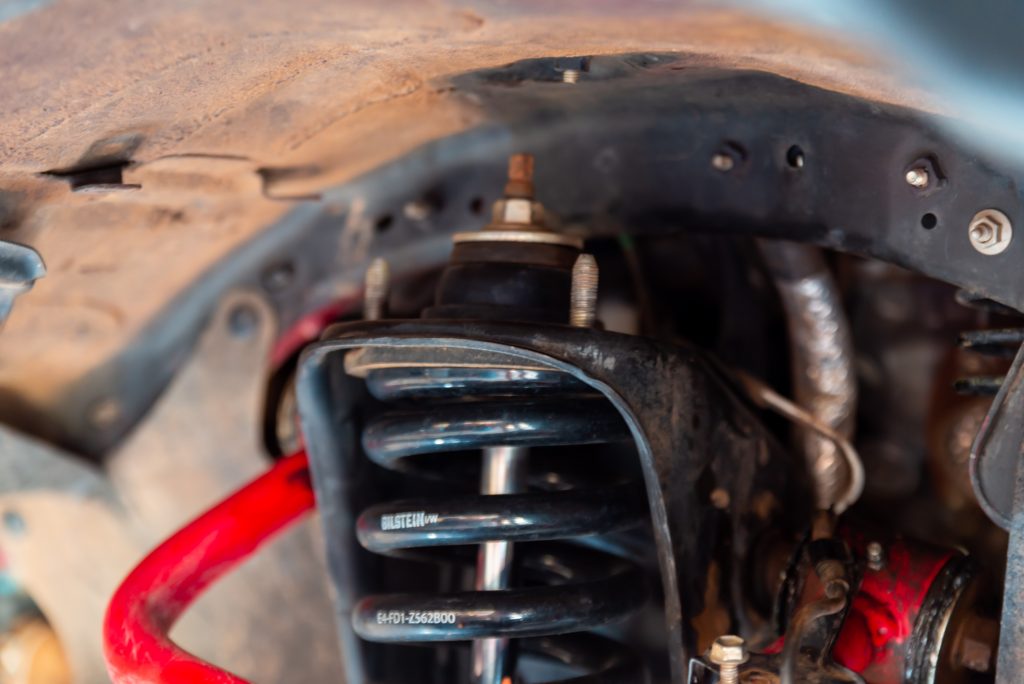
The top of the coilover has three 14mm nuts that need to be removed and then one 19mm nut and bolt on the bottom (connected to the LCA).
The easiest way to remove the bottom bolt is by using a 19mm wrench on the bolt side and a 19mm socket on the nut side. Then, pull the coilover off of the truck.
Step 3. Install New Coilover
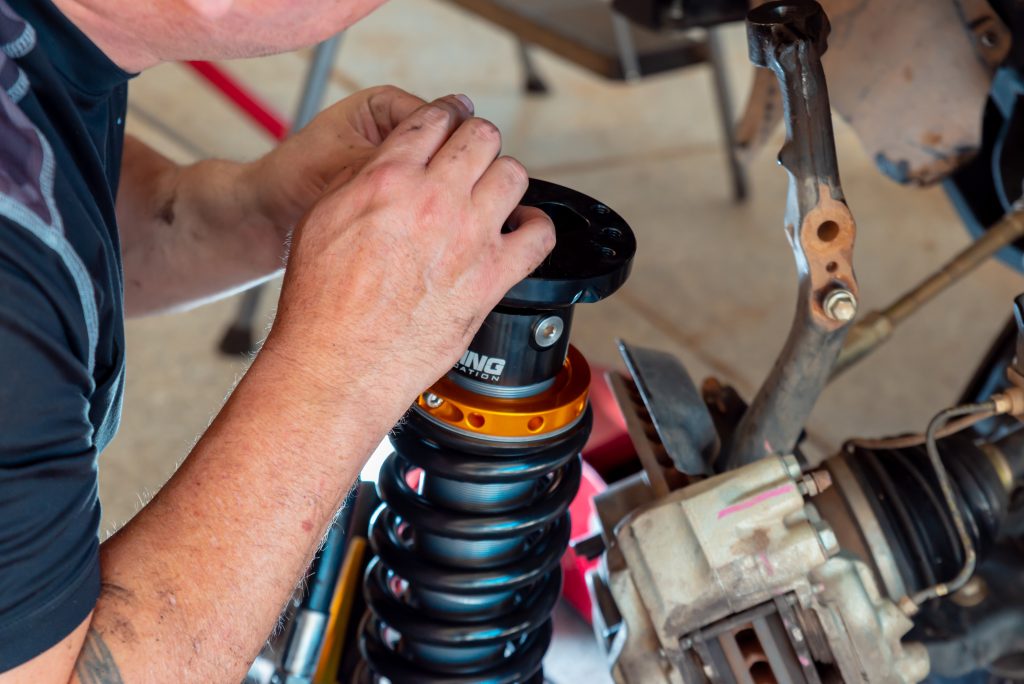
When placing the Dirt King coilover, make sure the reservoir hose coming out of the top of the shock is facing away from the truck. Line up the three coilover bolts through the tower and hand-tighten them. Next, install the lower bolt through the LCA.
Again, I was working on the UCAs as well, so my process was a bit different.
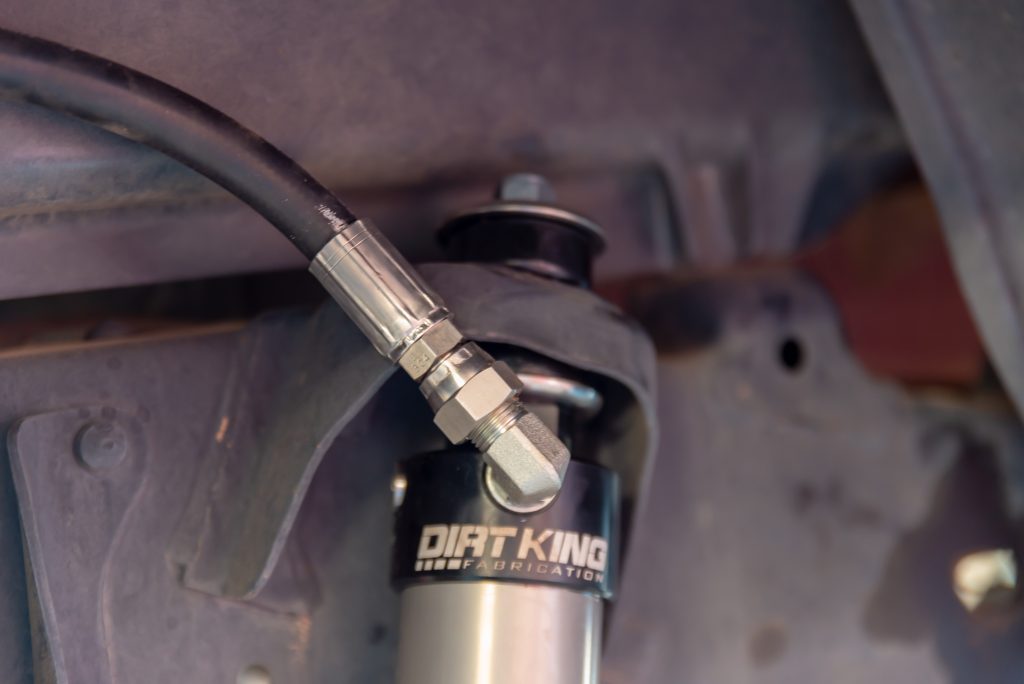
Step 4. Mount Front Reservoir
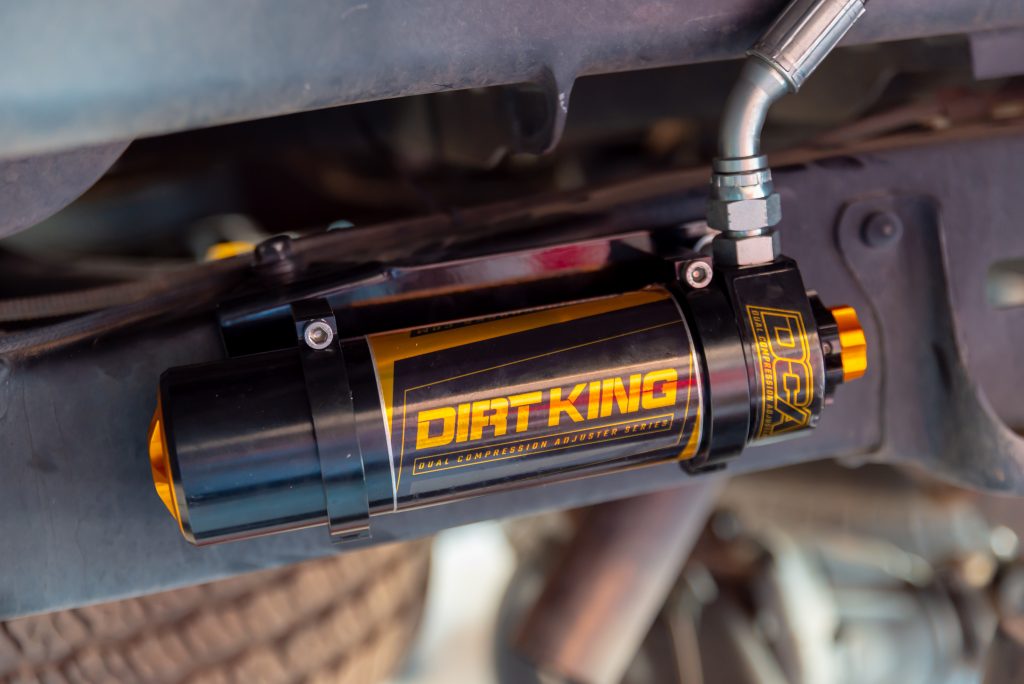
In the hardware package are mounting brackets for each reservoir. These are mounted to the frame of the truck.
The bracket attaches to the factory sway bar mount location with supplied hardware. With the Dirt King bracket, you can attach the bracket with or without the factory sway bar. Tighten with an 8mm Allen wrench.
Step 5. Torque To Spec
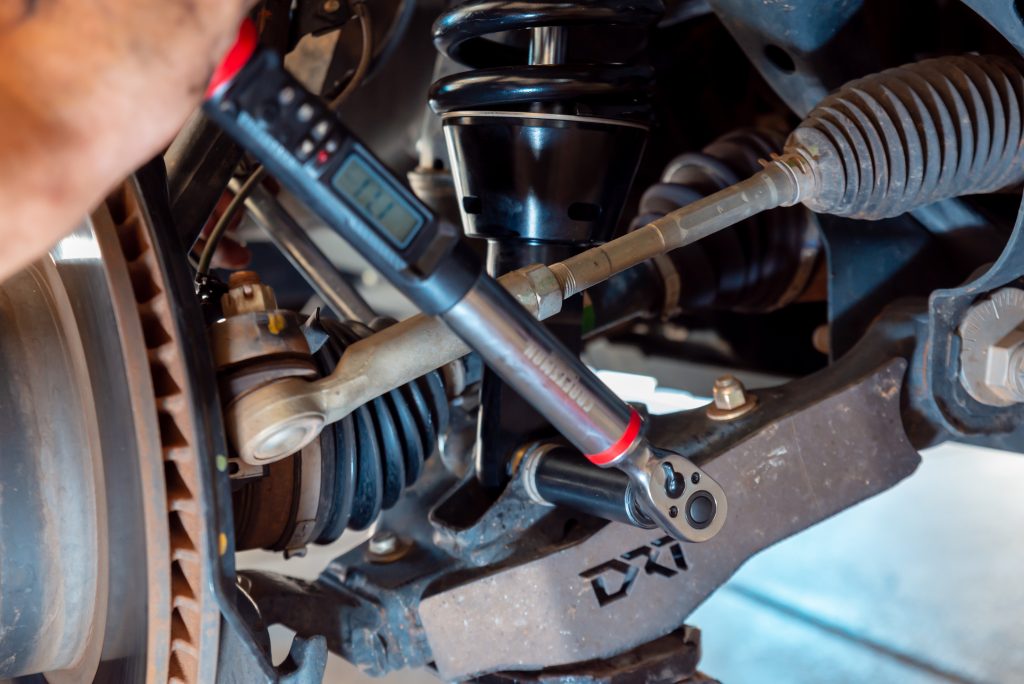
Now that the front end is all put back together, torque down all the hardware. Reinstall your wheels.
Step 6. Rear End Preparation
The rear shocks have a much easier installation process.
First, break loose the lug nuts, and then remove both rear tires. Don’t forget to place the truck on jack stands for safety.
Step 7. Remove Rear Shocks
The rear shocks have only two nuts that need to be removed to pull them out. The top one is 19mm and the bottom is 17mm.
With the hardware removed, you can simply pull the it out of the truck.
Step 8. Install New Rear Shocks
Grab the new rear shocks and make sure the hose is facing away from the vehicle.
The top of your shock will have pre-installed hardware comprising a metal washer, rubber bushing, another rubber bushing, a washer, and lastly a nut on top of the threads. Remove only the nut, one washer, and one rubber bushing.
Insert the top end into the tower with one washer and rubber bushing still installed. Place the second rubber bushing and the washer over the threads then hand tighten the top nut.
It’s time to use some muscles; compress the shock until the bottom half lines up with the mounts on the axle. Then, insert the new mounting bold and hand-tighten the nut.
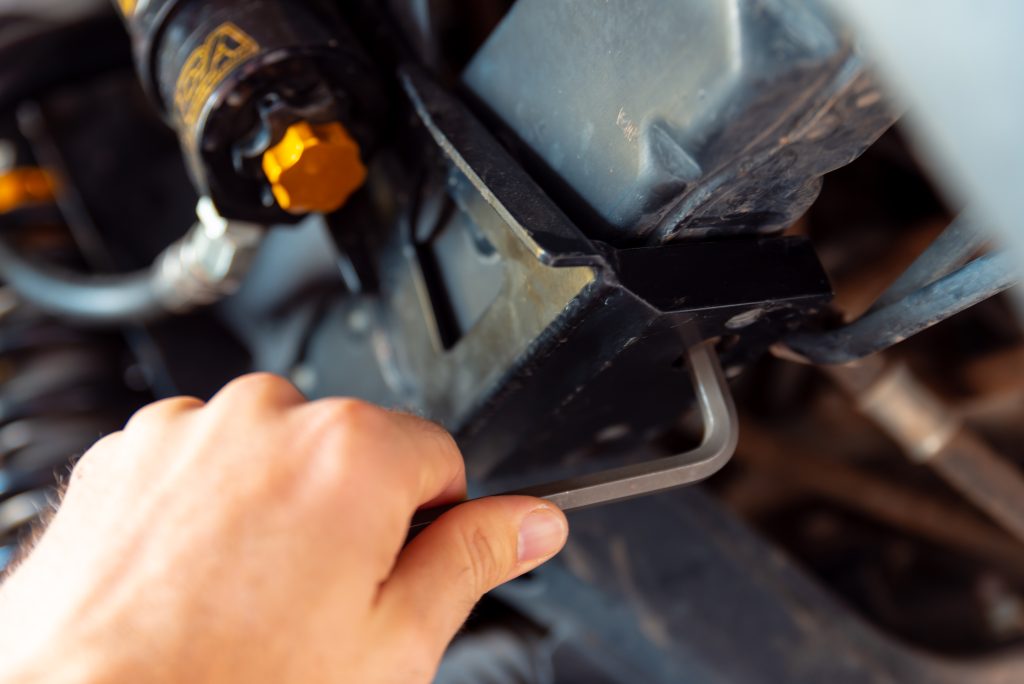
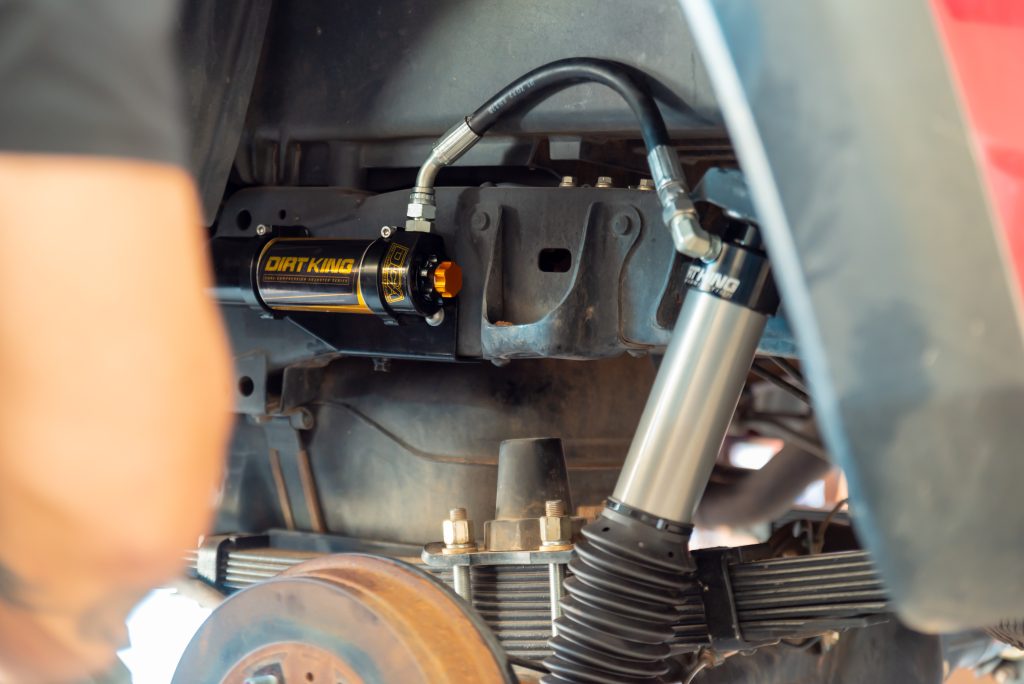
Step 9. Mount Rear Reservoir
For the driver’s side, the mounting bracket goes in front of the shock. There is an existing black 12mm bolt on top of the frame and then a hole on the side of the frame where you will attach it.
For the passenger’s side, you will also use an existing bolt that is already threaded into the frame. For the second bolt, though, you will need to drill a hole into your frame. If you don’t want to do that, Dirt King supplies a silver hose clamp to secure the bracket.
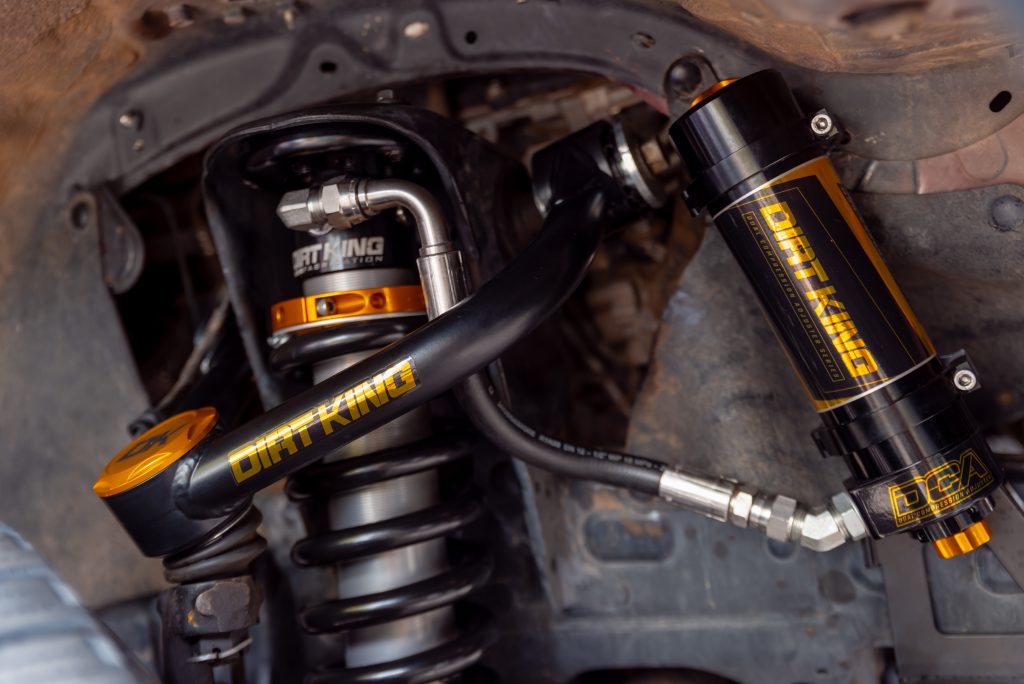
Once the brackets are attached to the frame, use the supplied Allen wrench to loosen the clamps and insert the bypasses. It’s best to align the Dirt King graphics facing outward and centered between both of the clamps on the bracket.
After they’re placed, tighten the clamps with the Allen wrench.
Step 10. Torque To Spec
For the top nut, you can’t get the nut torqued down due to the rubber bushings. I tightened this until I felt that it was secure and both rubber bushings were just slightly starting to compress.
Finally, install the wheels and tires back onto the truck and put it back on the ground.
I highly recommend getting your truck aligned after replacing suspension components.
First Impressions
My previous setup was okay, but not nearly as nice as this Dirt King DCA setup. From the very first ride, I could immediately feel the difference in ride quality. I was like a kid in a candy shop.
This is my first adjustable remote reservoir suspension. At first, I set all the adjusters to the firmest setting and drove around the desert a little bit. Still, the ride quality felt better than my previous setup.
Then, I set all of them to the softest setting, which is easily done with the knobs. Of course, there was a stark difference. I started to speed up over some washboard desert and the truck seemed to float. It’s impressive how well these shocks transform a rough road into a smooth ride.
Between the looks of this beautiful black and gold suspension and its ride quality, I’m extremely impressed with what Dirt King has created. Everyone should be on alert because this entry into the suspension market is a banger. My next post will dive deeper into my long term use!
