

If you’re lifting your truck (or already lifted), you need to consider replacing your brake lines. Especially the rear ones.
Why Upgrade?
A stock Tacoma or maybe one with a small lift would be fine with the factory ones. Once you lift beyond 2″ though, the OEM won’t cut it as you run the risk of overextending and tearing them. With extended stainless steel brake lines, you get a firmer pedal feel, more durability, and peace of mind when you start flexing out your suspension. Even mid-travel setups can benefit.
The Mudify lines for 2005-2023 (2nd & 3rd Gen) Tacomas install with ease. The installation we’re covering in this article is on a 3rd Gen Tacoma.
Find It Online
Table Of Contents
Features & Specifications
- Allow for more axle travel
- Greater durability and reliability
- 3-year / 37,000-mile warranty
- DOT approved
- Compatible with all fluids
- Made in the USA
- Every line is tested to 3,000 PSI
Installation

With some patience and not too high of a difficulty level, you can easily install the front and rear extended brake lines on your Tacoma.
Tools & Materials
- 10mm flare nut wrench
- 3/4″ wrench
- Hammer
- 30-degree push pin pliers
- Prestone DOT 3 synthetic fluid
- One person bleeder bottle (optional)
- Small c-clamp (optional)
- Needle nose pliers
- Silicone rubber plug kit (optional)
- Shop towels or rag
- Brake cleaner
- Oil catch pan or something similar
- Latex gloves (optional)
- Floor jack stands
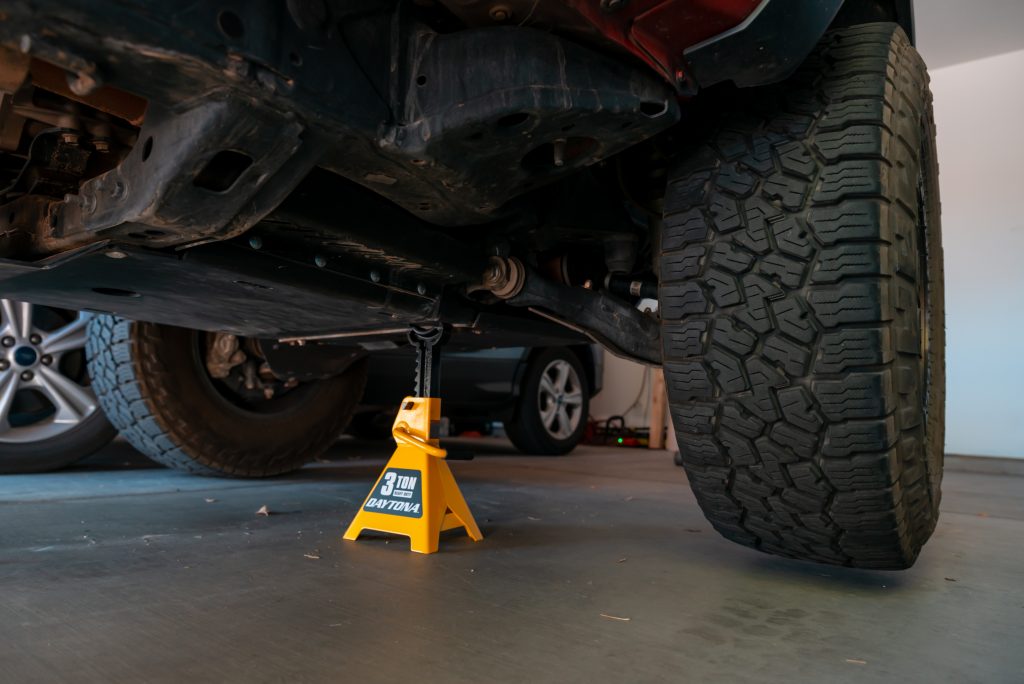
Step 1. Jack Stands + Remove Tires

To make the installation easier, you will want to jack your truck up for more room to work underneath it. I lifted my truck with a floor jack then set my rear axle down on a set of 3-ton jack stands.
After I got the truck placed on the jack stands, I removed both of the rear wheels again for more room to work around the truck.
The last thing I did to prepare for the rear brake line install was to drop down my spare tire (if you have one mounted under the truck). Dropping the spare tire will give you a lot of headroom that you will thank me for later when you are working up under the truck.
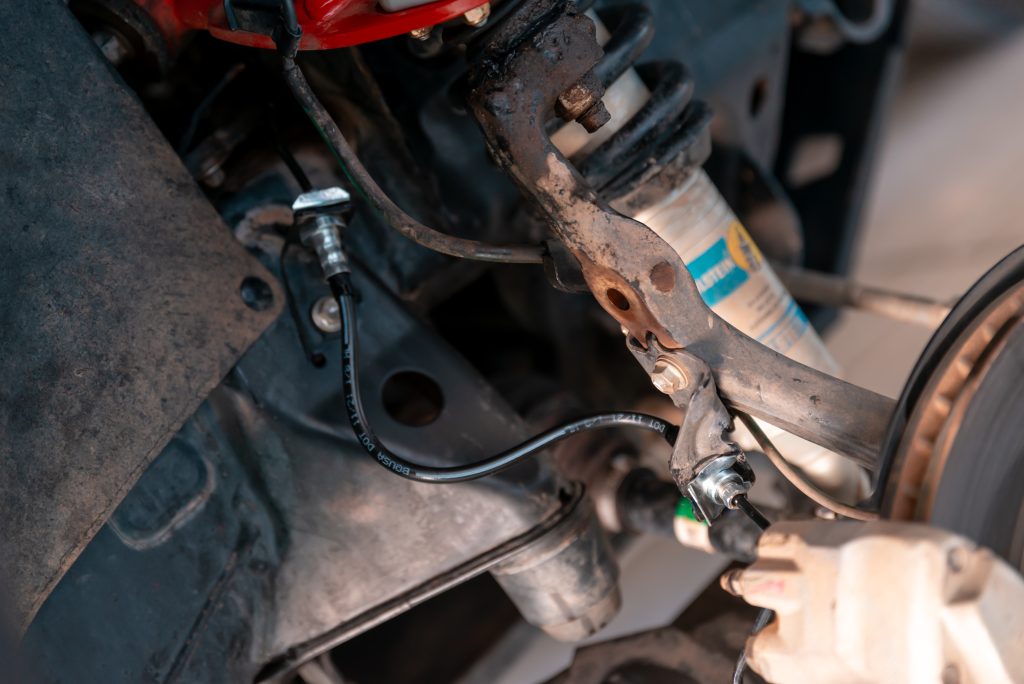
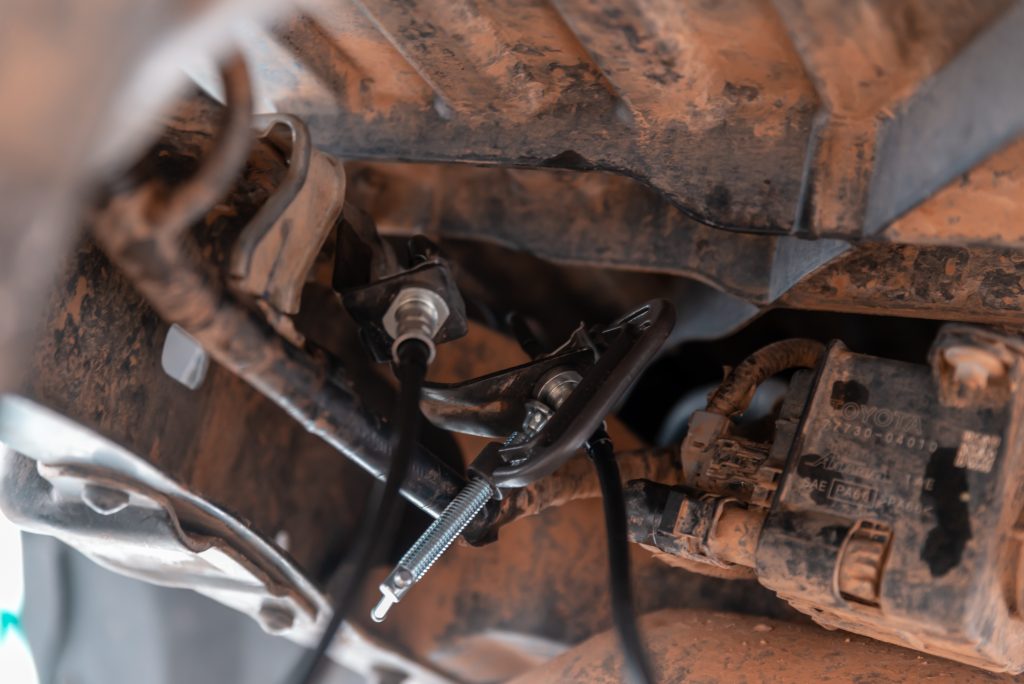
Step 2. Brake Line Fitting
Both of the rears that we will be replacing are going to be on the driver’s side of the rear axle. Once you locate them, start off by using your 10mm flare nut wrench to break loose both nuts. Don’t loosen these nuts too much or you will have fluid leaking and making a mess.
The lines will have a 10mm nut on each end so you will have a total of four nuts to loosen. The two nuts in the photo above are the bottom end of the factory lines and above you will see two more nuts at the top half of the factory lines.
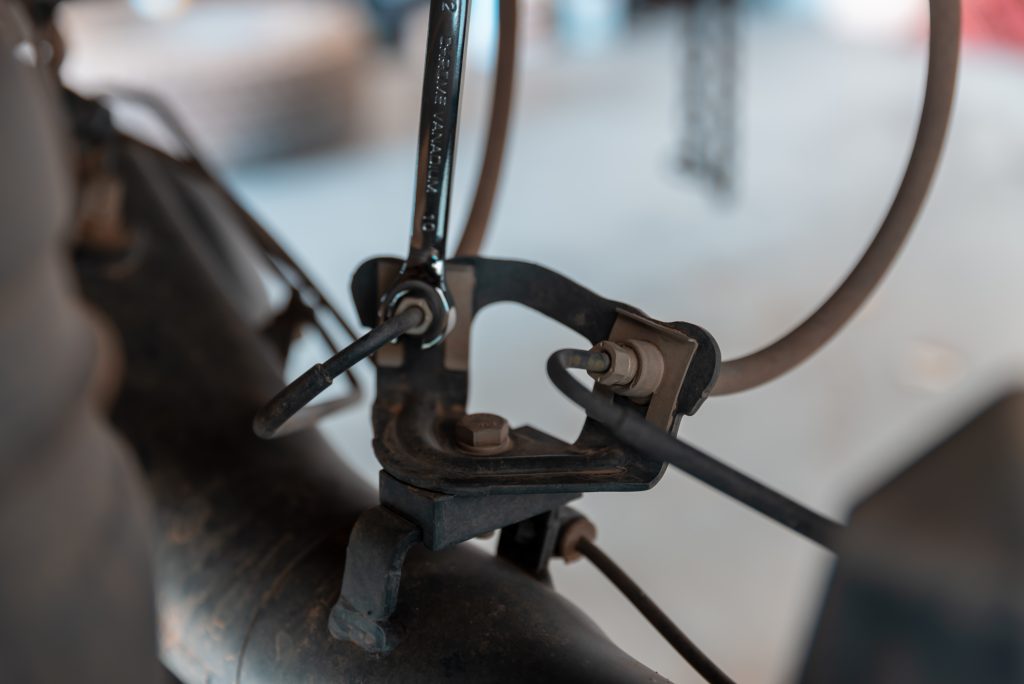
Step 3. Brake Line Brackets

For this step make sure you have some patience. In my opinion, this was the most difficult part of the installation, so if you can get through this part, then you can easily get this project done.
Using the 30-degree push pin pliers, you will need to pinch the U-shaped clip as you see in my photo above. When you have a good hold of the clip you need to pull it off of the bracket. This clip is pinched between the bracket and the fitting so it’s on pretty tight.
On the top half of the brake lines, there will be two more U-shaped clips holding them in place. The top two U-shaped clips are more difficult to remove due to the tight location.
Step 4. Remove Lines
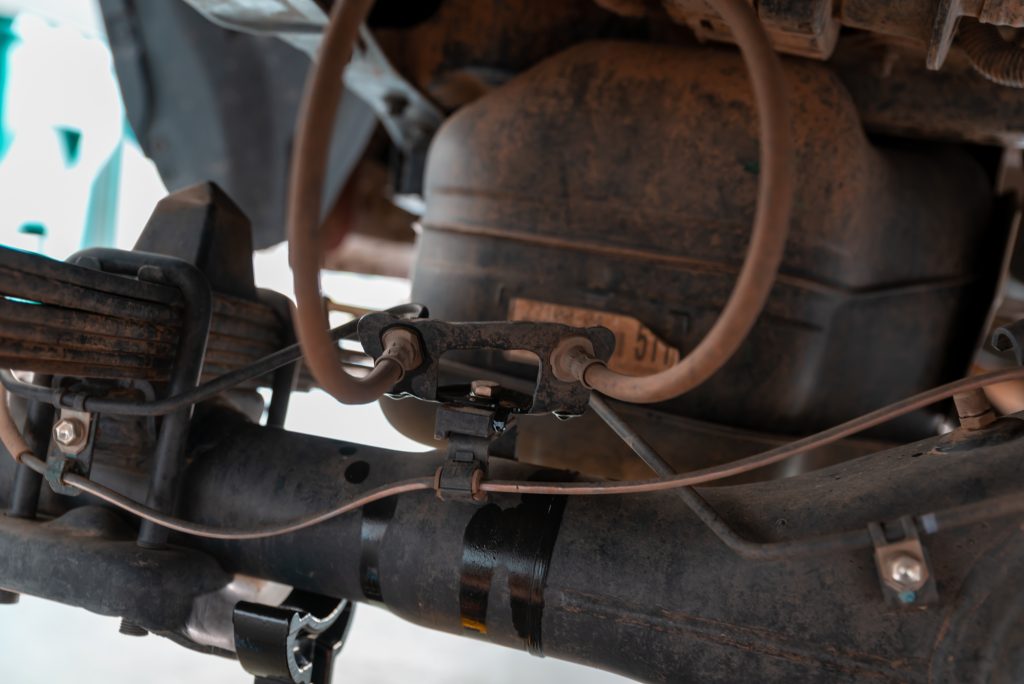
Once all of the U-shaped brake line clips have been removed you can unscrew the 10mm bolts that connect the hard lines to the soft lines. As soon as you separate both, fluid will start to leak.
At this point, you can either hurry up and get the new lines installed before you lose too much fluid or you can plug the hard lines on the top half to stop the brake fluid from flowing. I purchased a silicone rubber plug kit on Amazon and I used these plugs to stop the fluid from running out while I finished removing the factory lines.
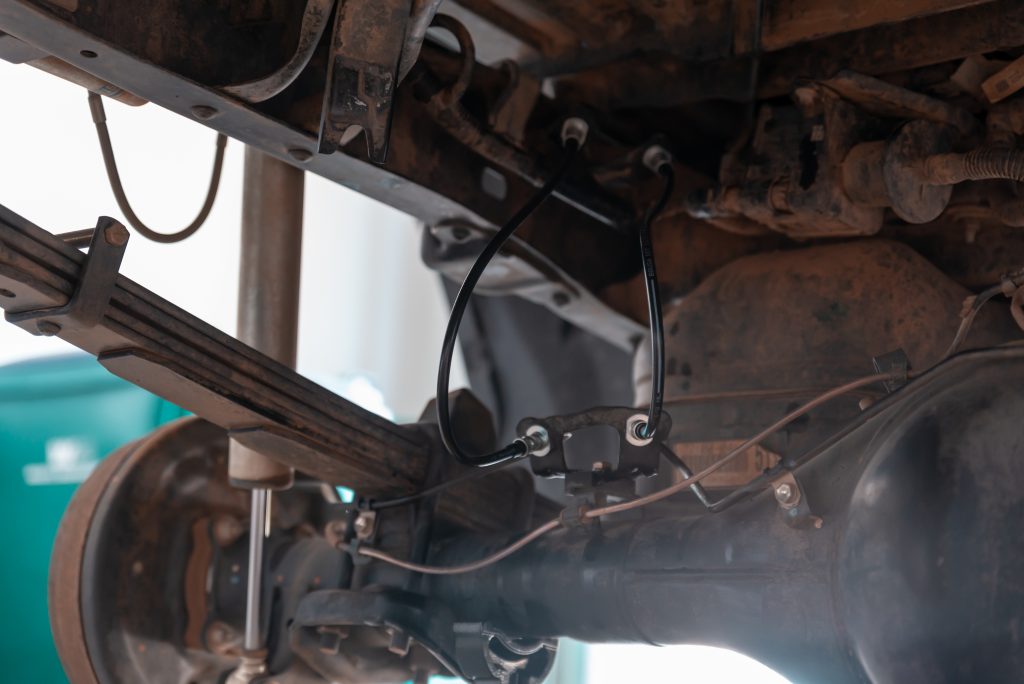
Step 5. Attach New Lines

If you choose to get the silicone plugs you can work at your own pace. However, if you don’t have plugs, you will need to work fast to conserve as much brake fluid as you can. These lines install in the same fashion as the OEM ones.
Tip: I choose to connect the bottom first, then do the top. If you start at the top and then go to the bottom, you might get fluid running down the new extended line and getting all over.

After you have the new lines installed, you need to tighten the 10mm nut from the hard lines to the new lines.
Using the 10mm flare nut wrench and a 3/4″ wrench, you can tighten the brake lines so there are no leaks and the system is secure.
Step 6. Install Retaining Clips
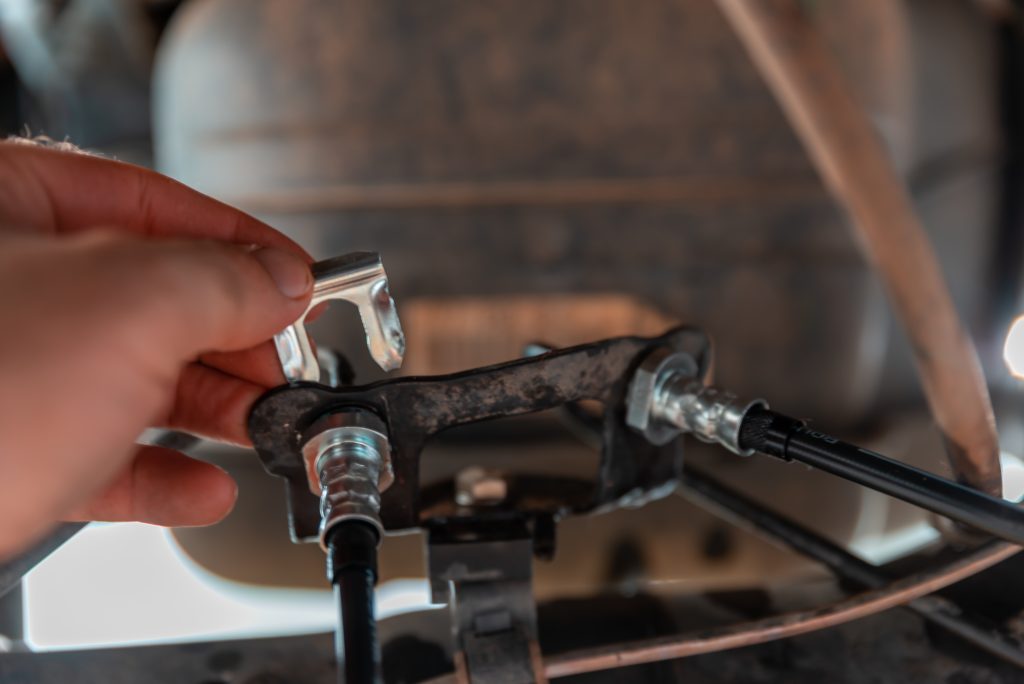
To finish, you need to install the new U-shaped clips that come with the extended brake lines.
Make sure the line is pressed up flush against the bracket. Then you can slide the U-shaped clip into position.

To properly install the U-shaped clip, use a hammer to gently tap the clip down in between the hard brake line and the bracket.
You will keep tapping the U-shaped clip until it is flush with the top edge of the bracket.
A pro tip that I learned (from Brenan over at Trail4Runner) is to get the top U-shaped clips installed where you can use a small C-clamp.
I found this to be very helpful since you can see the room for a hammer above that bracket is non-existent.
Step 7. Remove Front Wheels
After you have the rear end all back together and on the ground, you can lift up the front end so you can move to the front extended brake lines.
The removal and installation is going to be very similar to the rear end so I won’t go into too much detail.
Step 8. Remove Front Lines

Just as we did on the rear lines, the top end and bottom end of the soft lines have a 10mm nut that you need to break loose.
Use your 10mm flare nut wrench to loosen the nut on both ends of the factory line.

Use 30-degree push-pin fliers to remove the U-shaped clips on both ends of the line. These clips are the same exact clips as the rear brake lines. Be patient and take your time trying to remove these clips.
After the clips have been removed, you can finish completely unbolting the 10mm fitting. Just like the rear, as soon as these nuts are completely loose, you will start to have fluid flowing out of the lines, so you need to work quickly or use plugs.
Step 9. Install Front Lines

Attach your lines to both the top and bottom portions of the factory hard lines.
Hand-tighten both ends of the 10mm nuts until the brake fluid stops dripping.

After the soft and hard brake lines have been connected, you can install the U-shaped clips. Luckily for the front, you use a hammer on both the top and bottom clips. Gently tap both of the U-shaped clips into place until the top of the clip is flush.
Step 10. Bleed Brakes
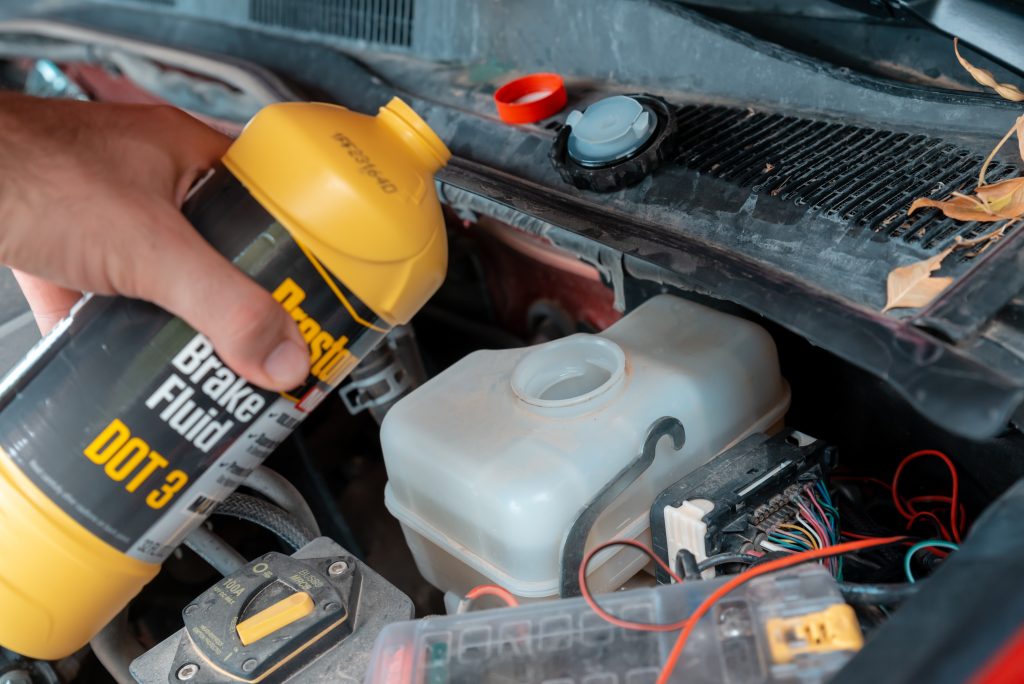
The top of the brake fluid reservoir will tell you what fluid your truck takes. Toyota says DOT4 is acceptable but it’s recommended to use DOT3, which is what I used.

To help with bleeding, you can buy this brake bleeder bottle on Amazon as I did. Or, you could make your own.
I liked this bottle because it has a magnet attached to it, so you can stick the bottle to a metal surface, which is good if you’re doing a single-person bleed.

Proper Brake Bleeding Order
- Passenger Rear
- Driver Rear
- Passenger Front
- Driver Front
This brake bleeder bottle comes with a clear tube that attaches right to the nipple. After you attach the clear tube, you can use a 10mm wrench to open the bleeder value. Once the valve is open, you can start to pump the brakes to remove any air bubbles from the lines.
Make sure you check your reservoir each time you bleed the fluid, do not let the fluid level go below the brake fluid low line.
Final Thoughts
If you plan on messing with your suspension, this is your sign to buy a set of new extended brake lines. You can hit the trails and let your suspension flex without the worry of having added stress on your lines.
Another benefit is the upgraded quality over the factory soft lines. The factory soft lines are made of some type of silicone or rubber while the Mudify ones are made out of multiple layers of stainless steel. The stainless steel hoses are wrapped in two layers of woven nylon braided rubber for additional protection.
For the price and benefits that these provide, every Tacoma should have them. The installation is also fairly easy for anyone to do has basic mechanical skills to remove a tire and turn a wrench.