
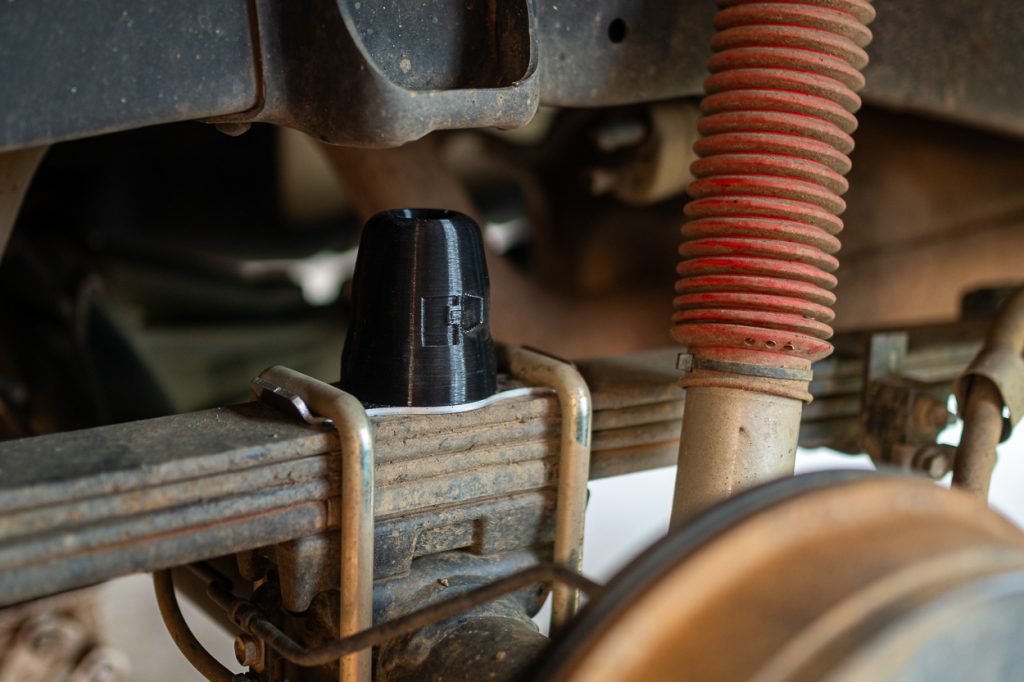
It’s no secret that the factory bump stops on the Tacoma aren’t much more than triangulated hockey pucks (they kinda suck). The best they do is prevent metal on metal contact, but we need more! Perry Parts offers a cost-effective improvement to the OEM bumps with their 3D-printed version that provide both form and function to the rear end of your truck. Give your suspension and back some relief with this simple upgrade.
In this post, I’ll primarily cover a quick install guide (they’re super simple to mount), and my initial thoughts.
Check out my first post on their front bump stops too.
Table Of Contents
Overview
I touched on this in my last post, but Perry is changing the industry, one product at a time. They use a special type of 3D-printing called Fused Pellet Fabrication (FPF). This allows for a ton of adjustment in the dampening and how they will react to impacts. They’ve been proven to be durable, and come with a great warranty. We’ve seen all types of builds running these parts with a ton of positive feedback. This ranges from daily drivers to more trail dedicated rigs.
Tools Required
- Floor Jack
- Jack Stands
- Torque Wrench
- 19mm Socket
- Penetrating Oil
Step 1. Remove Rear Tires
First, remove the rear wheels of your Tacoma to give yourself room to work. Place your floor jack under the rear differential and lift the rear end until the tires clear the ground. Next, place jack stands underneath the rear axle just inside the U-bolt assembly on both the driver and passenger sides. Remove the lug nuts and remove the rear wheels from the truck.
This can be done without removing the wheels, but access is much easier when you do. Make sure to take the right precautions in any case.
Step 2. Remove Factory Bumps
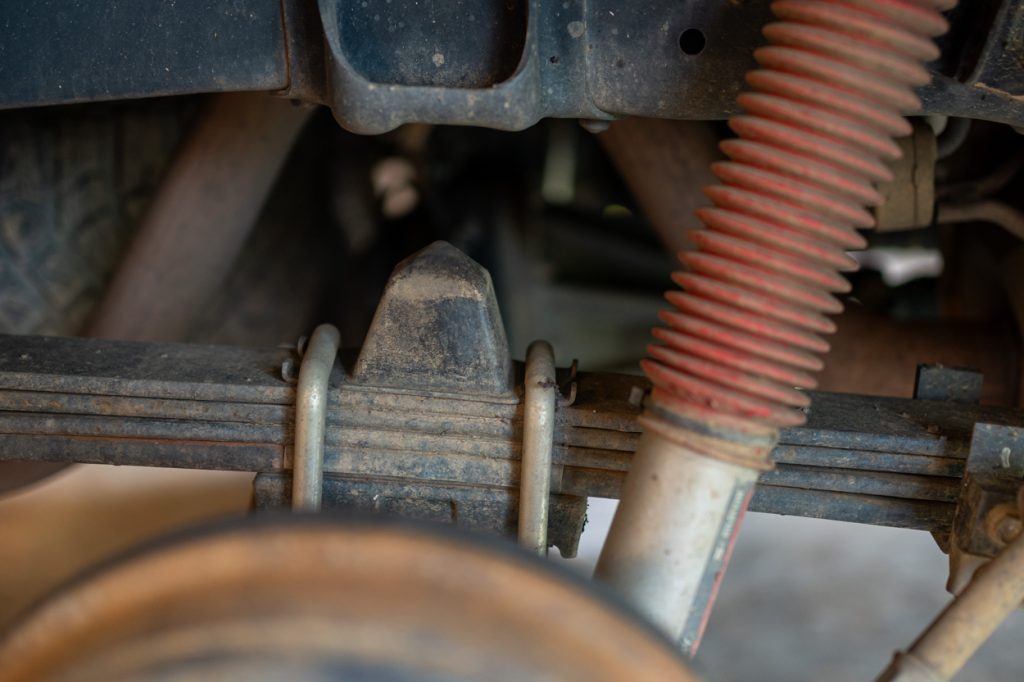
Using a 19mm socket, loosen the (4) nuts on the U-bolts. If you are running a factory U-bolt kit, these will be on the underside of the leaf springs.
You don’t need to remove them completely; just loosen them enough to give yourself room to remove the factory stops. They should slide out easily if the bolts have enough play in them.
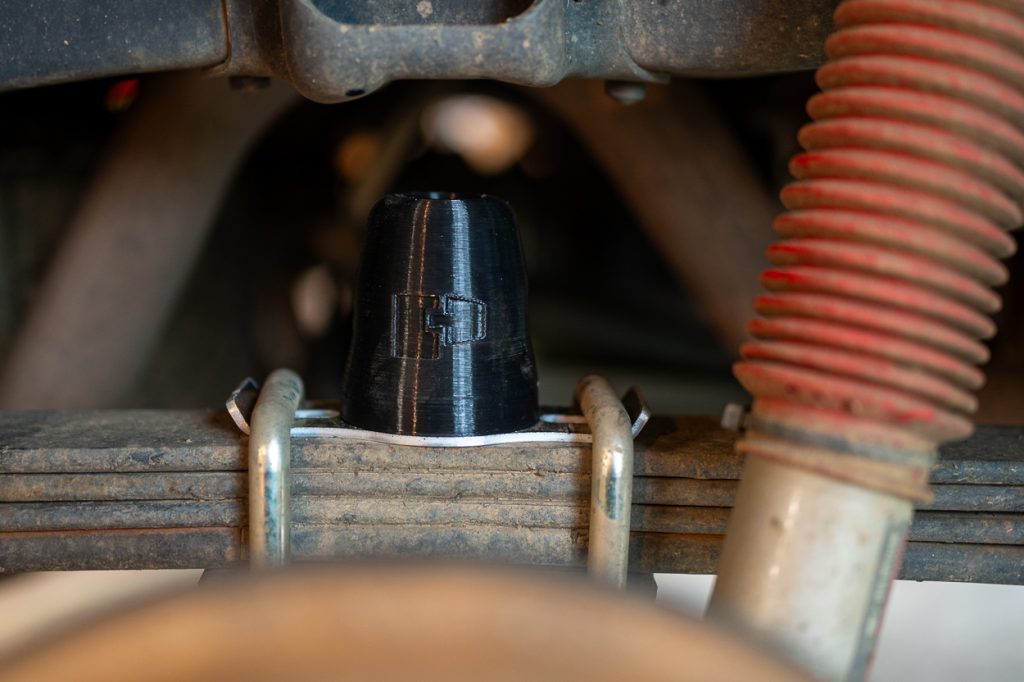
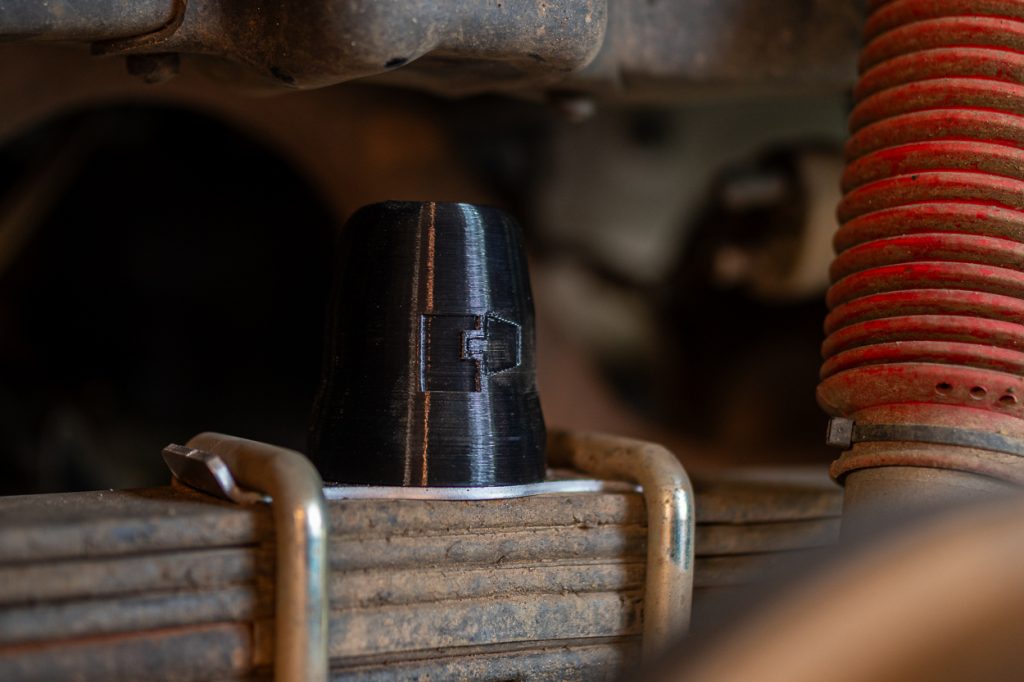
Step 3. Install Perry Parts Bumps
Position the new bump stops over the top of the leaf pack, but under the U-bolts protruding from the top side of the leaf springs. If the bolt doesn’t allow for the bump stop to sit flat on the leaf springs, cut off the top of the bolt using a grinder or hack saw.
Once they are positioned correctly, grab your 19mm socket and tighten the (4) nuts on the U-bolts, making sure to tighten them equally. You can use the number of threads protruding as a reference.
Once all nuts are tightened evenly, grab a torque wrench and torque in a cross pattern to 73 ft-lbs. Finally, reinstall the rear wheels, remove the jack stands, lower your truck, and torque the lug nuts to 83 ft-lb.
Initial Impressions
These bump stops are noticeably softer compared to the rock-hard factory ones. I inadvertently did some on-road durability testing due to some worn-out drooping leaf springs. With a fair amount of bottoming out at highway speeds, there have been no signs of fatigue from these. The progressive dampening made a big difference in softening the hard hits.
I have since installed an add-a-leaf on my leaf springs and haven’t experienced bottoming out anymore. However, if you run factory leaf springs on your truck with a bed rack or rooftop tent or consistently haul heavy loads, you may hit these more often as they are a bit taller than the factory bump stops. But that isn’t a bad thing, and should improve and create a smoother ride overall.
All in all, I’m very pleased with this upgrade and look forward to getting some proper testing done on the trails.