
Did you need to replace your Tacoma’s alternator? Well, you’re in the right place!
At roughly ~110,000 miles, my 3rd Gen’s decided it was finished. Funny enough, my last vehicle, a 4th Gen 4Runner, also experienced a failure.
While it may seem premature (these usually last longer) my truck has a lot of auxiliary electronics with a factory battery, and I have crossed my fair share of deep water crossings. I suspect the more strenuous use contributed to an early demise but who knows, it could just have been a fluke.
In this post, I’ll show you how to swap it on your own, with some basic tool sets. This is a doable project for most skill levels, but there is one bolt that is very tough to get to. More on that later.
Part Numbers
- 3.5L V6 130 Amp – 27060-0P350
- 2.7L V4 100 Amp – 27060-0C170
Required Tools
- Mechanic’s Tool Set
Table Of Contents
Diagnosis
So how did I know my alternator was failing? There are a few things that could indicate an issue. Some of them have overlap with a failing battery, so keep that in mind.
- difficulty starting truck (due to overuse of reserve battery power, battery loses charge)
- stalling/hesitation while driving (lack of response to throttle input)
- dim or too bright lights (flickering can also happen)
- dead battery (not charging properly)
- burning metal/rubber smell
- battery warning light on dash
- battery voltage reading fluctuating up and down
I have a OBD2 reader installed, so I was able to see the voltage jumping all over the place. From down to 8-9 volts upwards of 15 volts, the readings were erratic. At the same time, I had sporadic loss of throttle response, my main radio screen kept resetting, and slow start ups.
It’s also good to know, I got my alternator tested when I first started to see the symptoms. It came back as operating fine. Unless you’re experiencing issues when testing, it might not show up.
You can test on your own (outside of going for free testing at your local auto parts store), with a multimeter to check voltage, or by removing the positive terminal while the truck is running. This is inherently more risky, but if your truck stalls out, or has a tough time running, you’ll have definitive proof. Just be careful and don’t get shocked.
On my old 4Runner, the alternator failed in one day. This time, I was more fortunate. The first time, I got stranded.
Where To Buy New One
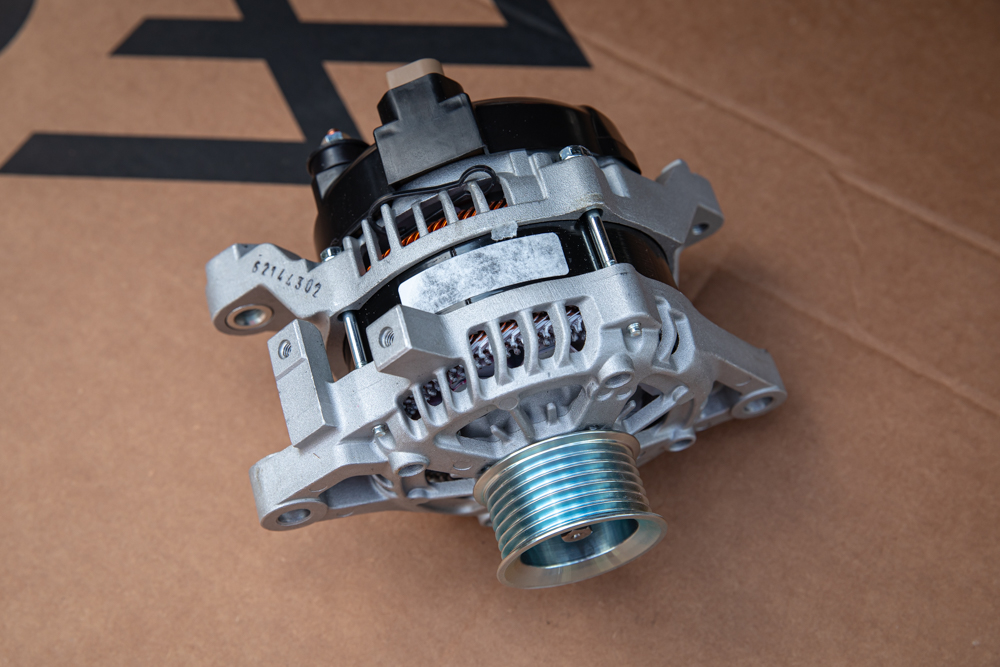
From my research, OEMs run just under $300 from a Toyota parts retailer. This remanufactured one cost me $380 after core exchange. But I needed it asap. Prices for remans seem to run from $300-500+.
If you can, I would also buy OEM parts, just anticipate the delay. To note, only one local store (within 30ish minutes) had stock. Others quoted 3-7+ days.
Which Amperage Does My Truck Have?
3rd Gen V6’s have two different ones available. Double check which one your trim has.
There are two – 100 AMP and 130 AMP. Not sure if you can swap back and forth. Might be something to research if you want more output.
My 2017 TRD Off-Road has the 130 amp.
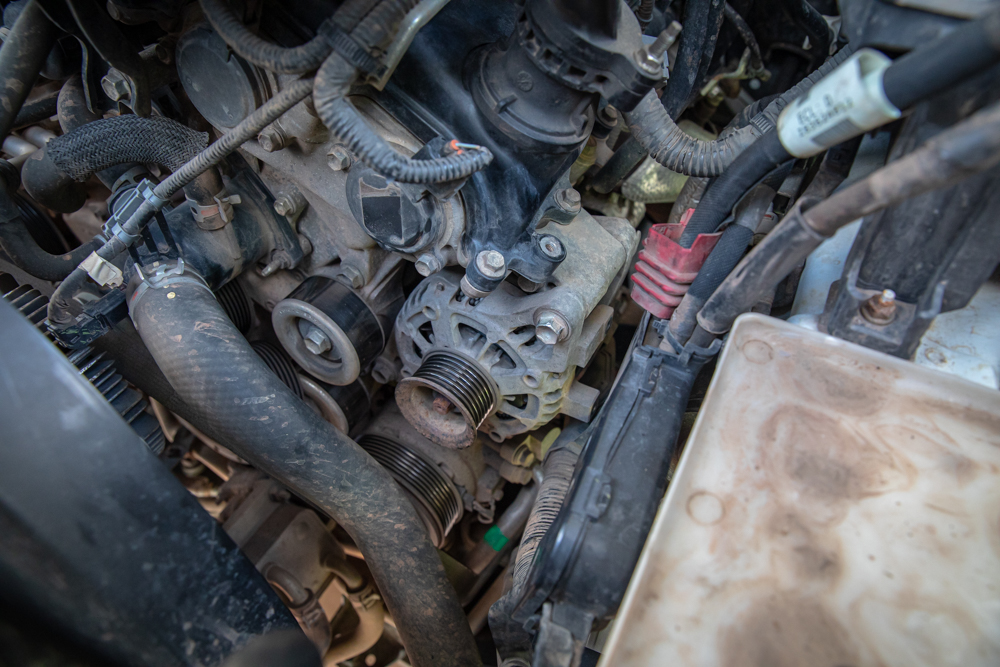
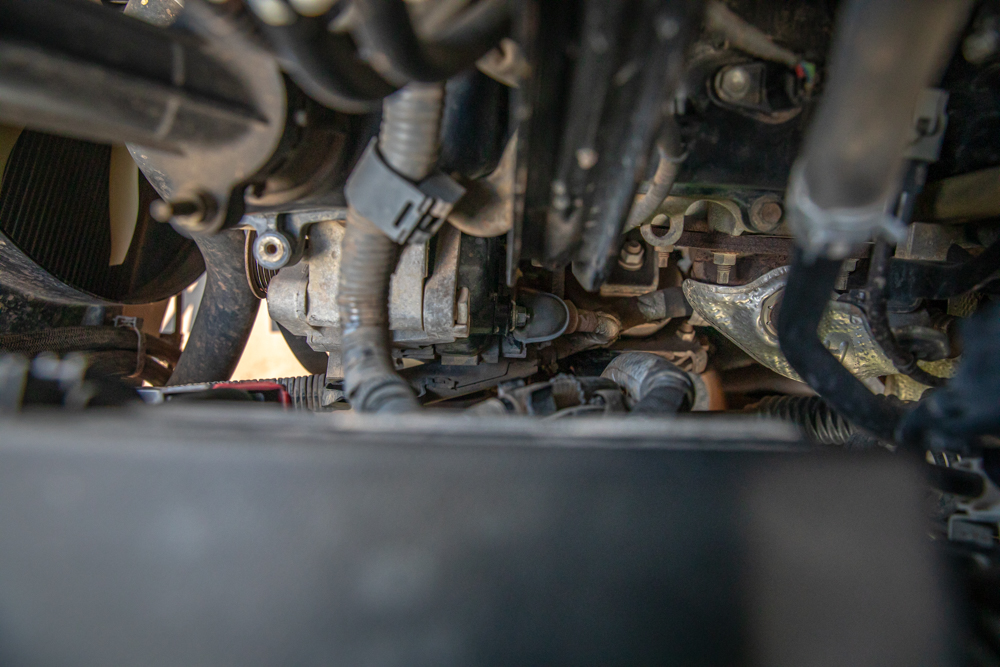
Step 1. Locate Alternator
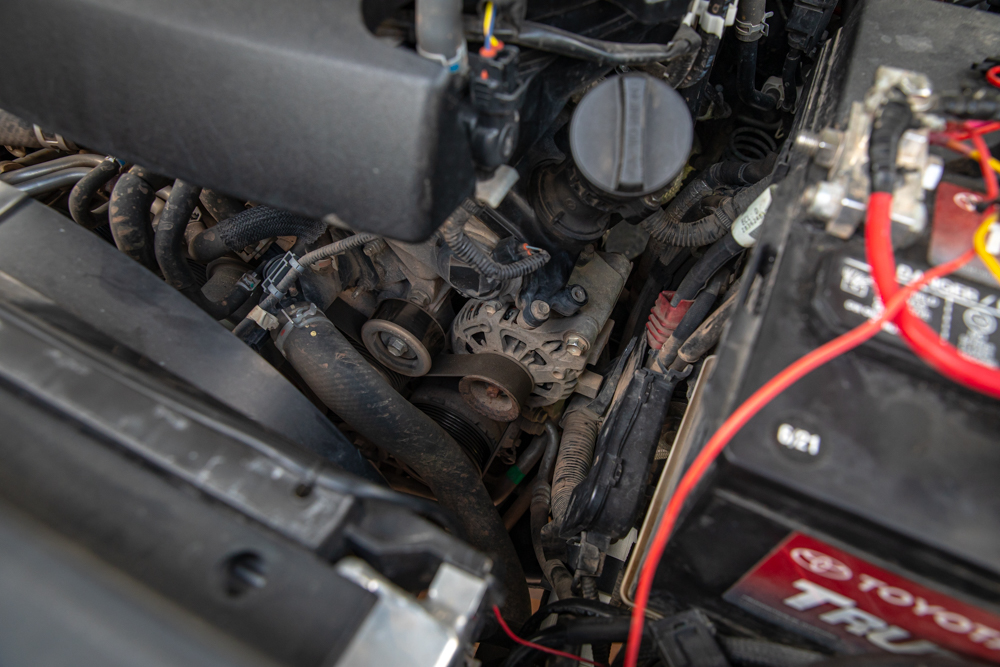
The alternator is located (when facing the front of the truck) on the right side of the motor, underneath the oil filler neck. Seen in the middle of the image above.
Step 2. Remove Battery
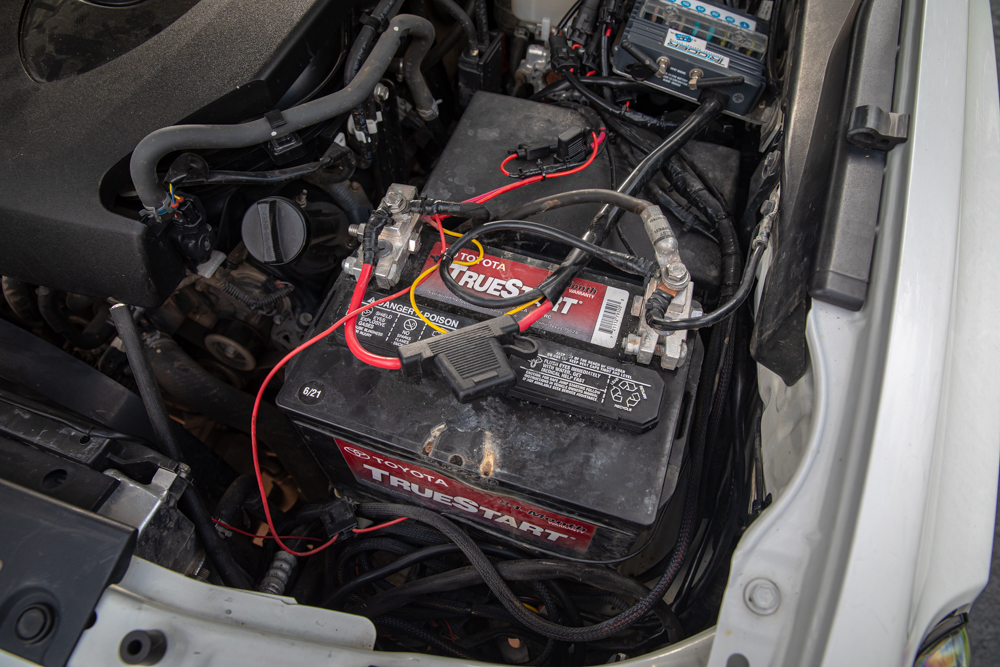
First things first. We need to disconnect and remove the battery. Not only to avoid any accidents but to make access easier.
I have aftermarket battery terminals, so they are a little different than OEM terminals.
Step 3. Remove Serpentine Belt
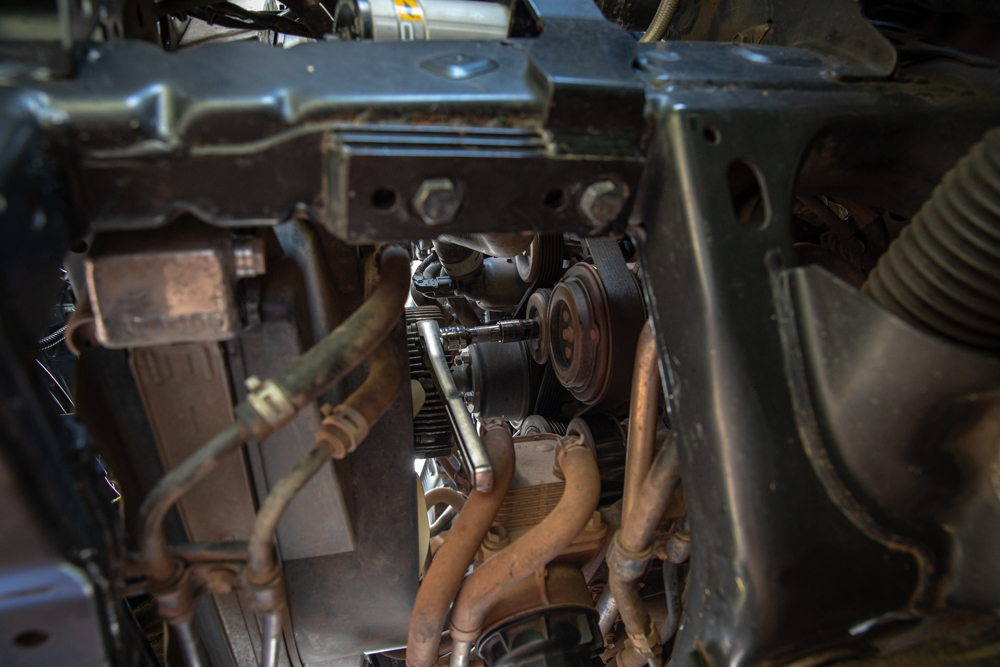
If you didn’t already know, there is a tensioner pulley on the front of the motor. This does exactly what it sounds like – it adds tension and allows the whole serpentine belt to work properly. The bolt here is reverse threaded.
In order to release the tension, you will pull your wrench and 14mm socket counterclockwise. Once you turn it far enough, you’ll be able to slip the belt off and gain access to the alternator. You do not need to remove it completely. Just enough to expose the pulley.
Note: There is a small hole to the inside of the tensioner where you can insert a small Allen key (5mm) to block the tensioner from returning to its normal position. This helps to navigate the serpentine belt easier. I just messed with it until I was able to get the belt off without this step. Up to you if you want to take the time. Technically, this is what is recommended.
Step 4. Loosen Front Bolts
Let’s go over all the connection points that need to be disconnected. First, as seen on the face of the alternator, there are two 14mm bolts.
They can be seen on the top right and bottom left (between the pulleys). Loosen, but do not remove them yet. They will hold the alternator in place while you continue.
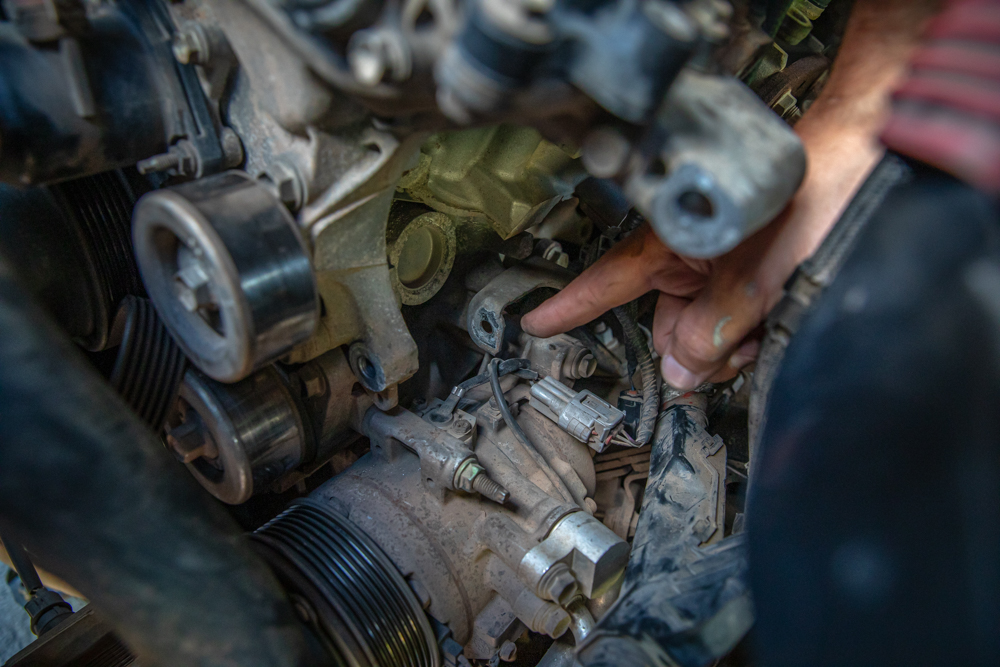
Step 5. Disconnect Harness
The various electrical harnesses that travel near the alternator are bolted via a plastic bracket to the unit. I do not currently have splash guards, but if you do, you will need to remove the one in the front, just under the front of the main UCA bolt.
Remove the two 10mm bolts are seen in the middle of the image above.
For another reference on the bolts in the last paragraph, see the photo above. The way the alternator is being held is how it sits in the engine bay (if you’re looking from the back/side).
The two nuts on the left hand side are the same ones seen in the previous image.
Step 6. Disconnect Metal Bracket
Next, remove the long metal support bracket on the driver’s side of the engine. In the middle of the image above, you can see one of two 12mm bolts that hold it in place.
The bolt on the bottom is hard to see, but with a small socket wrench, access isn’t the worst. Remove this bracket completely, unless you have teeny tiny hands that can fit between the body and the engine.
Step 7. Disconnect Charging Cable
Now, we can disconnect the charging cable at the back of the alternator (this ultimately goes to your positive terminal). You can still see the metal bracket removed in the previous step. I tried to leave it on, but ended up taking it off later than instructed here.
In the middle of the image above, I pulled back the protective rubber cover to expose the charging cable. A 10mm wrench will be used to remove the nut.
Step 8. Disconnect Rear Harness
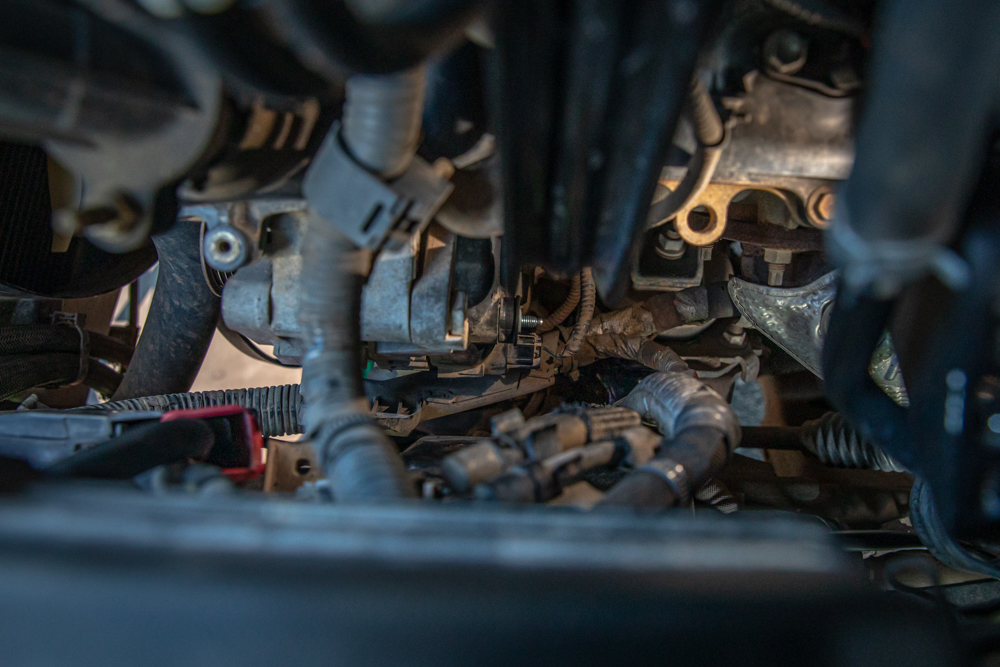
The silver threaded end above shows where the charging cable was previously attached. Right beneath it, there’s a hardness that connects to the back of the alternator. Disconnect this harness.
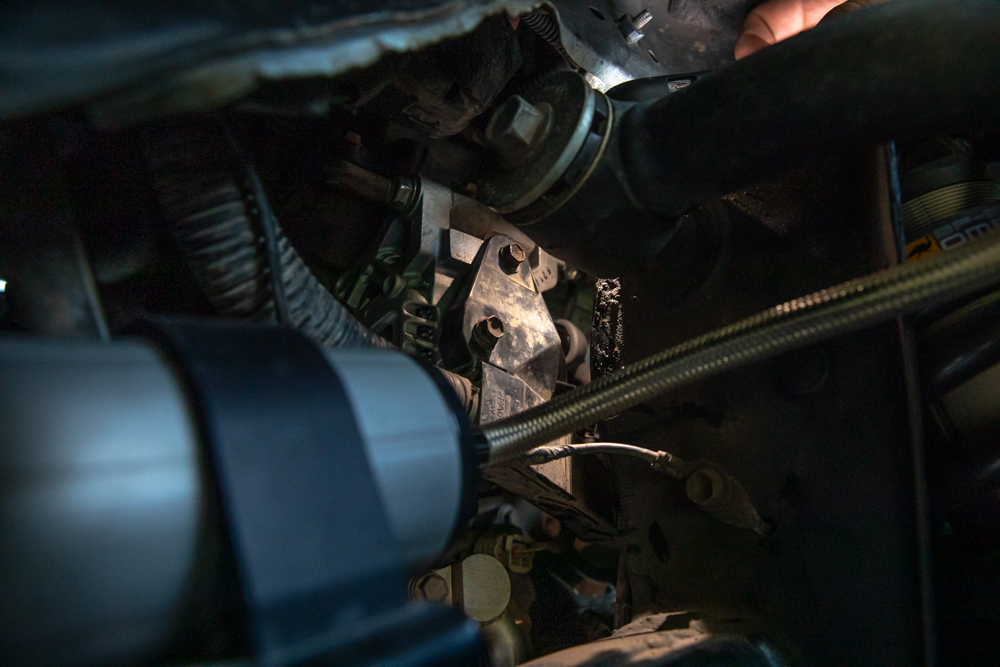
Step 9. Remove Hidden Rear Bolt
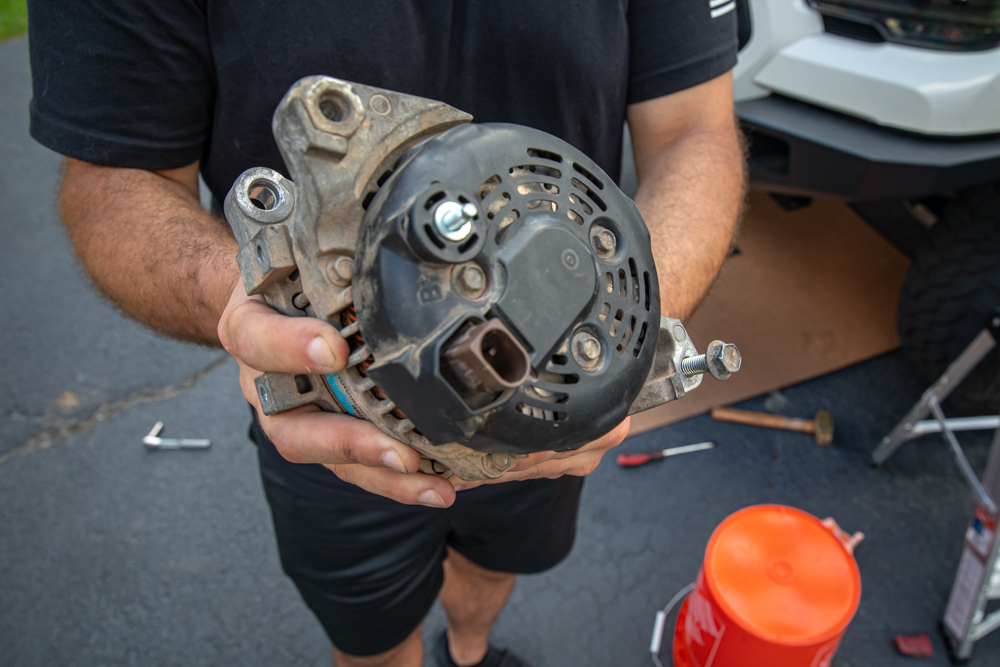
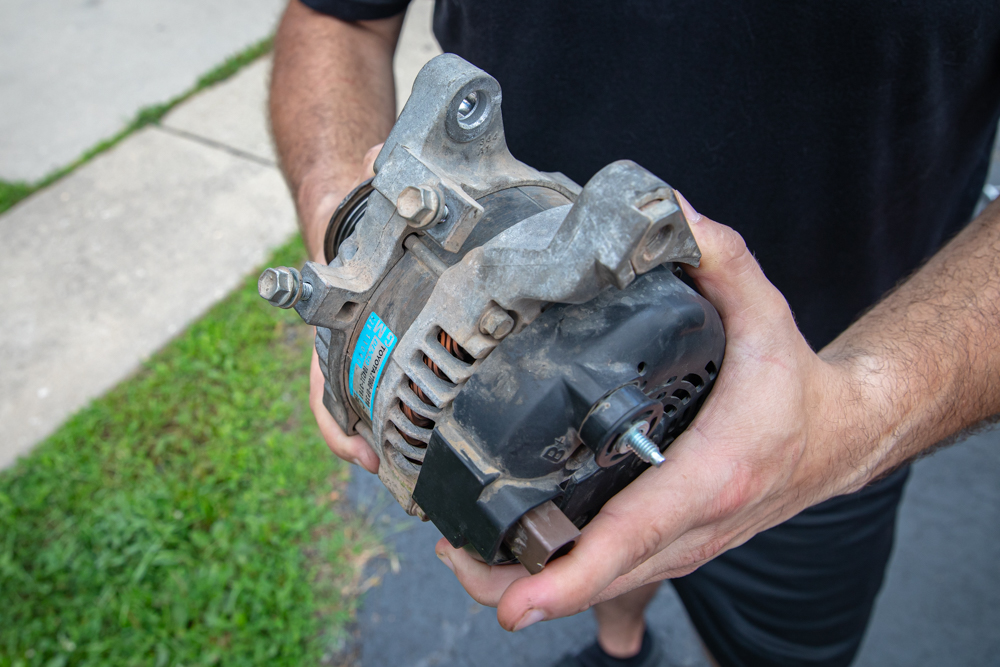
Now this is the annoying part. Pictured above is the old alternator. On the bottom right, you can see a 12mm bolt that holds it to the block.
The problem is, you cannot visualize it. I first didn’t realize 3rd Gens even had this bolt and couldn’t figure out why it wasn’t coming out. After 20 minutes of searching, we knew this bolt was the issue.
To find this bolt, I stuck my hand through the wheel well until I was able to approximate its location. Now, loosening it is a different challenge. I ended up using a 3/8″ drive ratcheting wrench with a deep socket to gain access and loosen the bolt. Then I switched to a 1/4″ drive with an extension and shallow socket to completely remove it.
The photo above shows the bracket through which the bolt above travels in order to screw into the back of the alternator. Yeah, it’s VERY tight. Even without anything installed.
The small bracket that is being pointed out is also attached to the block with another bolt, be conscious of this because if it moves or rotates, you will struggle to get the bolt back through here.
Once you remove this bolt, the alternator will be free.
Step 10. Remove Alternator
Pretty self explanatory. With all the previous steps complete, remove the front mounting bolts and maneuver the old alternator out.
Step 11. Install New Alternator
Repeats the steps in reverse, and you’re all set.
It’s good to note that while we tried several ways to get that tricky rear bolt in, we ended up connecting that bolt first (loosely), before any others.
The rest of the reverse steps can be done in whichever order is easiest for you.
Step 12. Replace Serpentine Belt
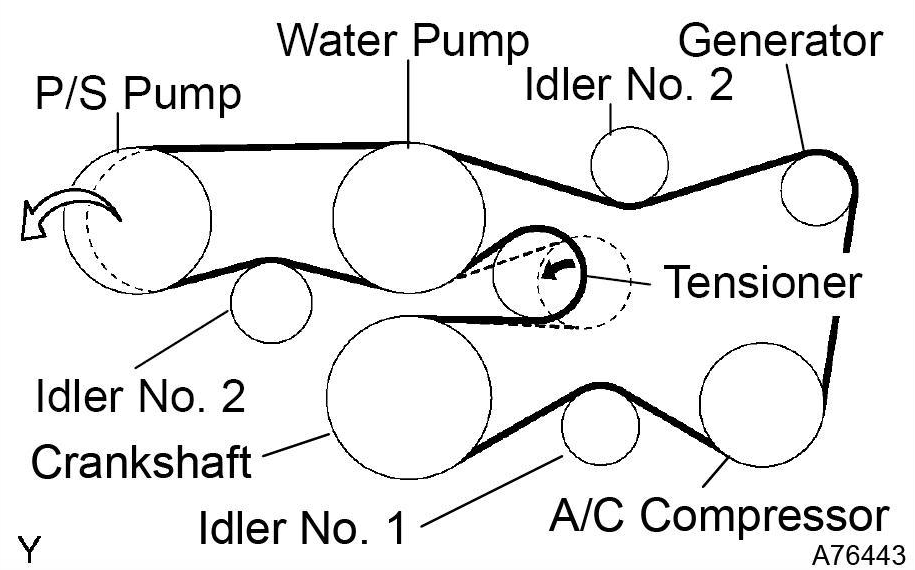
I’ve included a chart above to ensure that you route your belt correctly. It’s tough to connect incorrectly, but nice to have as a guide.
Make sure all the grooved aspects are properly seated on the pulleys. You don’t want to slip a belt.
Step 13. Start Truck & Test
You might need a jump start, depending on how low your battery’s charge is. If you pushed the limits of your alternator (till complete failure) you may even need a new battery. Emphasis on getting to the root of the problem as soon as possible.
Once you start your truck, leaving it running for 15-20 minutes to charge up your battery.
Final Thoughts
Hope that helps! All-in-all, outside of the bolt on the back, this is a relatively easy swap that can be done by just about anyone. Attempt at your own risk.
Awesome walk through, simpl, direct and clear, thank you so much.
I really appreciate your style of getting into the matter directly without lengthy and unnecessary intros prevalent in most how to’s and articles.
Greetings from a fellow (Tacomer) from Dubai.
I think I just coined a new term above🤣
Hey Khalid, glad you found it helpful! This install was quite a pain, haha. Couldn’t find any good resources online so I put it together. Appreciate your support.