
Some maintenance, like changing your differential fluids, or doing your own oil changes, while not necessarily hard, can be messy and time-consuming. But something like replacing a cabin air filter is the complete opposite.
Don’t even bother paying the dealership marked-up rates for this one.
Breathing clean air should be a priority—my filter was beyond dirty. So I’m also guilty of forgetting about this one.
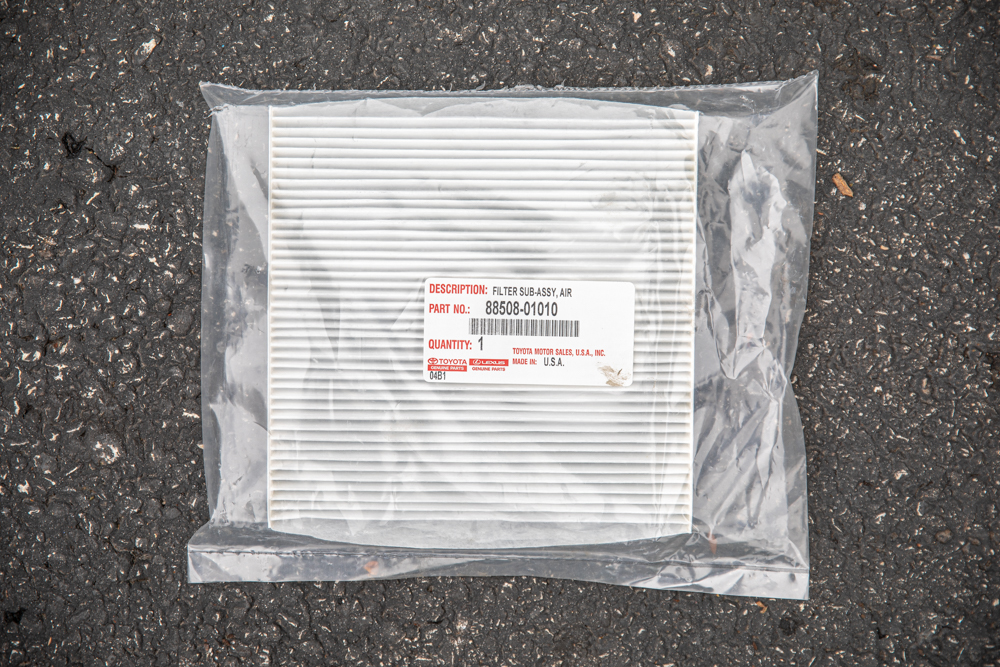
There are several options available. I chose to buy OEM since I found a great price, but there are many options.
Find It Online
- Genuine Toyota: Check Price
- FRAM Fresh Breeze: Check Price
- EP Auto Activated Charcoal: Check Price
Table Of Contents
Why Change Your Filter?
This is pretty much a no-brainer.
Like any filter, they help to ensure that the air coming into your cabin is nice and clean. If you frequent the trail or live in a dry or dusty area, the need to replace this filter is even more important. Toyota recommends that under extreme use, one should be replaced every 10,000 miles. For more typical driving use, Toyota recommends you replace your filter every 15,000-30,000 miles.
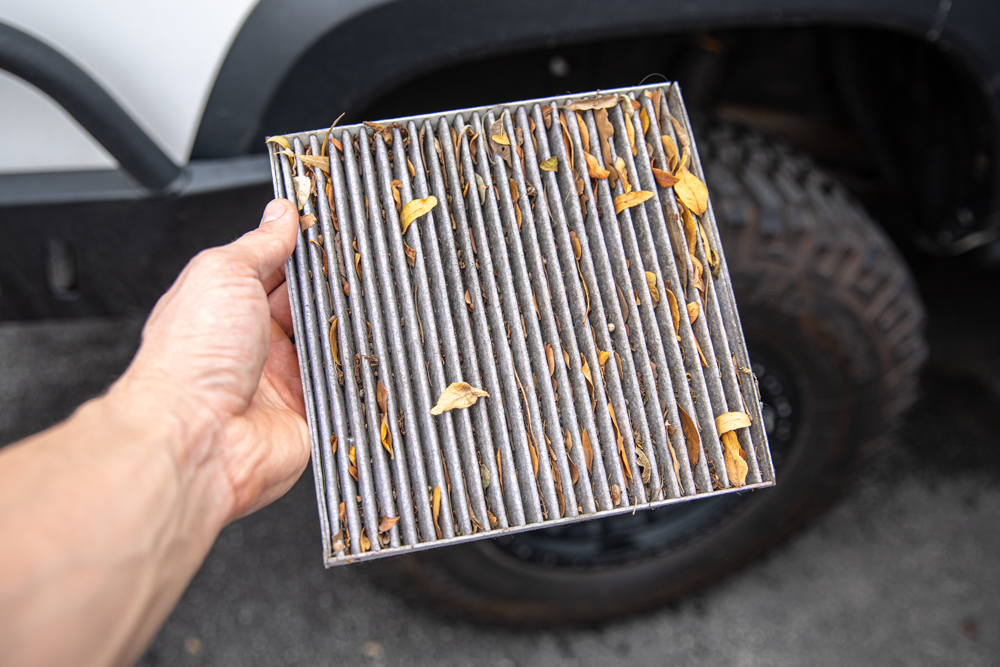
In the image above, you can see how filthy mine was. The filter material was black and full of junk such as leaves and random bits of dust and debris. Obviously, while the fan was spinning air into my cab, the clogged-up filter was not doing its job optimally and my passengers and I weren’t breathing the cleanest air.
I would estimate that this filter had about 30,000 miles on it, with usage trending towards the extreme side of the spectrum. Obviously, I waited way too long to do this, about three times too long. I’m sure that a clogged air filter has an impact on how hard the HVAC fan needs to work too, not to mention impeding the airflow through the climate system. Could a super clogged filter affect your fan down the road, a super costly repair? Potentially. But why test your luck? Just swap it and forget it!
Installation
Step 1. Open Glove Box
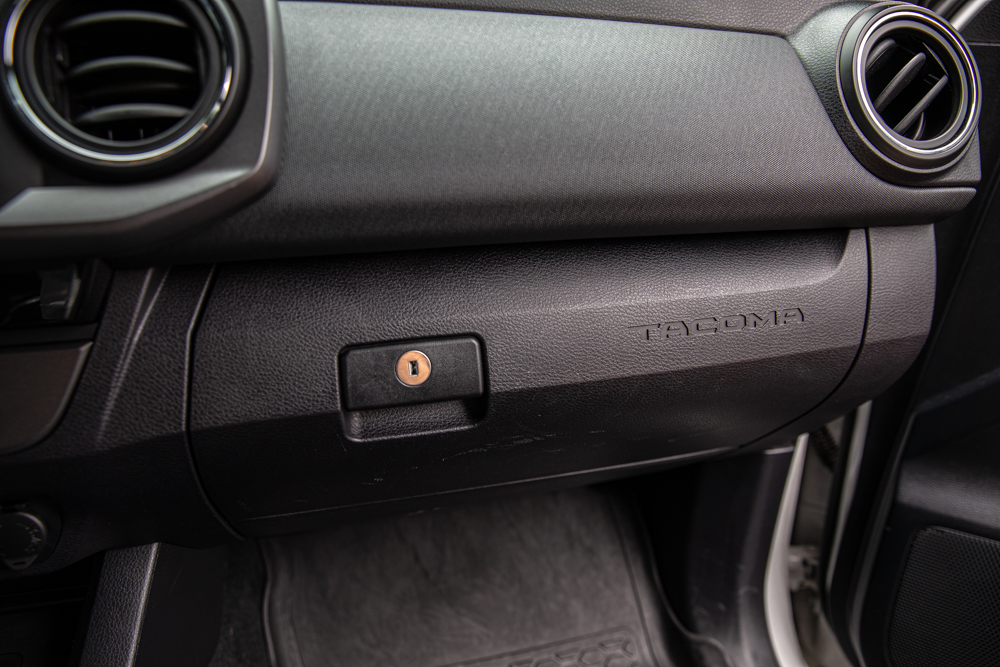
First step. Go to your glove box and open it up. Easy enough!

The filter is towards the back of the glove box.
Step 2. Remove Organizer

Most Tacomas come with some sort of organizer from the factory.
I had a glove box organizer from Vehicle OCD, part of a kit with organizers for the center console.
Regardless of what you have, it needs to come out so you can get access to the panel at the back.
Step 3. Remove Glove Box Panel

Couldn’t be any easier. The panel literally tells you how to remove it.
If you’ve never taken the panel out, it may fight you a little bit.
Step 4. Remove Access Panel
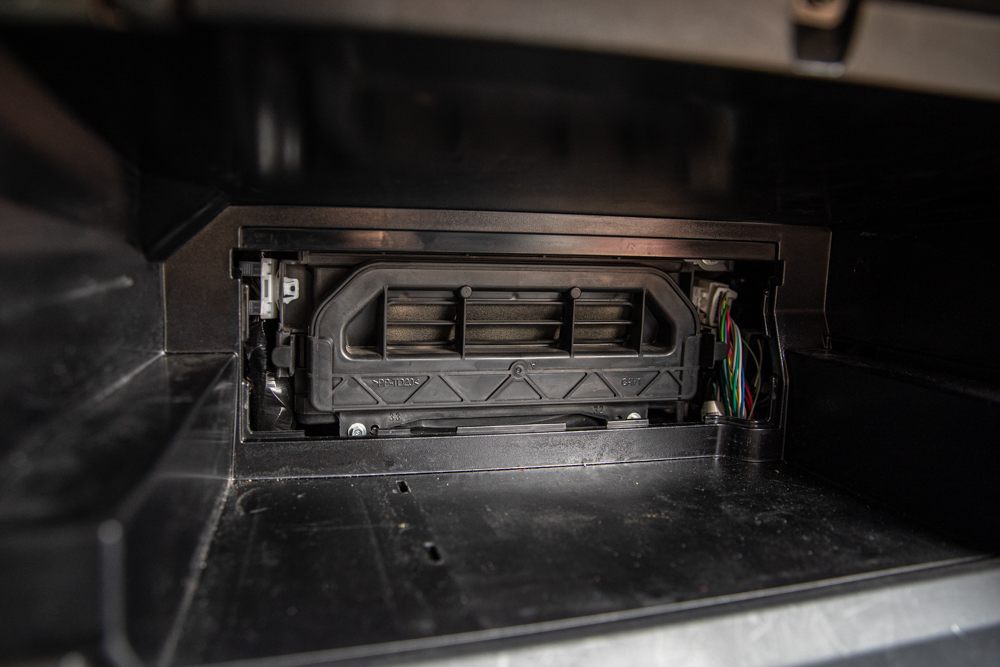
Once the panel covering this area is removed, you’ll see where the fan and part of the HVAC system sit.
Remove the panel to get to your filter.
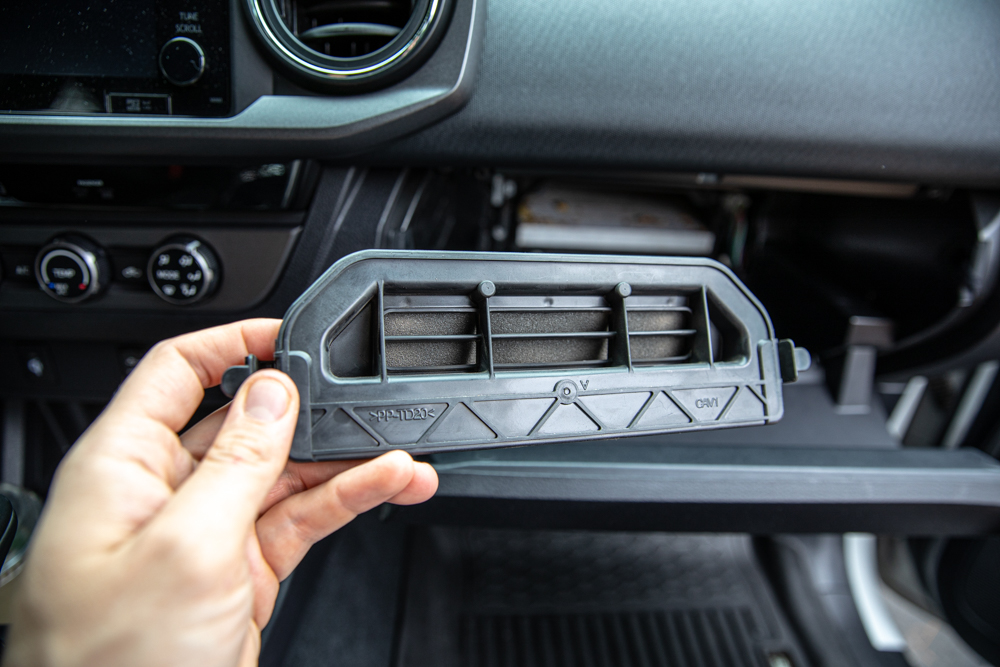
Simply squeeze the two tabs securing the cover on and it should pop right off.
Step 5. Remove Your Old Filter
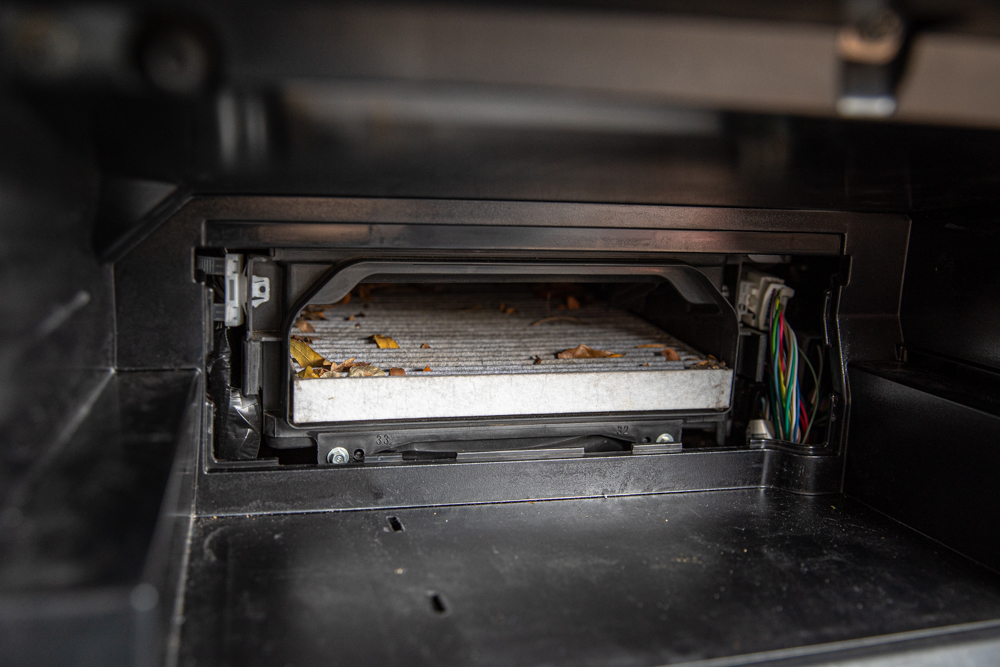
When the last panel is out, you’ll be able to easily see your filter.
Again, look at how dirty mine is…

Pull the filter out and toss it.
This is what the area under the filter looks like. You can see your HVAC fan inside.
Step 6. Install Your New Filter
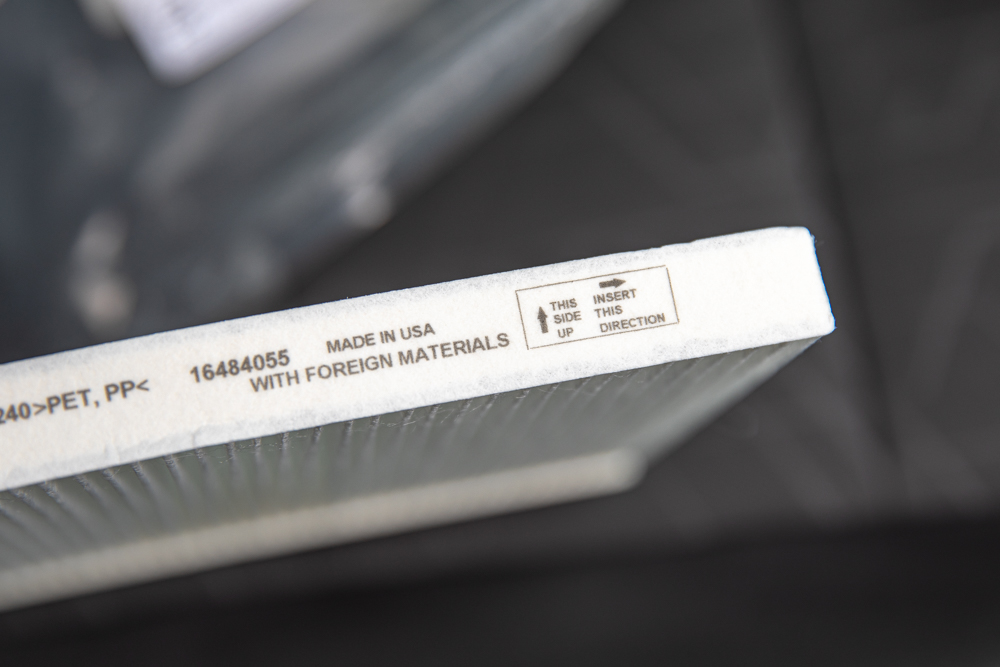
Many filters will tell you how to orient them inside the filter location.
The OEM one has the directions right on the side.

The new filter dropped into its place. And with that, you’re done. Probably the single fast and easiest thing on your scheduled maintenance list.
Just replace all the parts and everything is good to go. One thing to note, be careful and slowly install all the covers. One of them gave me some trouble and had I pushed it too much, I could have broken one of the corners. Slow and steady is the name of the game.
Final Thoughts
If you’ve never replaced yours before, we hope this guide was useful.
Most maintenance is really not that difficult, even swapping most of your fluids isn’t the worst. But bottom line, keep an eye on your air filters and change them at the proper intervals so you can breathe clean air and help to ensure that your HVAC system isn’t working too hard pushing air past a dirty filter. At the same time, save a few bucks and knock it out on your own. You got this!
Excellent – easy to understand thanks so much for doing this. Last time at the stealership it cost me $85 compare to $14 on Amazon.
Thanks, Joe! Glad it was helpful and saved you some money. You owe me a tank of gas! Lol. Kidding, of course.
It would be helpful to show arrow orientation thanks.
Hey Dale, Step 6 shows how the arrows should orient in the filter box.
When changing cabin filter is it ever necessary to clean/dust compartment before reinstalling?
If you find any dirt and debris inside, for sure.