
Before putting this list together, I made sure to put in the blood, sweat, and tears over the last decade of making all the wrong decisions, being unprepared, outfitting my vehicles out of order, and owning items I wasn’t an expert in using.
I’ve found myself in plenty of situations where I knew I should’ve known better. I wanted to provide the write-up I wish I had before I started putting things together.
For reference, I own a 2008 Tacoma with a handful of modifications, bringing my weight to just under 6K lbs, and it gets USED. This is the vehicle I’ll reference for most of my recreational recovery experience. I’ve also operated and recovered a handful of other vehicles – Hiluxes, Land Cruisers, 4Runners, Land Rovers, and HMMWVs.
There are no complete guidelines on what piece of equipment, brand, or model is best. Different products shine in different situations. I’ll discuss my experience in each off-road and overlanding-specific category and share what I use and why. Your vehicle should be outfitted with what you’ve researched and decided is best for your adventures.
So, let’s get prepared and put together a sensible recovery setup. Let’s start with the most important aspect of off-roading in general.
Plan, Learn, Practice

Your vehicle is an extension of yourself, and your build should reflect your planning, preparation, and knowledge of your equipment. Every piece of gear you choose to purchase and install, become an expert at operating, maintaining, troubleshooting, and repairing.
This means research and practice; the internet is your friend. Whether it’s your navigation technology, recovery kit, winch, jack, tire changing, or flat repair, you’re the expert. I learn my gear and plan my trips by running scenarios based on the routes I’ll be driving and preparing accordingly.
Practice, practice, and then practice some more!
This means physically practicing with my equipment to become efficient in employing it. I am training with my GPS and map-reading, lifting with a jack, changing tires, running winch recovery scenarios, and learning to diagnose and repair everything I am responsible for, especially anything that would prevent me from getting home. You’ll inherently learn plenty on the go, but do your best to learn as much as you can before you go.
So, what should you bring to keep you on track and unstuck?
Here are my top essential categories for off-roading and overlanding. These are not in order of priority.
I consider this a complete list of gear to prepare before you go, adjusted accordingly based on where you’re going and what you’re doing. With cost as a primary consideration, your research and scenario-planning will prevent you from taking a trip you cannot prepare for due to cost, etc.
Table Of Contents
#1. Navigation
 Where am I?
I could go deep into this section from wartime and fun-time (not mutually exclusive) experience with communication, navigation technology, and analog options.
The main point is to have what you need, have a backup and a tertiary, and know how to use them. First, I always bring a paper map that covers the area I’ll be traveling and/or adventuring in. This is your most reliable backup if your equipment goes down, but I also use it in conjunction with my GPS.
It’s nice to have a big paper map next to you for reference. You can download and print them from various online platforms through the US Forest Service, or visit a visitor center to purchase one in person. Learn how to read it and utilize it for navigation; this is important for you and rescue personnel if you find yourself in a situation. Before I go, I’ll also download offline Google Maps as an additional navigation and reference option. You can download a selected area from Google Maps that fully functions offline.
Popular Nat Geo Paper Forest Maps
- Lake Tahoe (Bundle)
- Yellowstone and Grand Teton (Bundle)
- Banff National Park (Bundle)
- Grand Canyon National Park (Bundle)
- Moab Trails (Bundle)
- Adirondack Park (Bundle)
There are numerous smartphone apps as well, such as Gaia GPS, and a long list of competitive overland/adventure-friendly GPS systems from names like Garmin, such as the various inReach models and the very handy Overlander, a bigger screen, mountable, and interactive with the smaller inReach models. Check out this review of the Garmin inReach for more information. These allow you to stay connected out of regular phone service, search, share, save routes, pre-plan checkpoints, mark areas of interest, etc.
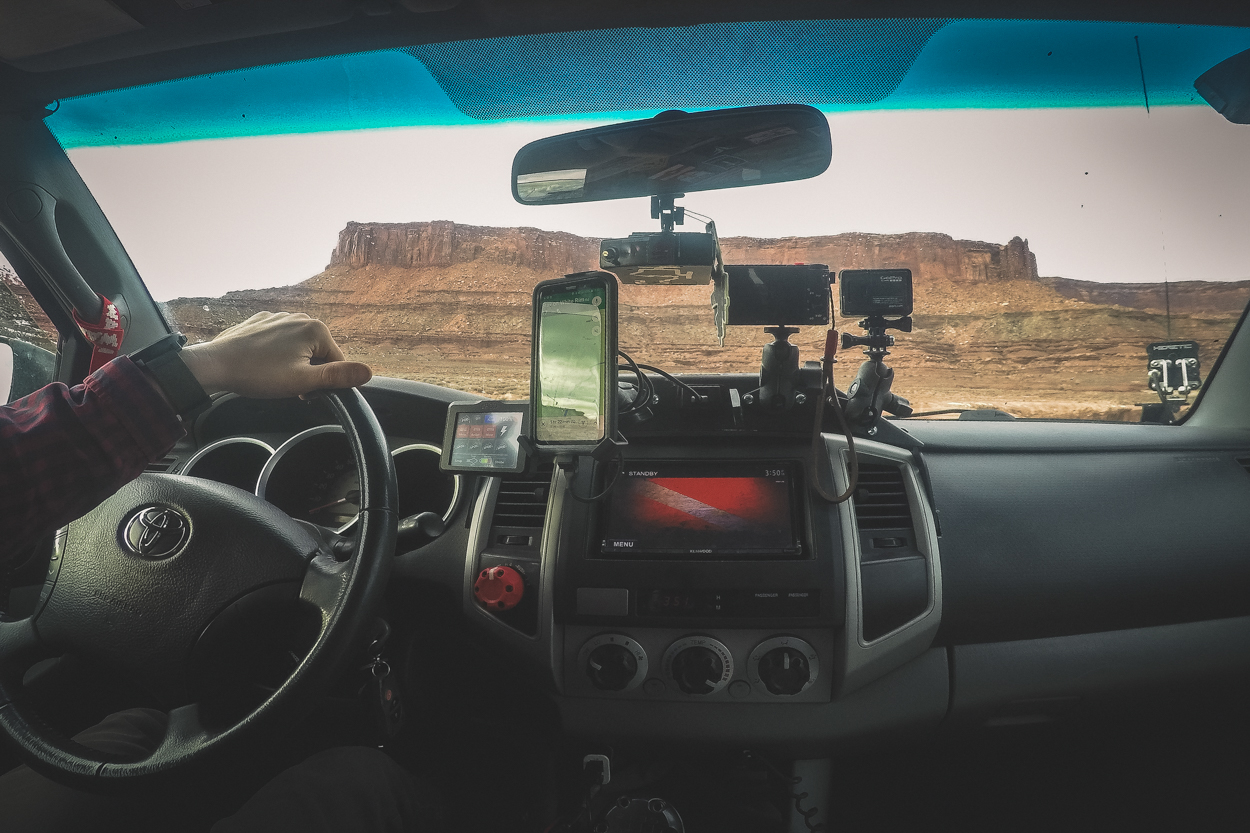
I choose to utilize the Gaia GPS smartphone app, as it’s great for tracking and saving your trips to share with others and allows you to import trips from friends. I also use the Garmin GPSMAP 66i (one of a variety of models with this technology from Garmin) to take care of all my map viewing (it includes satellite imagery and TOPO maps), very accurate multi-GNSS satellite support, navigation, and emergency needs.
You can pre-plan routes, track your progress, mark items of interest, and direct-navigate to items you find on the map. The device also pairs with the Garmin Connect app, allowing you to utilize your smartphone for searching, route planning, and settings, as the weatherproof, non-touchscreen GPS device isn’t particularly intuitive. I use an Expedition Essentials 2TPAM with Mob Armor and RAM mounts to keep everything organized and accessible.
My Setup (organized with an Expedition Essentials 2TPAM, Mob Armo,r and RAM Mounts)
- Garmin GPSMAP 66i GPS Handheld Satellite Communicator: Check Price
- Smartphone with GAIA GPS and Pre-Downloaded Google Offline Maps
- Official and Current Paper Map (refer to links above)
#2. Communication
 Can you hear me now?
Both radio and GPS can meet communication needs; it all depends on who you want to communicate with. For short-range communication, companies like Midland offer CB radios to provide communication between yourself and your team, urgent/emergency communication with the short-range radio network, and emergency and weather information. CB radios don’t require a license and are usually very affordable.
CB or HAM Radio?
The downsides of CB radio are its short range and unregulated network, which will often cause interference when you’re chatting; it is not private. So, for recovery, not ideal, but could be good for group travel. HAM radios are ideal for recovery due to their much longer range, no interference, higher quality, and the ability to use repeaters (amplification frequencies) that support even further distances for reaching out in an emergency. HAM requires a license and a fee, but it’s worth the price. Baofeng radios are another option that offers a great price point for entry into HAM radio.
You can take online ham radio classes through My Offroad Radio.
GPS satellite communication
Garmin inReach is an industry leader in GPS satellite communication technology that, with a paid subscription, allows you to stay in contact off-grid, view topographic maps, navigate, utilize your device for emergency and weather notifications, share your trip, text with contacts back home or others off-grid with you, and provides interactive SOS capability through a global response network, utilizing text messaging directly to response personnel. This is a must if I’m ever going far away from civilization and getting into dangerous situations.
Cell phone signal boosters like WeBoost have gained popularity and could be worth a look to keep your smartphone connected.
Options for Comms:
- Boafeng Radios (Pack of two)
- Midland Radios for Everything
- My Offroad Radio
- WeBoost Cell Signal Booster
#3. Winch and Recovery Kit
 Do I REALLY need a winch?
Winch
A winch is a lifesaver and should be equipped as early as possible, along with a reliable recovery kit. Your setup should meet your needs, but I would recommend recognizable and reputable brands. They’re pricey, but they’re worth it. As they say, you get what you pay for.
Winch Line & Hooks
I prefer synthetic rope for my winch; it’s lighter, doesn’t store as much potential energy under load (preventing snapping), and the synthetic rope doesn’t develop sharp burrs like a steel rope. I utilize Factor 55 accessories for the winch, fairlead, and Flatlink. Factor 55 has other options as well, such as the UltraHook, which is a Flatlink and hook built into one.
Recovery Kits
I use an ARB Essentials recovery kit as it has just about everything I need in one place. I’ve added to it over time. There are also a few heftier recovery kits from Factor 55, including an awesome heavy-duty weatherproof waxed canvas bag made by a Colorado-based business, Adventure Tool Company. The entire kit is made in the USA. There are other recovery kit competitors, such as Warn (which now owns Factor 55). Each kit has a different list of items, but most cover your needs. I add additional gear based on where I’m going.
Straps
I’ll bring tow and recovery/snatch straps. They’re different. The tow strap usually has hooks built in and is used strictly for towing. Your recovery straps will have loops on both ends and more give/stretchiness to utilize vehicle-to-vehicle recovery, hence the name “snatch strap,” as in snatching your truck out of whatever you got yourself into. A kinetic rope is also an option for this recovery application; Factor 55 makes a great one. Make sure the weight of the straps meets your needs.
Tree Savers
I bring a tree trunk saver to safely use my winch on a tree. Never use your winch cable bare on a tree; it’s bad for the winch and the tree. A choker chain is also an option, functioning like a tree trunk saver but for more abrasive situations, such as pulling a downed tree branch that could damage a strap.
Shackles
I bring a few three-and-a-quarter-ton shackles, which are hefty enough for my Tacoma; soft shackles are an additional option. I usually keep at least one connected to the front and back of the truck at all times for ease of use and less to fiddle with in a recovery situation. I added two Warn shackles to my winch purchase.
A winch line dampener will prevent a major incident if the winch malfunctions (strap or cable snapping).
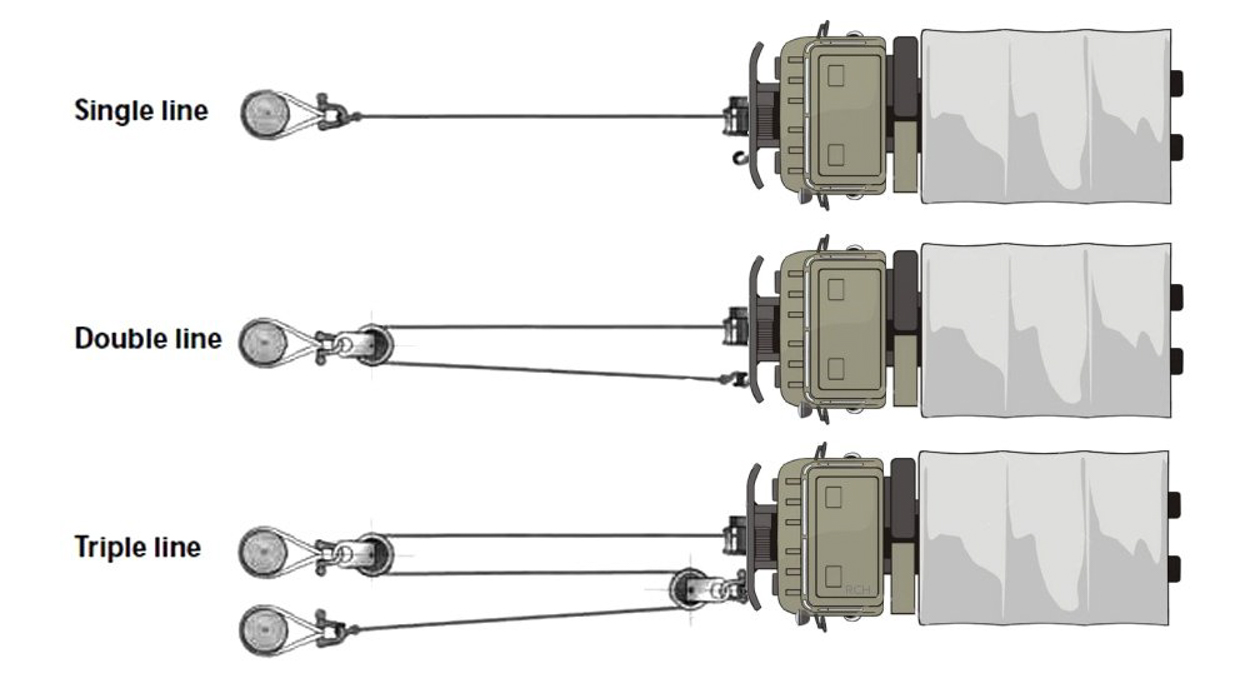
Snatch Block
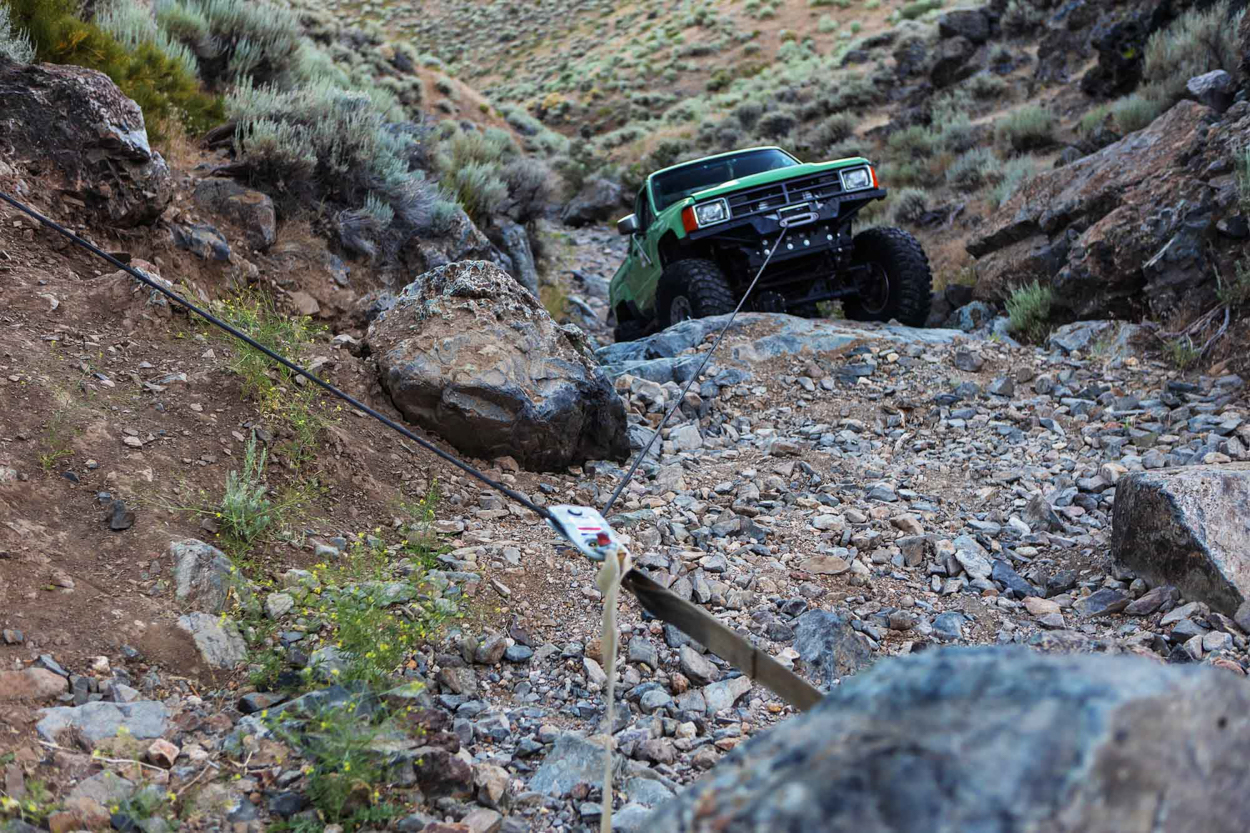
A snatch block is great for solving those odd recovery situations, allowing you to utilize angles and multiple points of contact to recover yourself or another vehicle. Last year, I was in a ditch on a snow-covered Colorado trail, facing away from where I needed to go. The snatch block with a setup like you see below did the trick. The diagram above gives you an idea of how to utilize the angles. You’re only limited by your imagination and the stress of the equipment. Learn the limits of your winch and cable and practice.
I also bring options for recovery without trees, such as the Deadman Off-Road Earth Anchor, which allows you to anchor to flat ground (even sand), big rocks, or anything you can think of… a Utah lifesaver.
My Setup
- Warn VR10 w/ Synthetic Rope: Check Price
- Factor 55 Fairlead: Check Price
- Factor 55 Flatlink: Check Price
- (2) Warn Epic D-Ring Shackles: Check Price
- ARB Essentials Recovery Kit: Check Price
- Deadman Off-Road Earth Anchor: Check Price
#4. Off-Road Jack
 Who should I go with?
I prefer utilizing a Hi-Lift AND a floor or bottle jack, depending on where I’ll be going. Each jack has its pros and cons, ideal uses, dangers, and extra unique capabilities.
The Hi-Lift jack can be used to change a tire if needed, but it shouldn’t be your first choice. Having a more stable, off-road floor jack or bottle jack is preferred. Think of the floor jack and bottle jack as your repair go-to, and the Hi-Lift as your recovery go-to. Your kit should also include a couple of jack stands. Don’t conduct a repair or tire change with your vehicle sitting on a jack.
Why Hi-Lift jacks?
Hi-Lift jacks are made in the USA (Indiana), and have been around and reliable for over 100 years. The Hi-Lift with an off-road base will take care of you in just about any situation, assisting in various recovery scenarios. The Hi-Lift can even be utilized as a manual winch; a slow one, but it works. The most important thing you must do with the Hi-Lift jack (before finding a cool place to mount it) is learning how to use it. Know the mounting points and risks, and become an expert at using it in its variety of applications – practice! I bring along the Lift-Mate for direct-wheel use and the Off-Road Base to keep it stable on off-road terrain.
The size of the Hi-Lift depends on your vehicle. I still have my cast-steel 48”, which has served me well so far; but I’ll upgrade eventually. Some argue, which I agree, that bigger is better, and opt for the 60”. Basically, the larger size will give you more capability in odd situations where the jack will need more travel, such as sinking in the snow/mud, and odd angles. If you can afford it, I’d also recommend the All-Cast or X-Treme versions, simply because of their construction (all-cast construction/zinc-coated) that will provide much more weather protection and longevity. I think I may have to get the P.J. Harrah Signature Edition, although… don’t look it up, because, like me, you’ll probably want to buy it immediately.
Floor Jacks for Off-Road Use?
A floor jack, or off-road jack, especially one with bigger wheels for all-terrain use, such as the Pro Eagle models, is great for repairs, such as the aforementioned tire-change scenario, as they are much safer for this application than a Hi-Lift. The benefit of this style is the ability to use it in hazardous conditions and wet/soggy terrain, as well as the quicker application with the ability to roll the jack underneath the vehicle to your mounting point. However, they take up a lot of space and can be expensive.
Bottle Jacks
Many people favor bottle jacks, such as the USA-made Safe Jack, for their simplicity, reliability, and safety. Their straightforward application is great for various repair and tire-change scenarios, and they don’t take up too much space. The bottle jack begins to falter in wet/soggy terrain, but a baseplate can mitigate this. You’ll get dirty using it, as the bottle jack often requires climbing underneath the vehicle, so prepare accordingly with a tarp or a change of clothes.
The floor and bottle jacks are pretty straightforward, but there’s plenty to learn. Know your mounting points, practice with the equipment, and change a tire or two to get familiar with them.
Traveling with both the Hi-Lift jack and either a floor/off-road or bottle jack will allow you to utilize whichever piece of equipment is best for your particular situation, and prevent you from putting yourself and your equipment in danger.
My Setup
- Hi-Lift All-Cast Jack: Check Price
- Hi-Lift Extreme Jack: Check Price
- Hi-Lift Lift-Mate: Check Price
- Hi-Lift Off-Road Base: Check Price
- Safe Jack Bottle Jack: Check Price
#5. Shovel and Axe
 It seems gimmicky. Do I really need them?
Any useful piece of equipment can be gimmicked with tacky mounting options and a lack of wear. But these are great to have, and even better when they’re easily accessible.
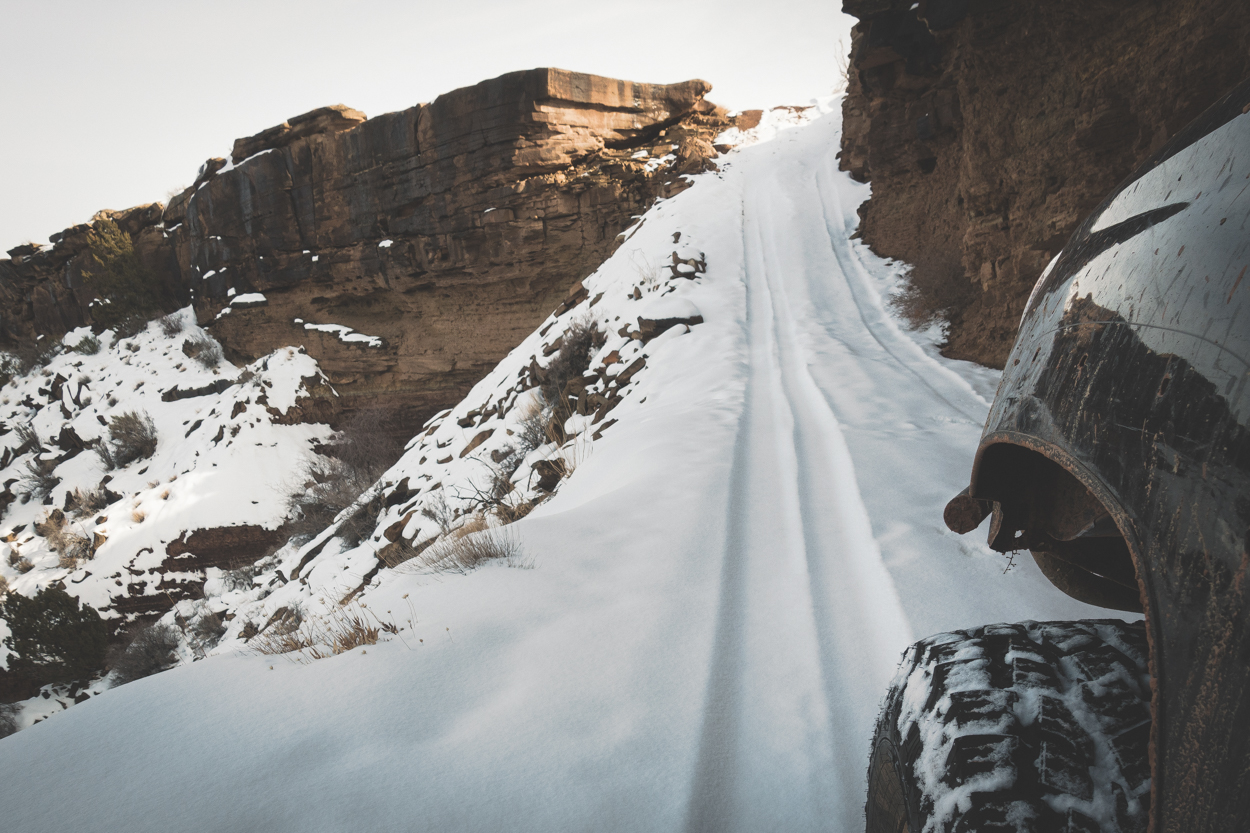
These off-road specific shovels and trail tools are your facilitators. A solid, weatherproof (this is a must) shovel and ax are what will assist in making recovery possible, whether it’s digging in front of your tires to take the strain off of your winch, making room for your traction boards, digging in your Deadman Earth Anchor, digging away debris for your Hi-Lift or off-road jack, piecing a fallen tree branch, or digging away snow or rocks from a steep incline. The tools are also great for preparing camp, digging a fire pit, chopping firewood, clearing out a place for a ground tent, tables, chairs, and anything related you can think of.
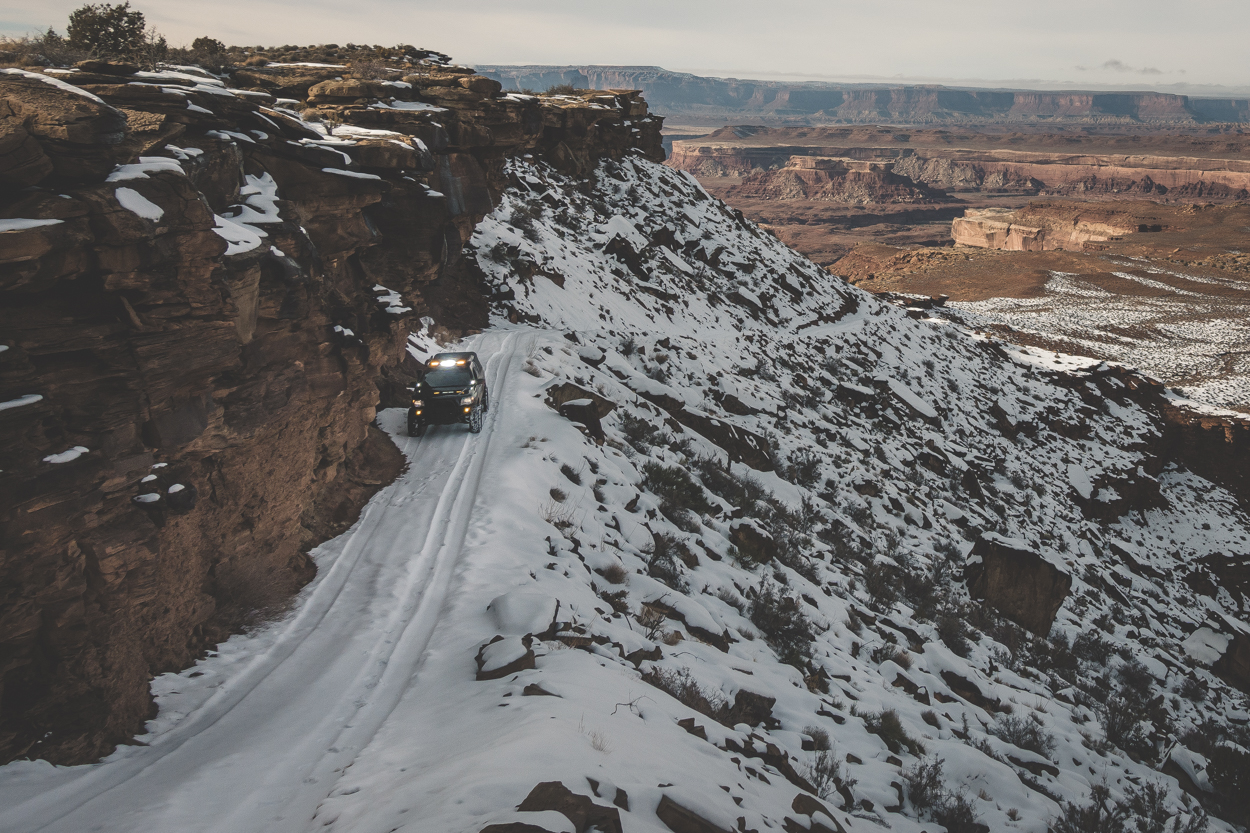
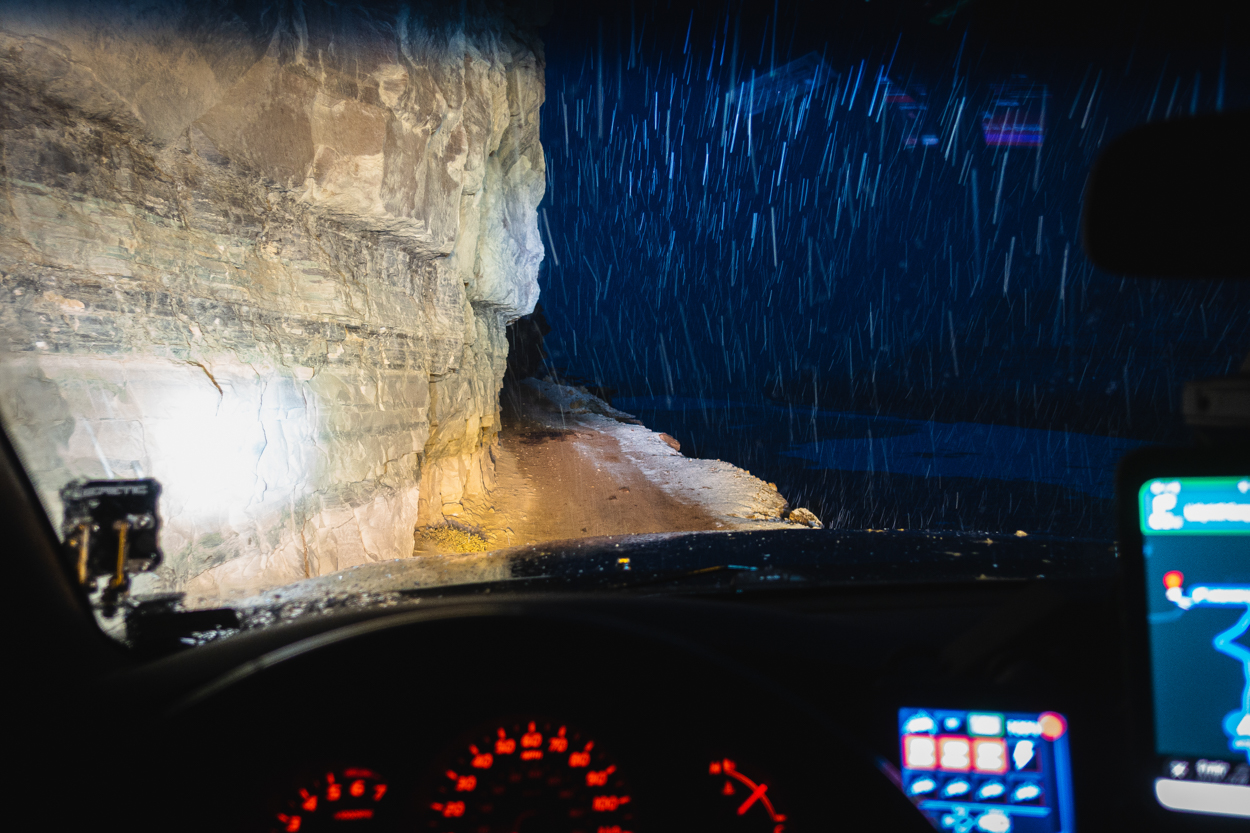
Flashback to Utah 2019, making my way through White Rim Road in Moab, Utah, during the winter. I came up to a section of trail that was very steep, and heavily covered in snow, on slick rocks. I made an initial climb attempt and found myself SOL, with a 1,000-foot drop on my left. I made my way down, got the shovel out, and dug away all the thick snow along two tire paths to the top of the incline, removed some debris, 4LO, and up I went.
It doesn’t matter what you get. The most important thing is that the products are reliable and weatherproof. I recently replaced my weathered ax and shovel with equipment from Krazy Beaver. They produce a high-quality toothed shovel (with shovel guard), which is made in the USA, that comes with a Fiskars axe as a package deal. I’ve used it on trips through Utah, Colorado, and Arkansas, digging snow, dirt, and mud, chopping up fallen tree branches, and prepping a campsite. So far, so good.
There are lots of options out there though, you can find a great guide on shovels here for more information on the best options.
Chainsaw?
A good ax upgrade is a chainsaw. This is for when you’re really getting into it. Two camps argue for either battery or gas-powered. I would never own an electric chainsaw at home, but I can see the benefit on the trail if you can support a charge. I also see the argument for the reliability of gas-powered, especially since you’re carrying extra fuel with you.
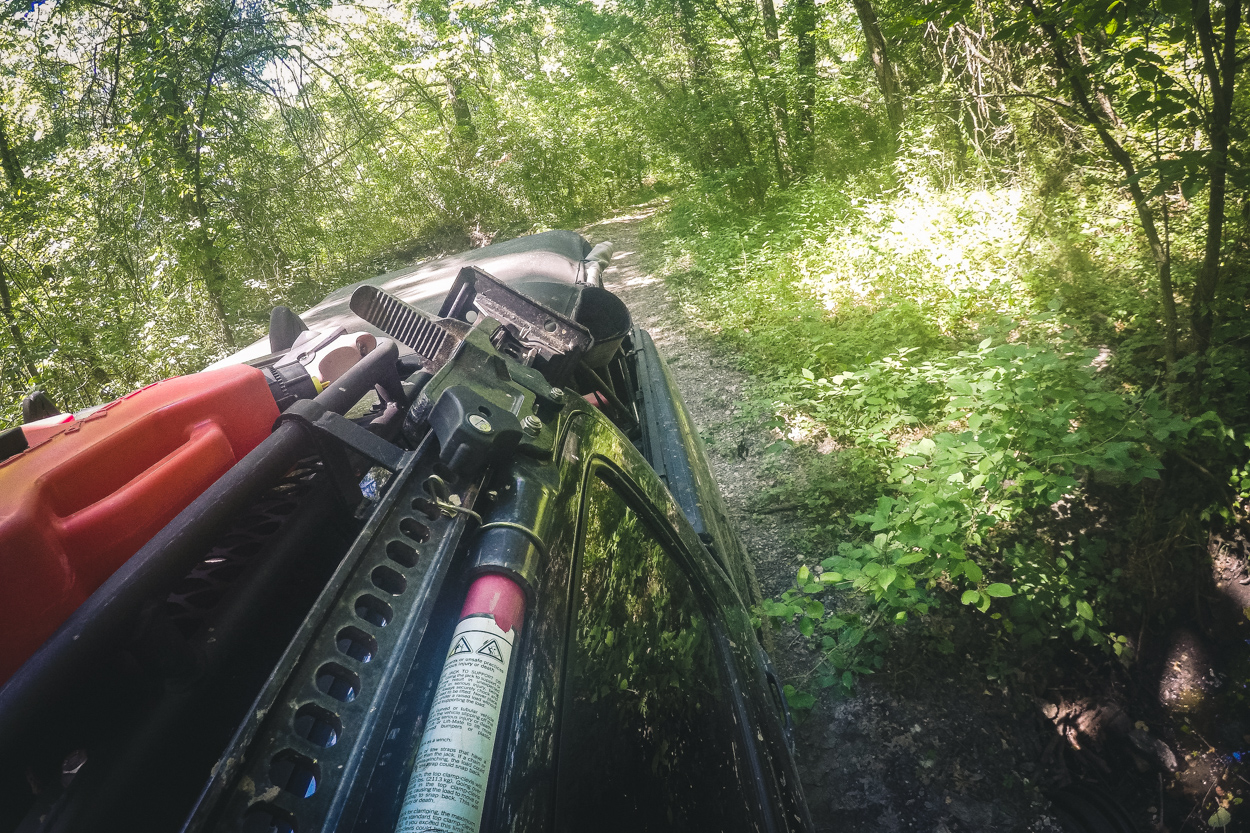
Mount your gear wherever makes sense to you. I prefer having them on the bedside with lockable strap-mounts, to keep them out of the wind, and somewhat out of sight. As long as they’re easy to get to, you’re good to go.
My Setup
- Krazy Beaver Shovel: Check Price
- Mounting Brackets: Check Price
- Mounting Clamps: Check Price
- Fiskars X25 Splitting Ax: Check Price
Other Options
- Agency 6: Check Price
- Bond Min Shovel: Check Price
- DMOS Shovel: Check Price
- Mounting bracket: Check Price
- Shovel Tec: Check Price
- Mounting Brackets: Check Price
- Mounting Clamps: Check Price
#6. Traction
 Is it required to mount these so everyone can see them?
Traction boards/mats are unique, and their uses are fairly endless. So, get a set, or make a set, and learn how to use them.
The traction boards, whether it’s MAXTRAX from Australia, the American-made ActionTrax from Kansas, or something you built at home, they’re all good for the same purpose. This piece of equipment is versatile for both solo-use, and as a facilitator to other recovery methods. A quick search online of the various uses of the traction boards will bring up a variety of uses.
Throwing a couple of boards down under your compromised tires can sometimes do the trick, often with some shovel digging to get everything in place. They’re also good for use in conjunction with a winch or strap recovery. Some of the pre-fabbed versions have both all-plastic and options for metal teeth (don’t spin your tires on these) with a handful of colors and mounting options. They’re fairly limitless in multiple applications if you take the time to research, learn, and practice how to use them.
Again… practice, practice, practice.
Finally, we have tires. There are plenty of great tires out there; just make sure you’re not running anything worn down. Check your tires before planning a trip, especially if you use off-road tires on technical roads frequently. Trail4Runner.com has a pretty good tire buying guide if you need assistance with which tires to buy.
My Setup
- 2 Sets of ActionTrax: Check Price
- TOYO Open Country A/T: Check Price
#7. Tools and Spares
 I have a multi-tool, will that work?
First, yes, definitely bring one of those.
I’ve seen plenty of versions of tool kits, whether it’s a pre-assembled recovery set from one of the more recognizable companies like Adventure Tool Company or Craftsman, a self-organized set of hand and power tools, or a combination of both.
In the beginning, I was somewhat at a loss. My main issue was not understanding my vehicle enough to know what I should bring or how to use the tools properly. So, I began to learn and continue to learn as much as possible.
Put in the time to understand how things work with your truck
What are you putting at risk while off-roading? What parts of the truck are most vulnerable? How do you address various problems? Tires, battery, suspension, fluids, belts and hoses, electrical, etc. If you’re beating your vehicle up, what can go wrong? Do I know how to deal with that if it does? Do I have the tools I need?
Carry a Tool Kit and Tool Roll
Then, get your kit together. Get a full-size spare. I bring an electric impact wrench that can handle lug nuts and a tire iron. The impact wrench with various attachments is great for various uses throughout the vehicle. The tire iron will save you if the lug nuts are too tight for the impact wrench or your equipment dies. Don’t forget your wheel-lock key if you have one!
Always bring extra fluid. This is an easy way to address radiator or power steering issues. You’ll have extra water for your travels, which can be used as emergency coolant to get you out of a bad situation. Don’t forget to bring a funnel.
Good brands for off-road and overland bags to consider are Step22 Gear, Blue Ridge Overland Gear, Adventure Tool Company, Kifaru, 5.11 Tactical, Last US Bag, and the Overland Gear Guy company.
What tools exactly?
Address the basic tools, such as appropriately sized wrenches, ratchets, sockets, socket extensions, spark plug sockets, drive adapters, Allen keys, pliers, an adjustable wrench, wire cutters, locking pliers, and a hammer!
Electrical spares, such as spare fuses and bulbs, are important. Bring a fuse tester, voltmeter, jumper cables, and a jump starter. There are SO MANY jump starters, with popular brands such as NOCO and Weego. Neither is very expensive, and both have great reviews. Just make sure the specs match your vehicle, and don’t forget to charge it before you go.
Bring some, or many, zip-ties and electrical tape. Also, bring along extra hoses and belts. Learning various repairs and quick fixes could be a lifesaver when getting home.
A tire repair or plug kit is great. Learn how to use it before you go! I use the one made by Power Tank.
Product Options
- Full-size Spare and Wheel Lock Key
- Extra Fluids, Spare Parts
- Adventure Tool Company ShopRoll (great starting point for essential tools): Check Price
- Adventure Tool Company Gear Bag (filled with essential hand tools): Check Price
- Milwaukee Impact Wrench
- TCompact Tire Iron: Check Price
- NOCO Boost Plus GB50: Check Price
- Power Tank Tire Repair Kit: Check Price
- Metal Zip Ties
- Tessa Tape
- Step 22 Gear Tool Roll: Check Price
- Step 22 Gear Box: Check Price
#8. Mobile Air
 Don’t they have air at the gas station?
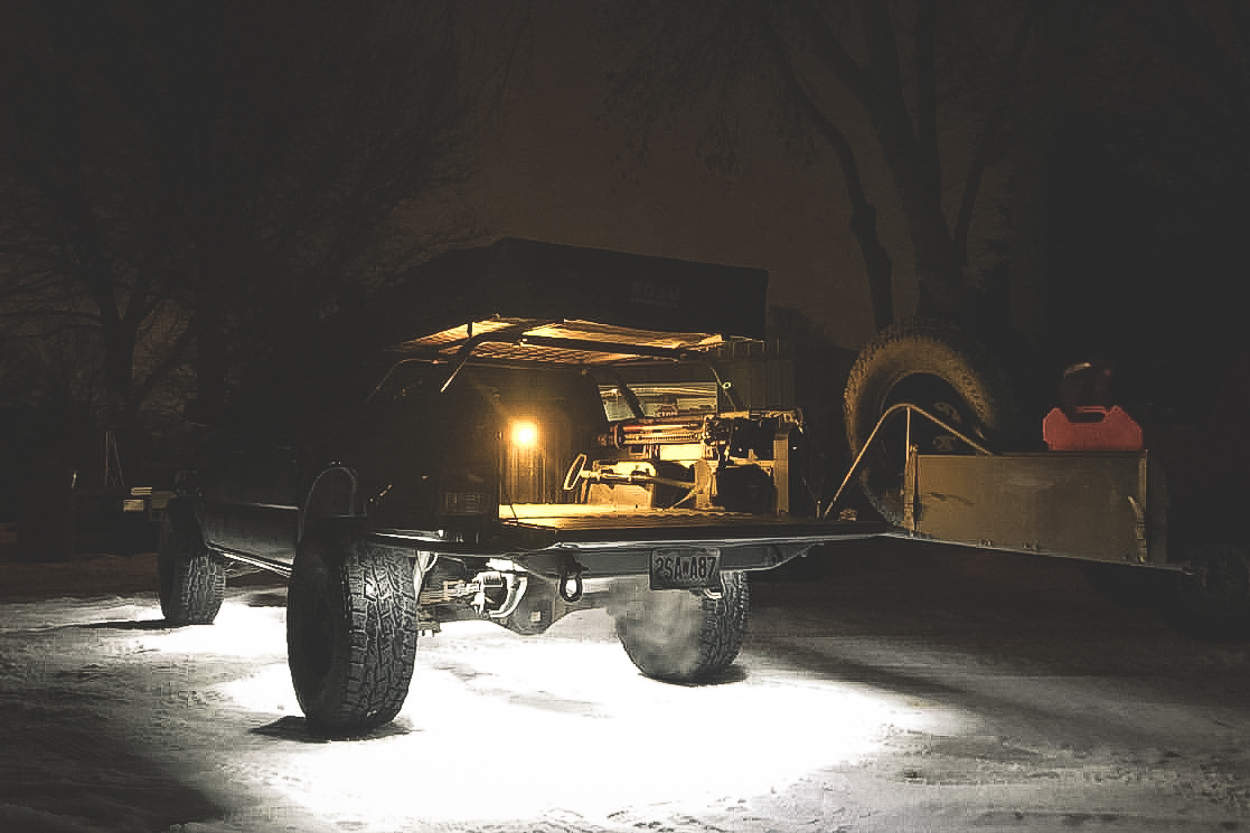
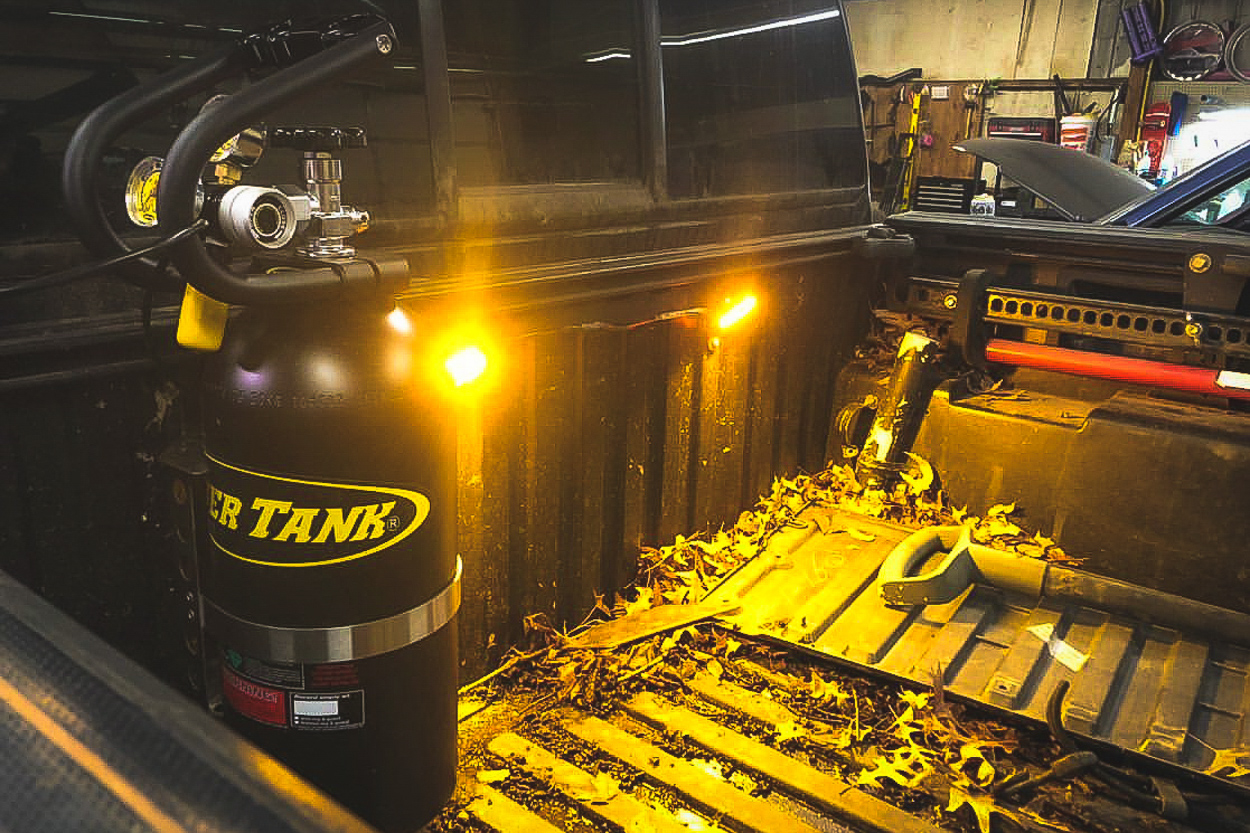
This was one purchase that set me up for self-sufficiency in the middle of nowhere. Having on-board air capability addresses a series of needs. This allows you to adjust the air in your tires throughout your trip, a source of air if you have a flat and conduct a tire repair, and a great source for clearing debris when doing work, cleaning tools, and prepping recovery points.
There are various options, portable and stationary. I use the Power Tank, which is made in the USA. I have it mounted in the bed, accessible from the driver’s side. It’s portable, looks like a small SCUBA air tank, and allows you to utilize it anywhere, like with other vehicles, whatever you need. They offer packages that include all the accessories, mounting hardware, hoses, and protective covers. It’s refillable, and each tank size can be recommended based on your tire size and how many refills you want to travel with.
There are also other options, such as the ARB High-Performance Twin On-Board Air Compressor that I’ve seen mounted both under the hood, and even, thanks to Expedition Essentials, utilizing the Tacoma’s bedside storage as a compressor mount. Being a compressor, it’s less portable and requires power, but doesn’t require refilling.
Product Options
- Power Tank 10lb Track Pack: Check Price
- ARB Twin Compressor: Check Price
- Viar 400p: Check Price
- 4-way Inflation Kit: Check Price
#9. Auxiliary Power
 My battery should be okay…
I snuck this one in as a preventative measure to prevent the need for recovery and power the gear that will keep you moving. Make sure your truck can power what you’re installing. Lights, winch, on-board air, GPS, phone, screens, fridge, power station; think of everything you’ll be powering while the truck is on and off. The battery jump starter should be the last resort for recovering a dead battery.
I currently run a singular Odyssey 65 battery to power what I’ve got going on in the Tacoma; Heretic lights, Expedition Essentials 2TPAM powered accessory mount that usually has a phone, Garmin GPS, GoPro, and one or two other things charging. This also has enough juice to run my various lights when the truck is off, allowing me to utilize the AC bed outlet. However, the last one always makes me nervous since it’s not set up with an auto-shutoff or anything like that if it’s draining too much juice.
I don’t bring a fridge or any super-overlander stuff like that, so a second battery is always an option if you’re planning to bring a living room or a kitchen. Do the math regarding power requirements and set yourself up with enough juice to keep you going throughout your trip so you don’t have to use your jump starter.
When choosing your gear, look for items designed to protect you with specs such as low-voltage cutoff (LVCO) battery protection. The sPOD, for example, the device I’ll get into in the lighting section, allows me to connect all of my lights to one source that is not only operated through one touchscreen pad but will also shut off automatically if the voltage reaches a critical low, and turn back on when the battery recovers (numbers vary based on your setup). Overland fridges like Dometic have their version of this, allowing you to choose different protection levels based on your vehicle and battery setup.
My Setup
- Odyssey Battery 65 PC1750: Check Price
#10. Lighting
 For the lights underneath the truck, which color adds the most HP?
Lighting is a massive rabbit hole, so I’ll focus on illuminating things to navigate hazards, conduct a recovery, and address repairs.
First, you can upgrade the simple stuff. I went to SuperBrightLEDS.com and upgraded all my interior lighting to LEDs and turn signals, reverse lights, and markers. This makes it easier to see what’s happening inside your vehicle while addressing a situation.
I decided to retain the OEM housing for headlights and upgrade to bright white bulbs. I don’t personally favor HID or LED lights, and especially do not advise installing them in OEM housings. Some creative upgrades you can do with your OEM housing involve upgraded H4 bulbs and an upgraded harness that significantly improves the output – the entire process is plug and play. There are plenty of options if you decide to swap the housing completely. Regardless of what you do, just make sure it makes sense for not only off-roading but road driving, that it’s legal and safe for other drivers.
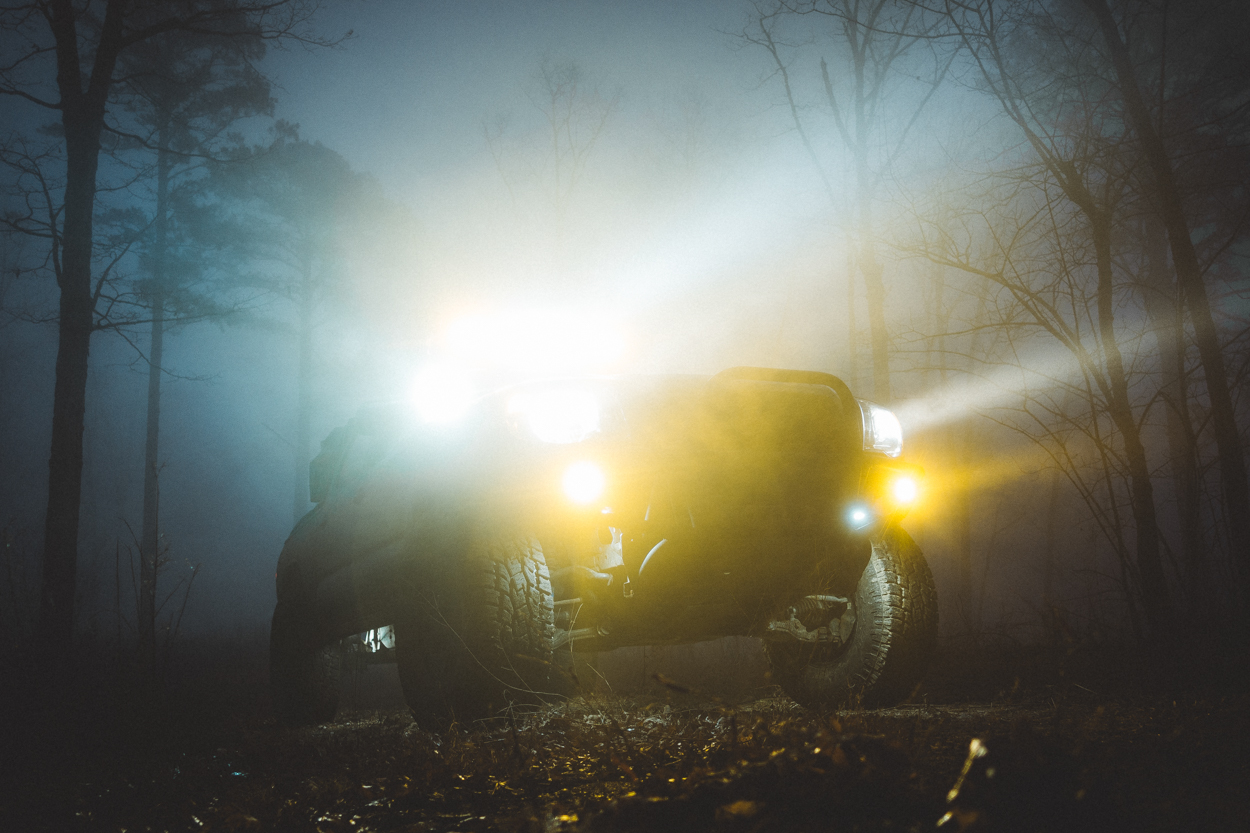
I used a mixture of Heretic Studio and KC HiLiTES for all my adventure lighting. Both of these companies are great. I can’t say enough good things about Heretic, from the product quality to the amazing customer service. These guys are great and very creative.
In a hazardous situation, I need to see as much as possible from the driver’s seat – I addressed this by piecing together a light bar from Heretic Studio on the GOBI roof rack with white and amber 6-series lights. They offer great light bars for various setups as well. I also swapped out my stock fog lights for Heretic amber Quattros and installed Heretic white Quattros for ditch lights. I may as well be driving midday when the entire system is on at night.
I wanted to make sure when things slow down and get technical, whether I’m navigating a hazard, conducting a recovery or repair, that I can see what’s going underneath – I addressed this with KC Cyclone LEDs for rock lights in the wheel wells and throughout the frame of the truck. Everything underneath the truck is illuminated, including the suspension, 360°. These are also great for when you’re parked and setting up camp. I got a bit fancy and added a couple of amber KC Cyclone LEDs to illuminate the truck’s bed, so it’s easier to sort through my recovery kit and tools. I also added a white KC Cyclone LED to illuminate the engine bay while addressing issues under the hood.
My exterior lights are organized through one of the best purchases I’ve made for this truck, the sPOD. The simplicity of this system is a Godsend while on the go, especially in hazardous terrain and conducting a recovery or repair situation. The sPOD gathers the wiring for all of your lighting and consolidates it into one multi-circuit, voltage-protected system. It allows you to control everything through either a switch panel or a touchscreen interface. I chose the touchscreen.
This allows me to control every light on the exterior of the truck with a single click, adjust brightness, utilize various modes such as strobing, customize icons for the lights, and organize the menu; it’s amazing. This system also allows you to control the previously mentioned ARB twin on-board air compressor through the touchscreen (it does not power the compressor; it will still have to be connected directly to the battery).
My Setup
- sPOD 8-Circuit System with Touchscreen: Check Price
- Lightbar – Heretic Studio (ideal for GOBI rack) – (4) 6 series units, 2 white, 2 amber: Check Price
- Ditch lights – Heretic Studio Quattro ditch lights, white: Check Price
- Fog lights – Heretic Studio Quattro fog lights, amber: Check Price
- Rock lights (underneath) – 8 KC HiLiTES 1352 Cyclone LED 2.2” Accessory, white: Check Price
- Bed – 2 KC HiLiTES 1352 Cyclone LED 2.2” Accessory, (Amber): Check Price
- Engine bay – 1 KC HiLiTES 1352 Cyclone LED 2.2” Accessory (White): Check Price
- Interior/accessory – SuperBrightLEDs
#11. Extra Fuel
 Are those fuel cans or Legos?
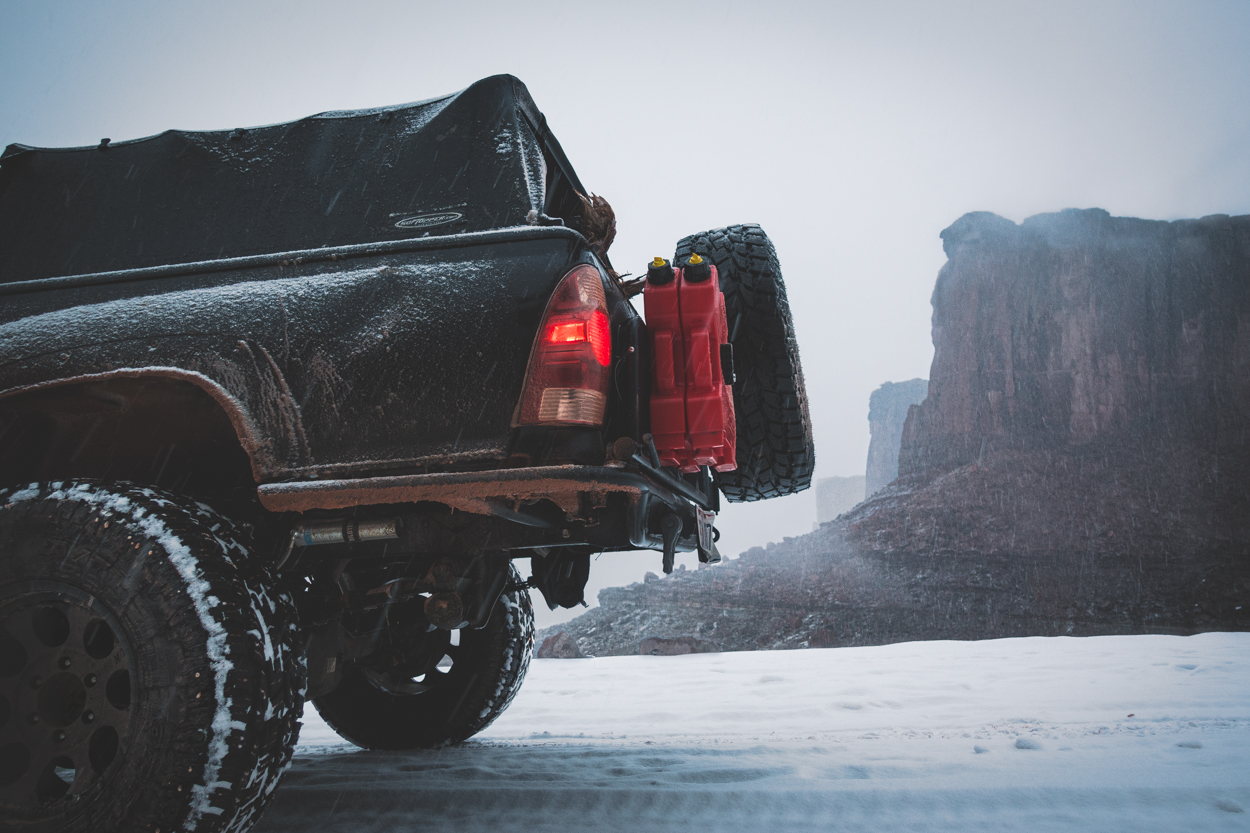
You should map out fueling stations, especially as your trip brings you to less-populated areas; fill up the truck at the last available station before heading off-road. Also, bring extra fuel; make sure it’s enough for your trip and secure and easily accessible. That’s really about it. There are plenty of special mounting systems like RotopaX or the classic Jerry can. I’ve used them all. I utilized two 2-gallon RotopaX for thousands of miles, and they did the job.
The locking mechanisms on the RotopaX systems are known to fail if you don’t use them frequently (I store my truck for long periods between trips), which required me to drill it out in the middle of a trip. The RotopaX is great for folks who use their vehicles more often or don’t require the locking mechanism; they’re super versatile, durable, and can stack along with the other RotopaX gear, like water cans, a toolbox, and even a first aid box. I’m currently swapping over to using plastic 5-gallon Jerry cans and will mount them on the swing-out bumper. This will allow me to carry more fuel, with a system that fits what I do. I chose plastic to prevent noise.
When you’re calculating for fuel consumption, always overestimate and overprepare. Remember that you’ll burn more fuel while off-roading, and way more if you get stuck. I put fuel last because no matter what else you prepare, learn, plan, and how much money you spend on making your truck seemingly indestructible, fuel is the one thing you can’t figure out on the go. You don’t want to be the guy or girl triggering your inReach SOS signal because you’re out of gas.
My Setup
- RotopaX 2-Gallon Gas Pack: Check Price
- RotopaX Mounting Hardware: Check Price
- Mounting Hardware Extension: Check Price
Final Thoughts
Research, study, learn, and practice.
This sport, hobby, addiction—whatever you want to call it—is best enjoyed when you’re prepared. A final note regarding preparation and recovery: no matter how much time, money, and effort you put into making sure you stay on track and unstuck, things happen.
Before you go anywhere, prepare for a non-recovery situation with your essentials: food, water, warm and cold support, protection, and first aid. Your communication gear will make sure you get out of there eventually, but always prepare for a delay.
And, most importantly, have fun!
Excellent information. This article was well thought out and a must read for all folks going of the main roads including dirt and gravel roads. One suggestion, eliminate the word utilize. Using utilize comes across as pompous and self-ingratiating. No, it does not help the writer come across as more intelligent, nor as a better writer. Utilize is not a substitute for use, both use and utilize have different meanings and usages. When something is utilized, it is being used for something other than its intended design and true purpose. Think of a chair. It is primary design is for… Read more »
Thank you for the awesome info. I will put it to good use.
Very good info! Recovery gear is a must for hitting up the trails because you never know when you’ll need to use them. I myself have been piecing together some stuff. Recovery gear is definitely something EVERYONE should invest in. So far I’ve got an air setup for airing down and up for certain terrains. Straps are a MUST HAVE. I learned that the hard way lol. whether you’re going on a short trip or a long long, you always want to be prepared. Never know if you’ll have service out there or not.
Great information!! I’ve been looking into recovery gear and there’s a lot of information out there and a lot of companies. Great to have this all compiled in one place. Definitely eases the anxiety of “what do I actually need?”
Awesome collection of info! I have been putting together a recovery kit that I can transfer between my two vehicles, and this article was just what I was looking for, thank you.