

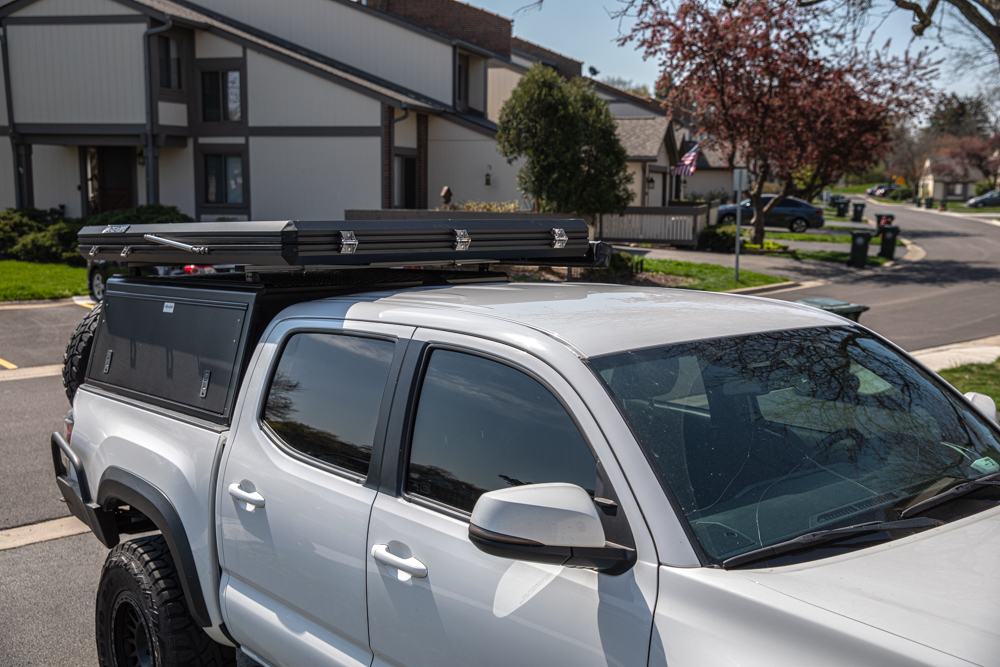
Strongest roof rack on the market? You heard that right!
I know it’s a big claim to make, but the redesigned roof rack from AL Offroad takes the cake. Similar to other aluminum roof racks, this rack mainly consists of aluminum extrusion bars, side load panels and mounting brackets. Where this rack really stands out, is in the extra strong mounts, and even more importantly, the strongest crossbars available on the market.
Find It Online
- AL Offroad 2nd & 3rd Gen (2005-2023): Check Price
Table Of Contents
Features & Specs
- Lightweight
- Aerodynamic
- Little to no wind noise (without light bar)
- Multiple tie-down locations
- Large, slotted aluminum extrusion bars (1/16″ deflection at 400 lbs center load)
- Custom colors available
- Stainless hardware
I’ve had experience with several different designs and types of racks, I can thoroughly say that this rack outperforms most of the options available on the market today.
There are a variety of reasons, but we’ll touch on those after the installation section. Let’s run through the process.
Installation

Installing this rack is pretty straightforward. It’s not the easiest install, but if you follow along, take your time, you should have your new rack on your truck in no time.
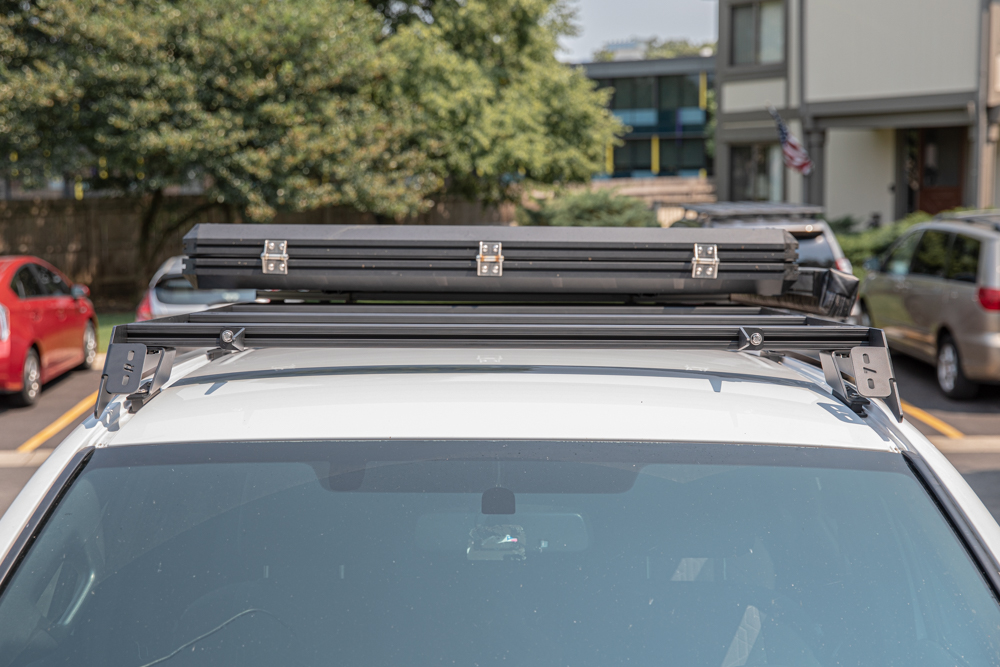
Pictured above you can see all the parts and hardware included when you buy an OG rack. The OG option has unfinished silver logos and hardware. I decided to go with the Onyx – which comes with an extra crossbar and all black everything.
Tools & Materials
- Allen wrench set
- Waterproof silicone (optional, but recommended)
- Mechanic’s tool set
- Cleaning solution
- Rags
Step 1. Prepare Roof
I was previously running a different aluminum roof rack, so the first step was to remove it.
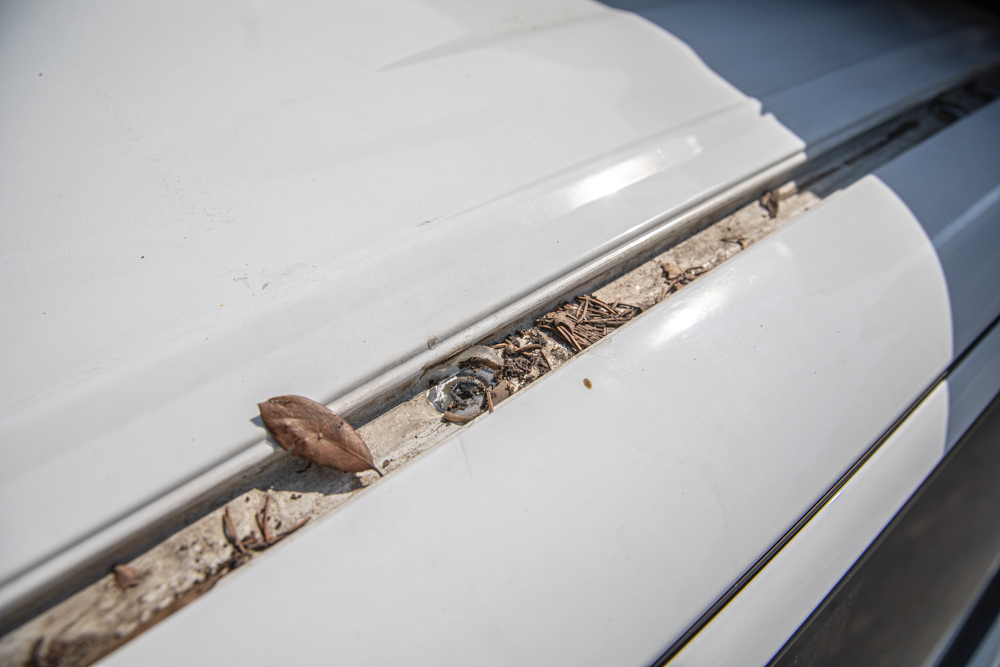
Alternatively, if you don’t have a rack, you will need to remove your factory weather stripping that runs in the channels on your roof. Underneath this weather stripping, you’ll find the recessed nuts that are used to hold the rack to the roof.
As I’m sure you already noticed, there is a ton of junk under the weather stripping. Make sure to clean everything out with your favorite cleaner.
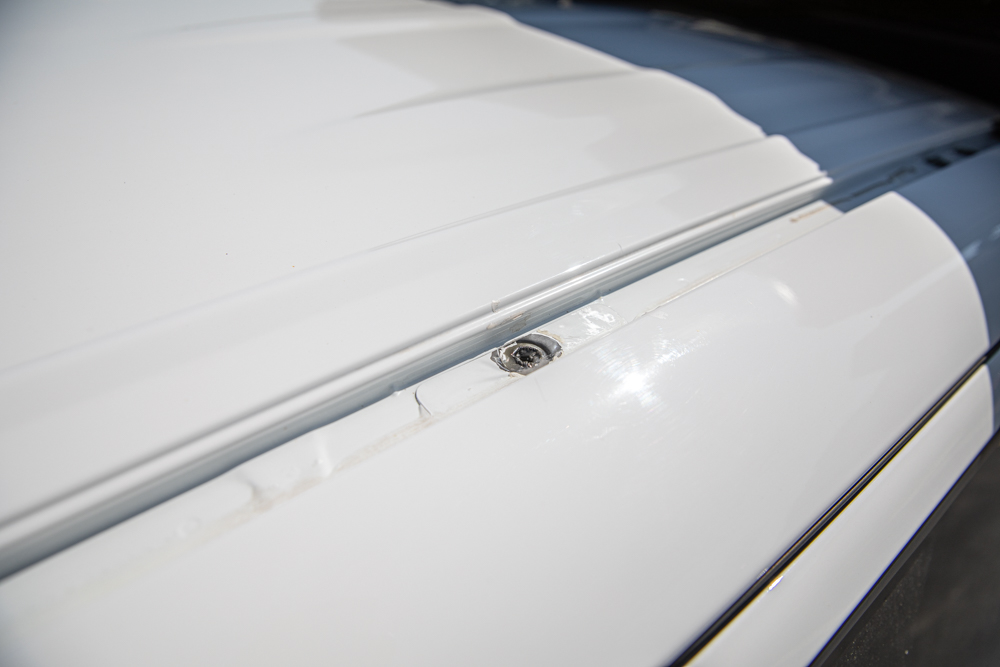
Much better. Now we can get started with mounting the rack.
A nice clean slate for a new roof rack. Looks naked!
This was the first time I saw my truck without a rack, I had bought my truck with one installed.
Step 2. Install Brackets
The next step to getting your rack mounted is to get all your mounts and associated hardware, seals, etc.
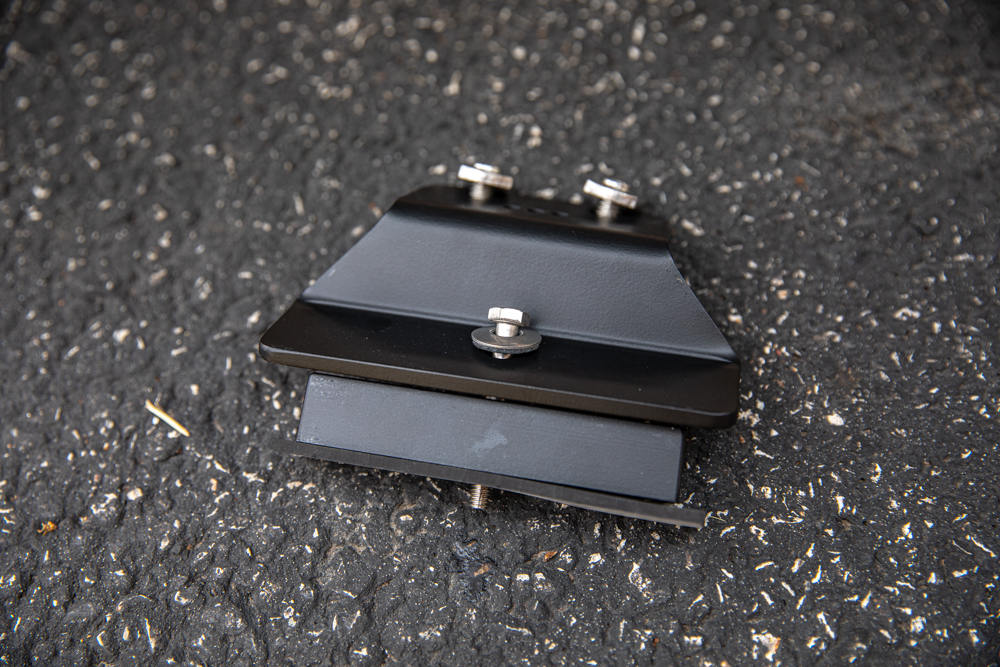
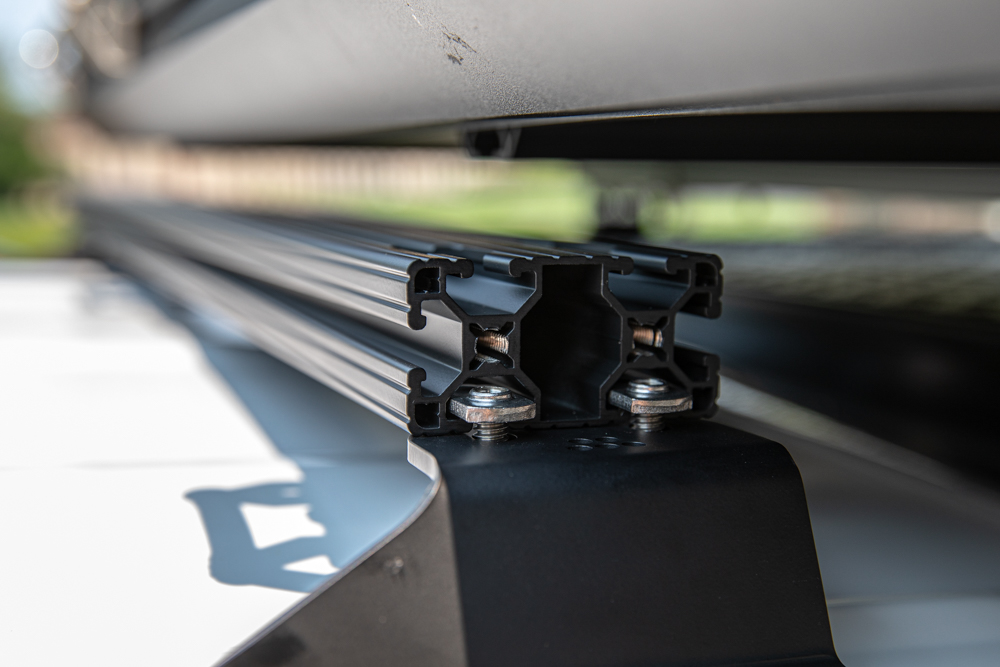
If you take a look at the shot above, you can see the correct order for arranging each mount. In order from bottom to top, first, you have your rubber gasket, then the spacer, and finally the piece that connects the spacer to the crossbars.

At this point, I also preloaded my brackets with the required hardware to mount the crossbars.
You can see the proper order above. You’ll need to grab your bolt, then add the split lock washer, then a regular washer. Feed the bolts through the holes and top the bolts off with T-nuts. Now it’s time to mount the brackets to the truck.
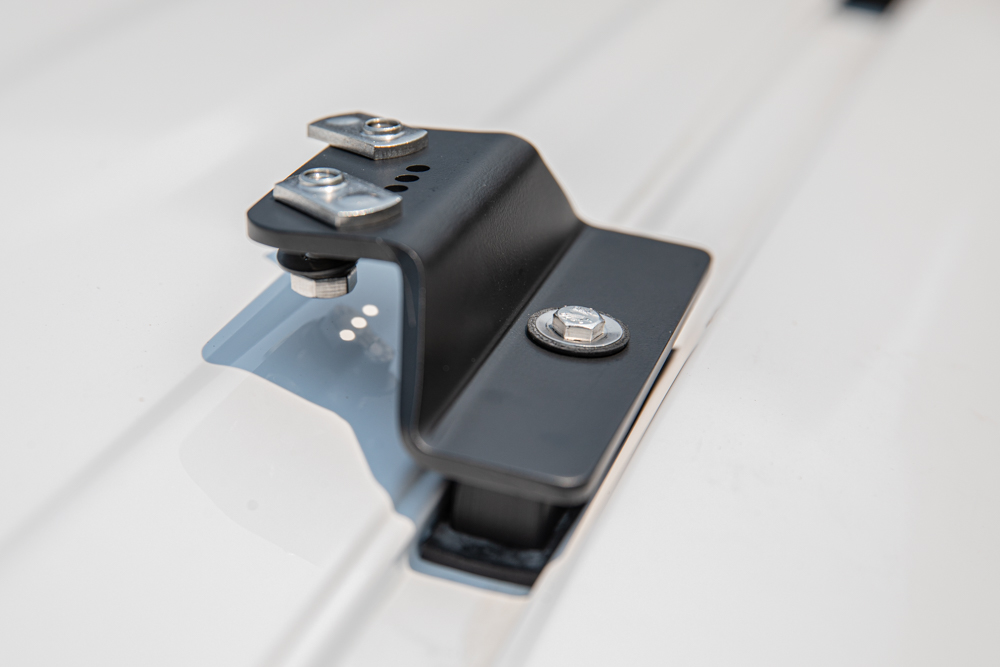
Here is what the finished bracket mounted on the truck looks like.
The seals should hold up to any weather, but I grabbed some outdoor silicone and applied it to the long bolt that attaches the mount to the roof before I installed everything, just in case. Tighten each bolt completely, before the silicone has a chance to dry.
Note: each bracket has a different position. These positions are identified by how many holes there are on the top of the bracket. The even-numbered brackets go on the passenger’s side and the odd-numbered brackets go on the driver’s side. In order, from front to back, the driver’s side gets the 1,3,5 brackets. The passenger’s side gets 2,4,6.
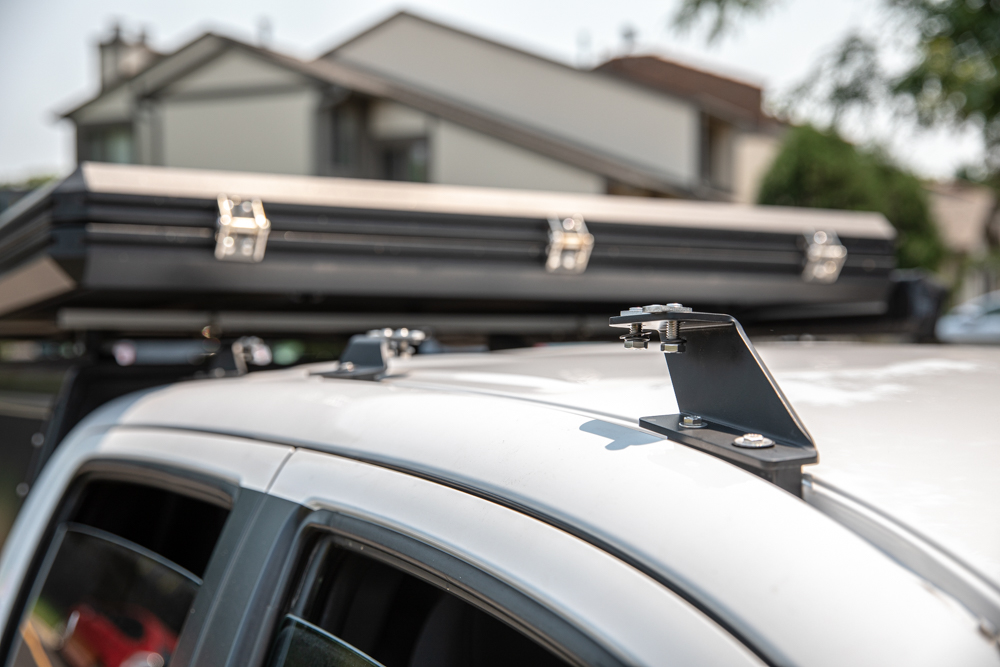
Three brackets are mounted on the passenger’s side above.
Note: your front brackets may look a little different from mine.
Step 3. Mount Crossbars
This step is pretty easy, but having an extra set of hands is definitely helpful.
Making sure to install your crossbar with the recesses for accessories pointed upwards, slide the three weight-bearing crossbars into the T-nuts. This can be a little tricky but just take your time. It helps to have the T-nuts as loose as possible without them falling off the bolts. Repeat this step for the two other crossbars.
Once all three crossbars are installed, you can move on to installing the side panels. Leave all the bolts loose for now so that you can later adjust and center the rack when the side panels are installed.
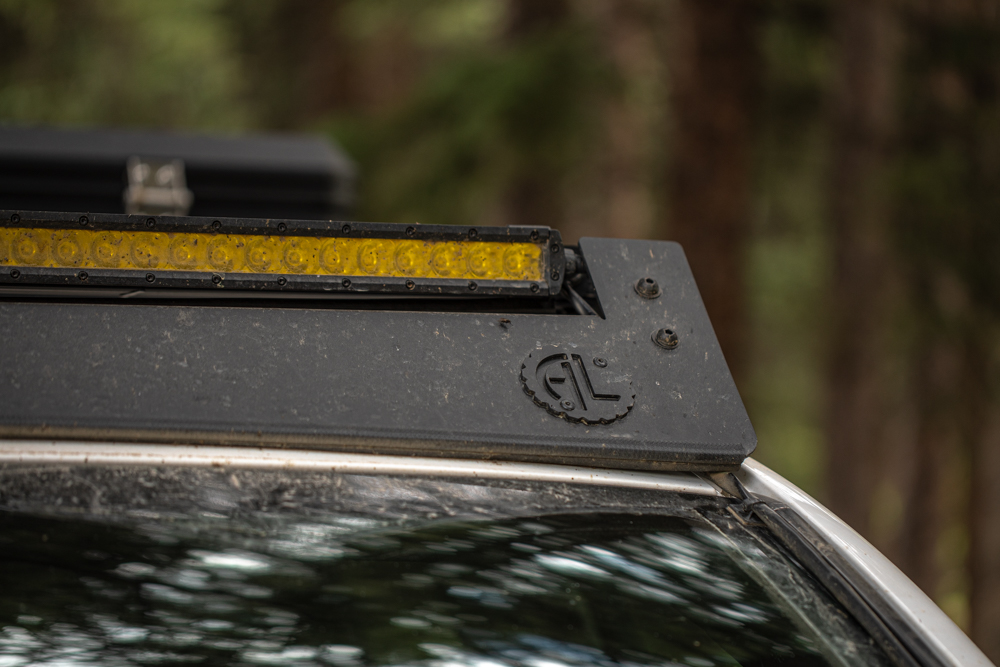
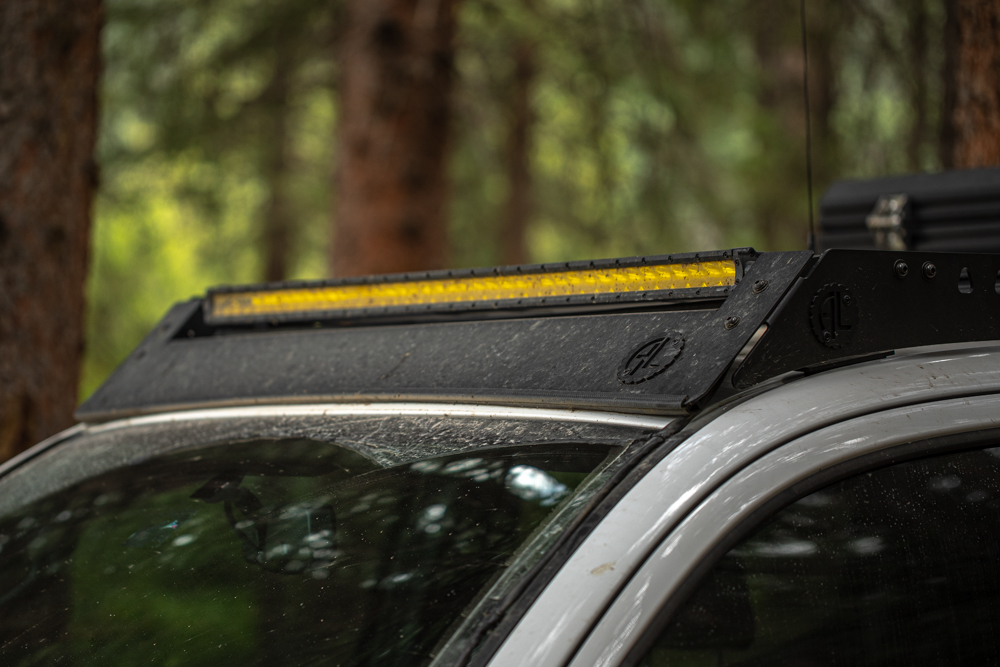
You may have noticed that the front crossbar has a bracket installed in the front for a light bar. If you have a light bar bracket, you’ll need to install the mount before the side panels, since there is no access to the channel once you’ve put the side panels on.
Step 4. Mount Side Panels
Once again, an easy step, but it helps to have someone assisting.
Simply line up the side panel with the crossbars and secure them into place with provided hardware.
A quick close-up of the attached side panel.
These Allen head bolts also get regular washers. I had a bunch of extra hardware, so I decided to add split lock washers as well. Just FYI, the rack does not come with extra split washers.
Step 5. Center Roof Rack
Now you can run to the front of your truck and make sure everything is completely centered.
There are a variety of ways to do this, but I chose to do it by eye and everything seems to line up well.
Step 6. Wind Fairing & Crossbars
Now that everything else is mounted, it’s time to install the wind fairing.
The wind fairing takes a bit more elbow grease to install since the fairing will be bent around the contour of the roof to ensure the best possible seal and as little wind resistance as possible.
The best method to install the fairing is to completely mount it on one side and then grab that second set of hands to help you get the other end flush with the mounting points.
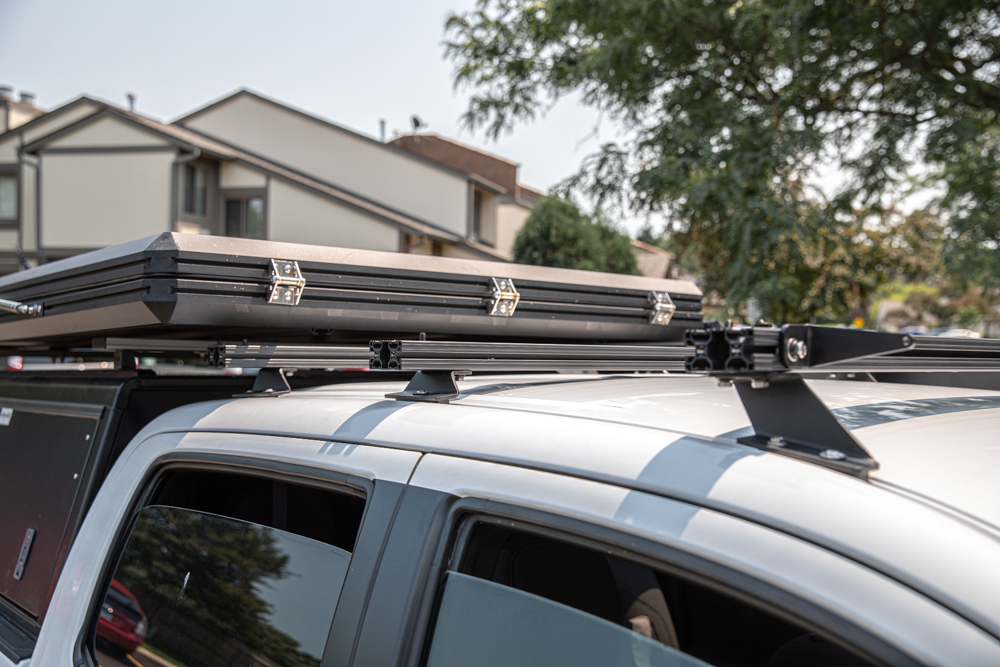
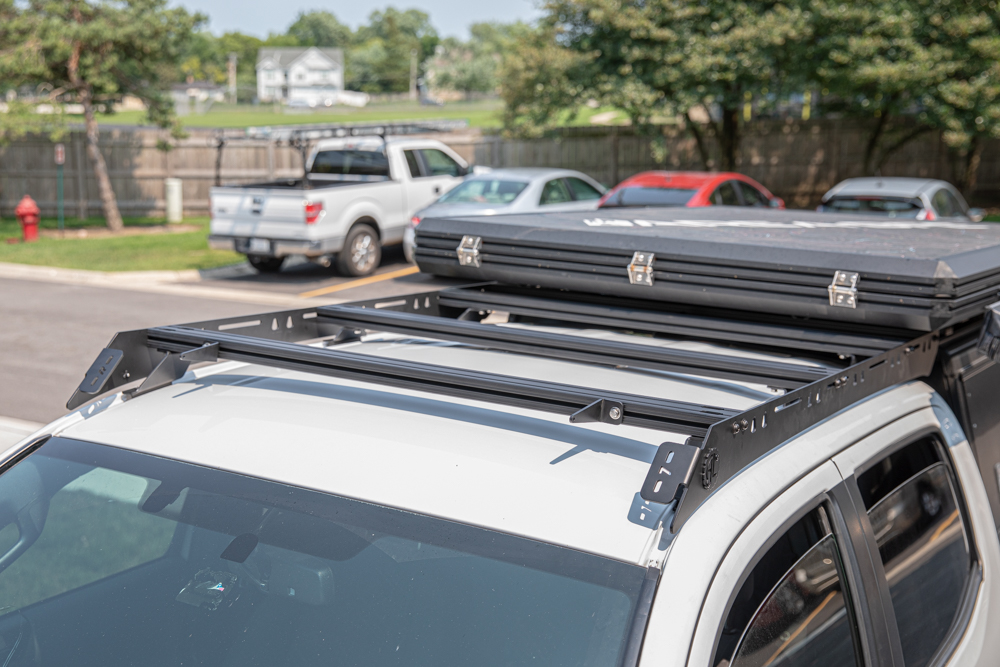
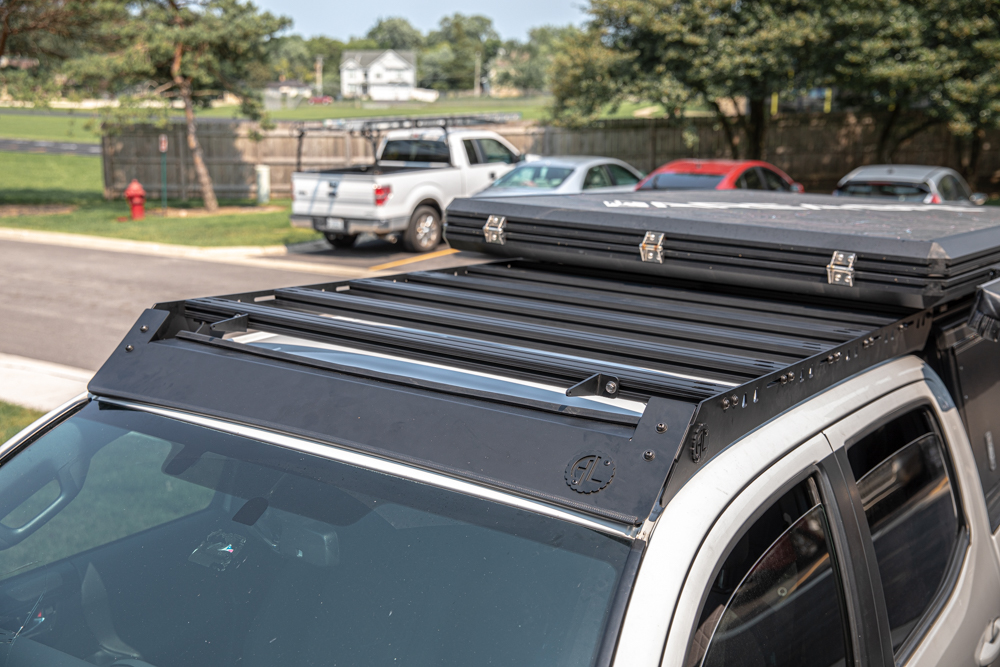
It’s a bit more difficult, but not impossible. At least you know this fairing isn’t going anywhere! You can also see here that I installed the remaining crossbars as well. Those mount in the side slots with the same hardware as the previous crossbars.

The final mounted wind fairing. You can somewhat see the slight bend in the fairing from this angle.
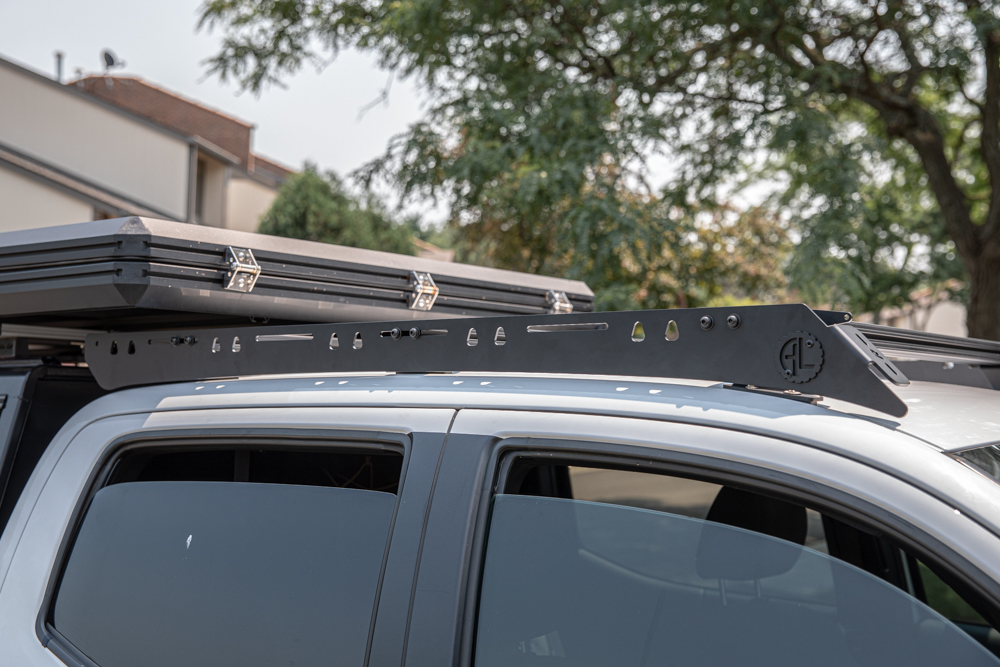
That’s it! If you have any accessories to install, now is the time. It’s also a good time to note, that adding some protective vinyl underneath the fairing, where it contacts the roof, is a good idea to prevent rubbing on the paint over time.
Long Term Review
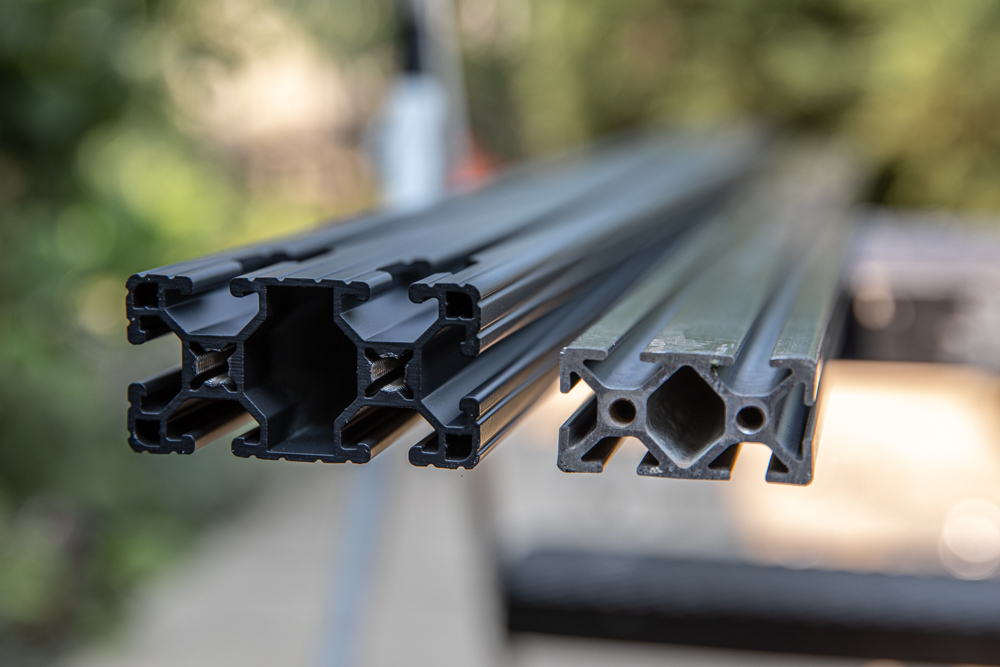
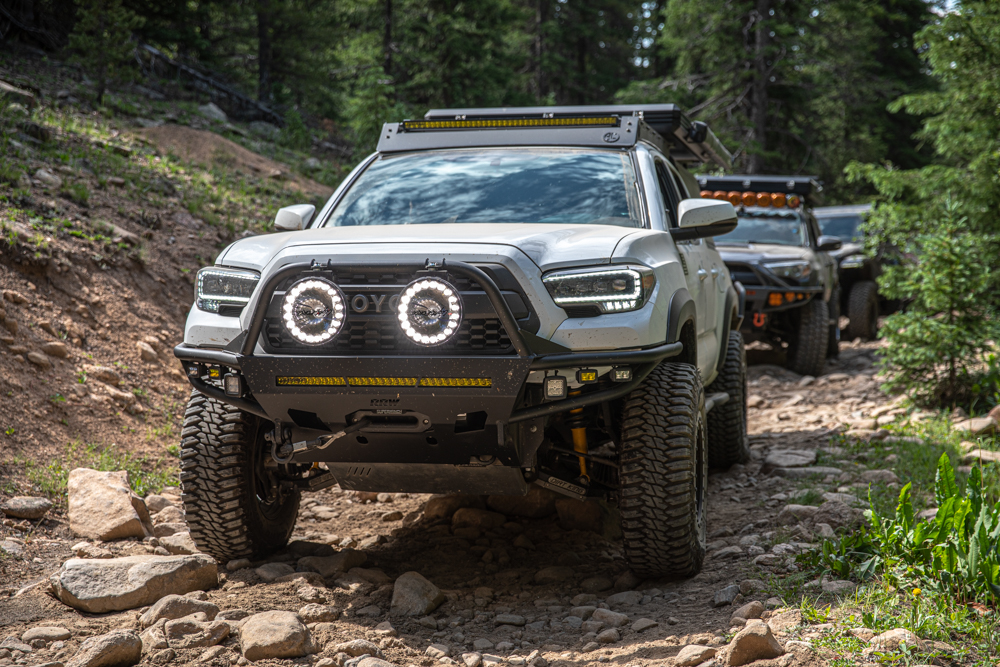
Before I dive deeper into my experiences, the first thing I want to touch on is why this rack is stronger than all other similar racks on the market. Above, you can see two crossbars. On the left, the AL Offroad bar, and on the right, the extrusion bar that everyone else uses. I don’t think I need to say much more, haha.
If you’ve ever stood on a competitor’s roof rack, you’ve likely seen that the crossbars deflect quite a bit. I’m a fairly lean guy, and the crossbar on the right bends even under my weight. The AL crossbar is so much stronger there is literally no comparison. The bar is rated for 1/16″ deflection at 400 lbs center load. That is an insane amount of weight capacity. You can jump on these with all your weight, and they won’t budge. DO NOT try that with any other comparable rack.

This rack, without a light bar, of course, offers little to no cabin noise. That’s not a claim that many can make. Potentially with a light bar, it may be quieter than the competition, since the baseline noise without one is so low. These AL racks are also super low profile, they have the slimmest profile possible while still allowing the rack to be functional. This profile means that if you have a sunroof, you won’t have any issues with clearance while operating it.
All the aluminum sourced for the roof rack is quality sourced in the USA and AL Offroad offers 5/16″ hardware, much beefier in comparison to other similar rack systems that use 1/4″. As you saw in the install sections, the AL rack mounts the crossbars directly to the robust brackets that are mounted to the roof. Many competitors use the side panels, which dramatically weakens the design.
So, how did the rack hold up? Well, I’ve already said a handful of times how strong it is.
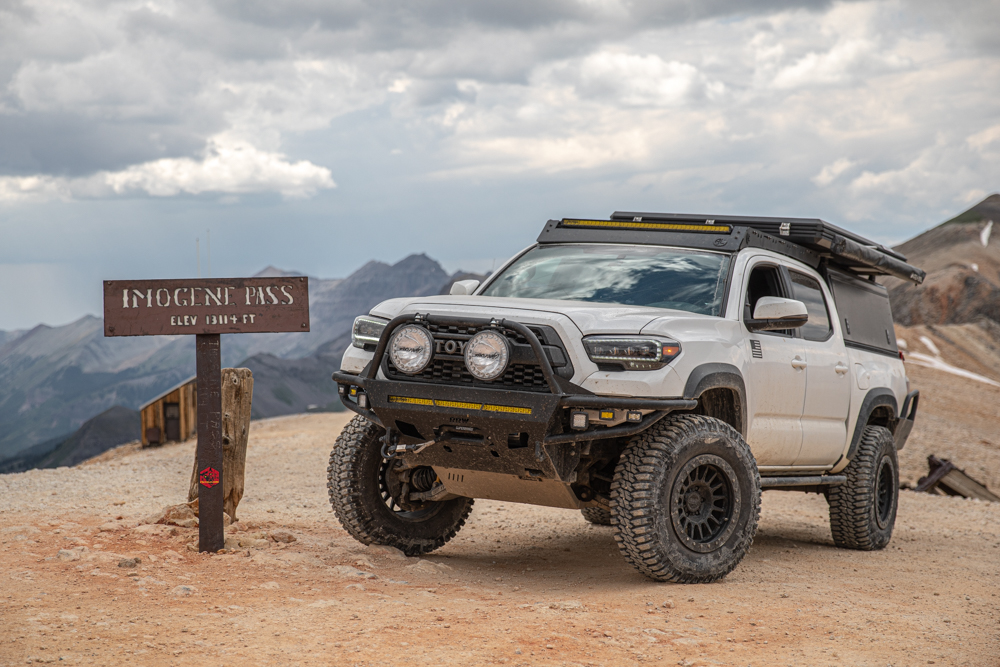
After 4 days of tearing it up on various trail systems in Colorado, I can confidently say that the AL Offroad rack lives up to the hype. And I’m not just saying that. I’ve had experiences with several other companies, both directly and indirectly, and I can say without hesitation that this rack takes the cake. If I’m being totally honest, I didn’t like the rack at first, especially when it was first released. But after months of testing and redesign by the team at AL, I completely changed my mind.
I genuinely believe this is one of, if not the best roof rack of this type on the market. I don’t make the claim lightly. Other racks, especially the most popular ones look great, but lack in performance. As I’ve gotten older and more experienced, I’ve learned to prioritize function, and this rack is the definition of functional. Not to say that this rack doesn’t look good. It flows really well with all the truck’s lines and offers a ton of options that make your life easier, both on and off the trail.
Final Thoughts
Overall, as you might have guessed, my experience with AL Offroad has been great, and I’m stoked to run their products. I say products because I’m also running the AL Offroad Trailgate, a tailgate panel replacement that comes with super deep cup holders.
If you’re looking for a roof rack that performs, this is the one for you. Don’t settle for weaker rack designs just because they might appear to be a little bit sleekier. Years ago, you couldn’t even get a rack that wasn’t a massive basket or otherwise. Not visually appealing, and certainly not helpful with wind noise or fuel economy. If you’re going to use your rack, and I mean load it up with tents, accessories, etc. – and you want to be sure that you won’t have any failures – this rack is the way to go!

Does this have a cutout for the satellite antenna on a 2021 Tacoma double cab?
How do the crossbars line up with the sun roof? Can I still open the sunroof vertically and have room under them?
I believe you should be fine with the antenna. I haven’t heard any issues there. The crossbars allow for full use of the sunroof. You could technically run without the one that goes across the sunroof too – it’s not a load bearing bar.
Konrad – Five months later and I’m wondering how the AL Rack is holding up? I ordered after reading this in January and just received it yesterday. Excited to install this weekend.
Hi Loran! It’s holding up great. Zero issues and it’s still as strong as ever. My brother-in-law just added one to his truck last week. You’ll love it. Wait until you see how sturdy it is on your Tacoma.
Great write up Konrad.
Do you have the Extreme LED S65 38” cutout on your roof rack? And is that what you’re running in these photos? Looks great man I might have to get this for mine while this deal is going on, thanks for all the info!
Hey Chase, like Scott said, this is a 40″ Lightforce Nightfall LED bar. It has yellow Lamin-X film on it. AL Offroad was kind enough to help me fit it. They’re a solid company with a great product!
He is running a Lightforce light bar.
Did you choose the 40″ cutout to mount 40″ Lightforce Nightfall LED bar?
Great write up! What kinds of things did you have on the roof rack during your testing? I’ve never heard of anyone having issues with the competition when mounting standard loads of maxtrax, solar panels, rotopax and awnings. No hate here just genuinely interested in knowing why the beefiness is needed.
Thanks, dude! We only ran standard loads during 95% of the testing. Besides that, we had multiple people standing and jumping on the rack, and attempted to rock the entire truck with as much force as possible. I would agree that standard loads will be fine, even with weaker designs, but I have heard stories of guys who actually used their racks, experience some kind of failure. This most often occurred with tougher wheeling with a rooftop tent. My biggest gripe is when I can tell something is not as sturdy as it could be. That could be for a… Read more »
Awesome! Totally makes sense! I will have to keep this one in mind if I ever decide to replace my Victory4x4 rack. Thanks.
Sounds good, man!