
There are many options in the way of electronic switch controllers to help organize and declutter the interior of your rig. However, one company is taking a huge step forward and creating something truly unique; meet the ARB LINX.
If you haven’t heard of ARB before, I would be shocked because they are known around the world. The LINX is the most advanced switch controller available today. At first glance, it’s a small touchscreen unit that acts as a switch controller. You would be mistaken, though, because it can do so much more.
It can also replace several different gauges and control compatible accessories, beyond simply turning them on or off. ARB packed a ton of functionality into this seemingly small piece of tech that will help you centralize controls for most if not all of your rig’s accessories.
For a complete guide to switches, check out our guide to switch panels for the Tacoma.
Find It Online
- ARB LINX Vehicle Accessory Interface: Check Price
Table Of Contents
ARB & The LINX

ARB is an offroad company based out of Australia. They are Australia’s largest manufacturer and distributor of 4×4 accessories. Being such a large company, they have the resources to stress test their products to ensure a high-quality product that will last.
The ARB LINX is a modern take on a switch controller. What makes it unique is its ability to do more than just turn accessories on and off. It can also monitor and adjust compatible accessories.
For example, you can adjust and control your onboard air compressor. With the optional pressure control module from ARB, you can even shut off the compressor once a set PSI is reached. You can also control and monitor the temperature of a compatible fridge or freezer and even air lockers. This product is truly a game-changer for the category.
Package Contents
- A. Controller (brains of the whole system)
- B. Display (touchscreen device for the controller system)
- C. USB Cable (connects the controller to the display)
- D. Gimbal display mount (mounts your display)
- E. Power – Wire Harness (powers the controller)
- F. Terminal Kit (power accessories for wiring your AUX accessories)
- G. DIN Rail 180mm (rail mount for the controller)
- H. Patch – Wire Harness
- I. Inputs – Wire Harness (wire harness to connect your existing accessories to the controller)
Not included in the package contents, but helpful:
Controller Layout

Before we get into the installation of the ARB LINX system, I want to briefly explain how ARB designed the controller. Knowing how the controller layout was designed will make the installation process easier to understand.

When you first open the cover to the LINX controller and see all of the pins for connecting wires, your head might start spinning. I know the product looks intimidating at first, but I promise you’ll have more confidence once you understand how ARB sets this product up.
The pins on the LINX are not labeled with specific parts or areas they will be powering. Instead, ARB used a letter and number system to help organize the layout of the pins. The groups of pins are labeled from group A to O. Inside each group is smaller pins numbered from left to right.

On the bottom row, you will see groups A through group G. Group A will be your main power and ground power terminals for the controller. Groups B through F will contain the pins for your digital outputs. Finally, group G pins are for the digital inputs to the controller.
The top row of pins is labeled with groups H through O and also contains the USB section. Group H would be the power terminals for batteries 2 & 3. Groups I through O are the pins for sensors that can be wired to the controller.
Lastly, the USB section is where we will later be plugging the USB cable into that will make a connection with our display for power and data to the display.
For wiring examples see my photo above, the red power wire is connected to group A on the first pin in the group which means the red power wire would be designated to the A1 pin. The black ground wire is connected to group A on the second pin in the group so that would be designated to the A2 pin.
Test System

Anytime I do an electronics install, I like to first verify full functionality. To test the LINX system, we need to connect the control box to the truck’s battery using the power wire harness.
Utilizing all the components in the power wire harness kit, we need to attach the terminal wire connectors to both the red and black bare-end wires. Use wire crimps to attach the wire connectors to the red and black wires. Then, you can slide the provided wire cover over both ends of the red and black wires.
Now that you have your power wire harness assembled for installation, pop the hood on your Tacoma. You will need the control box, power wire harness, display, and USB cord to your engine bay.
The red and black wire connectors you just made will be connected to the A1 and 2 pins shown in the earlier example of how to wire the control box above. The red wire connects to A1 and the black wire connects to A2.
On the other end of your power wire harness is a black wire with a ring connector end and a red wire with a ring connector end and an inline fuse.

Use a rachet and 10mm socket to connect the black wire to a negative ground location on the battery or on the truck. I used the body ground which is right next to the negative battery post on the driver’s front fender. Use a 12mm socket and rachet to connect the red wire to the positive terminal on your battery.
After making all of these connections, your controller should now have power.
Take the USB cable and connect that to your control box where it is labeled “USB”. The other end of your USB cable will plug into the micro USB port on the LINX display. If the display has no charge, you will have to wait a few minutes for the device to power up.

The first time you power up your LINX display I suggest having the display close to your home WI-FI. This is so it can be connected to the internet for any needed software updates. When the display first gets powered on, you will see a screen that says “connecting to the controller, please wait…”.
From this screen, tap on the circle on the far right side of the screen, this will take you to the device’s home screen. Once you’re on the home screen, on the right side of the screen, you will see another white circle now that has 6 dots inside of it. Tap on the white circle with 6 dots to get into the devices app menu.

After tapping the circle with 6 dots, you will be brought to a page that has several apps displayed. On this screen, you need to scroll all the way down to locate the settings menu (gear icon).

Tap on the settings icon so we can get to the WI-FI settings and get your device connected to your local WI-FI.
Tap on the WI-FI button and go through the steps to connect your device to your WI-FI. After you have successfully connected your device to your WI-FI, it’s time to check for any available updates. Tap on the white circle on the far right to take you back to the make home screen.
From there, tap on the second white circle with the 6 dots to get back to the apps menu. On this page, you will see the app in the top left corner, tap to open it. If your device still has not connected to the control box by now, let it load and wait until the device connects. Make sure the USB cable is still connected to the control box and the display.
After the connection is successful, you should be prompted with a message asking to pair to the control box with Bluetooth. Proceed with Bluetooth pairing so that you can use the display wirelessly going forward.
Once the device has connected to the control box and the initial setup is complete, the device will go to the default screen.

To check if the device software is up to date, swipe your finger across the screen from the right side to the left. This will take you to the app screen within the app.

This screen will be where you access the different switches and items you can control throughout the system. For now, you will tap on the setting gear in the top right corner to get into the settings menu.
Here you will now see the button that says “LINX Update”. Tap on that button and your device will start looking for any available updates over WI-FI. If the device has an available update, the device will take you through the necessary steps. Otherwise, it will let you know there are no available updates.
Now that you have successfully tested everything, let’s move on to installing the control box and display.
Installing Controller

Required Installation Tools
- Power drill
- Phillips head screwdriver or Phillips head bit
- 3/16″ drill bit
- Rachet with 10mm and 12 mm socket
- Metal snips
- Hex key set (Metric)
- Torx T-20 key
- Wire cutters, strippers, & crimpers
There are multiple different ways and locations where you can choose to install this system. If my installation does not fit your specific needs, feel free to just use this guide as a helpful reference.
While most switch controllers get installed under the hood, ARB’s control box mounts inside the cab. This is because it has a lot more electronics and is not waterproof. ARB recommends that you install the control box inside of the cab away from extreme weather or water.
I chose to install the control box down on the left side of the driver’s front footwell. I found that this kick panel would be an ideal place for my installation and setup.

To get the control box installed, I will need to remove the plastic kick panel so I can drill holes into it and attach the control box to it.
First, start off by removing the driver’s front floor mat, it will get in your way if you leave it in.

Next, you need to remove the plastic door sill trim piece because it overlaps on top of the kick panel. The door sill trim easily pops out by pulling up on it.

With the floor mat and the door sill trim removed, you now have access to remove the plastic kick panel. There is a plastic threaded nut up near the firewall that holds the kick panel in place, this plastic nut can easily be removed by twisting it off.

With the threaded nut removed, the only remaining connections for this kick panel are two plastic push clips. Grab onto the left edge of the kick panel that borders the driver door and gently pull the kick panel into the vehicle towards the center console. This kick panel will easily pop out and you can pull the kick panel out of the truck.

Now that we have the kick panel removed from the truck, we can start to plan out where the control box can be installed. I placed the control box on the kick panel to position it where I wanted.

Next, I marked the plastic kick panel where the metal mounting rail was positioned. I separated the control box from the metal mounting rail so I can mark where I need to drill mounting holes into my kick panel.
Using a small screwdriver, I marked three small holes where I would like to drill holes to mount the rail.

With the drill locations marked, I took my power drill along with a 3/16’s drill bit and I drilled three holes into my kick panel.
Note: Make sure you are aware of what is under the panel when drilling the holes. The plastic is thin and the drill bit will go through it pretty quickly.

For some odd reason, I was not supplied with any hardware to mount my rail so I had to go buy my own. I’m not sure if all kits come without hardware or if my kit was just missing it.
When it comes to hardware, I can sometimes go a little overboard. However, I don’t like things to rattle so I usually buy more than is needed. I purchased three screws at 3/4″ length, metal washers, rubber washers, and nuts.

I placed a metal washer over the screw and then inserted it through the metal rail. On the other side, I placed the rubber washer over the screw. The rubber washer is sandwiched in between the rail and the kick panel to prevent any type of rattle.

With the rail installed onto the kick panel, I flipped the panel over and installed the nuts. I tightened all of the nuts by hand before installing the panel back into the truck.

Before you go and put this all back together, you might want to run your power wires into the cabin while you have some extra room to work. On the engine bay side of the firewall of the Tacoma, there is a small rubber grommet you can feed your power wires through. The rubber grommet is on the driver’s side, right behind the brake fluid reservoir.
My rubber grommet has a wire coming out of it that you will probably not see on your truck. The wire going through my grommet is from my previously installed switch controller. This is where you can run your red and black power wire for the control box.

Once you get the wires pulled through the firewall, you can again connect the red and black connectors to the control box. After the wiring to the control box is complete, you can install the kick panel and control box into the truck.
A thoughtful design feature is how you can easily take the control box on and off the rail. The back of the control box has two springs with curved hooks on either end. To install the control box onto the rail, place those two curved hooks onto one end of the rail.
Once you have the two spring hooks on one side of the rail, pull on the control box in the opposite direction of the hooks. With the tension on the springs, they will be extended enough for you to hook the other side of the rail onto the control box.
Once the control box snaps onto the rail, that’s it! It’s just as easy to unhook the control box from the rail as well.
Installing Display

This portion of the installation can differ depending on the vehicle. It will also depend on where you choose to place your display. I chose to purchase a specific A-pillar bracket that would only fit a 2016+ Toyota Tacoma.
To my understanding, this bracket may not be available anymore. It is increasingly hard to find.
If you’re installing the ARB LINX in something other than a 2016+ Toyota Tacoma, then you will need to refer to the installation manual for details on your specific installation.
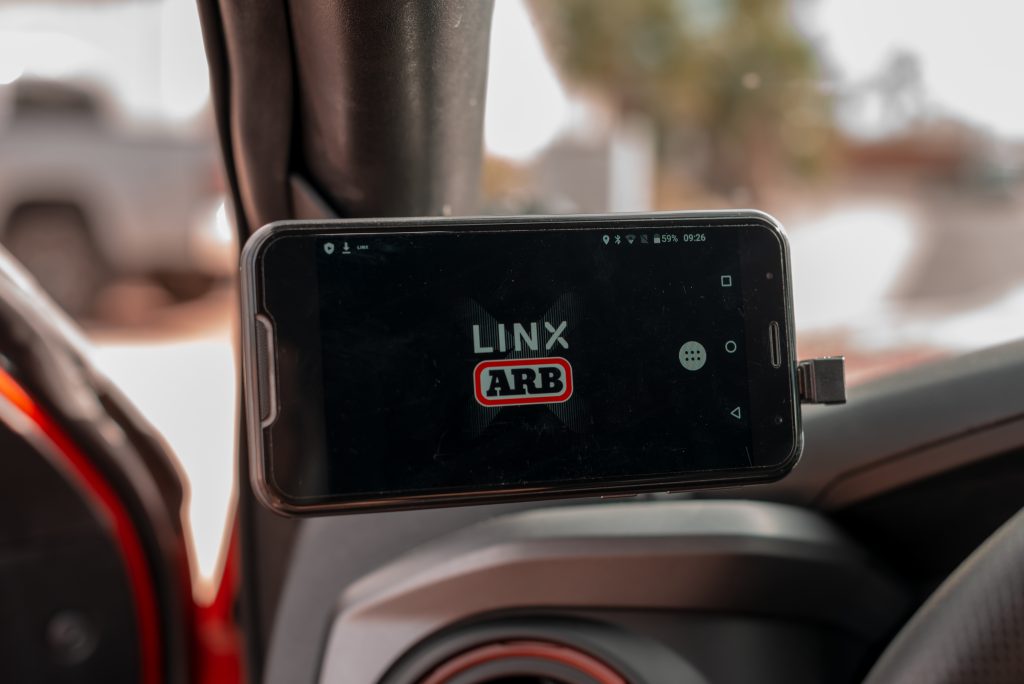
I installed my display on the driver’s front A-pillar for convenience and ease of access. My prior switch controller was also mounted in a similar location/

First, you will need to pull the rubber weather seal away from the door frame to expose the pinch weld.
With the pinch weld exposed, grab your A-pillar bracket to use as a stencil to mark where you need to drill holes for installation.

I assembled the A-pillar bracket to the gimbal mount and then held it up to the A-pillar to determine where I wanted my display to be installed.

Once I settled on a location, I held the bracket up against the pinch weld and marked the holes with a spring-loaded center punch.
The spring-loaded center punch comes in very handy when you need to drill holes in metal and don’t want to make a mistake on your drill location.

Important: Before you start the drilling process, be aware that your driver-side curtain airbag is right behind this pinch weld.
Be cautious and gentle when making tour holes in the pinch weld so you do not drill into the airbag. I used my 18V power drill with a 3/16″ drill bit to drill two holes into the pinch weld.
After the two holes have been drilled, it is time to attach your A-pillar bracket to the pinch weld. Place the A-pillar bracket on the inside edge of the pinch weld and attach it using the 2 smaller screws that came with the A-pillar bracket kit.
The 2 provided screws have a T-20 Torx bit head on them. Screw the A-pillar bracket into the pinch weld until they are hand-tight.

To attach the gimbal mount to the A-pillar bracket. you have to disassemble the gimbal bracket. This is easy and can be done in seconds. On one side of the gimbal is a plastic nut that is used to secure the gimbal in place after making adjustments. On the other end of that plastic nut is a metal bolt that holds the gimbal all together.

Unscrew the plastic nut and then you will be able to pull the metal bolt out of the side of the gimbal. Now you will be able to pull all of the gimbal components off of the bracket.

With the gimbal assembly taken apart, you will be able to attach the gimbal bracket to the A-pillar bracket. Provided in the A-pillar bracket kit are two larger bolts with nuts that are used to attach the gimbal mount to the A-pillar bracket. Use a 10mm ratchet to tighten the nuts and secure the gimbal mount to the A-pillar bracket.

To make the installation of the display mount look as close to the factory as you can, you will need to make a small modification to the weather strip. I used a pair of metal snips to cut a notch in the weather seal so it fits tight around the A-pillar bracket. With the notch cut out of the weather strip, you will be able to reinstall it for a factory-style look.

You can now press the weather seal back onto the pinch weld and admire the beautiful work you have just done. The weather strip covers the screws you just attached to the pinch weld and it gives the installed A-pillar bracket a clean look once it’s all installed.
Finally, reassemble the gimbal in reverse order of the steps above. Then take the display and place it onto the mount. ARB uses magnets to secure the display to the mount, pretty slick.
Remaining Wiring

The diagram above is information provided by ARB showing you how they designed this wire kit to coordinate with the unit. The red and grey wires connect to an accessory on-and-off power source so the ARB LINX can have a signal that lets the system know when the truck is being powered on or off.
There are multiple connections you can make to your ARB LINX to customize your system. This portion is optional based on how you would like your setup to be.
In the kit, there is a wiring harness labeled patch wire harness. This wire harness consists of four wires with the terminals pre-installed that will plug directly into the control box. The other end of these wires are bare metal ends for you to add whatever connections you need.
Each of these wires is color coded to help you set up your system and has a specifically designated spot where they should be wired up.
The yellow wire will be wired into a power source that is connected to the low beam headlight power source. This wire configuration allows the it to know when your headlights are on or off so the display can dim at night or be brighter during the day.
The blue wire will be wired into a power source that is connected to the high beam headlight power source. This wire configuration lets the ARB know when you activate your high-beam headlights. You can have specific accessory lights connected to this system activate when you turn on your high beams. For example, a roof-mounted light bar that turns on with your high beams lights.
The last purple wire gets connected to a reverse light power source. This is similar to the high beam function but when you put your vehicle into reverse, you can choose auxiliary lighting turn on.
For now, I’m only going to be wiring up the grey / red stripe wire. This will wake up the display when I power on my truck and put the system into sleep mode when I turn it off.

Before wiring up my grey / red wire, I went down to my local AutoZone to pick up some add-a-fuse connectors and some extra fuses. I’ll be using an add-a-fuse to wire my accessory on/off to a 12V accessory fuse inside the truck.

I removed just the grey / red wire from the wire harness loom and I cut the wire down to 18″ long. This length is specific to my control box location. You will need to measure your own setup.
I used a wire stripper to trim off the end of the wire so I can add it to my add-a-fuse. Then, I used my wire crimper to attach the grey / red wire to my add a fuse.

I installed the control box right next to an interior fuse box, this is where I’ll place the add-a-fuse.

You will see a white cover with all of the fuse labels on it. This fuse cover is held on by some small plastic clips and easily pops off with a gentle pry. Using the fuse diagram, I found an accessory fuse that I was going to use for my accessory power on/off.
The fuse slot I choose was labeled USB and it’s a 7.5A fuse. This fuse is connected to the vehicle’s accessory USB port that turns on and off with the truck.
Another possible fuse I could use would be the 3rd down on the left side labeled P Outlet. However, I was not able to use this one because it’s already being used for my Midland GMRS radio.
Any fuse that turns on and off with your truck will be a fine to use for this wire.

After installing the grey & red wire into the fuse slot, connect the other end to the control box. In the control box, look for pin G1 which is going to be below the USB port. Connect the metal terminal of the grey / red wire to the G1 pin.
Place the cover back onto the control box and install it back onto the rail.
Final Thoughts

I’m very excited to have this system installed in my Tacoma and look forward to adding more accessories. This system will make controlling my off-road accessories super convenient when navigating the trails.
There are many other accessories you can connect to the ARB LINX system. What I have covered was just the base installation of the ARB LINX system itself. ARB makes multiple other kits that connect to and can be controlled by the LINX.
A pretty cool add-on that ARB makes is a TPMS system that integrates with the LINX. With it, you can monitor all your tires’ PSI, including the spare and even trailer tires.
ARB has come up with a very detailed and well-thought-out system in the ARB LINX. It was designed with off-road enthusiasts in mind to help make the most out of your adventures.
I hope you enjoyed my detailed installation and overview of the ARB LINX system. If you have any questions or comments regarding the system, please leave them down below!