
Protecting the vehicle’s undercarriage and body panels becomes a top priority when venturing off the beaten path, especially on rocky or technical trails. As such, a solid set of rock sliders is one of the most critical pieces of trail armor.
For my Tacoma, I chose the CBI Offroad Overland Series Rock Sliders. After extensive use on the trail and during everyday driving, I’ve developed a deep appreciation for their design, durability, and overall value. This article offers a comprehensive look at the installation process and long-term performance of these sliders. I’ll also review key considerations for anyone looking to upgrade their rig’s trail readiness.
Specs and Features
- Heavy-duty DOM tube construction
- Fully bolt-on install
- Optional powder coat finish
- Flat style doubles as a side step
- Top plates for added protection and a stepping point
- Available for double cab and short or long bed
- Kick out or non-kick out
Use code – TRAILCO – to save an extra 5% off your order! Typically stacks with any sale going on.
Table Of Contents
Why Chose CBI?
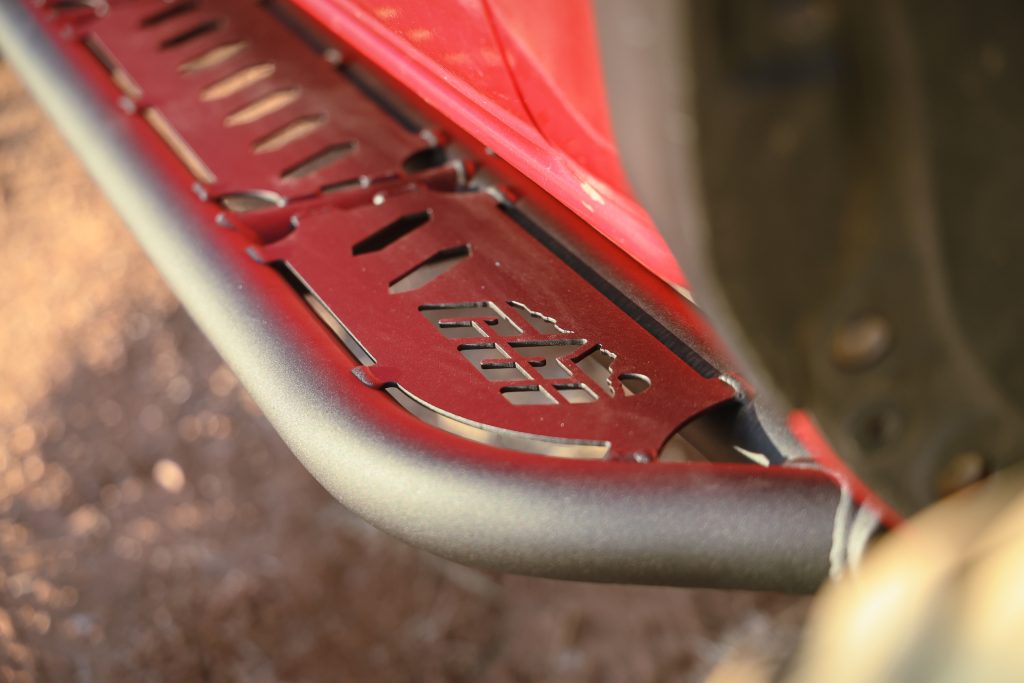
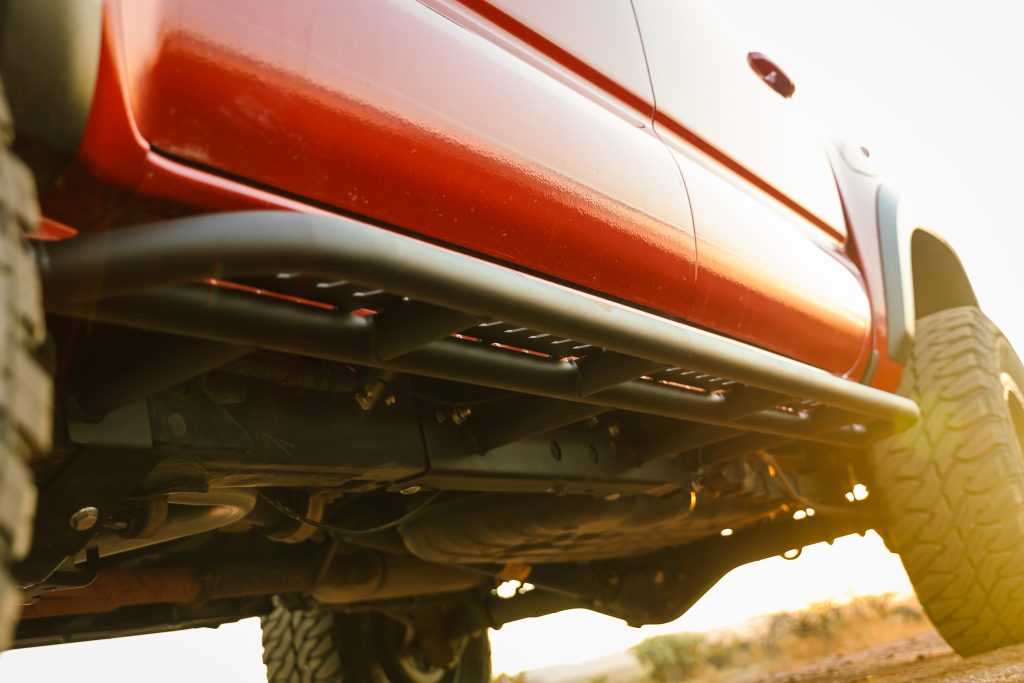
CBI Offroad is a well-respected American manufacturer based in Idaho Falls, known in the off-roading and overlanding communities for producing high-quality, trail-tested armor. Their Overland sliders stood out to me due to their ideal balance of protection, functionality, and clean design.
Made from 1.75-inch DOM (Drawn Over Mandrel) steel tubing, they are built to absorb serious impacts on rocky terrain. You can opt for them with or without a kick-out, which curves outward near the rear tires to help deflect the truck from trail obstacles.
I decided to have no kick out for a flush and clean appearance and got mine with the black powder-coat finish.
Installation
The installation process was straightforward and manageable for a moderately experienced DIYer. One thing that I quickly want to call attention to, which I didn’t see mentioned, is the step where you must use a grinder with a cut-off wheel or flap disk to trim a small portion of your pinch weld to prevent any contact. I will cover all the required steps to get you up and running to hit the trails.
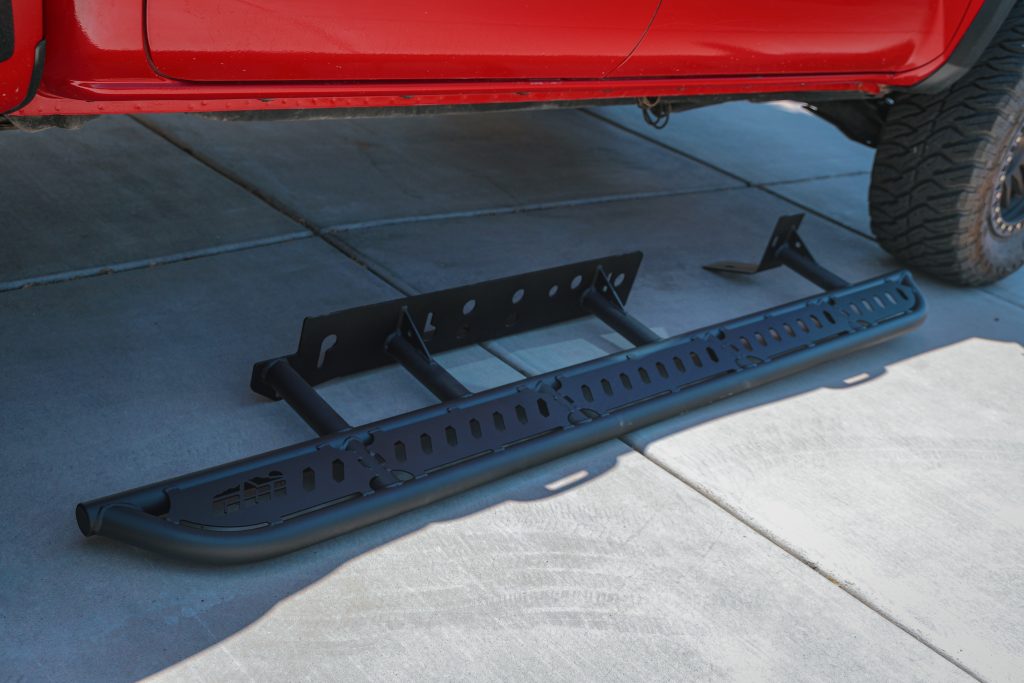
Depending on the configuration, each slider weighs between 75 and 90 pounds, so having a second set of hands or a set of floor jacks makes a big difference.
Tools Required
- 3/8″ ratchet
- 12mm socket or wrench
- 14mm socket or wrench
- 3/4″ socket
- 3/4″ wrench
- Jack stands
Step 1. Frame & Hardware Prep
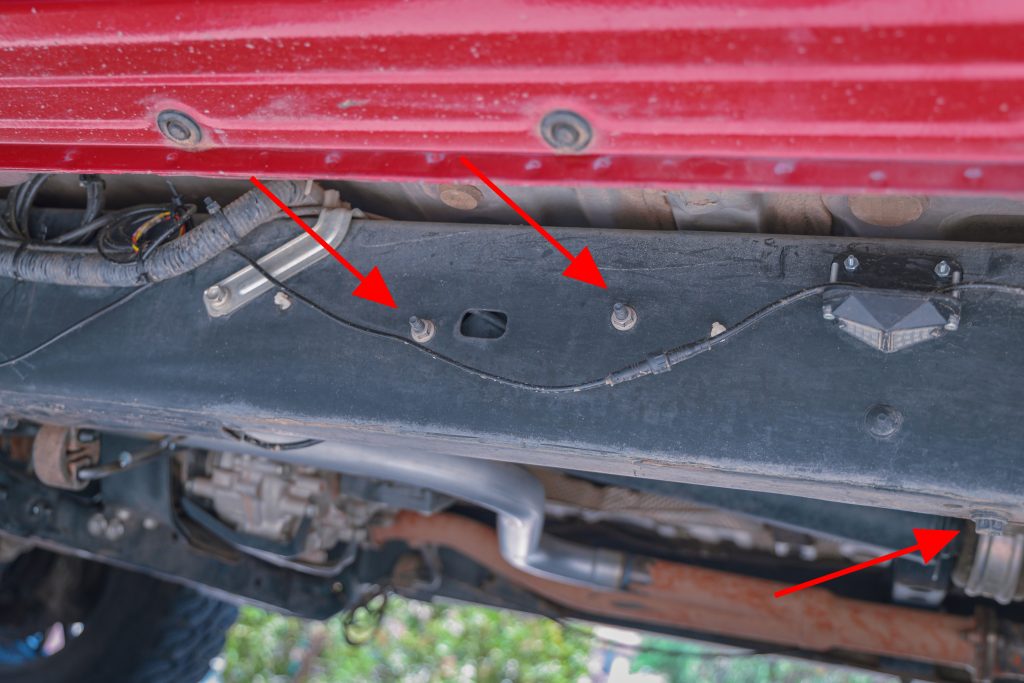
Pictured above is the driver’s side frame rail. There will be a slight difference between the driver’s side and the passenger’s side. The red arrow shown above on the bottom right points to a black 14mm bolt on the bottom side of the frame. You will need to remove this single black bolt from both frame rails.
The two other red arrows you see are only going to be present on the driver’s side. They are two 12mm nuts securing a black box to the inner side of the driver’s side frame rail. Remove those two silver nuts and let the black box hang for now.

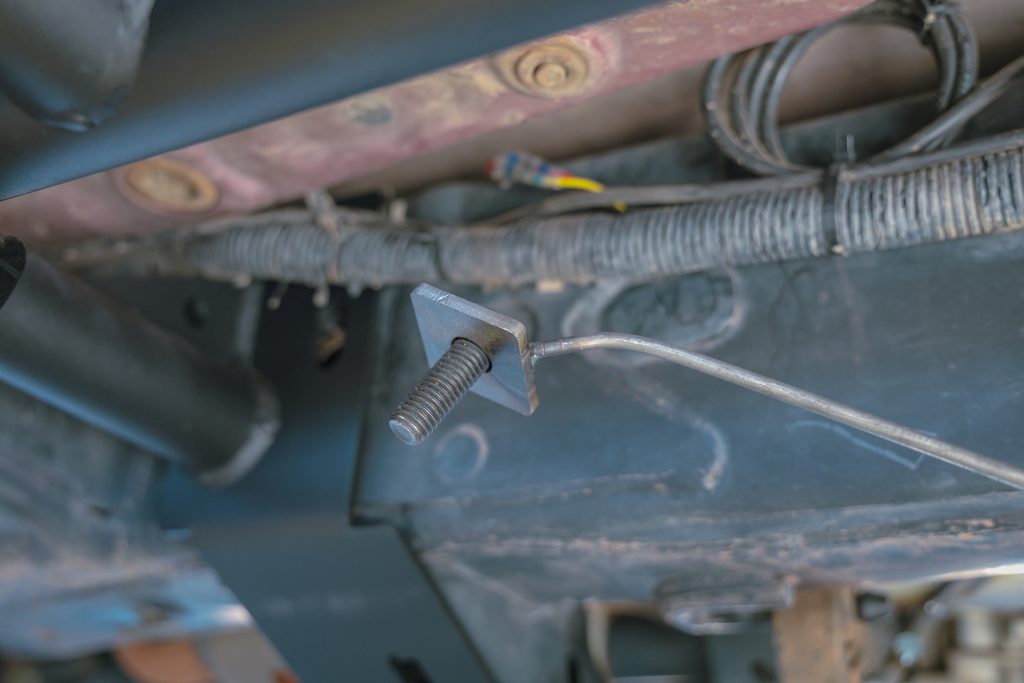
Next, you will insert the supplied plate nuts into the square hole cutouts on the frame cross member near the front of the truck. This plate nut will later be used when bolting the sliders to the frame. Keep in mind that once they are lifted up to the frame, you won’t have access to the square holes on the cross member.
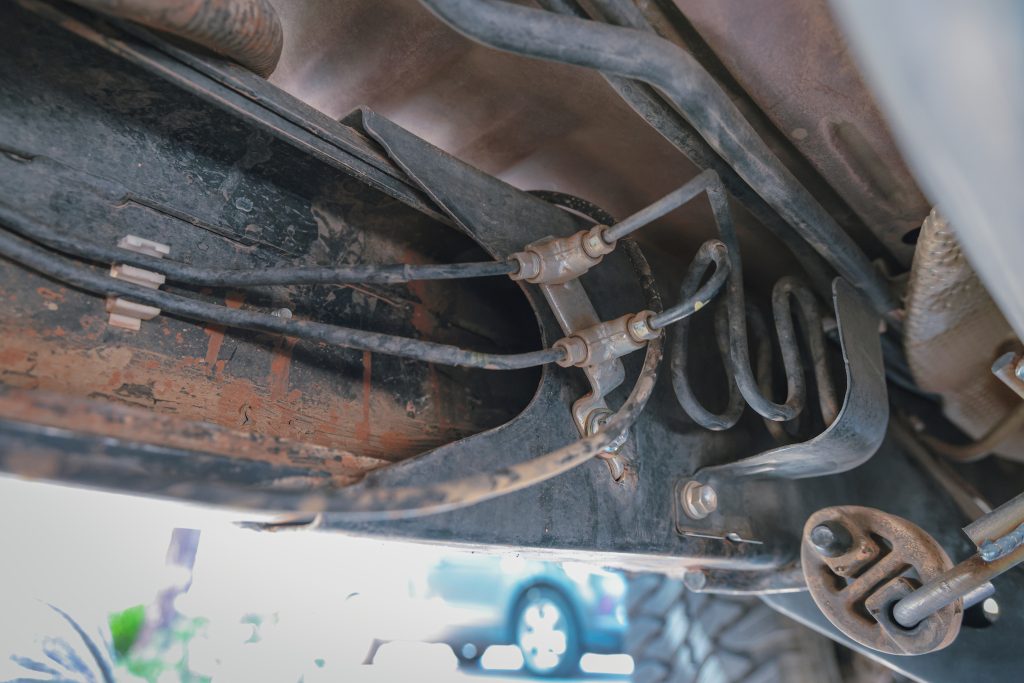
The back side of the driver’s side frame rail, where the brake lines are attached to the frame, is shown above. To remove the plastic frame cap behind it, you will need to temporarily remove the bolt holding the bracket.
The plastic frame cap is not shown in my photo, but yours will be where you see that hole in the frame rail just behind the brake line bracket. You will need to pull this plastic frame cap out later when bolting the sliders to the frame, so you can access a hole inside.
Step 2. Grind Front Pinch Weld
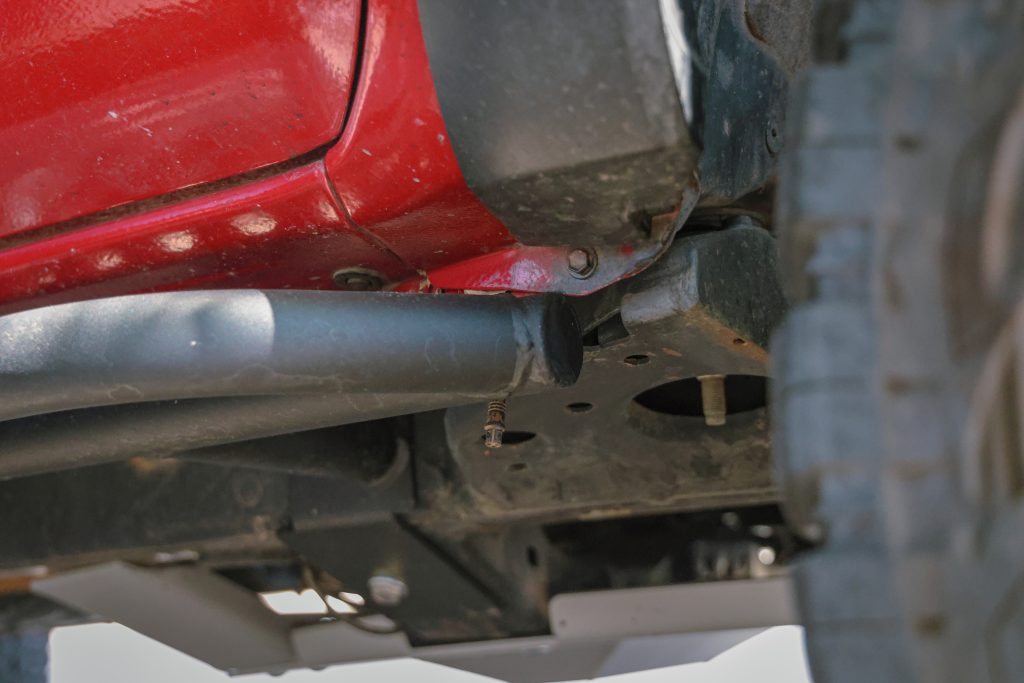
I didn’t learn about this step until after the install was done. In the photo above, you can see the front end of the slider touching the pinch weld slightly near where that bolt is.
If you don’t do some trimming and grind down your pinch weld, the slider will rub and vibrate against the pinch weld, causing a loud rattle inside the cab. Use a cutoff wheel or a flap disk to make clearance between the sldier and the pinch weld so you will not have any noise.
Step 3. Install Sliders
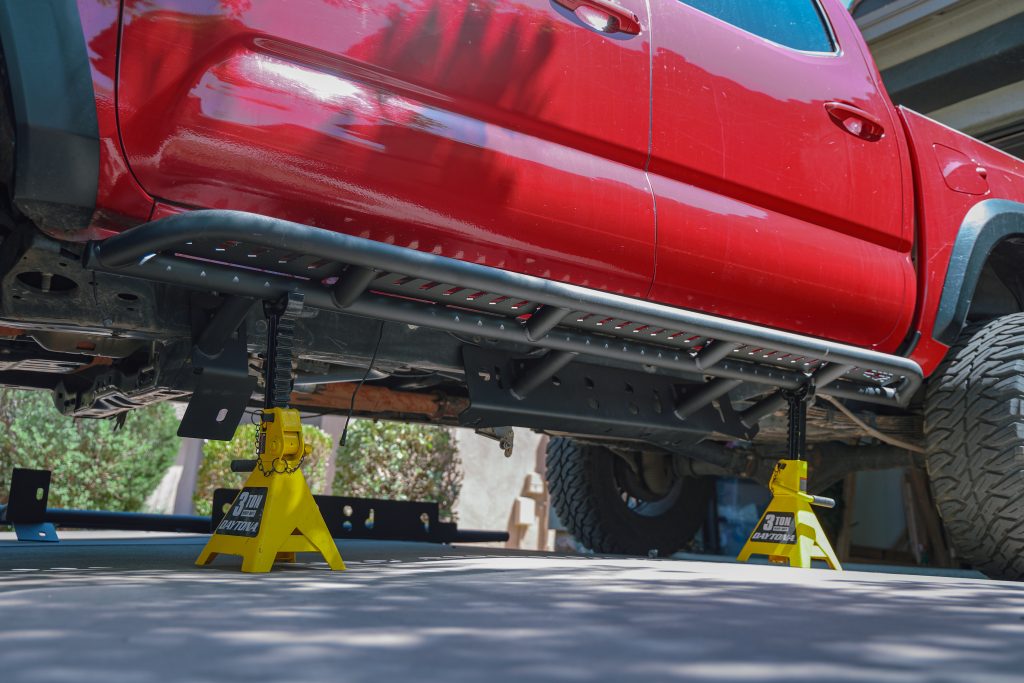
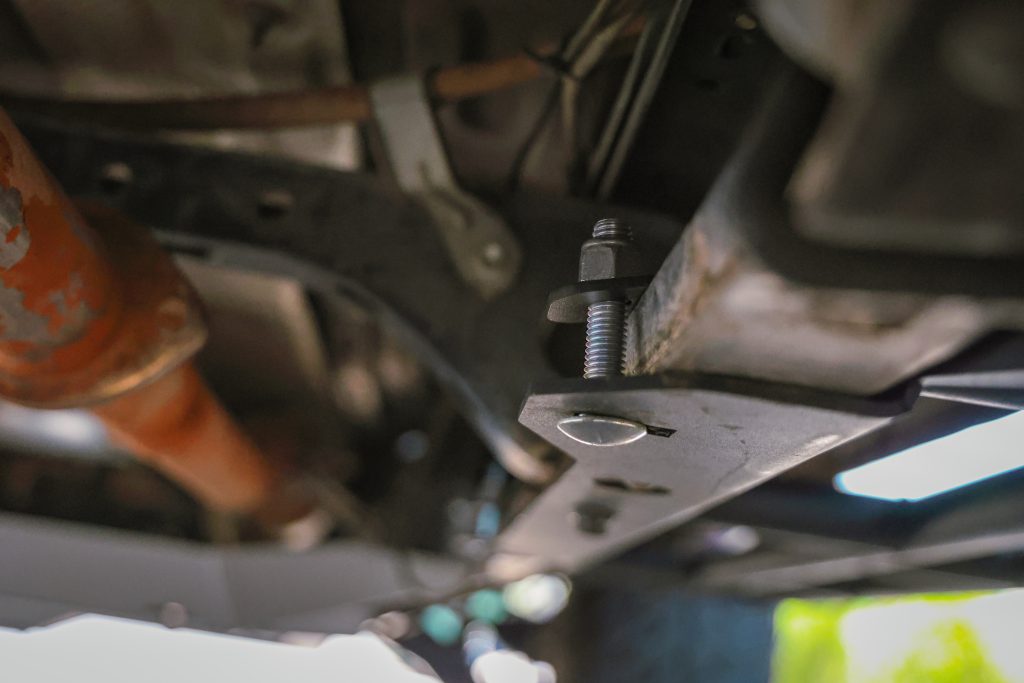
With the truck prepped and ready for the sliders, use a set of jack stands or an extra set of hands to raise them up to the truck’s frame. The first bolt you can put in is one of the black 14mm bolts we took out of the bottom of the frame. Once that bolt is installed, it will hold the sliders up in place, and your extra set of hands can relax.
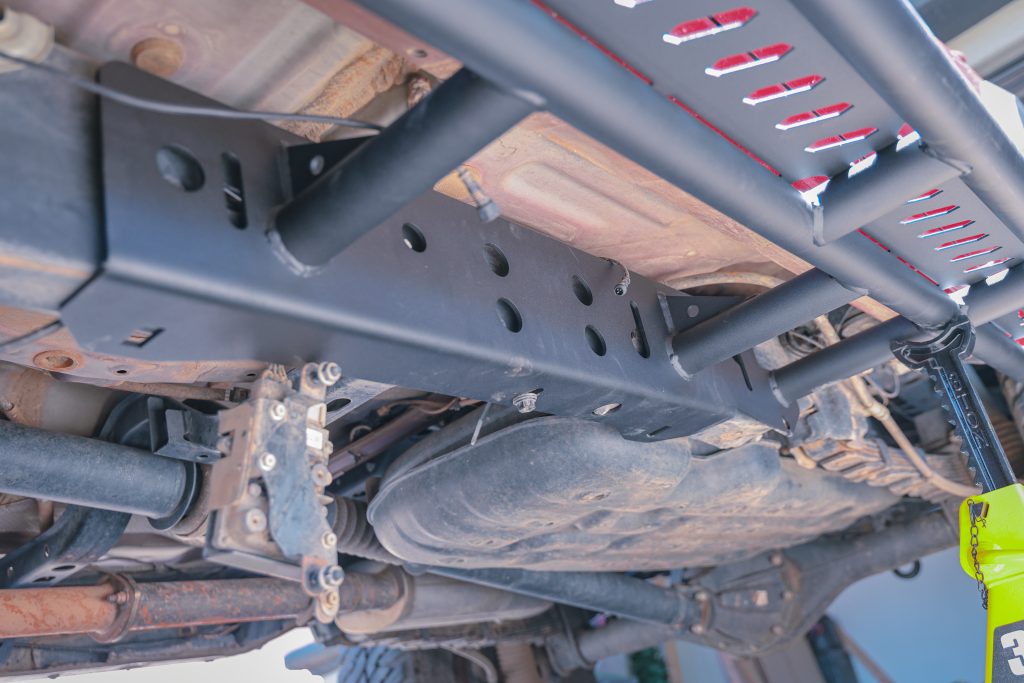
You will see multiple holes lined up along the truck’s frame where the sliders touch. Use the supplied CBI hardware to start securing the sliders to the truck’s frame.
The location where you took out that plastic frame cap from the inside of the frame rail will give you access to install this bolt that’s welded to a long metal pole. CBI supplies this unique bolt so it’s easier to reach all the way down into the frame rail to attach this bolt, which goes at the very front of the slider.
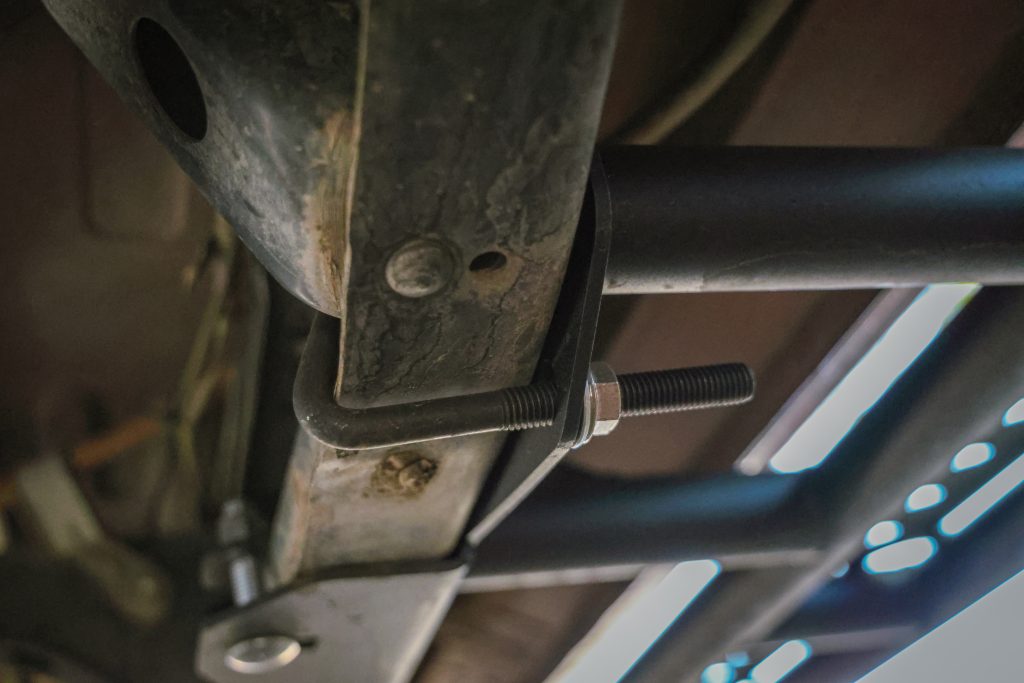
Next, you will use a couple of J-hook bolts to further secure the sliders to the frame rails. Each slider will get (2) J-hook style bolts near the rear ends, pinching the sliders to the frame for a more secure fit.
Then you will also have (2) carriage bolts for each side that go through the bottom side of the slider and pinch the frame using the black curved washers.
To finish the install, make sure you go through and tighten up all of the hardware. Also, remember to reinstall the black box, brake line bracket, and plastic frame caps.
Initial Impressions
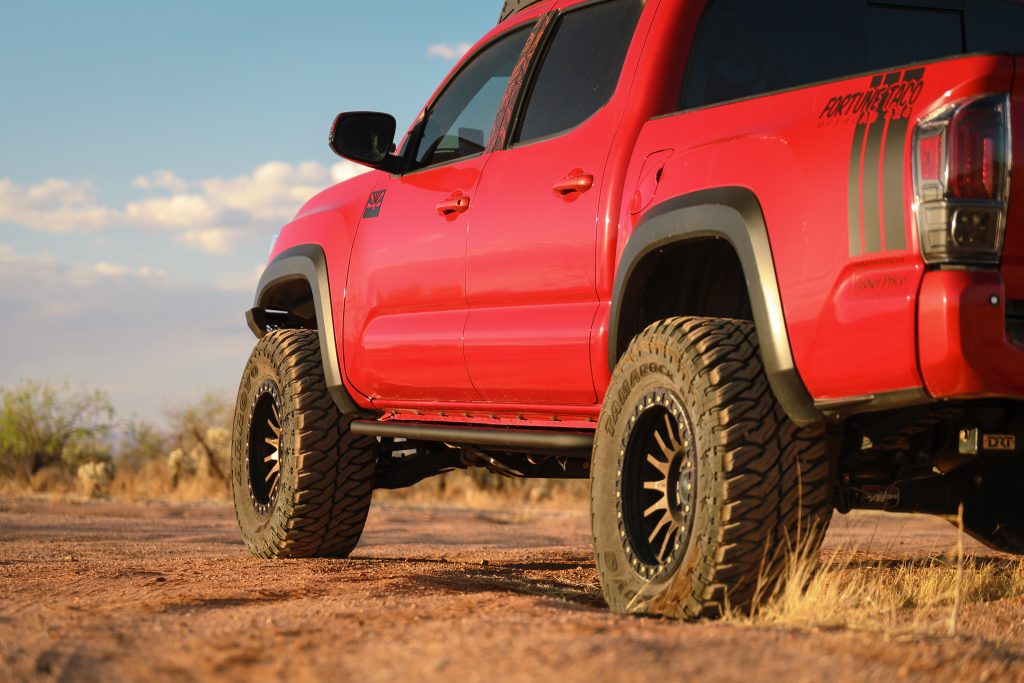
These sliders gave my Tacoma a more aggressive and capable look. The low-profile design stays high near the rocker panels without sacrificing ground clearance, and the powder coat finish looks sharp. The optional tread plates immediately proved their worth, making ingress and egress from the cab easier, especially with a lifted truck.
Despite their heavy-duty construction, the sliders feel like a seamless addition to the truck and don’t protrude awkwardly from the sides. The OEM+ appearance also complements the Tacoma’s design.
Final Thoughts
In conclusion, the Overland Rock Sliders are one of the most functional and confidence-inspiring upgrades I’ve made to my Tacoma. They provide critical protection on technical trails while also serving as a convenient step in daily life. The bolt-on installation, excellent build quality, and field-tested performance make them well worth the investment.
Whether you’re an occasional weekend warrior or a full-time overlander, these sliders are a practical and rugged addition to your rig. They’ve proven their value to me, offering security, style, and long-term durability all in one clean package.
