
The only question I have for you is this; how comfortable are you while seated in your Tacoma?
I have never thought of the seating position of the Tacoma as anything other than okay. I have sat in dozens of trucks and I have been both more and less impressed.
At 5’10”, I am not a huge human. However, I do have longer legs, which has always made the seating position feel a little off.
There are many conversions throughout the forums:
- How do you increase your seat comfort
- How to increase the seat height
- Seat position problems on the Tacoma
Desert Does It saw a need for something better and has knocked it out of the park with their front Seat Jacker. Along with changing the angle of the front of the seat, they have a rear Seat Jacker which changes the angle of the rear of the seat with different width spacers.
Desert Does It doesn’t stop there.
They also came up with a multi-mount panel for the Front Seat Jacker and the Rear Seat Jacker. These multi-mount panels are set up to accept molle pouches which are a standard system used by both military and police.
Honestly, they had me at molle!
Desert Does It Products:
- Seat Jackers: Check Price
- Multi-Mount Panel: Check Price
- Small SPacer Set for Adjustments: Check Price
Please note that Desert Does it has a front and rear multi-mount panels. Pictured here is both the front and rear multi-mount panel but you can buy them individually.
Note: Since this article was published, DDI has released a second version (V2), in which the front MMP is one solid piece.
Table Of Contents
Installation
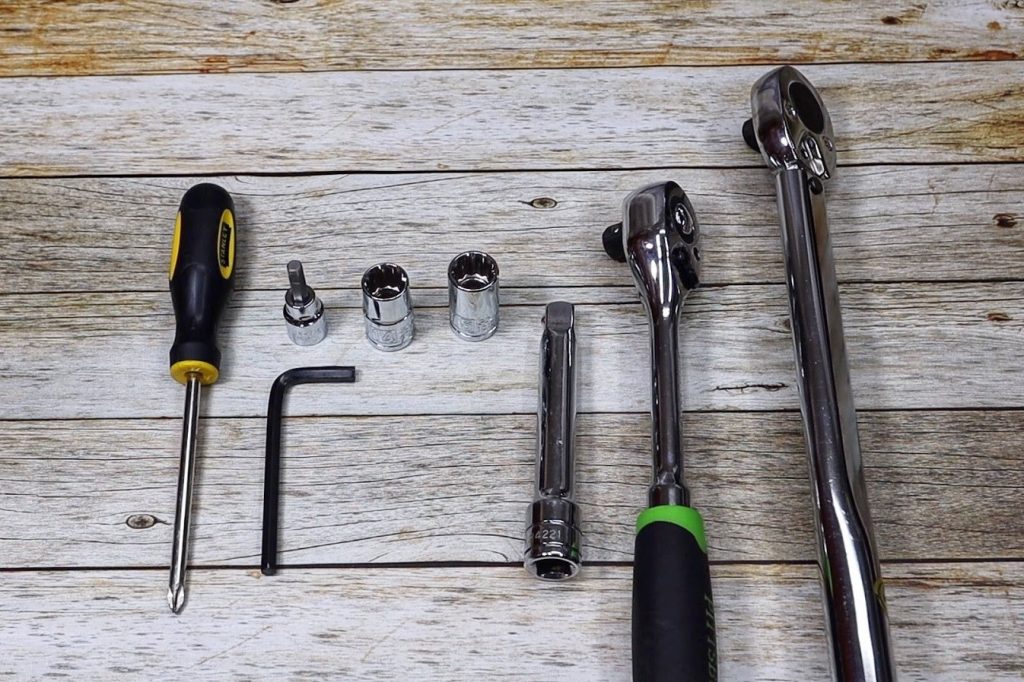
Suggested Tools
- Philips Screw Driver
- 6mm Hex/Allen Key
- 6mm Hex/Allen Socket (not needed but faster)
- 14mm Socket
- 15mm Socket
- Socket Driver
- Foot Pound Torque Wrench
Front Seat Jackers
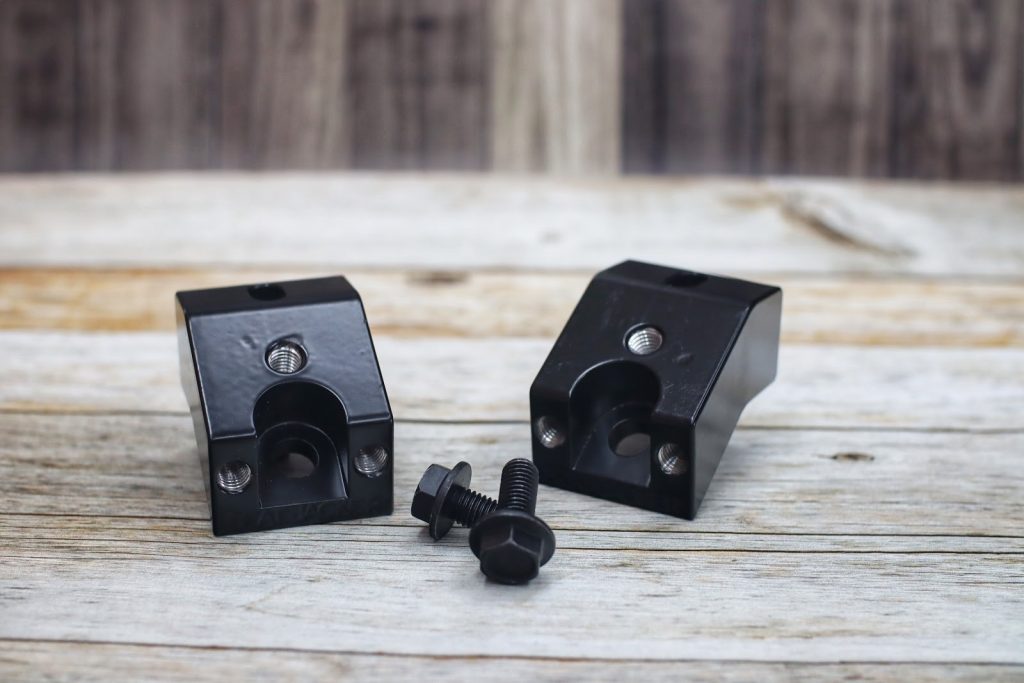
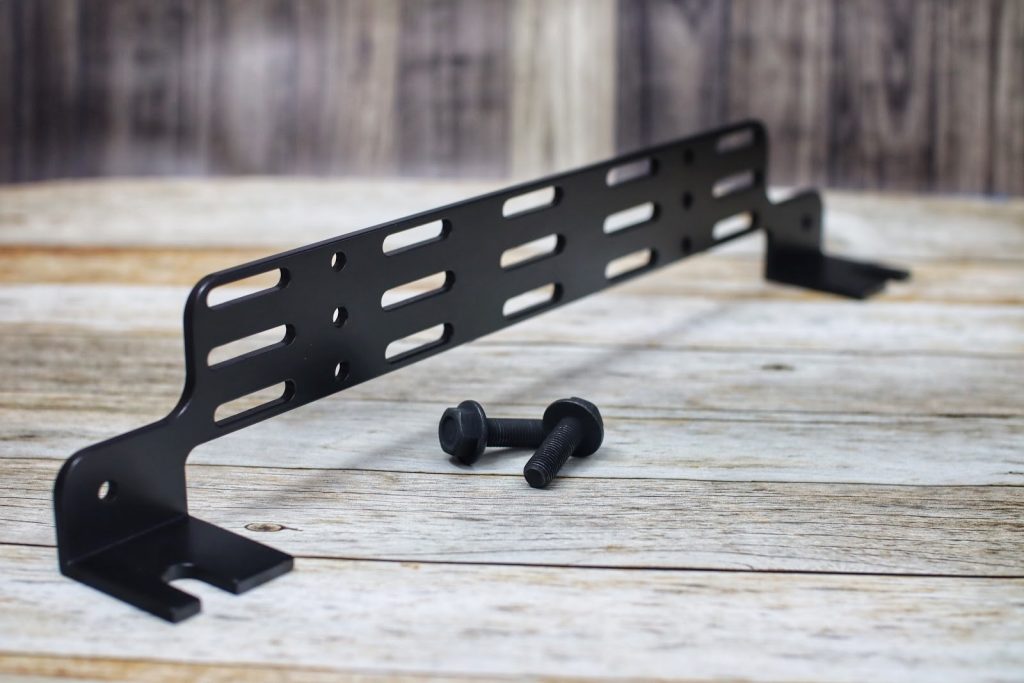
The front Seat Jacker from Desert Does It is a nicely machined piece of aluminum that is painted black. I found the fitment on the front Seat Jacker to be superb. Let’s see how it all goes together.
Step 1. Remove Factory Bolts
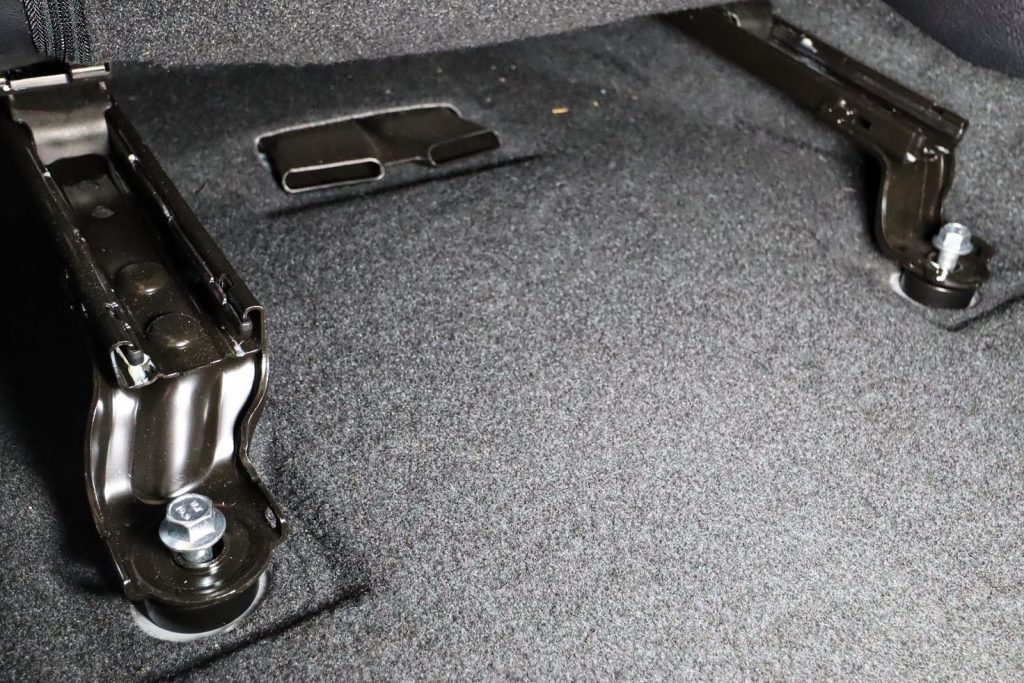
There are a total of four bolts that hold in your seats, two in the front and two in the back. Locate the two bolts at the front of your driver’s seat.

Utilizing a 14mm socket, remove the two bolts on the front of the seat.
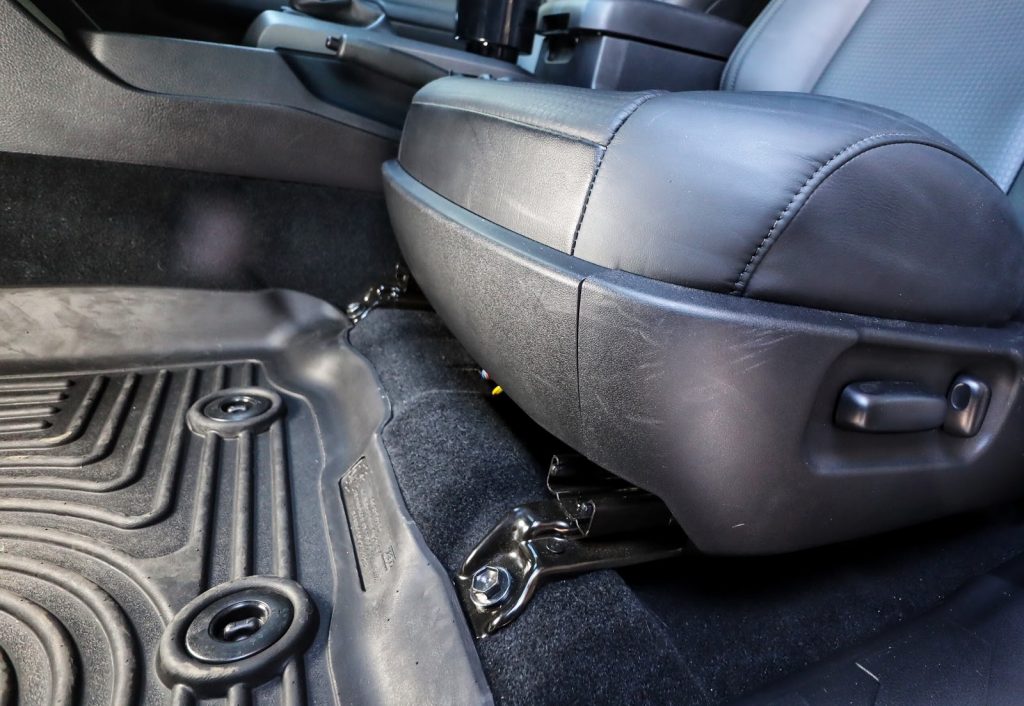
Step 2. Loosen Rear Bolts
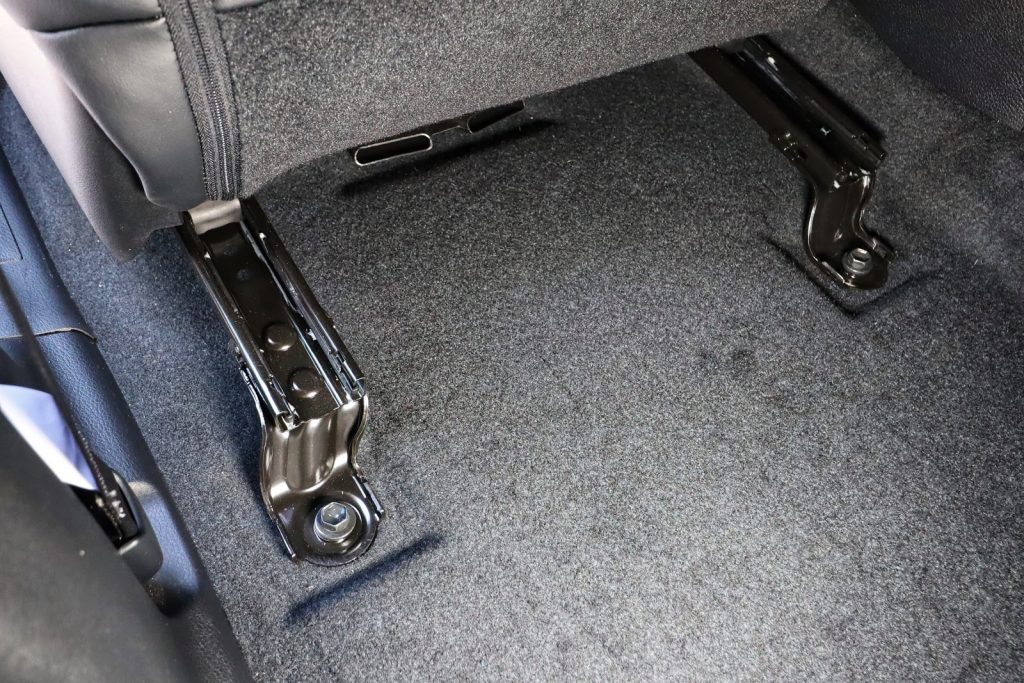
Start by removing rear seat mats. In my case, I have the rubberized Husky mats and they were almost covering the rear of the seat. Once the floor mats are removed, locate the two plastic covers that hide the rear bolts to your seat. Slowly, and carefully, remove the covers off to expose the bolt heads.
Utilize the same 14mm socket and loosen, don’t remove the two rear-seat bolts. Leaving these bolts in but keeping them loose will allow you the access under the front seat bolts you need but making it easier to align the holes later.
Step 3. Raise Front Seat
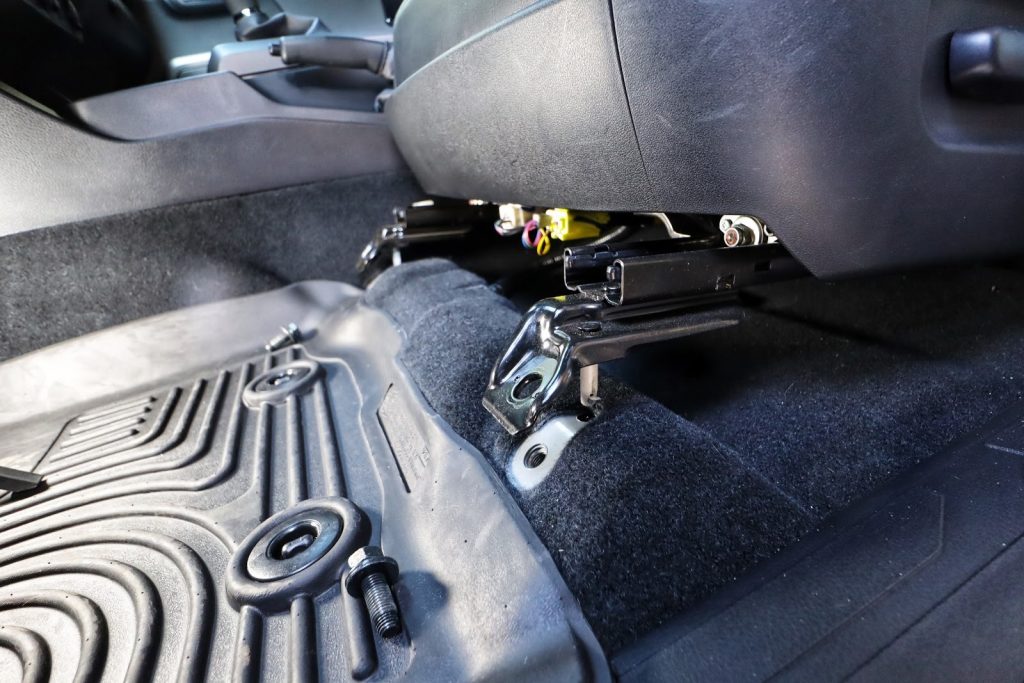
The easiest way to lift the front of the seat is to push on the front of the headrest to create that space between the seat bracket and the floor of the Tacoma.
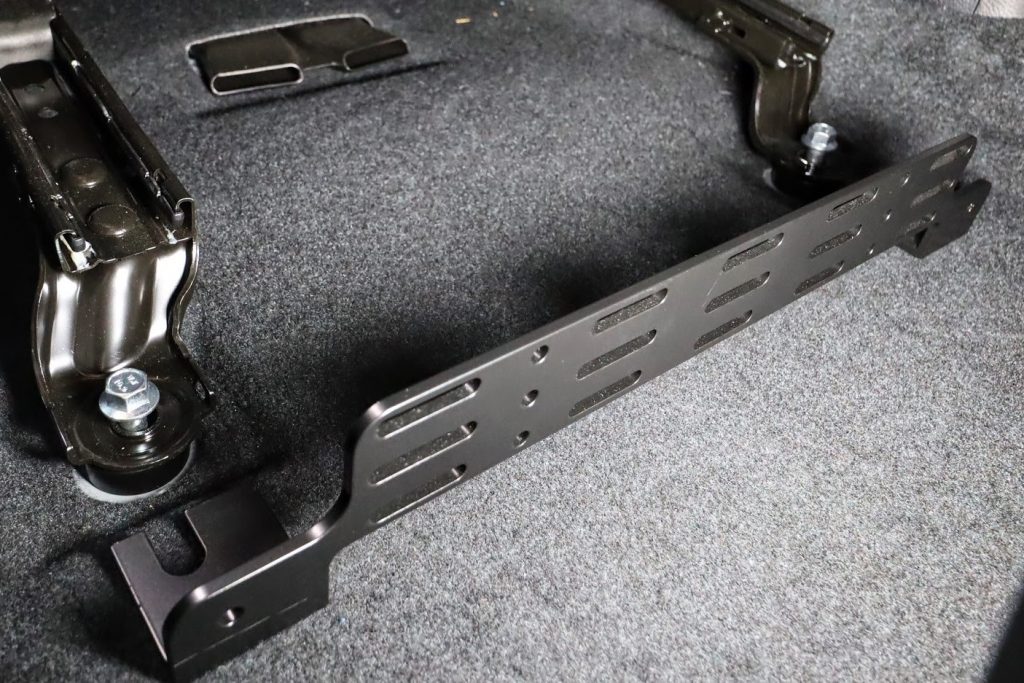
Step 4. Insert Seat Jacker
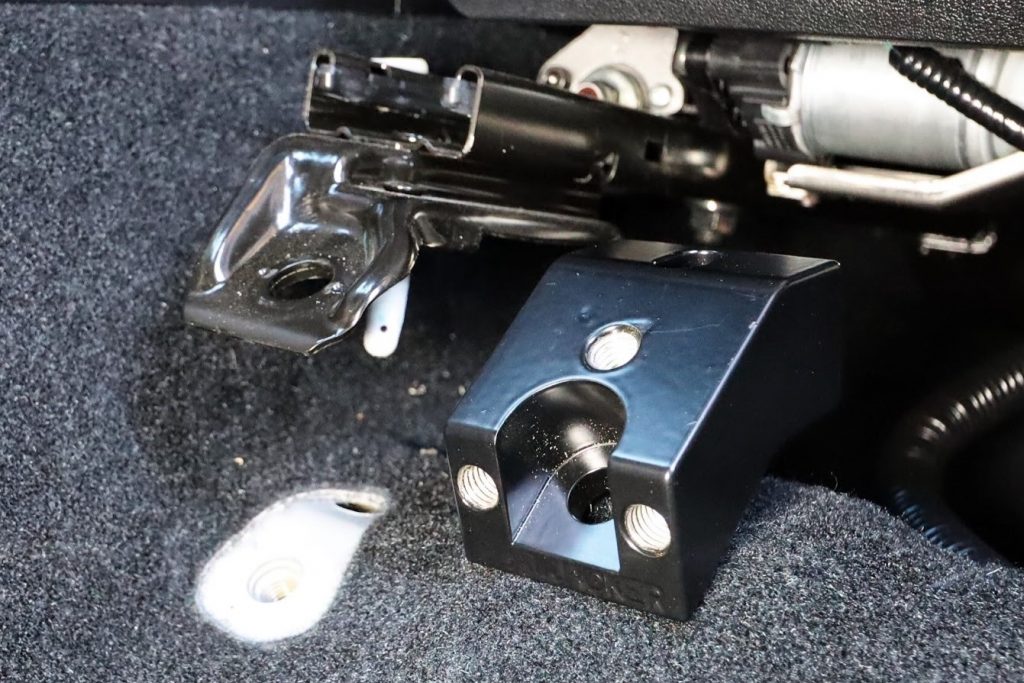
Utilizing the room you have created by pushing back on the headrest, place the front Seat Jacker so the front two screw holes face toward your pedals. On the bottom of the Seat Jacker, there is a post that lines up with where the post of the seat bracket inserts into.
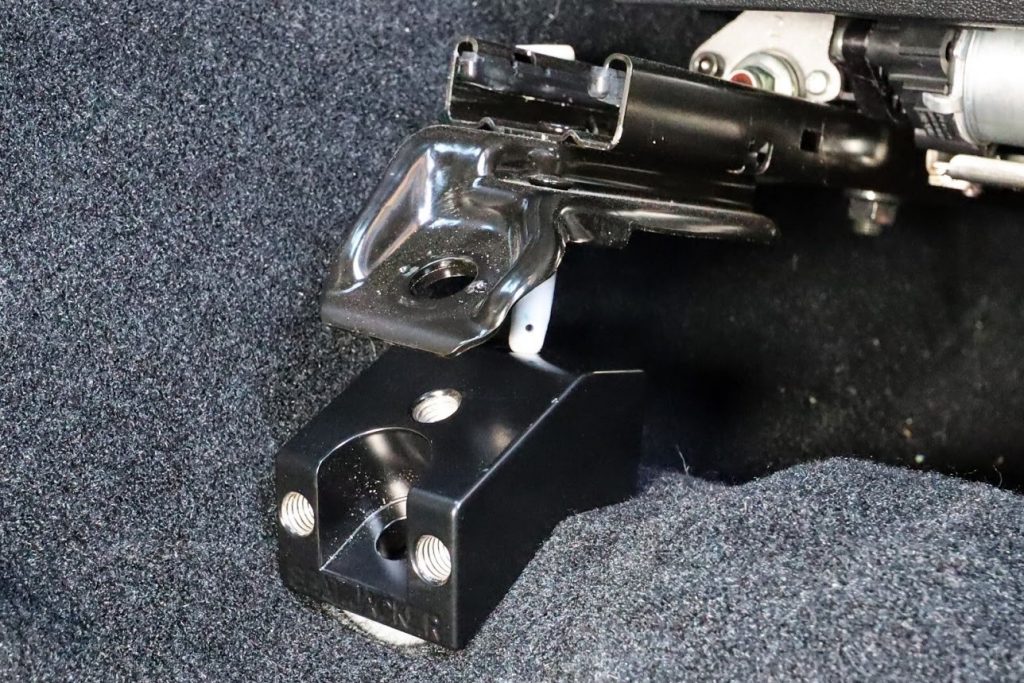
Insert the bottom post of the Seat Jacker into the post hole and it will fall into place. You should be able to look down into the holes and see that they align.
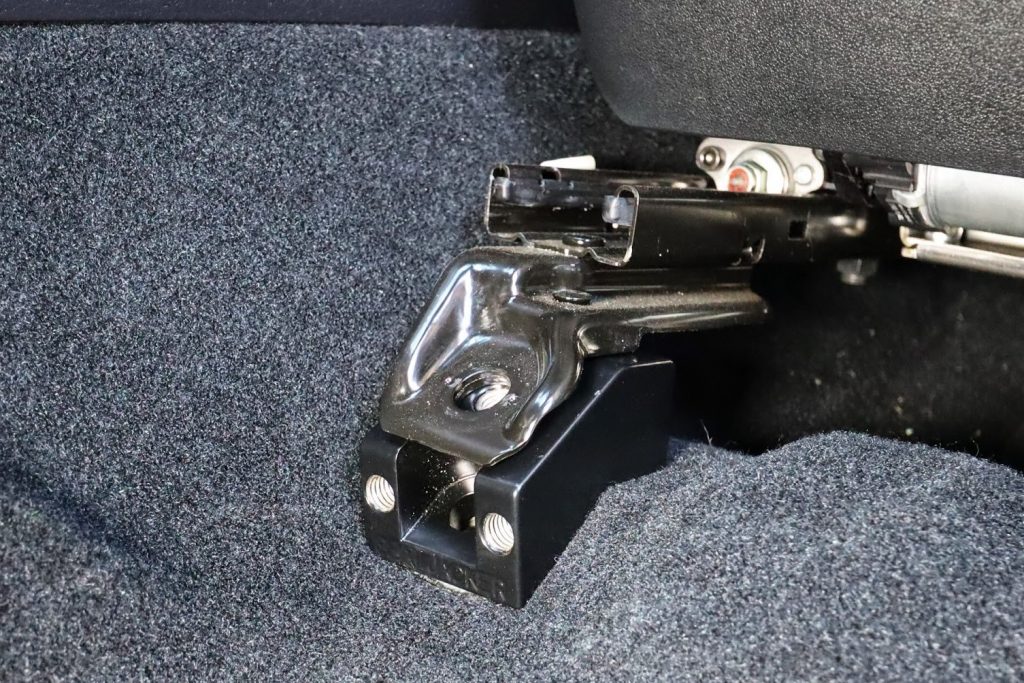
Lower the bracket into the Seat Jacker and all the holes should align perfectly.
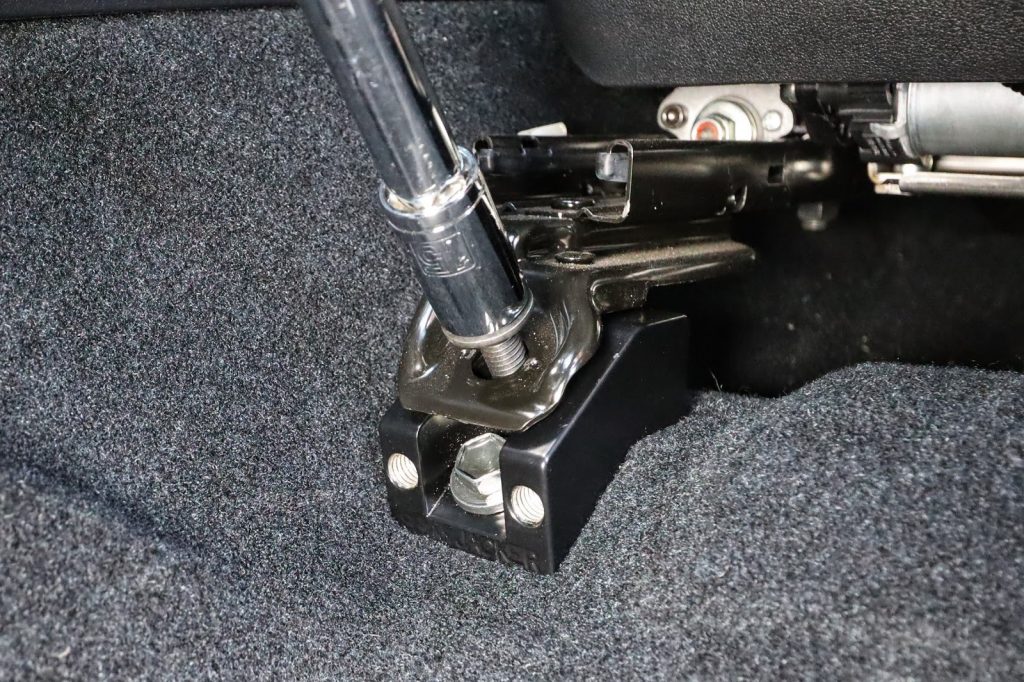
Step 5. Fasten Front
Pro Tip: It was way more challenging than I thought it should be to get these front seat bolts tightened using only one hand, so I came up with this little cheat to free up a hand. I took some thin rope and tied one end to the front seat headrest then tied the other end to the back seat headrest.
Then I tightened the ends together which held the front seat off of the Seat Jackers. Now, the rope is holding the seat up so you don’t have to!
Insert the factory M10 fine thread bolts through the front Seat Jacker front recessed hole and screw into the floor of your Tacoma. Be careful not to cross-thread these bolts, they should go in pretty easily.
I also torqued these bolts to 27ft lbs before moving onto the next step.
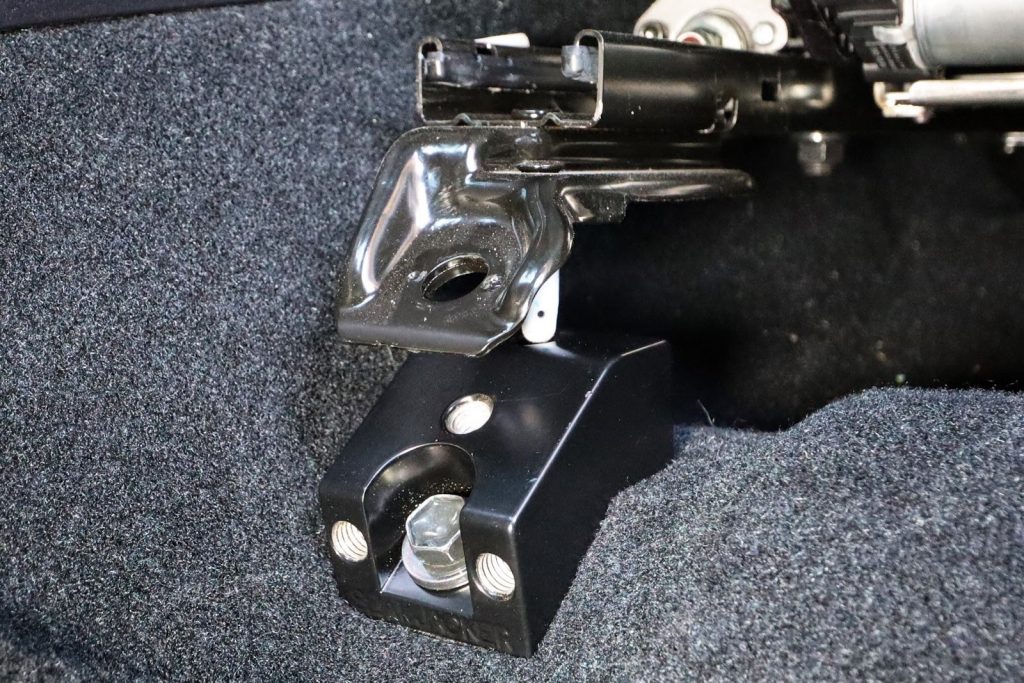
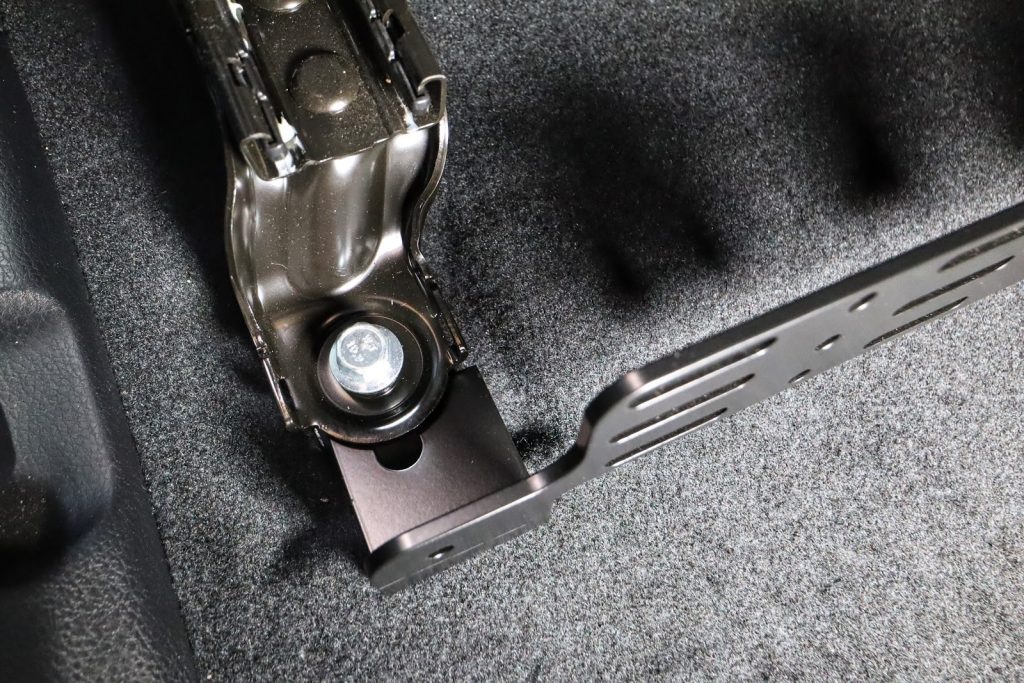
Step 6. Fasten Bracket
Using the M10-1.5 x 25mm bolts, that are provided in the kit, fasten the seat bracket onto the Seat Jacker. The bolts should go in very easily. If you are having any difficulties getting these bolts in, lift the front of the seat slightly to free up the bolt hole.
For my application, I am installing the rear Seat Jacker so I have to leave these bolts loose. However, if you are only installing the front Seat Jacker, then tighten down the bolts with a 15mm socket. Then torque the bolts to 27ftlbs.
You have successfully installed your front Seat Jacker.
Front MMP
The front seat multi-mount panel is my favorite piece of this installation. Having a Molle pouch storage within quick reach is right up my alley. These, just like everything Desert Does It produces, is finely machined.
The front seat multi-mount panels either have to be used with the front seat Jacker or another bracket that Desert Does It sells separately.
UPDATE: Just one note, Desert Does It has moved onto the V2 of the front MMP that is one piece with a honeycomb design. The functionality is pretty much the same but it’s worth noting.
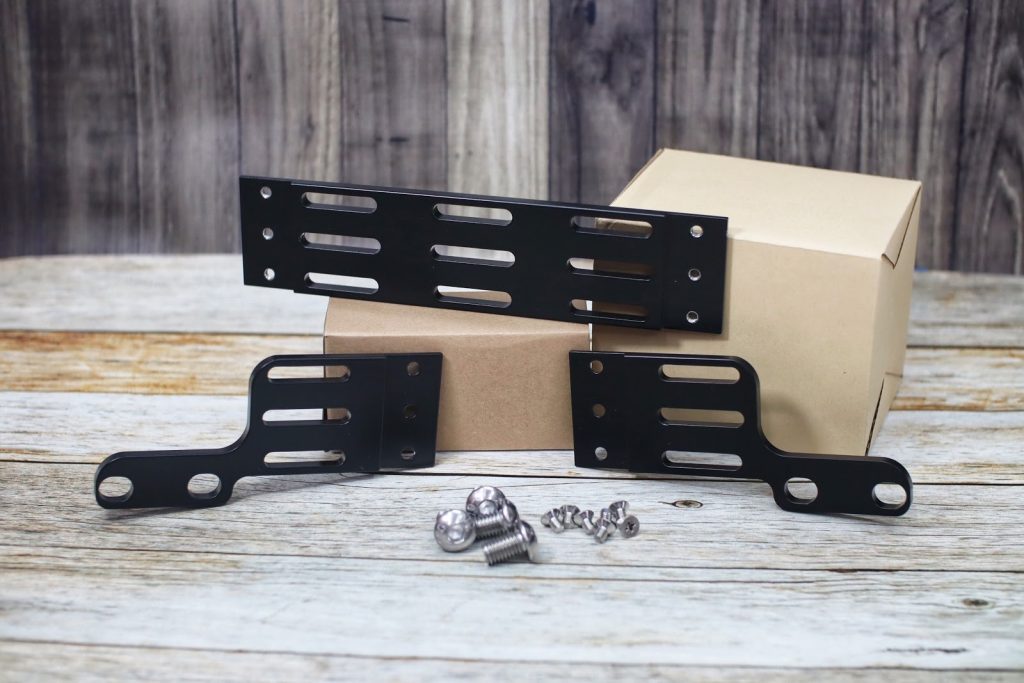
Step 1. Assemble Plate
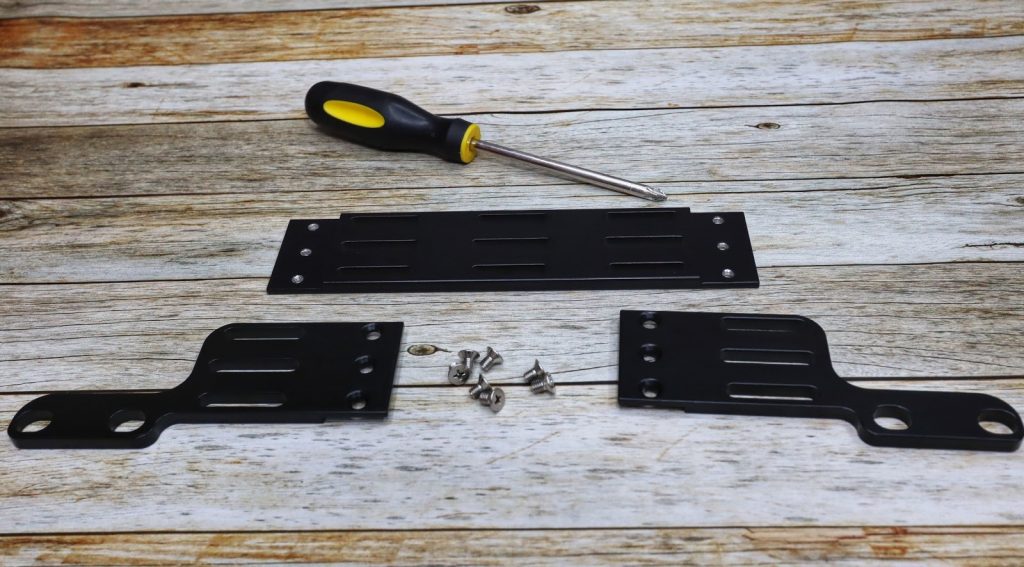
Before we install the front seat multi-mount panel, we have to do some assembly on the workbench.
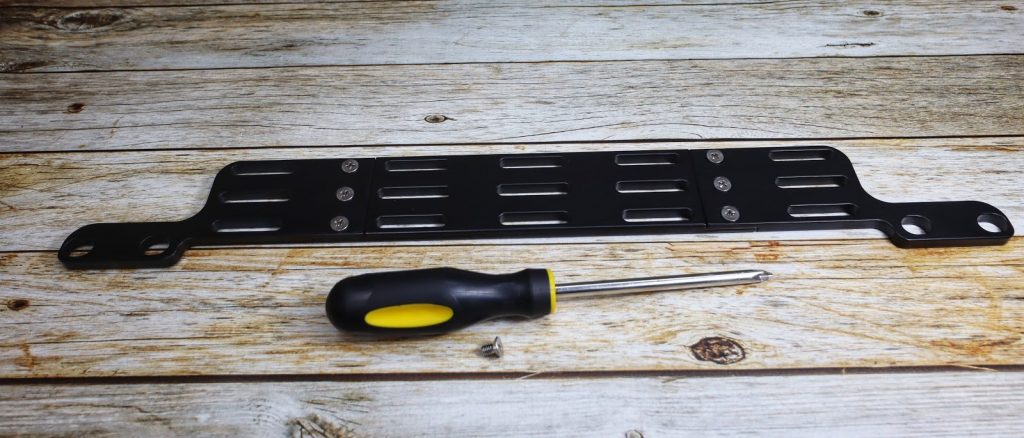
Utilizing a Phillips head screwdriver and the six screws, attach the side plates to the center plate and tighten.
Step 2. Mount Plate
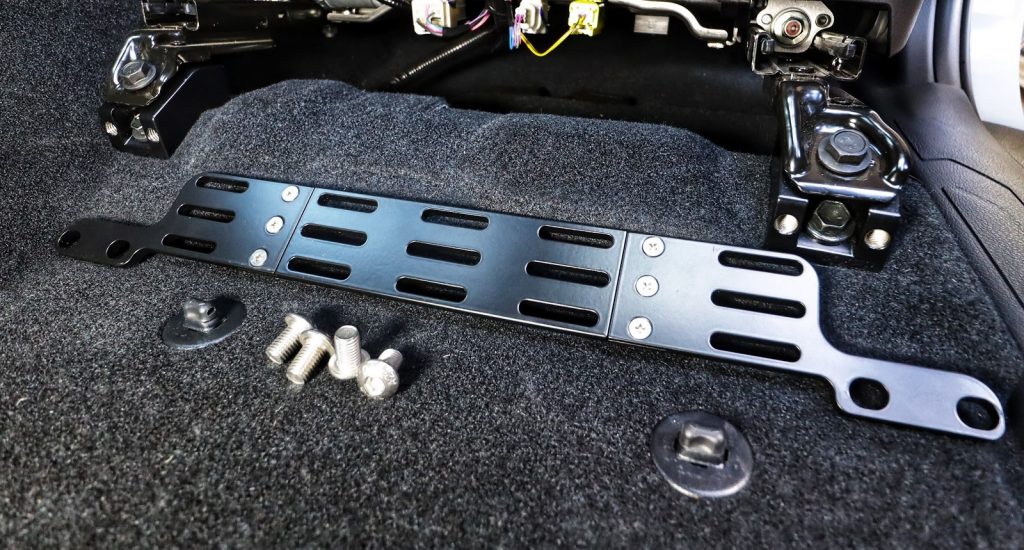
Attach the multi-mount panel utilizing the four 6mm Allen/hex head bolts that come with the kit. The bolts will go in most of the way by hand.
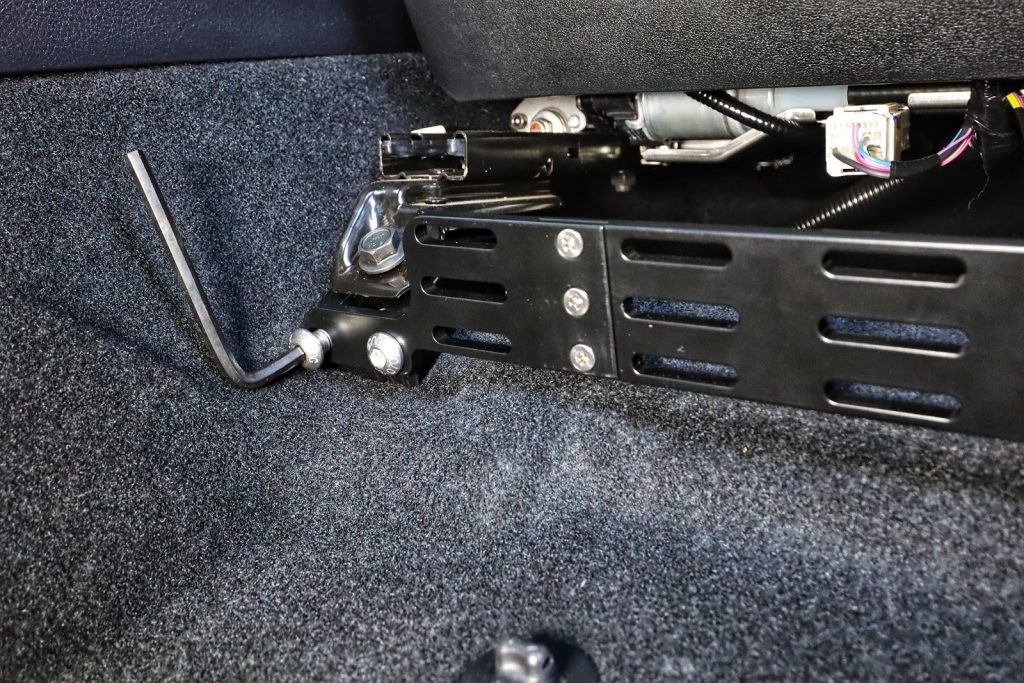
I used a 6mm Allen/hex head socket to tighten all the bolts except the bolt closest to the center console. Because of the proximity to the console, I did not have the clearance to use the socket. However, a 6mm Allen/hex key worked just fine.
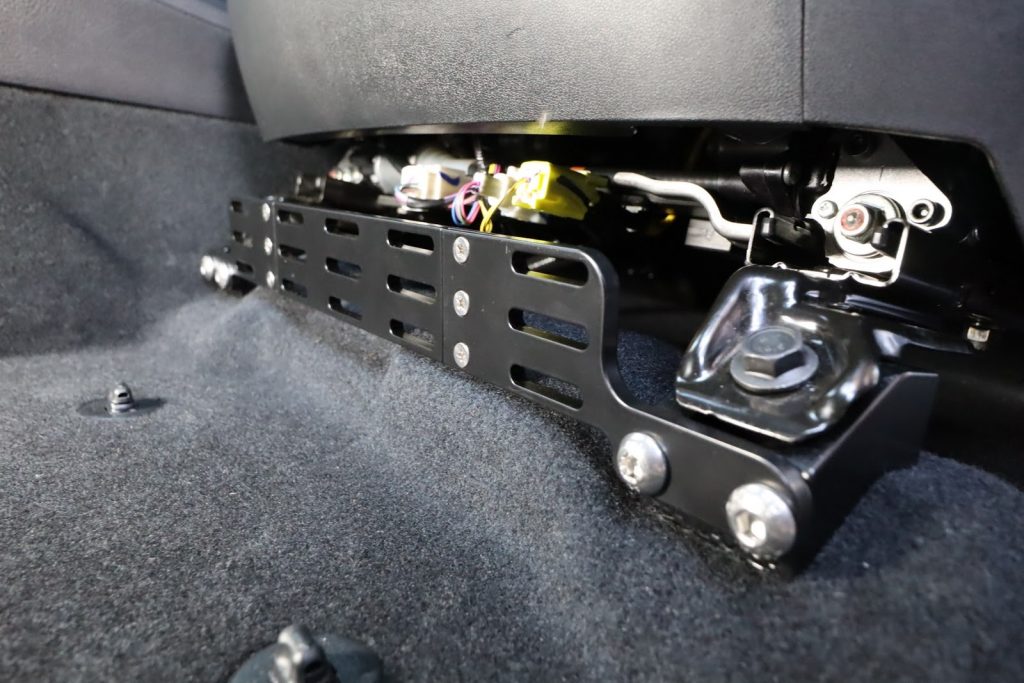
Secure all the bolts down nice and tight. Once that is done, the front multi-mount panel is installed. How nice does that look?!
As you can see, the front bolts are still loose, that is for the next part.
Rear Seat Jacker
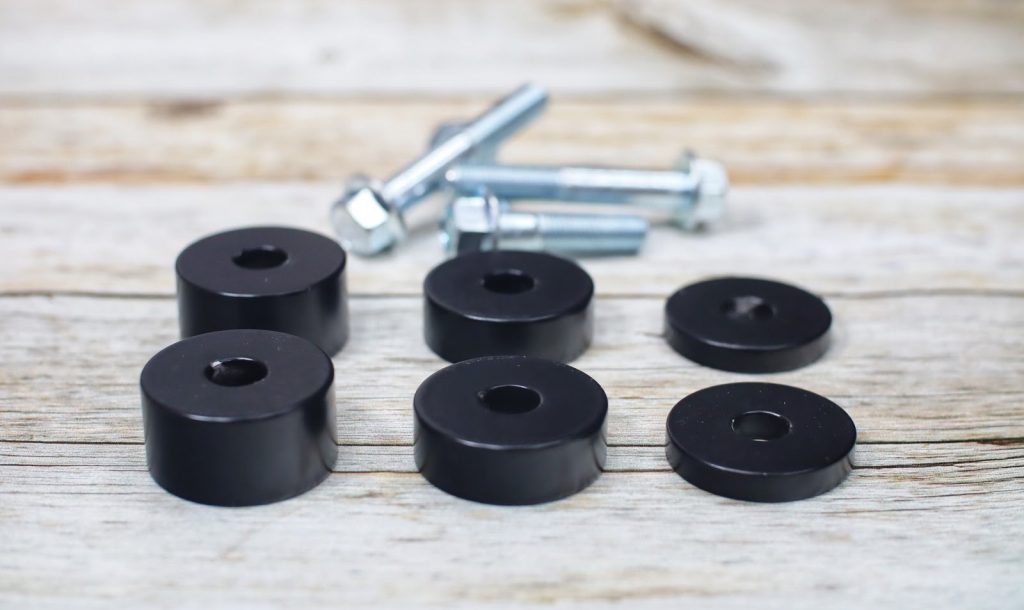
The Rear Seat Jackers have three different spacers so that you can completely customize how much lift you want for the rear of your seat.
The smallest spacer is ¼”, the middle spacer is ½” and the large spacer is ¾”. If you are utilizing the ¼” or ½” spacers, use the 40mm bolt that is supplied. If you are utilizing the ¾” spacer, use the 60mm bolt with the ¼” spacer as a washer.
For any spacer combination above 1” be sure to use the 60mm bolt.
Step 1. Remove Rear Bolts
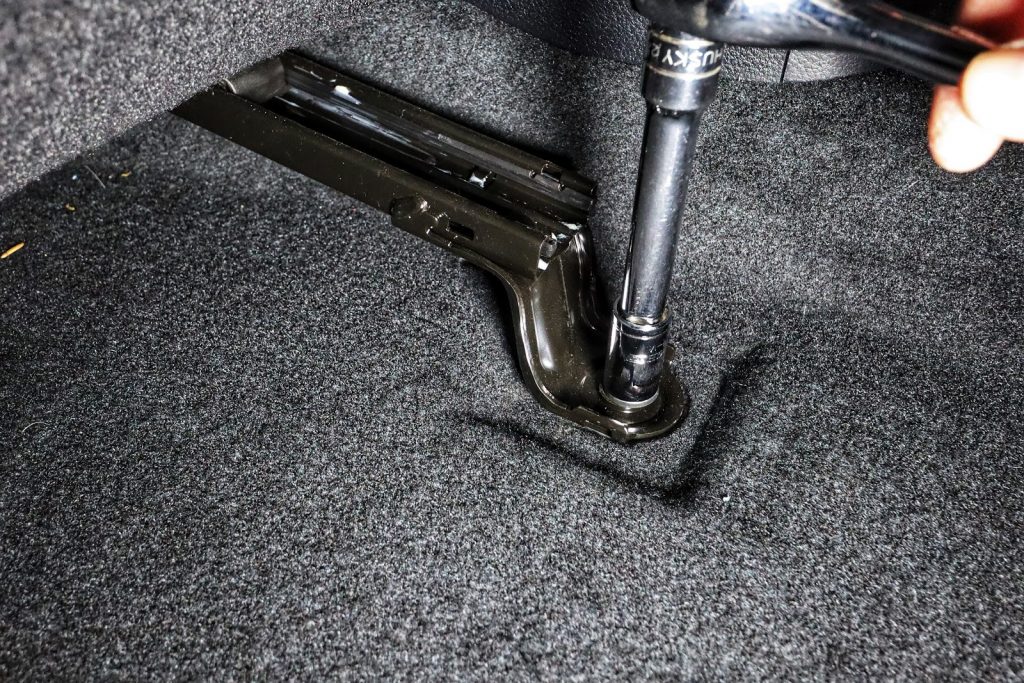
These bolts were still loose from installing the Front Seat Jacker. If you are only installing the rear Seat Jacker, begin by carefully removing the plastic covers, then loosen and remove the two bolts with a 14mm socket.
Step 2. Place Spacers Under Seat
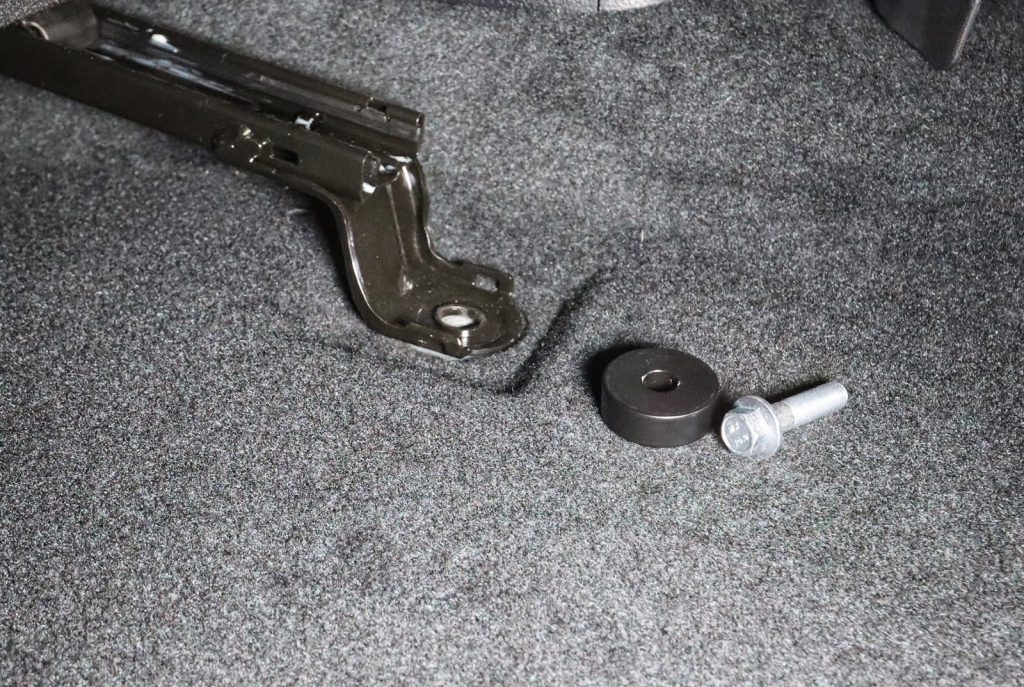
I chose to use the ½” spacer because I wanted my seat to be higher in the front than the back, because of my long legs. For now, I am only guessing at the height and I can always go back and add more spacers later if necessary.
Step 5. Tighten Rear Bolts
If you are only installing the rear Seat Jacker, then you’ll need to tighten these bolts down with a 15mm socket then torque them to 27ftlbs.
But I’m not done yet!
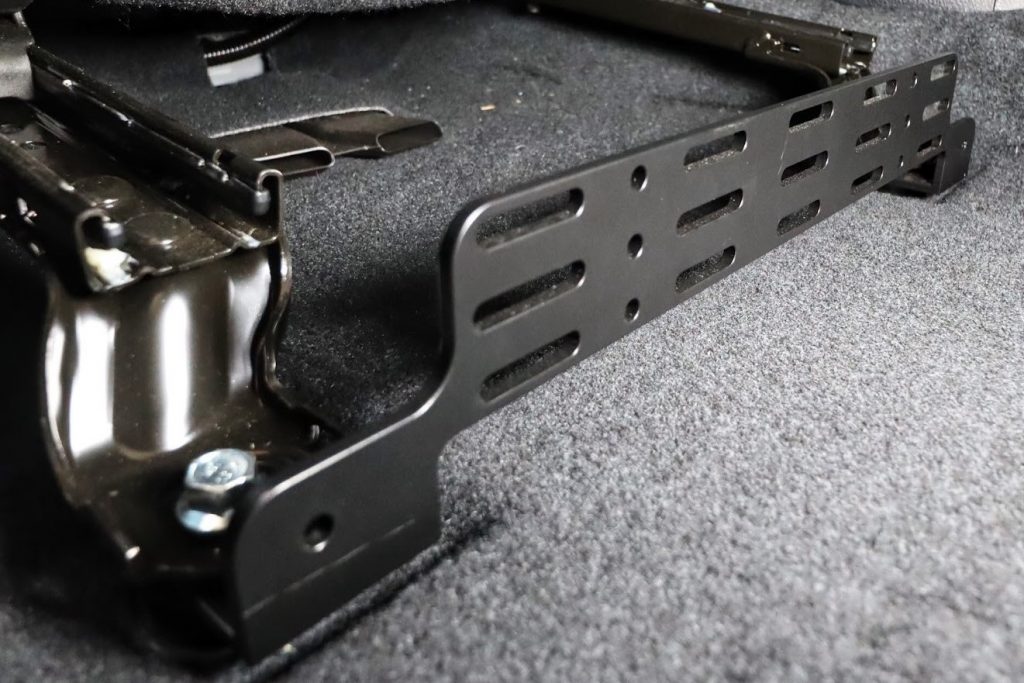
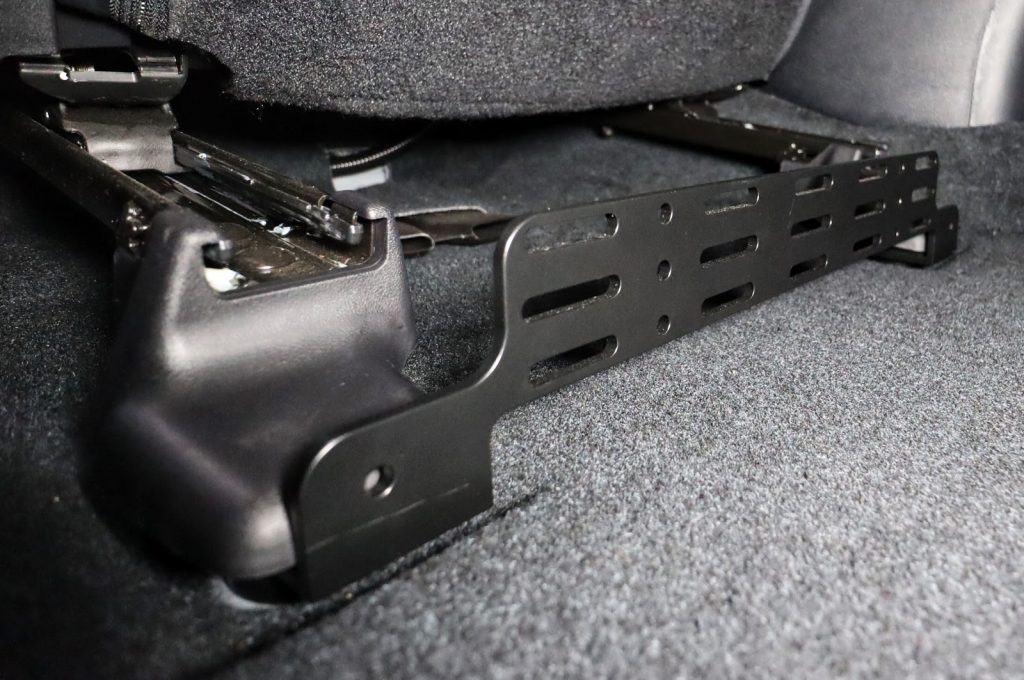
Rear MMP
The rear multi-mount panel can be used with or without the rear Seat Jacker kit. It just slides under the factory bracket and you tighten it down. Simple, but effective in providing accessible storage.
Step 1. Insert Panel
The holes that you use to mount the multi-mount panels are slotted.
With the rear seat bolt loosened, just slide the rear multi-mount panel between the bracket and the spacer. Make sure the multi-mount panel is secured to the bolt for a secure fit.
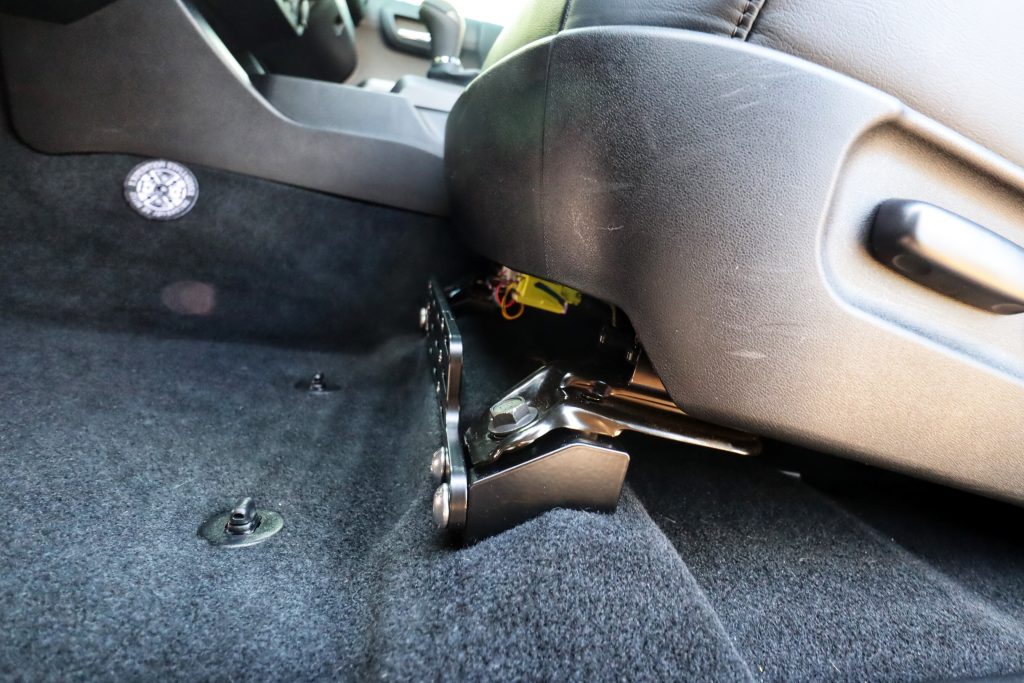
Step 2. Tighten Bolts
With a 15mm socket, tighten the two rear-seat bolts. Then, torque the bolts to 27 ft-lbs.
Step 3. Replace Caps
Now, replace the caps that cover the rear bolts. Start from the end furthest from the seat and slowly work the cap over the bracket. You will hear an audible snap when it seats into place.
Fit & Finish
First, I have to say that all of the machined pieces to the Front Seat Jacker, Rear Seat Jacker, front multi-mount panel and the rear multi-mount panel fit great. It is so nice when you are putting these pieces together and everything fits flawlessly.
Second, the tapped screw holes in the pieces were again, flawless. The hardware, both factory and the aftermarket hardware, that came with the kit all went together by hand. That rarely happens.
The install went together very well. If you were doing this install, I would plan for a couple of hours, if you were working carefully and had to search for tools. A great confidence builder project for someone new to the modification realm.
Product Review
Seat Jackers
I never gave much thought to making my Tacoma seats a more comfortable ride until I made this upgrade. The Front Seat Jacker and the Rear Seat Jacker take the comfort from a 7 to a 9. It completely changes the angle so the front of my seat is ever so slightly higher supporting my legs more comfortably in the driving position.
You have to experience the difference to understand what I mean. It’s just better.
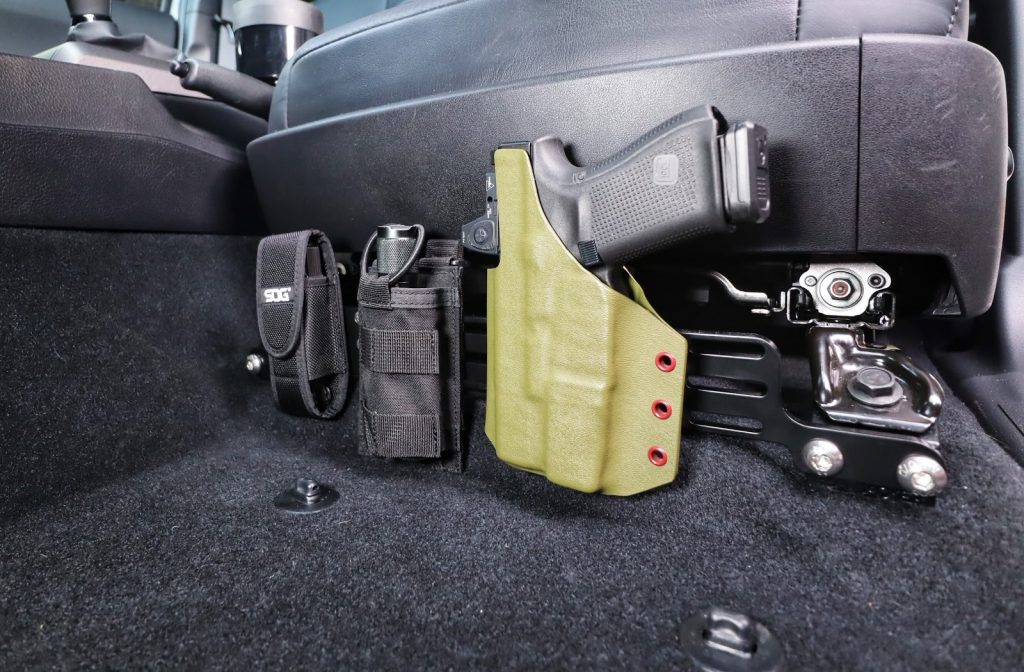
Front Multi-Mounts
Now the fun part. The front multi-mount panel is amazing. So far I have been playing with the setup and the above picture is how I am running it now. I have my Glock 19 in a Kydex, in the waistband holster setup, lefty but still accessible. Luckily, I make all my holsters so that will be a quick fix.
My SOG multi-tool is also on a belt clip. The holster and the SOG all clip over the top of the multi-mount panel and clip into the slots. There is the slightest movement side to side but completely acceptable. The flashlight has a Molle mount pouch and isn’t going anywhere. It is a truly amazing setup.
Rear Multi-Mounts
The rear multi-mount panel I am designating to be a fire extinguisher holder. I’m still looking for the perfect mount and an extinguisher that will fit in that space but I know it’s out there.
Now, it’s not all rainbows (but mostly) with this kit. There are two negatives that I have found.
- Foot Space
- Floor Mats
Foot space: The first is the Rear multi-mount panel takes up the bulk of the back seat passenger’s foot space if you have someone seating there. This is completely acceptable for me since my youngest son is the only one that travels with my wife and I. He just sits behind my wife, on the passenger side, because she is shorter. So, my feeling is, what I lose in the foot room, I am gaining in usable, accessible storage.
Floor Mats: The second is my all-weather floor mats in the rear. I use the rubberized Husky all-weather floor mats to protect my carpet from all the usual stuff. Unfortunately, the rear multi-mount panel sits just high enough for my Husky floor mat to fit underneath it but it is very distorted. I may end up cutting two notches in the floor mat so that it sits more naturally. Again, I don’t think it is that big of a deal and is well worth it to have a fire extinguisher right behind my seat at all times.
Final Thoughts
Besides, this is just another excuse to look for a new set of floor mats that might fit a bit more easily. So, don’t get me wrong. These mats are my personal choice, I will just need to modify them a bit to accommodate my new rear multi-mount panel perfectly. If you have the standard floor mats, I doubt you will run into this conflict.
All of that being said, I highly recommend the Desert Does It front/rear Seat Jacker and the front/rear multi-mount panel!

make sure to use loctite. had to retorque the bolts several times due to not using it when i first installed them.
Good call. I haven’t had any issues but better safe than sorry!
What is the length of the center bolt hole to center bolt hole for seat bolt? They don’t make this set up for all vehicles and trying to see if this setup for the Tacoma will work on my vehicle, need 17”. Thanks!
Can Iuse front seats. Jackers on 2012 toyota. Highlander. Thanks
I would check the Desert Does It website and reach out to them directly!
Try the factory rubber/upgraded Tacoma floor mats. They seem to work fine on the front and rear.
Sound advice. Thank you!!!