

Unfortunately, our Tacomas do not come with a power-locking tailgate. The KTJO 4×4 tailgate lock kit aims to solve this issue and keep the contents of your bed safer! KTJO 4×4 prides itself on having many plug-and-play options for the Tacoma, Tundra, 4Runner, etc.; this kit is no exception.
While it’s not a fool-proof way to keep your bed secure, controlling a lock on your tailgate is a vast improvement over having nothing at all. At the very least, it will hopefully make would-be thieves skip over your truck.
Table Of Contents
What’s Included

Kit Contents
- (1) Plug-and-Play Harness
- (1) Tailgate Wire Harness
- (1) Integrated Body Wire Harness
- (1) Locking Actuator
- (1) Bolt-N-Lock Bracket
- (1) Locking Rod
- (1) Hardware Package
- (2) Dual Wire Harness Protectors
- Zip Ties
All of the hardware that you’ll need for installation is included. This plug-and-play kit requires no modifications to your truck to function properly.
Installation

Tools Required (not included):
- Installation Instructions – Power Tailgate Lock – Click Here
- 1/2-in Socket (10 mm)
- 1/2-in Drive Ratchet
- 8mm & 9mm Wrenches
- #15 Star Screw Driver
- #30 Torx Screw Driver
- Phillips Screw Driver
- Electrical Tape (optional)
- Small Flathead Screw Driver (optional)
Installation is very straightforward. However, routing the new wiring will likely take longer than installing the locking actuator.
Step 1. Assemble The Actuator

Initially, we need to undo the #30 Torx bolts holding the tailgate cover on. Then, set these off to the side with the tailgate cover.
Having a matching driver will make this go much faster!

Now, it’s time to attach the bracket to the new actuator. This is done with two bolts, two nuts, one bracket, and the actuator itself.
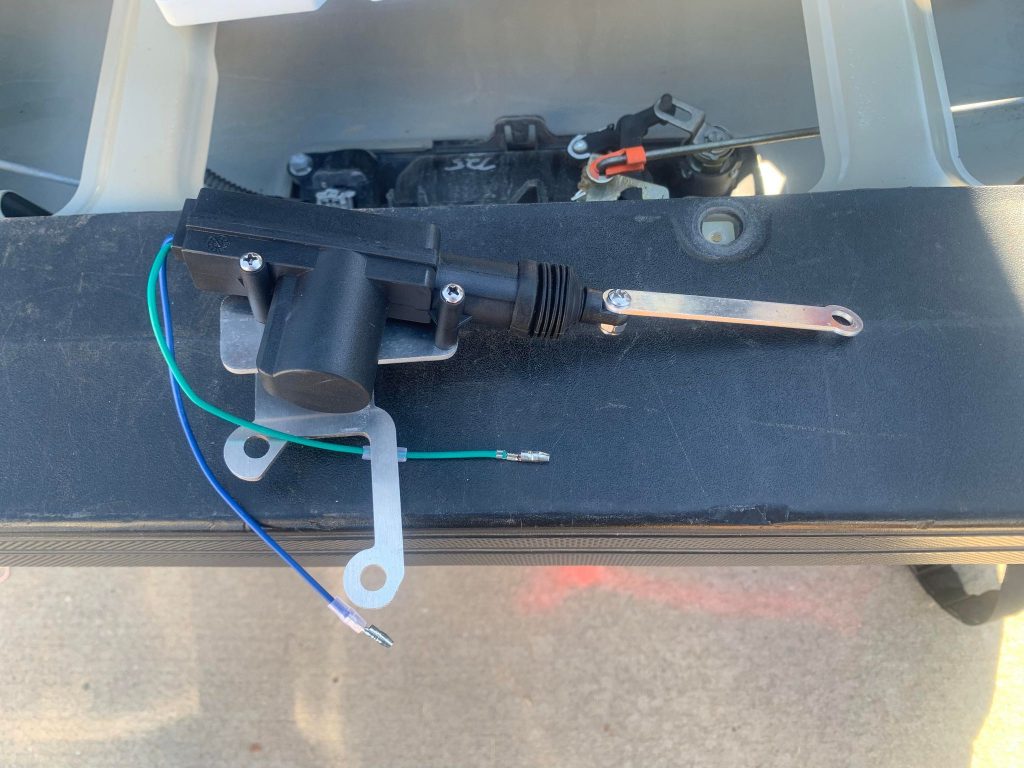
After that is done, bolt the locking rod onto the black tip of the actuator. Grab your bolt and use a 9mm wrench or socket to tighten it. Do not over-tighten, however.
Step 2. Install Actuator Into Tailgate

First, we need to remove the two 10mm bolts holding the OEM camera in place. (Don’t worry—the camera won’t move!)

Next, place the actuator and bolt it in securely with the 10mm bolts you just removed. Once that is done, you can now remove the #15 Torx screw from the OEM tailgate lock.
Once that is removed, gently lift the black tab on which the lock is sitting.

The actuator’s new locking rod will slide over the black tab, and the OEM lock will slide back onto the tab.
Step 3. Route Wiring Harness

Now, the not-so-fun part! We need to move the harness from the tailgate to the truck’s passenger-side kick panel.
KTJO 4×4 provides replacement tailgate plastic grommets for a clean, factory-looking install! Plug the green into green and blue into blue, and you’re ready to start routing the harness.
I followed their installation guide and removed the clip on the left side of the tailgate near the actuator to tape my wiring tightly to the factory harness. Having this loose also gives you a little more wiggle room when routing the wiring.
Use your flathead screwdriver to push the clip in on the wiring harness. Once that first one is out, route your wiring like factory and carefully clip it back into place.
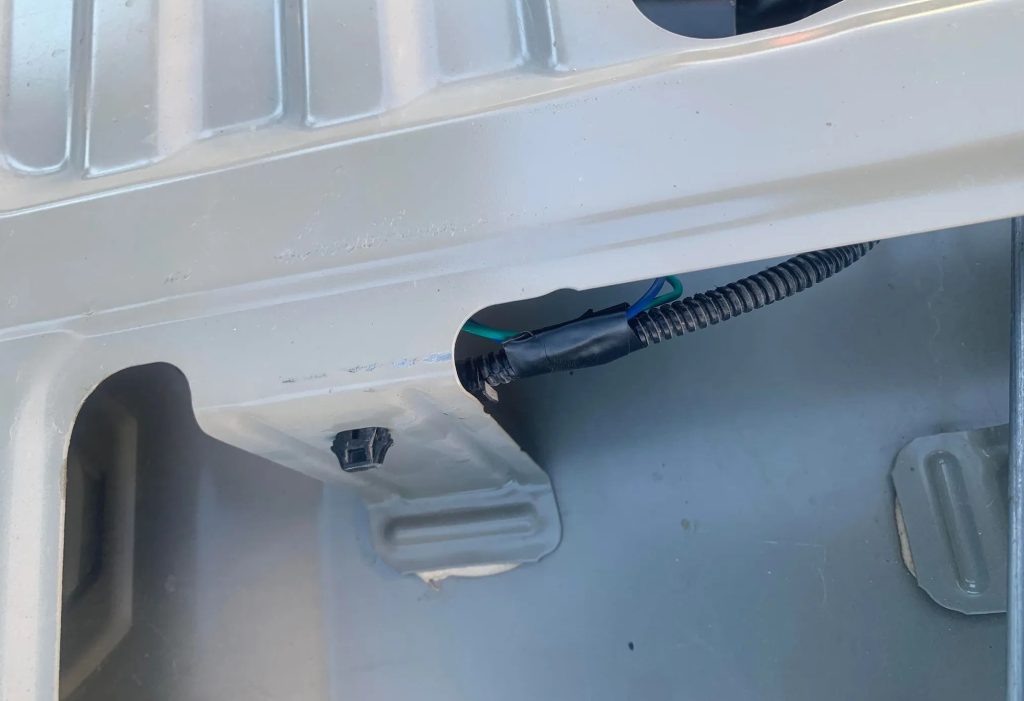
Next, you’ll need to repeat for the bedside. This one is a little more tricky due to the lack of room to work with. I released the clip near the bedside grommet to give more play in the harness. This made it way easier to work with.

Once this harness is poking out of the tailgate, we need to get it over to the bedside and through the new grommet.

Place some electrical tape to keep the harnesses together when going to the grommets.
Step 4. Route Harness Under Truck

Next, we must route the harness up the passenger side to the kick panel inside the cab.

This is super easy; just follow your existing harness and keep the wiring tight with zip ties along the way. You’ll see a large wiring harness going through a grommet into the cab. Pull this down and there is a small amount of tape that can be removed to slide your new wiring through.

Run the new wiring through the white factory clips to keep everything nice and neat. You can see where the wire loom is heading towards the right side.

Once you are at the kick panel, remove the plug pictured above. Next, plug in the KTJO 4×4 harness and connect the factory plug to the female end of the new harness.
You should be all set! Replace the kick panel after getting all the wiring cleaned up.
Final Thoughts

My first impression of this kit was that everything was very well packaged, and the instructions on their site were super clear. Everything was truly plug-and-play, and I had no issues with installation.
The actuator is not too loud when you hit the lock button on your key fob, which is always a plus! Overall, this kit is well worth the price!
If you need additional guidance or pictures for the installation, refer to the link under required tools at the beginning of the installation section.
Thanks for this review. Can the tailgate still be unlocked with the key with this setup?
It sure can!